Hello lovelies!
Hope everyone is having a fantastic start to their week & October! Can you believe it’s October already?! It is absolutely my favourite month of the year because HALLOWEEN! & my birthday as well, but still haven’t decided if I’m excited for my birthday this year or not.
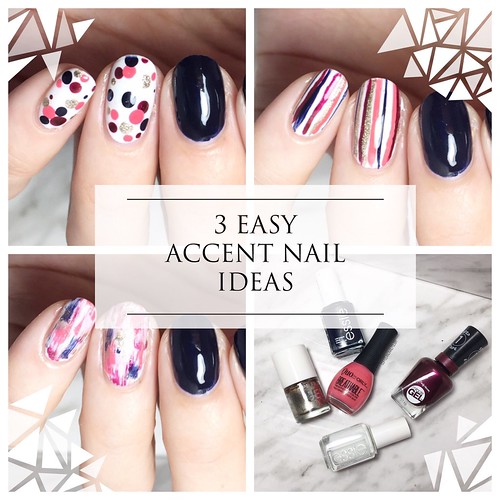
Today though I have a fun nail art post to share with you featuring 3 different accent nail art looks that are both quick & easy! For these designs I used the same polishes for all 3 looks, & tried to do nail art that #1. wouldn’t take forever to dry, & #2. didn’t need a whole lot of complicated tools

For all three designs, I decided to use the same polishes:
- Essie After School Boy Blazer
- Essie White Page
- Quo by ORLY Breathable Nail Superfood
- Joe Fresh Gel Look Sparkling Glitz
- Sally Hansen Miracle Gel Frosted Berries
As always, I used my base coat & top coat for a complete look. As well, I used a couple nail art tools in order to achieve my look–a dotting tool & a striping brush. Mine are both from NailStuff.ca, although there are a ton of different places you can purchase nail art tools.
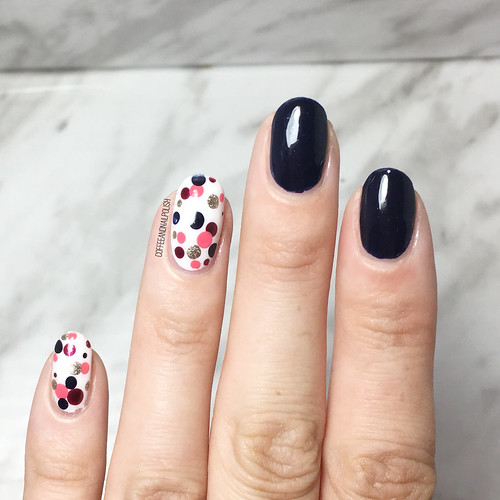
Polka Dots
.
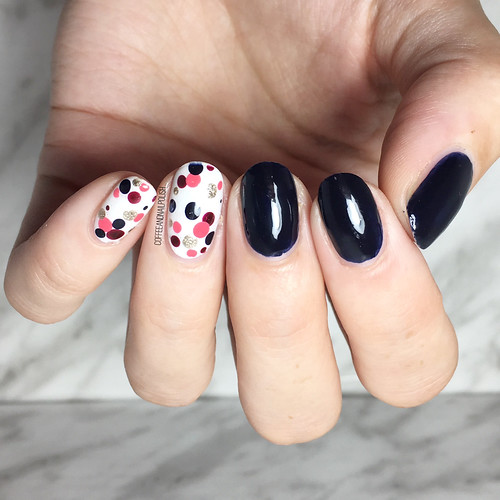
For this nail art look, I painted my accent nails with a white base (Essie White Page) & added a top coat. When my white base was dry, I went in with a double sided dotting tool & added in dots in my 4 other colours. I like to layer some dots over each other because it gives it good dimension. You can be really dot crazy, leaving minimal white space, or spread your dots out a bit (which is what I prefer). Also make sure you let your dots dry a bit before adding your top coat to keep them from smearing.
.
Dry Brush
.
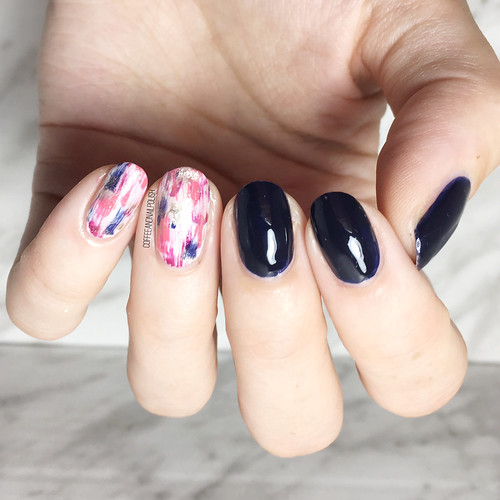
Next up is probably the easiest accent nail, because no tools are required! For this look, I started off by painting a base of white & applying top coat. When I felt like my base was adequately dry, I grabbed my polishes one by one & dragged the brush over my nail. What’s important here is to get off the majority of your polish from your brush so you get that streaky brush effect. I like to keep a piece of paper beside me when doing dry brush nails, so I can brush the polish off even more before I apply it to my nail. I also like to apply my top coat really quickly to the nail, because I prefer a dry brush design where the polishes blend together more.

.
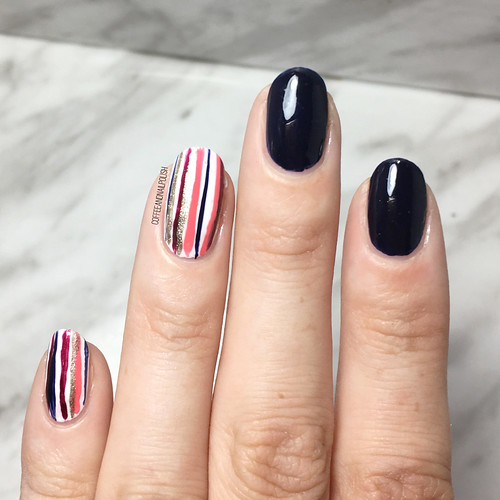
Stripes
.
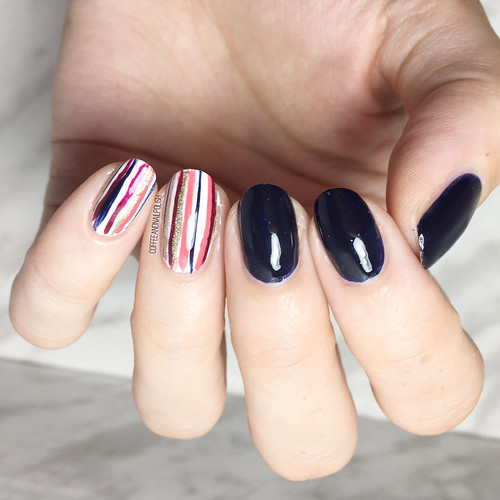
For the last look you can really start with any base colour, but I decided to go with the white again. After my base was dry enough (thank you quick dry top coat) I went one colour at a time & used my brush to draw a line up my nail vertically. You could also do horizontal lines, but I find vertical lines are easier to draw, more forgiving if you mess up, & make your nails look longer. You definitely want a striping brush for this, because the long brush makes creating lines much easier than a short brush. & when your happy with how your stripes look, just seal everything in with your top coat.
So what do you think about these 3 easy nail art ideas? Which one is your favourite? & obviously these don’t just have to be done as accent nails–all three would make amazing full manicures if you have a little more time! & if you’re inspired by any of these quick & easy nail art looks, don’t forget to tag me on Instagram or use the hashtag #lookcoffeeandnailpolish!
