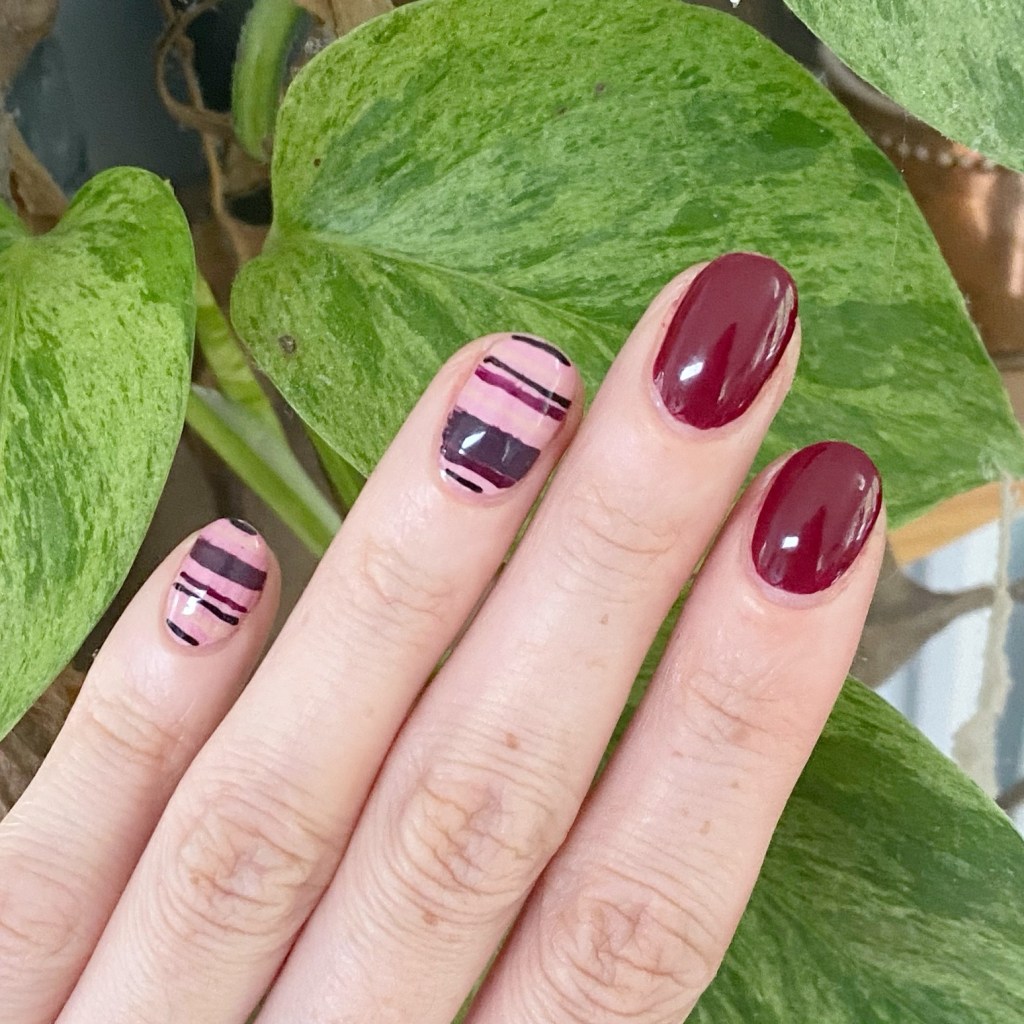
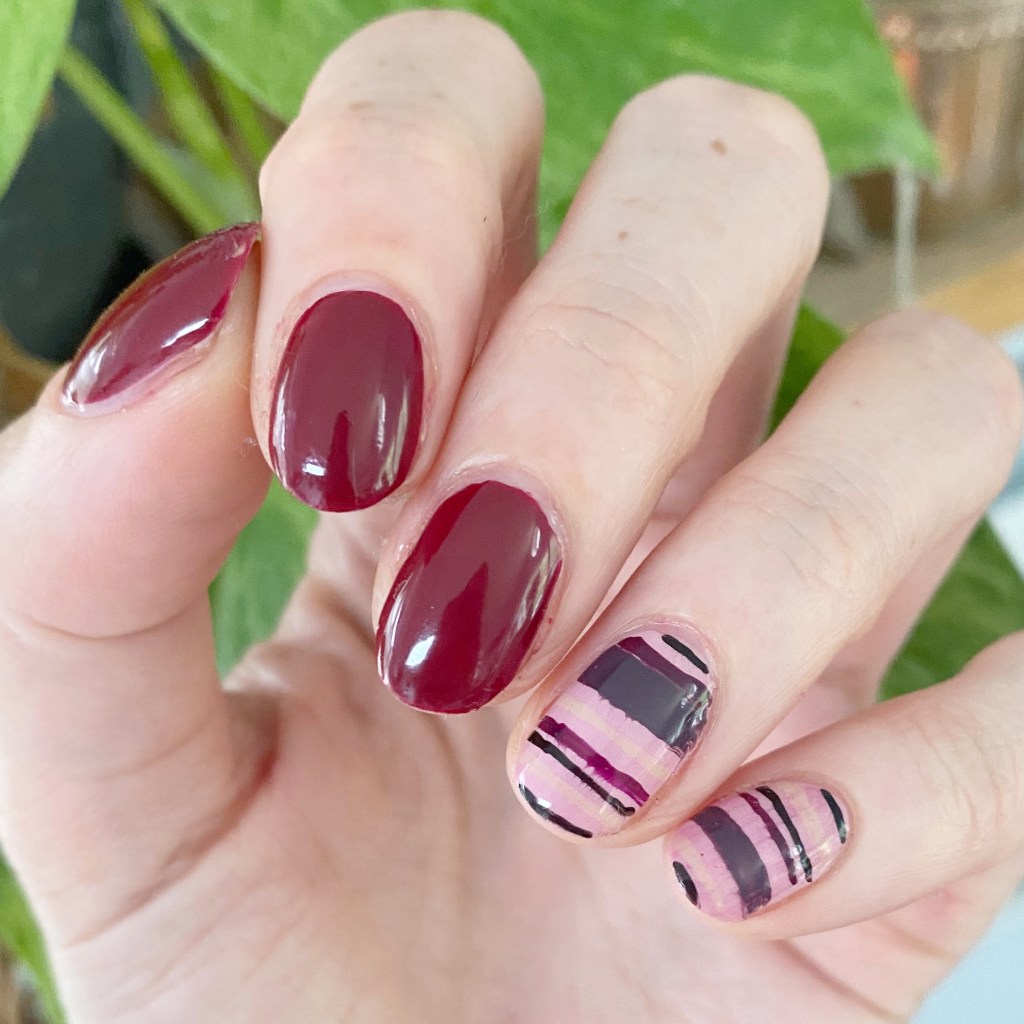
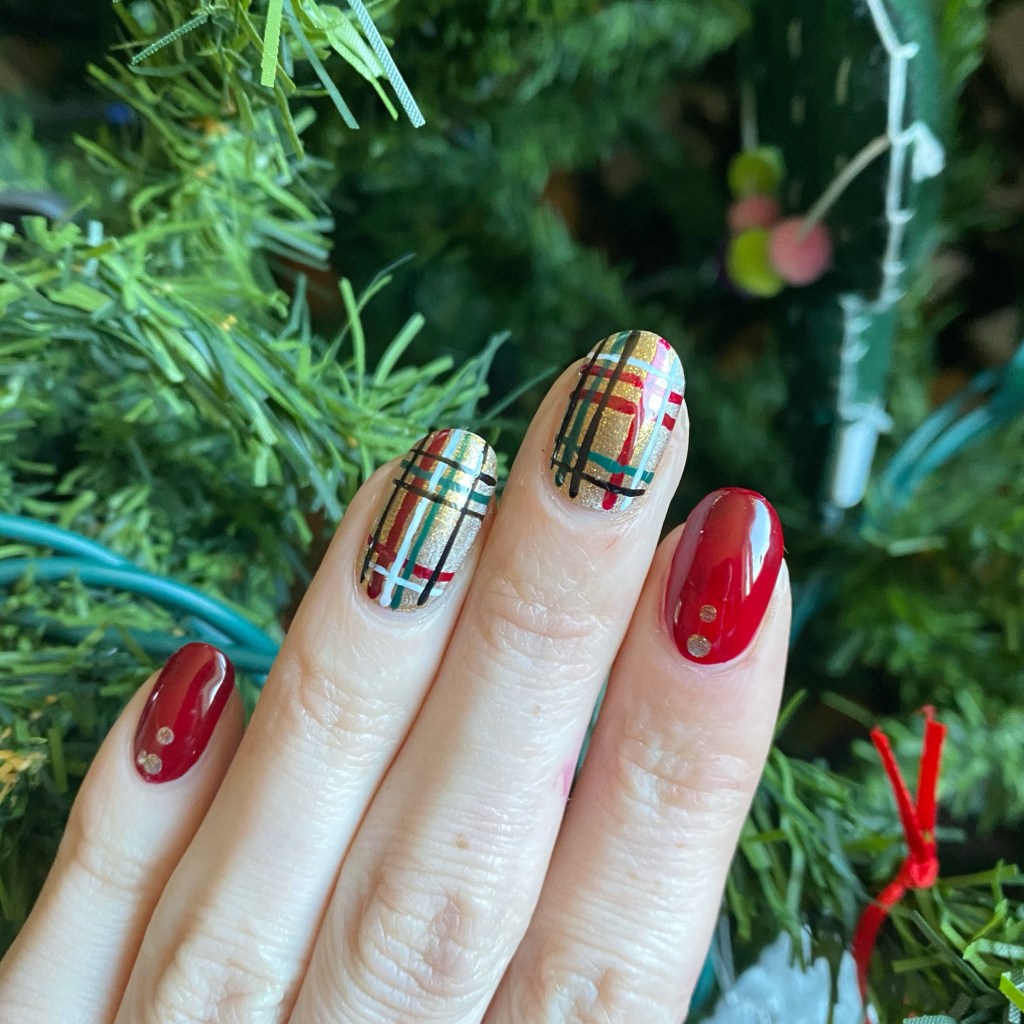
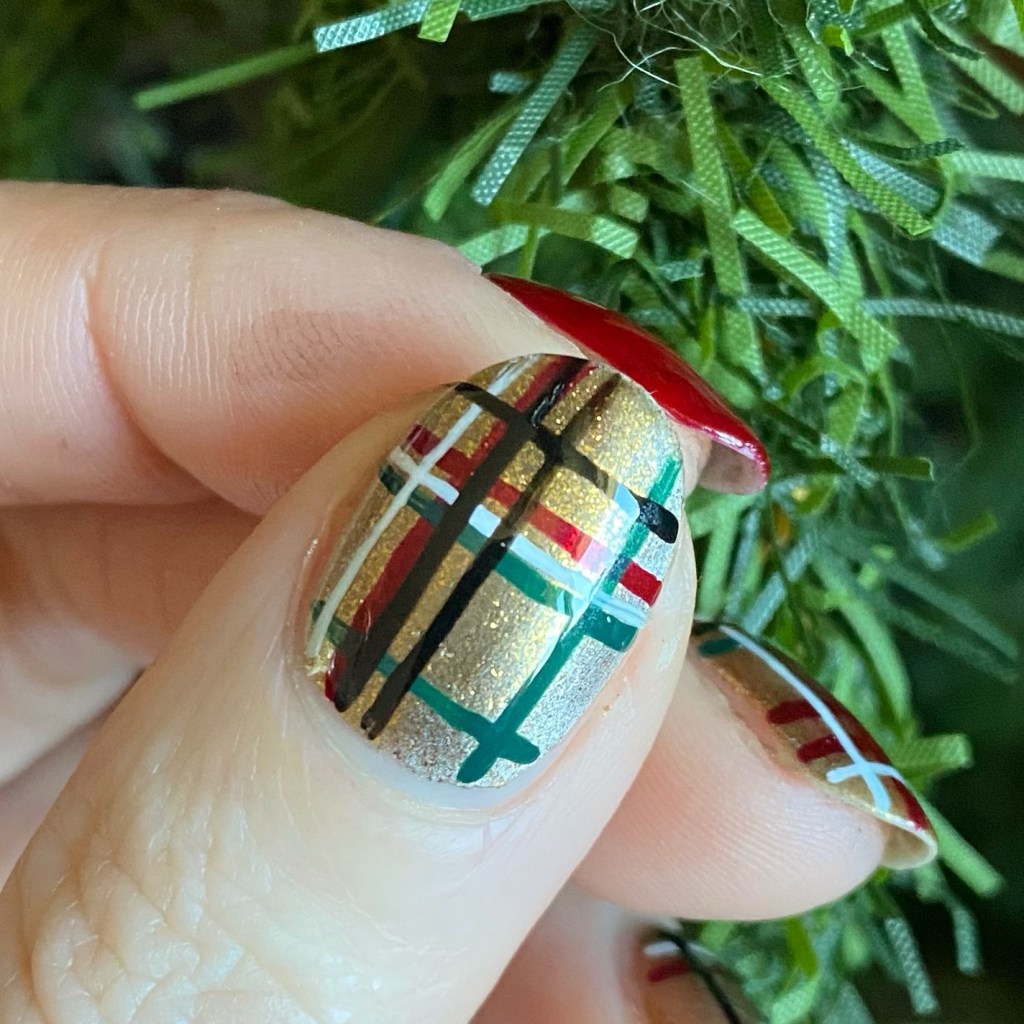
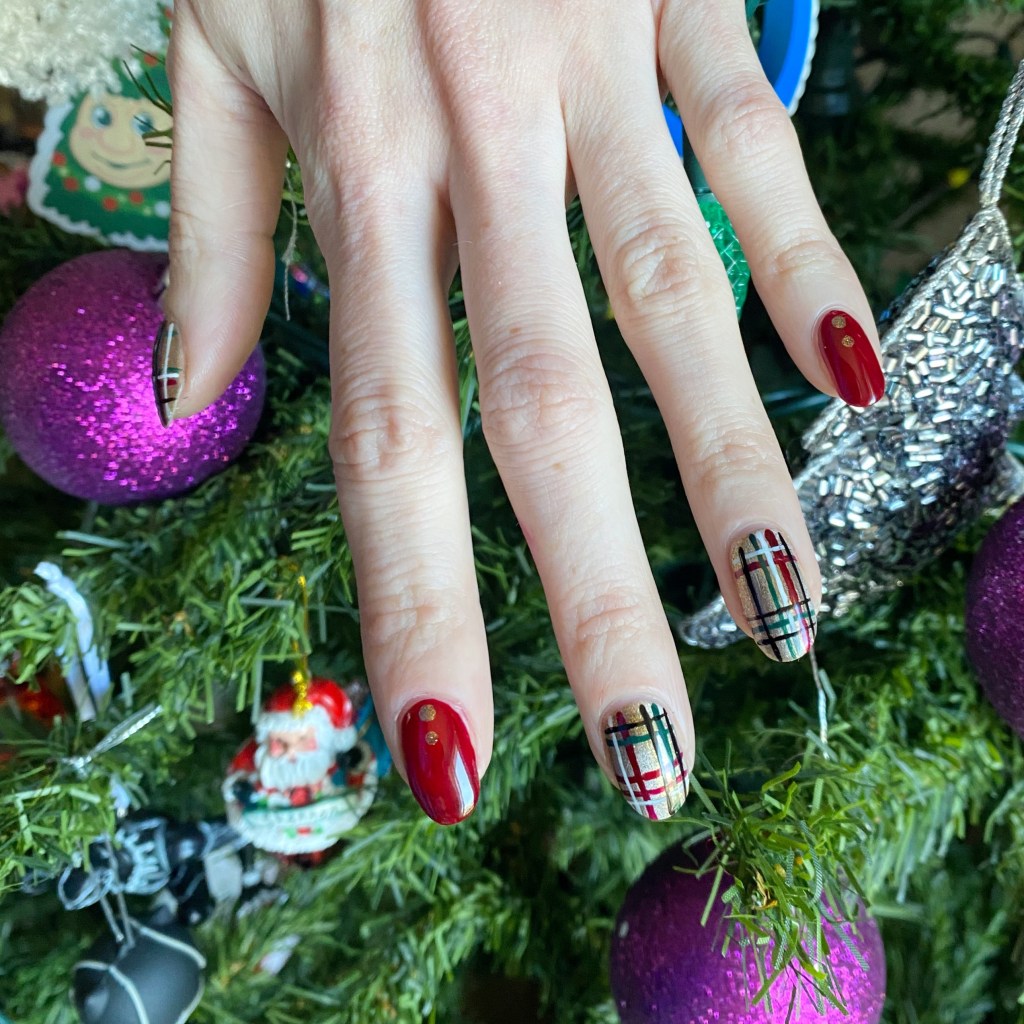
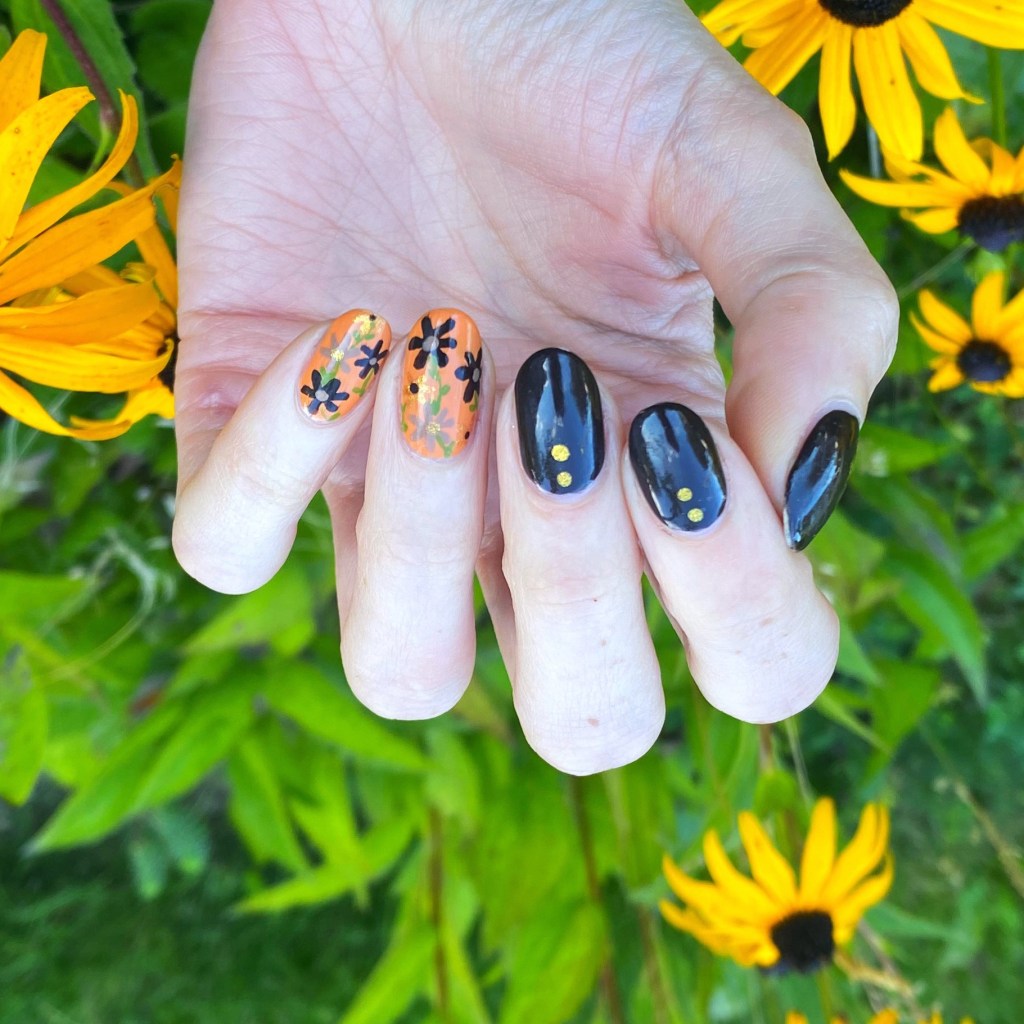
Hello lovelies & happy Wednesday! How is everyone enjoying their week so far First full week of school for the kiddos, & today is the first day I have all to myself so I’m going to enjoy some nail painting (& much overdo room cleaning!) First up, though, I have some beautiful Fall floral accent nails I recently painted on my nails, & they turned out so beautifully. So I thought you might enjoy them!
The polishes I used for this manicure are:
- Top Coat: Essie Good To Go Top Coat
- Base Coat: Essie Hard to Resist (purple)
- Essie Expressie Take The Espresso
- Essie Fall for NYC
- Essie Get Your Groove On
- Essie Merino Cool
- Essie Wind in the Willow
- NailStuff.ca Mermaid Tail 7mm liner brush
- NailsStuff.ca Dotting Tool Trio


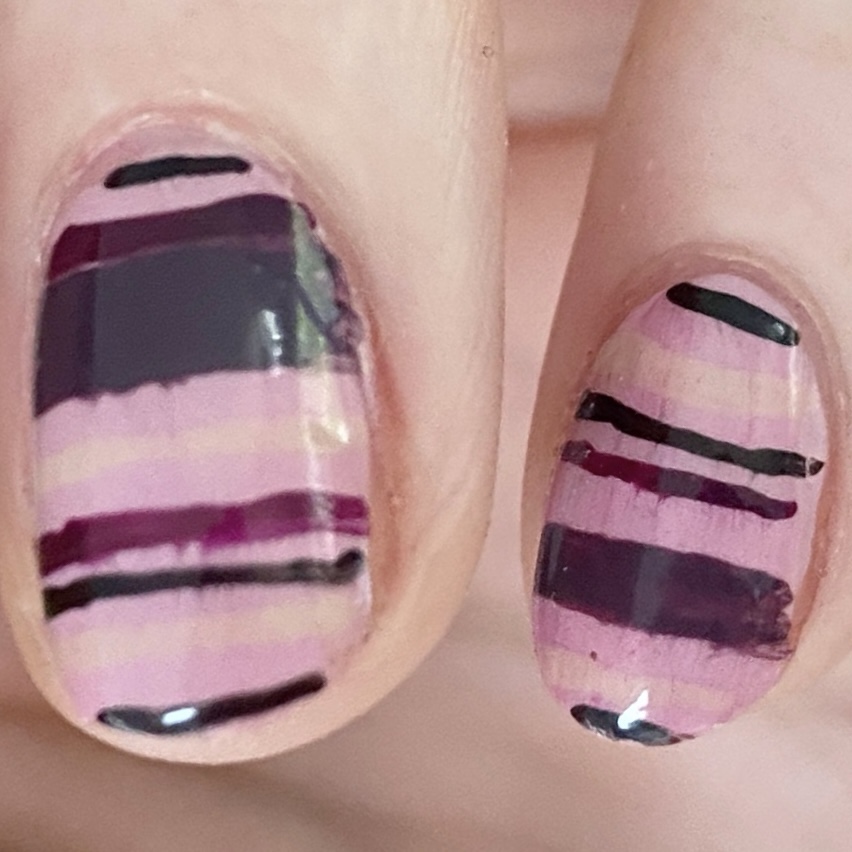
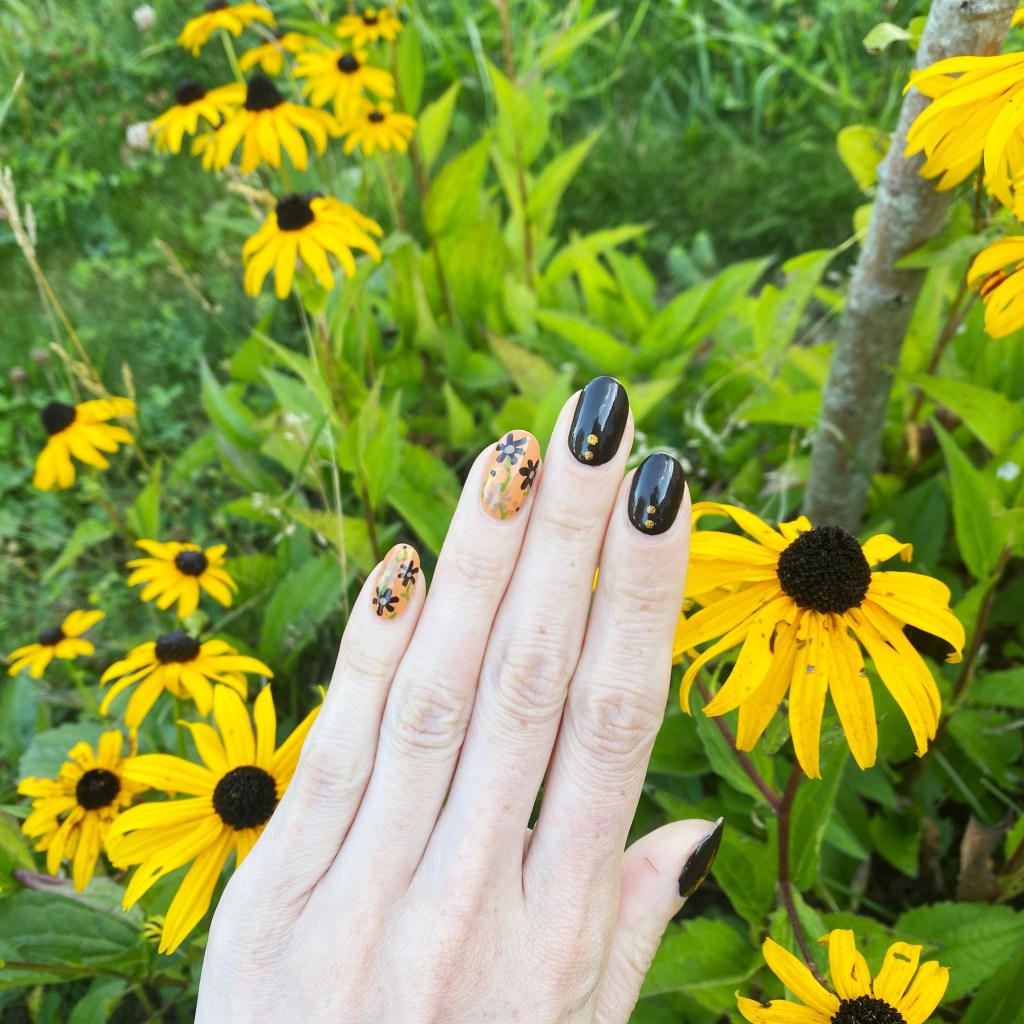
Look at the close up! Oh, these are the nails that make me the happiest. Floral accent nails have always been one of my favourite designs. & I think the combination of colour is absolutely Autumn on the nail. Plus it matches the Brown Eyed Susans in our garden so perfectly — they made the perfect background for my pictures.

What do you think of this Autumn inspired floral design? Are you feeling the Autumn vibes as much as I am? Our neighbours have started decorating for Fall, which makes me happy to see whenever I’m out walking. This is just my favourite time of year, & I’m ready to embrace it fully.
♥︎