Kitty Cat Nails 🖤

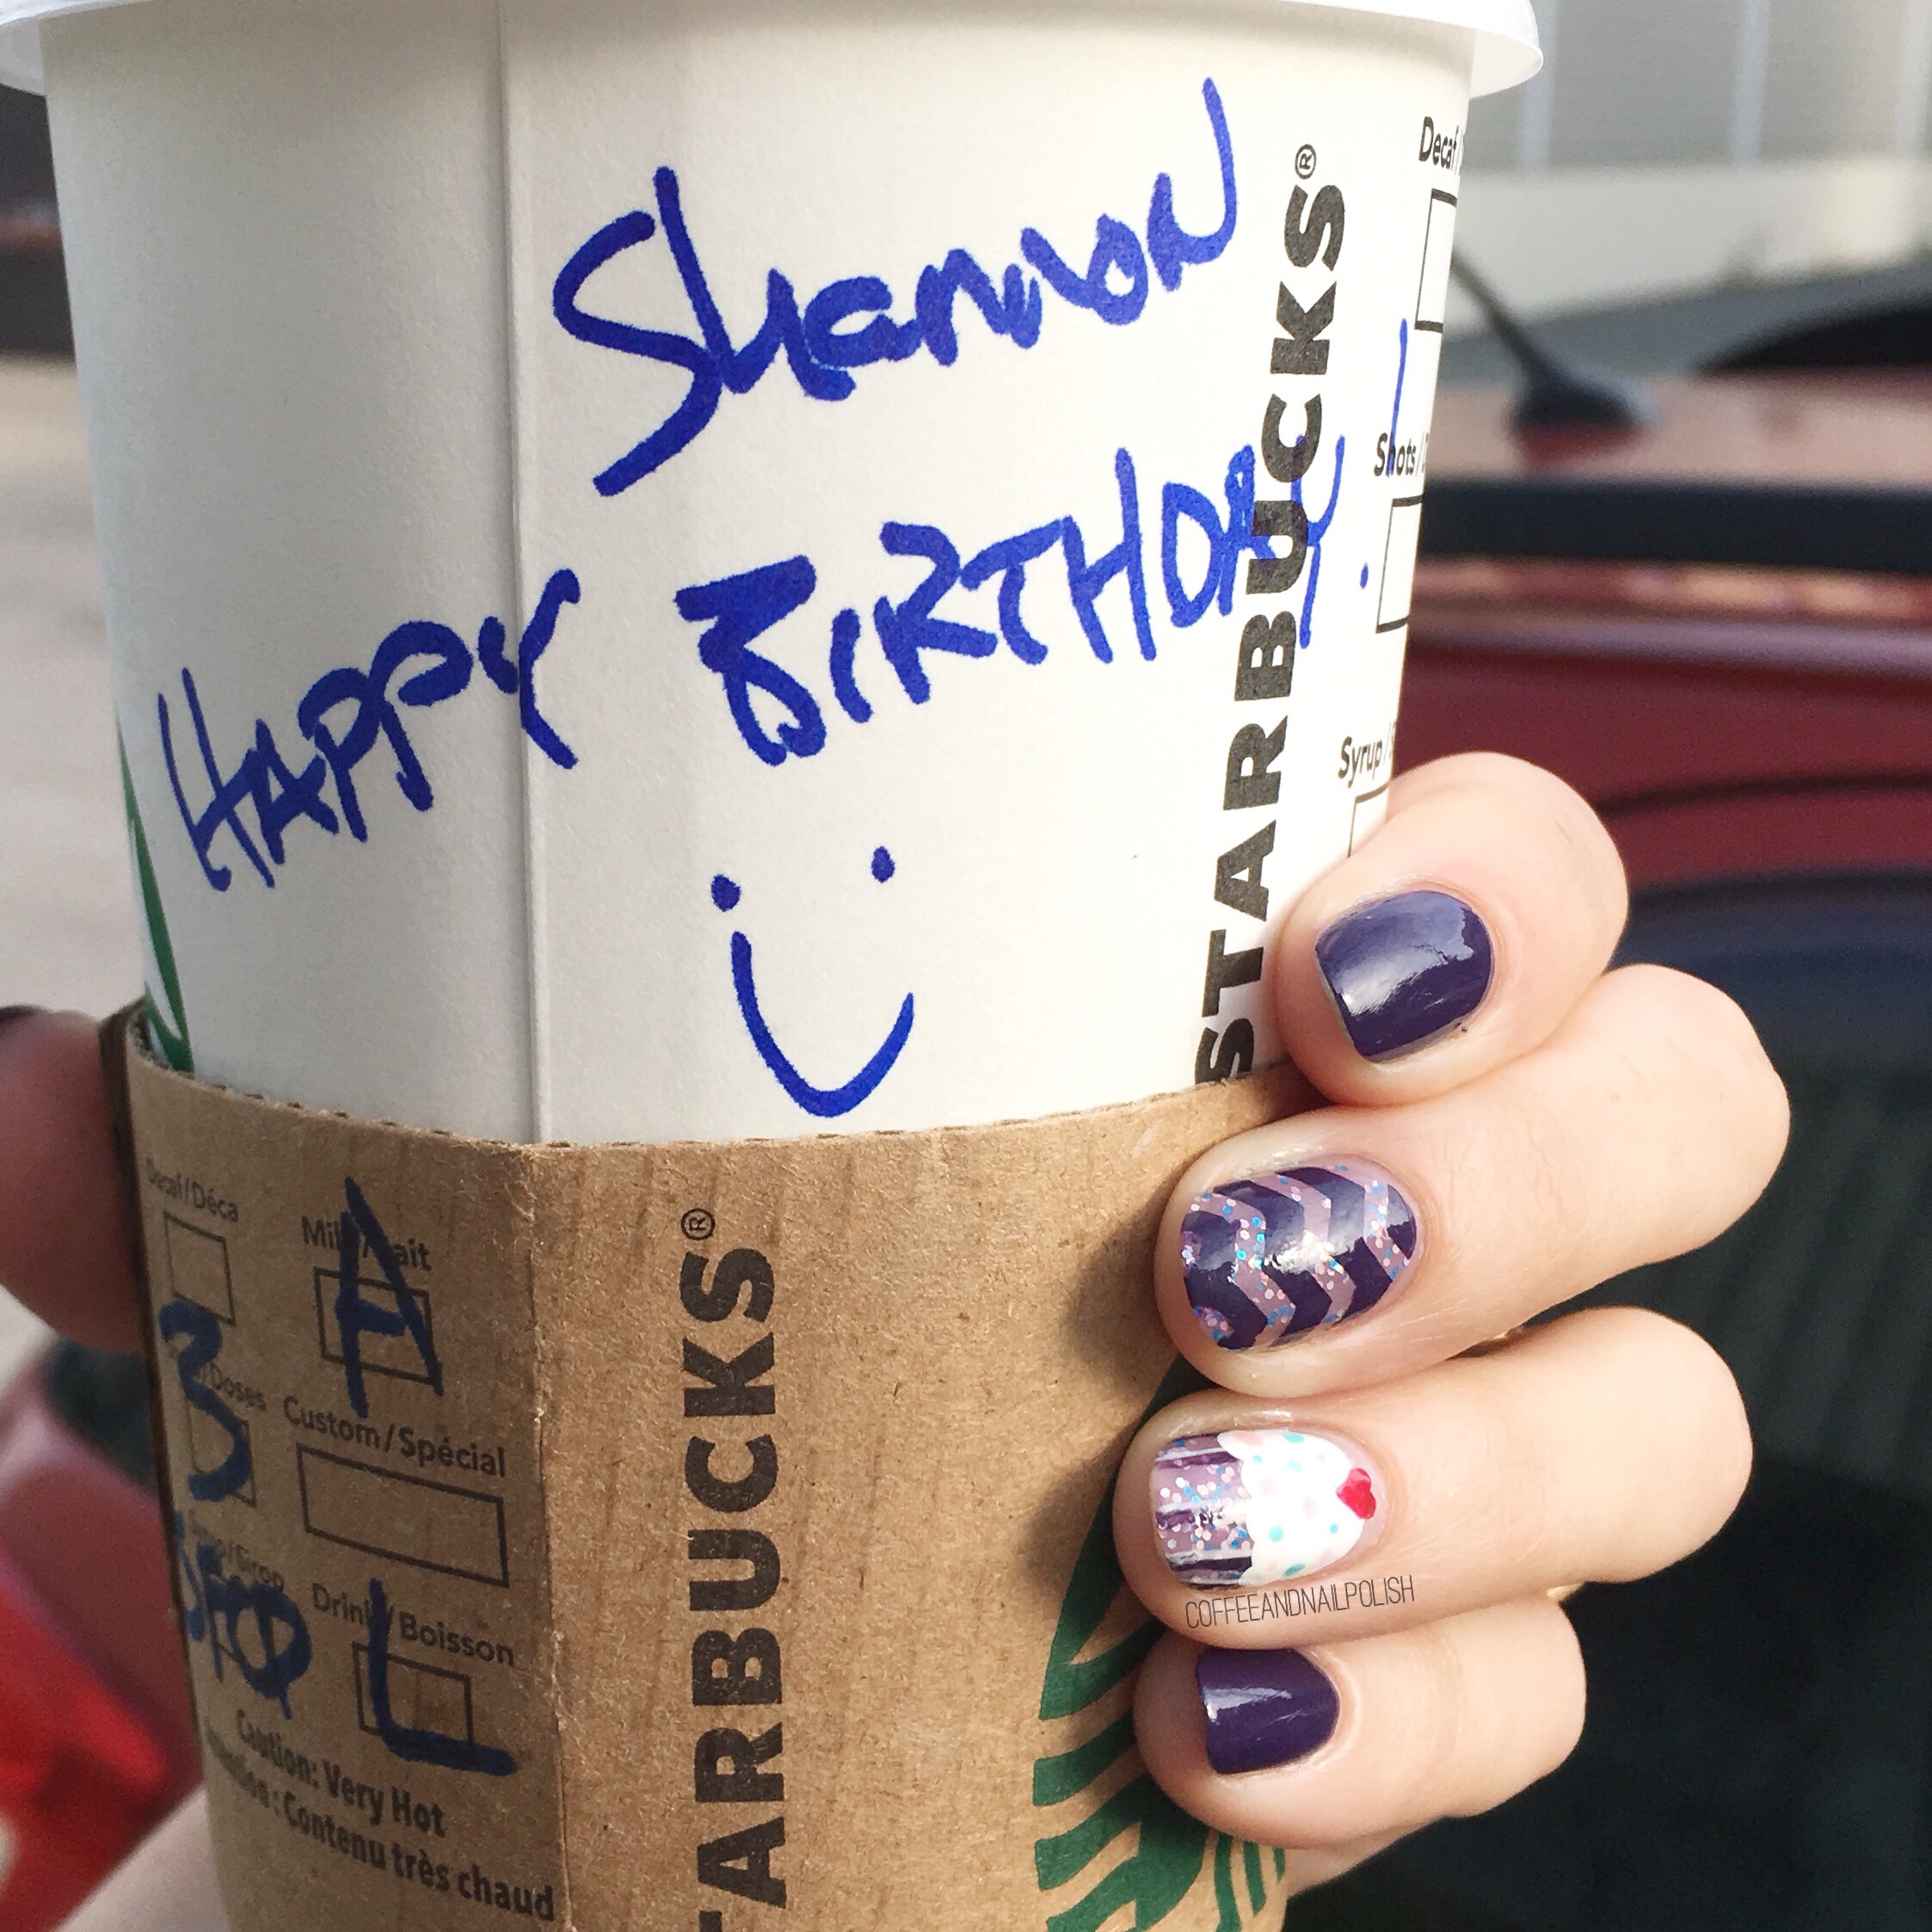
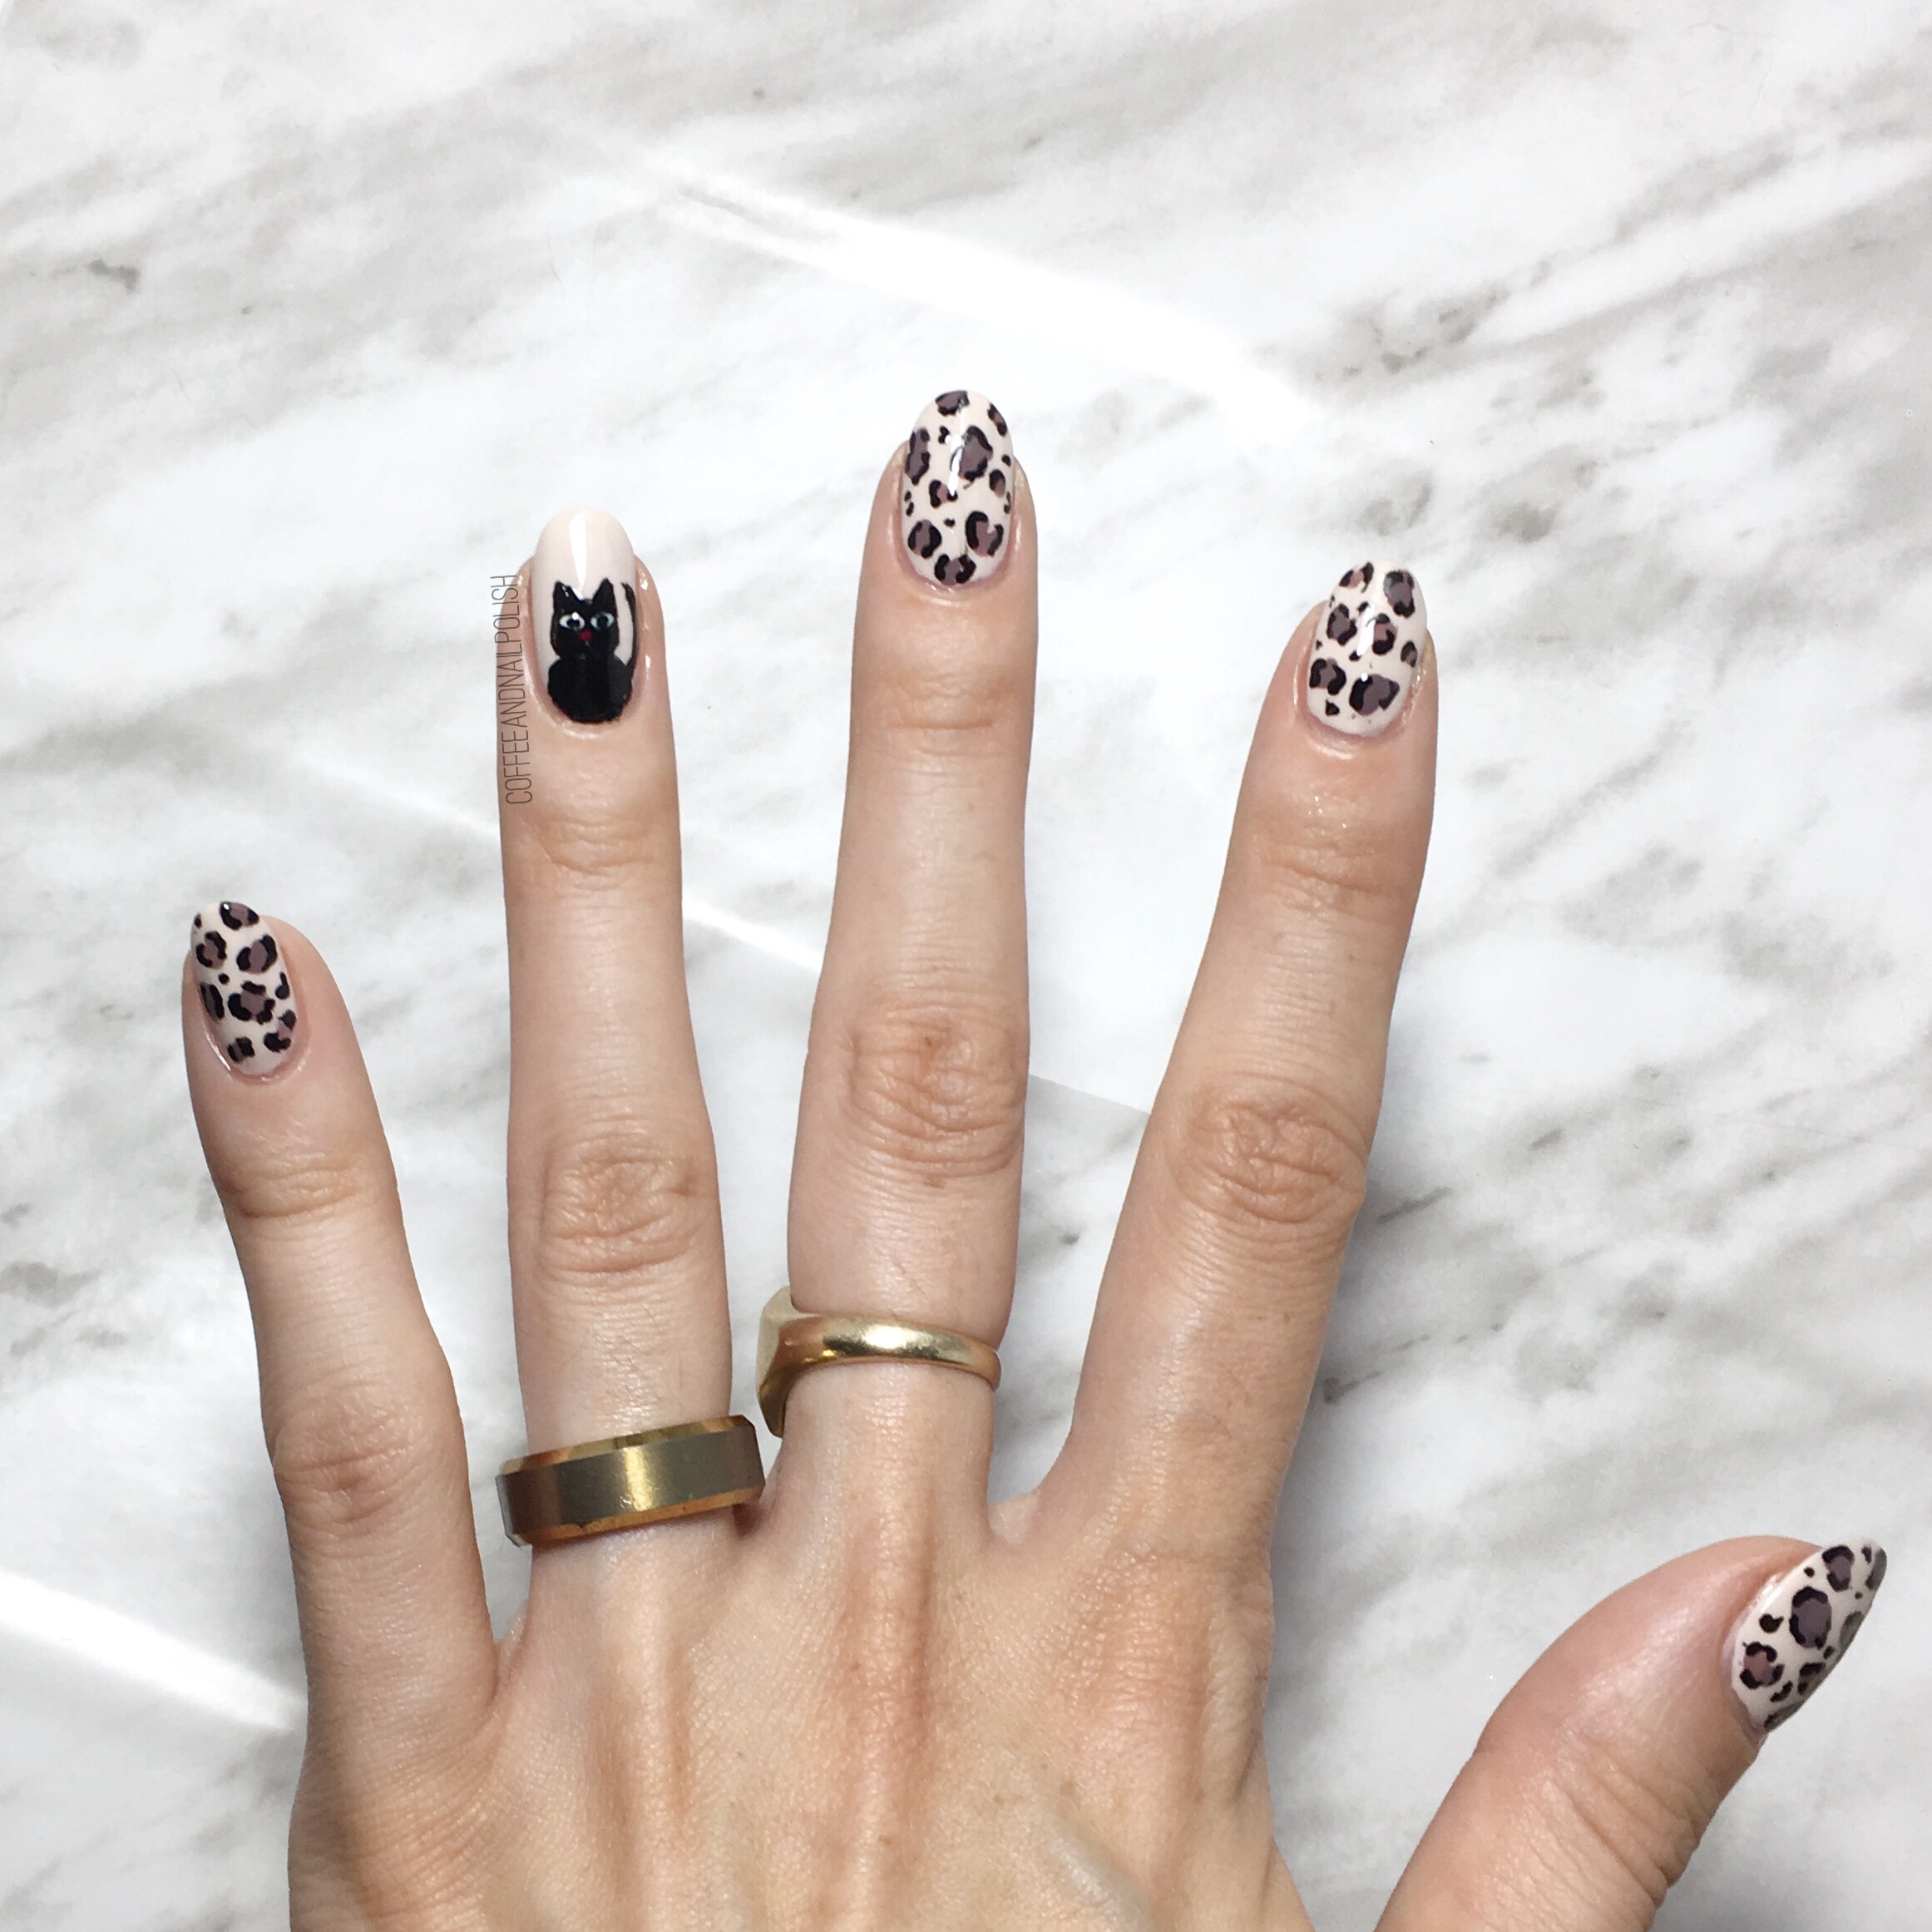
Happy Halloween Eve everybody! 🎃

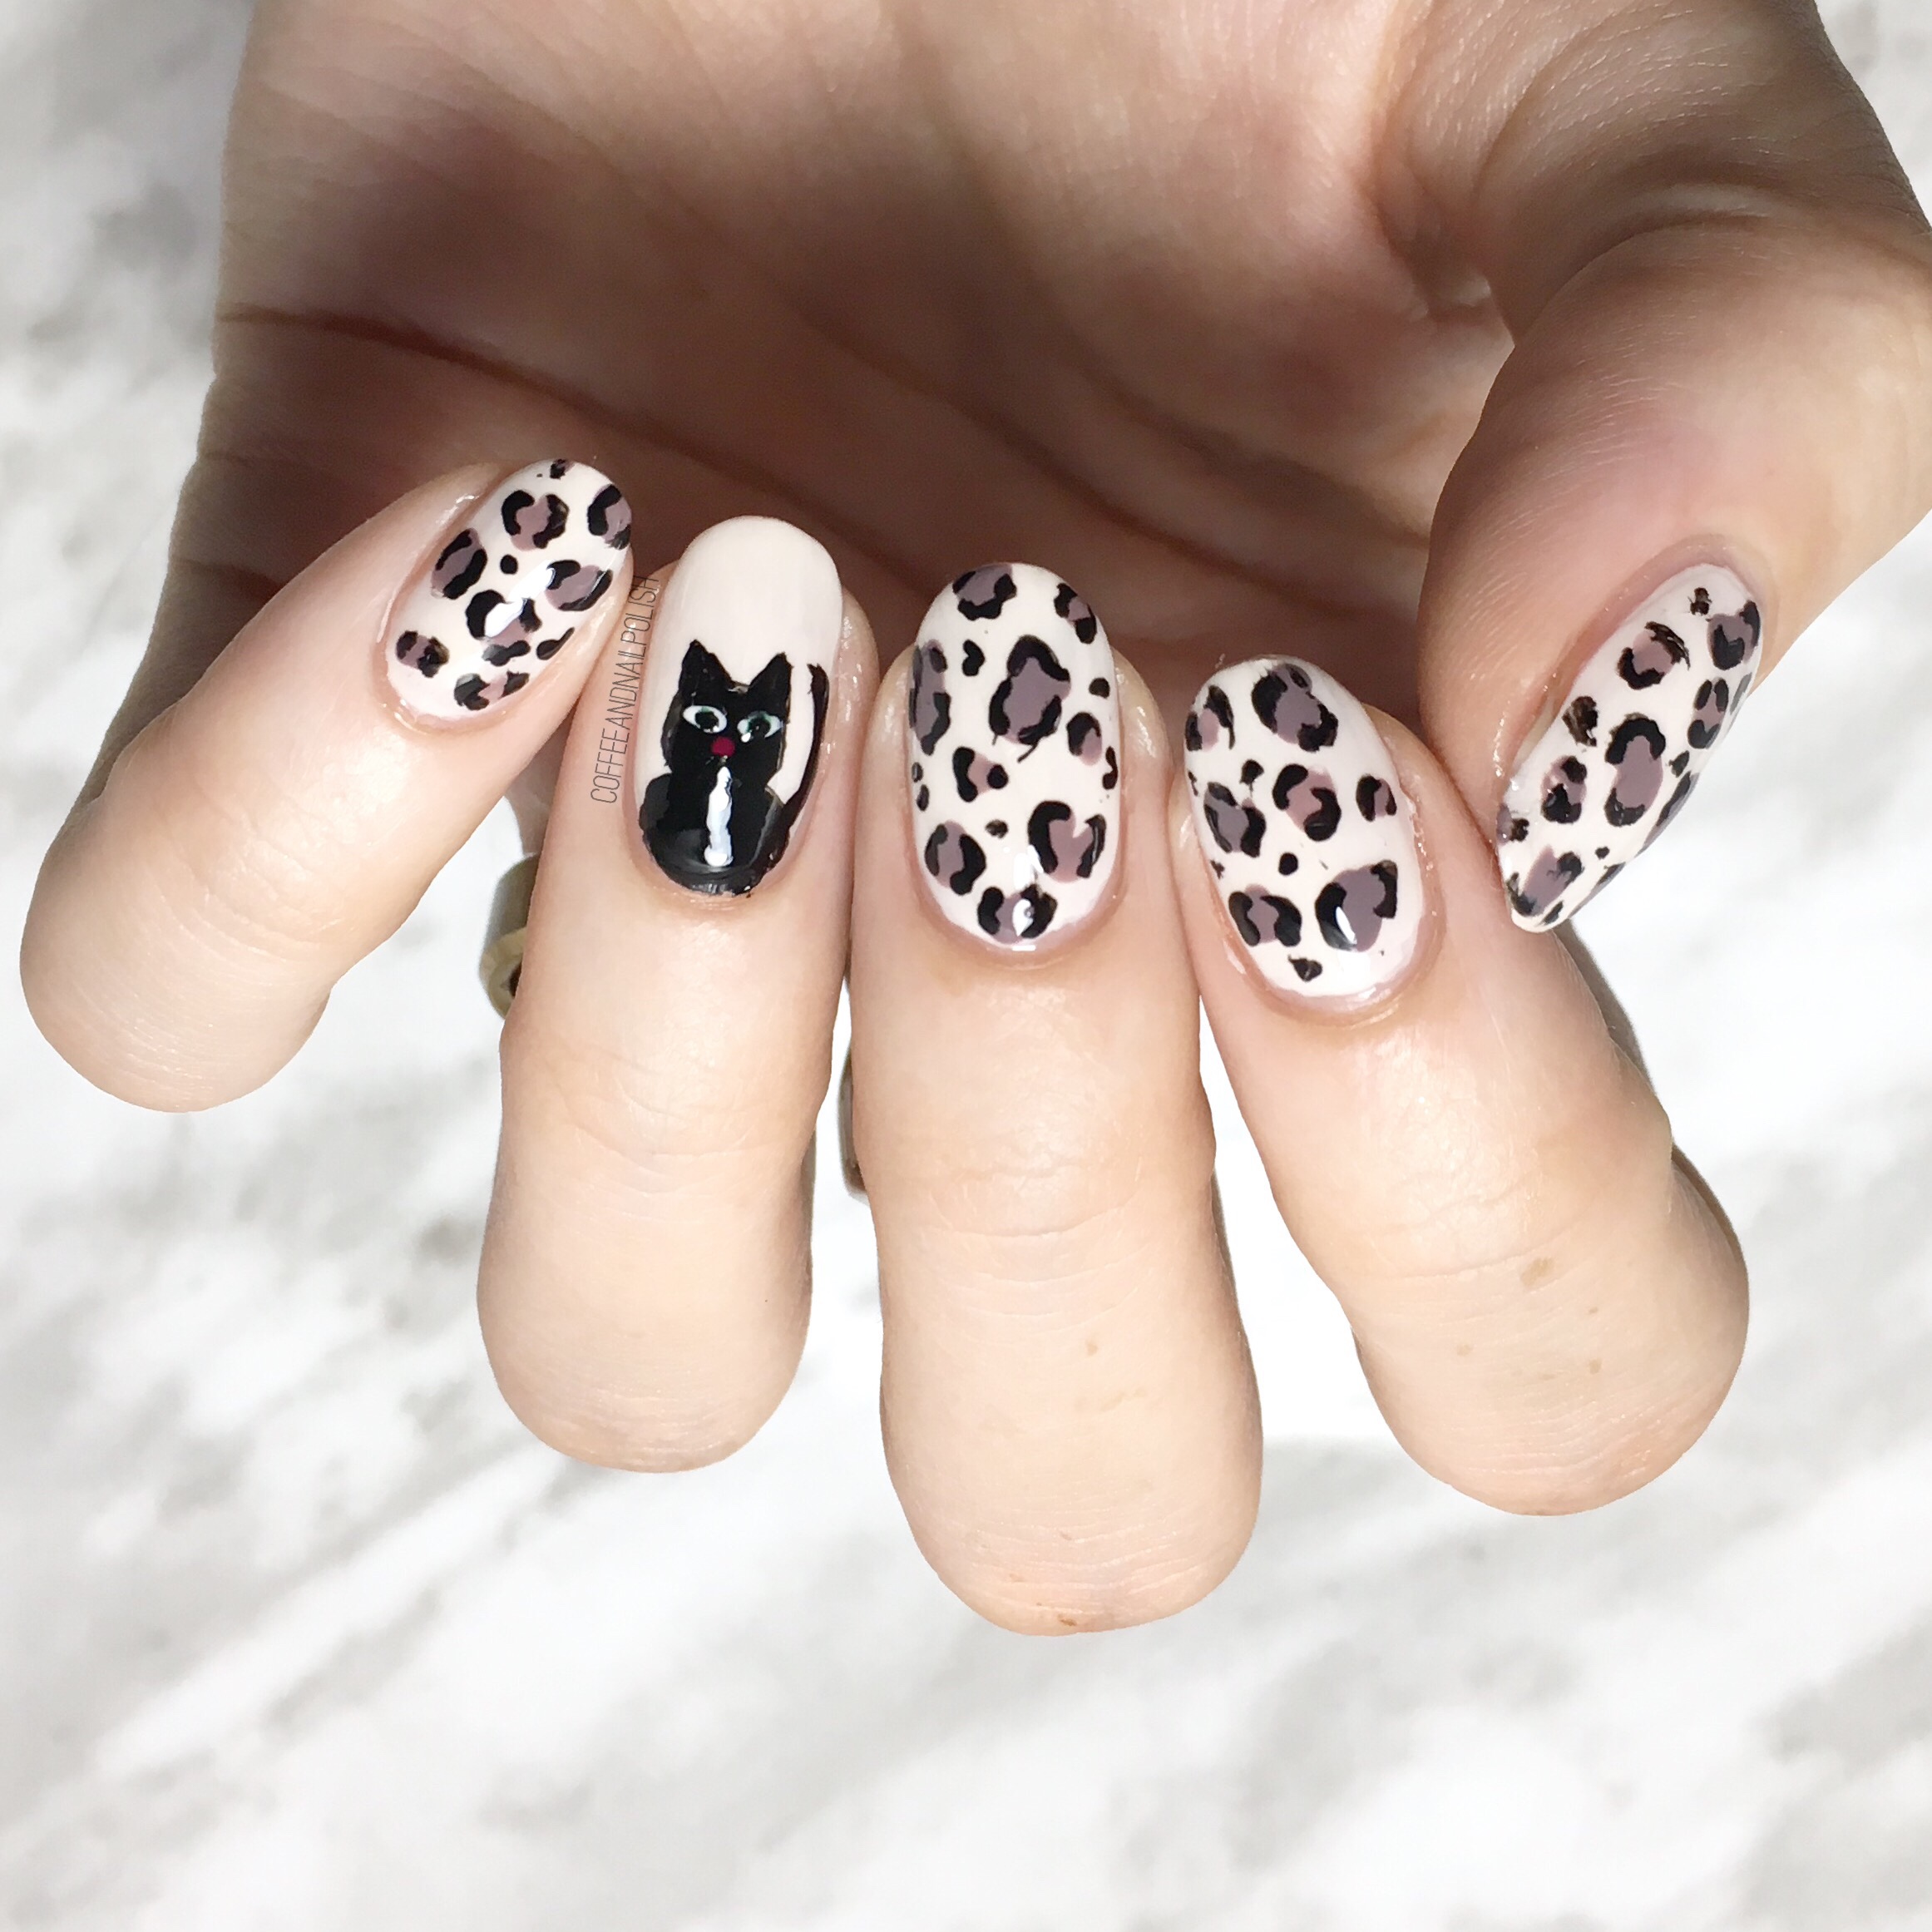
So confession time: I’m the queen of the last minute Halloween costume. Seriously I was the girl always looking for something to wear the day before Halloween (or worse, the day of Halloween). This year I’ve got our Halloween all ready, but if it wasn’t already prepared, then I would probably go with last minute Halloween costume go to: a kitty 🐱. & if I were going as a kitty for Halloween, these would be the perfect nails to go along with that costume!

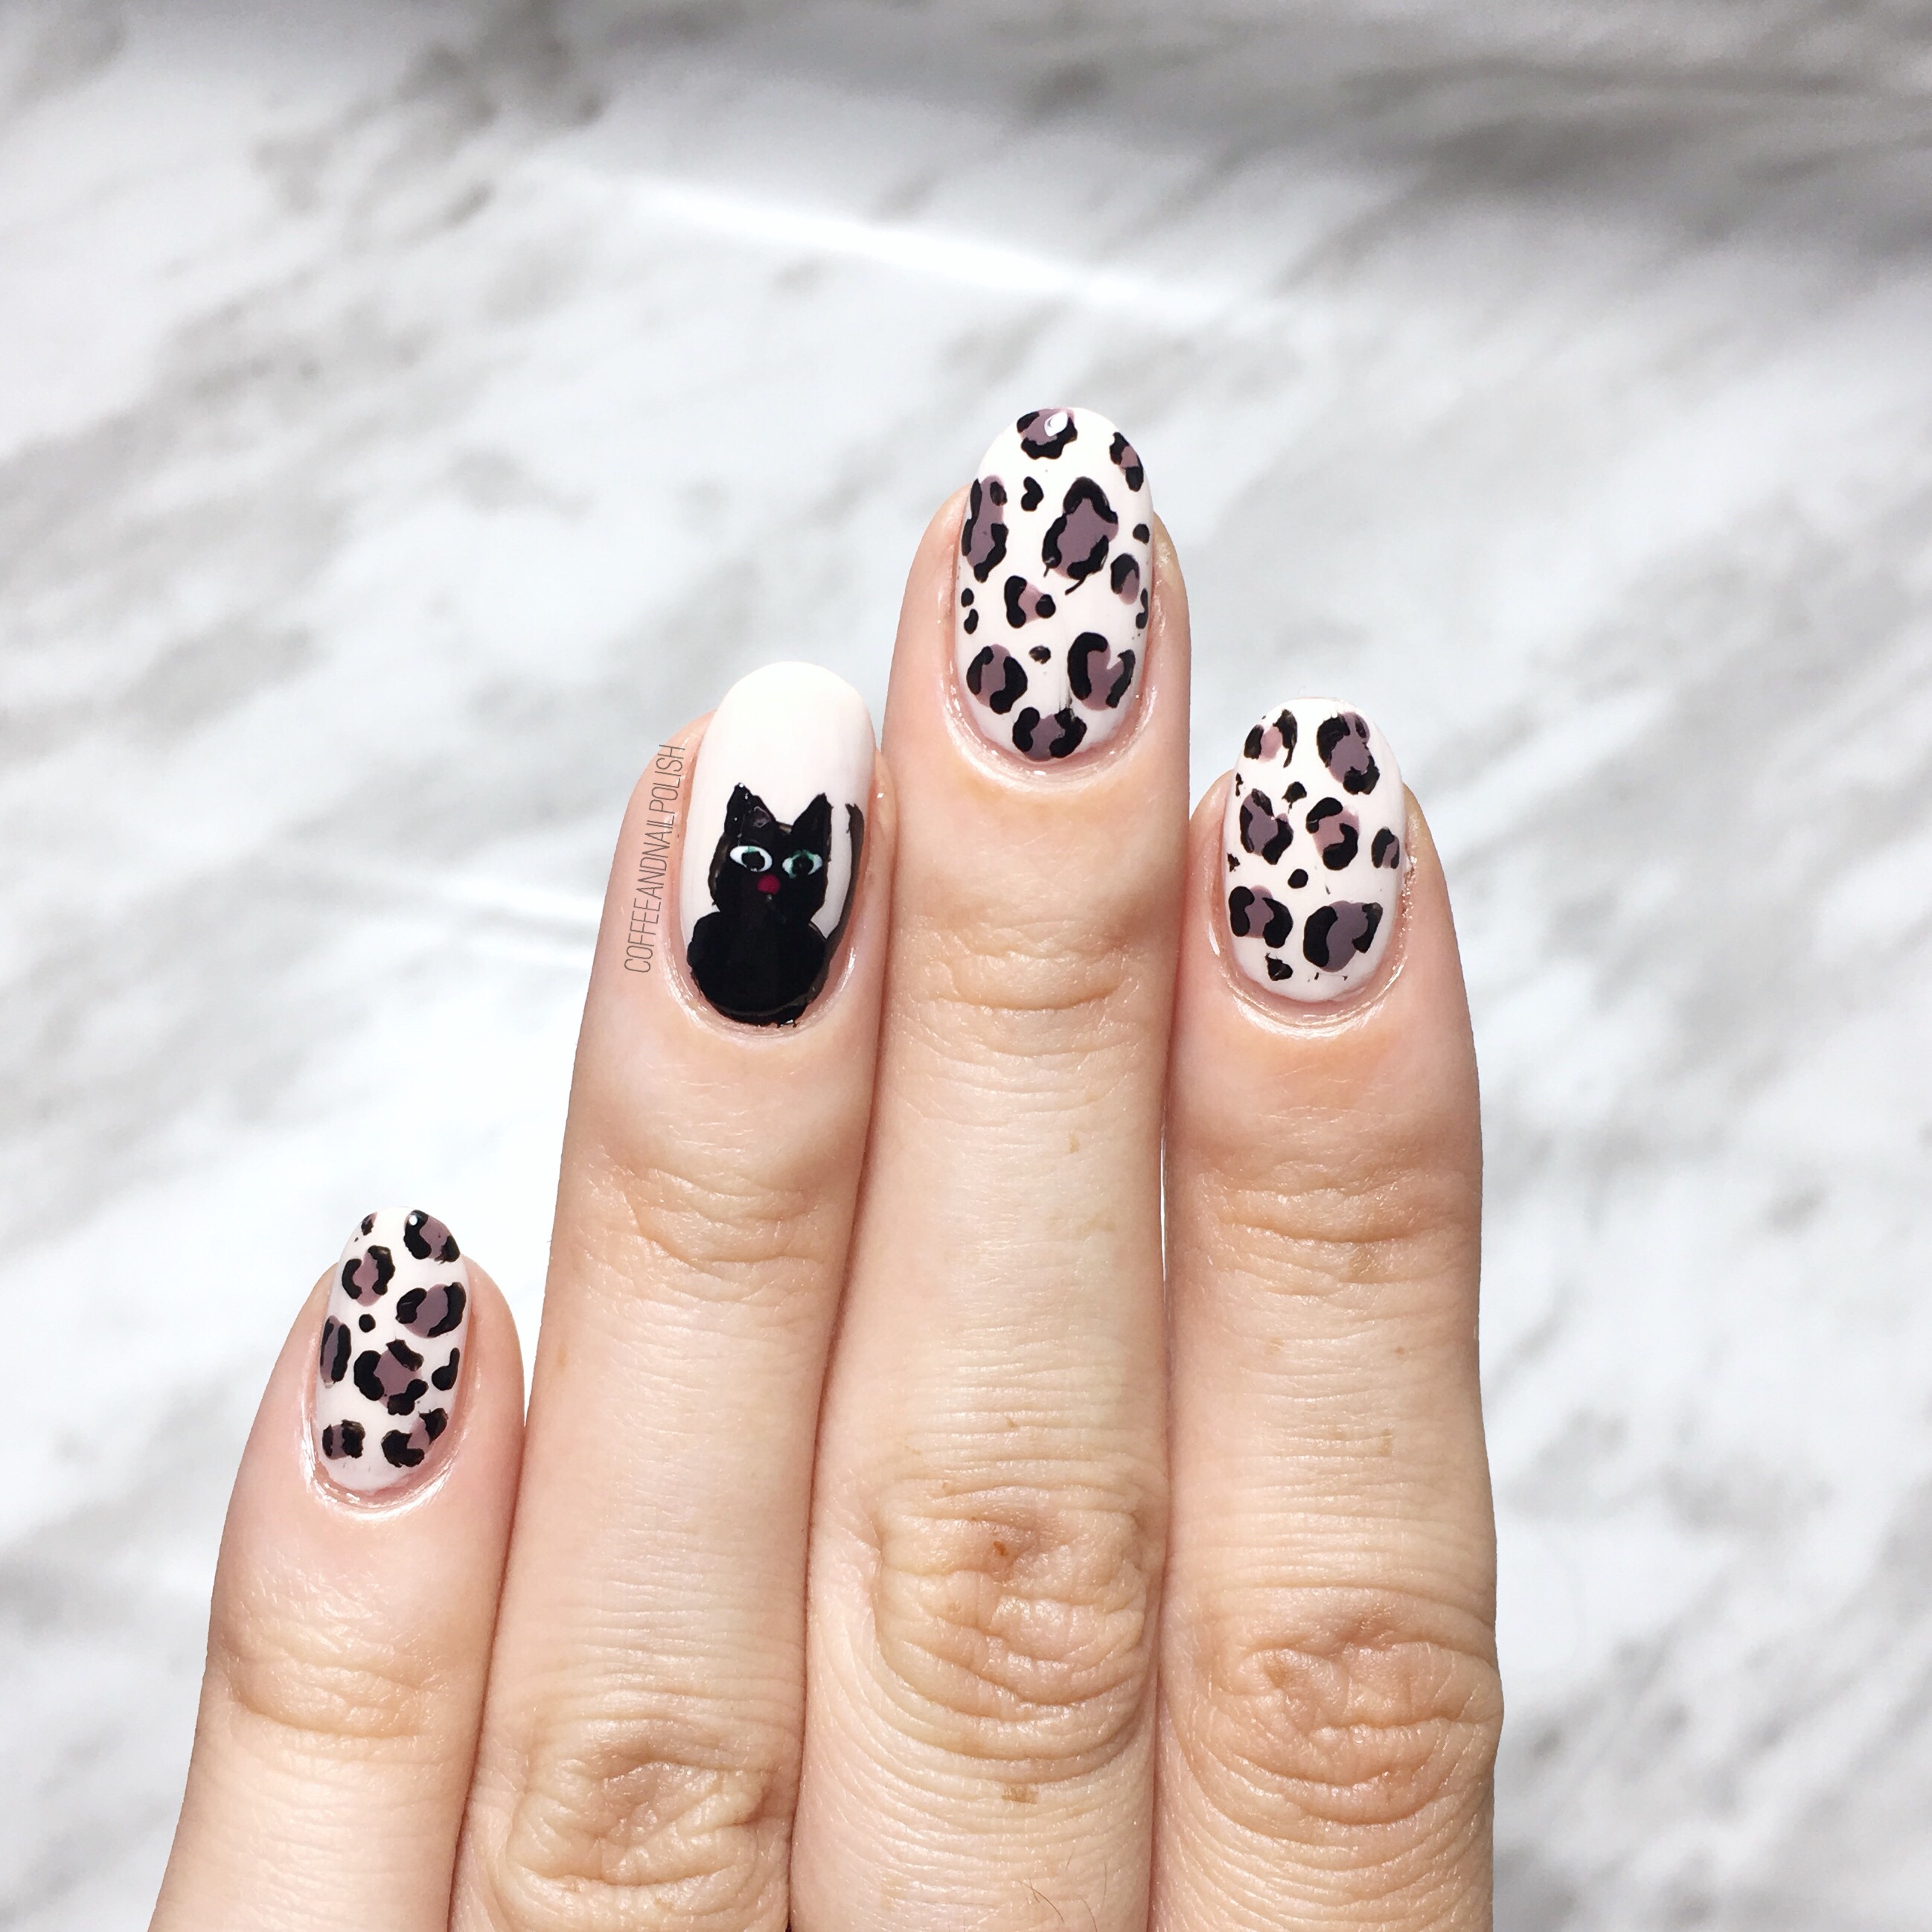
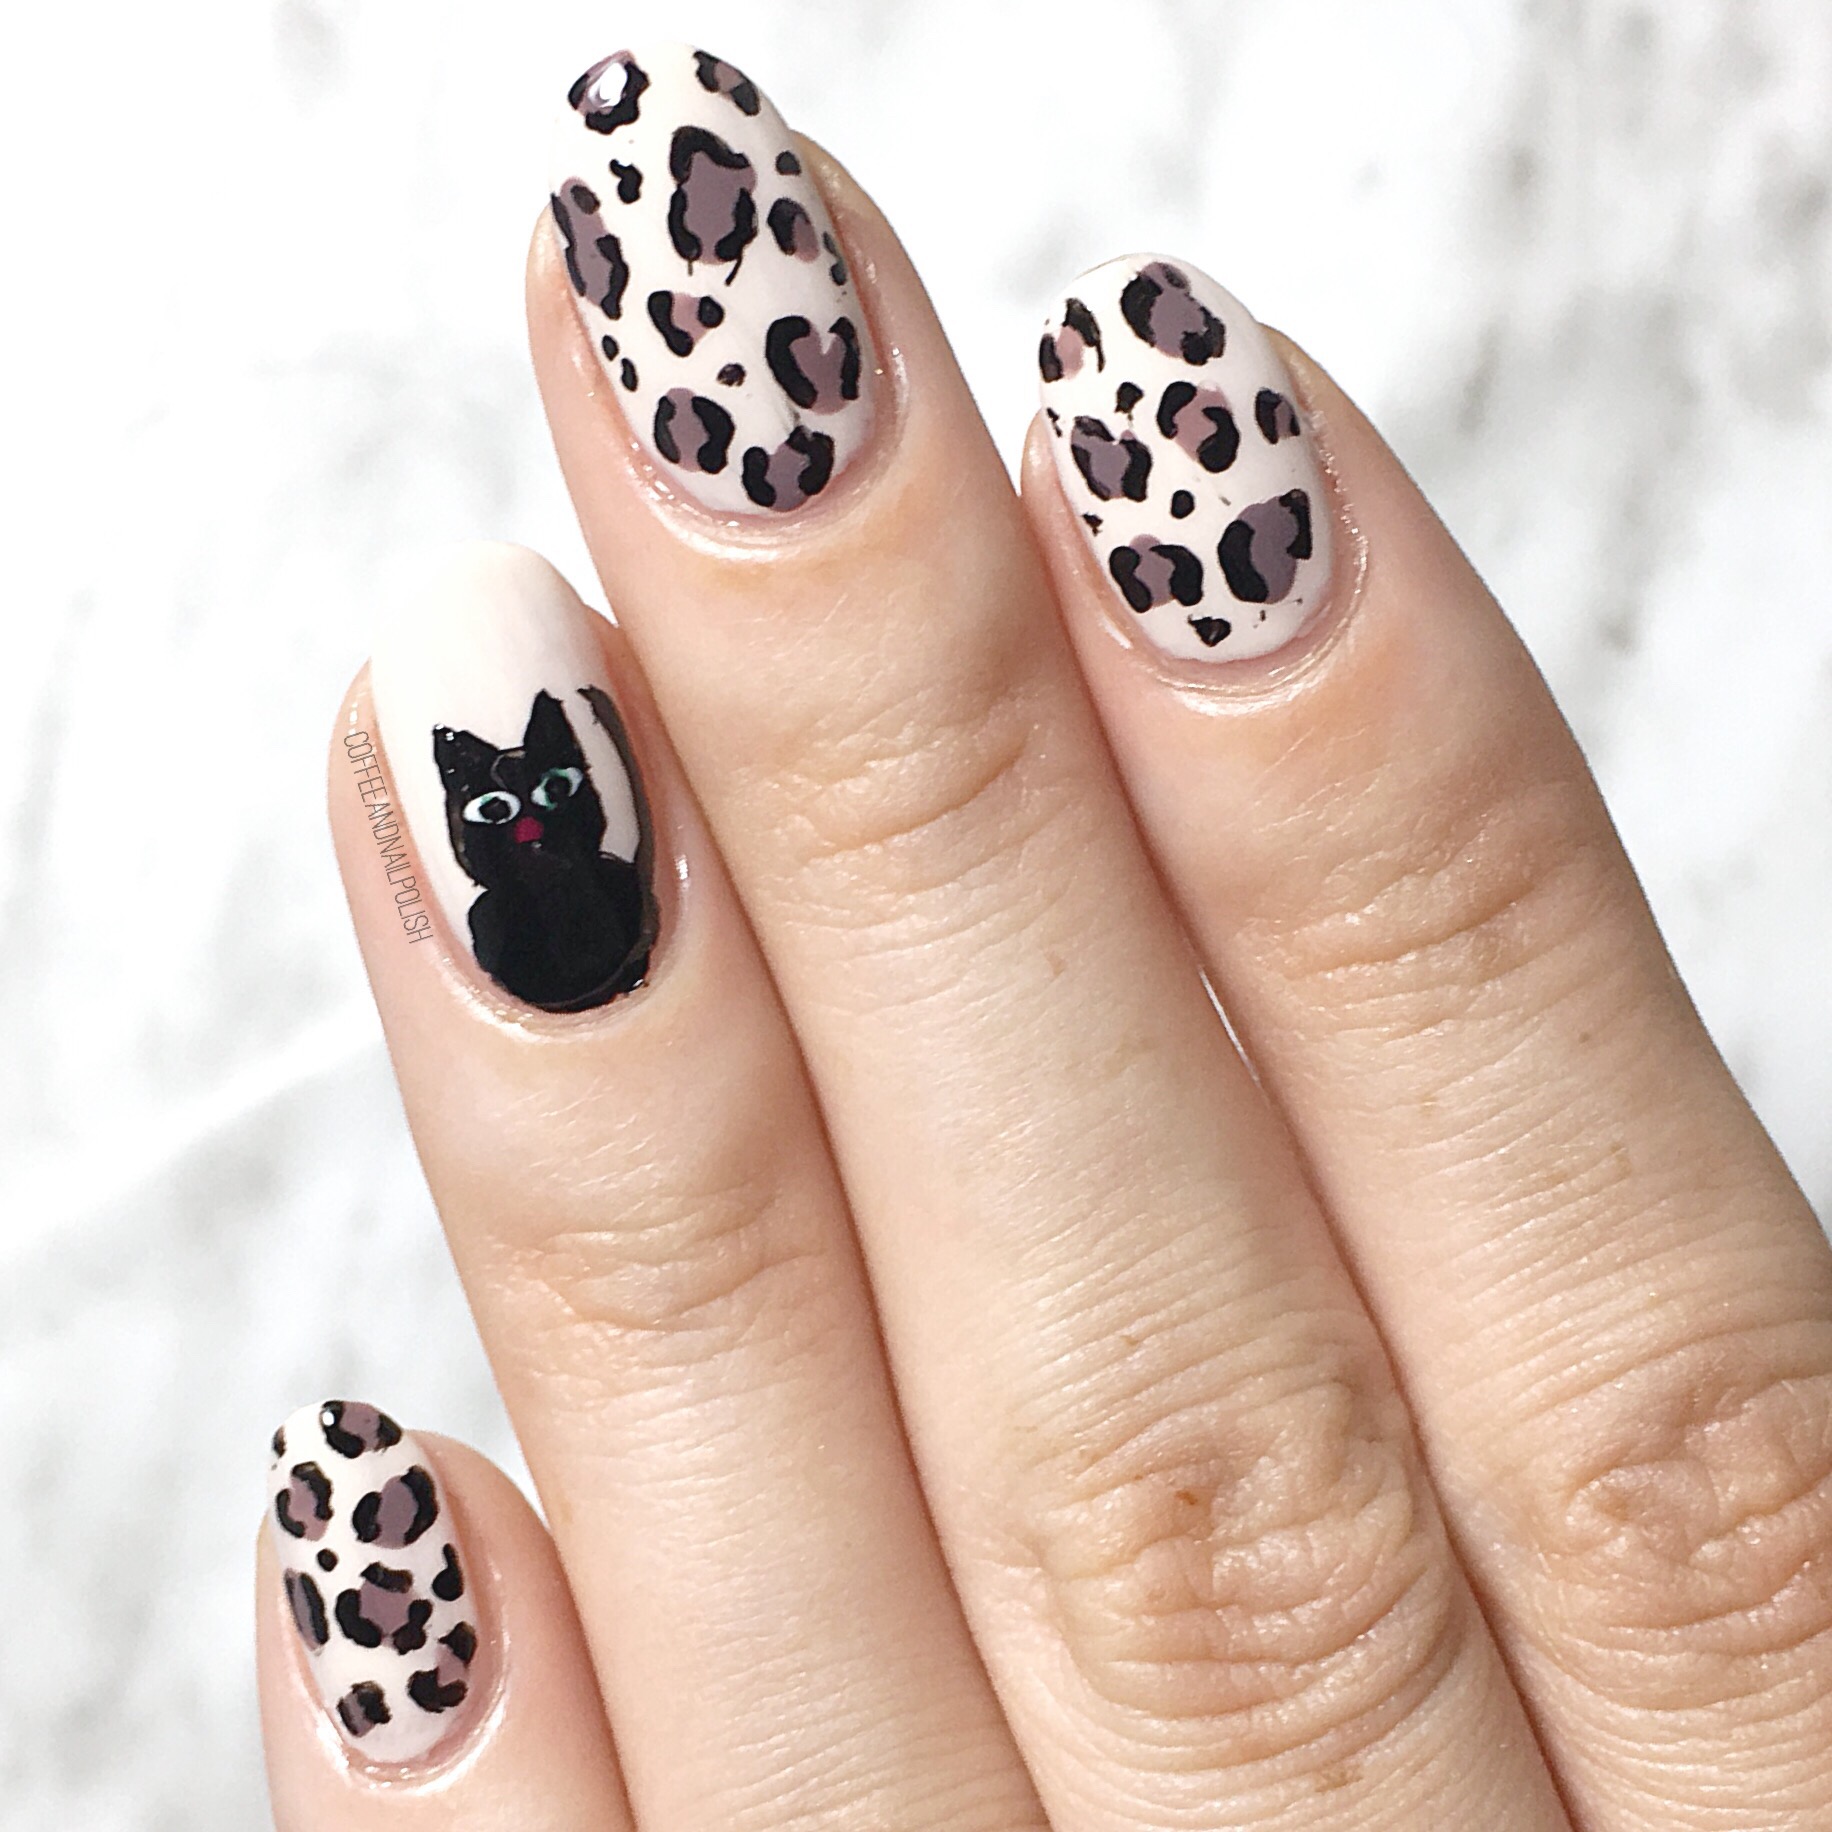
Polishes used for this design:

  • Base Coat: OPI Natural Nail Base Coat
  • Top Coat: Seche Vive
  • Essie Wrap Me Up
  • Essie Merino Cool
  • Sally Hansen Hard As Nails Black Heart
  • Sally Hansen I ♥️ Nail Art Pen in Red
  • Small detail brush & dotting tool from Bundle Monster

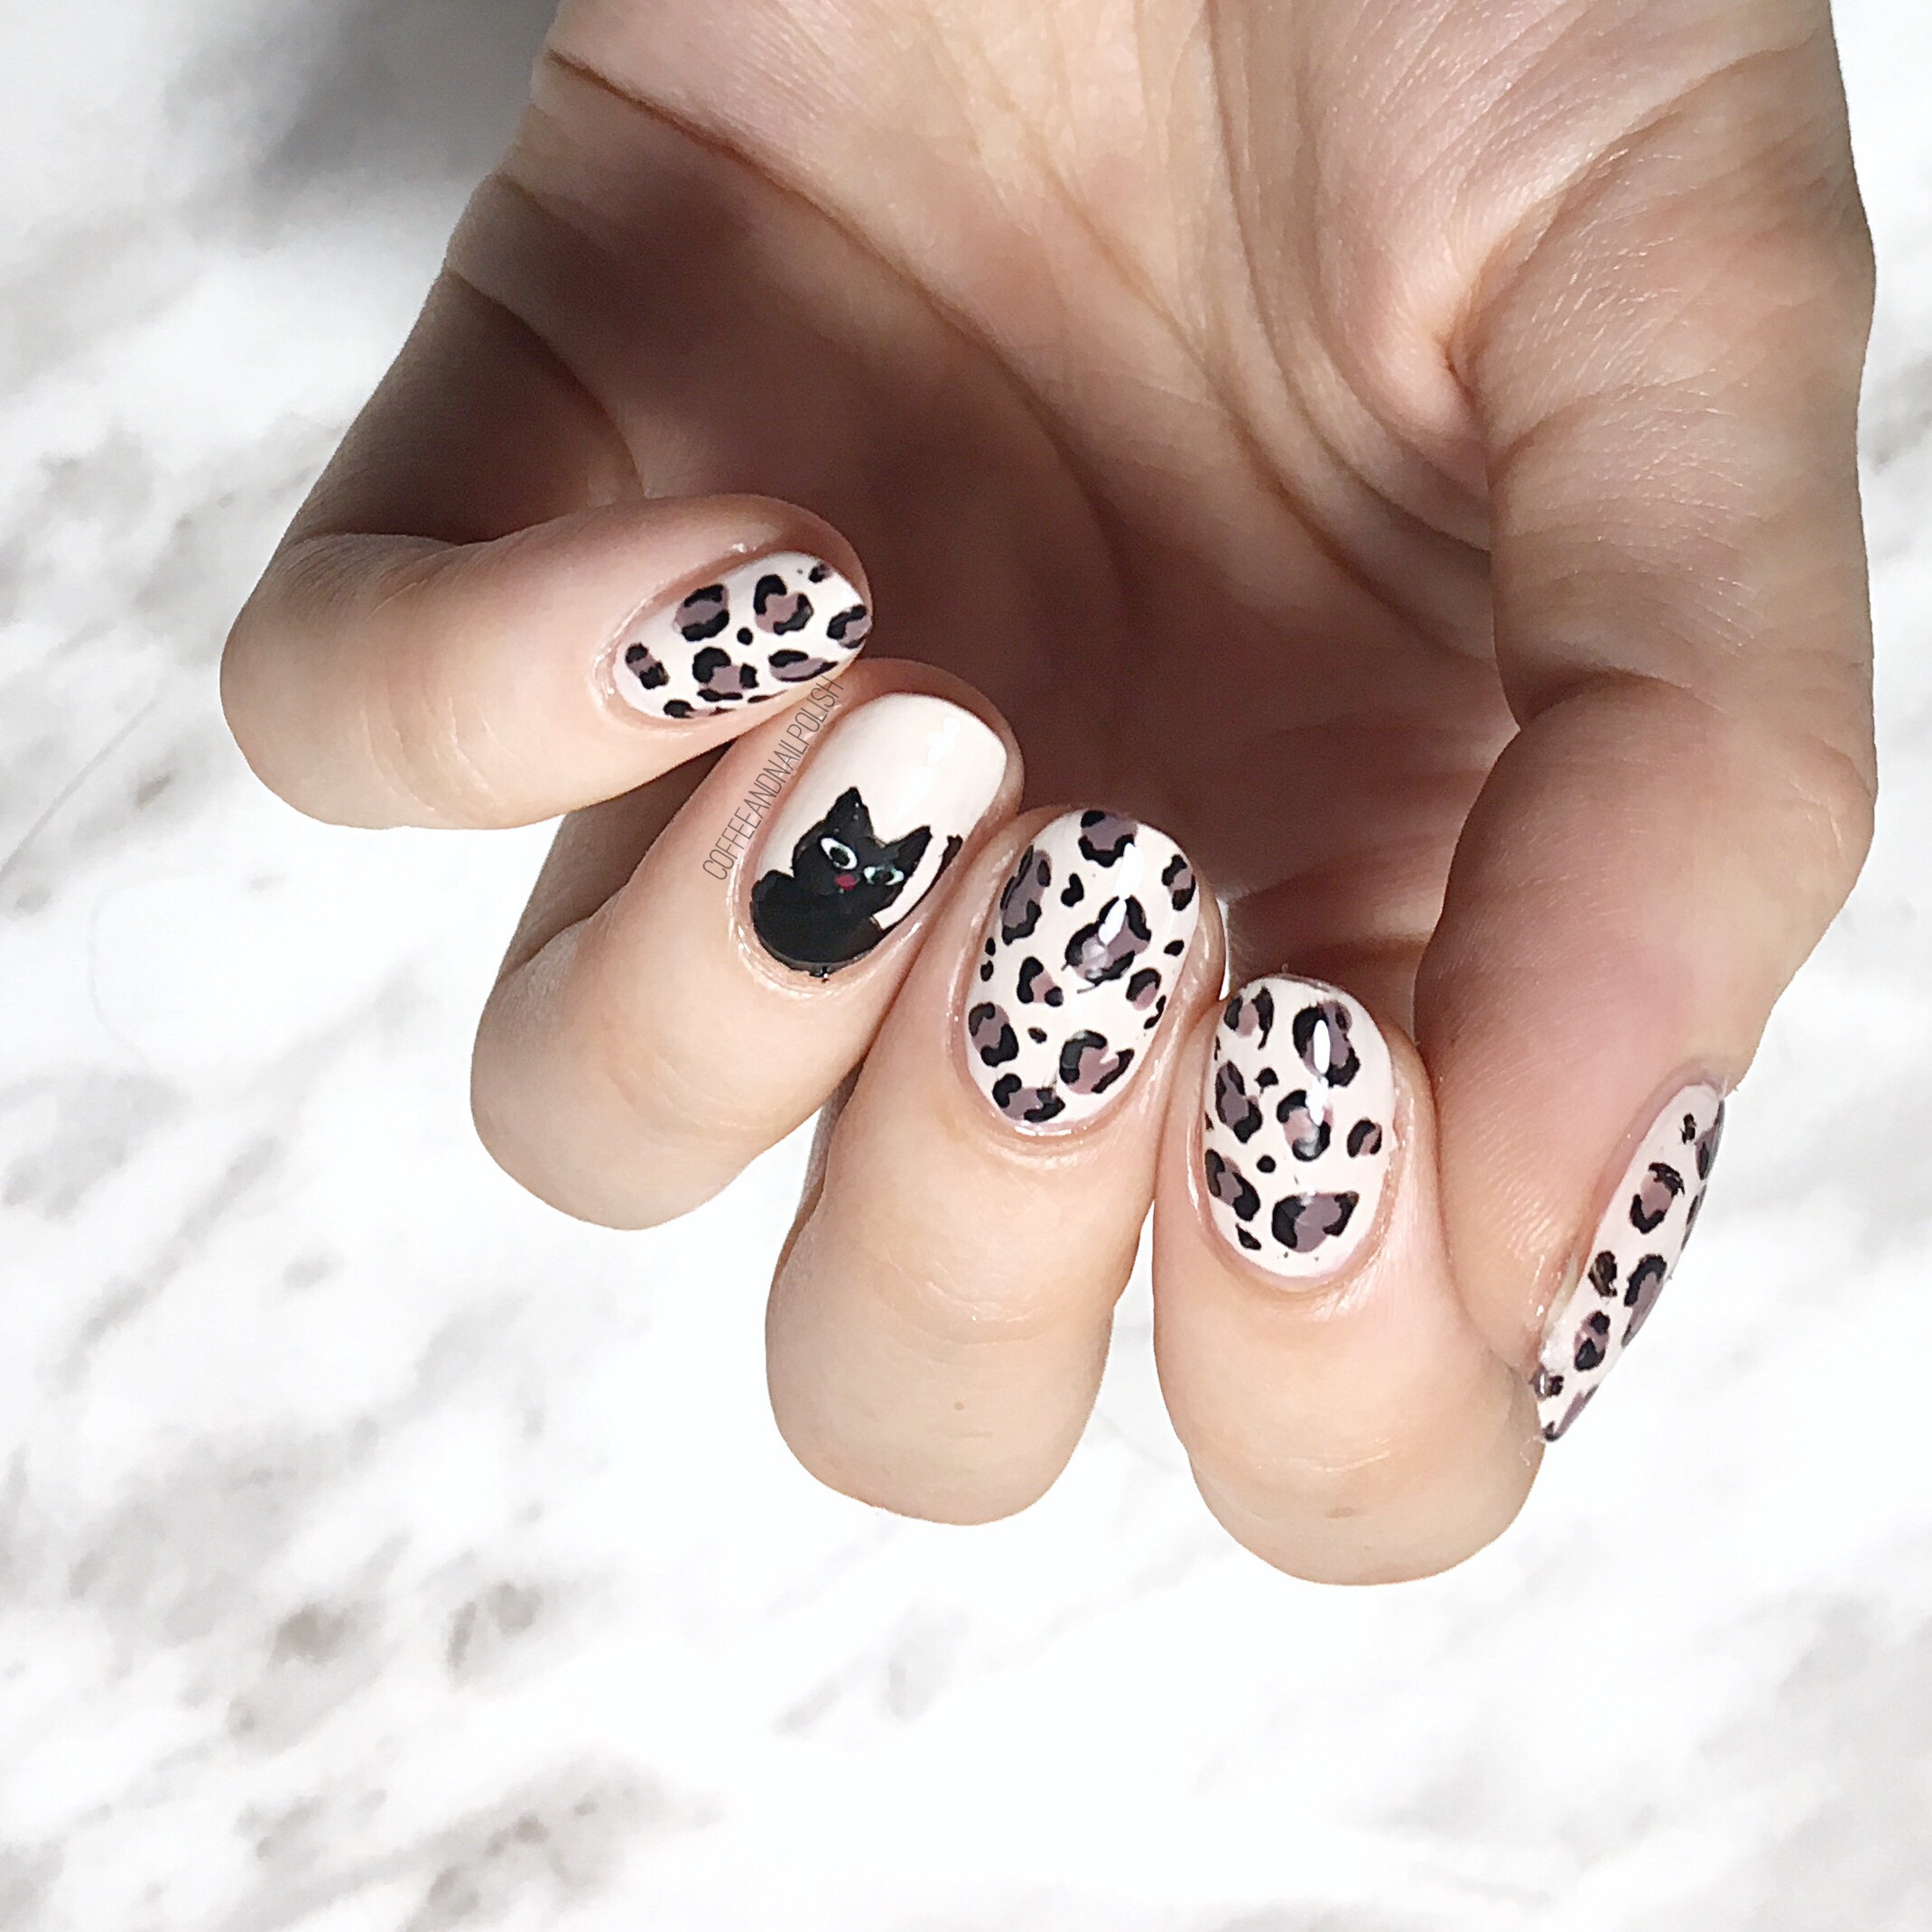
These nails were surprisingly easy to achieve. The leopard print is just blobs of colour outlines with black using your small detail brush. The cat is a bit harder to do, but not by too much—just takes a little bit patience to get it done. & if you feel like you can’t freehand a kitty, you can just as easy wear leopard print on all your fingers instead or use a sticker or decal. 

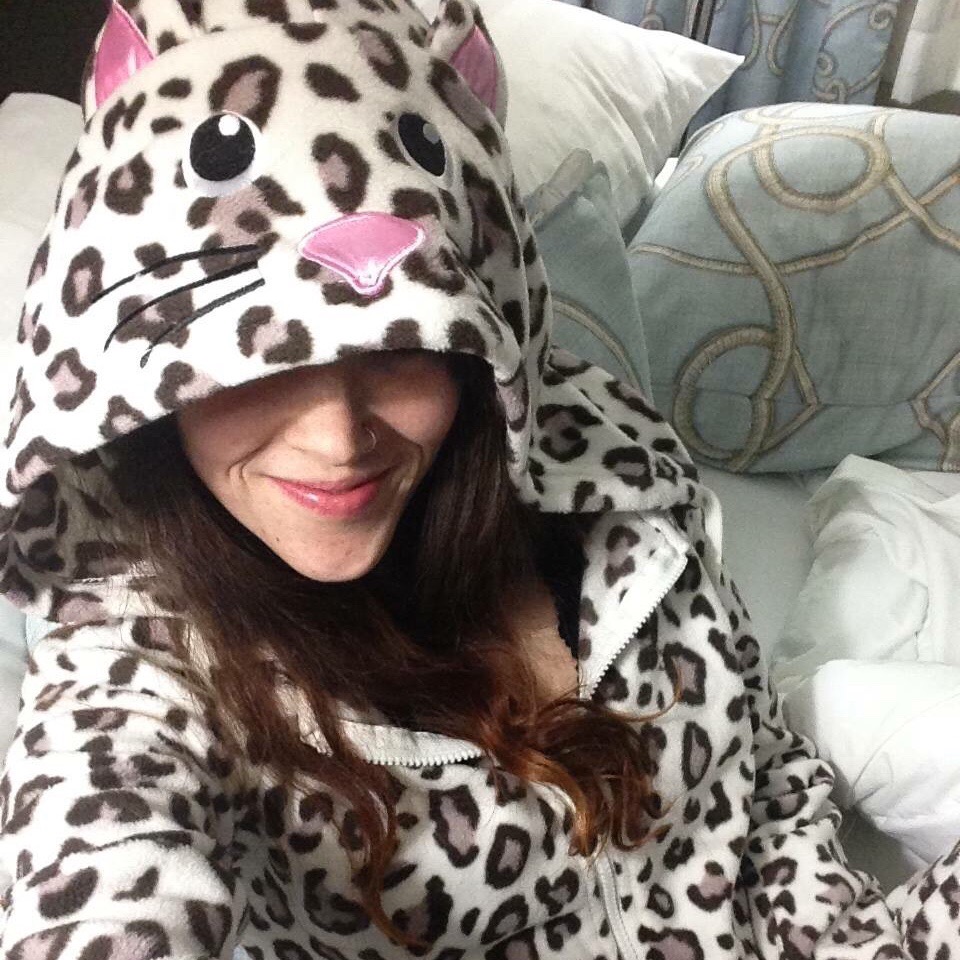
Yep, that’s a onesie & what inspired my colour choices for this leopard print. Who else has totally worn a onesie for a Halloween costume? I mean, they’re pretty perfect for Trick or Treating! Keep you warm & then you immediately can hop into bed (with a chocolate bar or two or fifteen!)

What is your favourite Halloween snack? I’m totally a gummy candy girl. The hubs & I are taking the little guy trick or treating a few places & we already have the candy situation figured out… he gets any chocolate as I’m lactose intolerant, I get the gummy candies & we’ll split the chips. & the little guy… well he gets to be adorable in his baby flash costume. 

♥️

Throwback Thursday Halloween Nails

October is quickly speeding by, so I need to amp up my Halloween designs! 🎃

 This time I decided to recreate a design I did all the way back in 2014 (originally done with @mynailpolish_addiction as part of a bestie twin nail collab.) Even though I had spiders, I always thought this design was adorable so I wanted to recreate it. 

For this manicure, the polishes used were:

  • Base Coat: OPI Natural Nail Base Coat
  • Top Coat: Cutex Quick Dry Top Coat
  • L’Oréal Orange You Jealous?
  • Color Club Wham! Pow!
  • OPI I Cannoli Wear OPI 
  • Sally Hansen Hard To Get Black Heart
  • Essie No Place like Chrome
  • Revlon Holographic Pearls
  • Sally Hansen Xtreme Wear Pacific Blue
  • The Base Coat Spiderweb nail stencil 
  • Small detail brush from Bundle Monster
  • Latex Free Make Up Sponge 

I thought these nails were super cute when I did them originally, & I still think they’re super cute. & I definitely feel like they turned out a little less wonky this time around. Sometimes when I feel like my nails suck & I have no talent & I’m feeling especially hard on myself it’s nice to do these recreations to see how far I’ve come. I may not be the most insanely talented nail artist, but I’m hugely proud of how far I’ve come. 

What do you think of this Halloween design? Let me know your thoughts in the comments below! 

Happy Birthday Nails! 🎉🎈🎂 

I know, it’s Sunday which means normally I would be sharing a swatch with you. But today is not just any Sunday… it’s my birthday! So obviously I had to do something fun on my nails in honour of the occasion & I couldn’t think of anything more fun to put on my nails than a glittery purple cupcake nail (which are a few of my favourite things.) After perusing Pinterest searching “cupcake nails” I had an idea of how I wanted my design to look, & I’m so happy that they turned out exactly how I imagined! 

For this manicure, the polishes I used were:

  • Base Coat: OPI Natural Nail Base Coat
  • Top Coat: Cutex Quick Dry Top Coat
  • ORLY Plum Sugar
  • Nails INC Cherry Road
  • Sally Hansen Hard As Nails Hard To Get
  • Color Club Evolution
  • Cosmetic Arts Unnamed Baby Pink
  • Color Club A Warm Place
  • URSugar Zig Zag Nail Vinyls item #AUB39877 
  • Dotting Tool
  • Small Detail Brush


I really really love my birthday cupcake nails. I feel like it’s been ages since I freehanded anything & I was a little nervous about my cupcake but it turned out so cute! These are going to be fun to wear for my birthday celebrations with my family later this afternoon. Last year I spent my birthday in a dark room with an eye infection, so I’m determined to make up for that this year! 

Have a great Sunday everyone! 💜

Deep & Dark Vintage Floral Nails 

Okay so I know every time I paint floral on my nails I gush that they’re my absolute favourite floral… but I swear this time I really mean it! It may have something to do with the super vampy perfect-for-Fall base colour. These are definitely not a Spring floral & I think that’s why I love it so much. I am also really in love with the slightly messy look of this floral–they’re not perfect, & I think that’s what makes them so perfect to me. 

For this manicure, the polishes I used are:

  • Base Coat: OPI Natural Nail Base Coat
  • Top Coat: Sally Hansen Diamond Flash Top Coat
  • Essence Plump Power 
  • Sally Hansen X-treme Wear Mauve Over
  • Sally Hansen Miracle Gel Pretty Peony 
  • Sally Hansen Complete Salon Manicure Montley Hue
  • Sally Hansen Hard As Nails Black Heart
  • Sally Hansen I ♥️ Nail Art pen in Green
  • Sally Hansen X-treme Wear Kiwi Bikini
  • Quo by ORLY Diva 
  • Large & Small dotting tool 
  • Small detail brush from Bundle Monster

Obviously nothing could make me love this mani any more…. except adding Matte top coat to it! It’s been forever since I mattified anything, so it was long long over due. For this mani I used an inexpensive matte top coat I picked up on vacation this summer for a $1, but if you’re looking for suggestions my all time favourite Matte top coat is L’Oréal The Matte Velvet top coat. 

Anyone else just love love love Matte nails as the weather gets cooler & Fall creeps into the air? Maybe it’s because I always grab my darker shades & they look so fabulous mattified? Whatever the reason, it makes me very very happy! 


What do you think of this vintage floral design? Which do you like better–shiny or matte? Let me know your thoughts in the comments below! 

Fall Leaf Stamping 🍁

Sorry for my lack of posting this week. If you follow me on Instagram you would have saw that I was struck down by the gluten gods this past weekend & I’ve been recovering from a particularly bad attack the last couple days. I spent Monday & Tuesday in bed sleeping but I finally had a bit of a burst of energy, enough at least that I could post this mani. 

& can I just say I freaking love how this design turned out?! Okay so my husband may have said that he thought they looked like spiderwebs but he’s a boy & it doesn’t count. 😂 

For this manicure, the products I used were: 

I started off with a base shade of This Isn’t Iceland the used my other OPI shades to create a Saran Wrap splatter. I topped that with clear nail polish that I knew would smear the polishes so it blended them together better. Then I stamped the leaf print over top over the blend using Back to Black to finish the design. I topped everything with top coat to seal in the design, & used a brush dipped in acetone to clean up around the cuticles. I love using Back to Black for stamping because not only does it stamp well, it cleans up easily & doesn’t leave my cuticles stained black when using acetone. There is nothing worse! 

I’m digging this pattern. I wish I could have gotten a picture with an actual leaf but mine aren’t quite on fire yet. I’ll have to repeat this stamping again when the leaves are in full colour change, just for the chance to take a picture! That, or I’ll recreate one of my all time favourite Fall designs. 

What do you think of these Fall leaf nails? Do you see leaves or spider webs? Let me know what you think in the comments below! 

Some of these lovely polishes were all gifted to me by OPI as part of the #PreenMeVIP program.