Geometric stamping over Sally Hansen Mermaid’s TaleĀ 

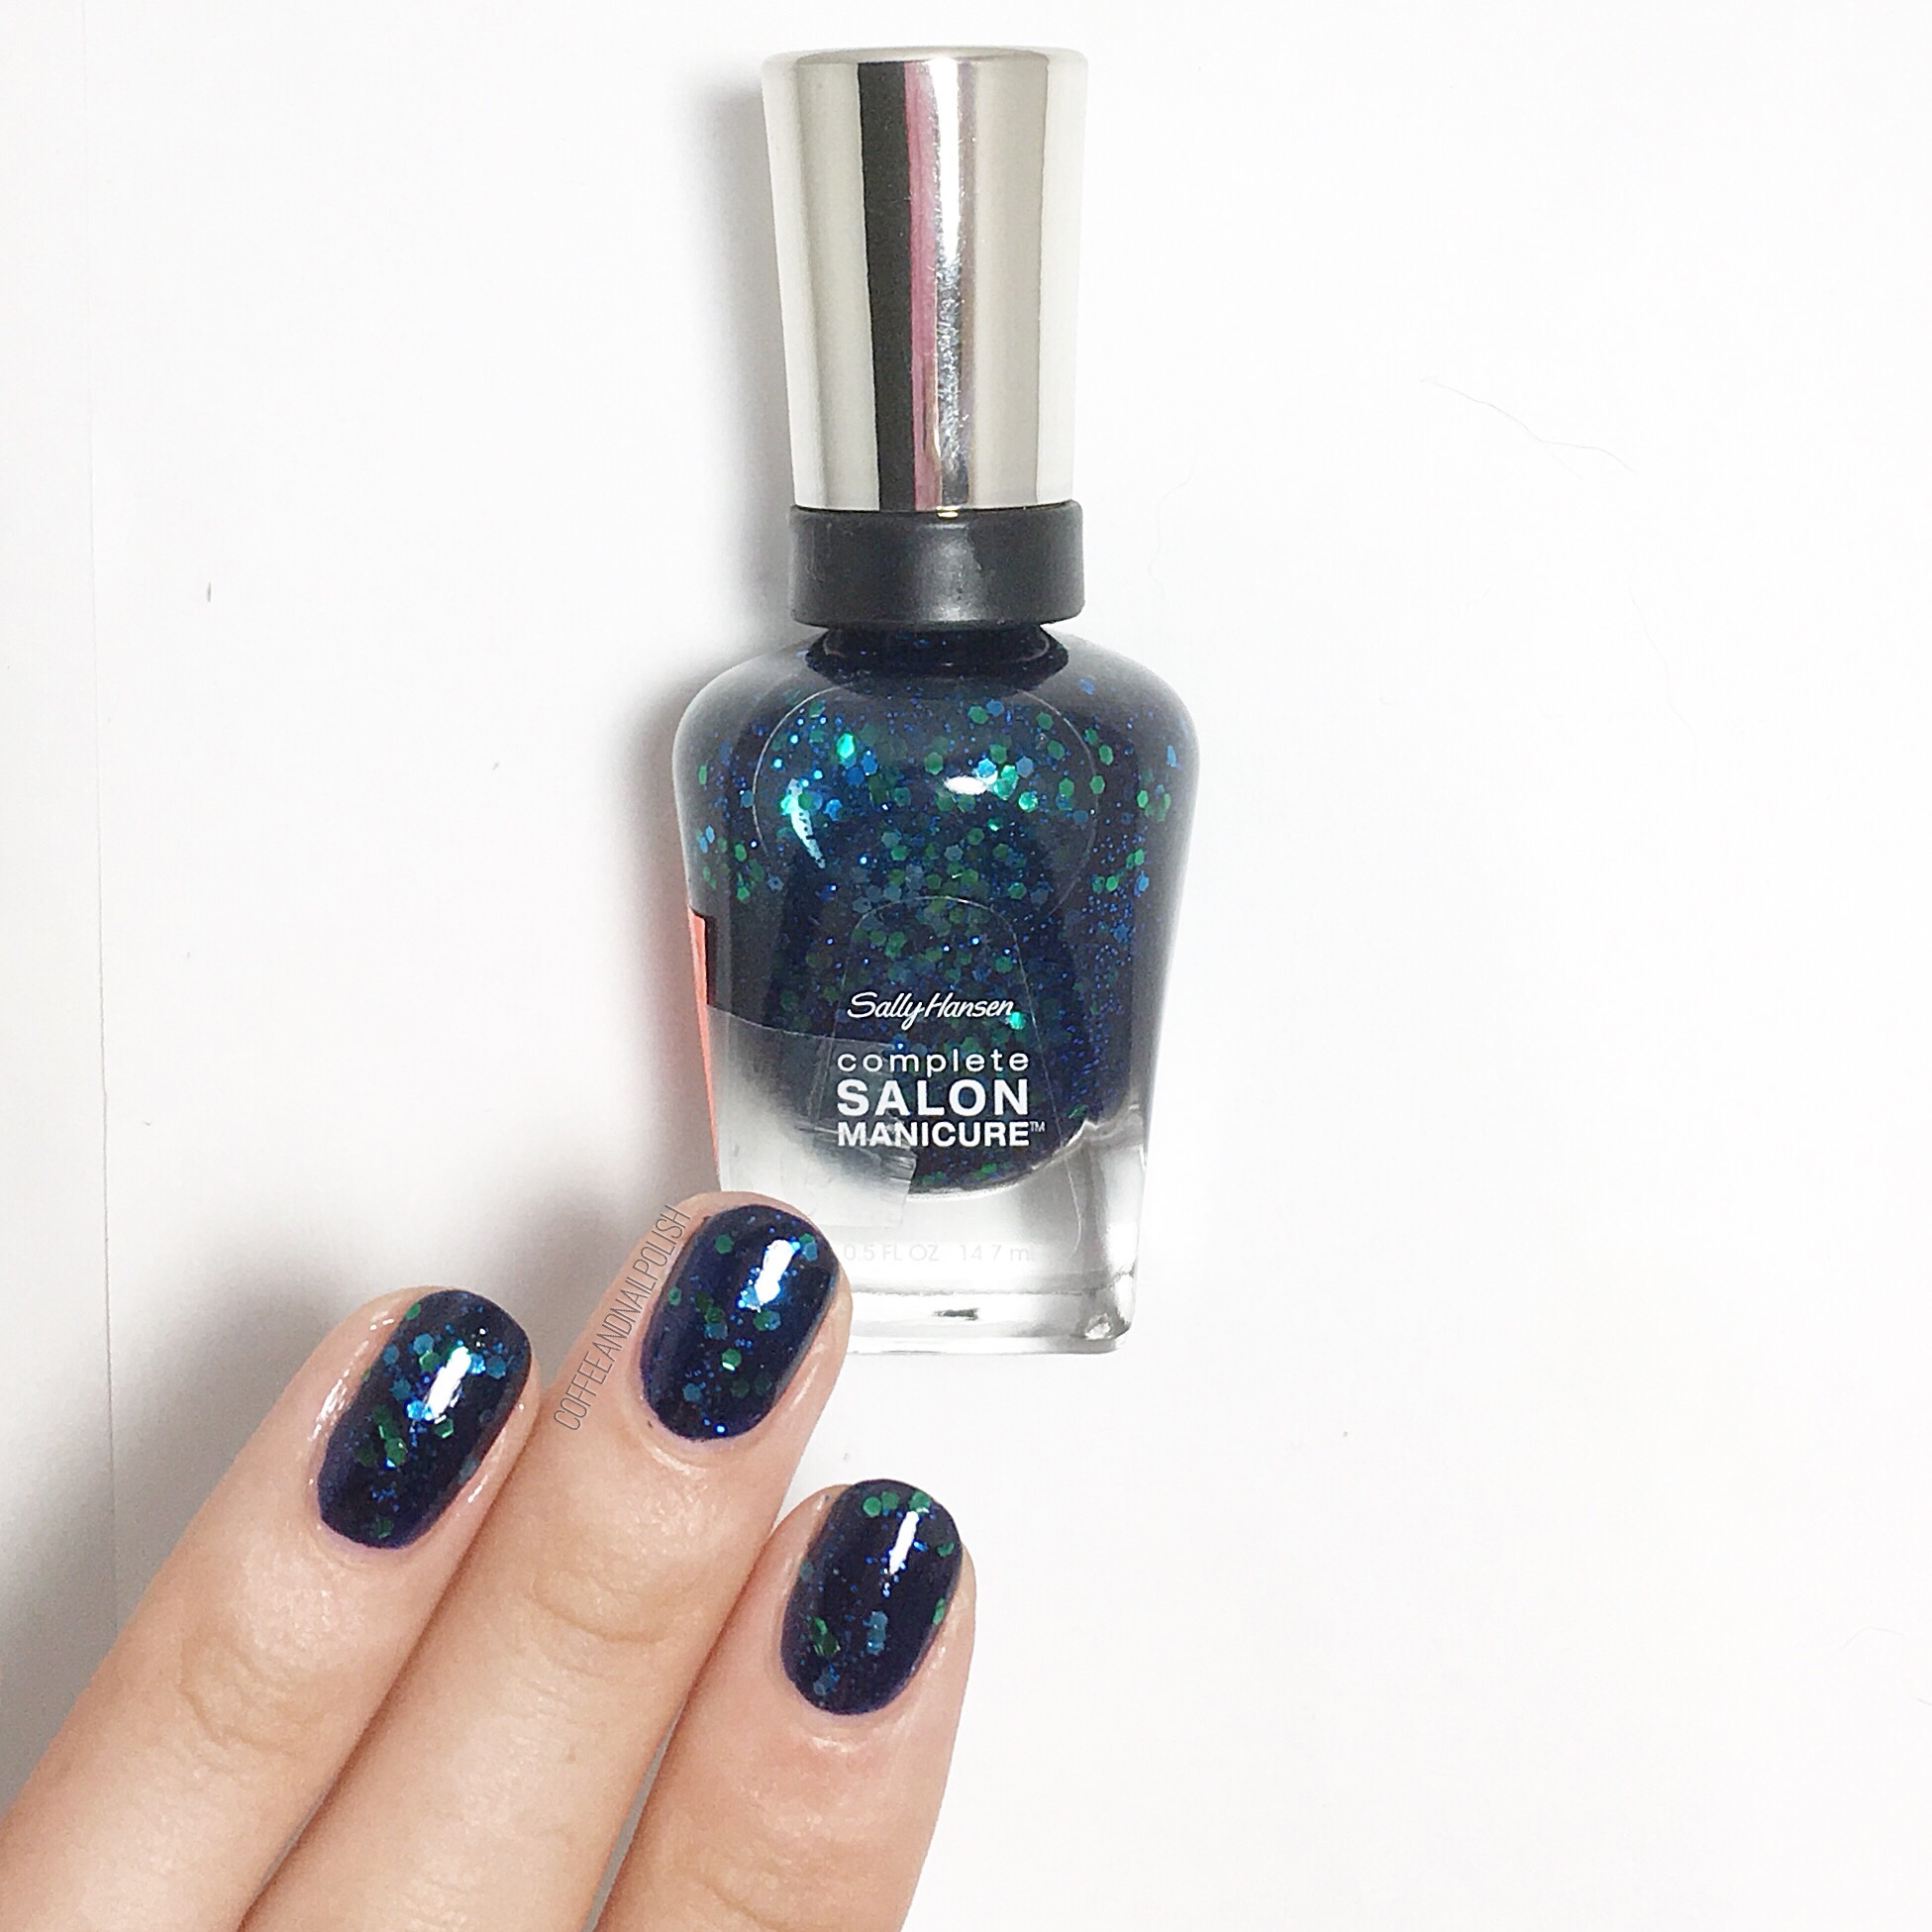
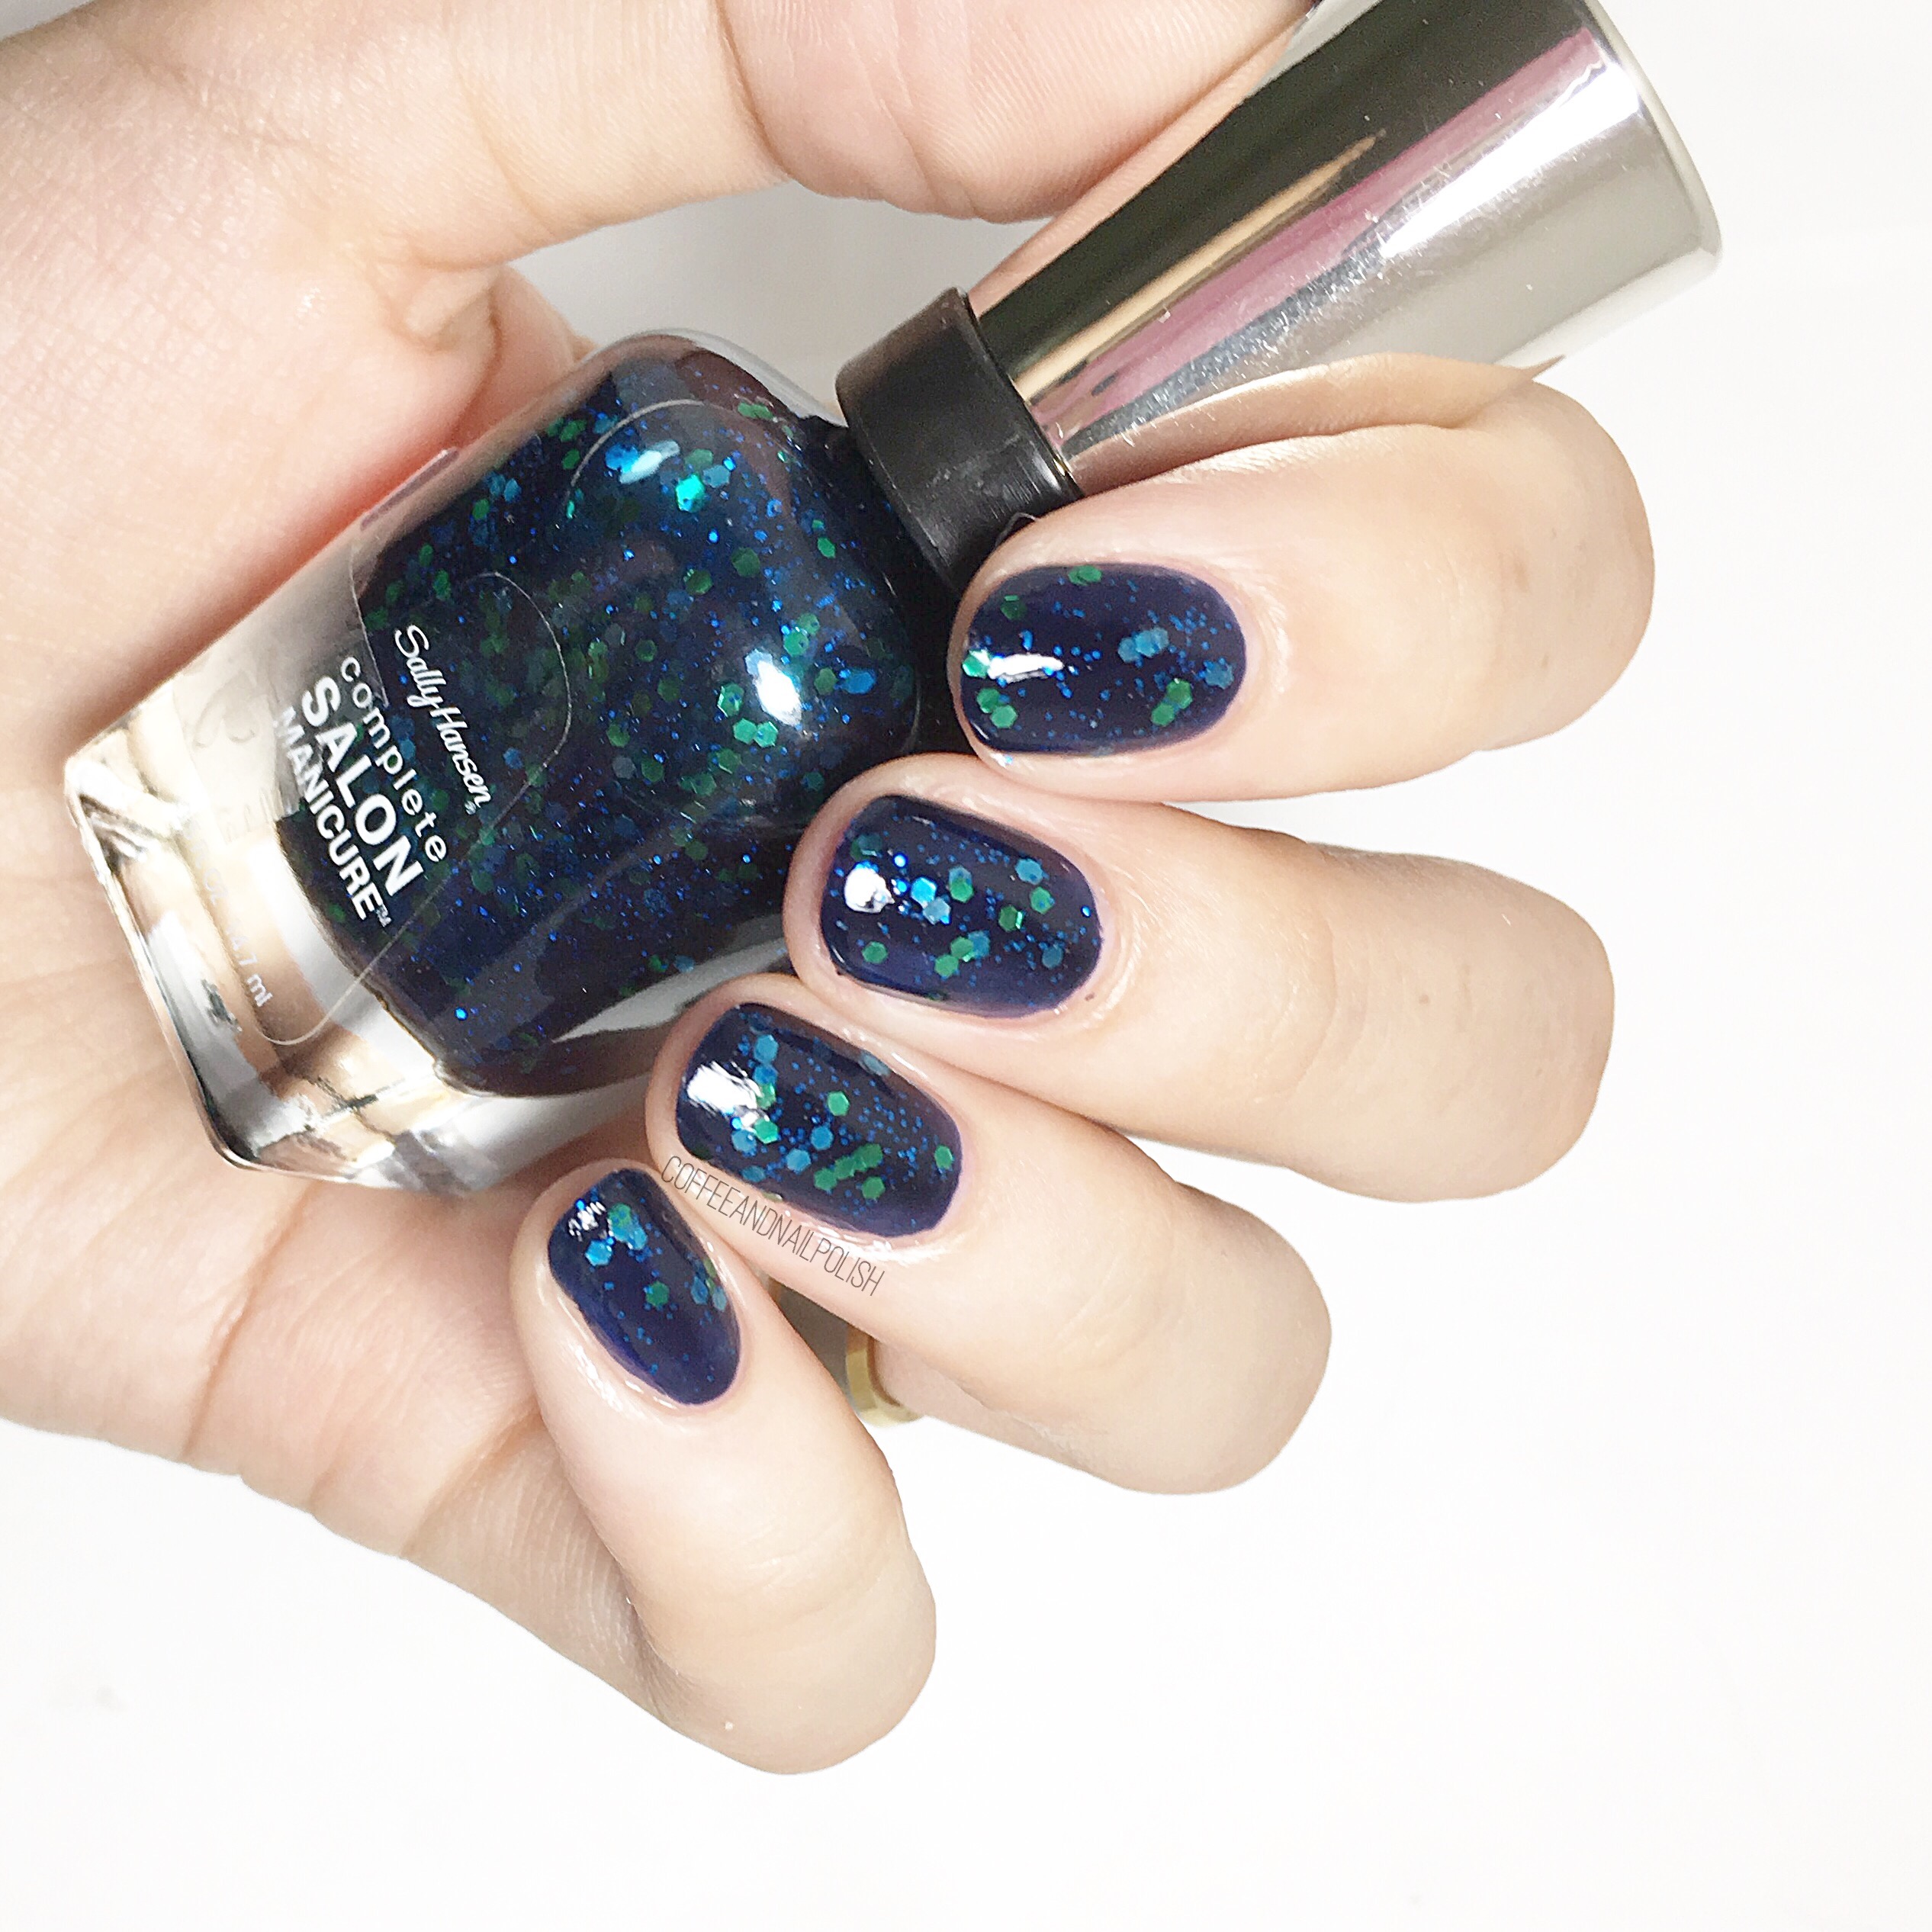
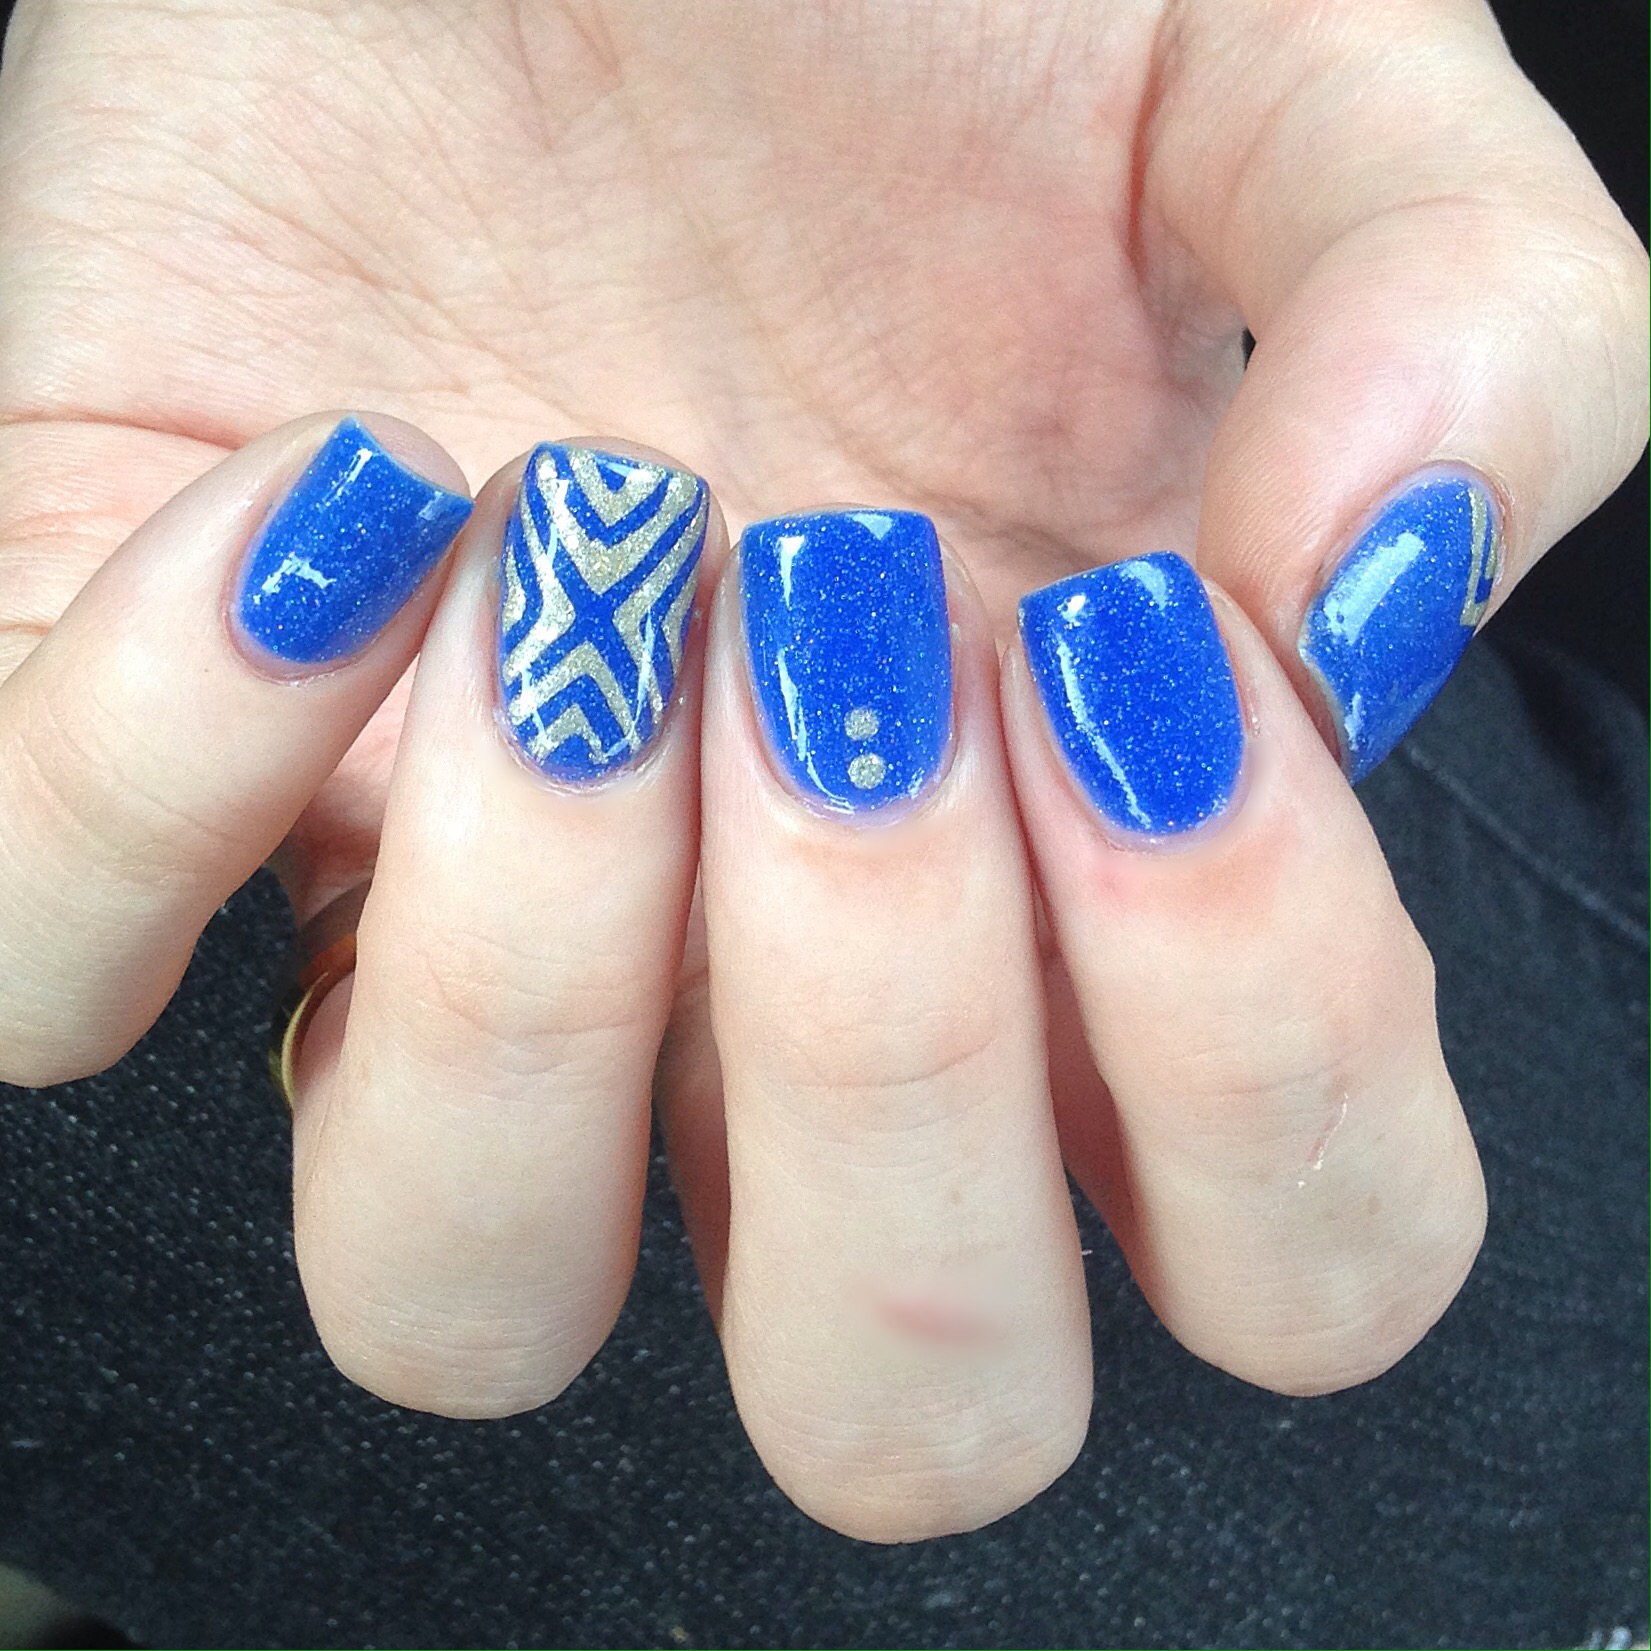
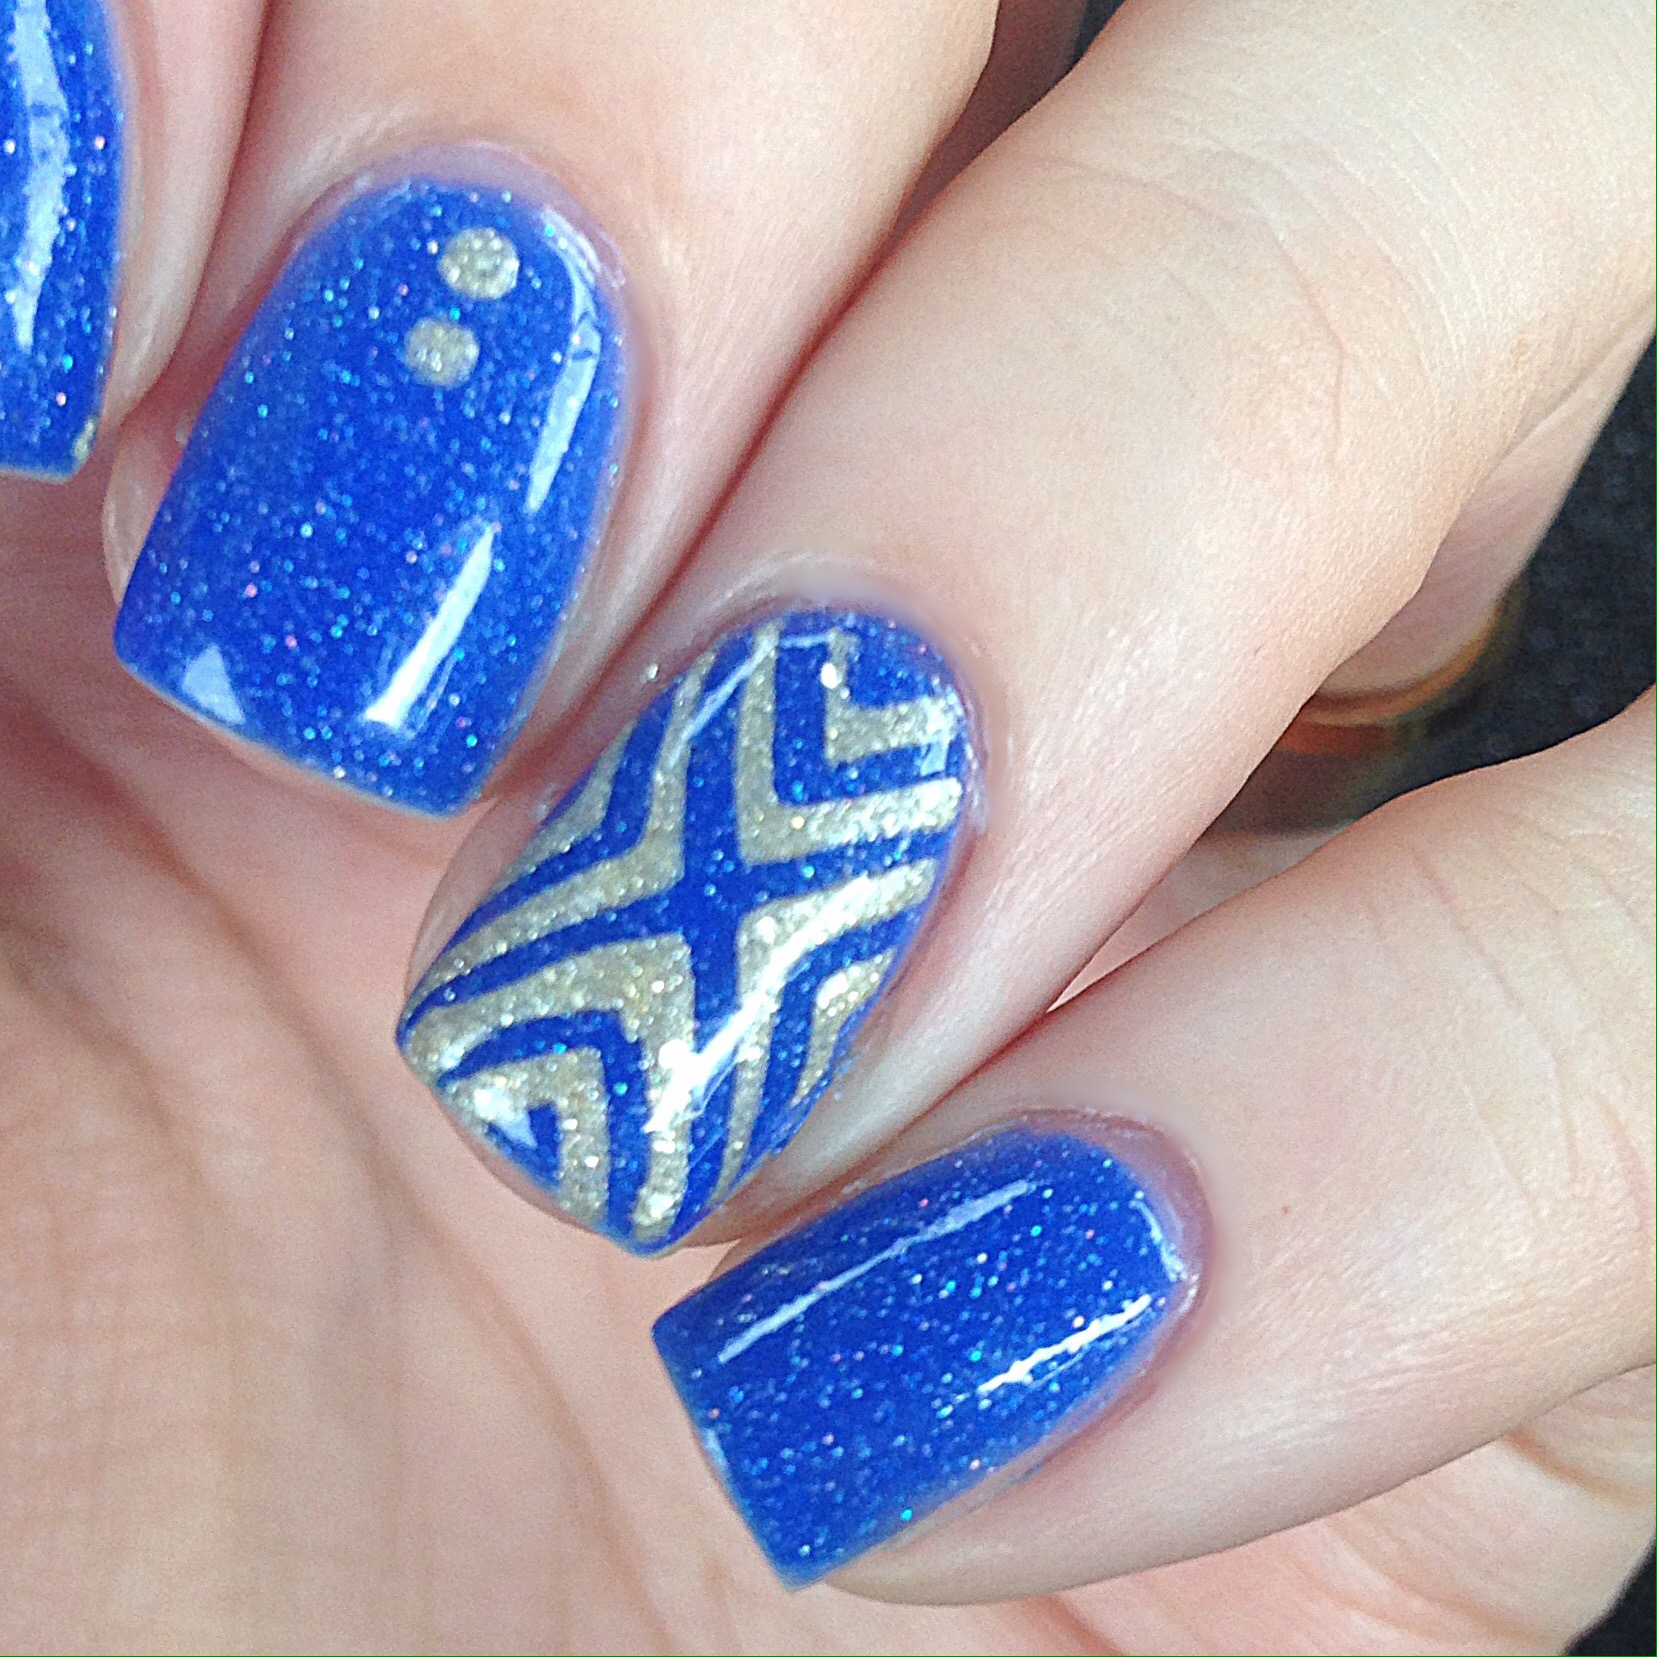
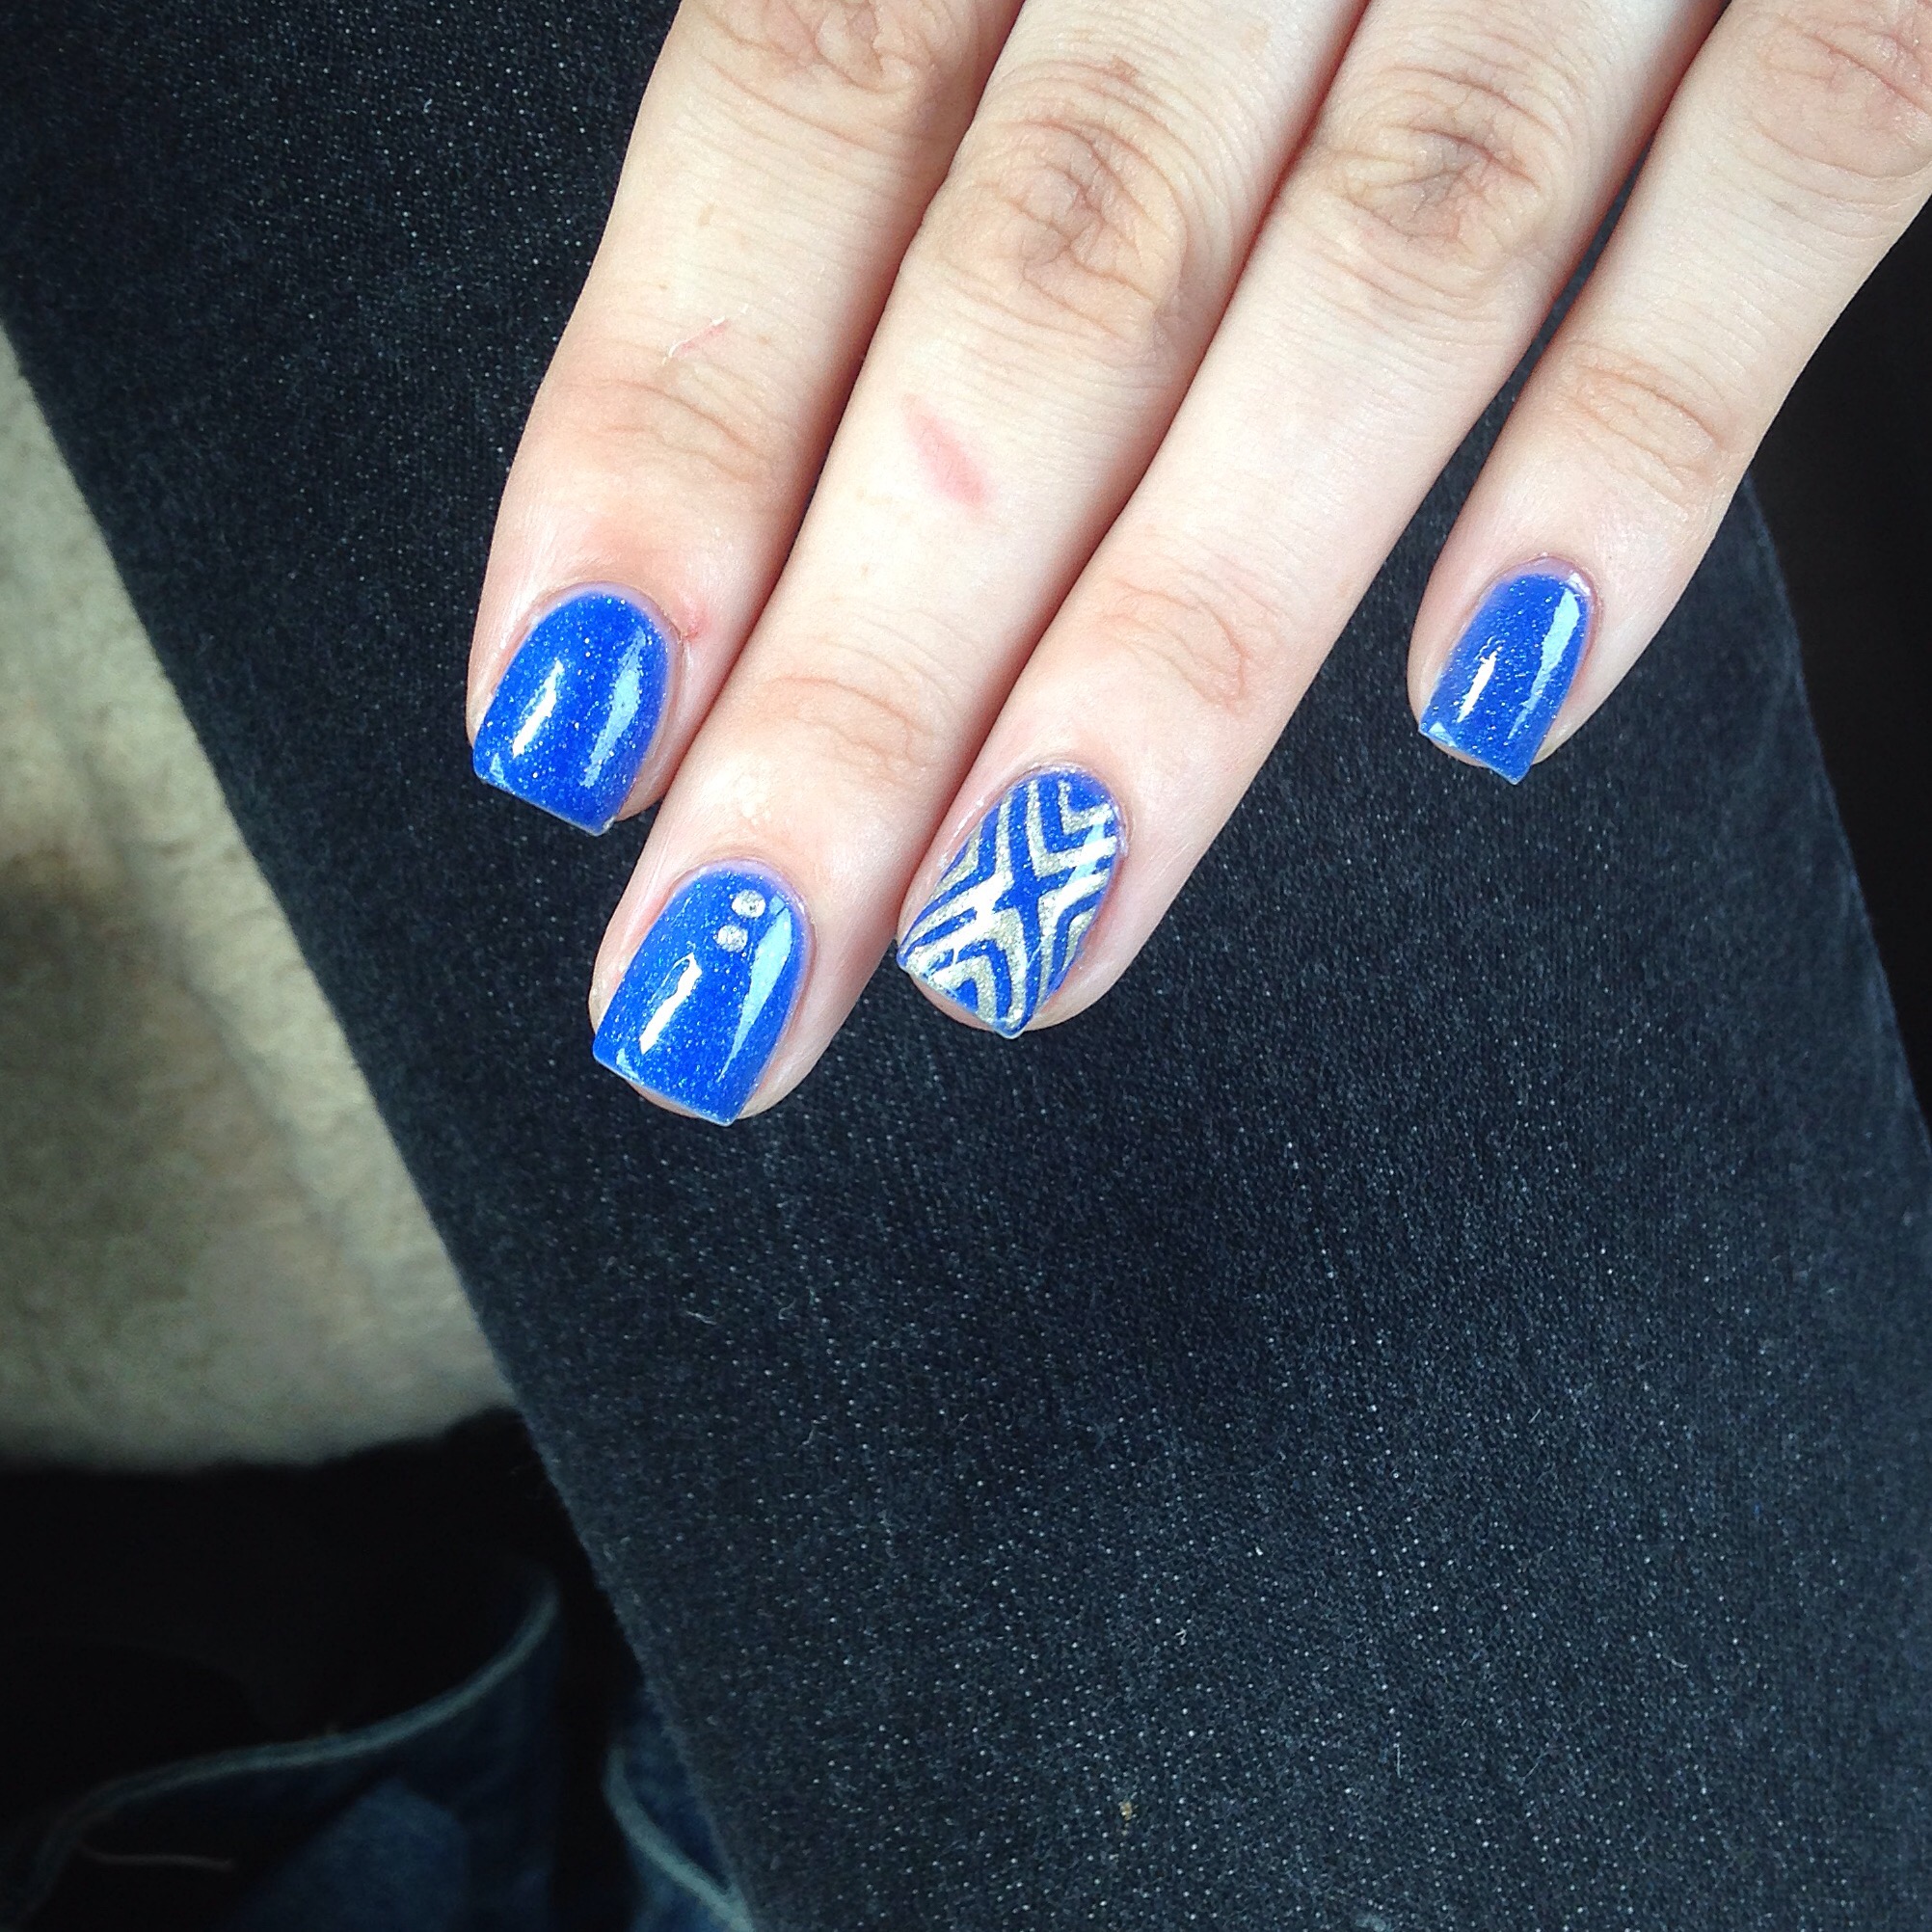
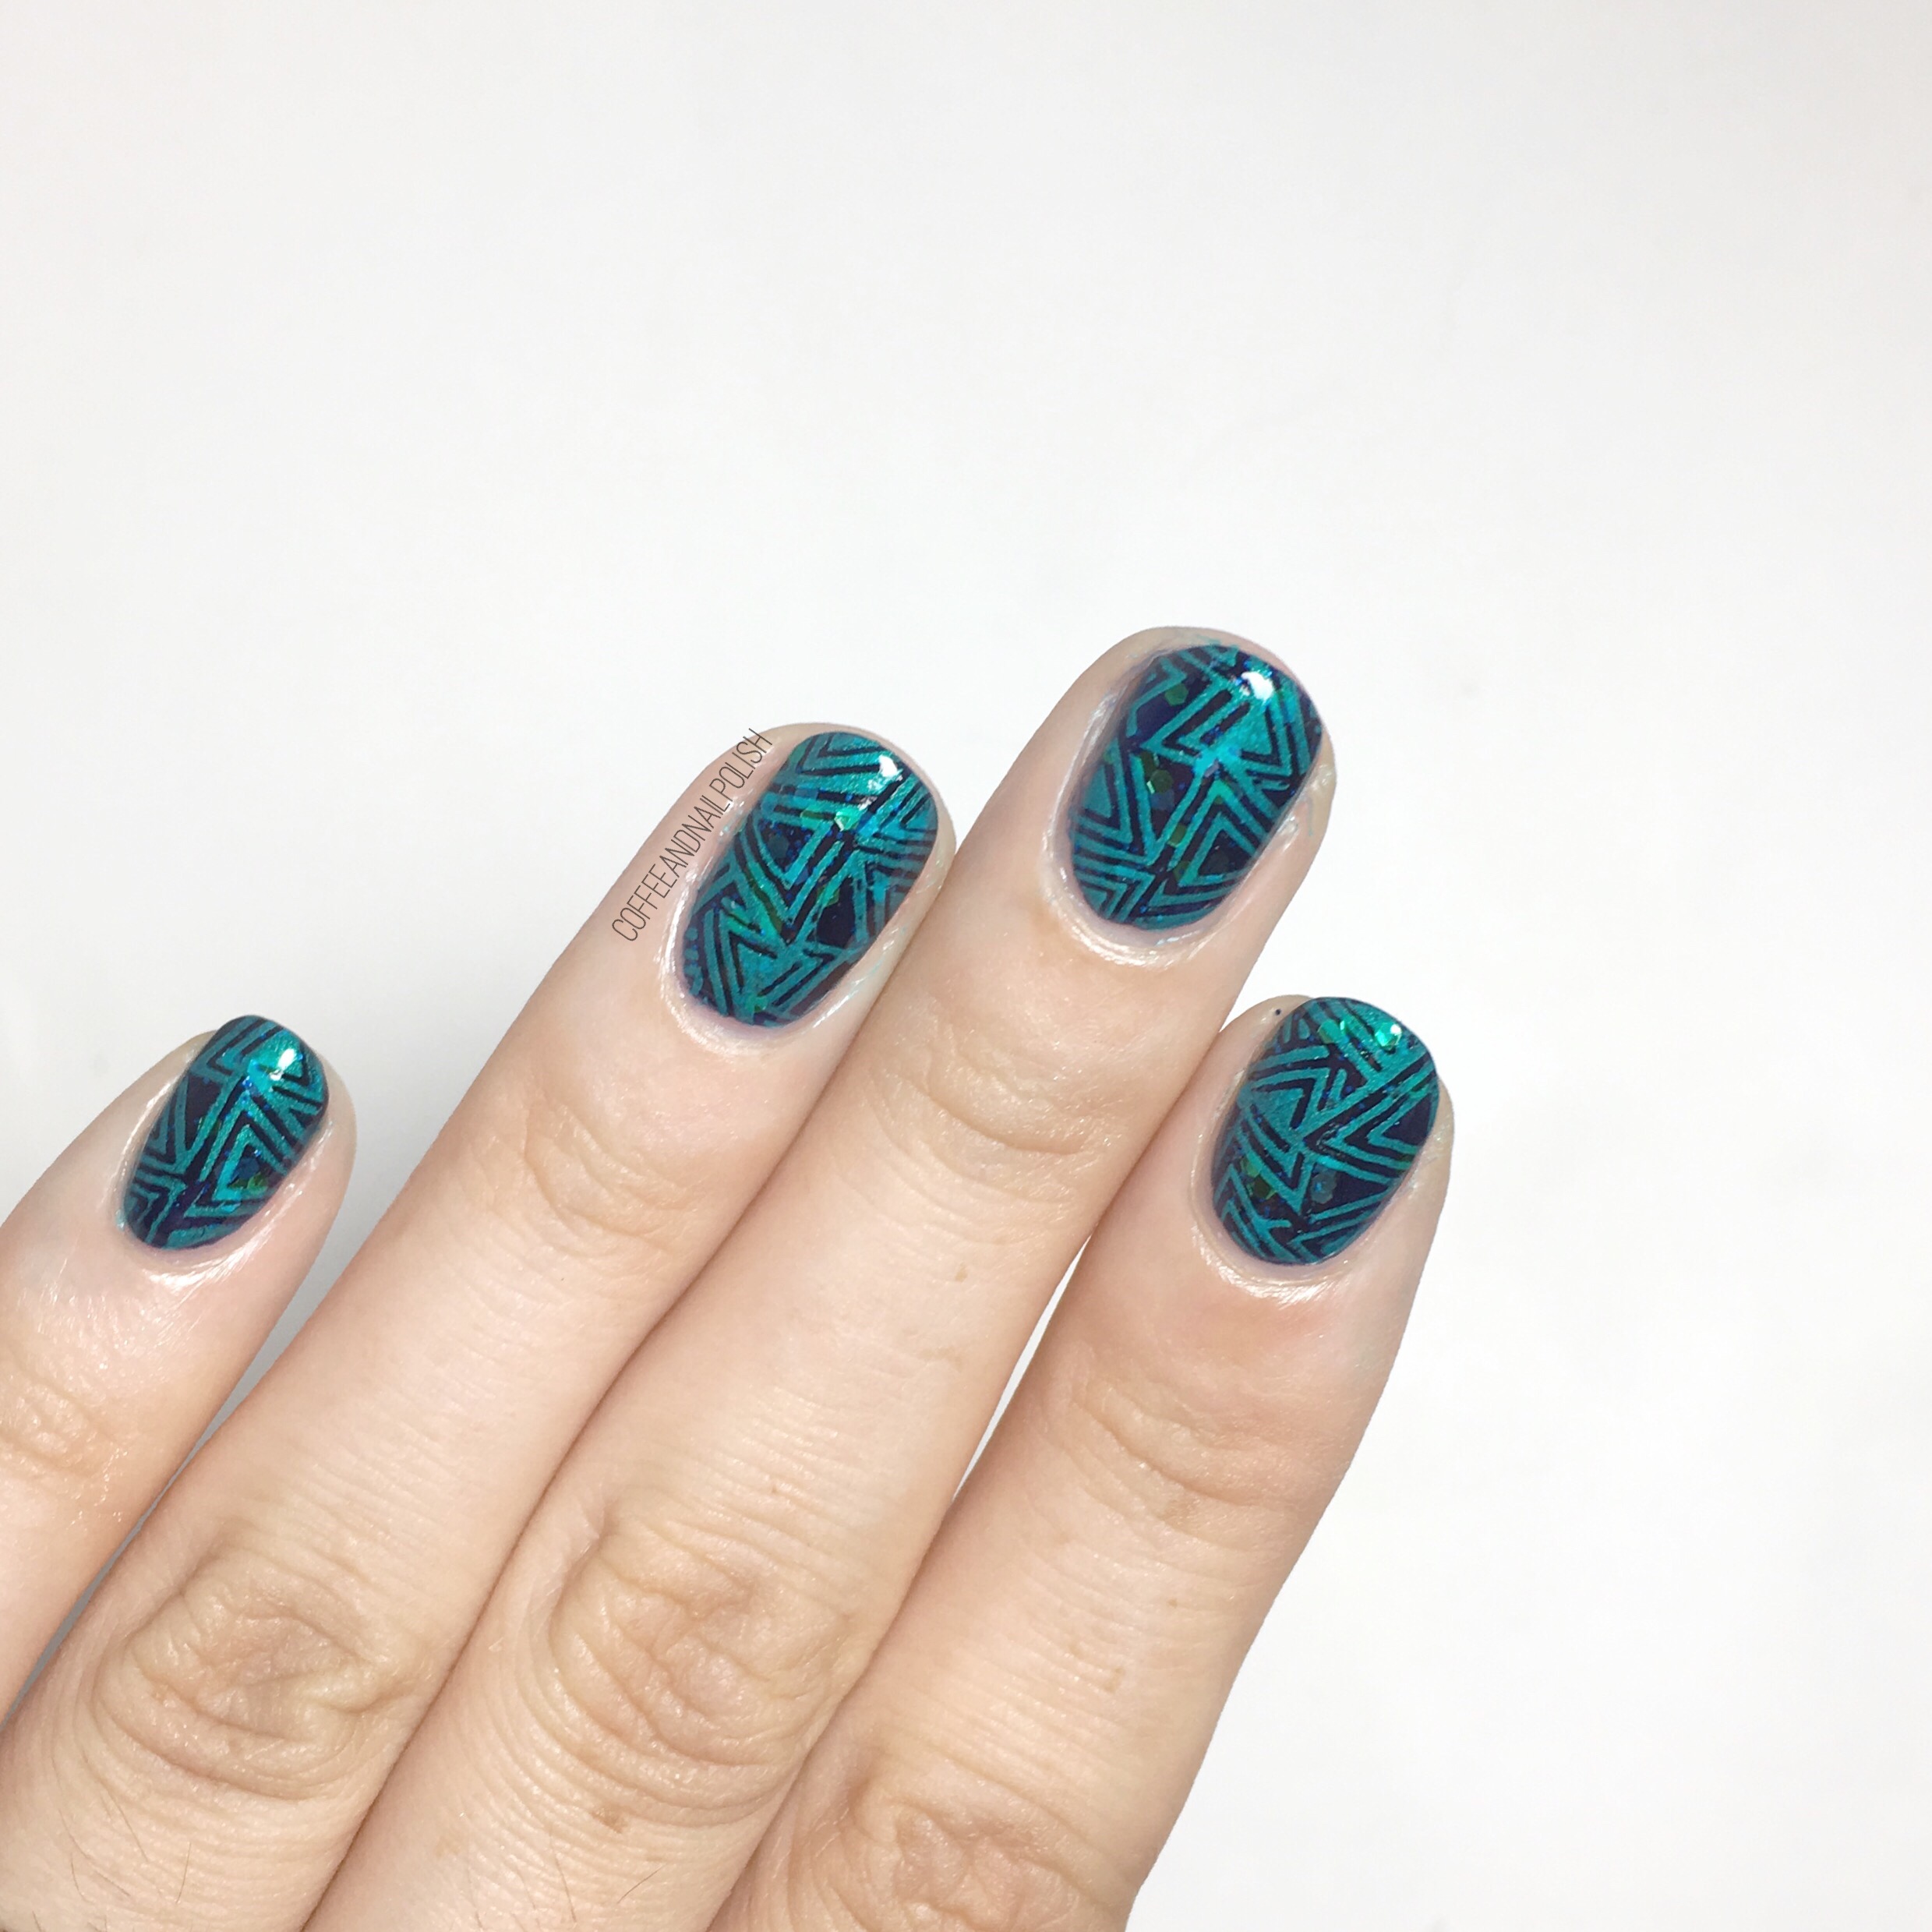
Yesterday I featured a swatch of Sally Hansen CSM in Mermaid’s Tale–a beautiful teal jelly glitter shade. Today I have the mani I did using that shade as my base colour! I’ve really had a lot of fun getting into stamping, & practicing, so I decided to try stamping a pattern over the glitter. I knew black wouldn’t show up over such a dark base, so I decided to grab something fun & bright (Turquoise) & the end result turned out perfect. 

For this manicure, the polishes used were:

  • Base Coat: Finger Paints Peel Off Base Coat for Glitter
  • Top Coat: Cutex Quick Dry Top Coat
  • Essie Under the Twilight 
  • Sally Hansen Complete Salon Manicure Mermaid’s Tale
  • China Glaze Turned Up Turquoise
  • Born Pretty Store Clear Jelly Stamper item #24059
  • Older Born Pretty Stamping Plate that’s no longer available — this plate contains the same image. 

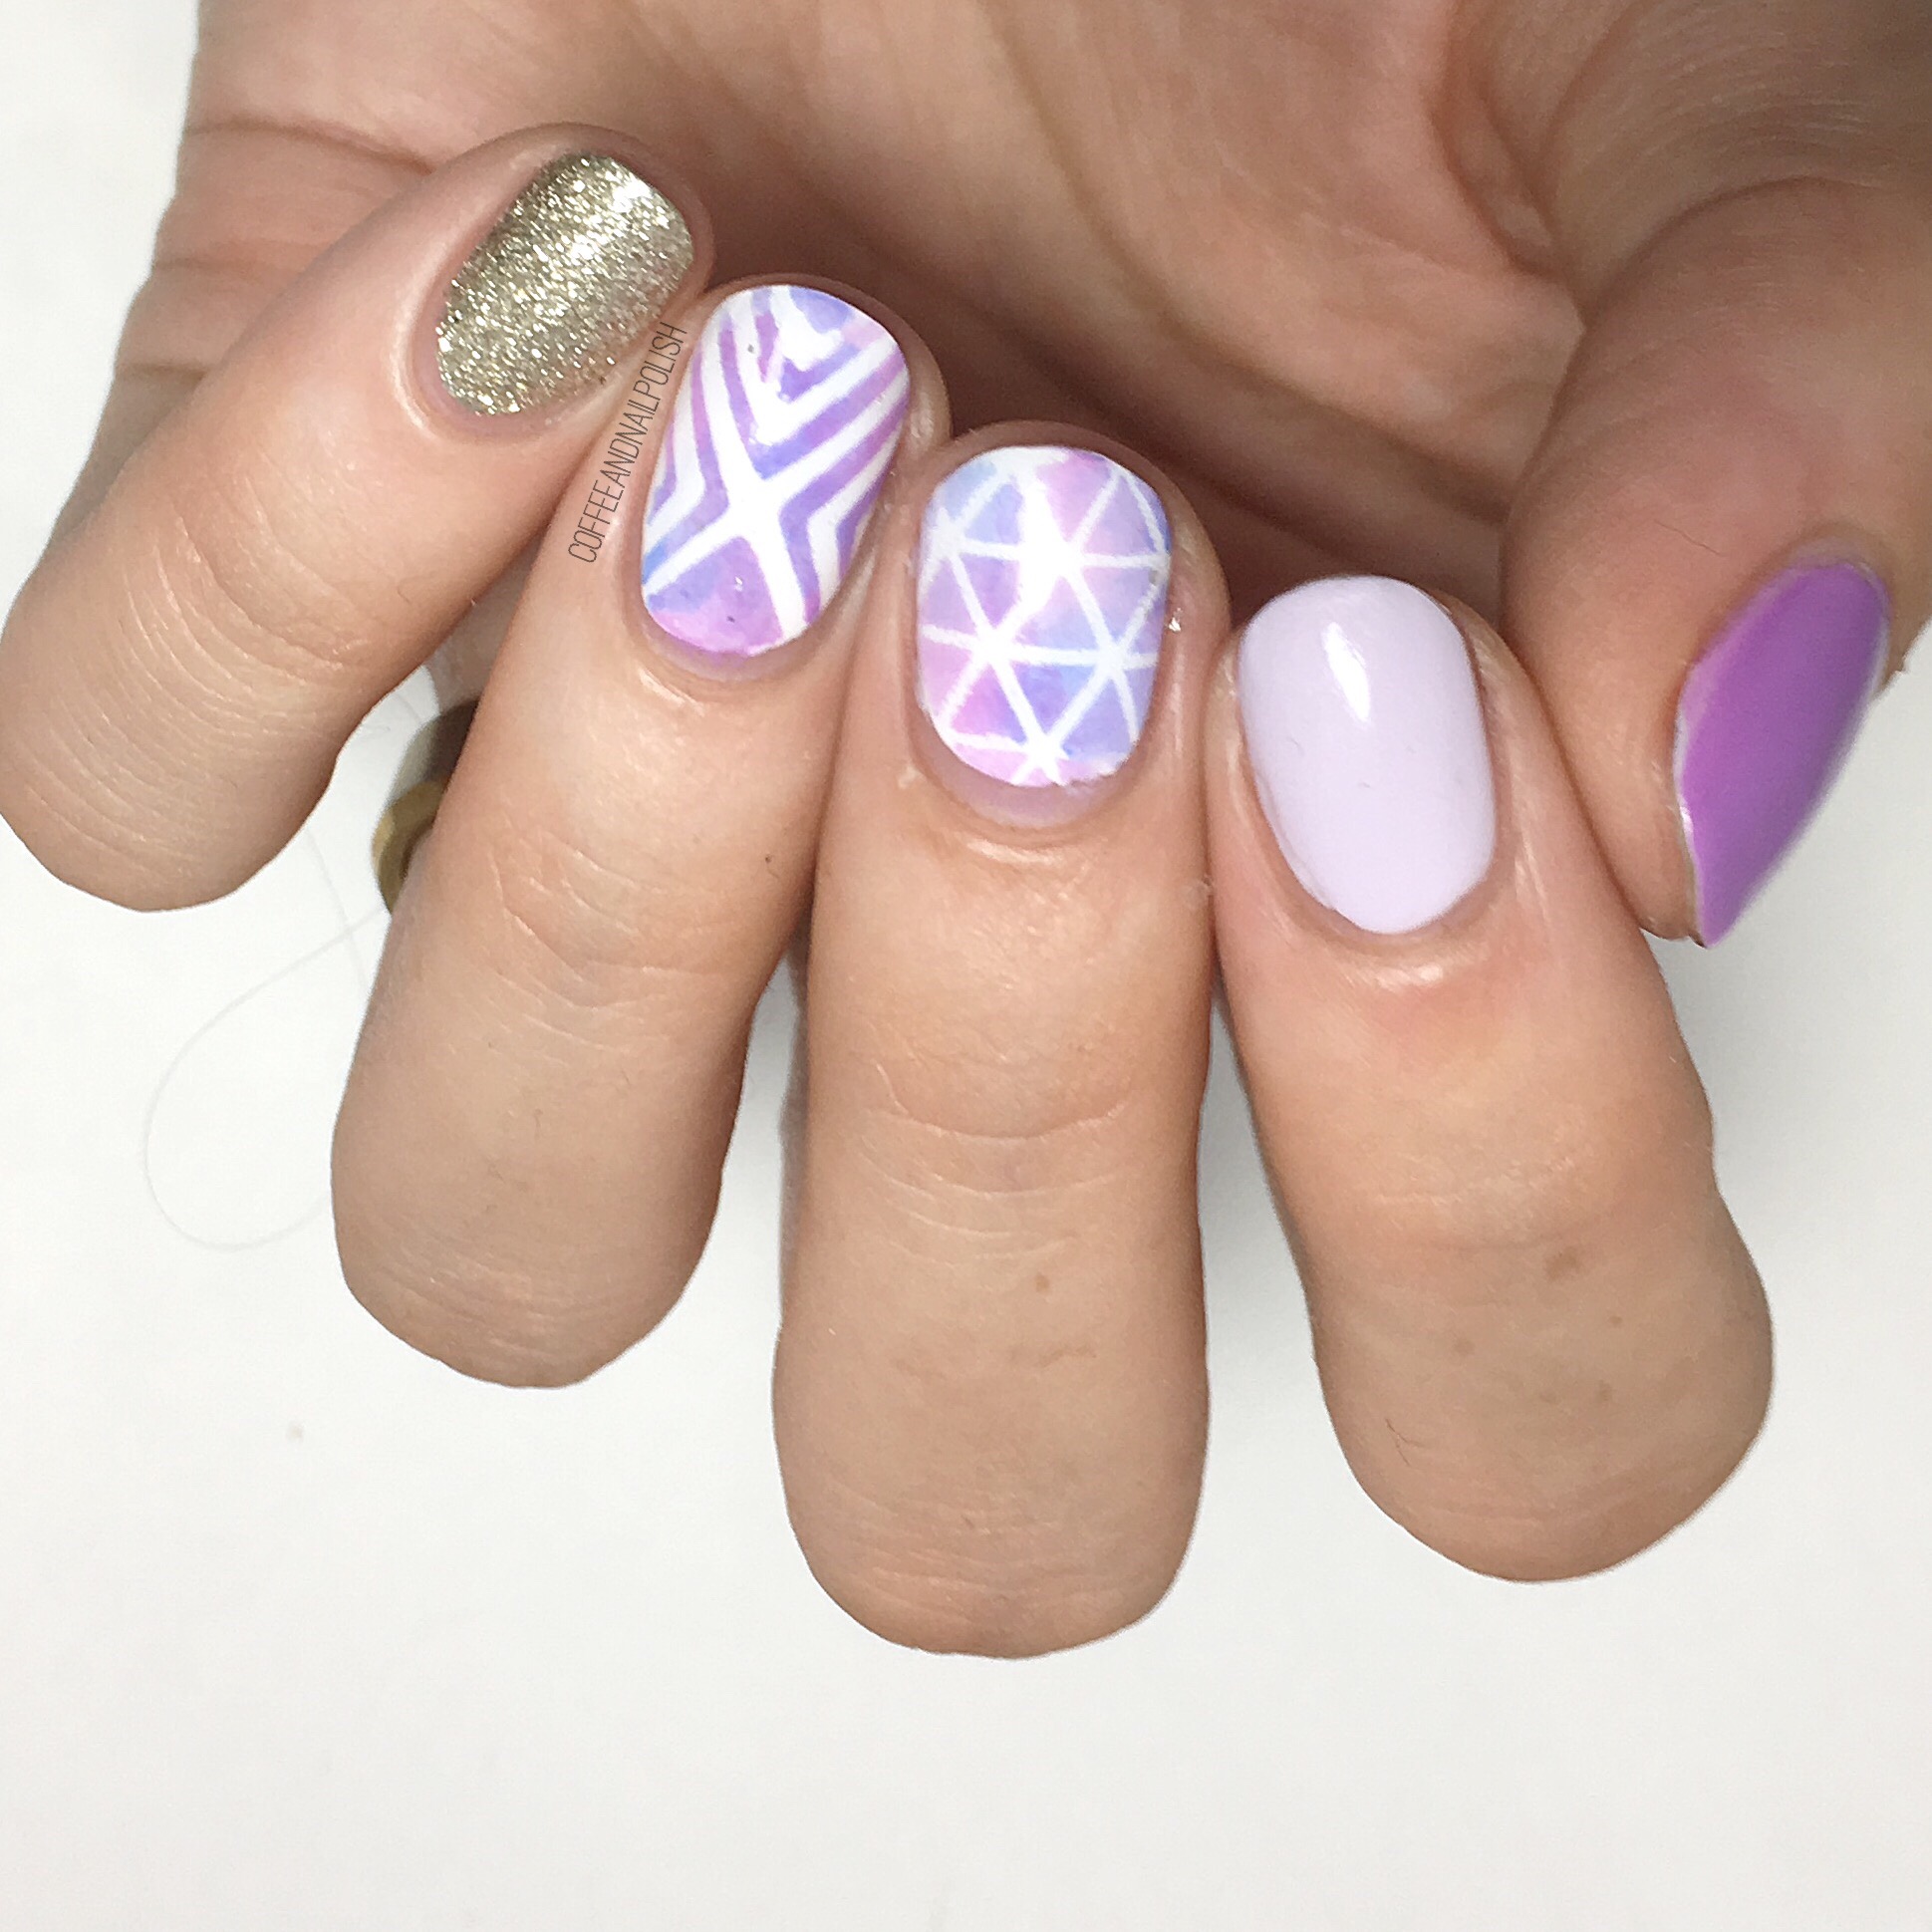
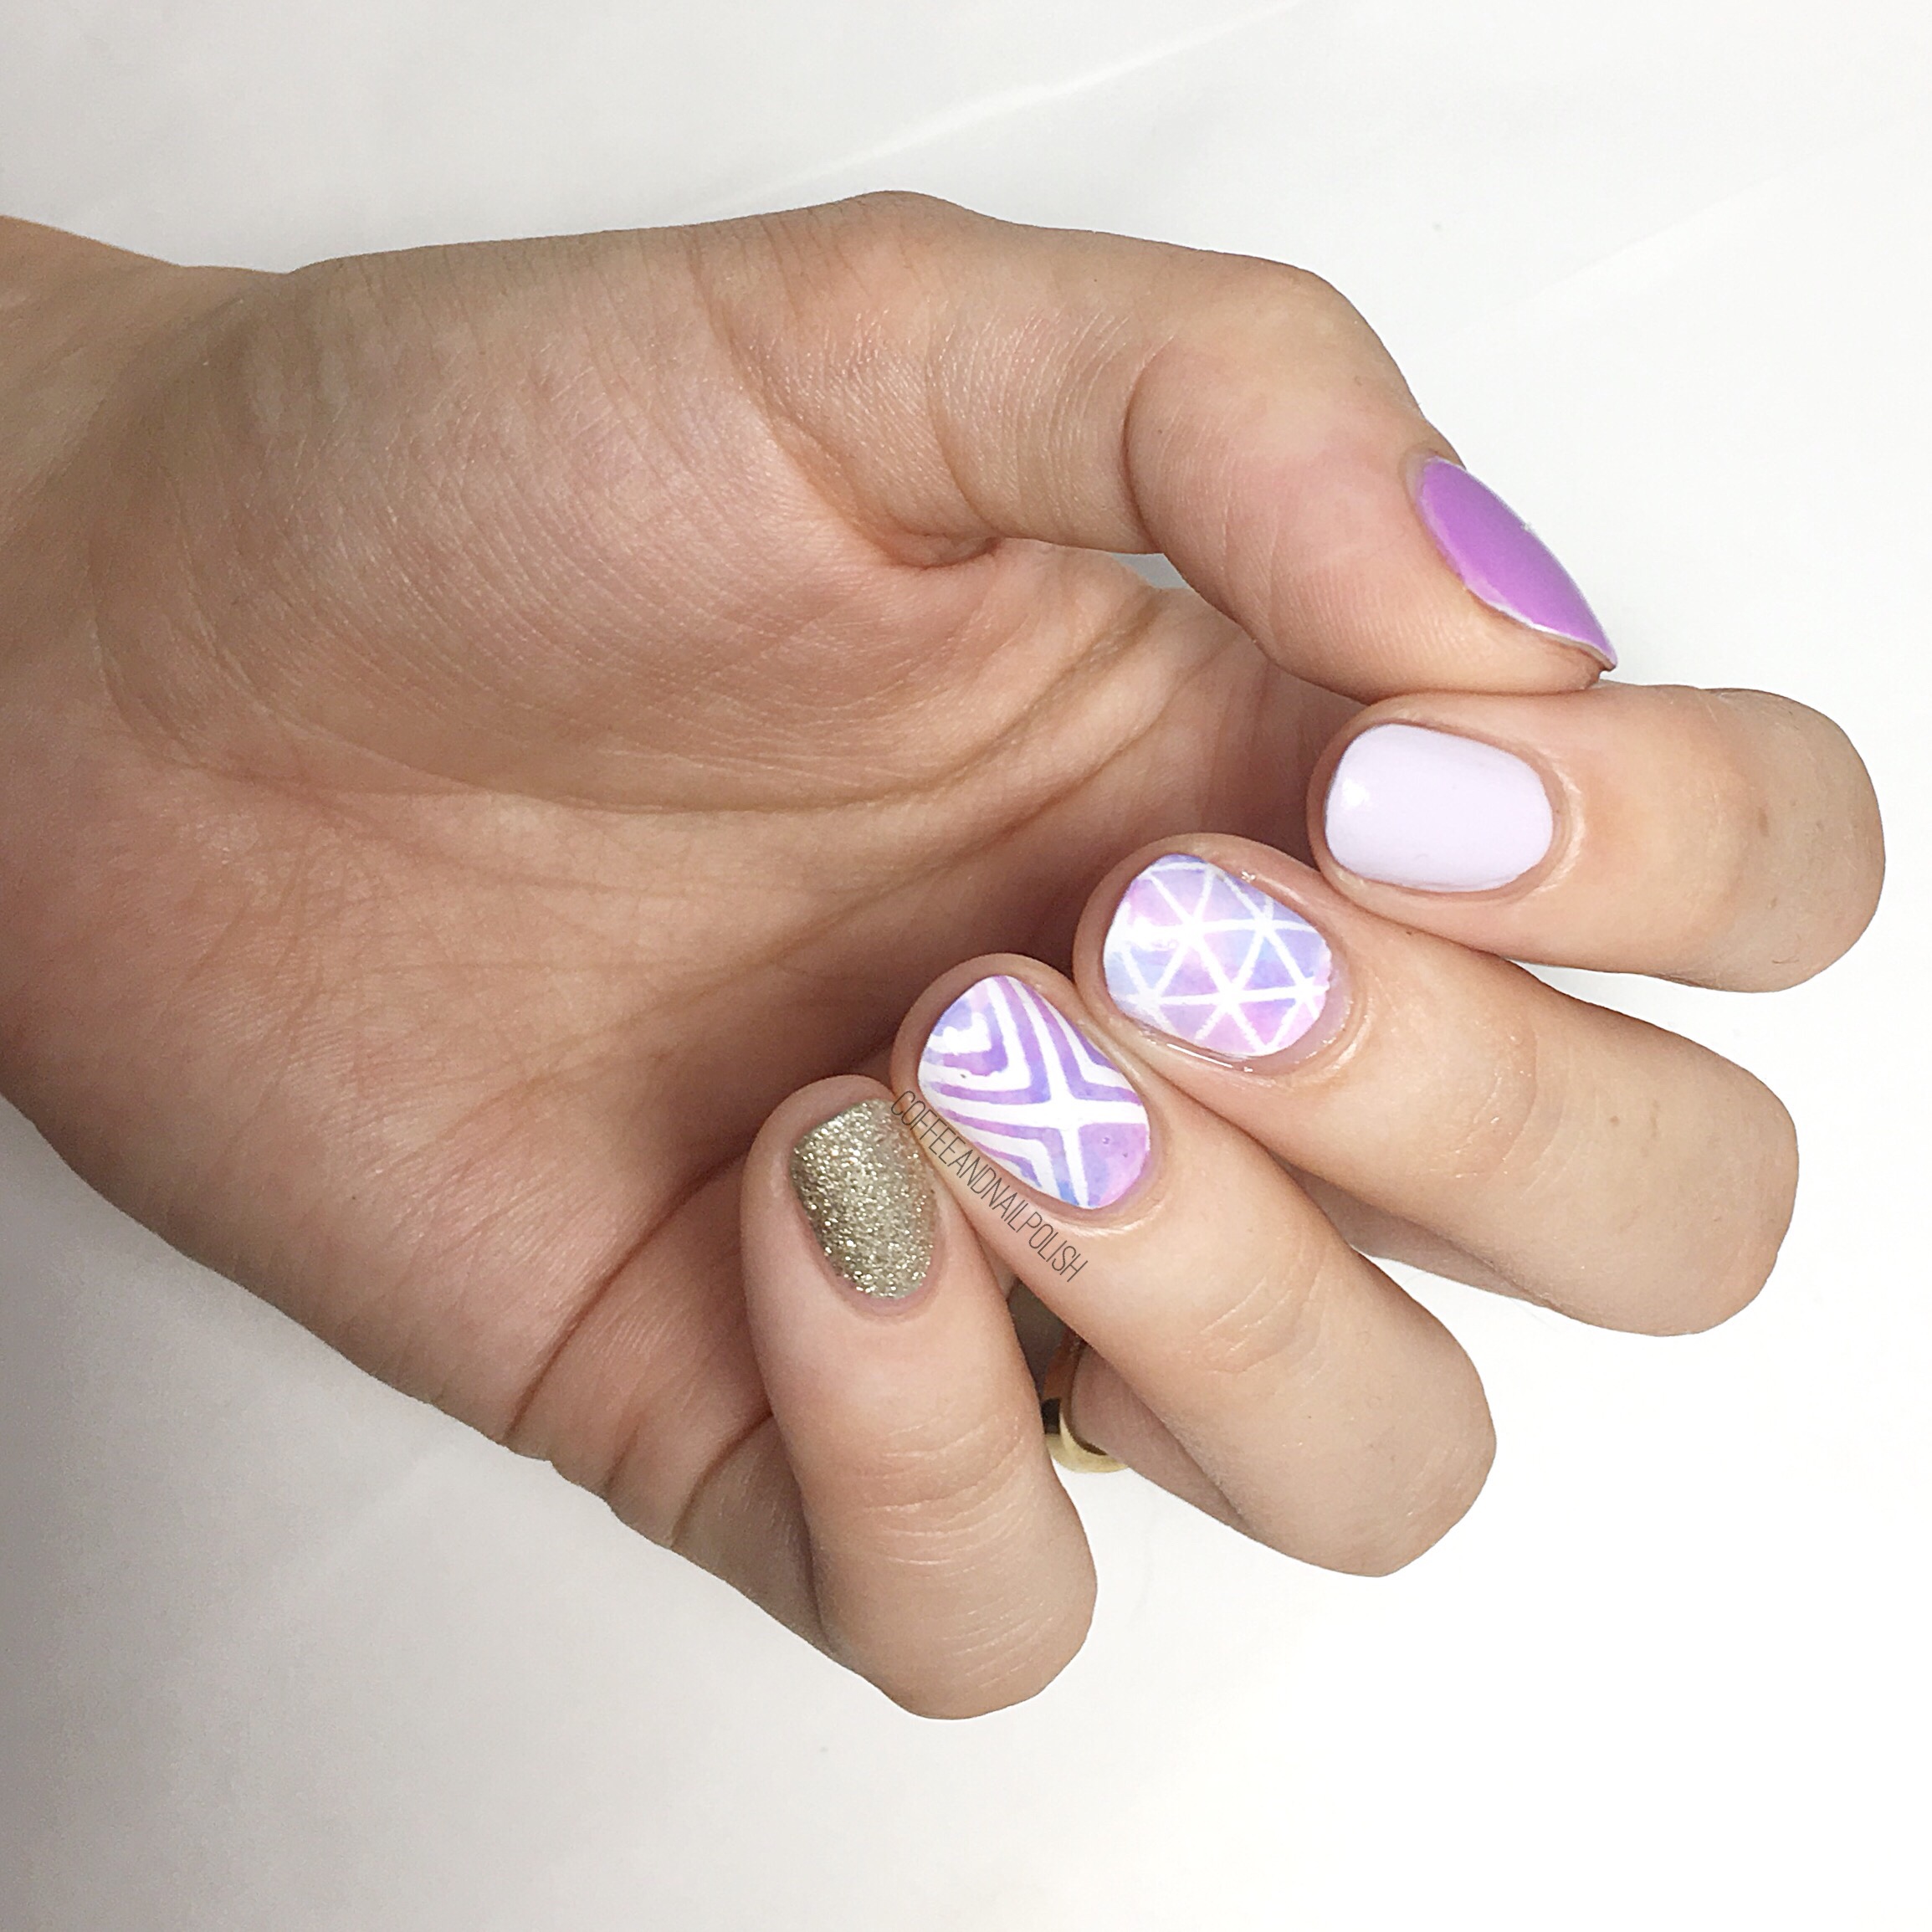
Can I just say how impressed I am with how well Turned Up Turquoise stamps? I was shocked with how opaque it was on the nail, especially over such a dark base colour. I wasn’t sure how it was going to look, but it turned out awesome! I always find myself so drawn to dark shades in the Fall months, but the pop of colour over top works well for a transitional manicure–just enough of Summer & just enough of Fall, all in one design. 


What do you think of this stamping? What polishes do you love for stamping? Share all your secrets in the comments below! I’m going to be ordering a bunch of new stamping plates (especially Halloween/Christmas themed plates) in the next couple days so I’m looking for all the best stamping polishes for playing. 

SWATCH SUNDAY: Sally Hansen CSM Mermaid’s Tale


Have you ever had a polish that you’ve thought & thought & thought about but for one reason or another just don’t buy for whatever reason? I’ve got a few on my list, but a major one is Sally Hansen Complete Salon Manicure in Mermaid’s Tale

Mermaid’s Tale is a dark teal jelly stuffed full of assorted sized glitters both large & small. It was originally released as part of the Under The Sea collection in 2013 & stayed as part of the permanent collection.  Recently I’ve noticed it popping up in the clearance section at my favourite pharmacy’s polish clearance, so I had no excuse not to pick up this long overdue lemming. 

Because Mermaid’s Tale is a jelly base, I was scared about building opacity so I applied two coats over a base of Essie Under the Twilight. It helped achieve the look without having to apply 40 coats. I tend to do this a lot with jelly based glitters to avoid polish waste–all you need to do is find a creme shade close to your glitter shade to keep any visible nail line from showing. From what I’ve seen online, without undies it takes 3-4 coats for opacity. That’s a lot of glitter to remove when you go to change your polish! 

Oh goodness, seeing this shade on my own nails makes me so happy to own it! Originally I started listing after Mermaid’s Tale because it was a very close dupe to Deborah Lippmann’s Across the Universe for about half the price. & because I waited, & waited & waited I got the polish for only $5 which is half the price Sally Hansen CSM shades usually go for in stores around me. 


What do you think of Sally Hasen Complete Salon Manicure in Mermaid’s Tale? Have you ever waited a long time to buy a much loved lemming shade? What is you #1 all time lemming shade? Let me know your thoughts in the comments below! 

Patterned Watercolour Nails Inspired by @thesammersaurus

So I’ve been feeling a little stuck, inspiration wise, & when I feel lost for ideas I love browsing through the feeds of my favourite nail artists to see what catches my eye. I was scrolling through @thesammersaurus‘s instagram feed & came across a gorgeous geometric design from 3ish years ago. I’ve been a massive fan of Sammy’s for a long time–she was one of the first nail art blogs I discovered–& I love how she comes up with awesome, creative designs & rocks those shorter nails!  It gives hope to those out there who don’t have crazy long nails. So when I discovered this gorgeous design I loved, I popped over to her blog & found all the details of her design to make painting my recreation way easier! 

For the manicure, the products used were:

  • Base Coat: Cutex Brittle Nail Fix
  • Top Coat: Cutex Quick Dry Top Coat
  • Essie Go Ginza 
  • Essie Play Date
  • Sally Hansen Xtreme Wear Royal Hue
  • Sally Hansen Hard As Nails Hard To Get
  • OPI My Favourite Ornament 
  • Xroma Polish & Vinyls X Stencil (I cut off the bottom) 
  • The Base Coat Triangle Pattern Stencil
  • Latex Free Make Up Sponge 

Thanks to my vast collection of vinyls, I was able to cheat & skip having to place striping tape/skinny vinyls individually for a relatively easy to do manicure! (Thank god for that!) I also used a make up sponge instead of the Saran Wrap technique for my colour blending on the accent nails. But even though I didn’t follow her exactly, I feel like this recreation turned out Pretty on point. Just please ignore the shrinkage on my middle finger nail. šŸ˜‚


Do you have a favourite nail art you love to turn to for nail art inspiration? Where is your favourite place to get nail art inspiration from? Let me know in the comments below! šŸ’œ

Gold & Blue Holo X-Pattern Nails

After a bit of an impromptu hiatus, I’m back with some new nails! Today I’m showing off these gold & blue holo nails featuring more of the great vinyls from Xroma Polish & Vinyls

For this manicure I used: 

  • Base Coat: Perfect Formulas Pink Gel Coat
  • Top Coat: Cutex Quick Dry Top Coat 
  • ACO by Ardene La Luna mixed with Nicole By OPI Make A Comet-ment
  • Color Club Dirty Money 
  • Xroma Polish & Vinyls ‘X’ Stencil
  • Small dotting tool from Bundle Monster 


First can I mention how much I love this polish combination? ACO by Ardene La Luna is such a pretty cruelly, & it occurred that it would show off some holo really well so I took a risk & mixed it with some of my bottle of Nicole by OPI Make A Comet-ment. & it turned into an absolutely perfect blue scattered holo. I’m kind of in love. So I wanted to create a design that would compliment this colour & I think these x pattern stencils are perfect for that. 


I need to start coaxing myself into wearing colours other that blue. Maybe that will be my goal for June! Although I did just pick up Revlon To The Chapel which is… you guessed it! A pretty baby blue. Haha. But after I wear that it’s going to be a blue free month! Think I can do it? Guess we will have to see. 

What do you think of today’s design? What’s your favourite colour to wear? Let me know in the comments below! šŸ’™

Simple Rose Accent Nails

Sometimes a polish is so pretty, it doesn’t need much in tens of nail art. That’s how I felt about the combo of CND Vinylux in Dazzling Dance & Nicole by OPI Love Song. It looked so dang pretty on its own I didn’t want to ruin it by overwhelming it with too much. So what would be the perfect simple nail art? Roses of course! 

For this manicure I used:

  • Base Coat: Perfect Formulas Pink Gel Coat
  • Top Coat: Cutex Quick Dry Top Coat
  • CND Vinylux Dazzling Dance
  • NOPI Love Song
  • Sally Hansen Miracle Gel Pretty Peony 
  • Sally Hansen Miracle Gel Bourbon Belle 
  • Essie Brides No Grooms
  • Essie First Timer
  • Sally Hansen X-treme Wear Kiwi Bikini
  • Dotting Tool from Bundle Monster
  • Small Nail Art Brush from Bundle Monster 

First off, check out the holo glitter in Dazzling Dance! I’ve worn this polish before a couple years ago, but without any undies & it took way too many coats (4+ with visible nail line.) So undies we’re necessary. I picked out NOPI Love Song to bring out the purple undertones. I bet a gray base would be beautiful too. 

These roses make me happy. So simple but beautiful. I will never get tired of roses & floral designs in general. They’re just the perfect pop of nail art for when you don’t want (or don’t have time for) something more complex. 

What do you think of my roses? Don’t forget to comment below & let me know you thoughts!