Red Plaid Holiday Nails

Good Morning Lovelies! Can you believe it’s only 13 days until Christmas… where has this year gone?! Even though I’ve been insane at work with Christmas coming, I’ve been trying to do my nails when I can–& trying to get in as many Christmas-y designs in as often as I can.

(Not going to lie… painting them has been a struggle, but having time to take pictures is another story all together!)

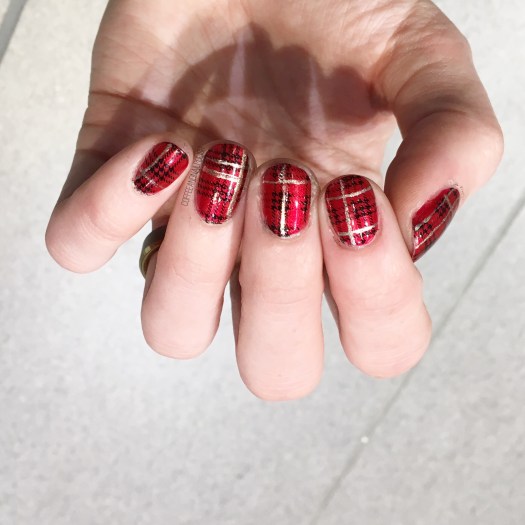
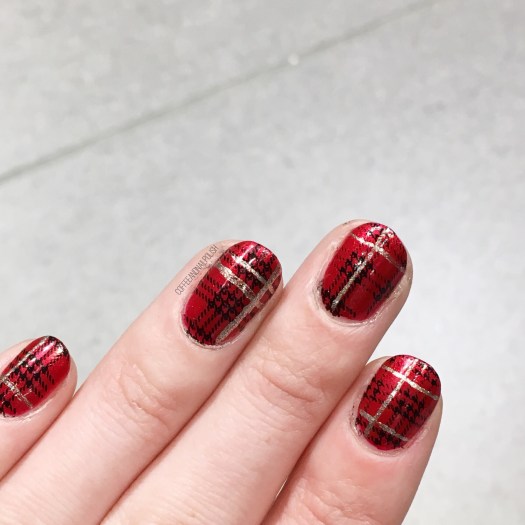
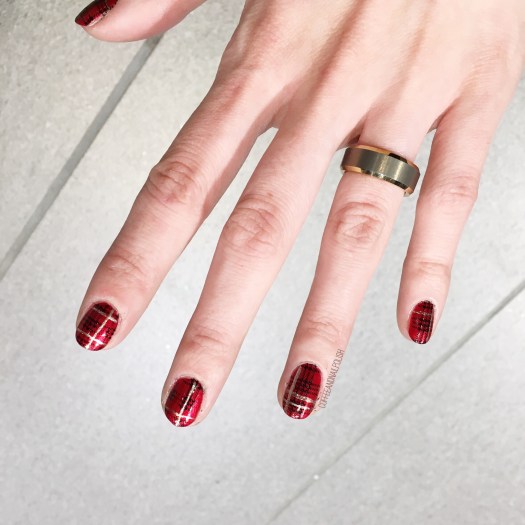
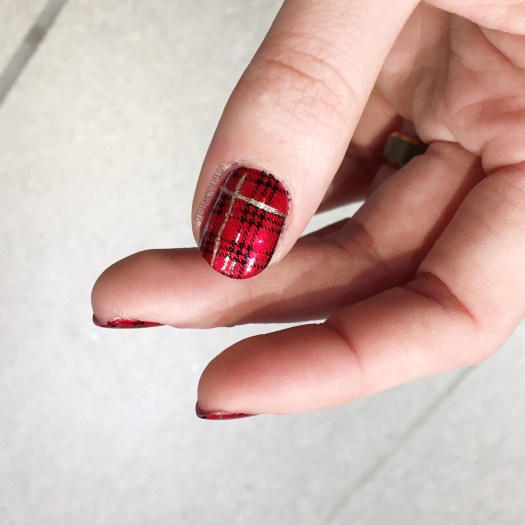
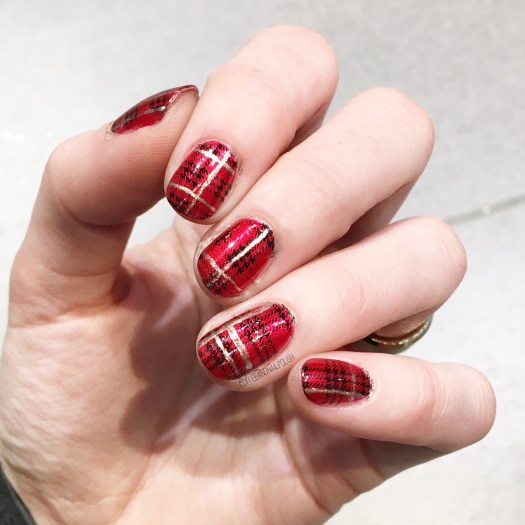
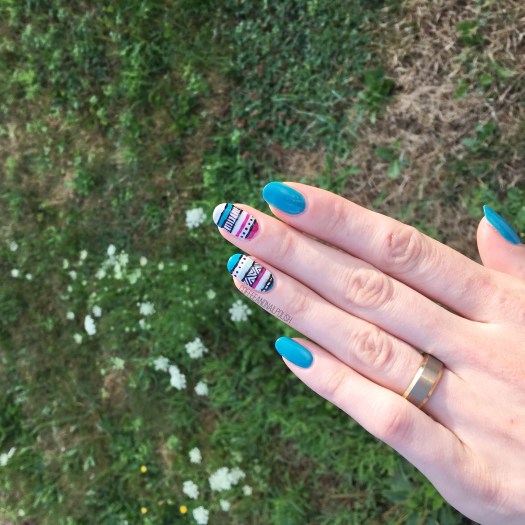
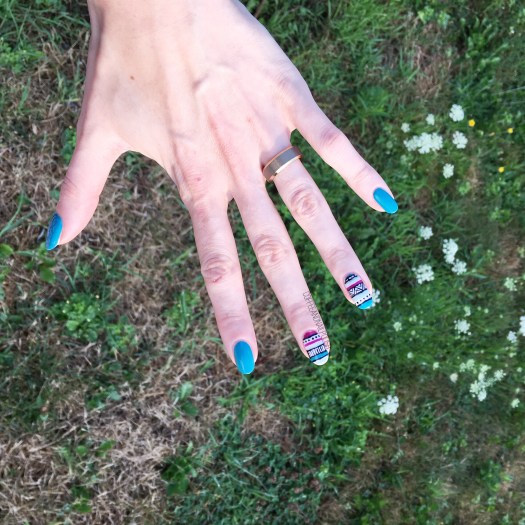
Today I have some pretty red plaid nails that are a combination of stamping & freehand. I LOVE plaid nails, but sometimes they can be time consuming depending on how many lines you have to free hand. By combining a plaid stamping pattern I had with a bit of freehanding, I managed to come up with a cute & relatively easy plaid look that’s perfect for this time of year!

For this look, the polishes I used were:

  • Base Coat: Essie Grow Stronger
  • Top Coat: Essie Gel Couture Top Coat
  • Sally Hansen Miracle Gel Good Cheer-y (from the Decadence collection)
  • Sally Hansen Hard As Nails Black Heart
  • L’Oréal Getting Kilty
  • NailStuff.ca Clear Stamper

I’m not going to lie–I’m a little rusty, & my nails & cuticles have seen better days. But it feels so good to be painting my nails again, & it always feels nice when people randomly compliment me on how pretty my nails are. Of course, then stock comes & they end up a mess… but still nice to have them done in the first place! (& more than just a since colour.)

Going to try & cram as many Christmas designs in as possible over the next week or so, since I’ve been so bad at actually posting the last few months. But January is coming… & things are going to slow way down so I’ll be able to get back into my regular posting life soon. For everyone who has stuck around (& continues to stick around!) thank you so much! It means so much to me.

Now the most important question remains… should I do Christmas tree, snowman or penguin nails next? Let me know in the comments below!

Freehand Tribal Print Accent Nails

Hello lovelies! & happy Saturday!

Today I’m sharing the most amazing design with you. It feels like absolute ages since I created any kind of tribal design. (I went back & checked–it was December!) So it felt like the perfect time for a new tribal design.

I’ve done tribal a lot in the past, but sometimes I struggle creating the line work. I love my prepolished stripers, but they end up junky & chunky so quickly. Thankfully I received some new nail art brushes from NailStuff.ca & couldn’t wait to see how they would work for freehanding!

For this design, the polishes I used were:

  • Base Coat: OPI Nail Envy
  • Top Coat: Essie Speed Setter
  • Essence Let’s Get Lost
  • Sally Hansen CSM Let’s Snow!
  • Sally Hansen CSM Ruby Do
  • Essie Mint Candy Apple
  • Essence Black is Back
  • Nailart.ca Mermaid Tail nail art brush trio
  • Born Pretty Store Aurora Rainbow Nail Striping Tape in purple (item #40423)

I cheated a little bit & used striping tape to create my thicker lines of colour & then use my smallest detail brush from Nailstuff.ca to go in & create my print details with black polish. & I’d be lying if I said I wasn’t incredibly proud of myself for how this design turned out! Especially the chevron/zigzag line work on my ring finger. This design just ended up looking exactly how I hoped & I feel so accomplished. My new nail art brushes were definitely the main reason this look turned out so well–not only were they so easy to use, but how find the brush was meant my line work didn’t end up looking like a blobby mess!

This look turned out so lovely, & I like the hint of Fall it’s giving off. These colours are such good jewel tones & just what I need in the inbetween time before Fall really hits!

So what do you think of this design? Shade your thoughts down in the comments below. ♥️

Pink & Grey Leopard Print

Good morning lovelies & happy Tuesday. Starting off my Tuesday morning with a little 90210 & cold brew & a brand new mani to share with you guys! It had occurred to me that I hadn’t done a leopard print design in a really long time, so I was itching to do one!

Originally I had been planning on doing a more neutral themed colour scheme, but I’ve been obsessed with all things pink lately (planning on even adding pink to my hair soon!) so a pink base shade seemed like perfection.

For this manicure, the polishes I used were:

  • Base Coat: OPI Nail Envy
  • Top Coat: Essie Speed Setter
  • Sally Hansen Complete Salon Manicure Rose to the Occasion
  • Essence Rock My World!
  • Essence Back in Black
  • Small dotting tool
  • Small detail brush — currently obsessed with this brush set from Nailstuff.ca

How cute is this look? I forgot how much fun it is to wear leopard print. One of my all time favourite dresses (& the birthday dress from my 23rd birthday) was leopard print! & although my crazy leopard print dress days are (probably) behind me, it makes me excited to be able to still rock it on my nails! Plus I absolutely love the colour combination of grey & pink—I can definitely see myself rocking this combo a lot with Fall on its way.

What do you think of this pink leopard print? Do you have a favourite leopard print colour combo? Share down below! 🐆💗

Mermaid Nails

It feels like ages since I last pulled out my mermaid stencils for some mermaid nails. The other night I was playing with some new flakies from NailStuff.ca & after looking at them on my nails, I couldn’t help but think they would make an amazing base for a mermaid nail design! I’ve had this mermaid tail idea floating around a while, so I grabbed some more vinyls from What’s Up Nails (I believe it’s suppose to be a whale tail) & have it a go.

For this manicure, the polishes I used were:

  • Base Coat: OPI Nail Envy
  • Top Coat: Essie Speed Setter
  • FingerPaints Fun Peel Off Base Coat (to apply flakies)
  • Sally Hansen Miracle Gel Ocean Daze
  • NailStuff.ca Flakies — these guys aren’t currently available but there is a huge selection here!
  • What’s Up Nails Scale Stencils
  • What’s Up Nails Whale & Tale Stencils
  • Color Club Eternal Beauty
  • Layla Cosmetics Mermaid Spell
  • Color Club Crystal Baller
  • Wrenn Polish Mesmerizing
  • Wrenn Polish Summer Sands
  • NailStuff.ca Summer Nail Wheel — Silver seahorse stud

This design didn’t quite turn out how I pictured on my head, but that’s mostly the tail look on my ring finger. I really wish it was bigger. I do however love the holo scales over the flakie base just makes me so happy! I also wish I had done that look on the majority of my fingers with just the stud being my accent! (& if I had more of these nail vinyls left, I probably would have… going to need to buy some more ASAP!)

Also holo & flakies have to be the most beautiful combination. Definitely trying out these flakies OVER holo next!

What do you think of this mermaid nail design? Are you a fan of the holo & flakie combo? Let me know what you think down in the comments below! 🧜🏼‍♀️

Vintage Roses (take #17283)

You know when you did that perfect pair of jeans or shirt or outfit that looks amazing, & fits your perfectly, & just makes you look amazing? You wear it constantly (maybe more than you should), because it just looks so good? That is how I feel about floral & vintage rose nails. & that is why I have ANOTHER floral design to share with you.

This design is actually inspired by an old design of mine, this time using blues instead of pinks. Yep, I’ve done a different version of these simple roses a lot but they never get old to me, so hopefully they’re not tired to you.

For this manicure, to polishes I used were:

  • Base Coat: OPI Nail Envy
  • Top Coat: Essie Gel Setter
  • Essie Find Me an Oasis
  • OPI Angel with a Leadfoot
  • Sally Hansen Complete Salon Manicure Rose to the Occasion
  • Essie Bachelorette Bash
  • Sally Hansen Insta-dri Petal Pusher
  • YSL Beauty Vert D’Orient
  • Essie First Timer
  • NailStuff.ca Mixed Decoration Nail Wheel in Gold
  • Small dotting tool
  • Small detail brush from Bundle Monster

Oooooh these roses over white is definitely one of my favourite accent nails to do. I love all floral nails, but there is something about vintage roses that just looks so good: easy to do, but looks beautiful & complicated every time. Not to mention, roses are one of the easiest florals to do because I find (for me at least), they’re one of ten hardest florals to mess up.

My tutorial on how I do roses is Here.

So what do you think of this design? Are you a vintage roses person or do you prefer other floral? Share your thoughts down below!