Hello lovelies & happy Thursday!
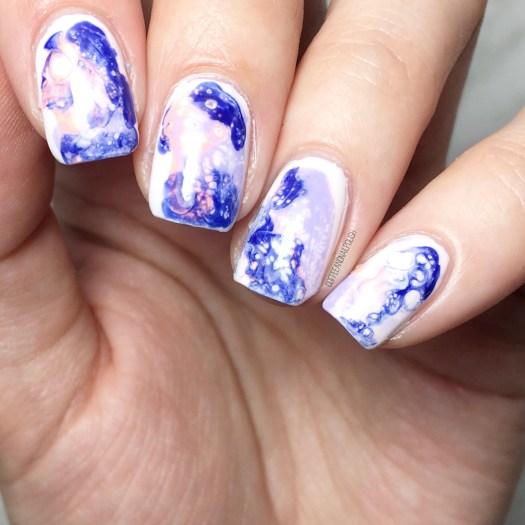
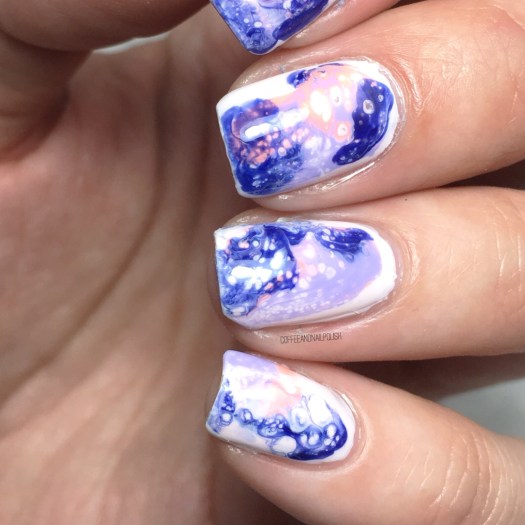
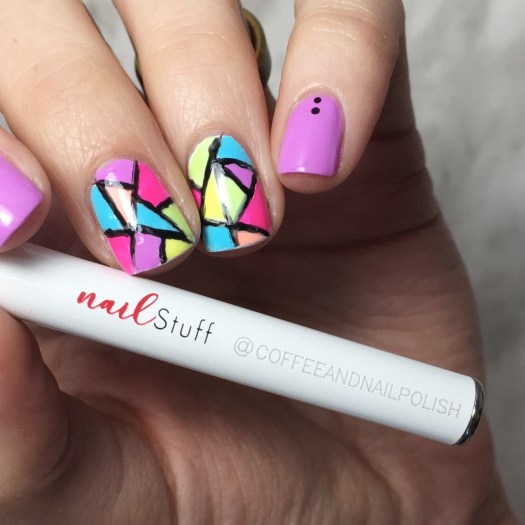
Today I’m doing sort of a throwback Thursday post as today’s manicure is one I did a while back but never shared. I was scrolling through my phone last night, & stumbled across this design & knew I had to post it! Especially because I have no idea what I wouldn’t have shared them in the first place. Thankfully I kept a list of the polishes I used, so even though these were done a while ago, I could still share exactly what I used to create this look!
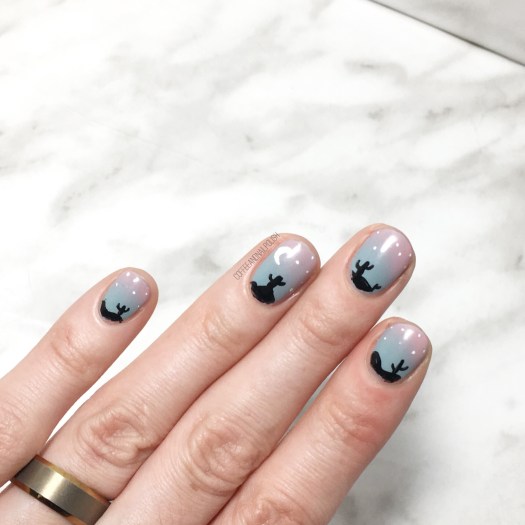
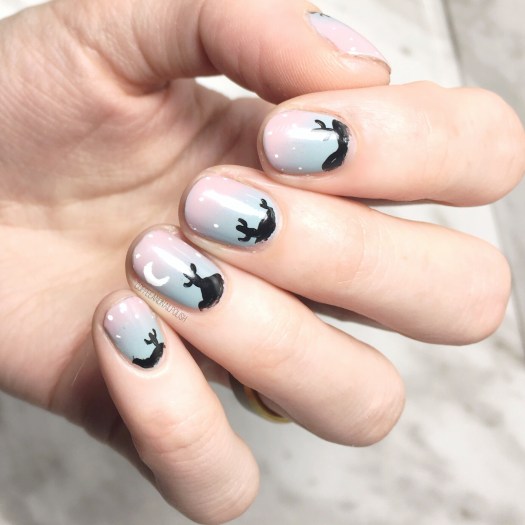
For this manicure, the polishes I used were:
- Base Coat: OPI Nail Envy
- Top Coat: Seche Vive
- Essie Parka Perfect
- Sally Hansen Complete Salon Manicure Rose to the Occasion
- Essence Black is Back
- Sally Hansen CSM Let’s Snow!
- Nailstuff.ca mermaid tail detail brushes
- Edge Perfection cuticle barrier
- Latex free make up sponge (I buy mine at Dollarama)


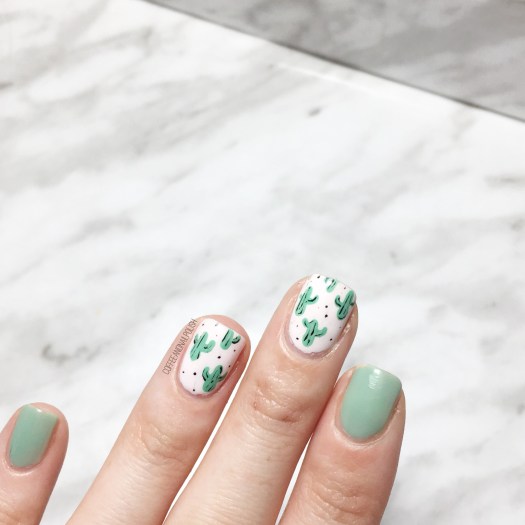
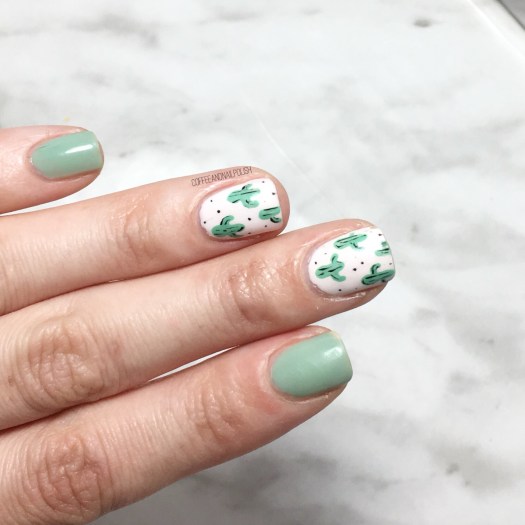
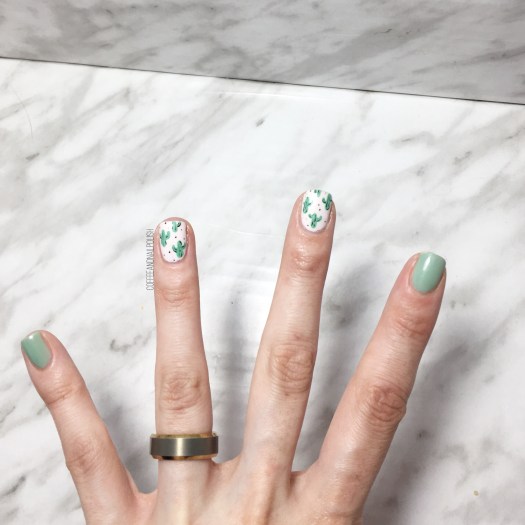
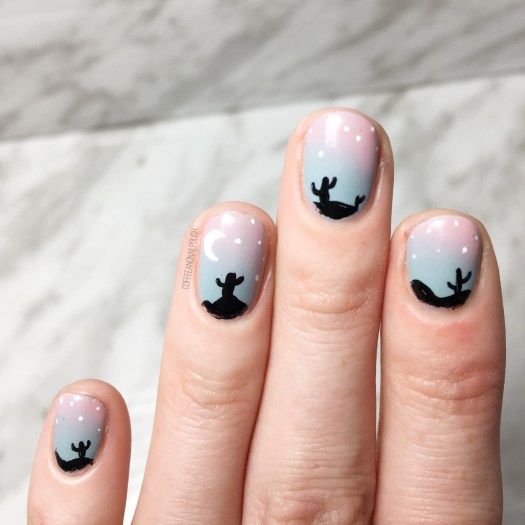
I love love love doing these landscape gradient nails. It’s kind of like a galaxy nail, but less work. & of course I added cacti in the distance, because they’re my favourite.
Seriously, I cannot understand why I never shared this design when I originally did them. The gradient looks nice, my freehand work isn’t awful. Maybe I was just saving it for right now (without realizing it?) Either way I’m happy to share this look with you now!
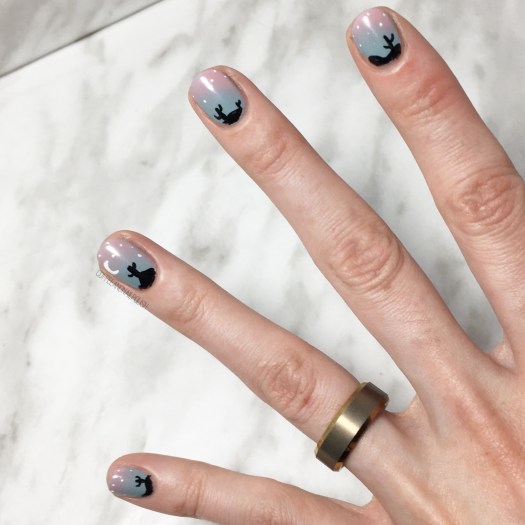
What do you think of this gradient landscape look?
Would you like to see more of these designs on the blog?
Hit like if you’re into this kind of nail art & share down below what else you’d like to see me do!