Negative Space Colour Blocking

Hello lovelies & happy Thursday! 💜Hope everyone is enjoying their week (& hopefully everyone is ready for the Easter bunny this weekend).

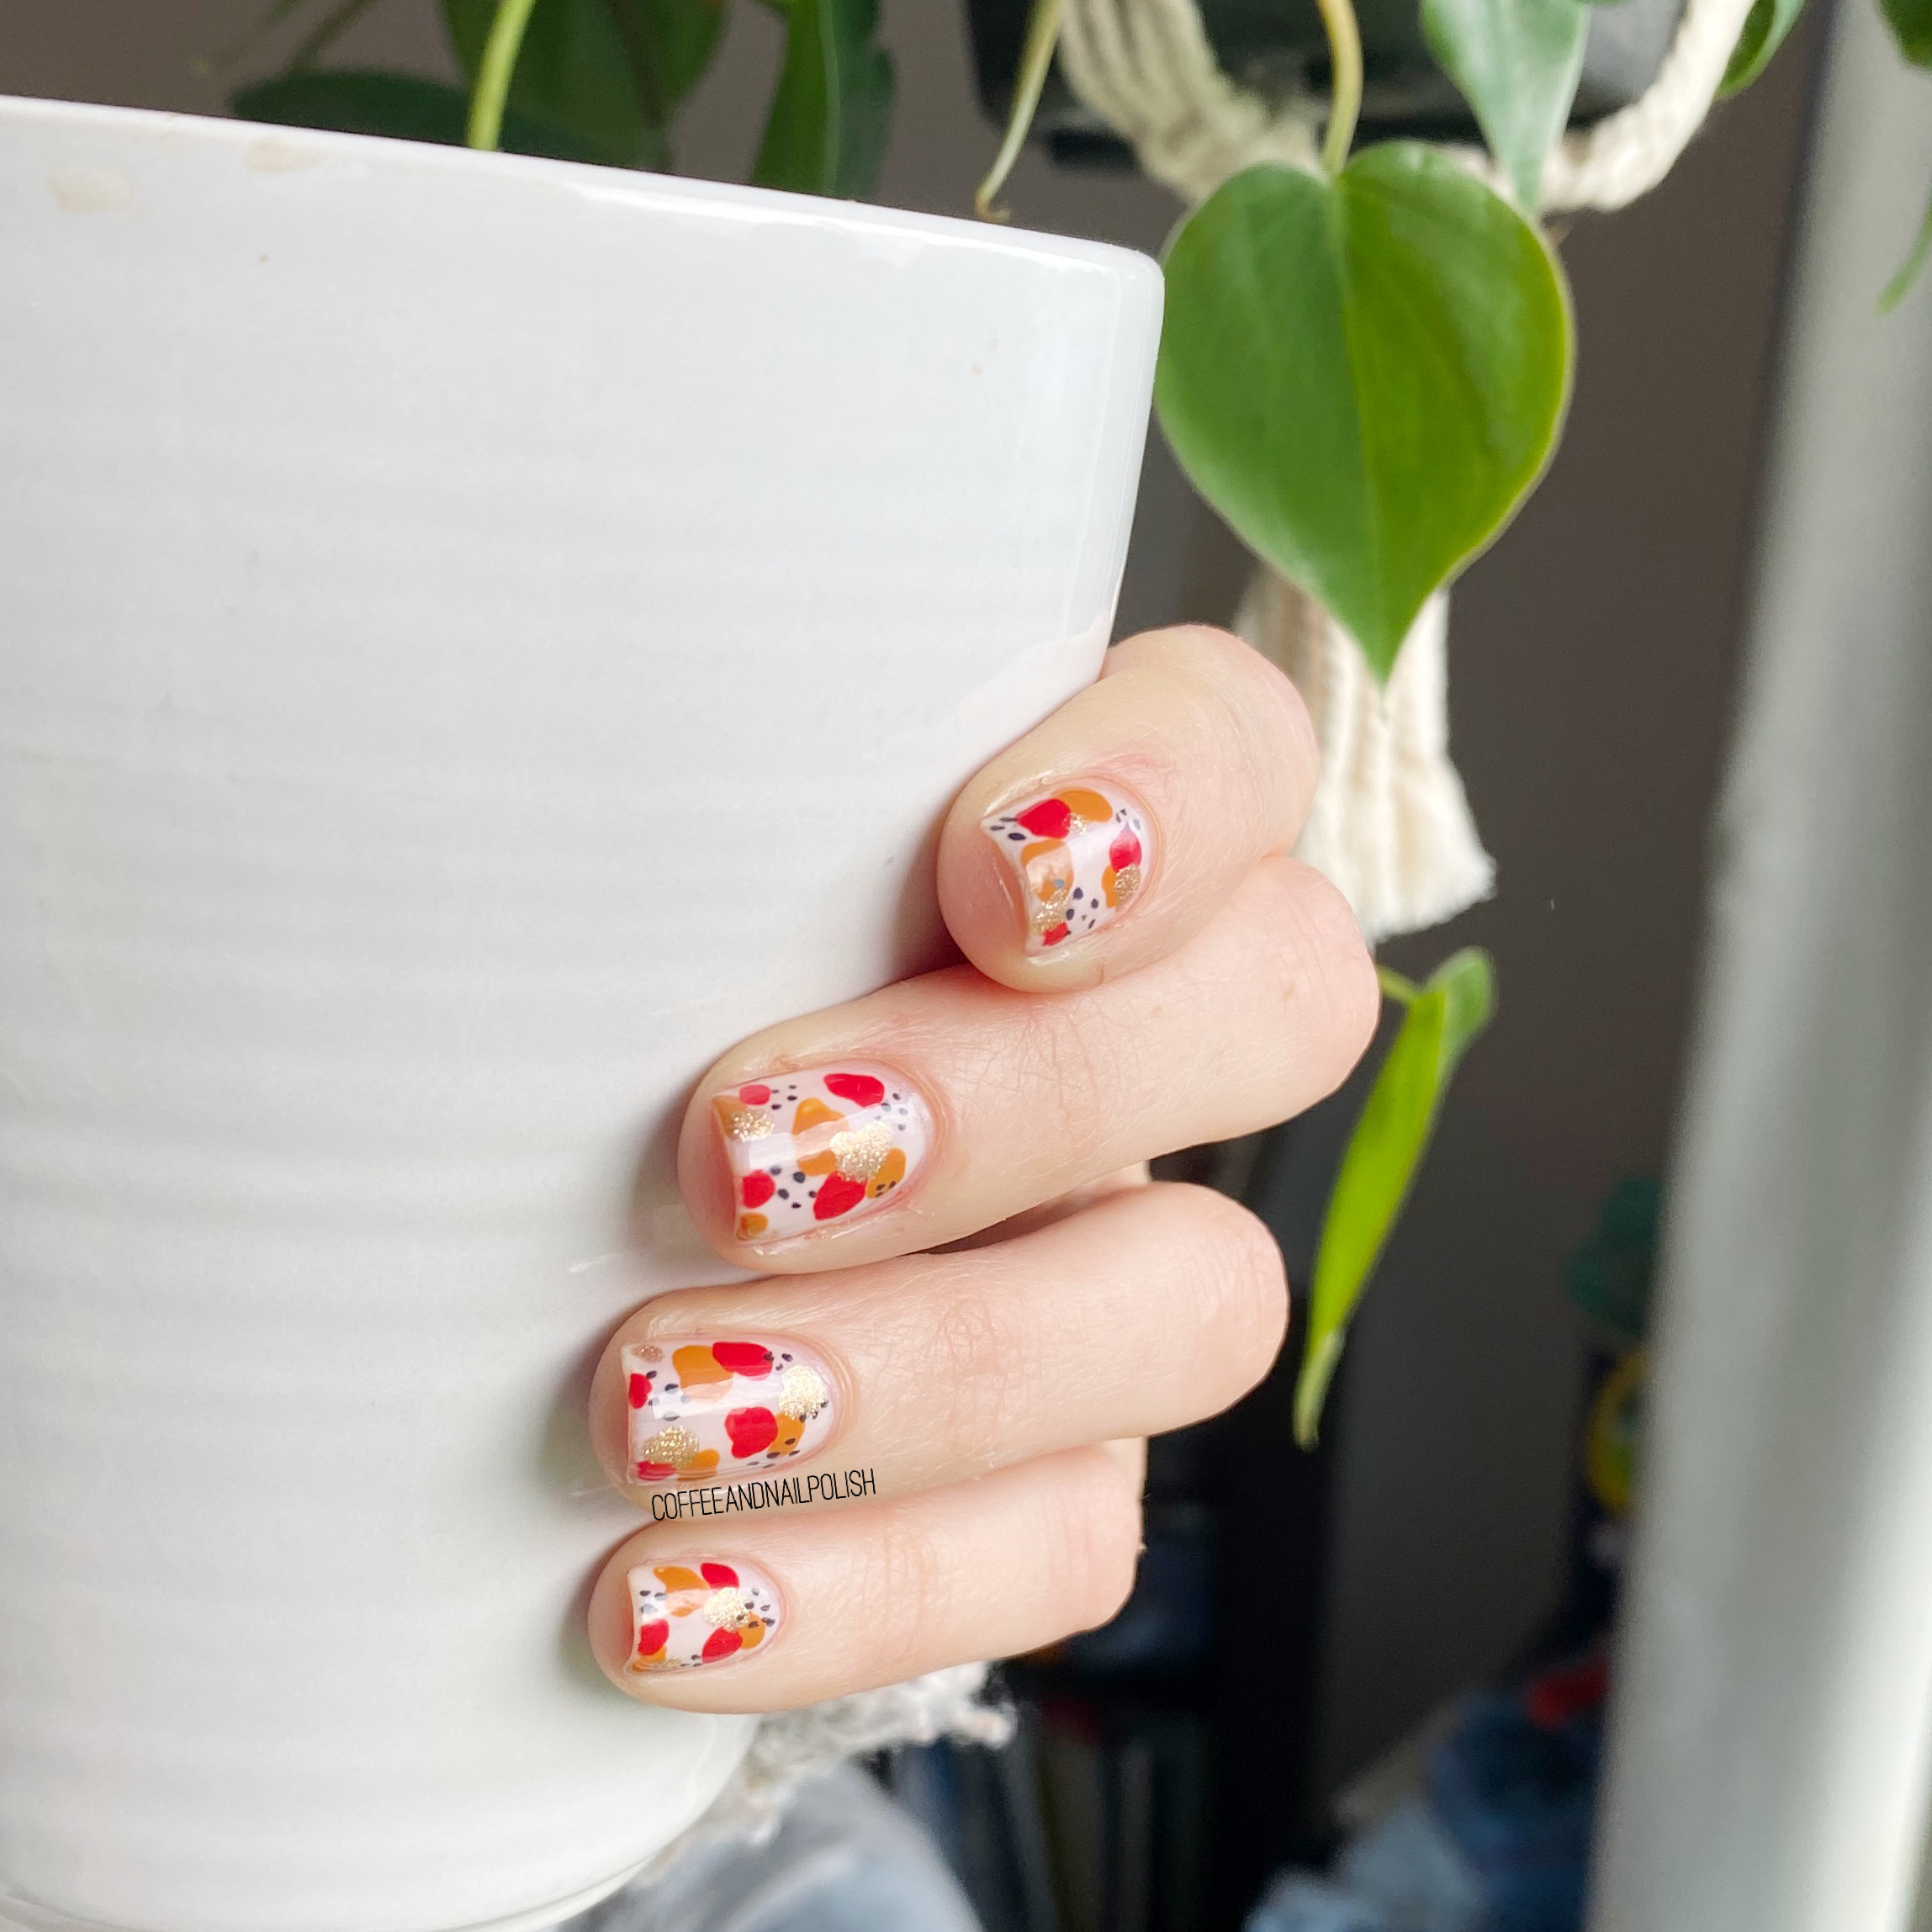
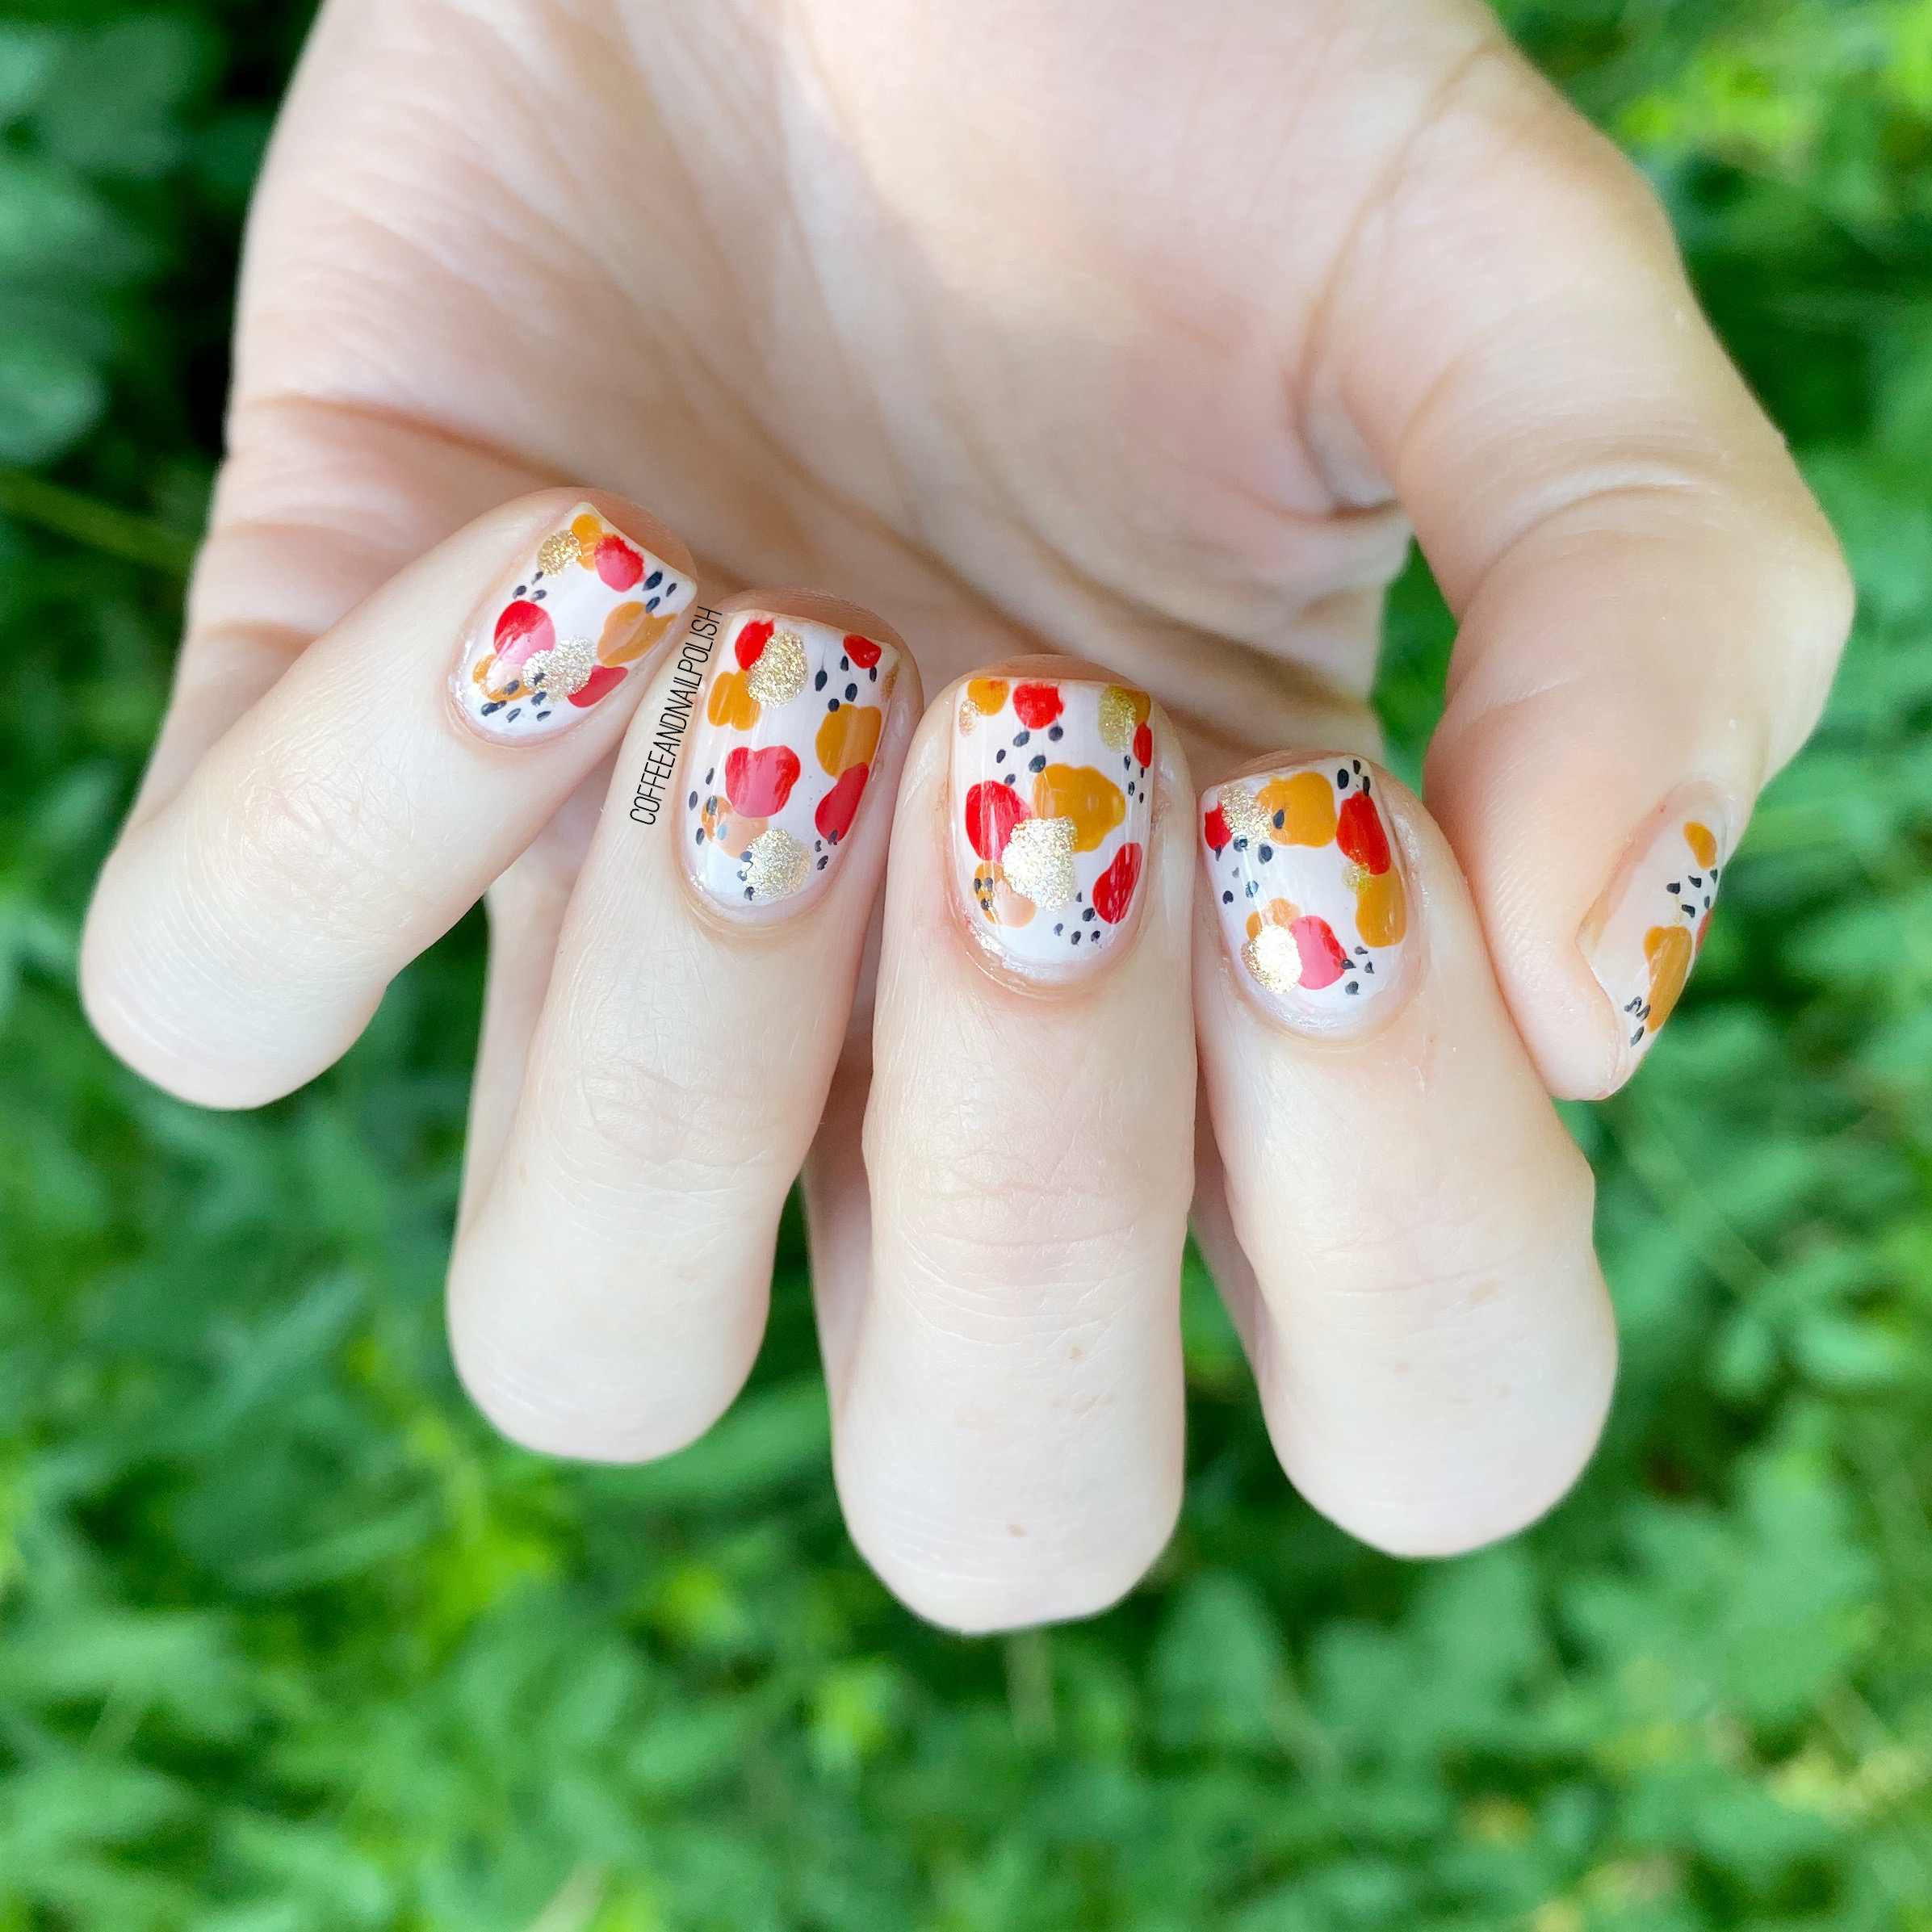
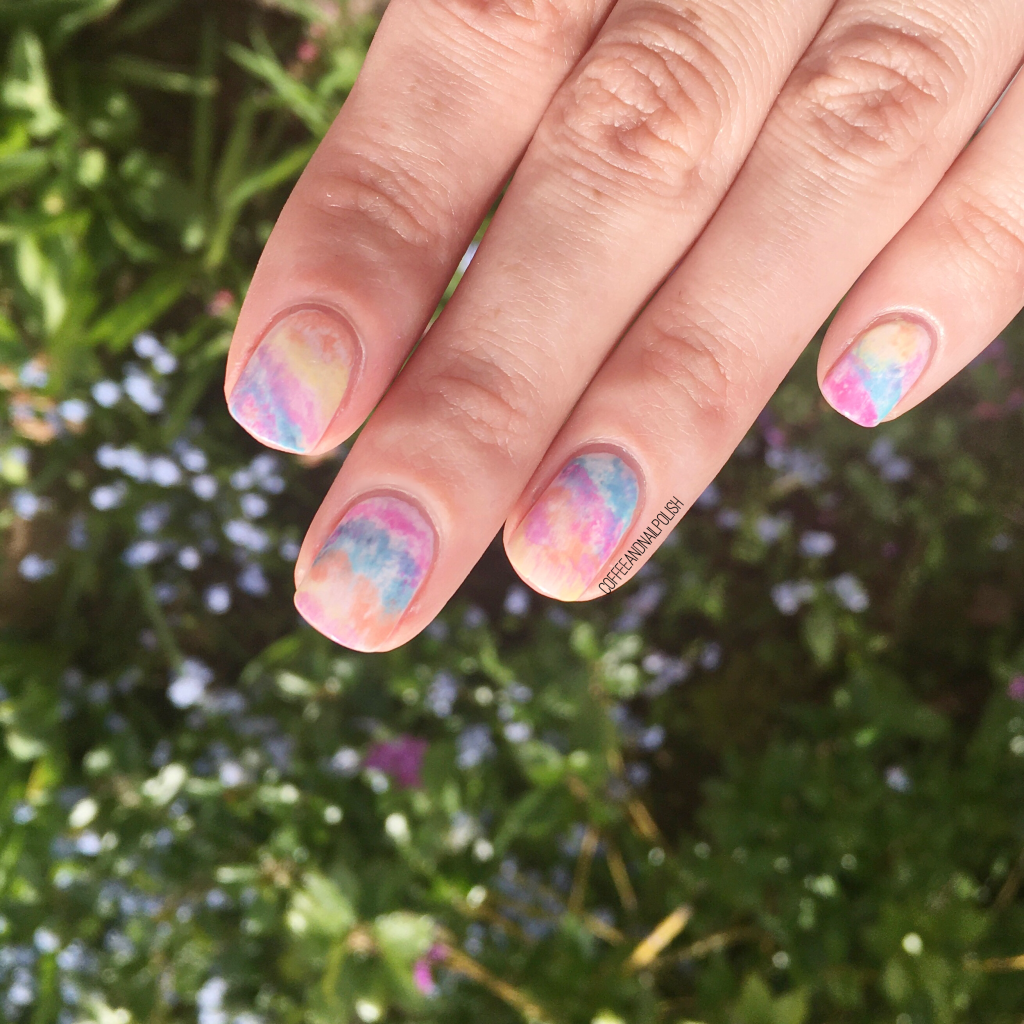
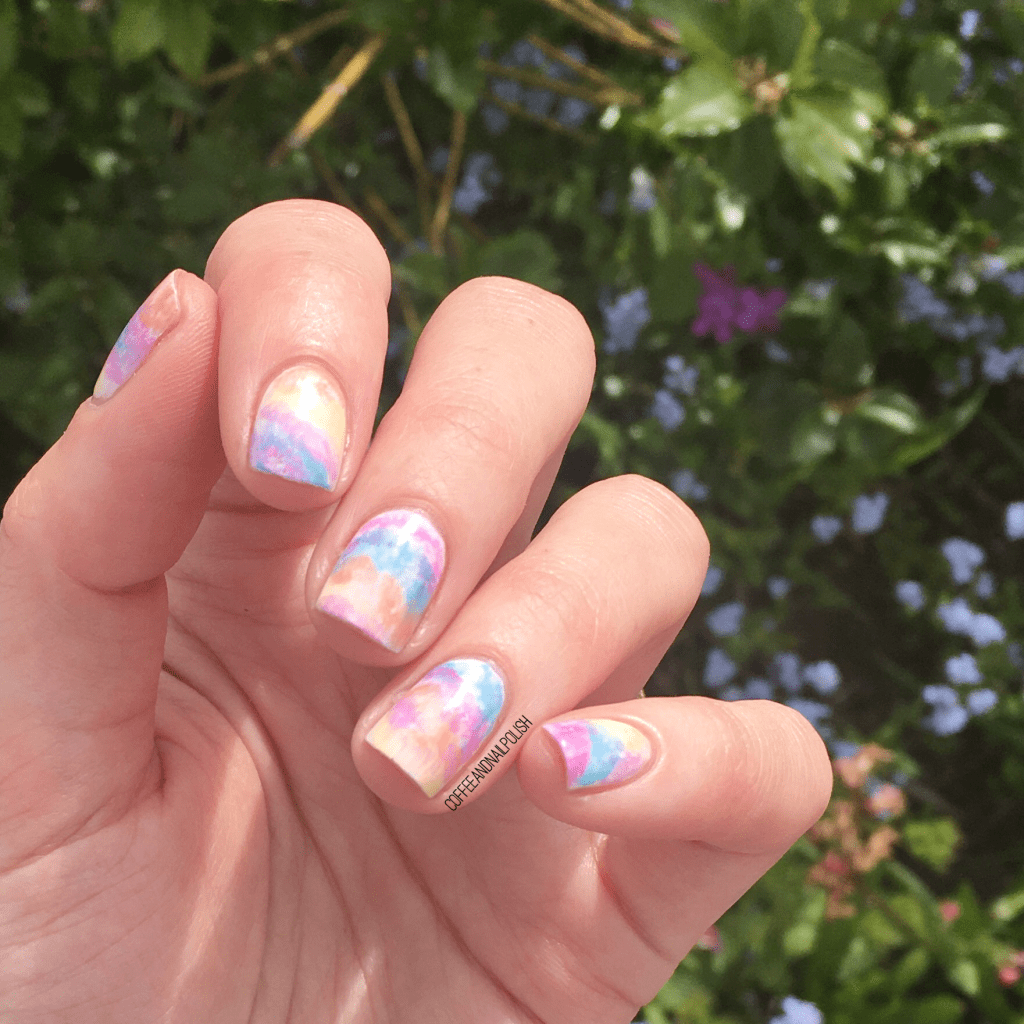
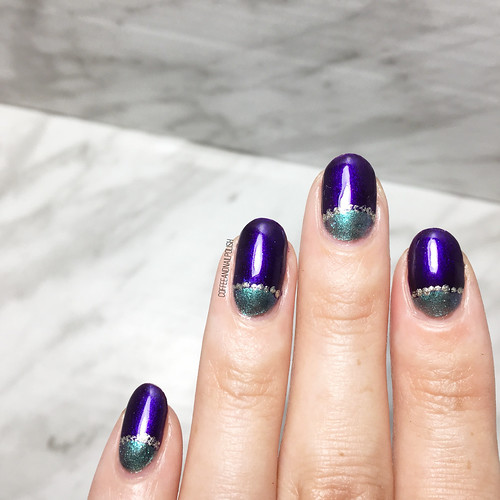
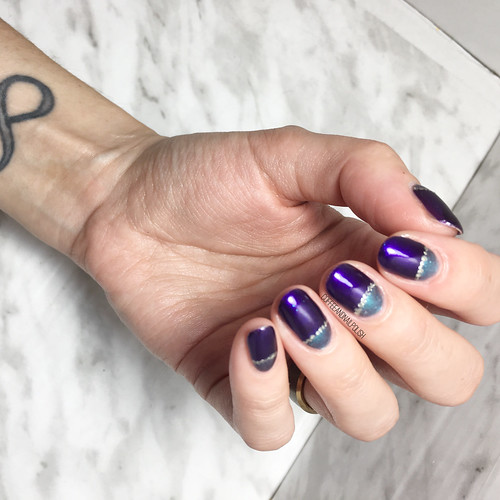
Today’s look is one I did last week on a whim, which I actually totally ended up loving. I used to do these negative space colour block designs a lot around Spring/Summer 2016, & I think it’s about time I bring them back!

For this manicure, the polishes I used were:

  • Base Coat: Sally Hansen Nailgrowth Miracle
  • Top Coat: Essie Good to Go
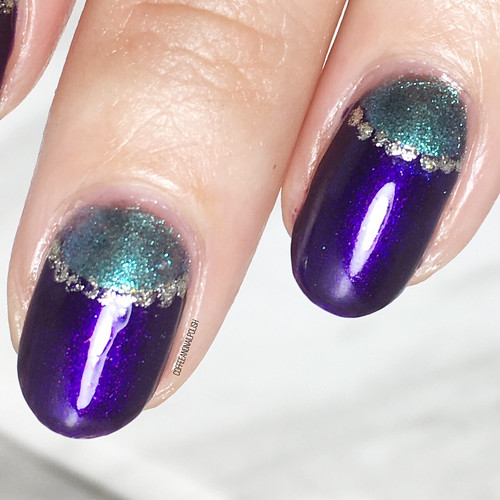
  • Sally Hansen Miracle Gel Get Mod!
  • ORLY Scenic Route
  • Starrily Vantablack
  • NailStuff.ca 16mm Striper Brush

Like I had mentioned, I did this manicure on a whim. I had started another design, mucked it up, & then had needed something quick to do. & I’m so glad I decided on these! I ended up getting so, so many compliments on them while at work, which is kind of the reason I’m thinking I should start rocking them more!

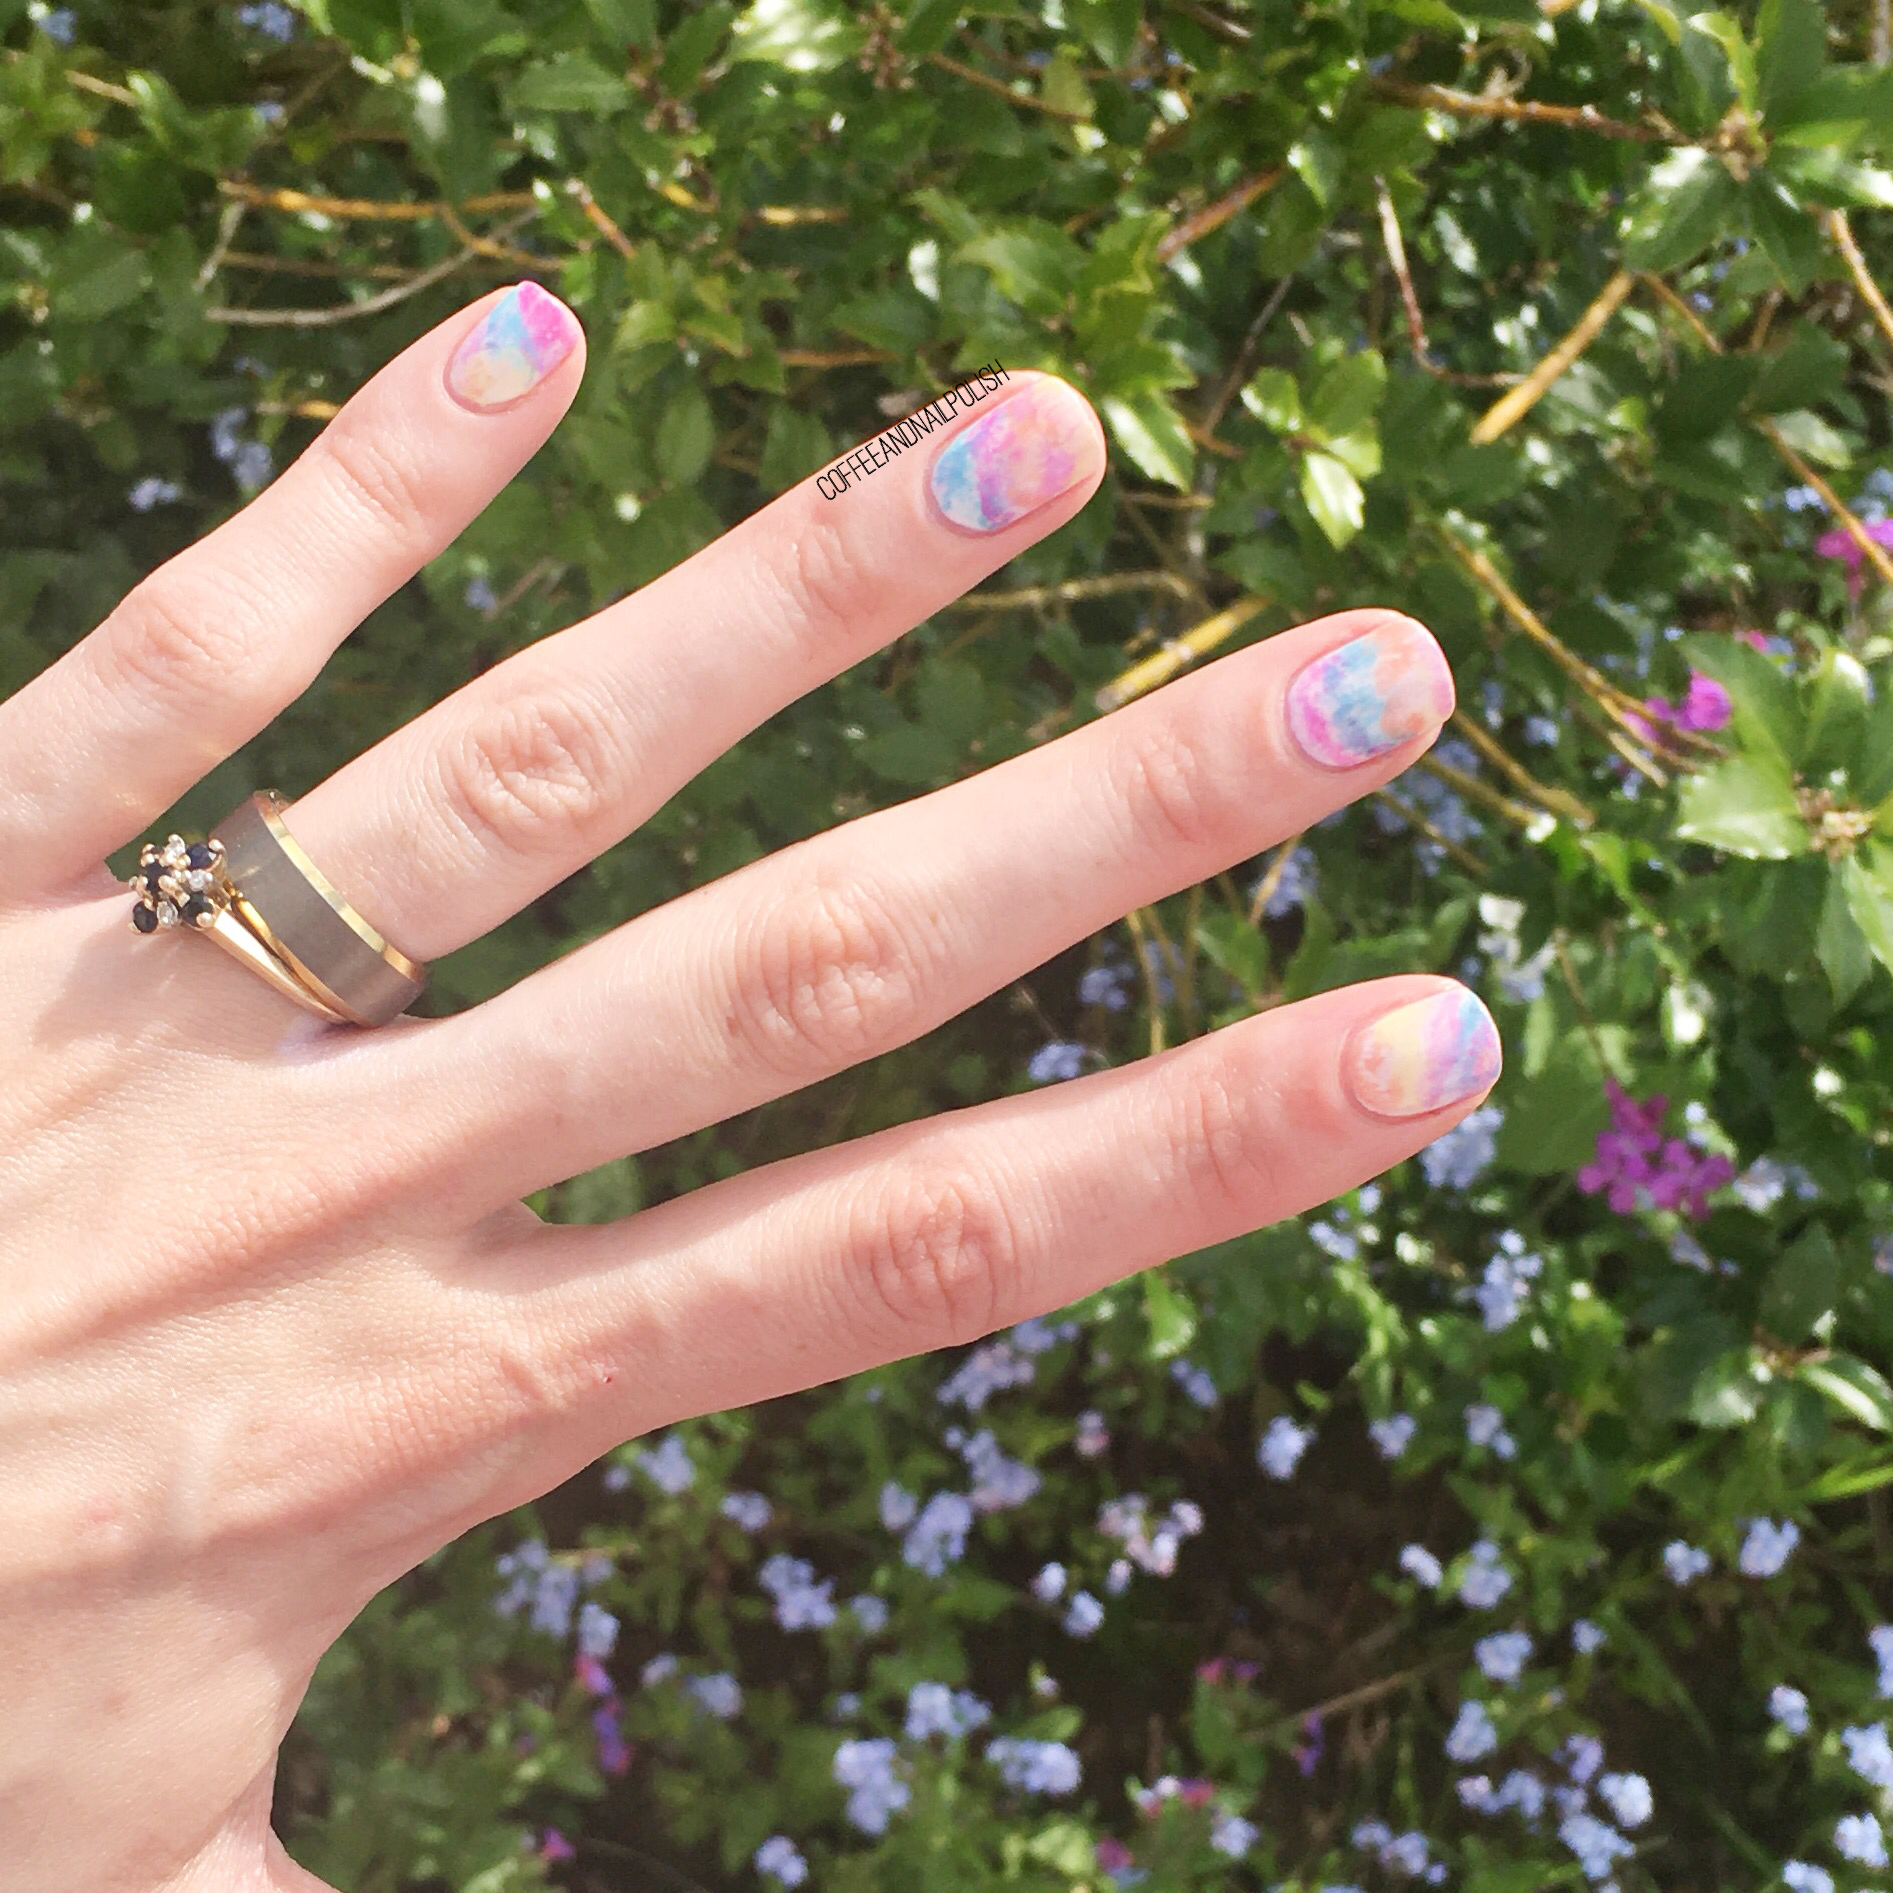
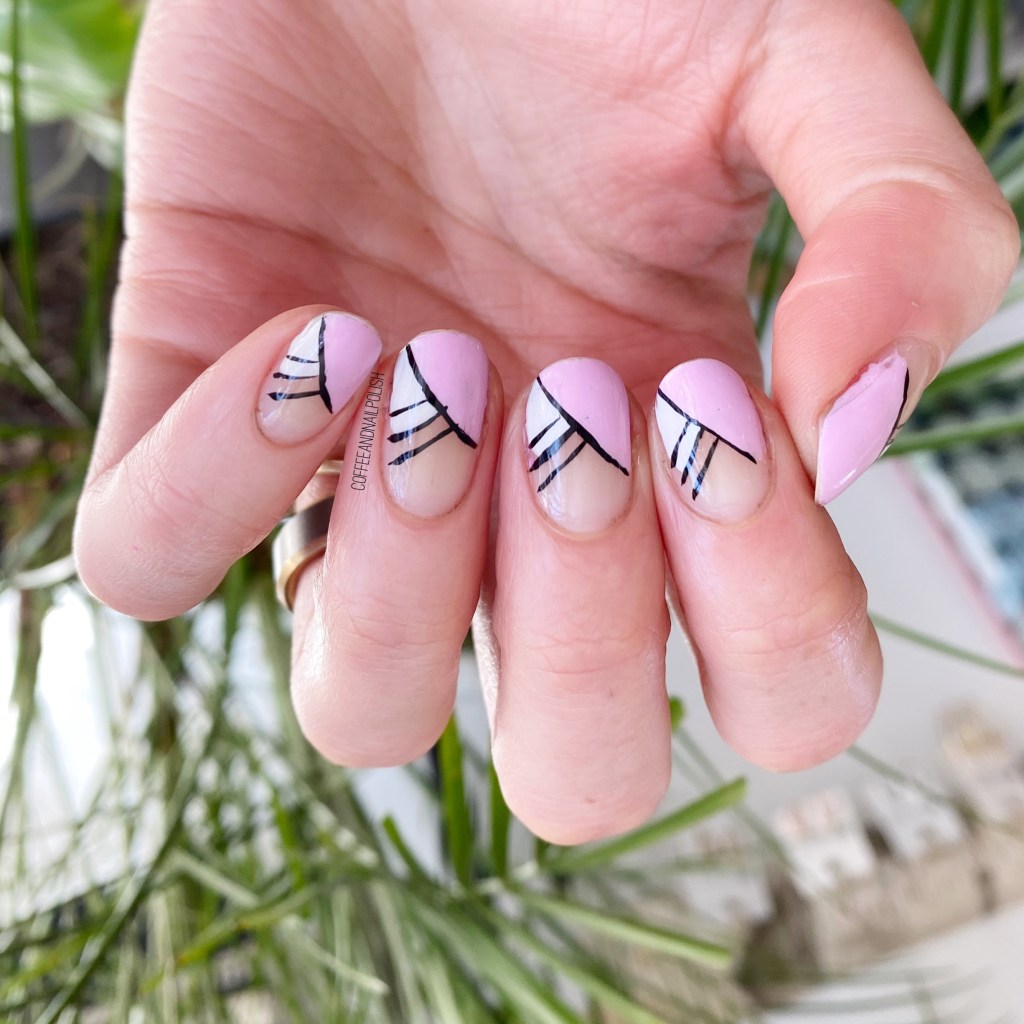
I did everything freehand—mostly because I was short on time, & didn’t feel like waiting for multiple layers to dry. & I really really love the end result. Just a fun, simple look that anyone can wear, with any length nails. & I’m going to prove it because I just had a major nail catastrophe, I’m back to itty bitty short nails.

So stay tuned!

What do you think about this nail art look? Would you wear a colour block design like this? What colours would you pair together? Let me know all your thoughts in the comments below!

#GlamNailsChallengeOct — Bats

Hello lovelies & happy Monday! Can you believe we are so close to the end of October? Seriously… where did October even go? I can’t believe that it’s almost Halloween. I seriously want to petition to make Halloween a whole week instead of just one day. It’s just over too quickly!

We’re also down to our second last design for GlamNailsChallengeOct! Today’s prompt is Bats. While I would have loved to freehand some cute bats on my nails, after my first attempt, I knew it was going to end up being super frustrating & I decided to pull out some nail stickers to create my cute Halloween look.

For this manicure, the polishes I used were:

  • Base Coat: Sally Hansen Hard As Nails
  • Top Coat: Essie Gel Setter
  • NYC Color Frightening Fingers in Red
  • Essie Shine Of The Times
  • Dollarama Halloween Nail Stickers

Aren’t these super cute?

I was actually really impressed with these nail stickers. While I don’t wear them a lot, they’re great to grab for a quick nail art look. These particular stickers were bought at my local Dollarama, while picking up Halloween decorations, & they stick to the nail really well. I wore this look through a long day at work, & I didn’t have them peel off or stick off the nail at all. Granted, I applied two coats of top coat, but even still you can’t even feel the sticker on the nail. I love it! & I also love the little bit of glitter on the stickers. They’re actually some of the cuter stickers I’ve used.

What do you think about this nail art look? Do you ever use nail art stickers? Which brand are your favourites? Let me know in the comments below!

Abstract Dots Featuring Essie

*features gifted products*

Hello lovelies & happy Wednesday! How crazy is it that we’re already half way through the week?

Today I have a fun look to share with you I did with a few of the shades from the Essie Summer 2020 collection! This is actually a redo of a design I did a few weeks ago (& posted on Instagram) that was inspired by @thesammerasaurus. I’ve really been loving Kaf-tan, Spice It Up & Mosiac On Down, & I decided I had to do a design pairing them together. & since I’ve been kind of obsessed with abstract designs, I decided to give this abstract dotticure-ish look another go!

For this manicure, the polishes I used were:

  • Base Coat: Essie Strong Start
  • Top Coat: Essie Gel Setter
  • Essie Ballet Slippers
  • Essie Spice It Up
  • Essie Kaf-tan
  • Essie Mosiac On Down
  • Essie Bobbing for Baubles
  • NailStuff.ca Dotting Tool Trio — I used a medium sized dotter (Use COFFEE10 to save 10%)
  • NailStuff.ca 7mm detail brush (for my tiny navy dots)

Isn’t this just such a cute look? I love it! Besides the fact that the colour options are endless, because you’re not trying to be “perfect” in your dots, you can’t really mess it up! I don’t know about you, but sometimes trying to make my nail art perfect gets me a little frustrated. Plus this nail art took me maybe 20 minutes from start to finish — which is great because I was doing my nails before bed. Haha. So I needed a quick manicure.

What do you think about this design? Are these abstract dots something that you would rock? Let me know all your thoughts in the comments below! & let me know what your favourite quick & easy nail art look is!

Tie-Dye Nails Inspired by @BadGirlNails

Hello lovelies & Happy Wednesday.

Today I’m sharing a cute look I did a few weeks back. Tie-Dye is everywhere this year, including on nails. I haven’t yet found the perfect tie-dye sweatshirt yet, & I’m too scared to do one myself, but as soon as I saw Sonya at @badgirlnails tutorial for tie-dye nail art I knew I needed to recreate them!

For this manicure, the polishes I used were:

  • Base Coat: Sally Hansen Good Kind Pure Hardener
  • Top Coat: Essie Speed Setter
  • Sally Hansen Miracle Gel Get Mod
  • Sally Hansen Miracle Gel Malibu Peach
  • Sally Hansen Miracle Gel Lemon Chillo
  • Sally Hansen Miracle Gel Miami Nice
  • Sally Hansen Miracle Gel Fuchsia Fever
  • NailStuff.ca Round Clean Up Brush (COFFEE10 saves you 10%!)
  • Pure Acetone
  • Plastic Yogurt Lid

Ahhh, I love this colour combination so much. Like, I wish I could transfer it into clothing. The Sally Hansen Miracle Gel Neons from last summer are absolutely perfect for this kind of look & feel so Summer-y. & Sonya’s tutorial she posted was so easy to follow to recreate this look, I’m definitely going to recreate with a variety of colours.

Like I said, thanks to @badgirlnails easy to follow tutorial, the look was a breeze to create! You definitely want to make sure you have an extra thick layer of top coat down before you start applying your tie-dye (so you don’t destroy your base) but other thank that this is a quick & easy look to do! & so on trend right now!

What do you think of this tie-dye look? Have you attempted tie-dye on your nails yet, or at home on clothes? Let me know any tips you have for creating your own tie-dye sweatshirts at home because I really want to give it a try (without, you know, tie-dying myself in the process!)

Shimmery Teal & Purple Half Moons

11D25747-F0D9-4E00-81D5-2627C3FA913E

07346D81-807B-4EA6-A8AF-4ACD5C74CE26

Good morning lovelies & happy Thursday! Hope everyone is having a lovely week so far. Today I’ve got some more Fall nail art to share with you, in a fun jewel toned colour scheme!

There is something I love SO MUCH about pairing purple & blue/teal together. I just find they compliment each other so well, which is probably why–regardless of the season–it is a go to combination for me. I was already wearing my Swatch Sunday pick for this week, & I wanted something to pair with it in a quick half moon, so naturally I had to reach for a purple to complete the look.

CFD458E9-CA10-4772-B3D1-08492950322A

66015A3D-F6FA-4F0A-B27A-FFE2CC510C4B

BD8E2F71-1B06-4B38-8D93-4D65D8DD1BCF

For this look, the polishes I used were:

  • Base Coat: Gel overlay
  • Top coat: Essie Gel Setter
  • Quo by ORLY Breathable Freudian Flip
  • Essence 25 Arabian Nights (new formula Shine Last & Go!)
  • Essie Jiggle Hi, Jiggle Lo
  • Paper hole reinforcements
  • small dotting tool (Mine are from NailStuff.ca)

.

5ADEE743-46BC-4DC7-96B2-9EF44AE3F1F4

5136D70C-383F-4BCF-8815-F70984BDB16F

EC2C5F96-F1AD-4F55-9C7F-B3CF682371B1

Trying out this new purple from the reformulated Essence line at Shoppers Drug Mart. I’m trying my best not to buy too many new polishes (since, you know, I have a million) but I can’t resist $2.99 nail polish so I picked up this pretty shimmery dark purple called Arabian Nights, & I really think it compliments my base of Freudian Flip really well! I decided to add in some gold as well, so keep it feel luxe, & I think the end result looks super fancy. (Also Arabian Nights applied over my base in only one coat, which made this manicure even quicker to do!)

Feeling like this has a bit of a Mardi Gras vibe as well, although a little bit early for that! But I really do love how fancy these feel, thanks to the jewel tones & gold accents. Of course, the fanciest place I’ll be wearing these is the grocery store, but that’s okay with me! I’ll have the best looking nails at Sobeys!

14BBD6F5-B306-4852-BB3B-B1BC8BB6E818

AA9CDACF-60D4-4208-BAFA-4976BD07F8A3

What do you think about this half moon look? What manicure are you planning on rocking this weekend? Let me know all your thoughts down in the comments below!