Hello lovelies & happy Tuesday! I hope everyone is having a fantastic start to their week. Can you believe we’re in August now? That’s just… this Summer is really speeding by!
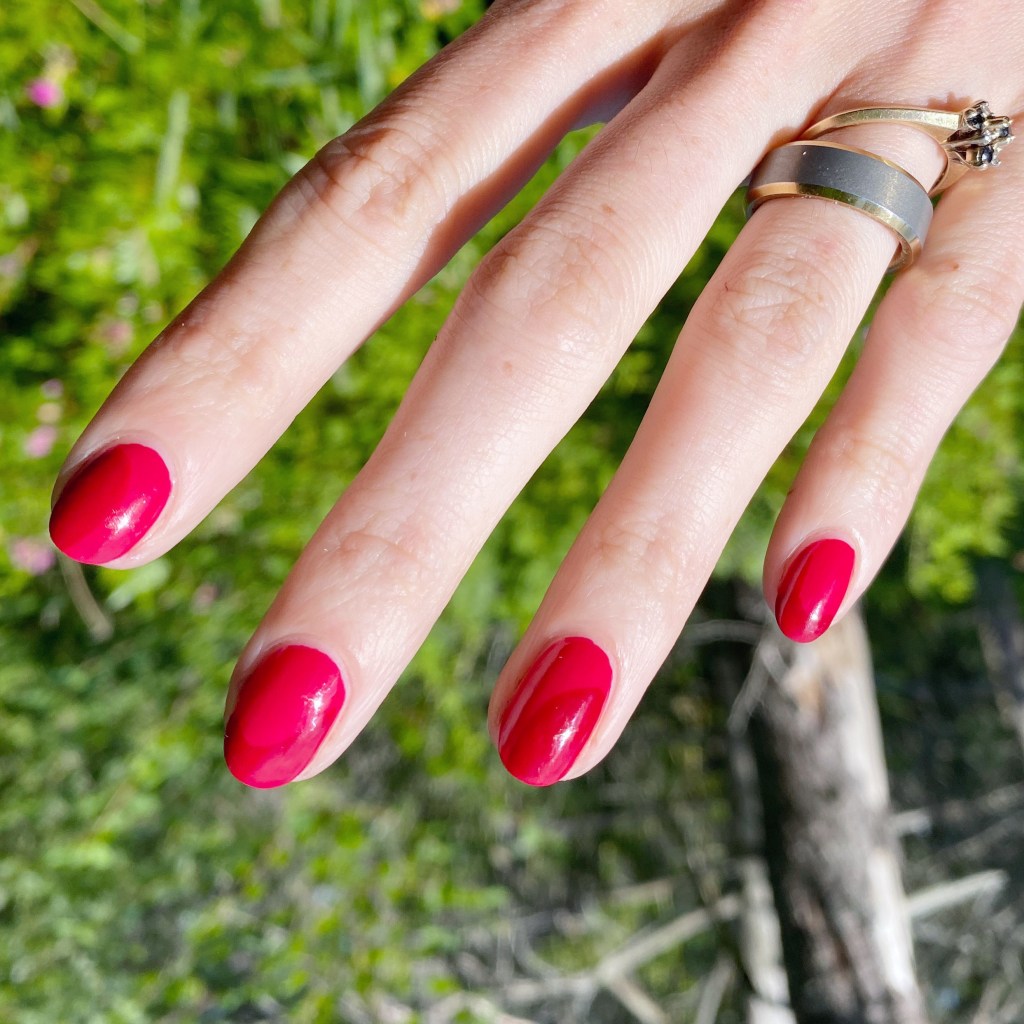
Today I’m sharing an easy nail art look I wore recently. We all know — I love red nail polishes. & I was feeling a red manicure. So I decided to pair a couple of red polishes together in a fun (& super simple) nail art look.
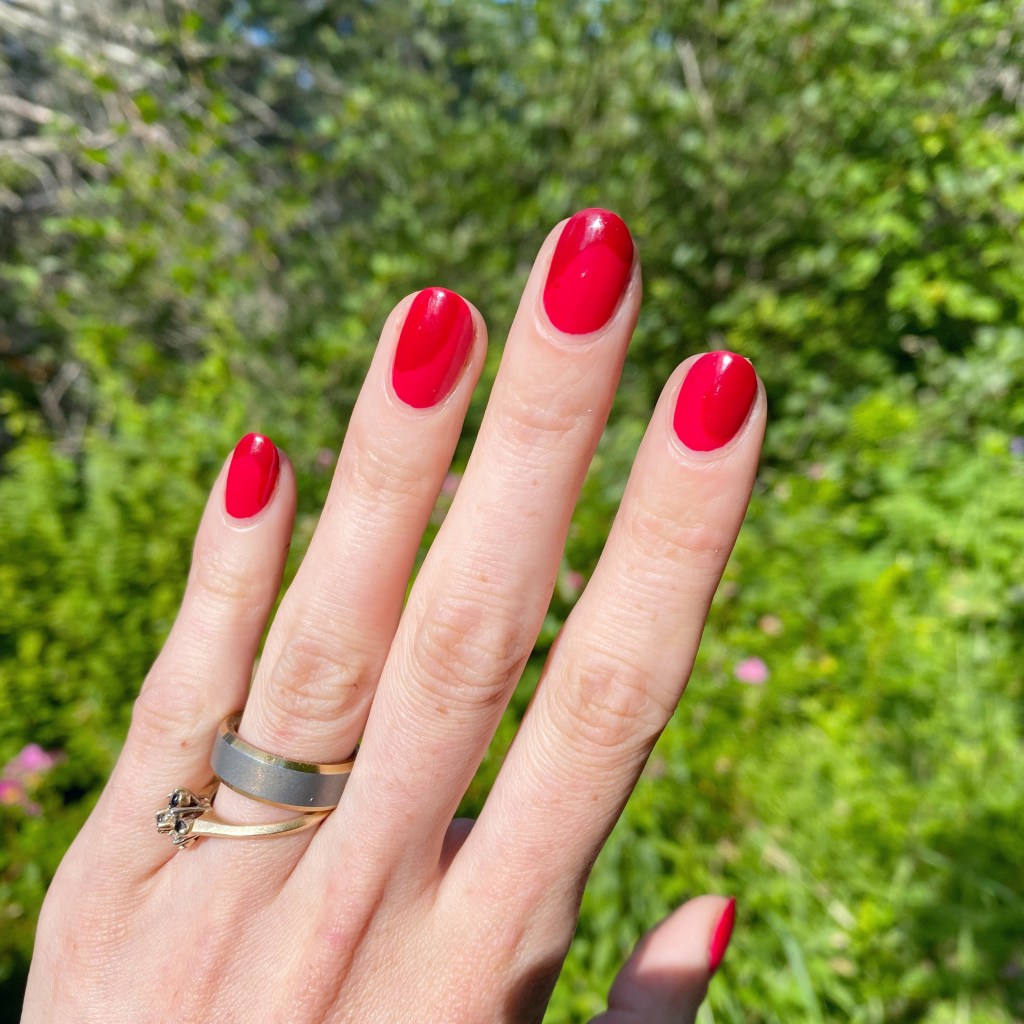

The polishes I used for this manicure are:
- Base Coat: Essie Hard To Resist Glow & Shine
- Top Coat: Essence Colour Shine Top Coat
- Sally Hansen Complete Salon Manicure Warm Regards
- Sally Hansen CSM Red Handed


I really like the subtle red on red nail art. Like I said, I really wanted to wear red nails — I always want to wear red nails — but I wanted to spice it up a smidge, & this subtle colour blocking seemed like an easy, cute option! From far away you might not notice to two colour paired together, but up close you can see the fun pattern. Next time, I might do a similar look, but with all red abstract stripes.
Any excuse for red nails!
What do you think about this subtle colour blocking design? Is this a nail art design you would wear?
Let me know what you think down in comments below — & what colour you would wear this design in!