My first sucessful chevron moons!

I have a really, really exciting manicure to share with you all today.

finished product

As I’ve mentioned before, I love a good chevron, but I’ve never been very good with creating chevrons with tape as something always seems to go wrong. However I found a foolproof way to create chevron moons, and I’m a very happy girl. I also documented the process so I could share with you my easy tutorial on how to create these chevrons if you–like myself–have trouble getting tape manicures to work the way you want. =)

Continue reading “My first sucessful chevron moons!”

Long lost goodies.

So the other day I was over at my parents. They’re moving away the beginning of next year, so I’ve had to go through the few boxes I left in their attic when I moved out. I knew a box containing the stash I had collected while living at home, and after going through a couple I found it!

stash

Surprisingly–considering it’s been sitting in an attic for the last two and a half years–it survived. I was expecting a lot of causalities, but there were only a few polishes of mine that didn’t make it. (Mostly shatter and crackle polishes). But what excited me most of all was that all my Claire’s Mood Polishes have survived.

mood3

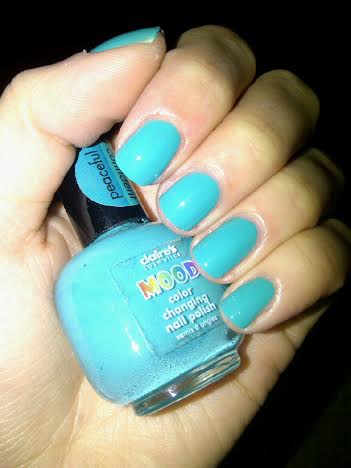
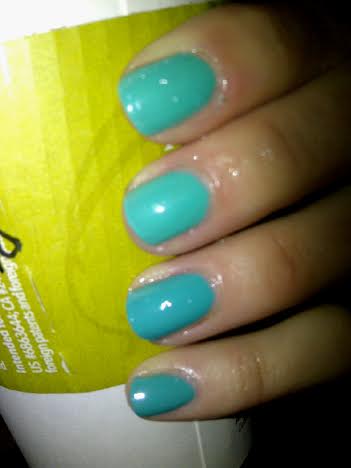
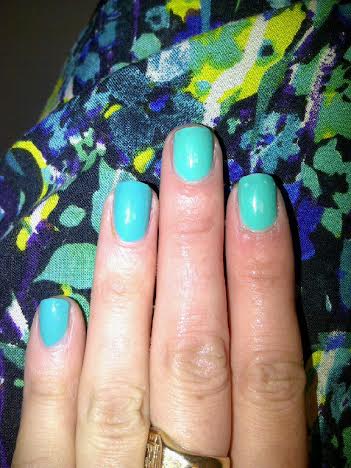
Claire’s Mood color changing nail polish in peaceful/confident.

When these polishes first came out (I believe it was in either 2010, or 2011), I was obsessed with them. I loved the thermal effect, and promptly bought 4 of them–3 are Claire’s brand, the other Icing brand. Unfortunately, I don’t think the years have been kind to the polish. Maybe it’s my base coat or top coat, but the color change isn’t as vivid as I remember it being.

mood4

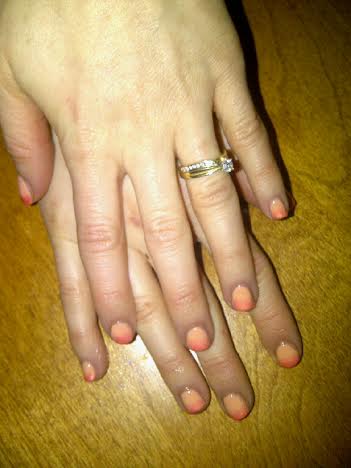
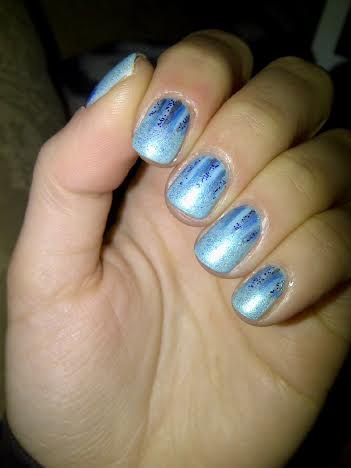
Index & Middle finger: after running under hot water. Ring & pinky finger: unchanged.

mood5

You can kind of see the change on my index and middle finger (after dipping in hot water).

I’m slightly disappointed that they seem not to work as well as they once did, but never the less the color is gorgeous so I’m happy to have found this and all my other polishes I’ve been without for so long. I’m especially excited for all the nail art combinations and swatches to be had.

It’s like Christmas in May. =)

More gradient fun!

The other day my friend Jenn came over, and let me do her nails. We had talked about it in advance, and she told me she wanted me to create something “professional but fun”. In the end we decided to go with a gradient. I haven’t done a lot of manicures and nail art on other people–with the exception of my roommate. But it was really fun to do, and she really liked them so I was glad.

 jenn2

jenn

For this manicure, I used Rimmel’s Reggae Splash as my base color, and China Glaze Thataway as my tip color. They two really compliment each other, I think–and Thataway has a very subtle shimmer in it which gives it a little extra something. I’m really glad she liked them, because I really love how they turned out. It was a little weird doing someone else’s nails, if only because her nail beds are so tiny! But I think this was definitely a nail art success.

Waterfall nails.

As I teased yesterday, I wanted to create some fun nail art using Peek a Blue as my base color. Last Summer, I remember seeing waterfall nail art everywhere. I haven’t done a waterfall nail in a while, so I decided Peek a Blue would be the perfect base color for my nail art.

waterfall

waterfall2

The polishes I used for this manicure were:

  • Sinful Colors Be Happy & Icing Peek a Blue — my base color.
  • ACO by Ardene Blue Tide.
  • Nicole by OPI What’s the Mitch-uation.
  • The Color Workshop unnamed shimmery blue.
  • ACO by Ardene Midnight Stars.
  • QUO by Orly unknown mini blue polish.
  • Sally Hansen Diamond Flash Top Coat.
  • Icing’s It’s a Matte World matte top coat.

I feel like it turned out pretty well, even though it’s far from perfect. Next time I would definitely paint my waterfall lines slightly longer. Also I don’t know what I was thinking adding Midnight Stars–I totally forgot it’s a clear base with glitter so it looks a little misplace on the nail. But besides those little problems, I do love them. And the adding Matte top coat just pulled everything so perfectly together. I love the smooth finish it gives the whole look. =)

waterfall3

waterfall4

waterfall5

So what do you think of this attempt at Waterfall nails? I know the trend was super popular last year, and it’s not featured as much on nail blogs as it once was, but I’m still a big fan.

Icing’s Peek a Blue.

Today I’ve got an older polish from the depth of my stash to share with you.

blue4

This is Icing’s Peek A Blue, which is a sparkly blue polish that I picked up from Icing last summer. It was on clearance, so I managed so score it for a sweet $2.49 (it was regularly $5.00)

blue3

Peek a Blue is a very, very sheer light blue polish scattered through out with slightly darker micro glitters. I’ve applied two coats of it over a two coats of Sinful Colors Be Happy, as it would take quite a few layers to make it even close to opaque. But because the base of Peek a Blue does have it’s only tinge of color, the base color of Be Happy doesn’t really change it much. It still very much looks like the polish in the bottle, even with layering it over another color.

blue3 blue

The second I saw this polish, I remember thinking I need that! And now I remember why. Even though it’s very sheer, it’s just beautiful on the nail.

Tomorrow I have some pretty nail art to share with you using Peek a Blue as my base color. =)