Inspired by… Keira Knightley!

kk5


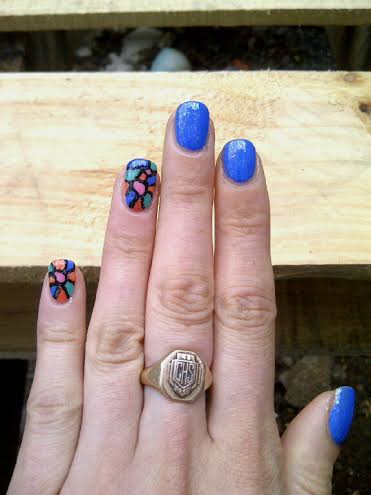
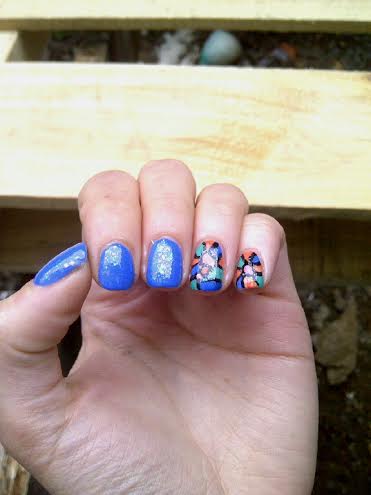
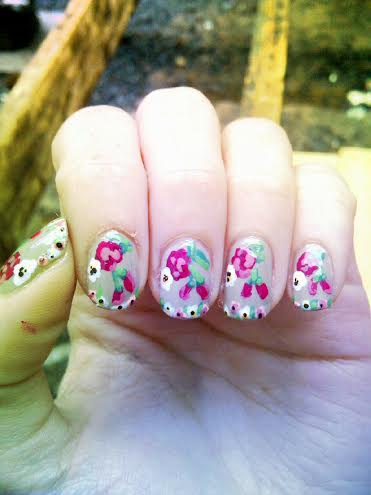
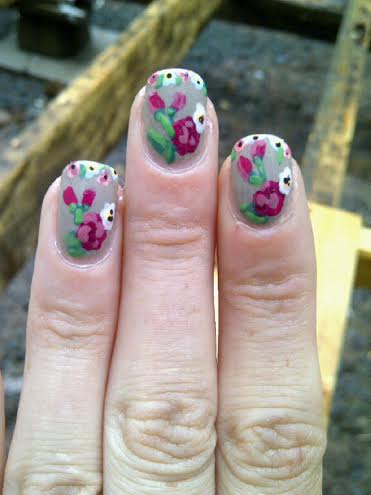
So… confession time. I have a HUGE girl crush on Keira Knightley. It’s a little dorky actually. She has an impeccable fashion sense that I can’t help but envy. The other night I was trying to come up with nail art ideas and remembered this Valentino dress she wore to the premiere of a movie a couple years ago. Since I knew I had a color very similar to the background of that dress (NOPI My Jay or the Highway) I thought… why not give it a try! After all, the worst that would happen would be that I’d have to redo them with something else!

kk4 kk2

The (many) polishes I used for this manicure were:

  • Nicole by OPI My Jay or the Highway.
  • ACO by Ardene Flower Girl.
  • Bourjois Paris in 1938 Mais Oui
  • Bourjois Paris  in 1995 Grains de beauté
  • Boujois Paris in 2002 Effect 3D Lip Gloss
  • ACO by Ardene Misty Love.
  • China Glaze Metro Pollen-tin.
  • Sinful Colors Strapped.
  • ACO by Ardene Green Peace.
  • Sinful Colors Easy Going.
  • Vernis Classique by Cherimoya Black.
  • Essie Good to Go Top Coat.

kk3

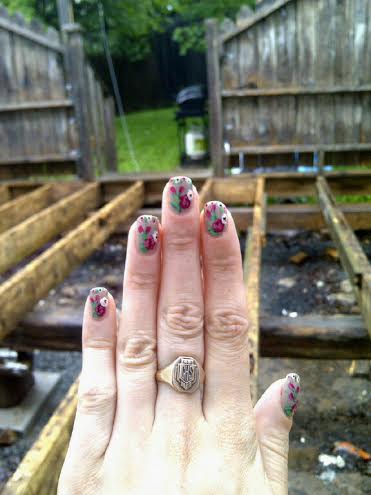
I love these. I love these SO much! When I first started I wasn’t sure what to do to capture that dress on my nails, but they turned out just how I hoped they would. Maybe my nail inspiration is little dorky, but the end result makes me smile. I don’t even want to take these off!


Purple Ombre.

When I first started getting into nail art, Ombre nails were all the trend. Even though they aren’t as popular as they once were, I still think they’re a great look. I hadn’t done ombre nails in a while so I decided to give them another try. I was feeling a purple manicure, so I grabbed five purple polishes as close to each other in tone and created a quick ombre.

OMBRE3

The polishes I used for this manicure were:

  • Essence Beauty Beats Baby Ooh Ooh — thumb.
  • Essence Color and Go Break Through — pointer.
  • China Glaze What a Pansy — middle.
  • ACO by Ardene Purple Rain — ring finger.
  • Sally Hansen Complete Salon Manicure I Lilac You — pinky.
  • OPI I Snow You Love Me — glitter placement.
  • Essie Go to Go Top Coat.

OMBRE2 OMBRE

Plus side of owning a TON of polish–makes it easy to match a few up to create  a quick ombre which still looks like the colors are supposed to go together. I also added some glitter to create a rhinestone look, just for an extra little something-something. It just pulls the whole look together for me.

OMBRE4

So what do you think of these ombre nails? Like I said, I still really love the ombre manicure so I could see myself doing this with all sorts of different colors. Also I’m really digging I Snow You Love Me for all the glitter placement possibilities. Plus from a distance it looks like rhinestones on the nails (but without the worry that I would knock them off in about 2 seconds at work.)

Also I’m seriously addicted to the Skinny Caramel Macchiatos at Starbucks. I go through waves of being addicted to certain drinks, and they’re my drug of choice right now. So delicious.

Pacific Blue (the original!) and a little subtle shimmer.

So as most people have probably heard, Sally Hansen decided a little while ago to change Pacific Blue, taking it from a beautiful creamy blue to a less appealing darker shimmery blue. I was not very impressed when I heard the news (as most people weren’t) because Pacific Blue is one of my all time favorite blue polishes! I’ve been on the look out to see if I could find any of the old bottles, but wasn’t having the best luck. However, I got lucky the other day when I visited my local Shoppers–they had a whole display with the old formula of Pacific Blue, so naturally I had to stock up on this beauty!

In honor of finding my beloved Pacific Blue, I decided to do a manicure featuring it. Originally I wanted to use striping tape to create triangle accent nails, but after getting way to frustrated I gave up on the striping tape and decided to create freehand mosaic accent nails. Someday I’ll manage to get the hand of striping tape, I just guess that today is not going to be that day.

pacificblue

The polishes I used for this manicure were:

  • Sally Hansen Xtreme Wear Pacific Blue — blue.
  • Essence Beach Cruisers Girls Just Wanna Have Sun! — Coral.
  • Essence Beach Cruisers Keep Calm and Go to the Beach! — Teal.
  • ACO by Ardene Kiss From a Rose — Pink.
  • Vernis Classique by Cherimoya Black — black outline.
  • Quo by ORLY Glitter Pink Matte Top Coat.
  • Essie Go to Go Top Coat.

God, I really love this blue. As soon as I came home, I put it on my toes. My old bottle was beginning to get goopy from over use, so I was really sad thinking I’d never get to wear this polish again. I also added some shimmer to my manicure in the form of Quo’s Matte Pink Glitter Top Coat so it would qualify for the OMD Nail Art challenge. I ended up adding top coat over the sparkle, just to bring it out a little more. Maybe it’s not as BAM! IN YOUR FACE! as some shimmery manicures, but I like the subtle quality of it. Plus it looks amazing over Pacific Blue so it’s a definite win for me.

pacificblue4 pacificblue5 pacificblue3 pacificblue2


Holographic stripes.

I’ve been coveting a holographic polish for a long time, but hadn’t yet managed to add one to my stash. However I was at Shoppers the other week, and happened to stumble across Holographic Hero by Gosh–on sale to boot!–and knew I had to own it.

holographic5 holographic7

Holographic Hero is a silver holo that goes on opaque in two coats. This is one of those polishes that definitely requires a bit of time to dry before coats, as it can drag if it’s too wet, leaving bald spots. However, once dry the polish is spectacular on the nail! I couldn’t stop staring at it! Not sure why I waited this long to buy a holo, but I’m definitely going to need to add more to my stash. So pretty!

Now Day 7 of the OMD Challenge is holographic, so I figured now that I had the right tools, I could totally create something fun with my new polish. I decided on a tape manicure, and holographic stripes.

holographic6 holographic3 holographic2 holographic

Sadly, my stripes ended up wonky on a couple fingers–a result of trying to do these later at night, and after a couple drinks (and not pressing down the tape hard enough so that the polish wouldn’t bleed under the tape.) I used China Glaze Flying Dragon for the purple which is one of my all time favorite purple polishes, and everything was topped with Essie Good to Go Top Coat. I can’t wait to play around with this polish a little more–it’s just so pretty and sparkly. Even though it’s hard to capture on camera, it’s very striking in person.

And, just for fun, here are my nails with my new bottle of Biotin. I found this also at Shoppers. Biotin is my go vitamin for my nails (and hair). I noticed SUCH a difference when I’m using it. I was impressed when I found these. They’re cool–they dissolve under your tongue, and taste like cherry. And they’re a much higher dose than I usually take, so I’m hoping they work even better.

holographic4

Blue Moon Manicure.

I love a good half moon manicure. It was one of the first nail art techniques I tried. So I do love to return to them when I’m in need of pretty nails. I just picked up Revlon’s Dreamer, which is a gorgeous baby blue, and thought it would be perfect for a little color blocking. I decided to go with something purple for a great contrast.

halfmoon4

The polishes I used for this manicure were:

  • Revlon Dreamer — baby blue.
  • Essence Break Through — purple.
  • Essie Go to Go top coat.

I was actually hoping this would be a little brighter so I could use it for today’s entry for the OMD Challenge, but they turned out a little darker than I imagined in my head. Never the less, they turned out great and I love how they look. A simple manicure, but eye catching none the less.

halfmoon3 halfmoon2 halfmoon