Petite Dotticure

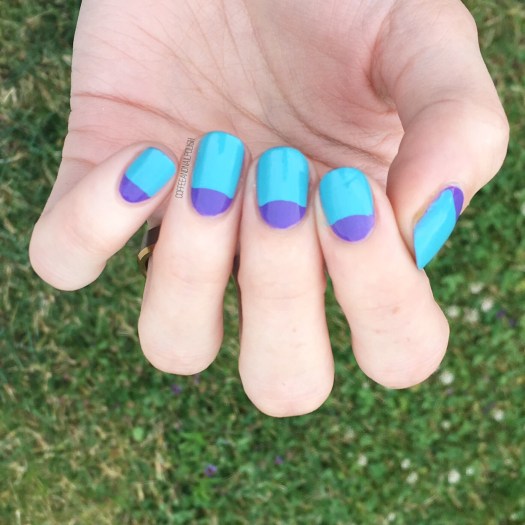
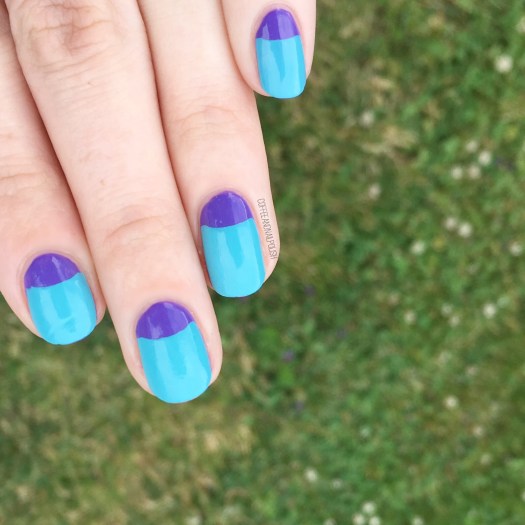
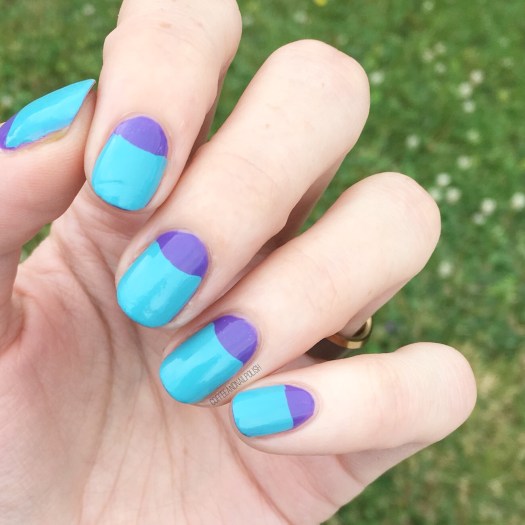
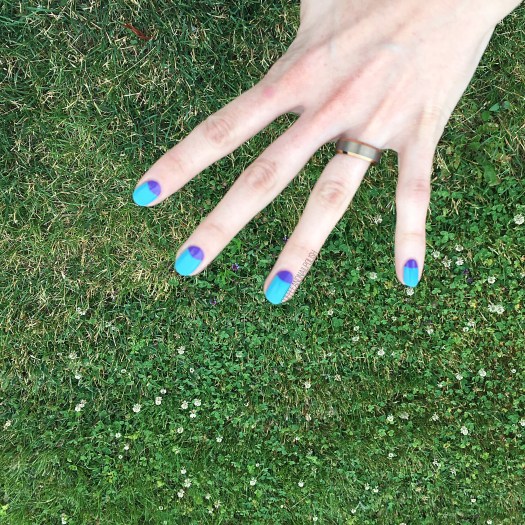
Good Morning Lovelies & happy Tuesday. I hope everyone had a good weekend & those who had yesterday off had a good extra long weekend! Today I’m starting off with a dotticure. It feels like absolute ages since I wore polka dots of my nails, so this manicure was long overdue. Plus I was in need of a quick look that I could do, looked snazzy & still meant I could get to bed at a reasonable time. Polka dots are always the right answer!

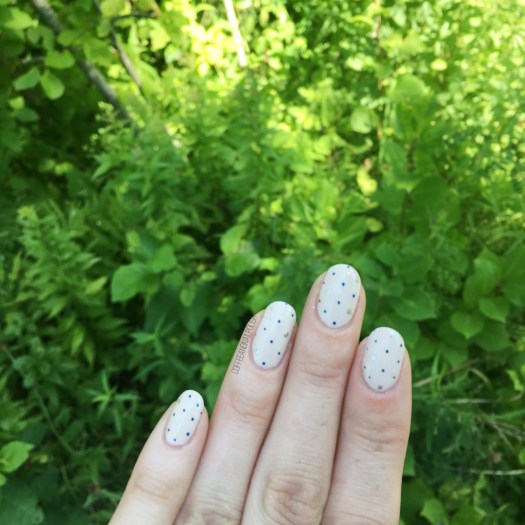
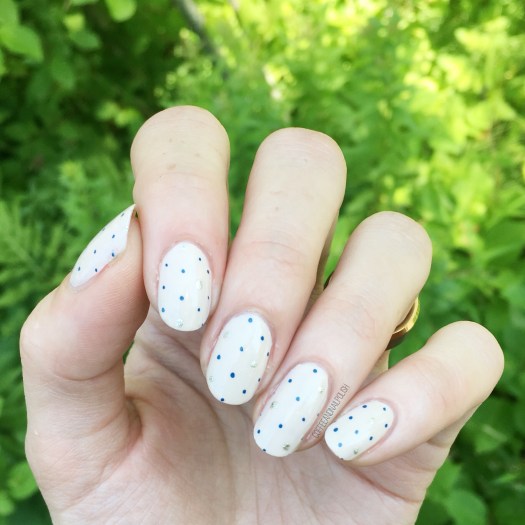
For this design, the polishes I used were:

  • Base Coat: OPI Nail Envy
  • Top Coat: Essie Speed Setter
  • ORLY Decades is Dysfunction
  • Sally Hansen I ♥️ Nail Art Pen in Navy
  • Essie Jiggle Hi, Jiggle Low
  • Small dotting tool

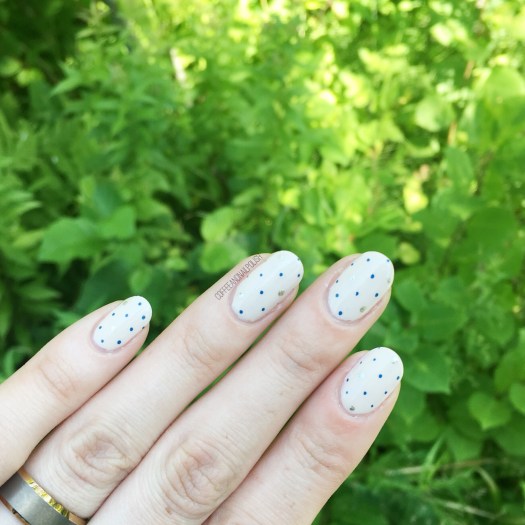
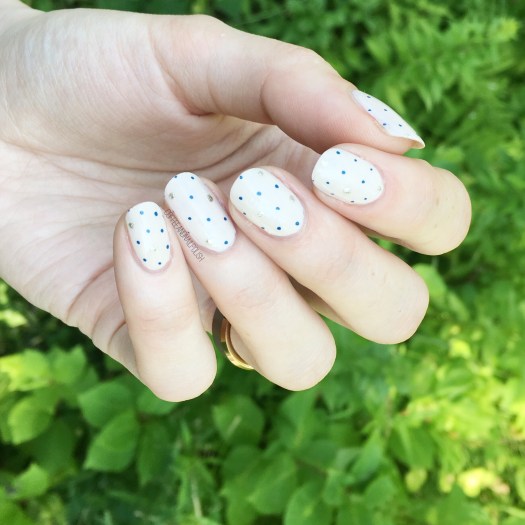
Don’t get me wrong, I love big bold dotticure designs (& I’ve been dreaming of a few as we get closer to Fall & Fall Polish season) but there is something about a teeny tiny dotticure that is just so satisfying. It’s such a fresh clean look, & so much more forgiving if your polka dots aren’t completely perfect. Also I still love using my Sally Hansen nail art pens for this purpose! So much easier to control when creating dots. & let’s be honest—when it’s 11pm & I have to be up at 5:45am to get ready for work, I don’t need to be re-dotting my nails for hours trying to get them right!

What do you think of this dotticure look? Do you prefer petite or regular sized polka dot designs? Let me know your thoughts down in the comments below! & if there is any looks you’d love to see me do, share them too!

♥️

Easy Purple & Turquoise Half Moons 🌙

Happy Wednesday lovelies! Today I have another set of half moons to share with you, this time featuring a blurple & turquoise colour combination I’m kind of obsessed with! It’s been a while since I went with half moons, & colour combination was inspired by a t-shirt dress from Forever 21 that I own & love.

Colour blocking makes me happy. It’s a great way to test colour combinations out.

For this manicure, the polishes I used were:

  • Base Coat: OPI Nail Envy
  • Top Coat: Essie Speed Setter
  • Quo by ORLY Venice
  • Essie In the Cab-ana
  • Paper Reinforcements (from the Dollar store)

Was half moons with paper reinforcements anyone else’s first nail art technique they learned? I remembering doing them back in the day & feeling like I was a nail art expert. For those of you who are still getting into nail art looking for easy designs… half moons are a great option with endless colour combinations. You can go subtle for more work appropriate designs or go crazy neon! I also love adding polka dots on top of my design for a little extra design.

what do you think of these half moons? What colour combination would you pick? Let me know in the comments below!

Rustic Floral Pattern Nails

Can you never have too many floral manicures in your life? Personally, I don’t think so. We all know how much I adore flowers–from clothes, to shoes, to cellphone cases to my nails, I can never have enough! Recently I found a Rifle Paper Co. phone case at Winners on payday, so I decided to attempt to recreate said pattern on my nails.

My attempt definitely turned out a little more rustic than its inspiration, but I think that is why I love the end result so much!

For this manicure, the polishes I used were:

  • Base Coat: OPI Nail Envy
  • Top Coat: Essie Gel Setter
  • Boho Green Make Up Moonlight
  • Quo by ORLY Breathable Pep in my Step
  • Sally Hansen Miracle Gel Pretty Piggy
  • Sally Hansen MG Pretty Peony
  • Sally Hansen MG Off the Shoulder
  • Essie A-List
  • China Glaze Sun Upon My Skin
  • China Glaze Metro Pollen-tin
  • YSL Vert D’Orient
  • Sally Hansen Insta-dri Thyme is Money
  • Essie First Timer
  • Sally Hansen I ♥️ Nail Art pen in Black
  • Bundle Monster detail brush

I’m kind of excited for Summer because it means I can change up my backgrounds & use outside. How lush does this design look with green grass in the background? Definitely throwing my pictures back to my pre-light-box days with these photos & I’m loving it! Seriously, staged photos are awesome but something about natural light makes your manicures look that much better.

If that doesn’t say Summer, I don’t know what else does! Also I’m never, ever going to get sick of doing floral. Never. How could you ever get sick of something so pretty! Hence why I keep filling my closet with more & more floral clothing pieces. The obsession continues! 🌿🌼🌱

what do you think of this design? Are you feeling Summery? Leave a comment down below & let me know!

SWATCH SUNDAY— Crafting a Layered Green Holo

Happy Swatch Sunday lovelies!

Today is a bit of a different post for me–instead of featuring single polishes on their own today, I’m showing off 3 polishes layered together to create one amazing look!

I’ve been really loving layering polishes together–it’s similar to creating franken shades only instead of mixing everything together, your layering one on top of another. Obviously this could only really work with layering more sheer shades over more opaque ones (which works well with a lot of the Layla Cosmetics hologram effect polishes I own.)

For this particular look I started with 2 base coats of Essie Turquoise & Caicos & then layered a coat of Layla Cosmetics Jade Groove over top. I’ve worn this Holo on its own but found it didn’t have enough of a green/mint pop to it on the nail. By adding some undies, it really showed off the colour I wanted. & then, because I’m absolutely Holo obsessed right now I finished off with a layer of Quo by ORLY Trash Glam (aka. ORLY Sparkling Garbage for my non-Canadian friends!) The end result is a whole lot of holo happening on the nail.

Seriously, this is a distracting amount of sparkle happening on the nail. In the sunshine, it was actually incredible how many rainbows you could see.

I love how you get the linear holo from Jade Groove but then the scattered holo from Trash Glam picks up the light too & it’s absolutely memorizing! I definitely need to find a linear holo top coat so I can transform every polish I own into a Holo Polish too! Let me know what your favourite ones are!

I hope everyone had an amazing Sunday. 💚✨