Pink on Pink Valentine’s Hearts 💗

Hello lovelies. It’s officially one week until Valentine’s Day, so I figured that a good enough time as any to start with a little love-ly nail art. Truth be told, I’m not a huge fan of Valentine’s Day… minus to opportunity to make cupcakes. But I do like the excuse to pull out all of my pink nail polishes at once, so I’m hoping to share a few nail art looks over the next week.

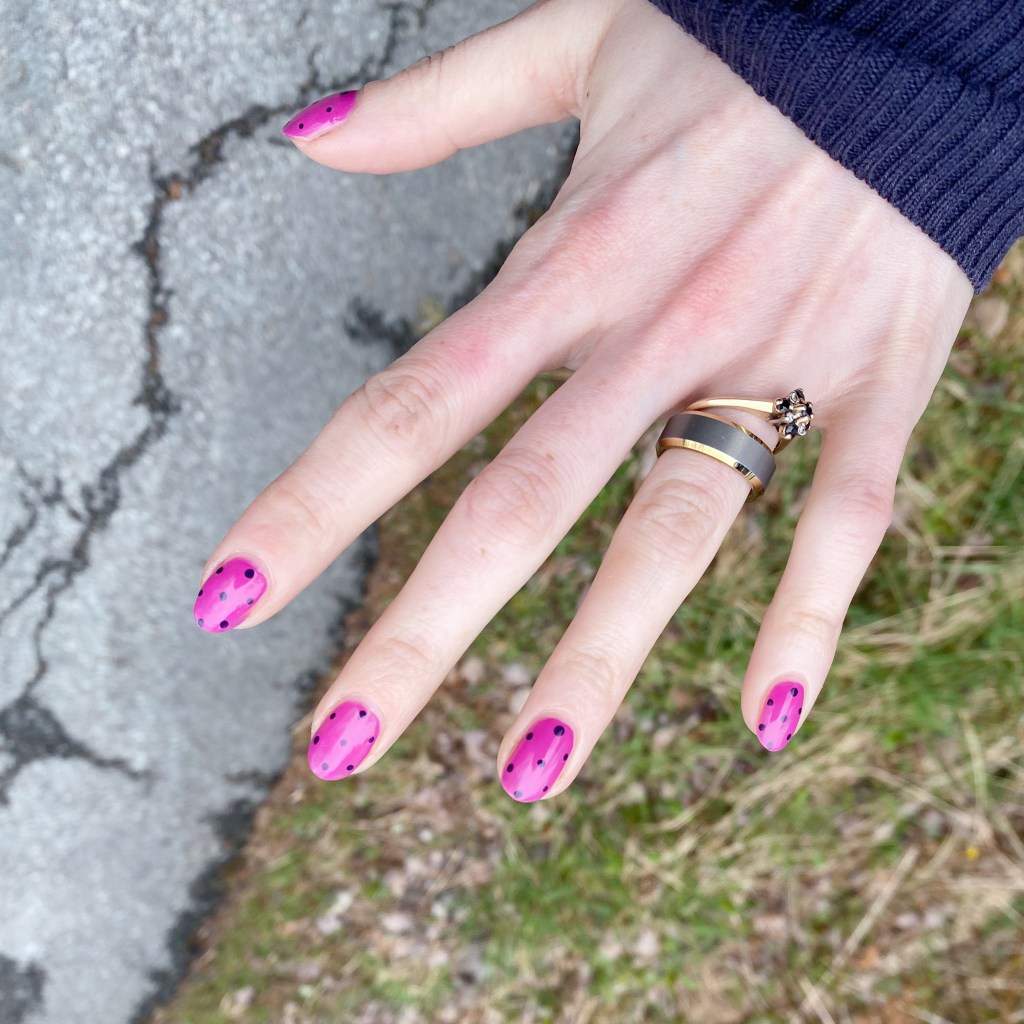
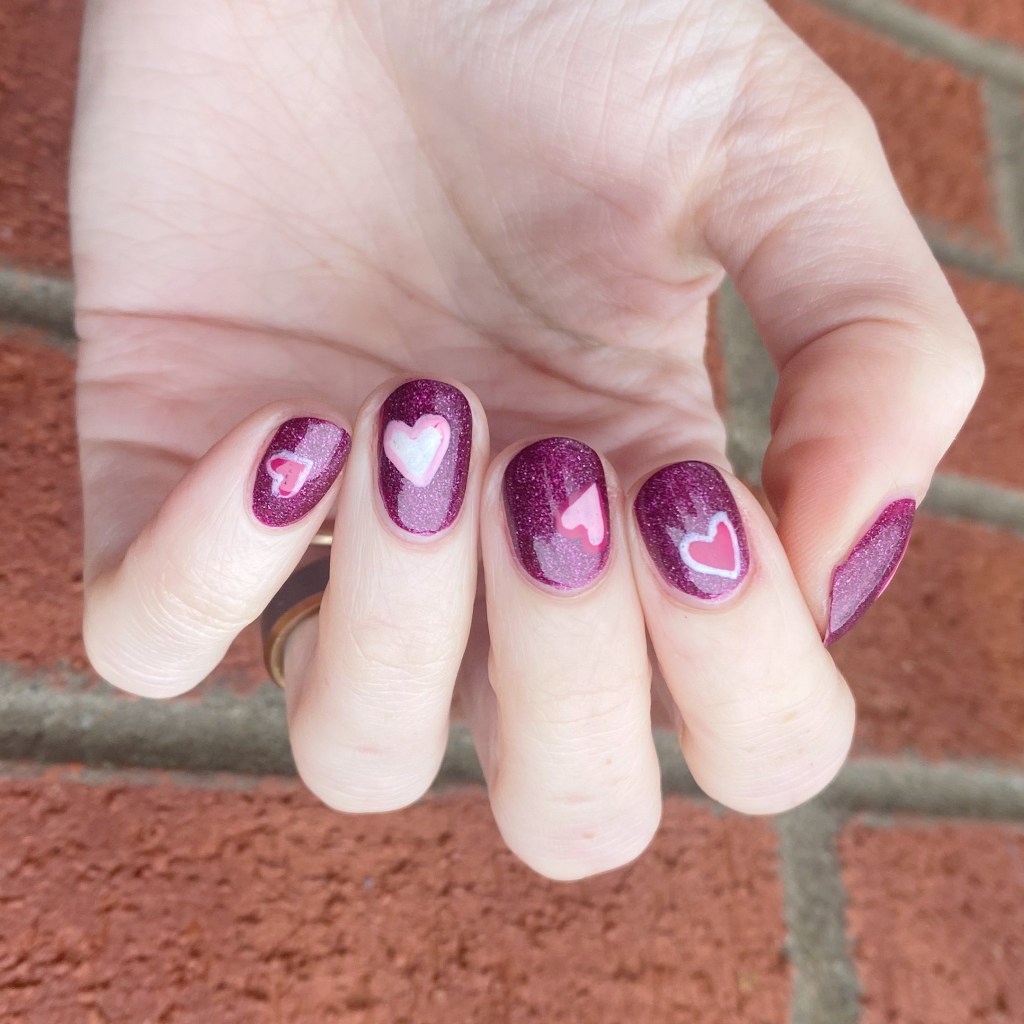
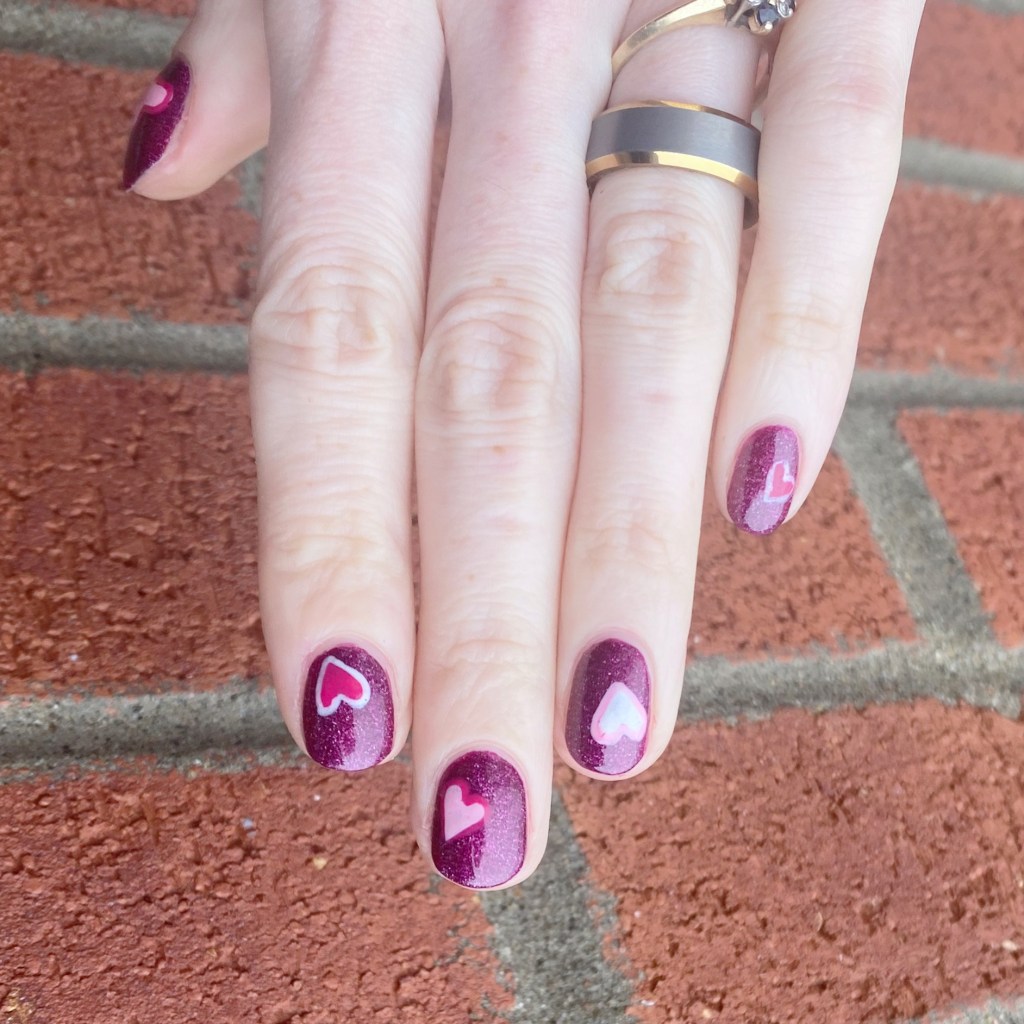
First up, a simple & slightly rustic heart design. I was inspired by my base polish pick, & decided to build my manicure around it.

The polishes I used for this manicure are: 

  • Base Coat: Essie Hard To Resist Glow & Shine 
  • Top Coat: Seche Vite Fast Dry Top Coat
  • OPI DS Extravagance
  • OPI Koala Berry
  • OPI Pinking of You
  • OPI Chiffon My Mi
  • Dotting tool (NailStuff.ca — Dotting Tool Trio)
  • NailStuff.ca Mermaid Tail Nail Brush Trio (11mm Liner Brush)

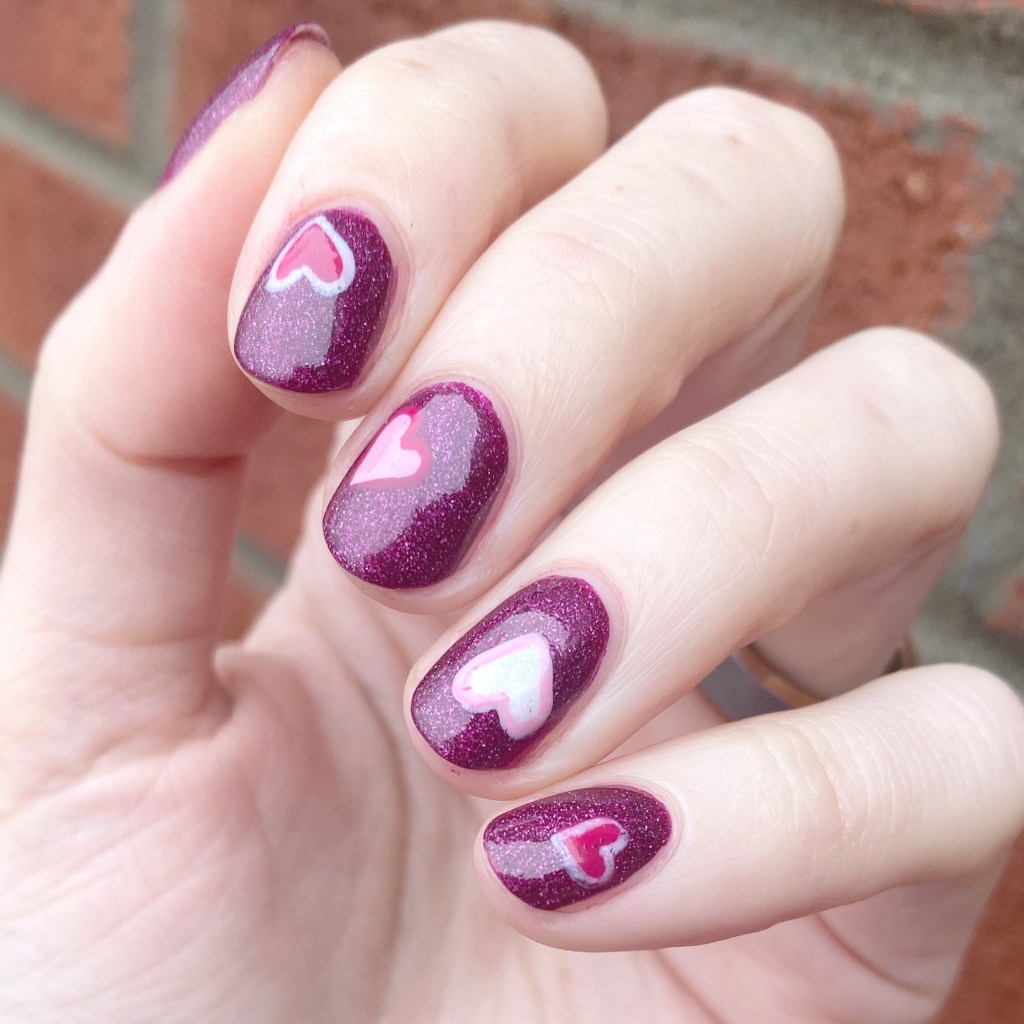
How cute did these little hearts turn out? I feel like free handing hearts can be kind of hit or miss, so I was a bit scared how they would turn out — especially because I was not in the mood to start my design all over again. I did like the hearts just solid colours, but I wanted to try outlining the hearts, & I’m so glad I did because I feel like it made them pop off the nail so much more vibrantly! & they don’t seem so one dimensional. Absolutely adorable.

What do you think about these adorable pink on pink heart nails? Have you been playing around with some Valentine’s (or anti-Valentine’s) Day designs for this year? I’m definitely thinking pink (duh) & maybe a gradient dotticure? I can’t wait to share what design I end up choosing!

♥︎

Nail Art Warriors for Maria (@so_nailicious)

Hello lovelies.

Today’s post is a special one for a very special member of the nail art community. Maria, aka @so_nailicious, has been a huge inspiration in the nail art world for a long time, & a personal nail art inspiration to me since I really started painting my nails. Over the last year, she has been facing some really tough health battles as she was diagnosed with MS, & as a result been forced to stop doing things that once brought her joy… like painting her nails. So Magda (@redheadnails) banded a group of us together so do some very special manicures in her honour, & I absolutely had to jump at the opportunity!

The colours orange & blue were chosen — orange, which is the colour for MS awareness, & blue which is a colour Maria loves. We also went with a “power” theme, to inspire & show off the strength that Maria is showing in her fight against this heart wrenching disease.

The polishes I used for this manicure are: 

  • Base Coat: Essie Hard To Resist Glow & Shine 
  • Top Coat: Seche Vite Fast Dry Top Coat
  • Sally Hansen Xtreme Wear Pacific Blue (the original formula)
  • Sally Hansen Complete Salon Manicure One in a Melon
  • Sally Hansen InstaDri Pump-kid
  • Starrily Vantablack
  • Nailstuff.ca clear stamper & scraper set
  • Essence “Stamp It!” plate
  • Unknown stamping plate (bought as part of a set of Dollarama in my early nail art days)

As I mentioned, I was super proud to do these nails in honour of Maria, as her nails & nail art has been an inspiration of mine for a long time, & I wanted to show even though she may be struggling right now & unable to do one of the things she loves, she’s still inspiring her friends in the nail art community everyday!

Check out #nailartwarriorsformaria on Instagram to see all the other beautiful & empowering manicures!

Hot Pink & Polka Dots

Hello beauties & happy Tuesday! A very, very snowy Tuesday here. The weather definitely cannot make up its mind lately.

Today I have a pretty design to share that I actually did a little while ago, but didn’t get a chance to share. I thought that it would be gorgeous for a pre-Valentine’s Day design, so I wanted to share.

The polishes I used for this manicure are:

  • Base Coat: Essie Hard To Resist Glow & Shine 
  • Top Coat: Seche Vite Fast Dry Top Coat
  • Essie Swoon in the Lagoon
  • Sally Hansen Miracle Gel Blacky-O
  • Dotting tool (I always use mine from NailStuff.ca — Dotting Tool Trio)

Gosh I love a good polka dot design. It’s literally the easiest & quickest nail art I think you can do — & it always looks so put together. This is definitely a great nail art look for anyone wanting fun nails, without wanting to put an hour+ into painting something.

What do you think about this nail art look? Is this a nice prelude to February & the Valentine’s Day looks to come? Let me know all your thoughts down below!

Embracing the Nostalgia with Crackle Nail Polish

Hello lovelies & happy Thursday. I decided to throw things back a bit (& embrace the crazy nostalgia taking over my life thanks to my very own mid-2006 emo playlist) with a fun look featuring a very nostalgic nail polish finish— crackle.

For anyone not around during the early 2010s, crackle nail polishes became huge around 2012, & by 2013 everyone & their mom was coming out with their own version of the crackle (or shatter) effect. Black was the beginning shade I remember being everywhere, followed by a whole assortment of different colours & finishes.

Recently I was going through my stash, & found a bottle of Avon Mosiac Effects Top Coat — aka their version of the crackle nail Polish — & decided to give it a little shake to see if it was still good. Sure enough, the formula is still perfect! So I had to give it a try to see how it looked after all this time.

The polishes I used for this manicure are: 

  • Base Coat: Essie Hard To Resist Glow & Shine 
  • Top Coat: Seche Vite Fast Dry Top Coat
  • Illamasqua Aorta
  • Avon Mosiac Effects Top Coat Black

I still have a couple crackle/shatter shades left in my stash, although most have long since dried up to be unusable. For this look, what you’re seeing is one rather thick coat over my base shade. I waited about 5 minutes for the cracked effect to set before applying my top coat, & I thought the end result was pretty perfect. I prefer my cracks to be larger so you can see more of the base shade underneath.

Is crackle/shatter nail polish going to make a comeback? I don’t know. I feel like these shades are so controversial, even 11 years later. You either love them, or hate them, & obviously I am firmly planted on the love side. I also think it’s a nostalgia thing, as I remember crackle being the first “nail art” trend I really feel in love with.

What do you think? Do you think crackle is due for its revival? Let me know all your thoughts down in the comments below.

Bright & Simple Swirls

Hello lovelies & happy Tuesday! A freaking chilly Tuesday here. We went from it feeling like Winter this weekend, to it feeling like Spring yesterday, right back into a cold snap. My nails are definitely not happy about the back & forth, but I’m trying to keep them looking cute regardless.

Todays look was a really simple one I did last week. I wanted something a little bit bright & colourful, & I was especially feeling Essie Flowerista as my base shade, so this is what I ended up with!

The polishes I used for this manicure are: 

  • Base Coat: Essie Hard To Resist Glow & Shine 
  • Top Coat: Seche Vite Fast Dry Top Coat
  • Essie Flowerista
  • Color Club Art Club Striper Passion Flower

I really wanted to do some nail art over my base, but I was running short on time. However — I thought these wavy lines using my Color Club Striper was perfect! I thought about doing them in more than one colour, but I think the purple over the fuchsia is more than perfect. I like the simplicity. It’s a great pop of colour which is exactly what you need when it’s still January.

What do you think about these bright & simple swirls? Are you feeling the simplicity of this design or do you prefer nail art that is more complex?

Let me know all your thoughts in the comments below. I love when people share their thoughts on my nail art!

Have a lovely Tuesday! 🌸