Happy 3rd Birthday Coffee & Nail Polish


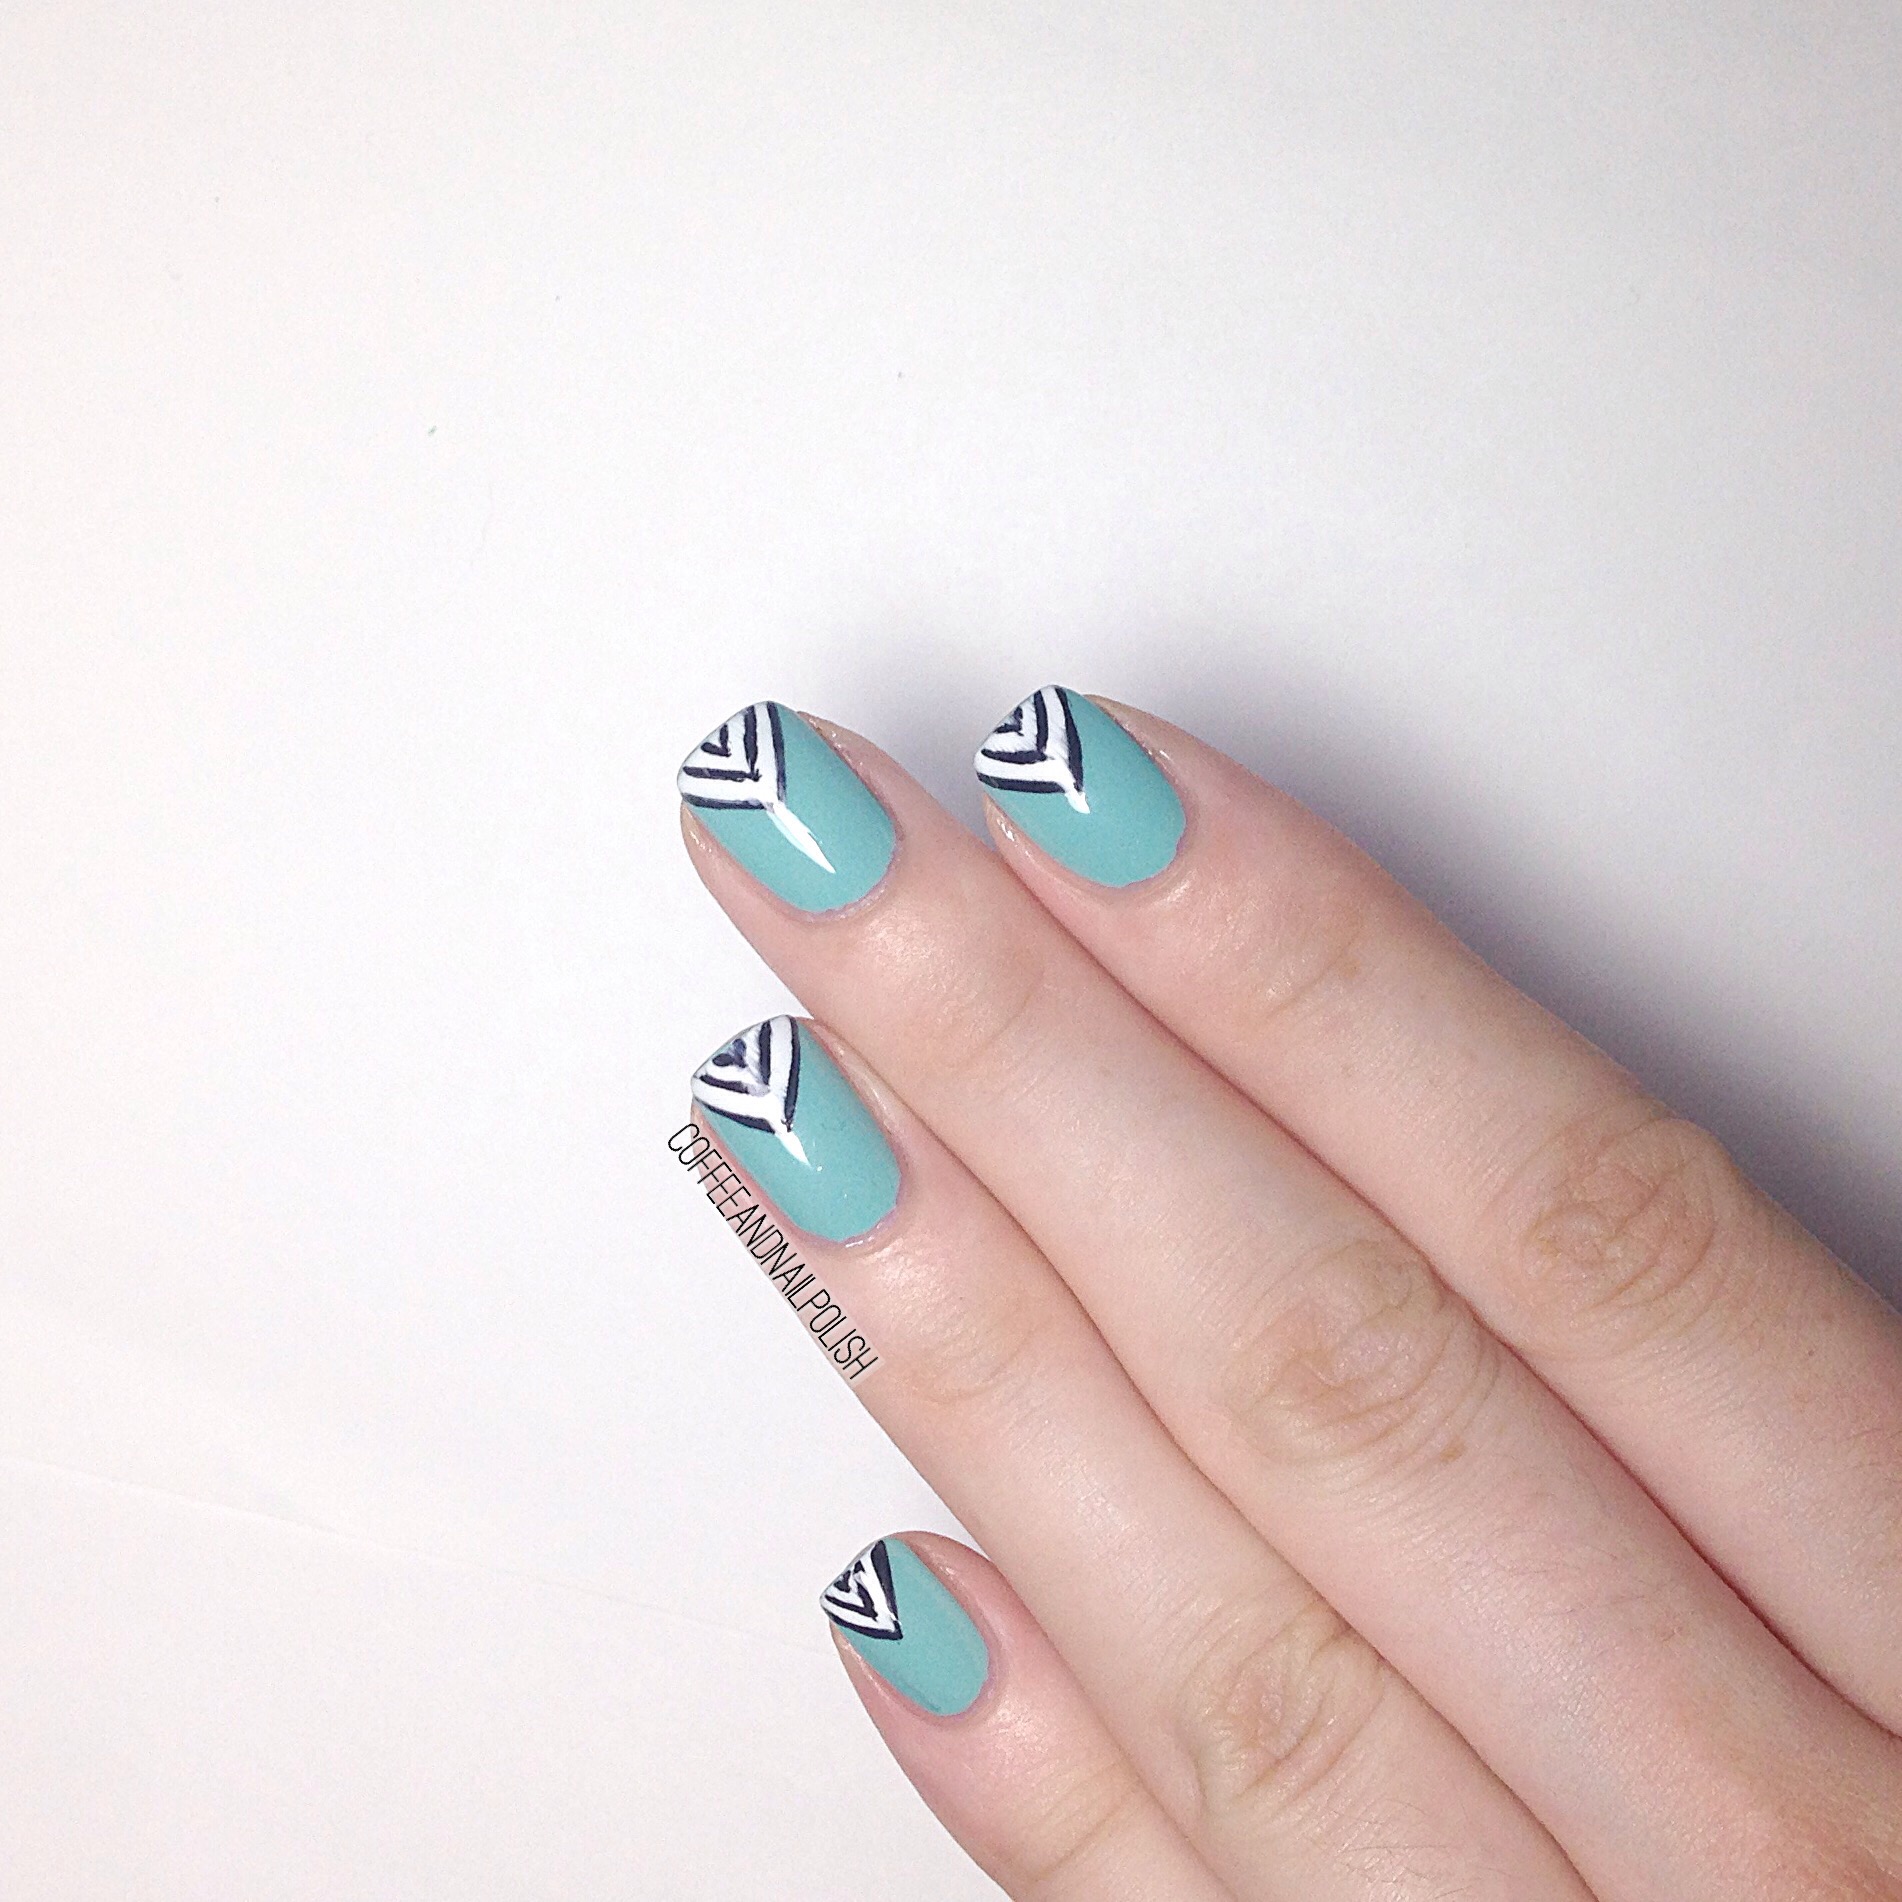
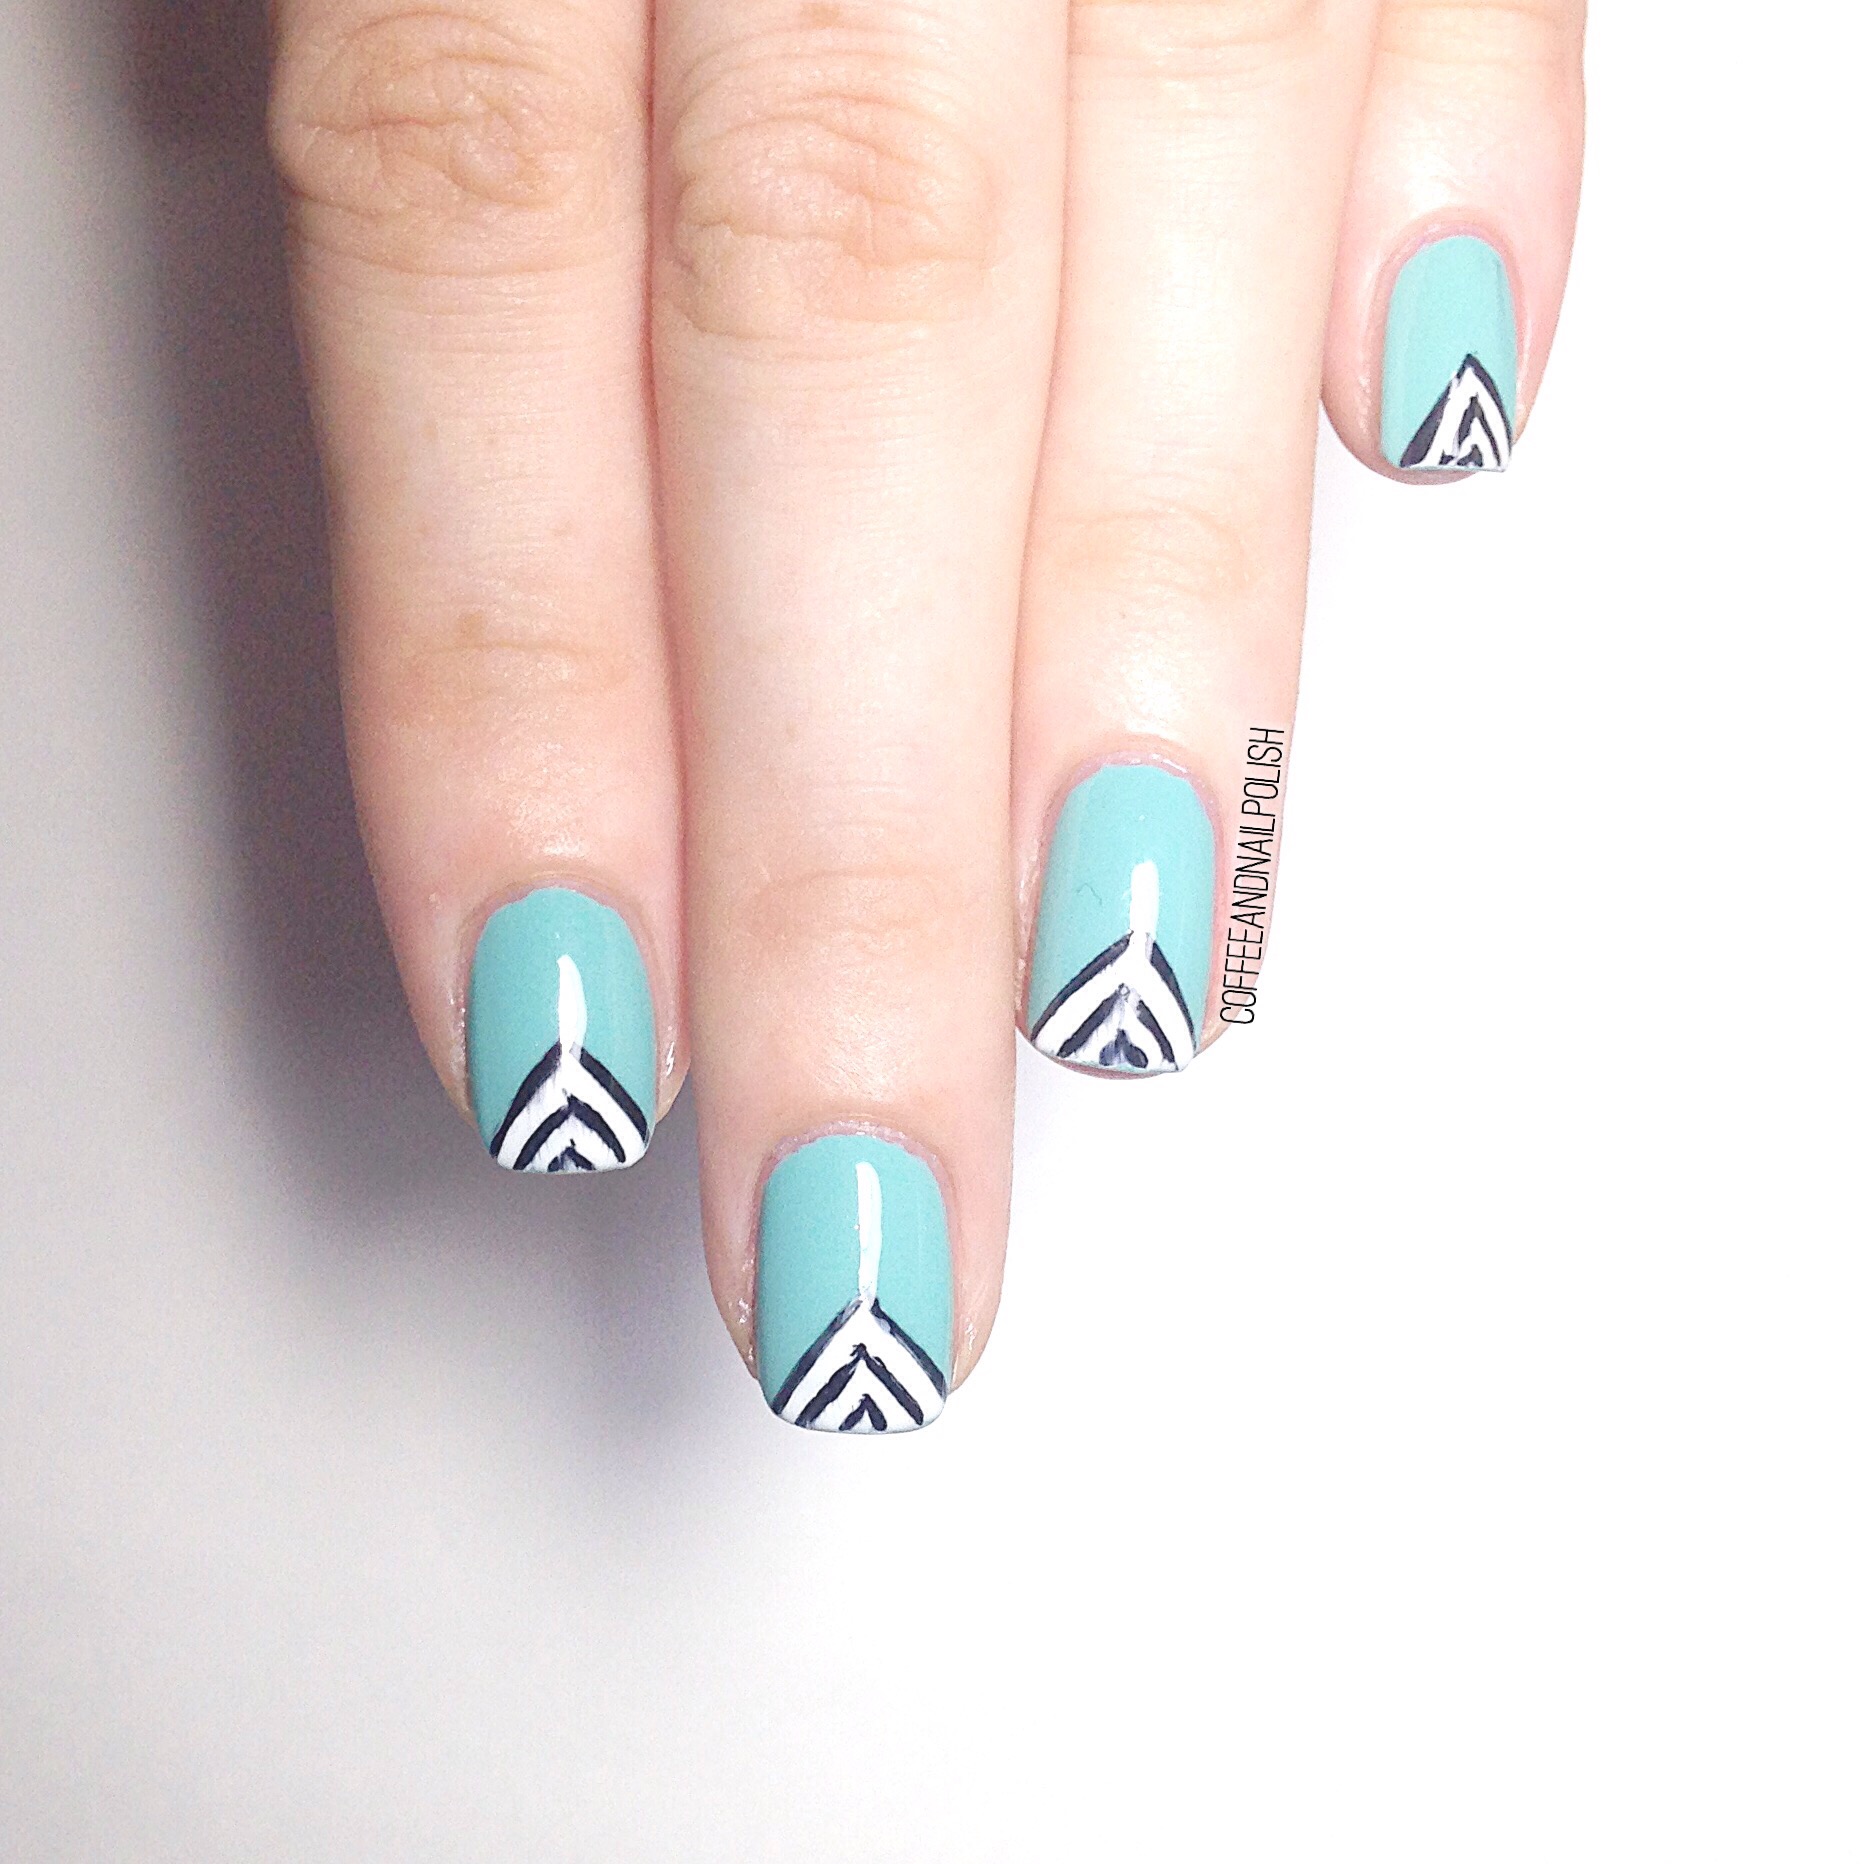
Today is a very special day… it’s Coffee & Nail Polish’s 3rd blog birthday! 🎈 So in honour of the occasion, I decided to celebrate with a gluten-free cupcake & a recreation of one of my favourite early manicures–chevron tips.

Three years, how crazy is that?! When I first started my nail blogging adventure I was still learning about nail care, nail art & taking pictures. Back then I was still using my Blackberry for less than stellar pictures, & hadn’t yet learned the magic powers of cuticle oil. I was just a girl who liked painting her nails & decided to share pictures with the whole internet instead of just her Facebook friends. 3 years, a bit better phone, & countless bottles of cuticle oil later here we are! 11.2k followers on Instagram, featured in Nail It magazine 3 times, & the occasional chance to swatch & review polish brands I love. It’s been an awesome amazing journey.
I cannot even begin to explain how much it means to me that you out there read and follow this blog. So to anyone who had ever read this blog, commented on my posts, or decided to follow: thank you.  You helped make my nail art dreams come true. I used to joke that the goal was for someone to want to send me free nail polish. But honestly, having people love my designs enough to recreate them? That’s how I know I’ve made it. 💜

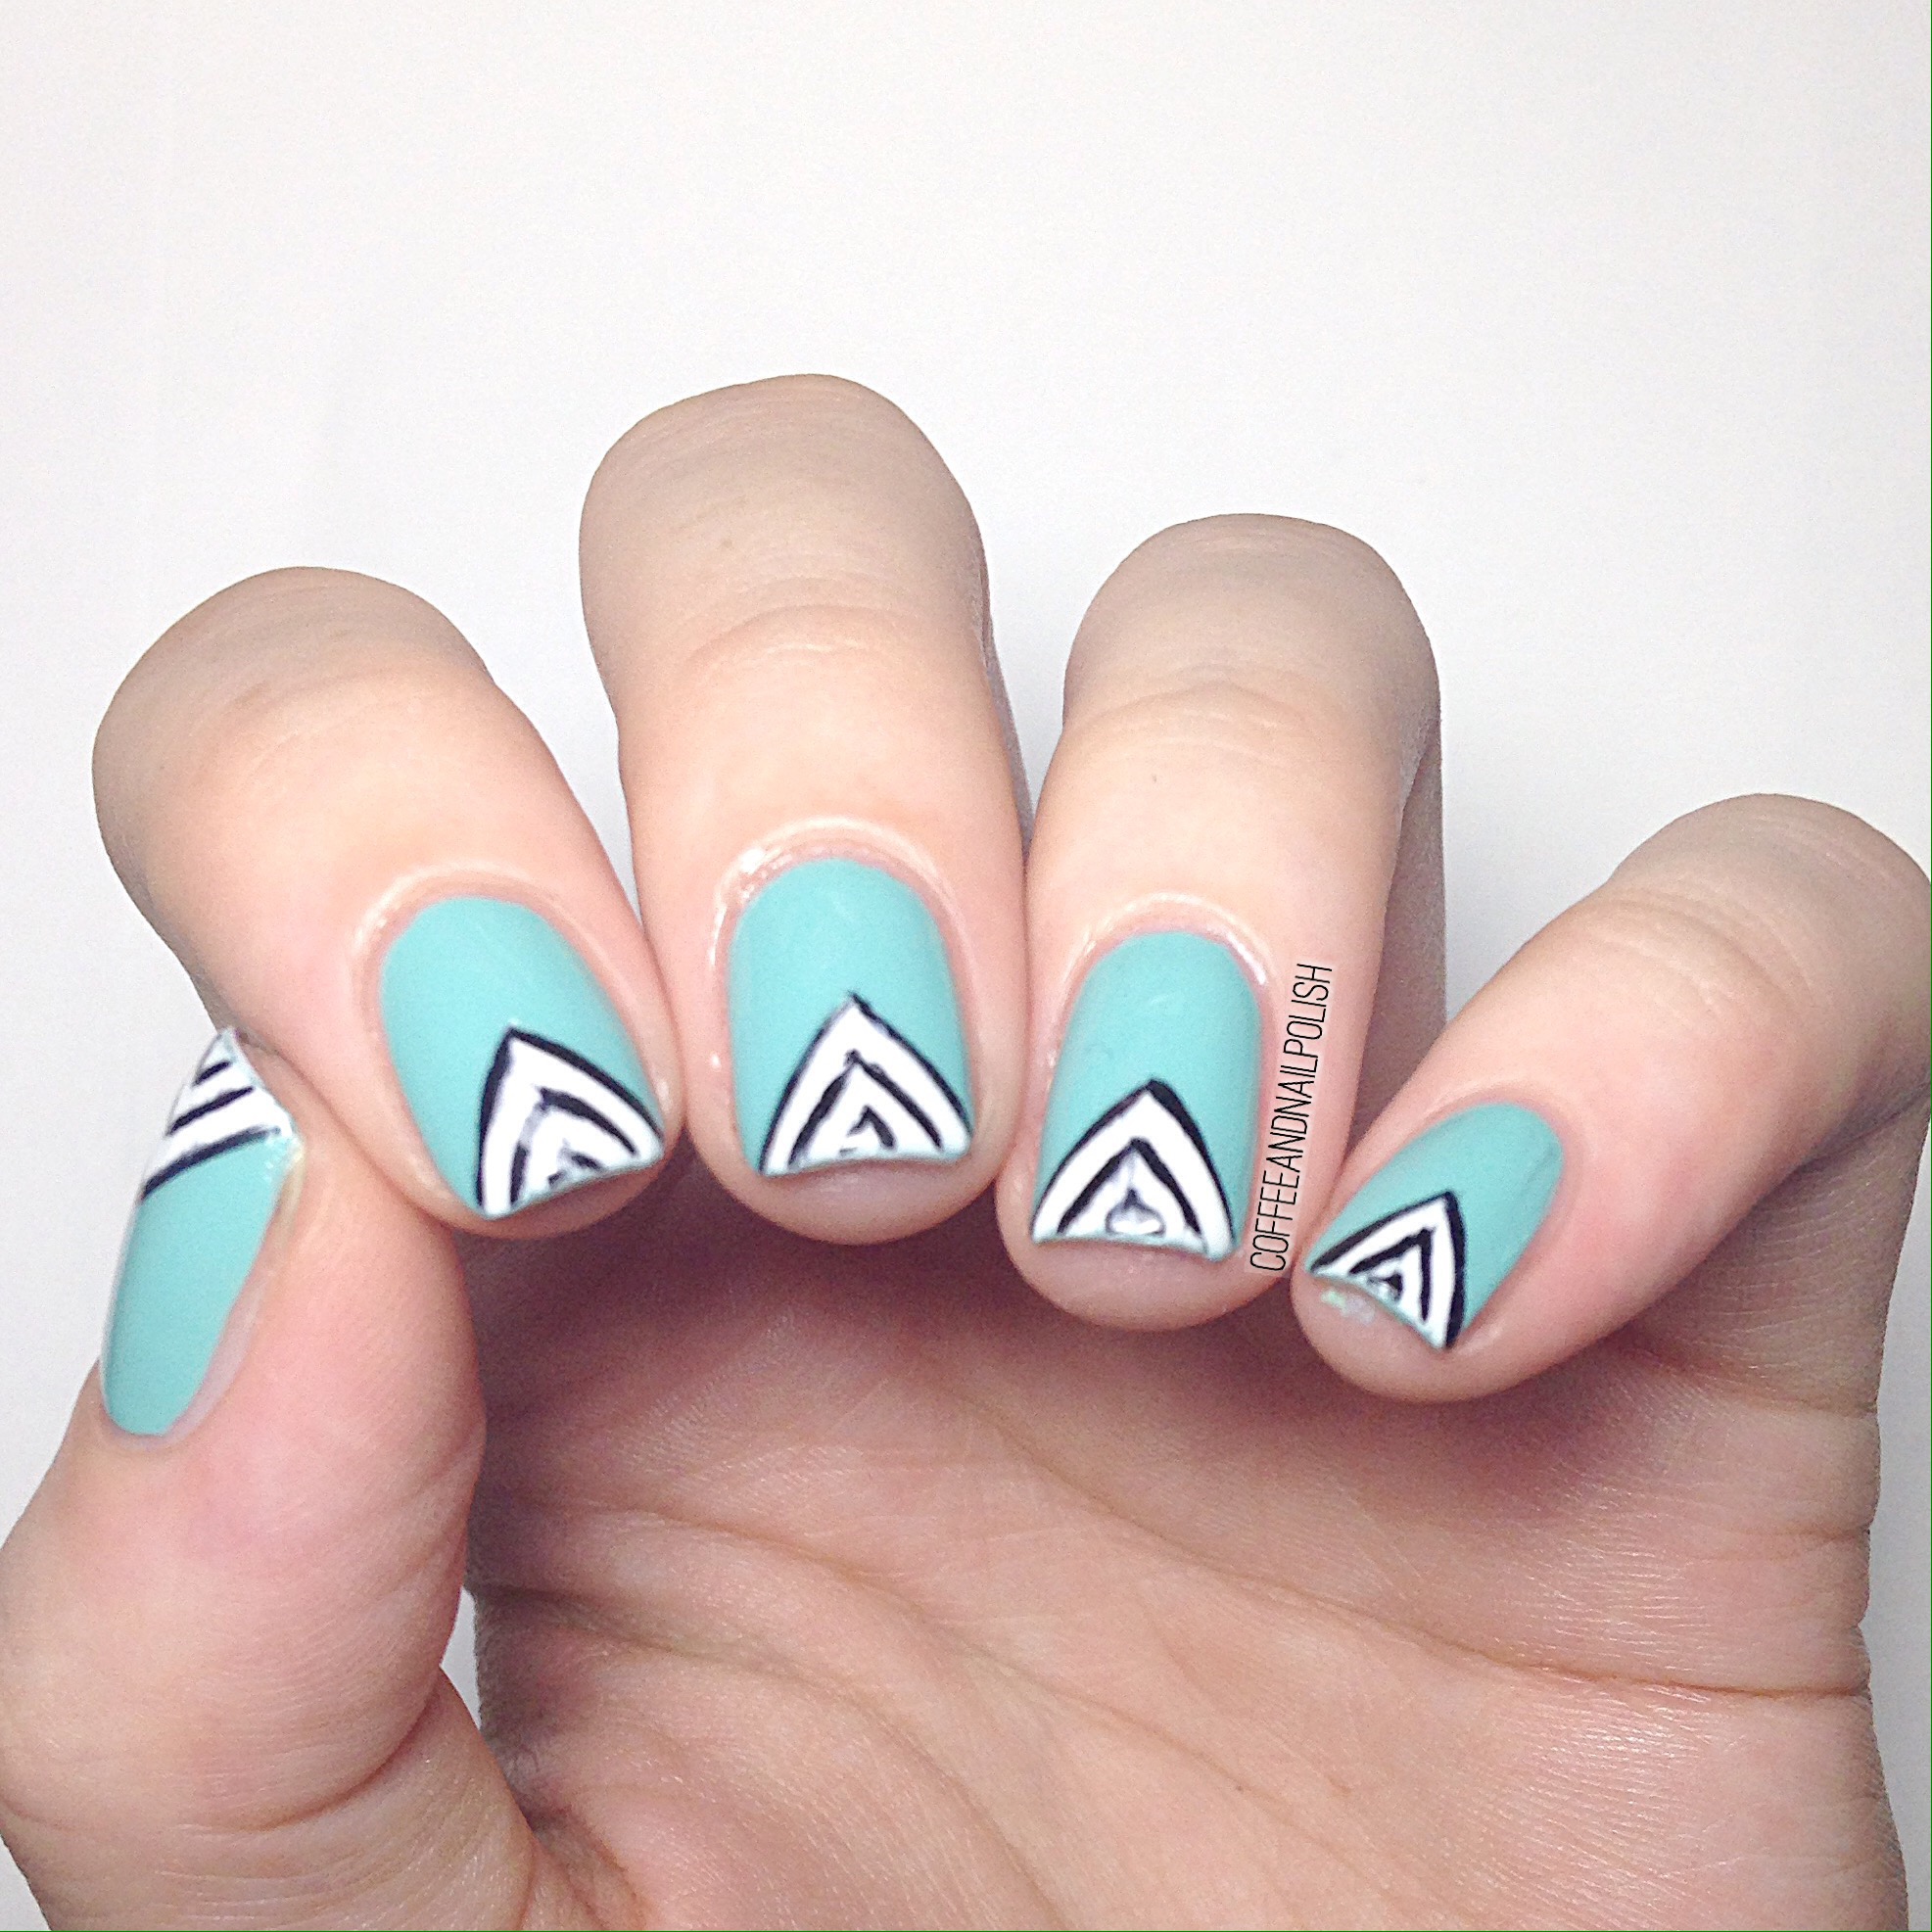
So enough mushy stuff! In honour of this special anniversary, I wanted to go back to the beginnings & recreate one of my favourite manicures from  the early days: Green Chevron Tips. This was my first foray into chevrons, way before my obsession with chevron moons exploded. I remember creating them (freehand!) & being so excited about how well they turned out. For my recreation, I obviously still had to free hand these… & still feeling pretty proud of how these turned out! 

For this manicure I used:
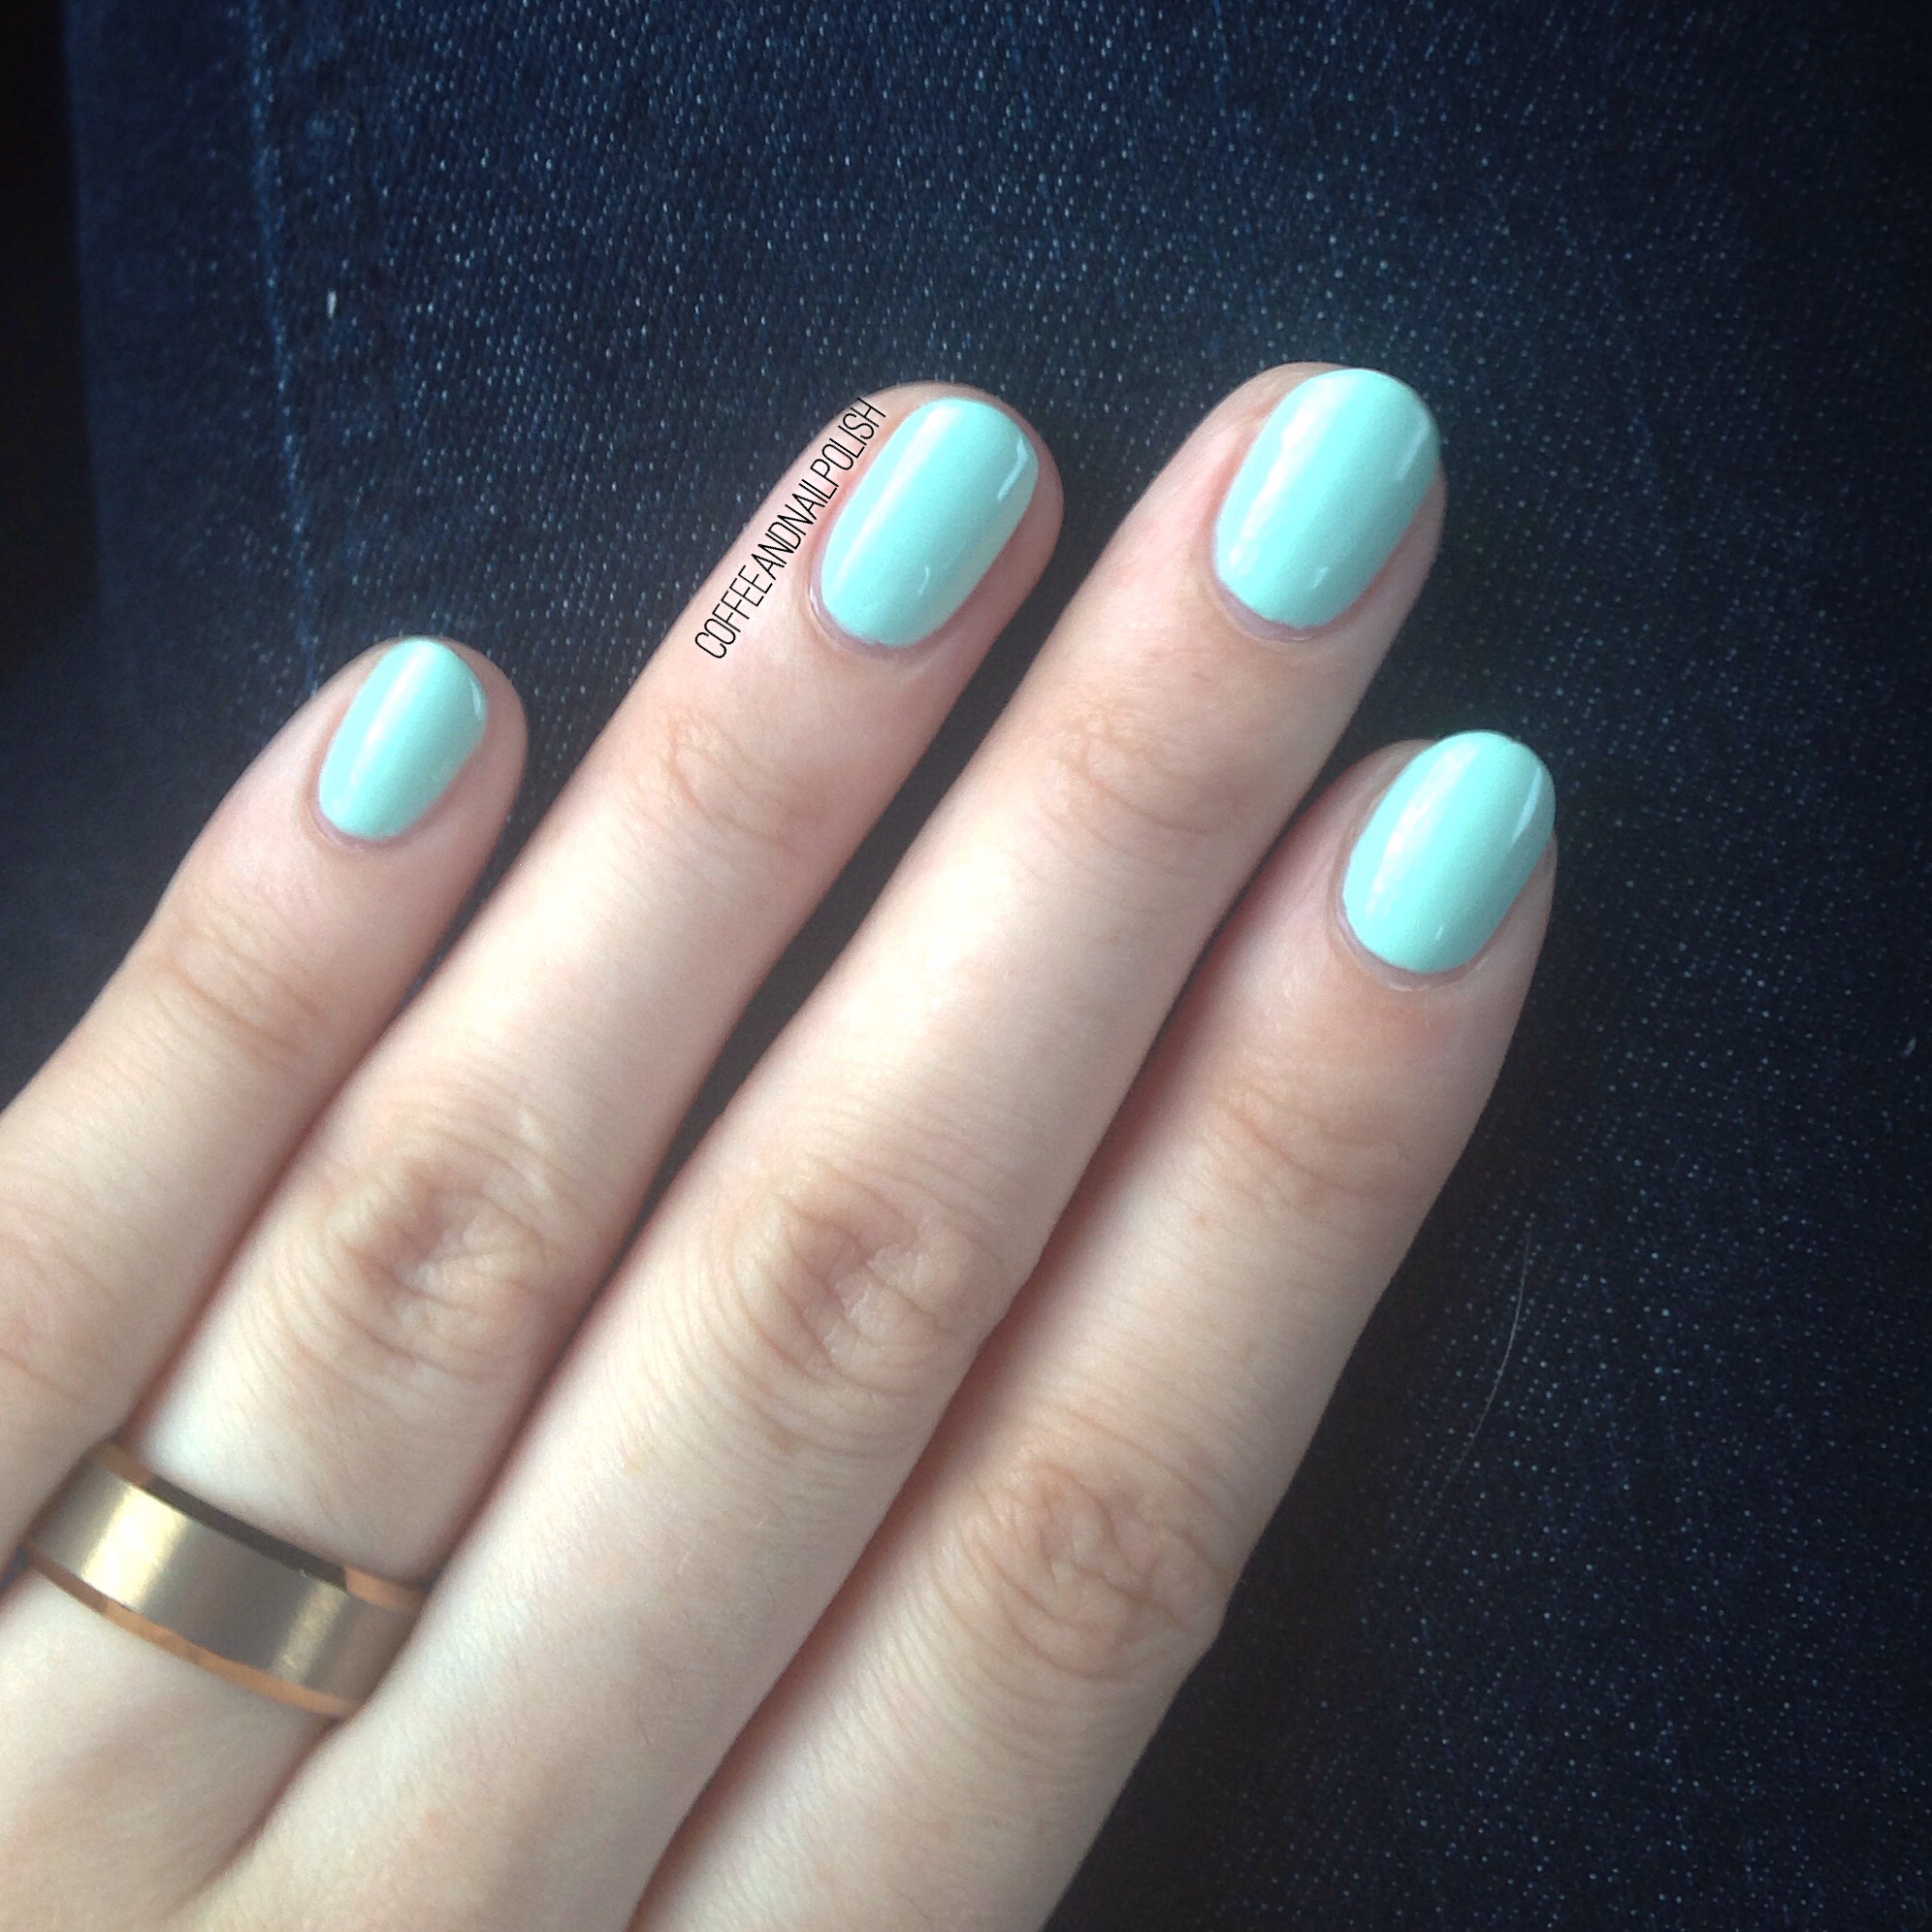
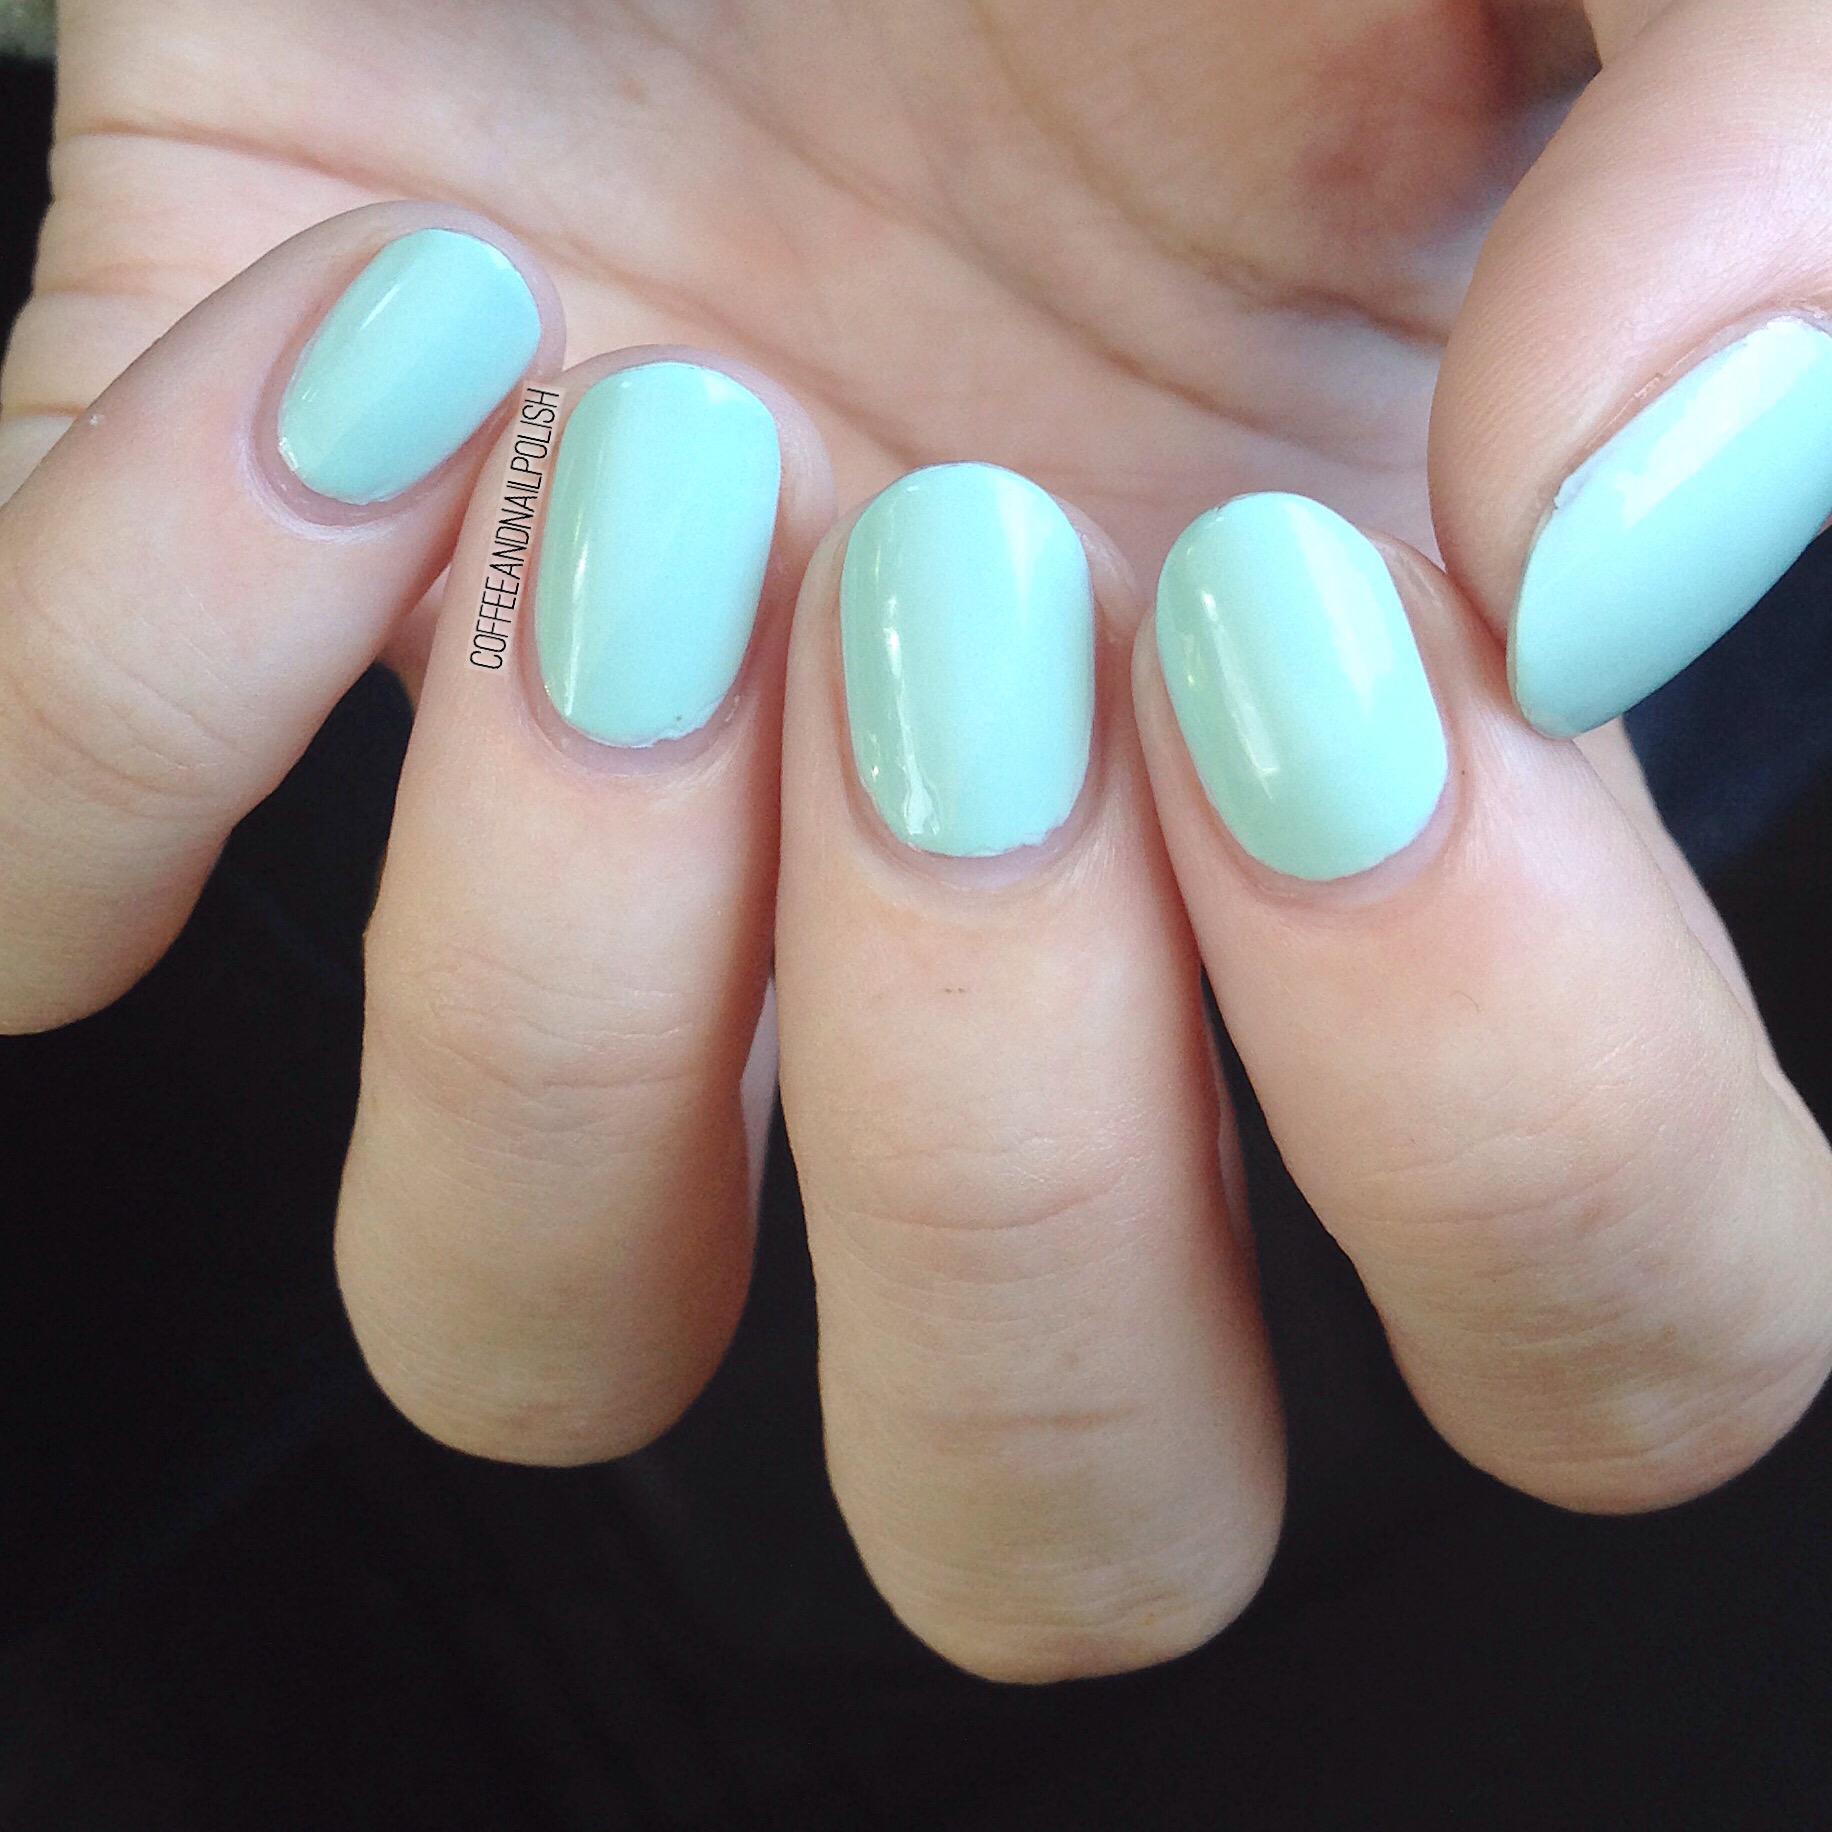
  • ORLY Gumdrop
  • Kiss Products Nail Art Striper in White
  • Kiss Products Nail Art Striper in Black
  • Cutex Quick Dry Top Coat

What do you think of my special recreation? Do you think it lived up to the original?  As always, let me know what you think in the comments below!

Thank you so much for 3 awesome years, & here is many more manicures to come! 💜

My Spring Polish Picks


If you’re like me, your love of nail polish may run into barriers such as money & time. Being a new Mom, I can’t afford to go crazy on buying nail polish like I used to, because you know… diapers. That means when I do want to buy polish, I have to make sure it is really something special. So instead, I’ve been “shopping” my own stash instead of buying new polishes.

In that spirit, I decided to go through & pick my favourite polishes for Spring from the shades I already own! It took me a while to pick my personal favourites from all the polishes I own, but these are all shades I can see myself reaching for in the coming months, & screams Spring to me!  I’ve listed the seasons these polishes were released, but I know some are part of the permanent core collections.

Continue reading “My Spring Polish Picks”

Joe Fresh Gel Look in Key Lime Pie 7 day test. 

As I teased in my last post, I wanted to test out the durability of the new Joe Fresh Gel Look polishes. They boast up to 14 day durability, so I wanted to see how long I could get the polish to last on my nails. I used to never wear my polish more than a day or two, but now that life has gotten busier I need a polish in my life that lasts between mommy mani time! 

Day one:

From my original post, Key Lime Pie on the first day. For those who don’t remember from my previous post, I used three coats for application, with no base or top coat required. 
Day two:

After a day of wear, (and many diaper changes on top of other Mummy duties!) polish still looked  the same as the day before. 
Day Four:

After four days of wear, there was minimal tip wear, most notably on my thumb and pointer finger. Also you can really notice the growth at my cuticles after four days. 
Day Seven:

After 7 days of wear there is noticeable chipping on my pointer, as well as serious tip wear on my other fingers. You can also see how much growth is at the cuticle after a week of wear. My other (dominate) hand saw similar chipping, although more. 

The chipping was enough for me that I wouldn’t want to go longer than I did (not to mention the growth at the cuticles). That’s not to say it couldn’t last longer, but for this experiment 7 days was my cut off. And for a polish that requires no base or top coat, I thought that was pretty impressive!

As mentioned in my previous post, these Joe Fresh Gel Look polishes can be found at your local Loblaws or Superstore for $5.

SWATCH POST: Joe Fresh Gel Look polishes

Hello loves, it’s been a while!

For those who don’t follow me on Instagram, I gave birth to our son last week so I’ve been spending the last little while snuggling with little Bubs and being a Mommy (with naked nails!) But I finally got a minute for my nails, which was perfect because I just so happened to receive these brand new Joe Fresh Gel Look polishes to test out!

The colours I received for review  were Cotton Candy, Raspberry Tart and Key Lime Pie. These polishes are designed to last as well as gel polish, without requiring a UV Light, base coat or top coat. As you can see from the release that came along with my polishes, they boast that this polish can last up to 14 days! I’ll have a second post coming where I review the lasting power of the polish to see how long it lasts for me.

For my below swatches, I applied my polish as directed with no base coat and no top coat.


Continue reading “SWATCH POST: Joe Fresh Gel Look polishes”

Mani Swap with @polished_yogi

Hello Lovelies! I meant to share a couple of mani swaps I did earlier in the week, but work and life (and now sickness) got in the way. Better late than never though, right? 

First up is the mani swap I had the pleasure of doing with @polished_yogi! Stefanie is one of the super talented ladies I’ve made friends with on Instagram, so I was super excited to get to swap with her. 

For this mani swap, I recreated Stefanie’s adorable little hedgehogs and she recreated my recent pink and chevron mani. 


The polishes I used for this manicure were:

  • Revlon Minted
  • OPI How Great is you Dane
  • Essie Moccachino
  • Essie Caoco Karma
  • Essie Take it Outside
  • Sally Hansen I 💗 Nail Art pen in Pink
  • Sally Hansen I 💗 Nail Att pen in Red
  • Essie Good to Go
  • Butter London Matte top coat. 
  • Small nail art brush from Born Pretty. 

Words cannot begin to describe how much I love this mani. Those cute little hedgehogs…. Oh how I love them! I didn’t want to take this mani off at all. I also think it’s a perfect start to my Valentines Day Nails. 

Stay tuned because I have another mani swap to share with you!