Rustic Floral Pattern Nails

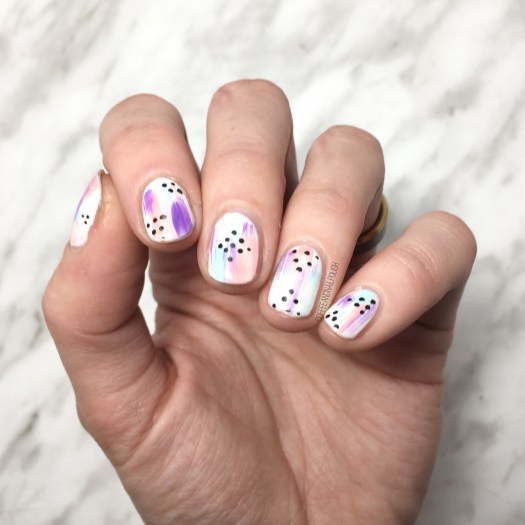
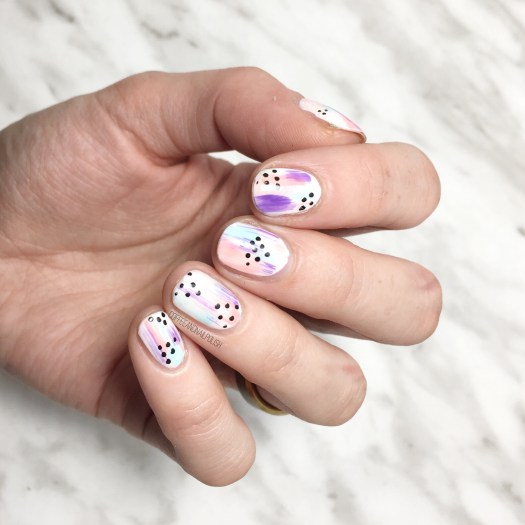
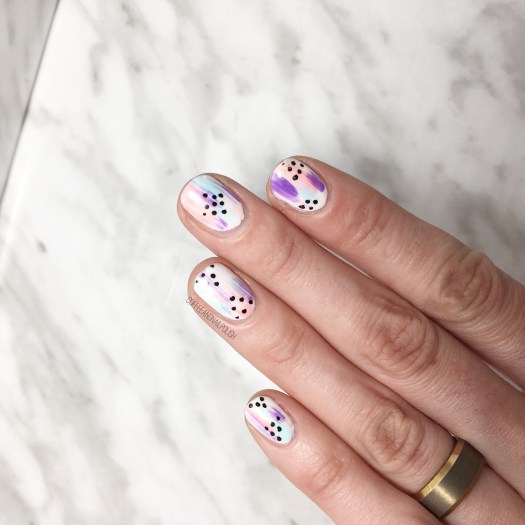
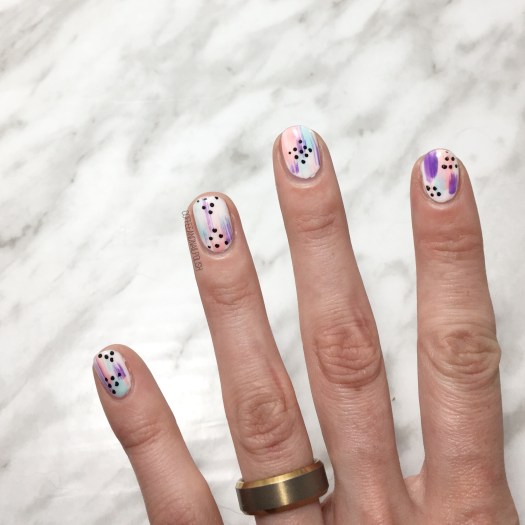
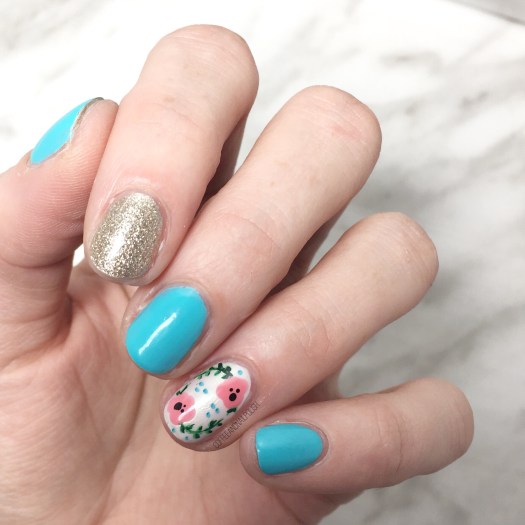
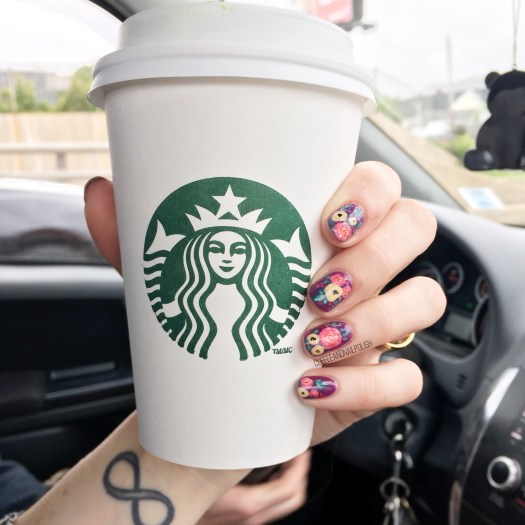
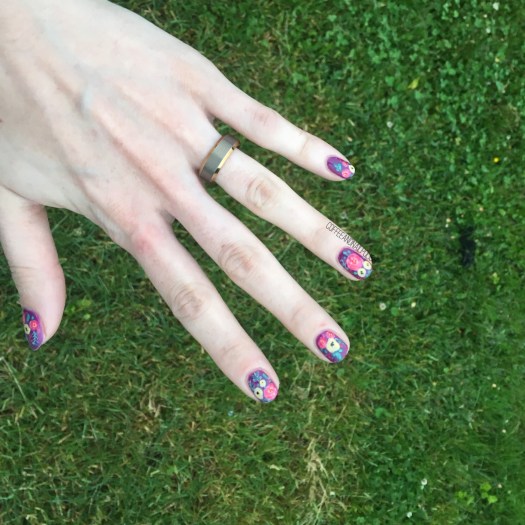
Can you never have too many floral manicures in your life? Personally, I don’t think so. We all know how much I adore flowers–from clothes, to shoes, to cellphone cases to my nails, I can never have enough! Recently I found a Rifle Paper Co. phone case at Winners on payday, so I decided to attempt to recreate said pattern on my nails.

My attempt definitely turned out a little more rustic than its inspiration, but I think that is why I love the end result so much!

For this manicure, the polishes I used were:

  • Base Coat: OPI Nail Envy
  • Top Coat: Essie Gel Setter
  • Boho Green Make Up Moonlight
  • Quo by ORLY Breathable Pep in my Step
  • Sally Hansen Miracle Gel Pretty Piggy
  • Sally Hansen MG Pretty Peony
  • Sally Hansen MG Off the Shoulder
  • Essie A-List
  • China Glaze Sun Upon My Skin
  • China Glaze Metro Pollen-tin
  • YSL Vert D’Orient
  • Sally Hansen Insta-dri Thyme is Money
  • Essie First Timer
  • Sally Hansen I ♥️ Nail Art pen in Black
  • Bundle Monster detail brush

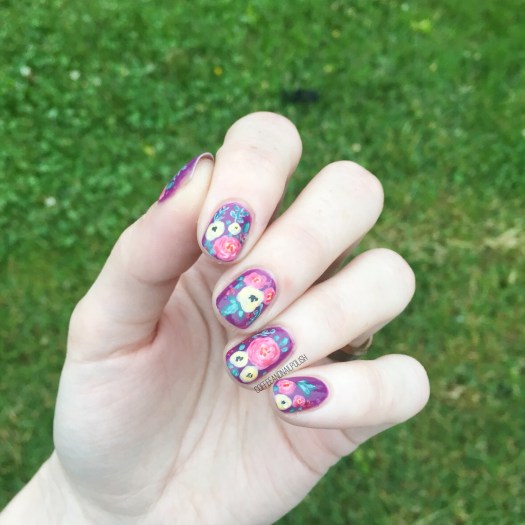
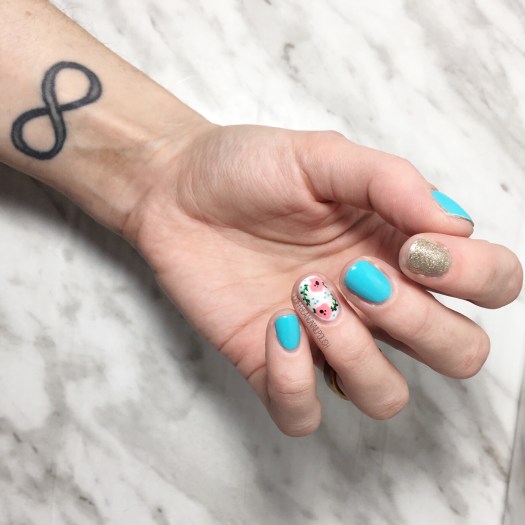
I’m kind of excited for Summer because it means I can change up my backgrounds & use outside. How lush does this design look with green grass in the background? Definitely throwing my pictures back to my pre-light-box days with these photos & I’m loving it! Seriously, staged photos are awesome but something about natural light makes your manicures look that much better.

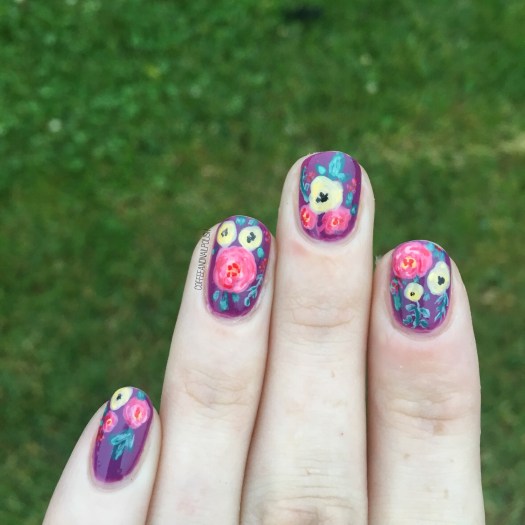
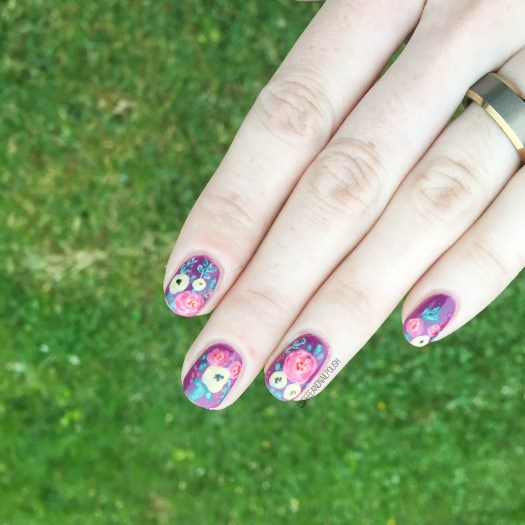
If that doesn’t say Summer, I don’t know what else does! Also I’m never, ever going to get sick of doing floral. Never. How could you ever get sick of something so pretty! Hence why I keep filling my closet with more & more floral clothing pieces. The obsession continues! 🌿🌼🌱

what do you think of this design? Are you feeling Summery? Leave a comment down below & let me know!

Pastel Dry Brush & Polka Dots

Happy Tuesday lovelies! If it’s possible for the Tuesday after a long weekend to be happy. I mean, I worked 2/3 days of this long weekend so I’m not even sure what a long weekend is anymore! But that’s okay… I’m feeling minuscule-ly better & I have a fun new manicure to share with you.

Today’s design is actually inspired by a design from a very long time ago! Okay maybe it was only 3 years ago, but it feels like forever since my nails were that kind of amazingly long. Last time, my polish picks were more in the neon family, so I decided this time to stick to more pastels. & oh yes, do I love how the colours went together!

For this design, the polishes I used were:

  • Base Coat: Quo by Orly Breathable Kiss Me, I’m Kind
  • Top Coat: Seche Vive
  • Wet n Wild Clear Polish
  • Sally Hansen Complete Salon Manicure Let’s Snow
  • Sally Hansen Miracle Gel Ocean Daze
  • Sally Hansen Miracle Gel Bourbon Babe
  • Color Club Pucci-licious
  • Sally Hansen I ♥️ Nail Art pen in black

Dry brush is such a fun technique to create on the nails, because depending on the look you’re going for you can use a clear polish or smudgy top coat to blend your colours together & let dry for a few minutes & use a non-smudging top coat to keep the look of your dry brushing more in tact. I wanted to create a more blended look, so I applied a coat of Wet n Wild’s clear polish over top, & brushed it a few times so the shades would blend together better. In this case, it’s good to smear your design. I also tend to do this with other nail art like gradients or Saran Wrap marbles, but I want to colours to blend together as much as possible.

I’m loving the vibrancy of these shades. They remind me of Summer & I love Summer. Suddenly wishing I could find a bikini with a similar dry brush & polka dot pattern on it. Or maybe a dress… something fun & Summery I could wear on more than just my nails.

what do you think of these pastel dry brush & polka dot nails? Is this a look that you would wear for summer? Share your thoughts down in the comments below!

Floral & Gold Nails inspired by @thelittlecanvas

Happy Saturday! & Happy Royal wedding day! Who else was up early watching all the Royal wedding coverage? The Bubs had me up at 5:30am, but I was already planning on getting up to watch coverage of the event.

I don’t have royal themed nails to share with you today, although personally I think this floral design would be perfect for any wedding! Today’s design was inspired by a manicure @thelittlecanvas posted back in March. I loved everything about it (Alaina always does the prettiest accent nail designs!), so naturally I had to recreate. Plus it was an opportunity to pull out one of my favourite vibrant blues that I haven’t worn in a while.

For this manicure, the polishes I used were:

  • Base Coat: Nailtek 2
  • Top Coat: Seche Vive
  • ACO by Ardene Whacky
  • OPI My Favourite Ornament
  • OPI Chiffon My Mind
  • Sally Hansen Miracle Gel Pretty Piggy
  • Sally Hansen Miracle Gel Super Charge
  • Essence The Green & The Grunge
  • Sally Hansen I ♥️ Nail Art Pen in Black
  • Bundle Monster detail brush
  • Bundle Monster large & small dotting tools

I love that event though this is a relatively easy design to create, the combination of everything just makes your nails look so fancy. Plus they look way more complicated than they actually are. I’m still trying to find more floral designs to do that aren’t just my typical roses that I can pull out when I’m feeling floral on my nails. Which, lets be honest, is 95% of the time.

What do you think of this floral? Do you think I stayed true to my inspiration? & if you’re on the hunt for new nail art inspiration & haven’t already discovered Alaina, definitely check out her Instagram & blog because she always come out with the most amazing patterns & designs!

Vibrant Colour Blocking

Good Morning lovelies & Happy Saturday!

I don’t know how the weather is where you are, but here in Halifax they’re calling for lots of sunshine over the next little while & I couldn’t be more exciting. I’ve worn dresses for the last few days, & I’m pretty dedicated to keeping my no pants streak going. Obviously, my cheery mood is translating to my nails because I’m all about bright & colourful nails! Today I’m showing off a colour block design done using a few vibrant polishes & nail vinyls.

For this manicure, the polishes I used were:

  • Base Coat: Nailtek 2
  • Top Coat: Seche Vive
  • Sally Hansen Miracle Gel In The Sheer
  • Essie Splash if Grenadine
  • Essie All the Wave
  • OPI I Eat Maine-ly Lobster
  • China Glaze Sun Upon My Skin
  • Xroma Polish & Vinyls Mosaic Stencils
  • Dotting Tool

Oooooh I love so much how these colours go together. This combo is feeling very 90s to me for some reason, & I love it! So blinding, which is perfect because I just bought brand new (giant) sunglasses. 🕶 To me, this is just the perfect bright design… the colours, the pattern. I’m seriously in love with everything about it! Plus I feel like these colours are perfect for making me look way more tanned than I actually am. & when you spend 10+ hours inside, you’ll take any hint of a tan you can get!

What do you think of this colour block design? Would you rock this pattern on your nails? What is your favourite nail polish shade combination? Share all your thoughts down in the comments below & let me know what you’re wearing on your nails for the weekend! 💅🏻☀️🌵

Beachy Gradient Nails

Happy Thursday lovelies! Who else can’t believe this week (month… year…) is speeding by as quickly as it is? Seriously, wasn’t it just Easter?

Today I’m sharing a recent gradient that is giving me beachy vibes! 🏝 The colours for this design was inspired by a recent trip to David’s Tea (for my mid-afternoon matcha fix) & their Spring colour scheme. I was loving all the gradients & the beautiful shades that I knew I had to create a gradient on my nails ASAP.

For this manicure, the polishes I used were:

  • Base Coat: Nailtek 2
  • Top Coat: Essie Gel Setter
  • Sally Hansen Miracle Gel Bourbon Babe
  • Sally Hansen Miracle Gel Sweet Tea
  • Sally Hansen Xtreme Wear Babe Blue
  • Sally Hansen Xtreme Wear Royal Hue
  • Icing Stores Mermaid Mint Shimmer
  • Latex Free Make Up Sponge
  • Edge Perfection Cuticle Barrier

Seriously, how fun are these? I loved the gradient just on its own, but adding the shimmer from Icing Mint Mermaid Shimmer really brought it over the top. Also I’m so happy with how the blend turned out in this design. Considering how awful my beginner gradients just to look (mostly because I was terrified of having to clean polish off my hands!) I’m really, really happy with them now.

Also these totally make me want to go to the beach. Hopefully it will be warm enough for those days soon enough!

What do you think of this design? Does it remind you of the beach? What are your favourite gradient tips & tricks? Share all your thoughts down in the comments below!