Fall Drag Marble

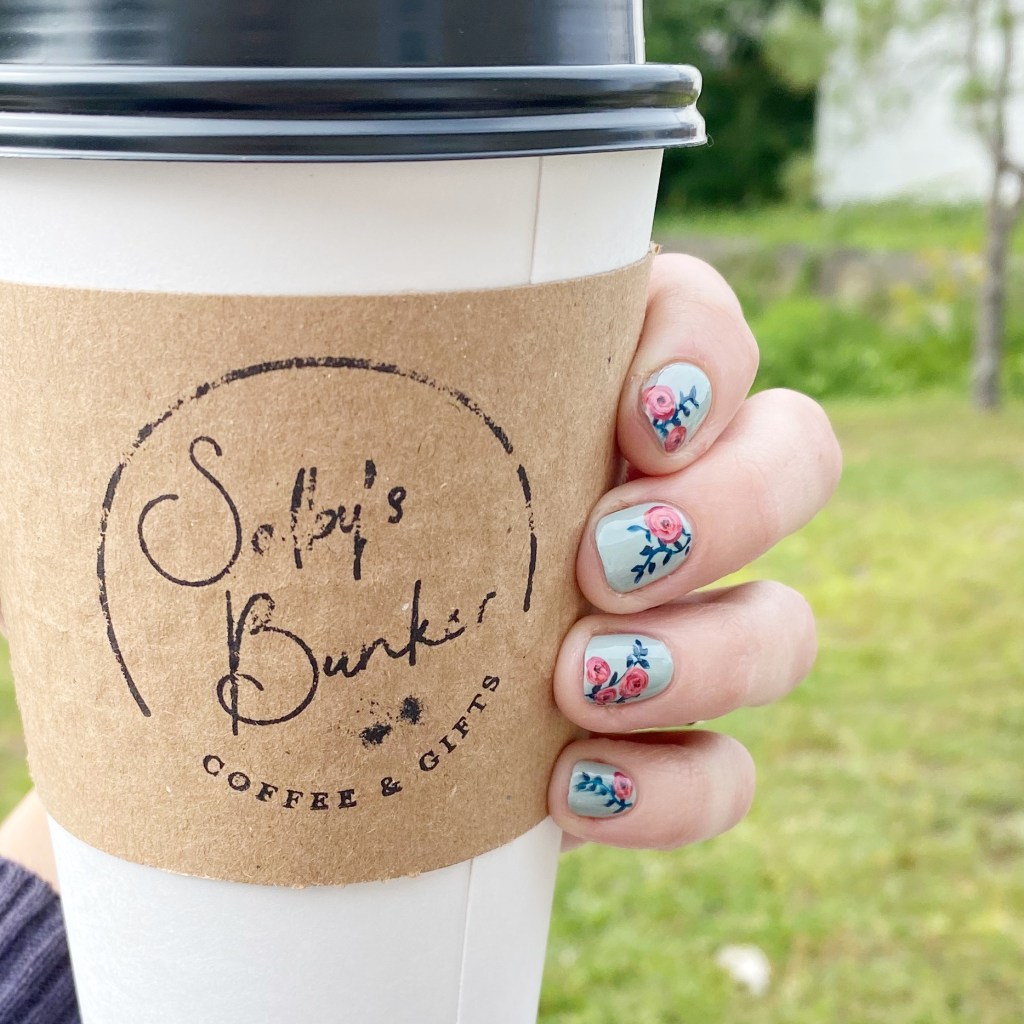
Hello lovelies & happy Thursday! How this week is speeding by so quickly, I have no idea. I know I’ve been pretty quiet on here; we spent Friday-Monday away for my Grandfather’s memorial, so I was pretty busy last week & basically everything took a backseat! But I’m back & I’ve got some new fun nails to share with you!

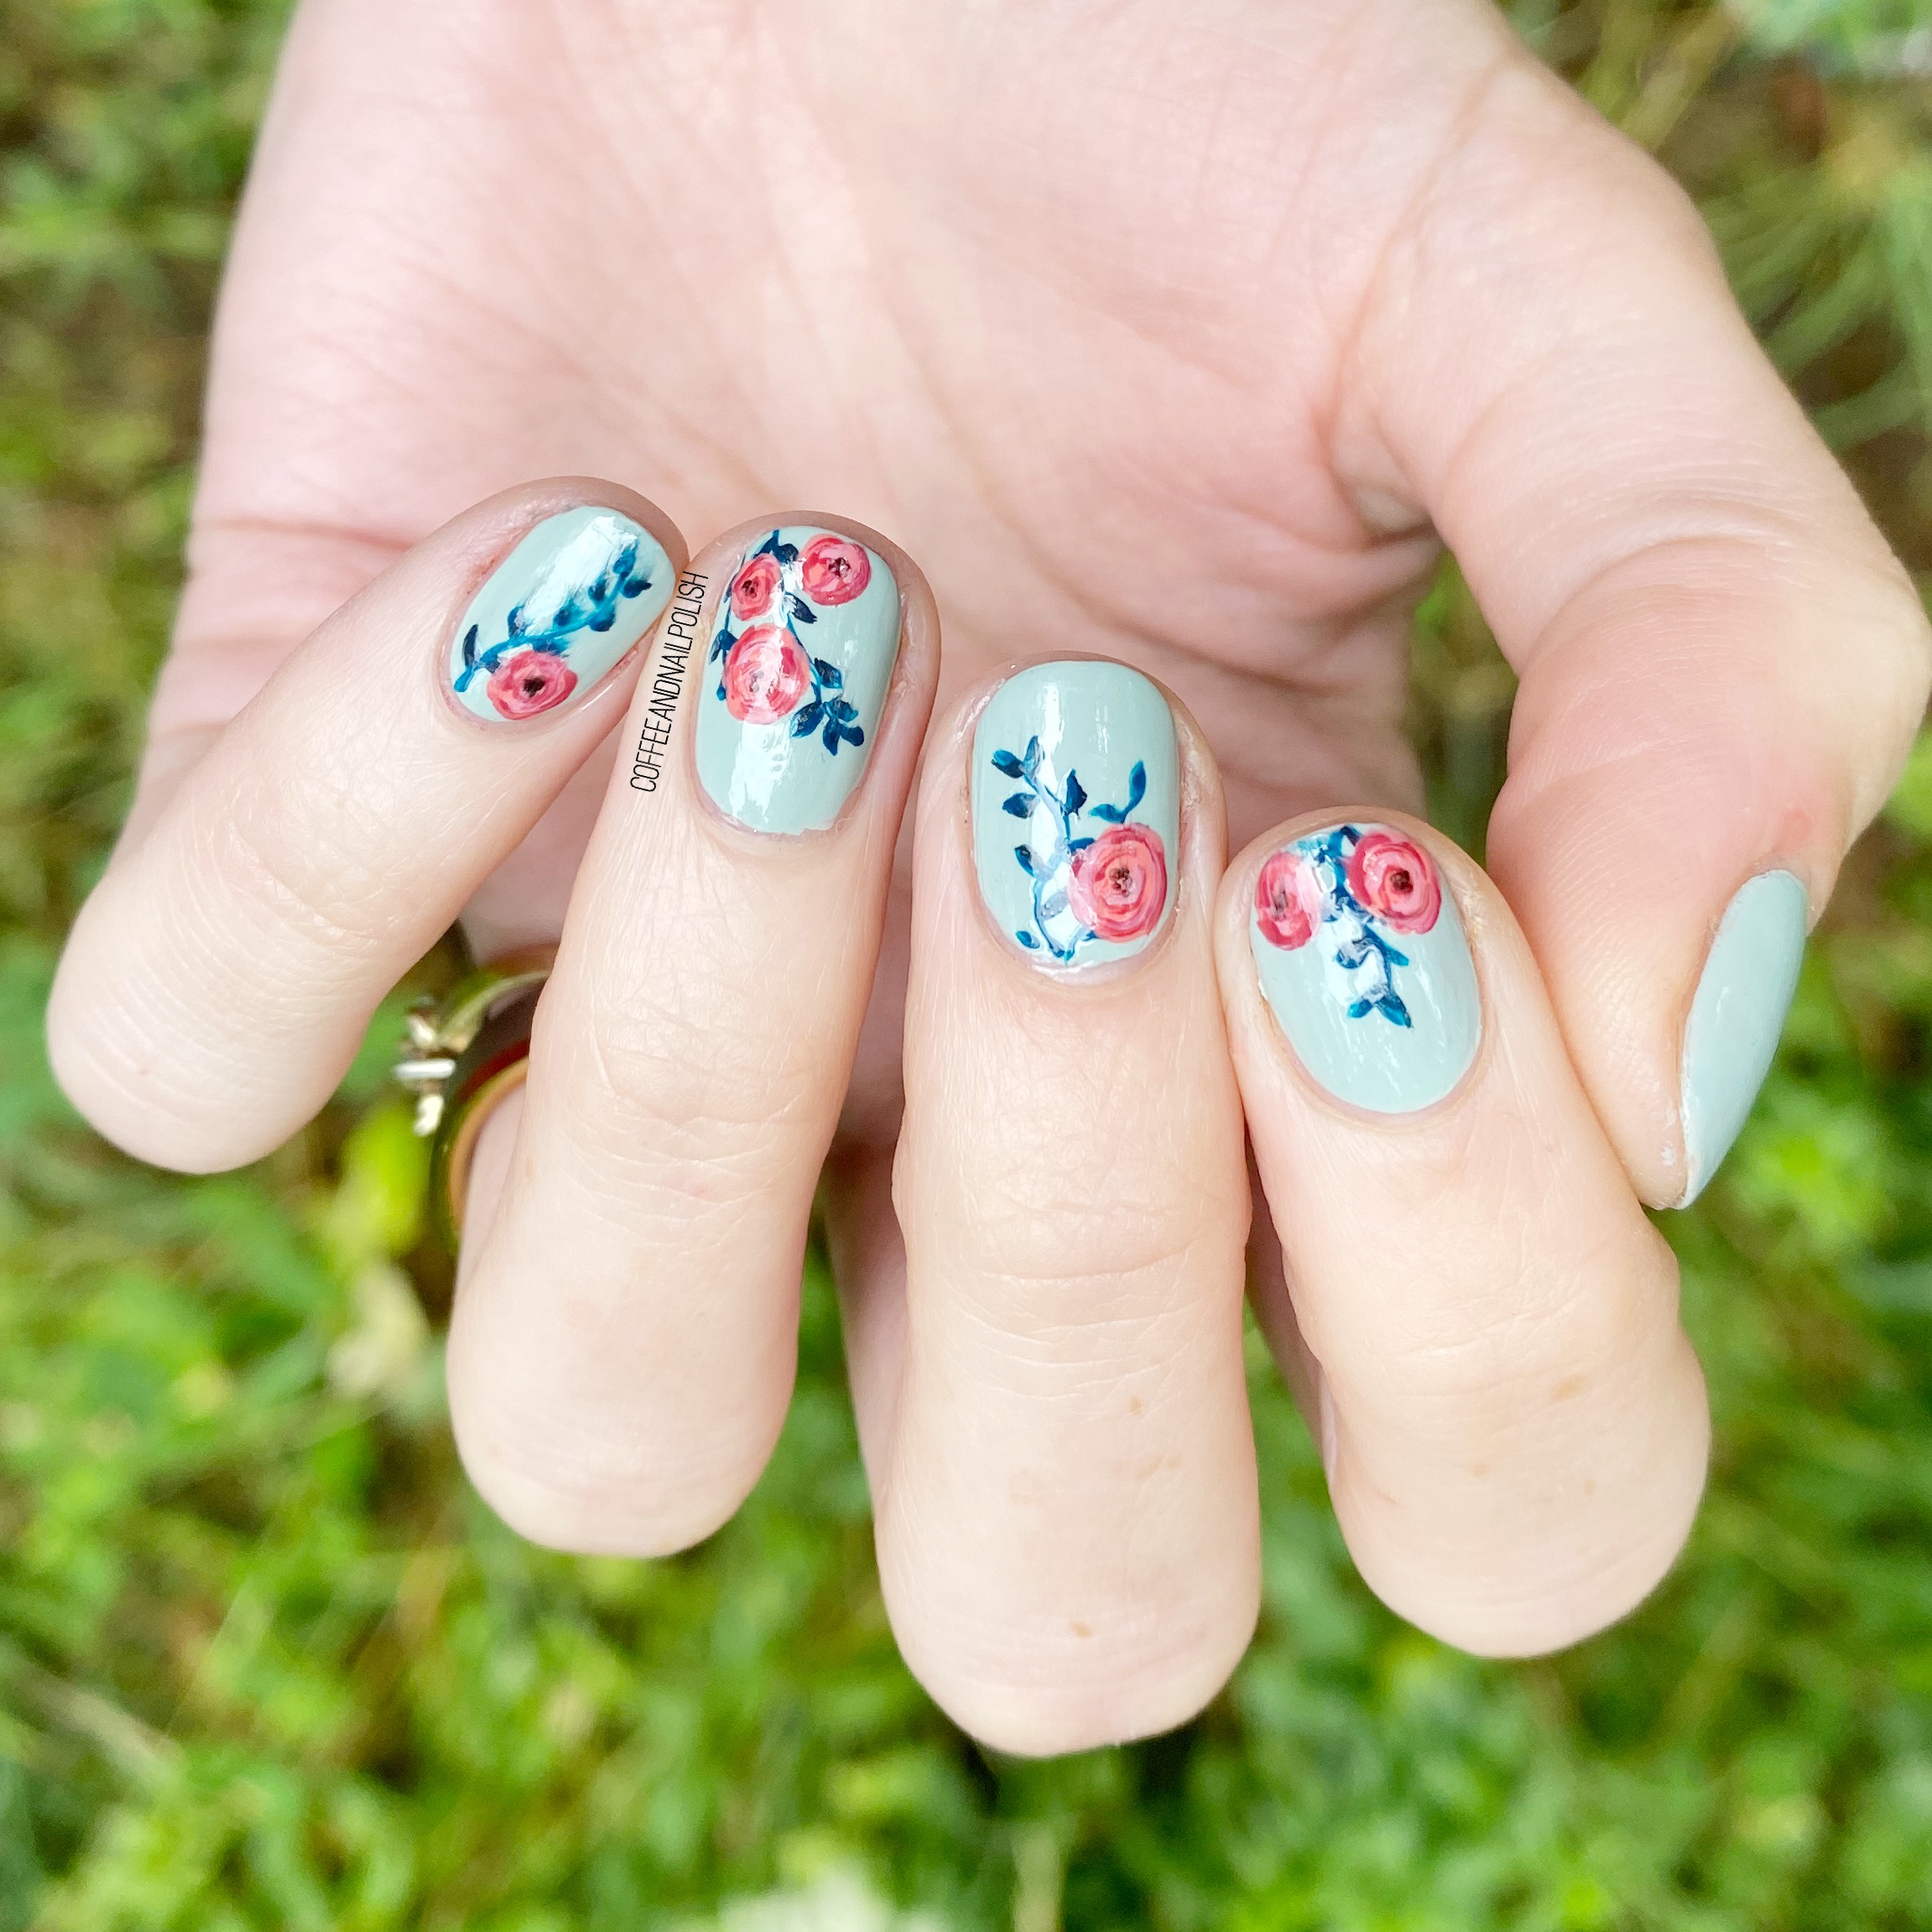
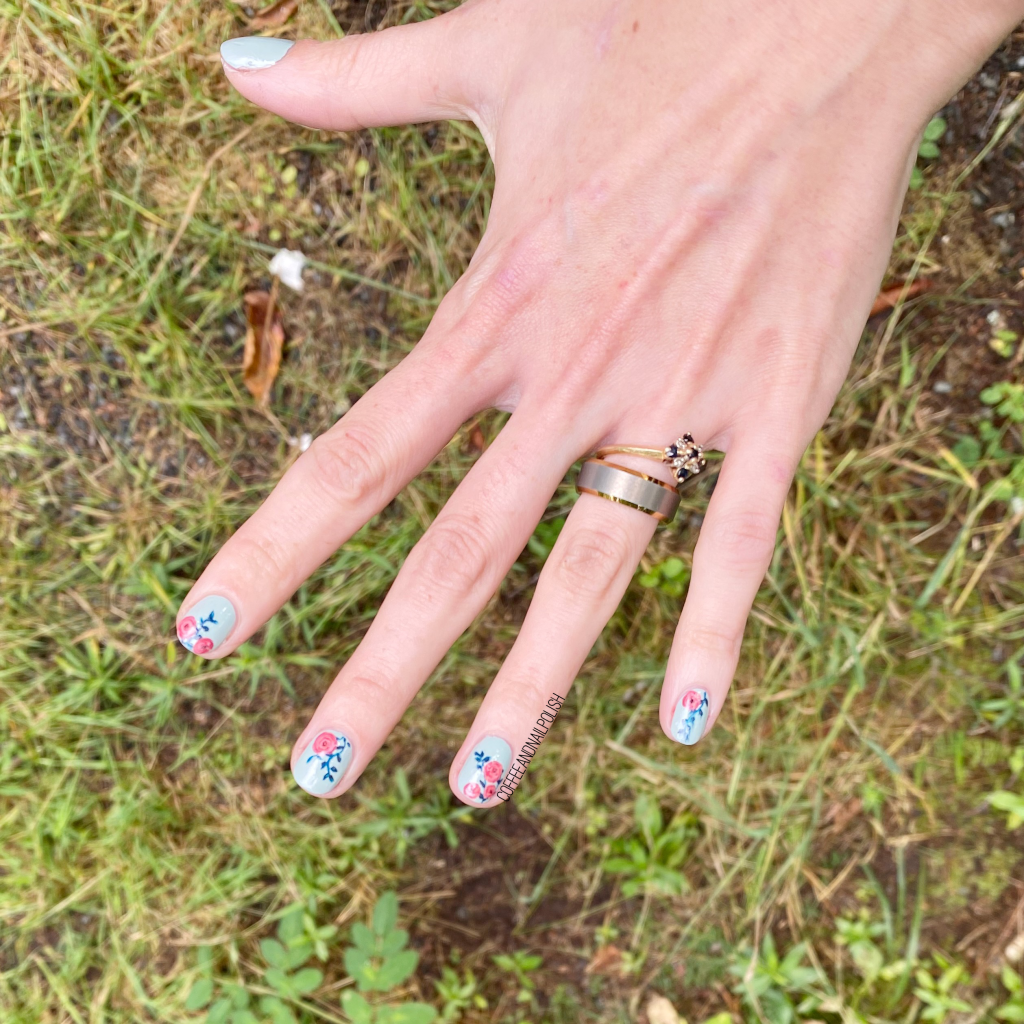
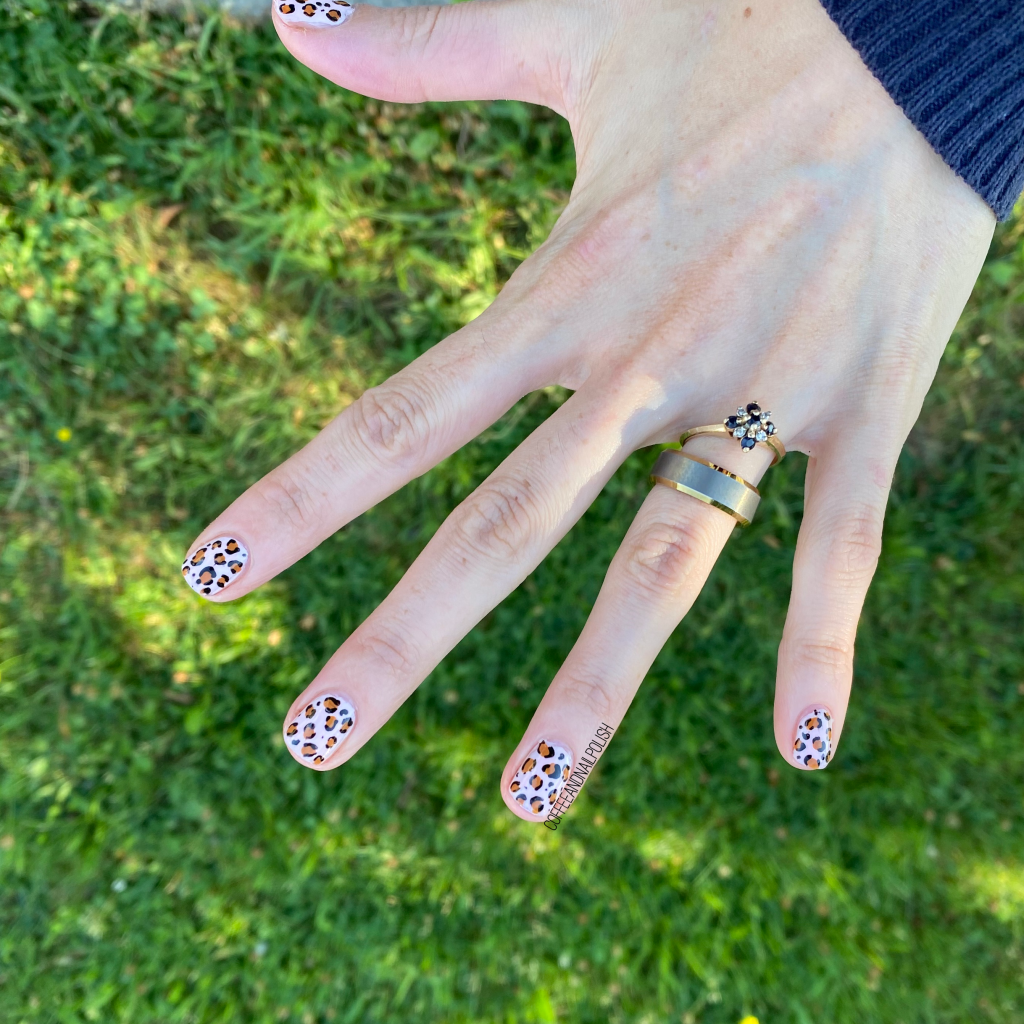
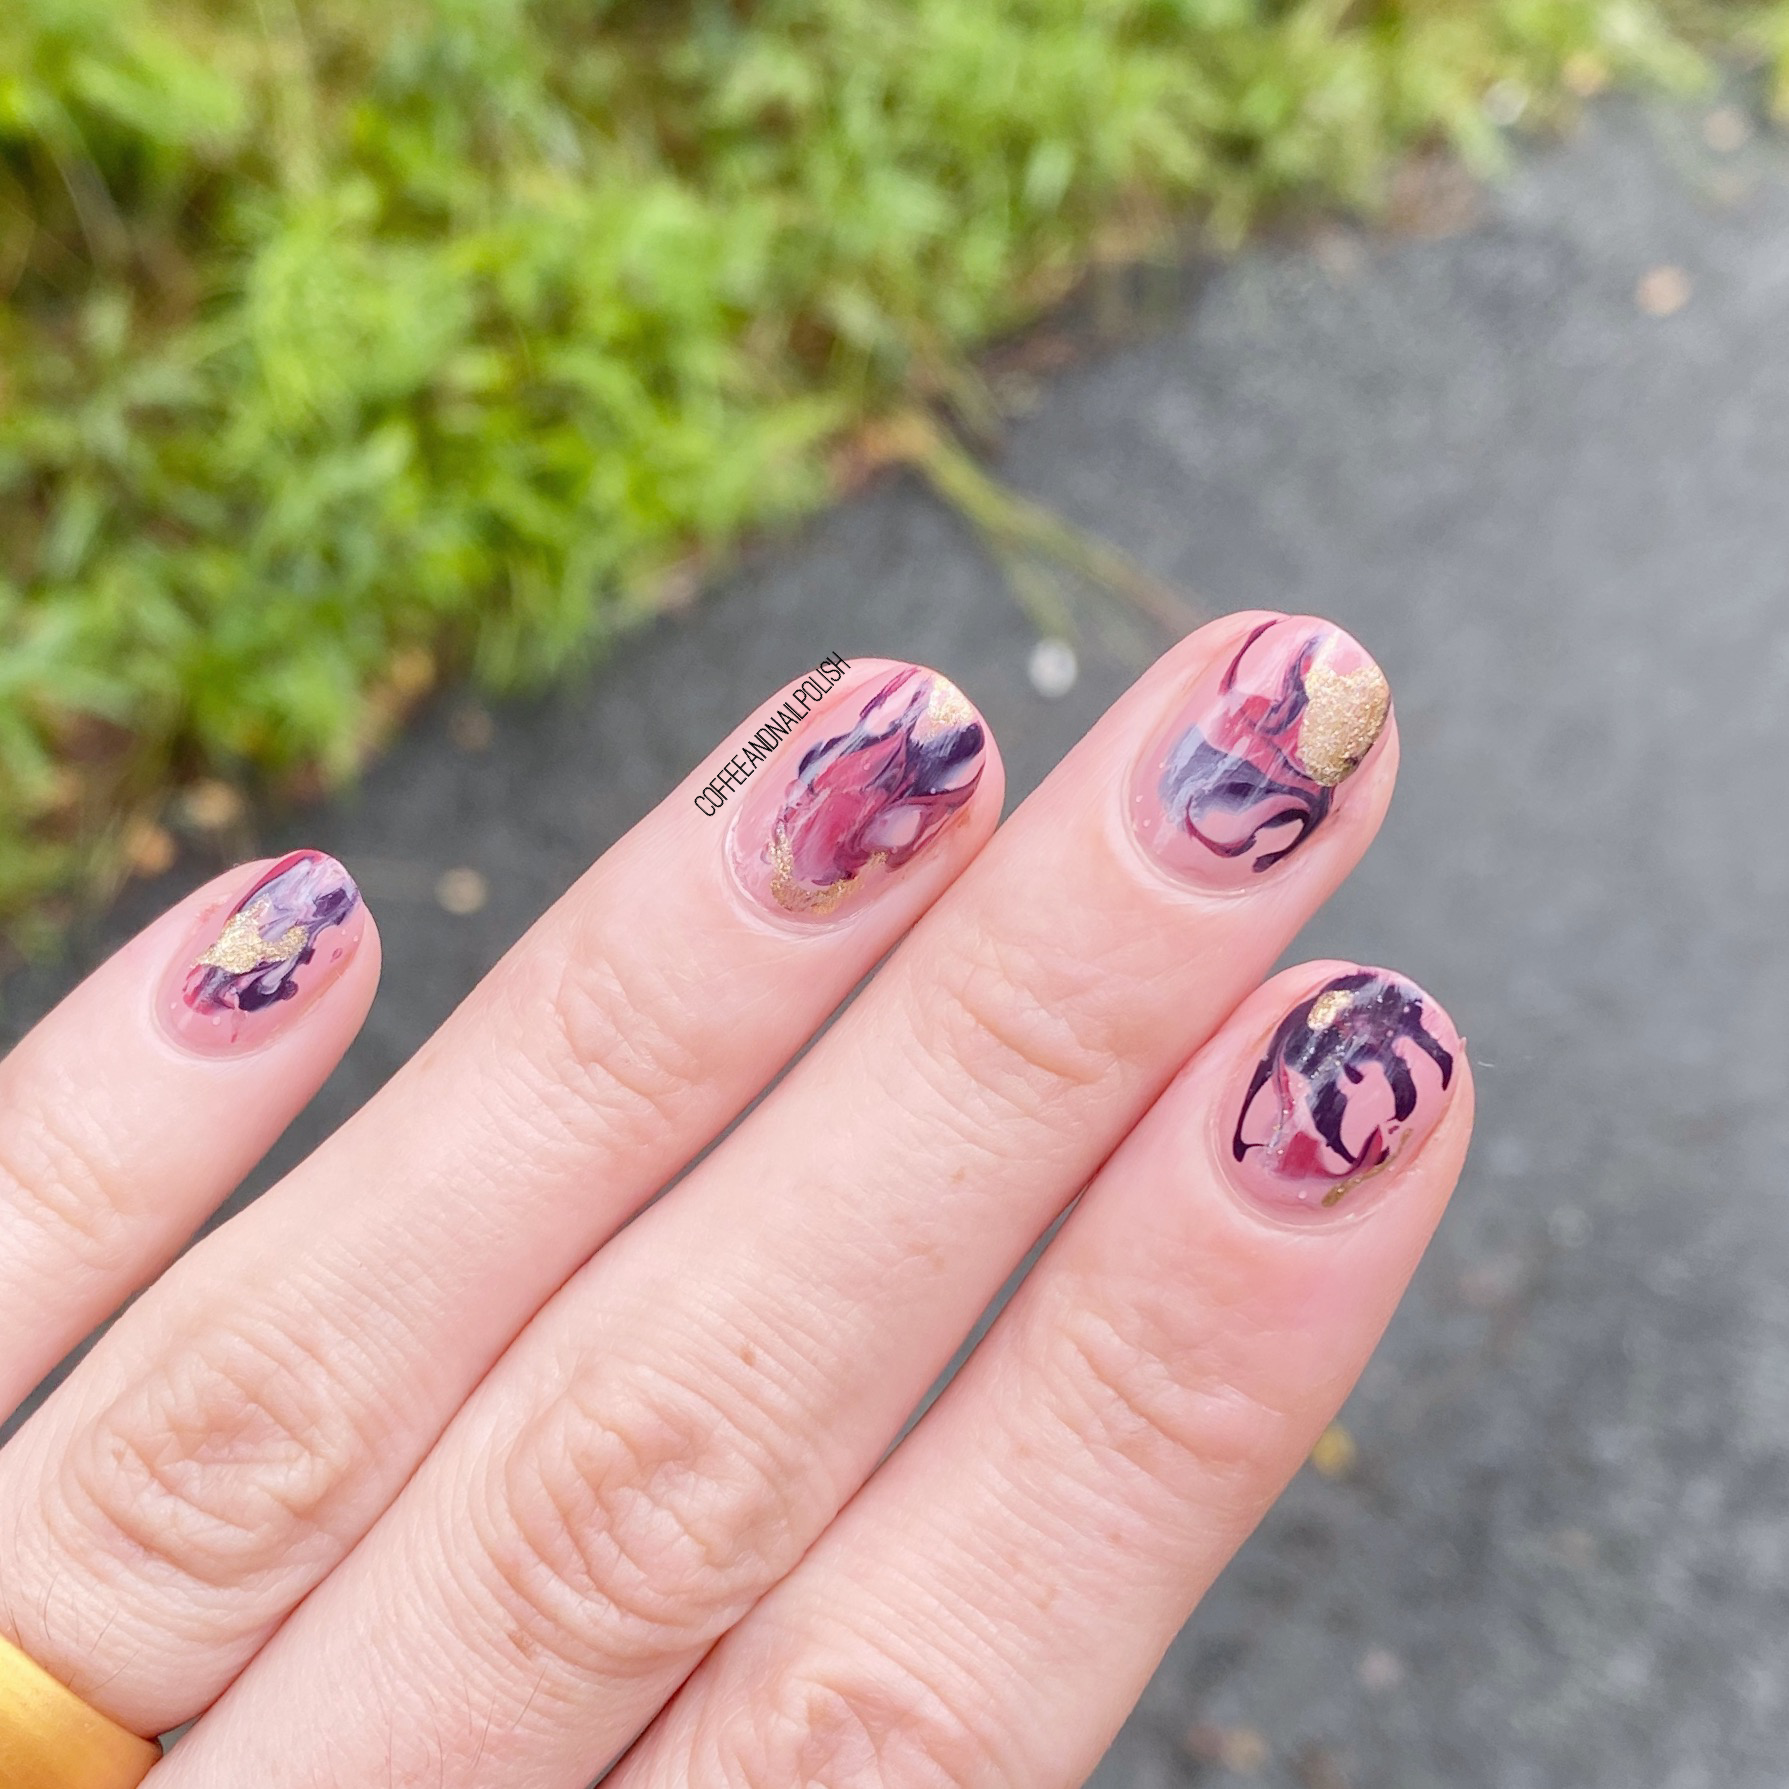
As I’ve mentioned before, Fall colours are pretty much all I’m grabbing right now. I’m so here for them! Today’s look combines a few darker shades, perfect for September, but still keeps things a little light. I’ll be honest, I’m totally counting down the days until Halloween designs can start! But I thought I would get a few other designs in beforehand.

For this manicure, the polishes I used were:

  • Base Coat: Sally Hansen Hard As Nails
  • Top Coat: Essie Speed Setter
  • Essie Gel Couture Princess Charming
  • Essie Kimono Over
  • Essie Brides No Groom
  • Essie Mosiac On Down
  • NailStuff.ca Dotting Tool Trio — I used the smalled one (COFFEE10 saves you 10%)

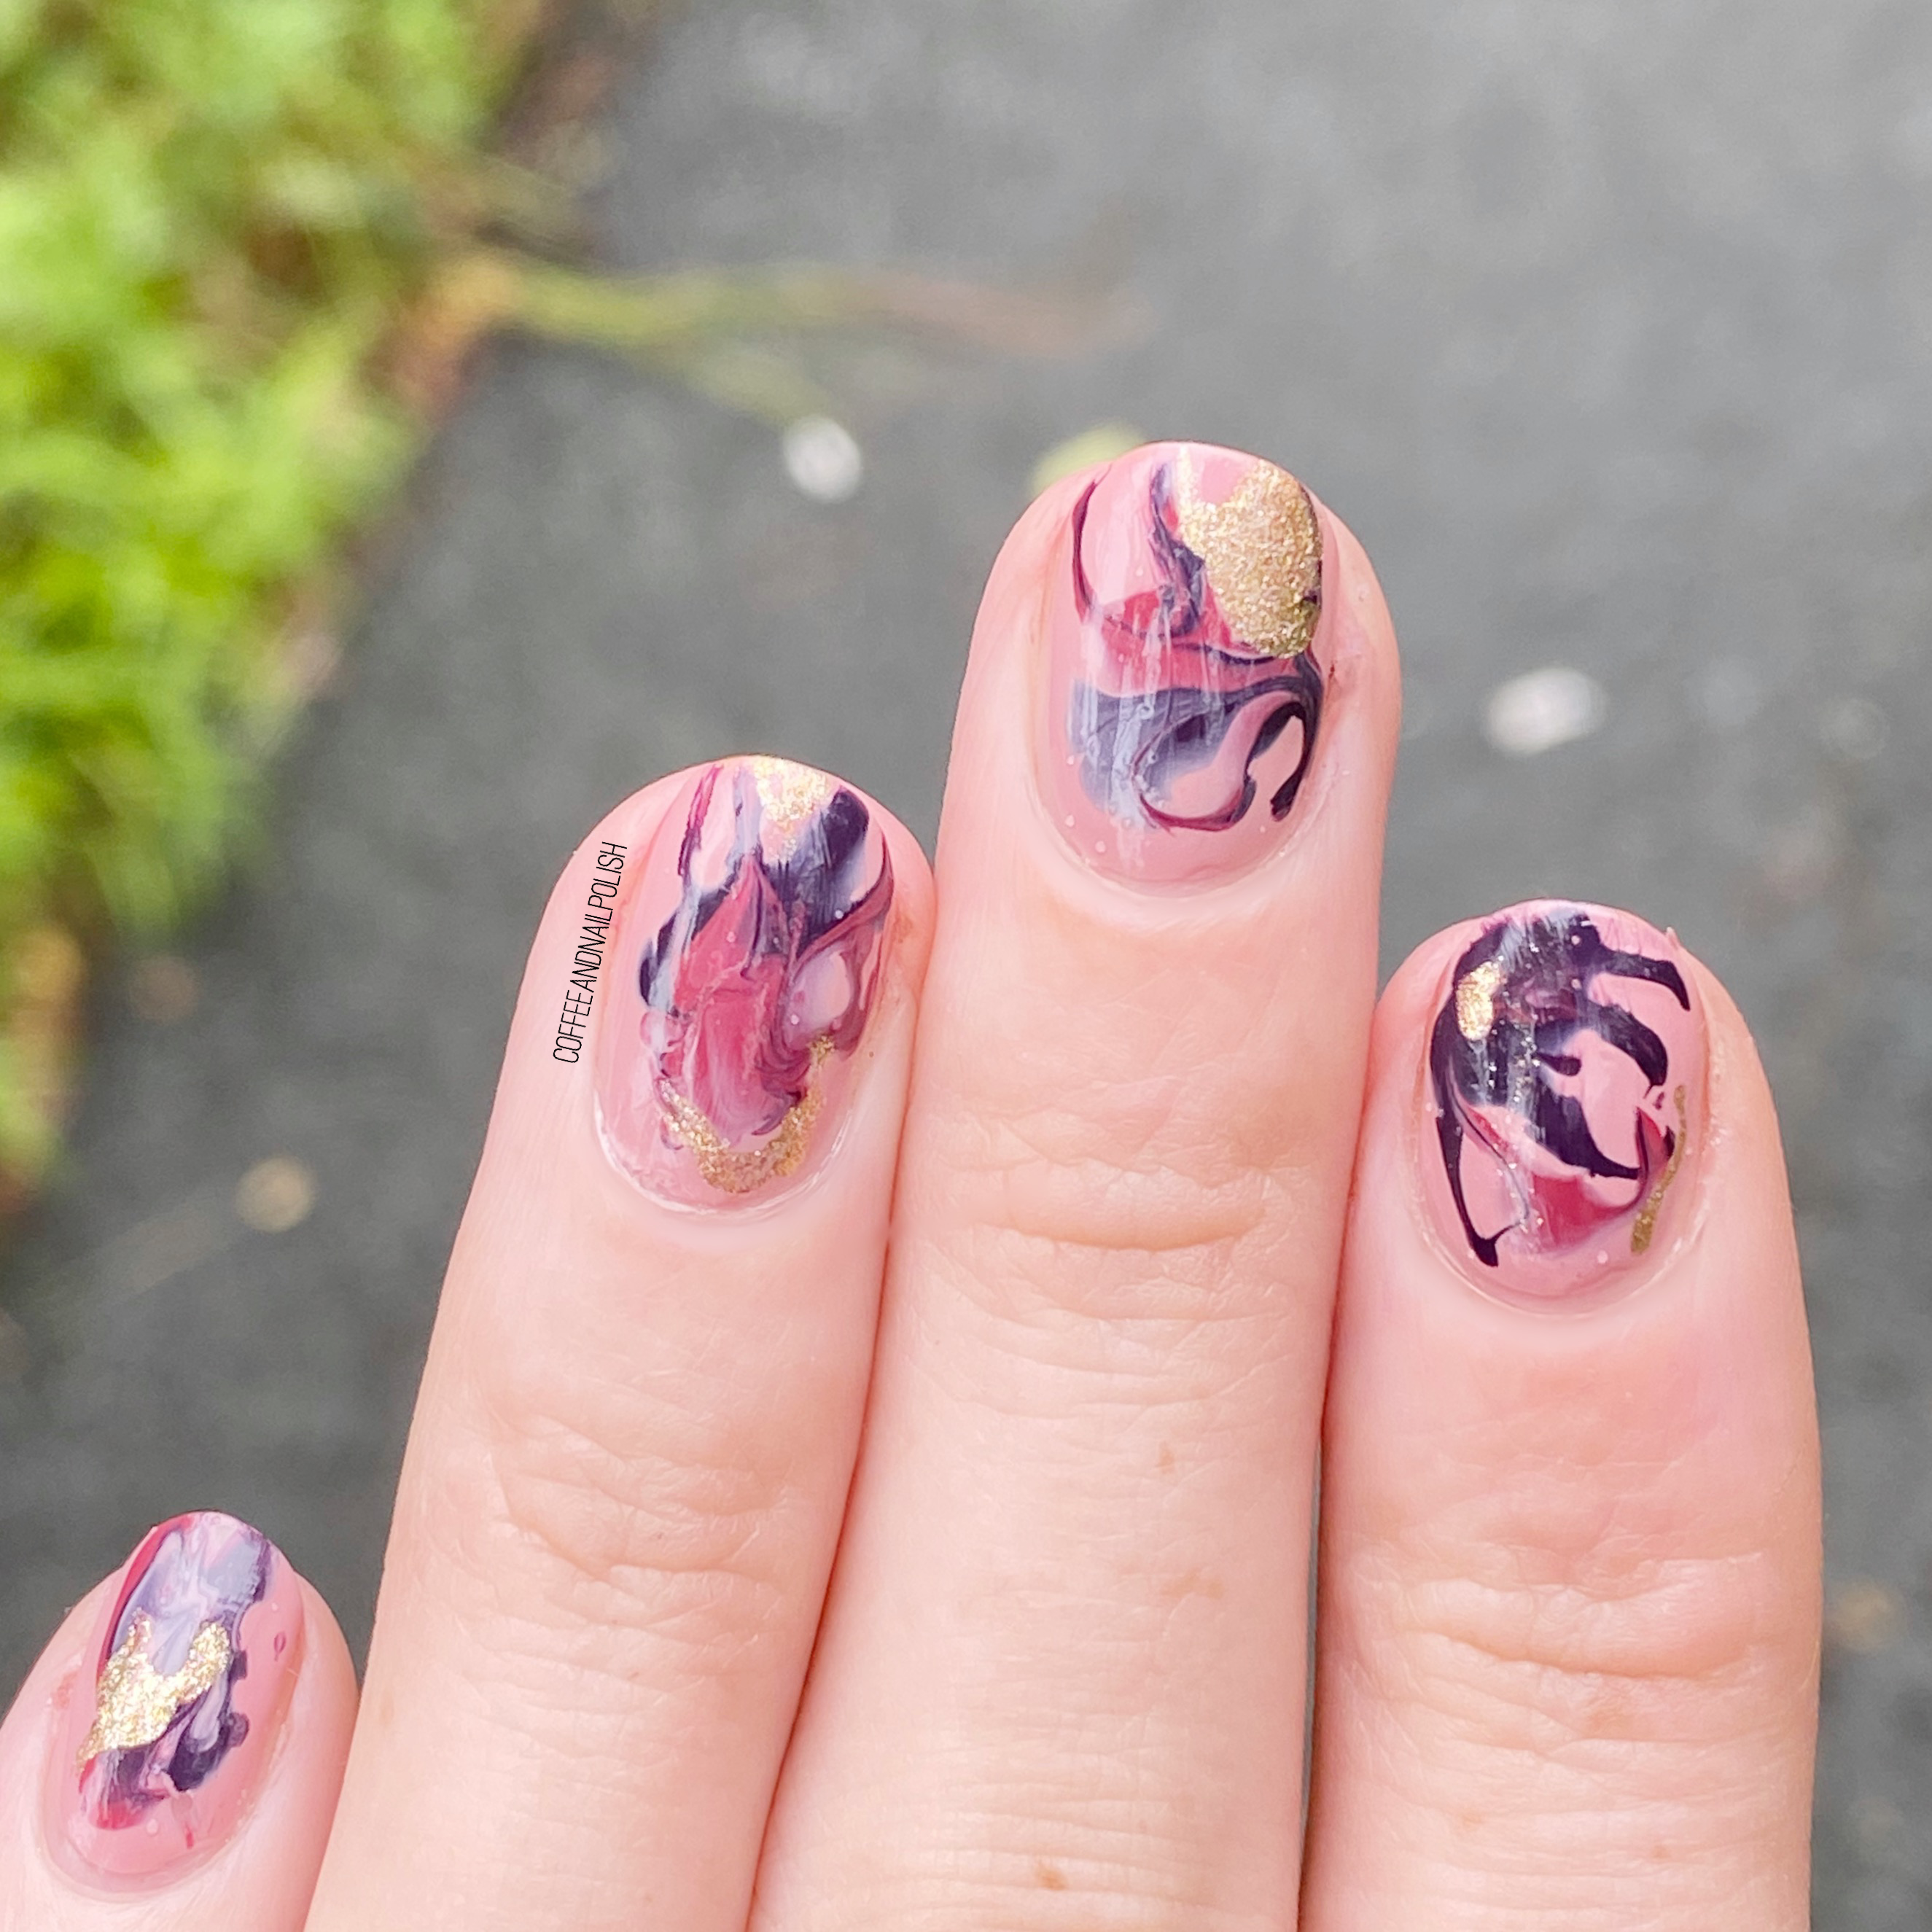
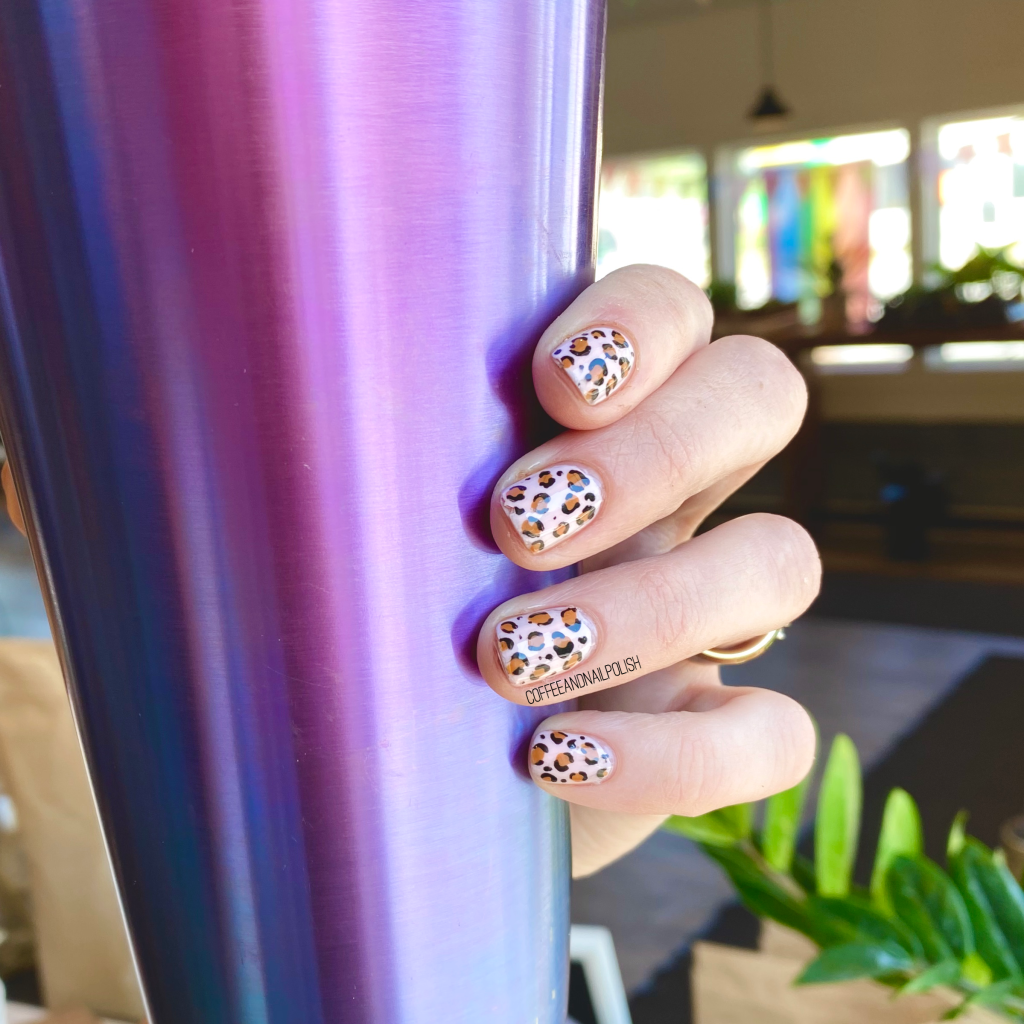
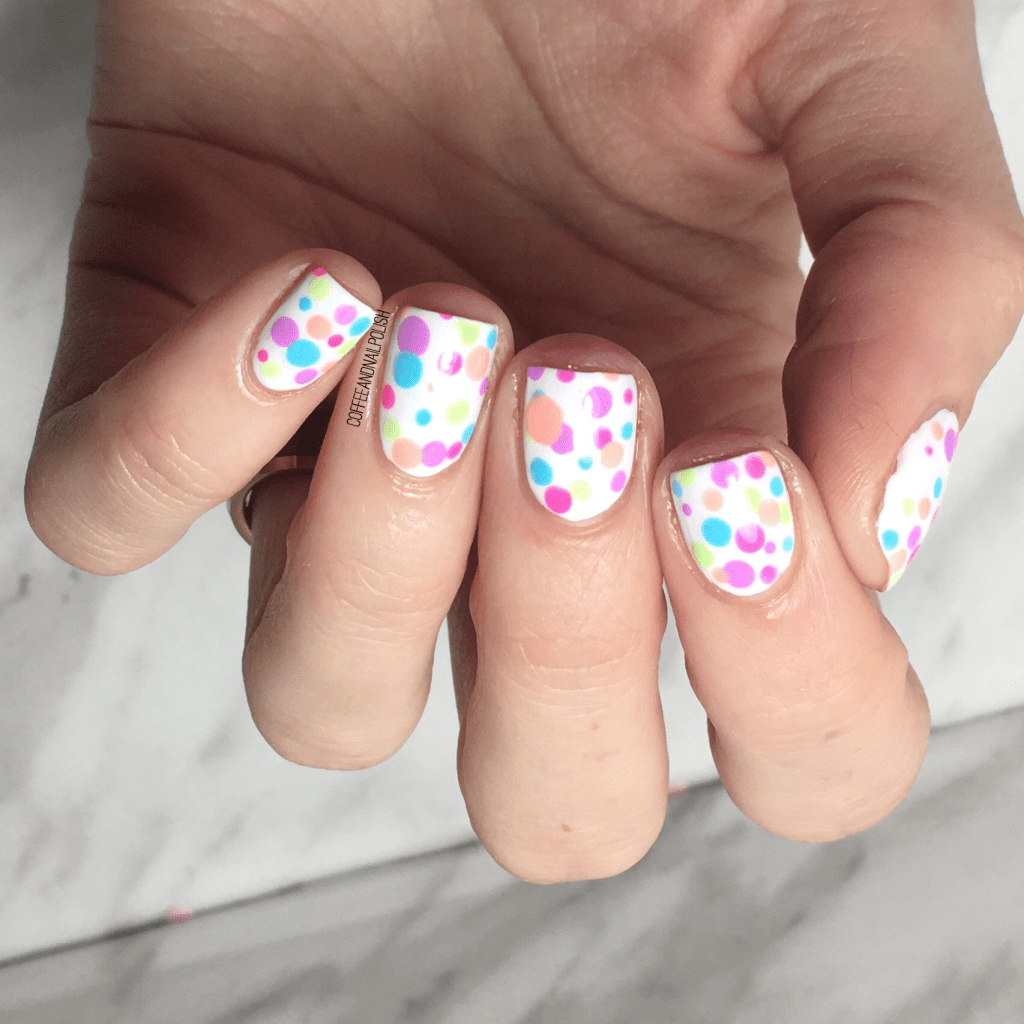
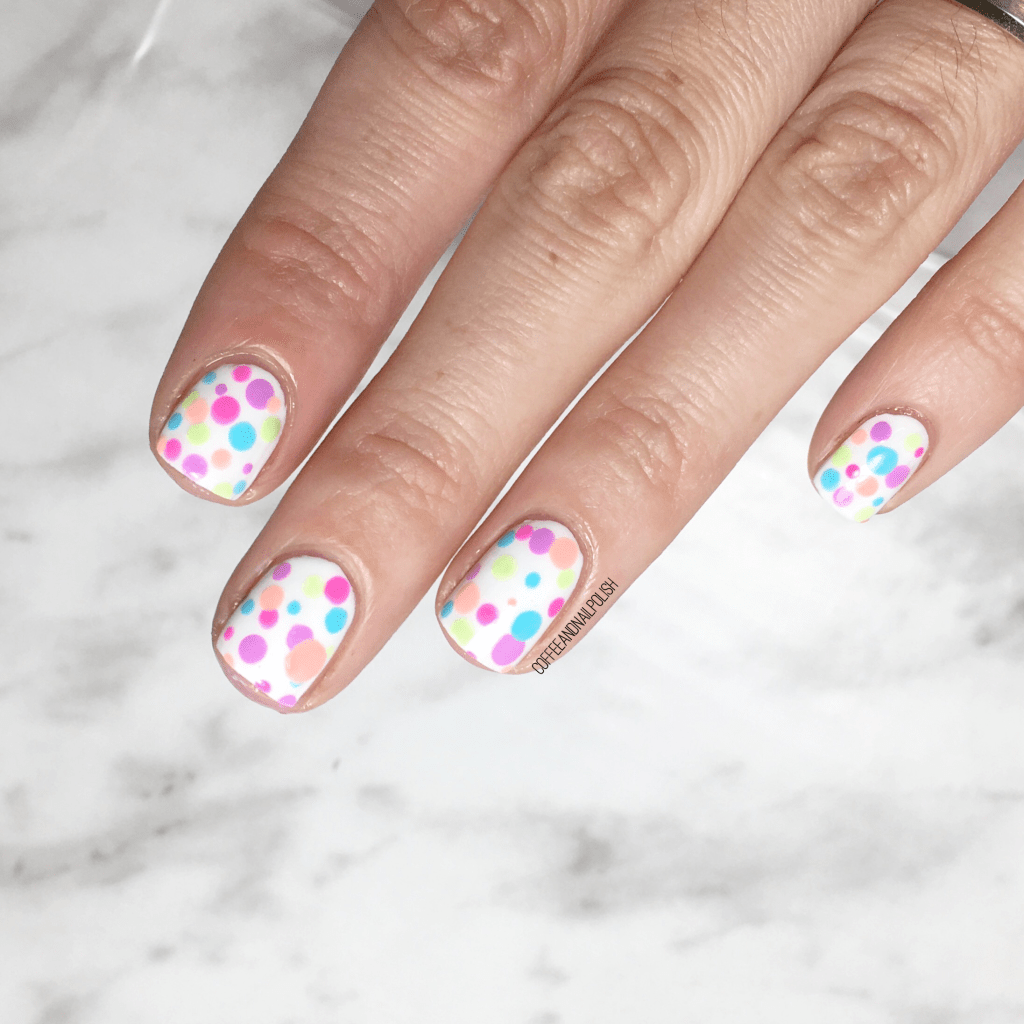
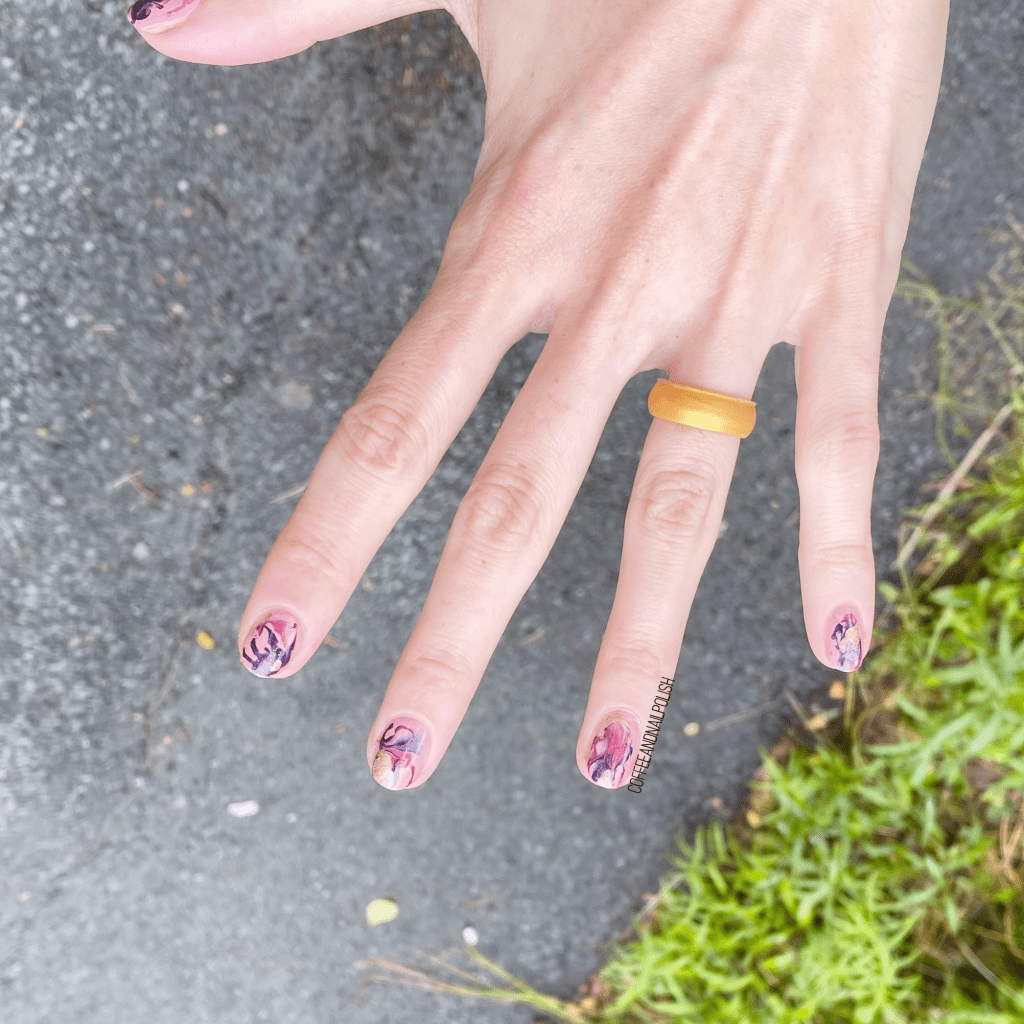
I won’t lie, it’s been a while since I attempted a drag marble, & even though I’m a little rusty, I think these turned out cool. Sometimes I find my drag marbles turn into a big blobby mess, so I tried really hard to make sure the colours kind of stayed separated. I’m going to keep practicing, because it’s such an easy way to fancy up your nails.

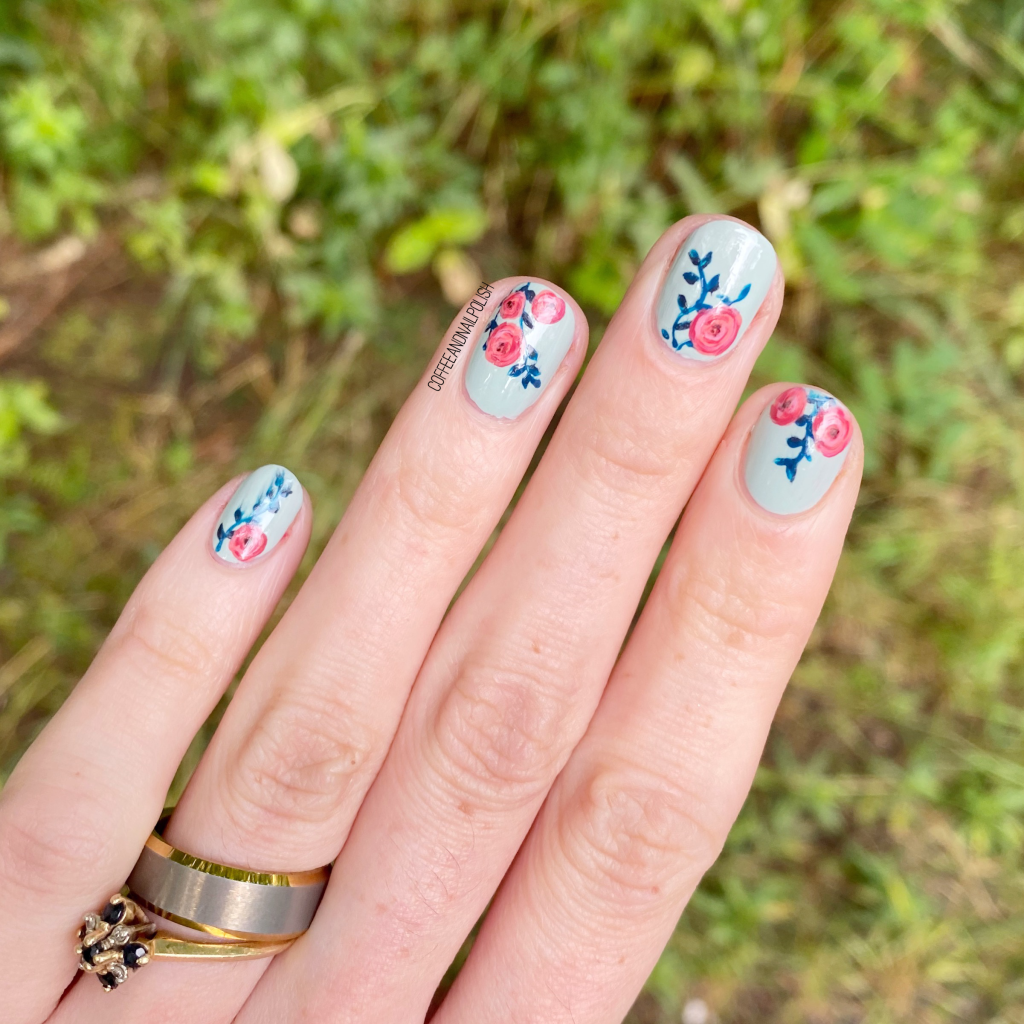
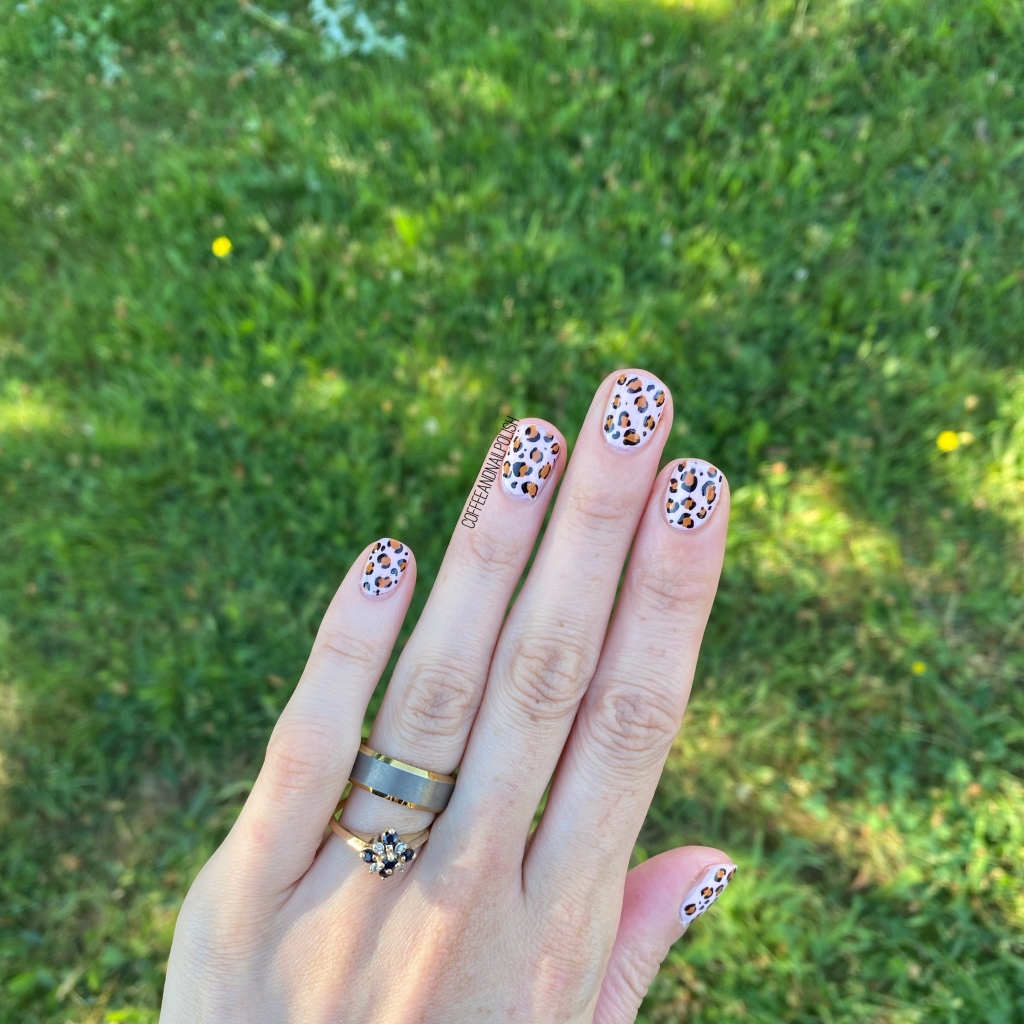
Loving this combination of colours. I’ll be honest with the fact I have been kind of distracted from looking at all the Fall shades popping up in stores. I’m not much for buying nail polish online unless they’re special shades, & I haven’t really been out in stores perusing nail polish like I used to. So I’m really trying to go through all my old nail polishes from years past, & using them! I definitely have a lot of nail polish to choose from, haha.

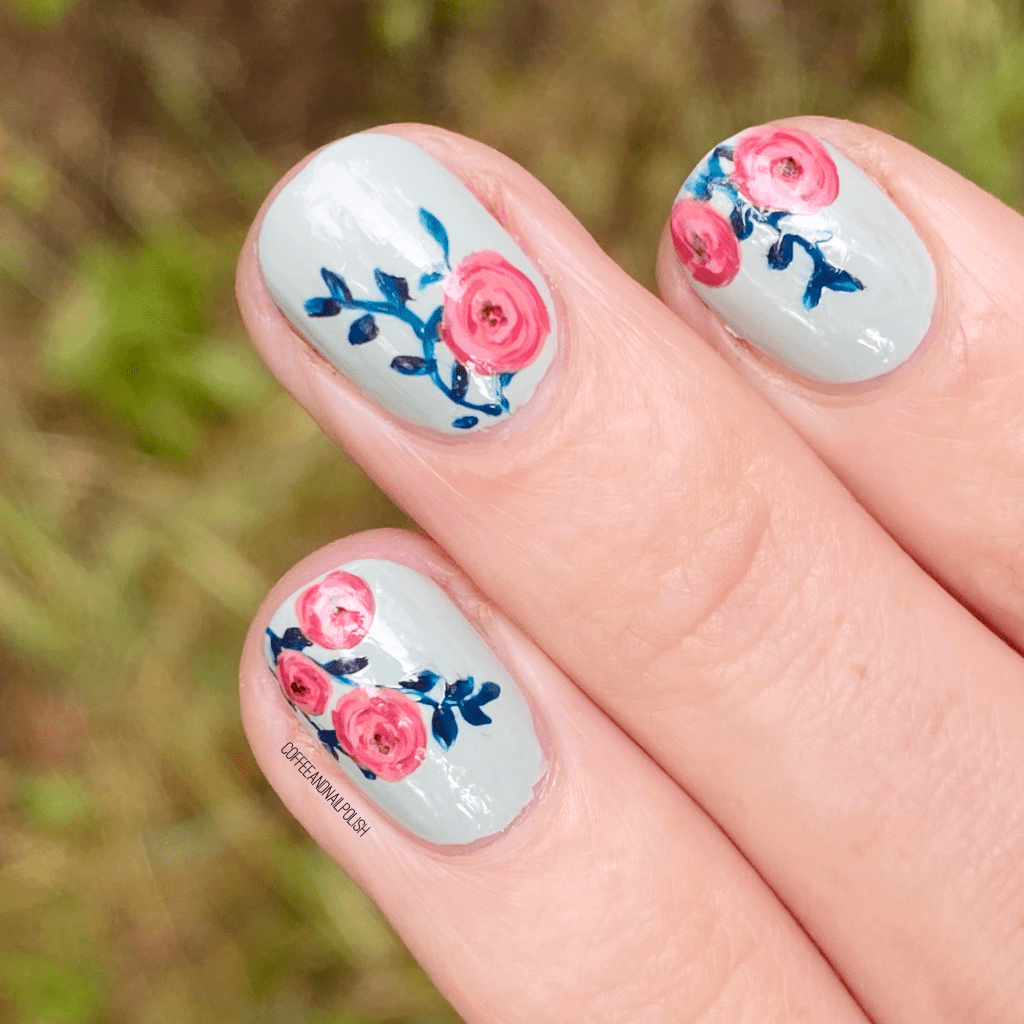
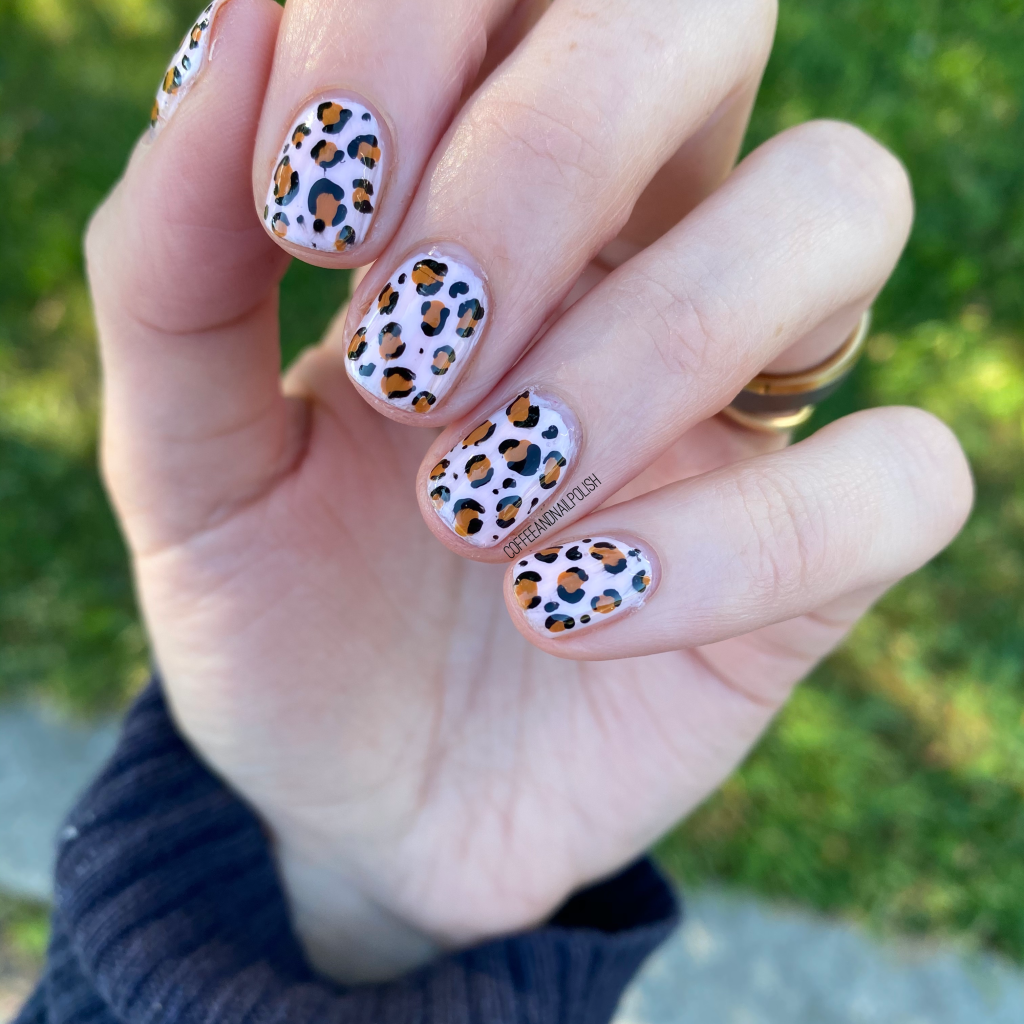
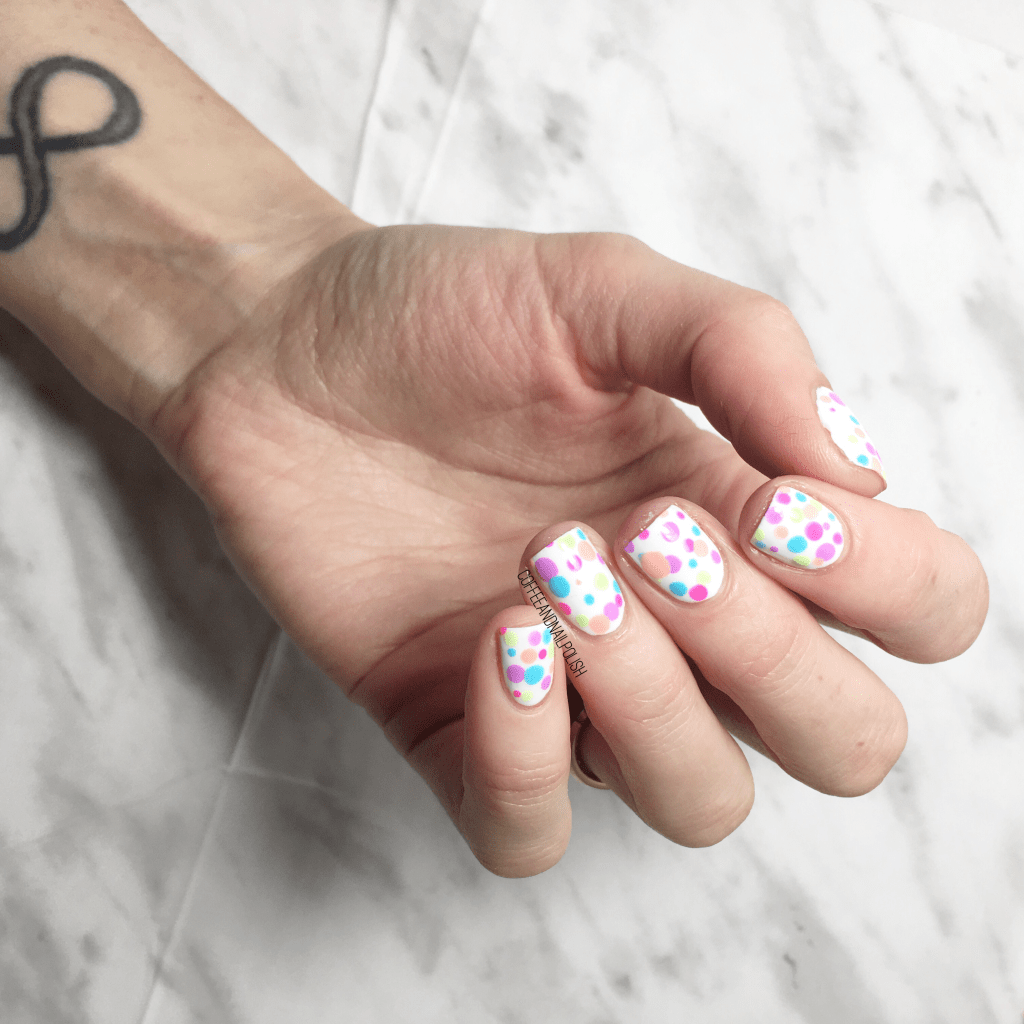
What do you think about this drag marble look? Do you like the colour combination I went with? Have you ever tried a look like this? Let me know what you think down in the comments below, & whether or not you would try this look!

Mint & Floral 🌿🌸

Hello lovelies & Happy Thursday. It’s been a minute since my last floral design, so I thought I was more than overdue. Truthfully, this started out as just a look featuring vining, but something felt like it was missing. So I freehanded a few roses & BAM! The look was complete!

  • Base Coat: Sally Hansen Hard As Nails
  • Top Coat: Essie Speed Setter
  • Sally Hansen Insta-Dri Thyme Is Money
  • Sally Hansen CSM One In A Melon
  • OPI Suzy Shops & Island Hops
  • Essie Stop Drop & Shop
  • Quo by Orly Diva
  • Essie After School Boy Blazer
  • Essence Black is Back
  • NailStuff.ca 4mm Micro Detail Brush (COFFEE10 saves you 10%!)
  • NailStuff.ca Dotting Tool Trio

You know I love a good floral — clothing, nails, phone cases. Give me all the floral! Also I really love the look of a pink floral over a pale blue or green vase — it really makes the flowers pop! Also using the micro detail brush from NailStuff really makes a difference when I’m free handing florals. The roses turned out so realistic! I’m so absolutely in love with them.

What do you think about this freehand floral? Have you missed seeing floral on my blog? Let me know down in the comments below!

Neutral Leopard Print

Hello lovelies & happy Thursday! I hope everyone is well caffeinated. Today I’m sharing my current nail art obsession: leopard print!

Not going to lie, I’ve been obsessed with leopard print a long, long time. I used to own the most amazing leopard print dress during my teenage years — sadly I have no idea what happened to it, but it was glorious. Now a days, I don’t have much leopard print in my closet, which is even more of an excuse to wear it on my nails! (& maybe go shopping…).

For this manicure, the polishes I used were:

  • Base Coat: OPI Nail Envy
  • Top Coat: Essie Gel Setter
  • Essie Ballet Slippers
  • Essie Kaf-tan
  • Essence Black is Back
  • NailStuff.ca 7mm detail brush(COFFEE10 to save 10%)
  • NailStuff.ca Dotting Tool Trio

Oh man, I really really love how these turned out. Obviously, with my nails being sort of short right now, I need to find cute looks I can wear on my nails. Small delicate designs like this work really well on short-length nails.

Can you tell I’m really, really obsessed with Essie Kaf-tan right now? It’s so funny because I didn’t think it was a colour that was all that “Me” but I can’t help but reach for it for every design I do right now. It’s just such a fun, unique colour for my stash. & it’s definitely going to be a Fall shade staple for me! Which means I’d better in go get myself another bottle then!

What do you think about this leopard print look? Are you digging this pattern right now? Let me know what you think down in the comments below!

FASHION FRIDAY — How I Keep My Clothing Organized

Hello lovelies & happy Friday! It’s been a while since my last Fashion Friday post! Today I have a bit of a different post for me — I wanted to give a little insight into how I keep my closet organized.

Anyone who knows me, knows that I own a lot of clothing. & therefore, I’ve always made sure to put effort into keeping things organized! In fact, I started my closet organizing obsession in my teenage years, making sure everything was categorized by type, colour, & even sometimes season! While this doesn’t mean I don’t ever end up with a messy room–I’m a busy girl–it definitely helps keep at least my clean clothing somewhat organized which can make getting dressed in the morning that much easier.

Organize by Colour

One thing I’ve always tried to do is organize my clothes by colour order; pink with pink, red with red, blue with blue. Over the years, I’ve upped that by organizing from shortest sleeve to longest sleeve, which makes things even easier. Not only does it make my clothes look more visibly appealing, but it does save on time. If I’m looking for a particular blue shirt, I know exactly where in my closet I need to look.

Organize by Style

Another thing I’ve always tried to do with my closet, no matter the size, is group all different like-styles together. This means all my dresses are organized with my dresses, shirts with shirts, cardigans with cardigans. Again, it makes it a bit easier when getting dressed because I know exactly where to go to find what I’m looking for.

Rotate by Season

So something I try to do twice a year is rotate my closet. This means, in the Spring I’ll rework my closet & push my cardigans & sweaters towards the back, & bring my kimonos & Spring jackets towards the front. I repeat this process in the Winter, basically flipping it again. Not only does this give me access to the clothes I wear more frequently, but I have the opportunity to go through & purge anything I’m not really wearing (or rediscover clothing maybe I’ve forgotten about!)

Take Advantage of Storage

So finally, one thing that I really find important for my closet is taking advantage of storage. I have a lot of clothing… I’m not joking. & not everything hangs easily in my closet. So I take advantage of all the storage I can. Everything is organized where I can put it, including at the top of my closet, the built in storage in the middle, & in bins under my bed. When I moved into my first apartment years ago, I didn’t have the room I do now, so I started storing clothes in under the bed bins, & it makes life so much easier. Plus, you can just slip your comforter over the side the bed, & no one even knows they’re there! A great idea for small spaces, or someone like me who has a lot of clothing to put away!

& that’s a little insight into my closet! Do you have any tips on how you keep things organized? Let me know down in the comments below!

Neon Dotticure (again 🕶)

Hello lovelies & Happy Thursday! I don’t know about where you are, but the August swelter is real here in Halifax. So I thought it would be a good idea to pull out some neons, embrace the heat, & enjoy what is left of Summer before I dive fully into wanting all things Fall (& it’s coming…. oh it’s coming!)

Today I thought I would share this fun neon dotticure I did with a few of Sally Hansen Miracle Gel’s neon shades they released last year! It’s fun, it’s bright, & it takes little real talent to look gorgeous, which is why they’re my favourite to do when I’m short on time, or too tired to function.

For this manicure, the polishes I used were:

  • Base Coat: OPI Nail Envy
  • Top Coat: Essie Gel Setter
  • Sally Hansen Miracle Gel Get Mod
  • Sally Hansen Miracle Gel Peach Please
  • Sally Hansen Miracle Gel Electri-Lime
  • Sally Hansen Miracle Gel Miami Nice
  • Sally Hansen Miracle Gel Fuchsia Fever
  • Sally Hansen Miracle Gel Violet Voltage
  • NailStuff.ca dotting tool from Dotting Tool Trio

Hey, so I know what you’re thinking: Hey Shannon, haven’t you already done a dotticure with these shades? Yes, yes I have. But that was a much more dainty dotticure, & this one is much more BAM! in your face. Or, at least that’s what I’m telling myself. Haha.

Or maybe I just totally forgot. I mean, 2020 has all kind of done our brains in a little bit. Who even remembers last year anymore?

What do you think about this dotticure redux? Are you still embracing the neon? Let me know what you think down below!