Drag Marble Decals 


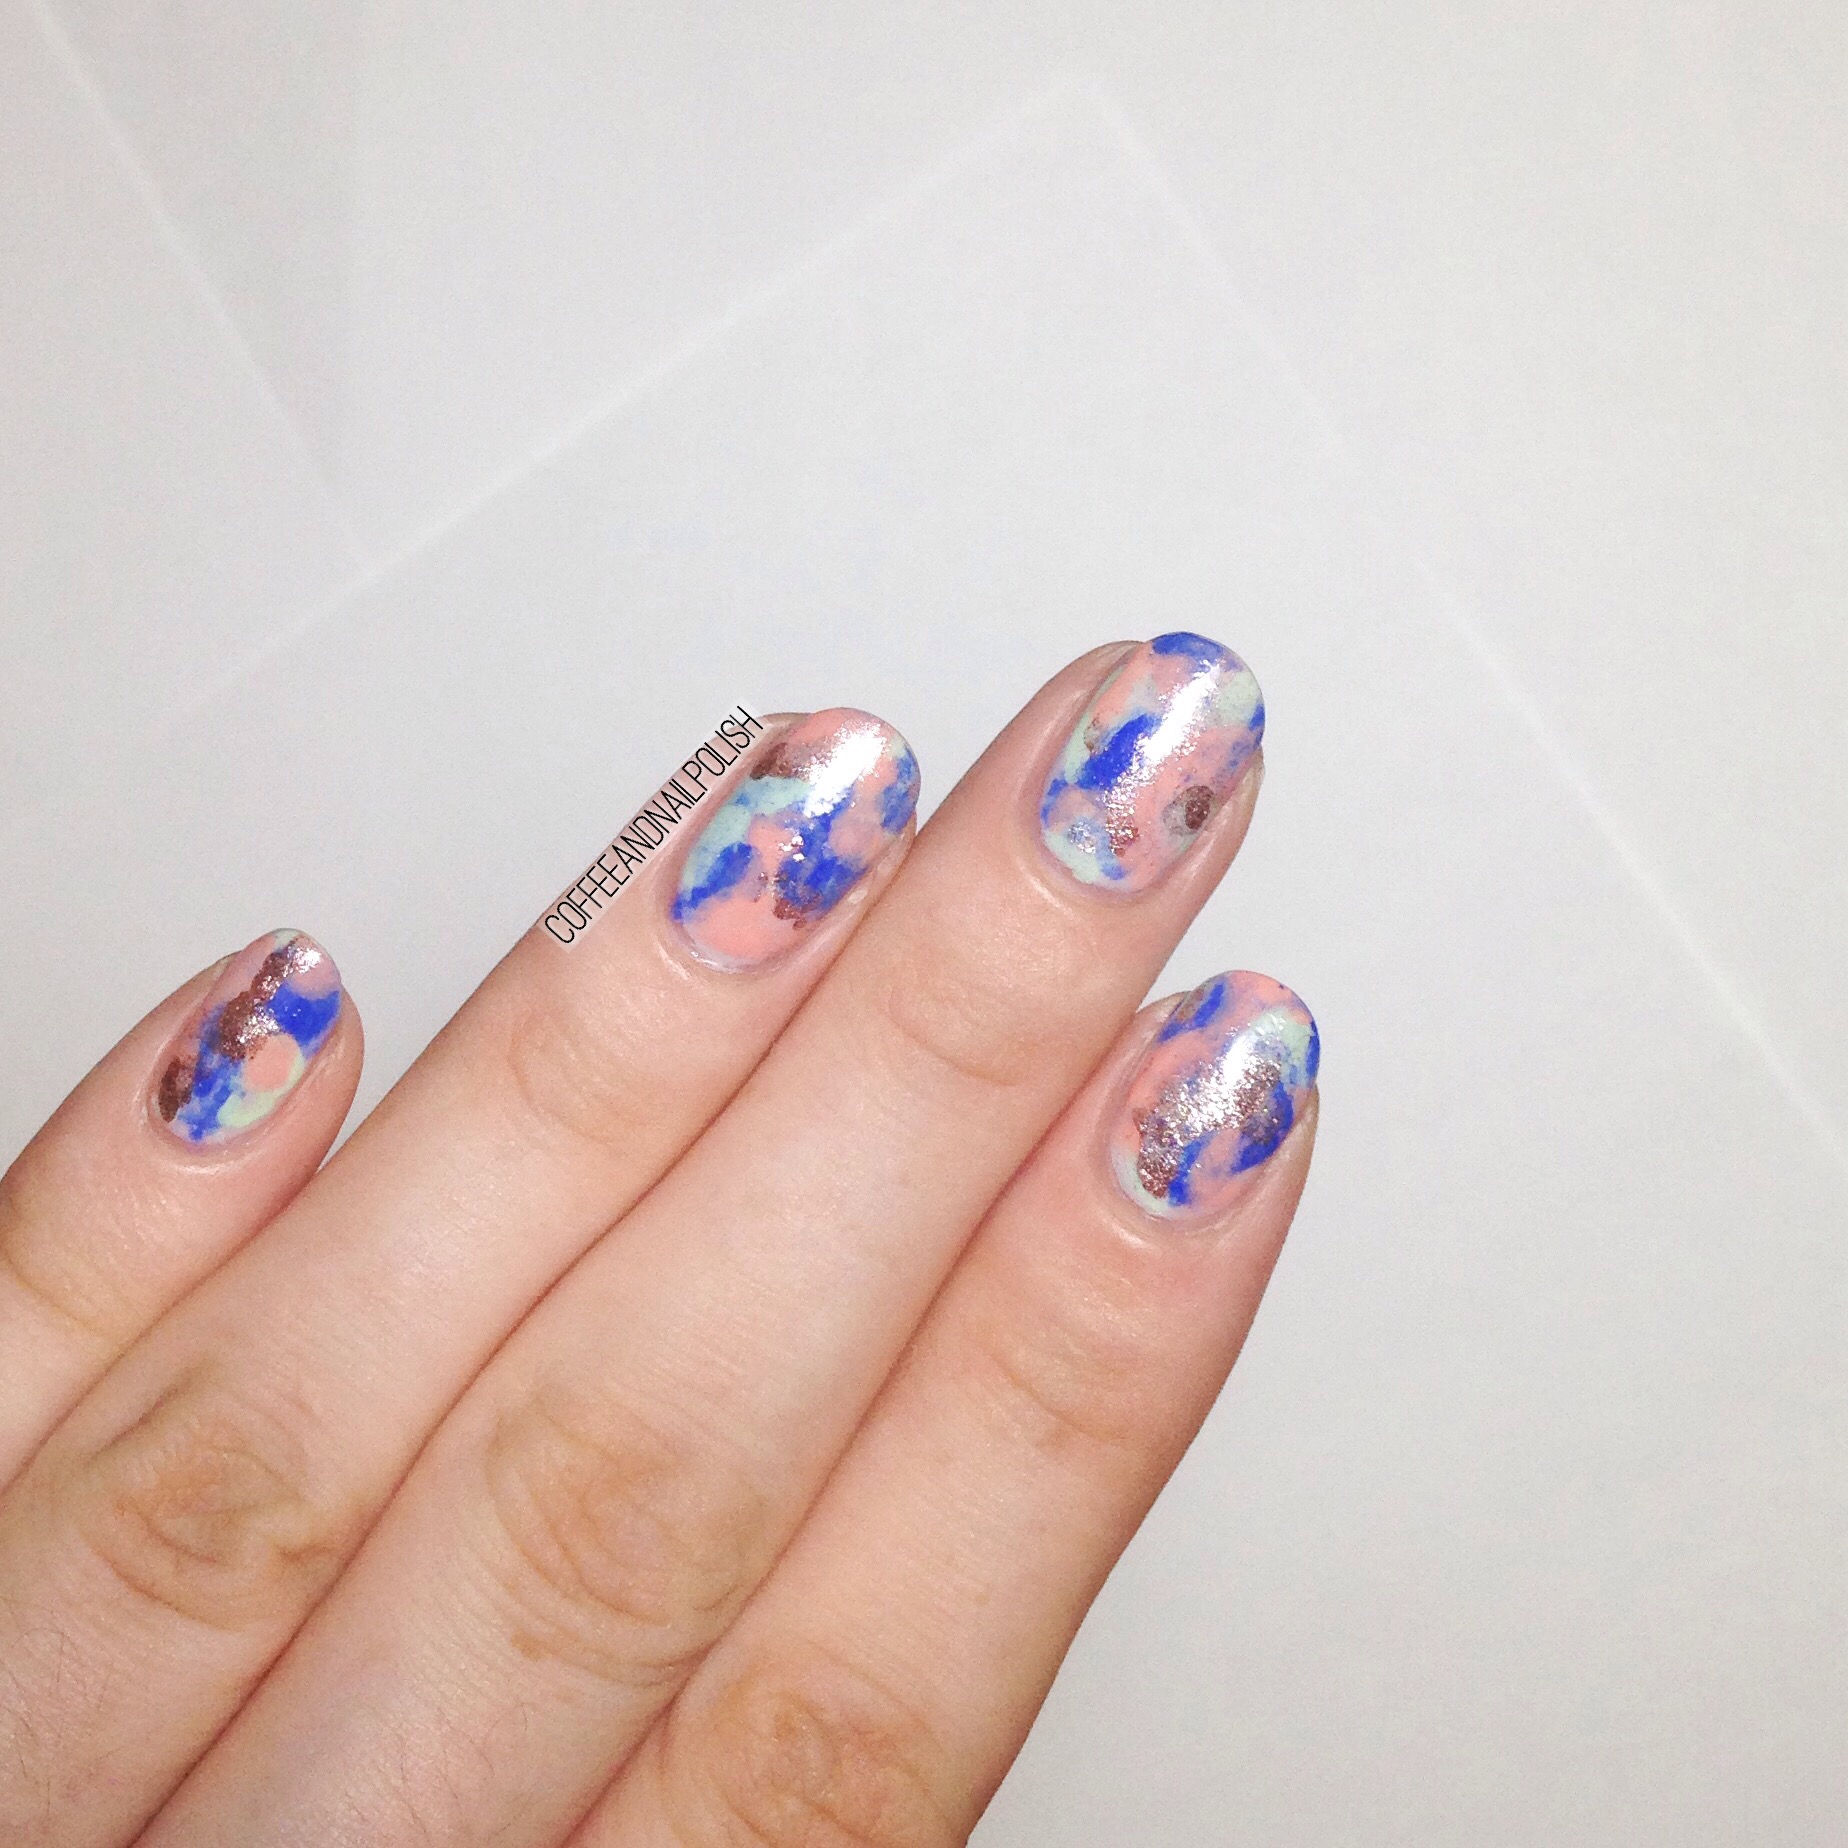
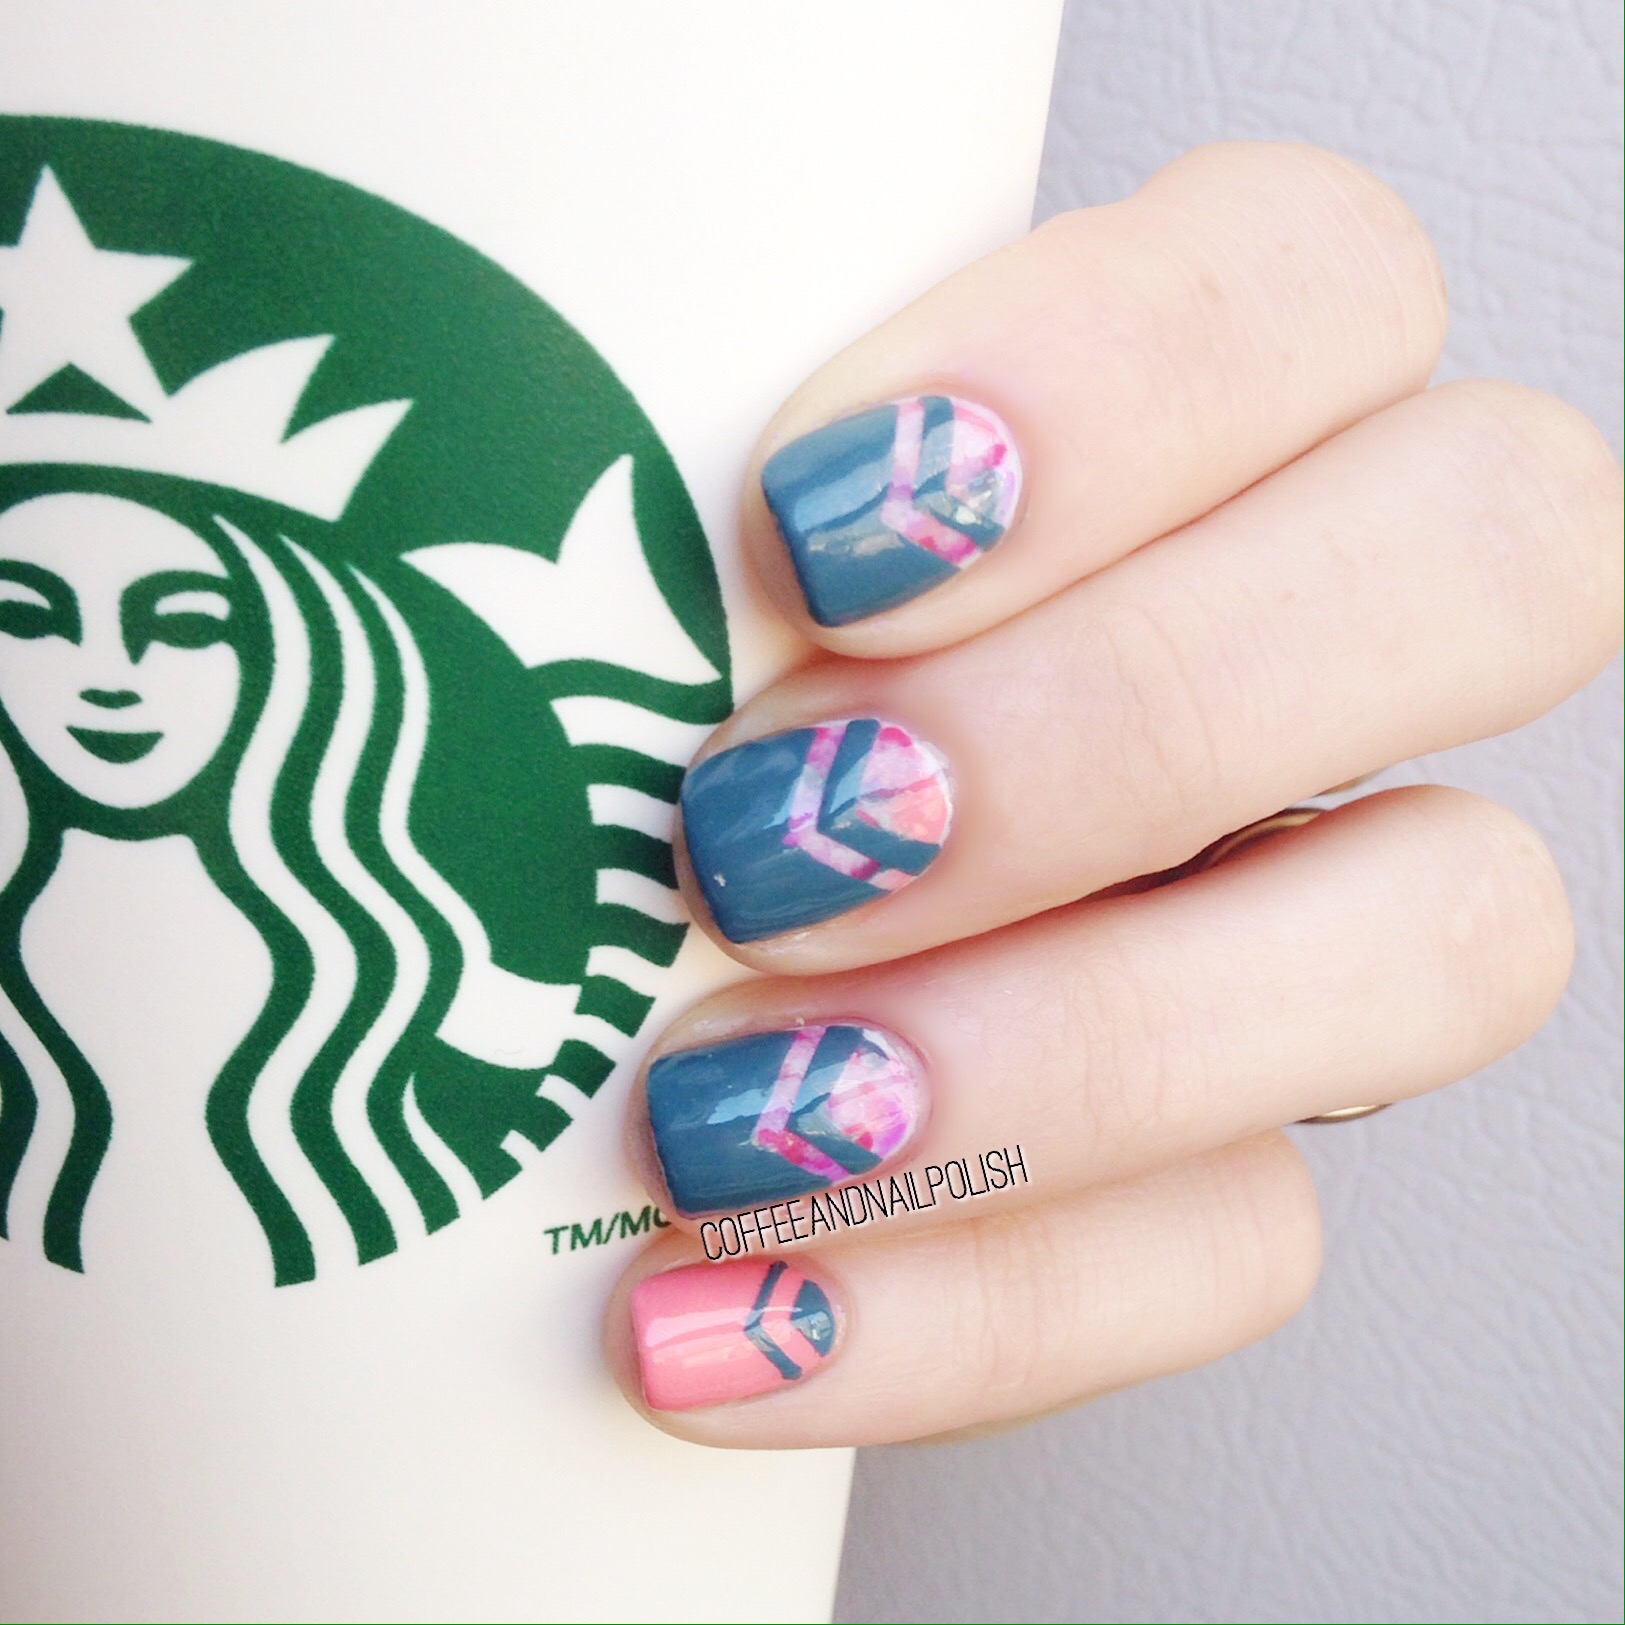
If you’ve been around a while, you’ve probably heard me mention before how I can’t water marble. I’ve tried to do it, I really have but the results never turn out quite right. So thanks to rewatching old Simply Nailogilcal videos on YouTube, I wanted to see if I can cheat at watermarble using my silicone mat, ala Cristine!

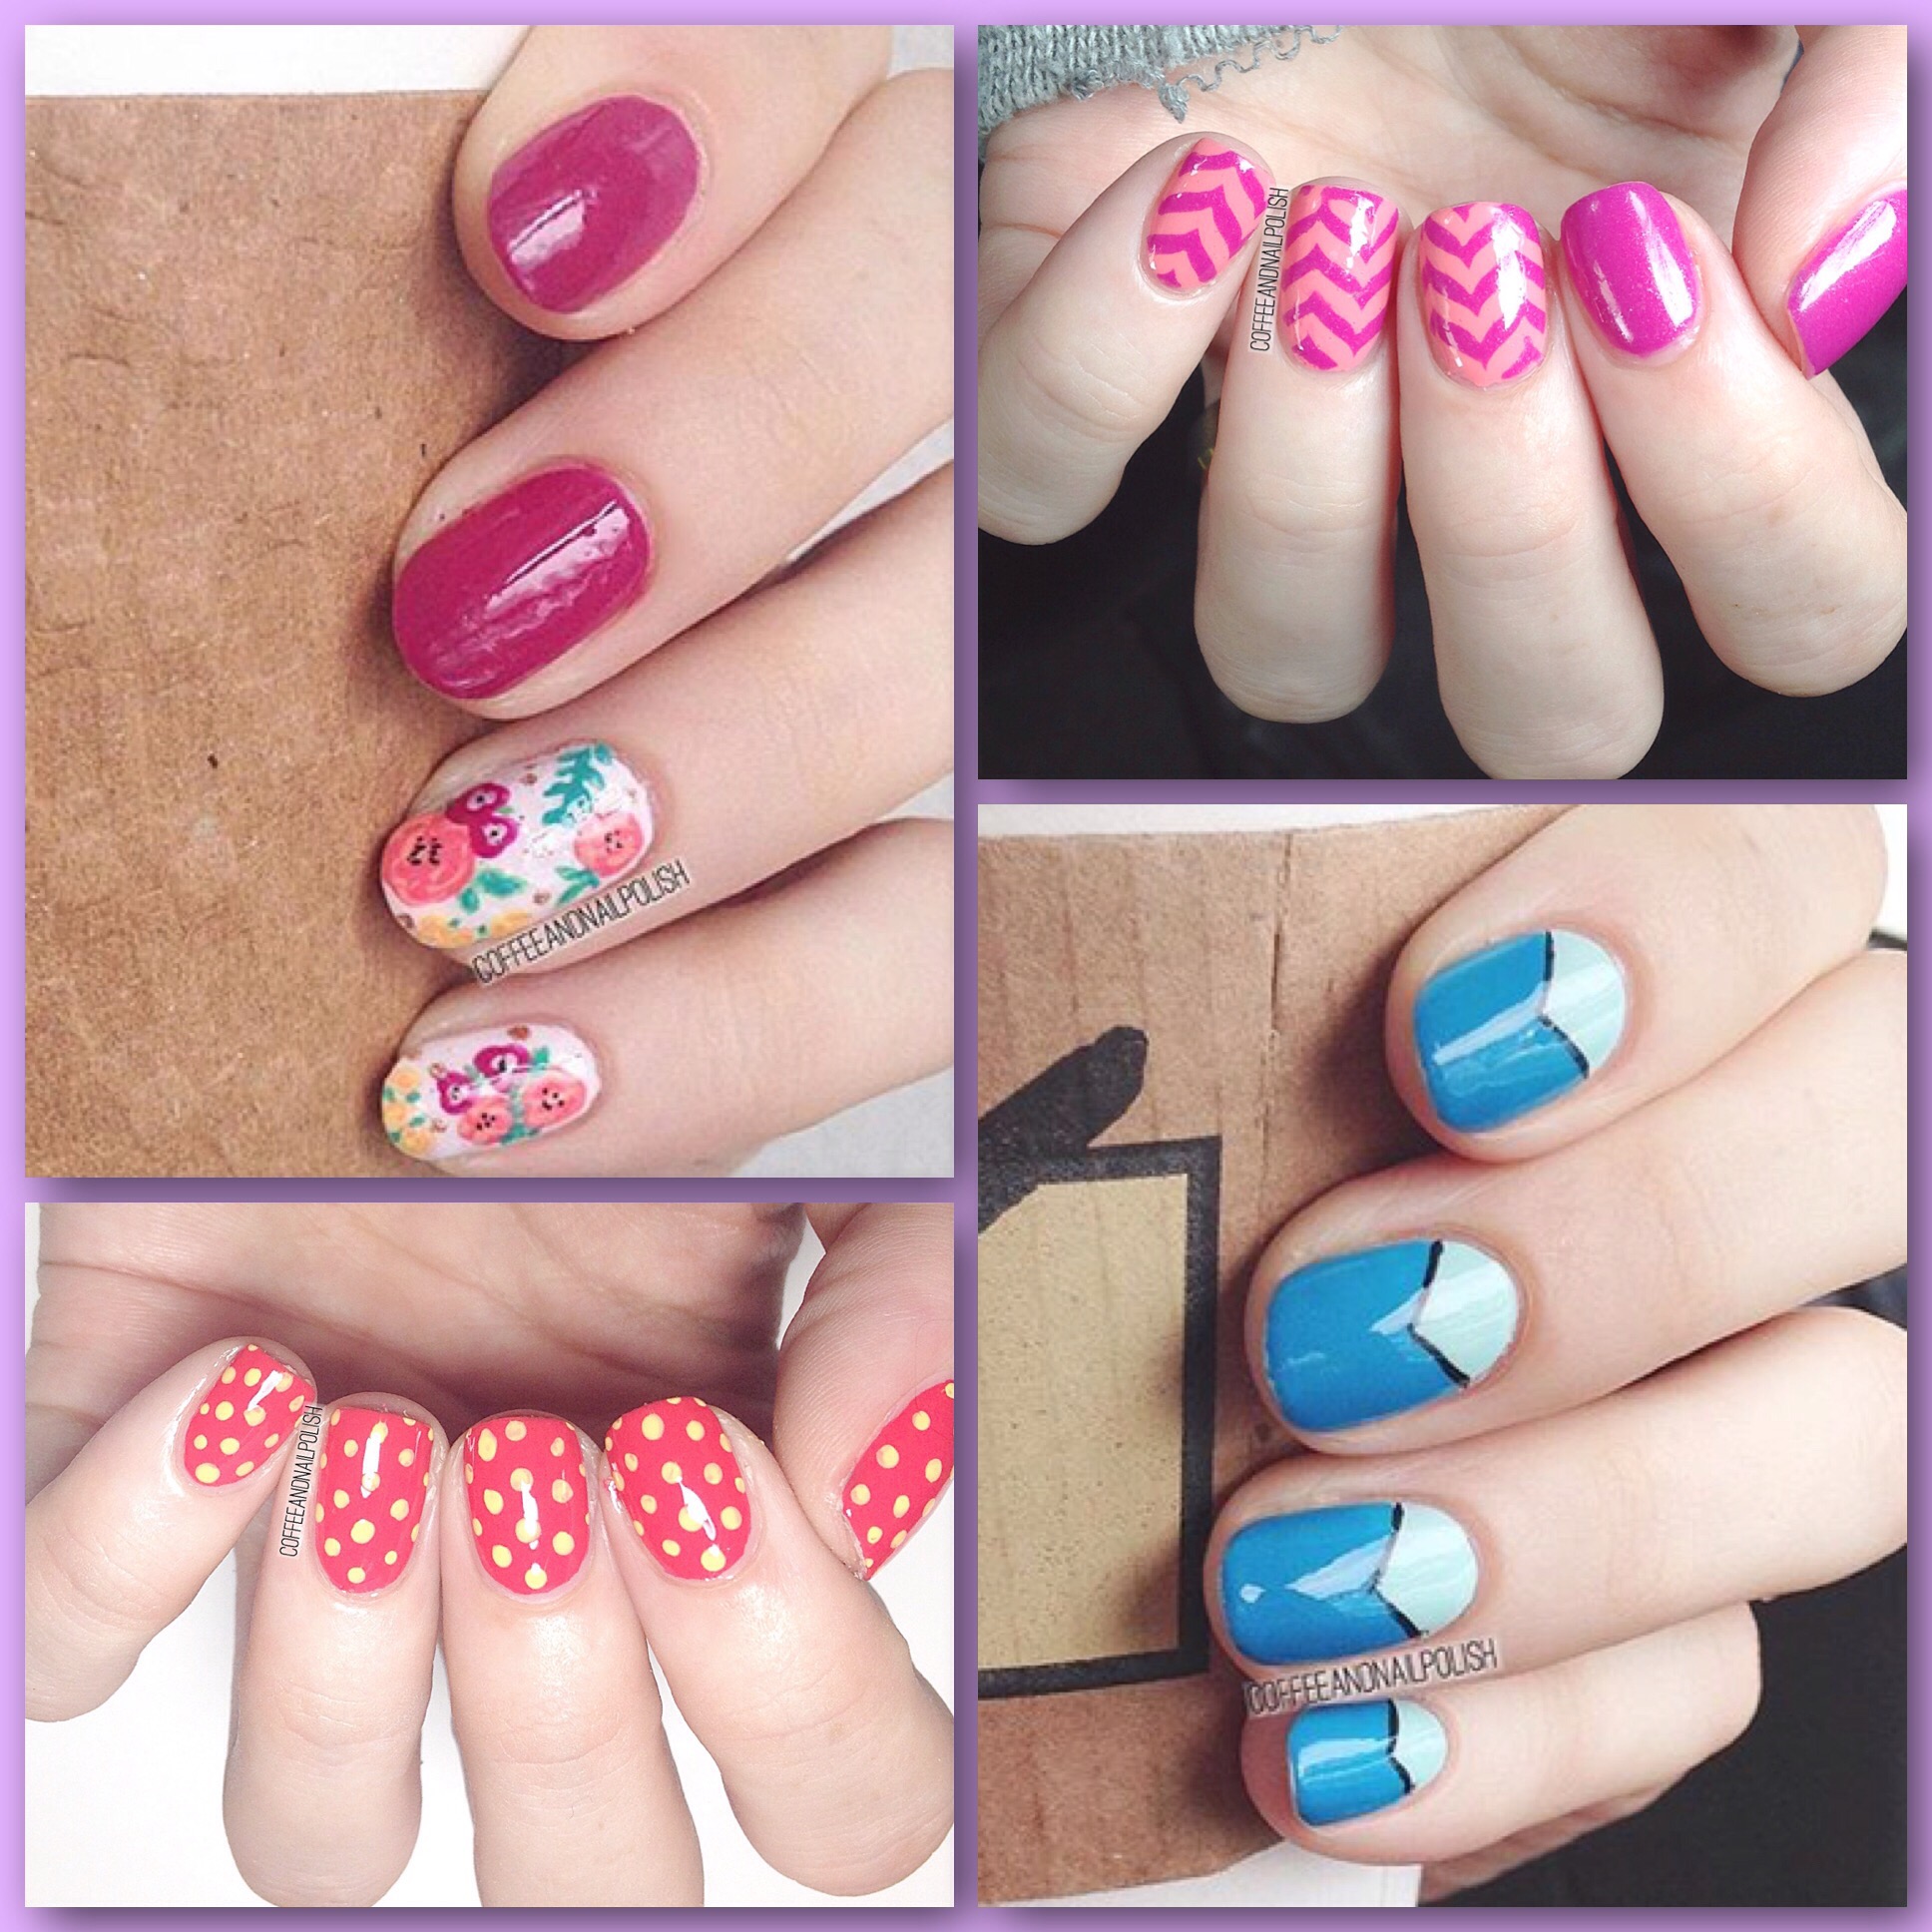
So for my first Drag Marble decal experiment, I decided to try a couple different designs that would sort of look like watermarble (if you didn’t look too closely). I did about 15 different decals using different polishes to see which colours/polish formulas worked best & picked the three best to apply.

For each manicure I used my silicone craft mat & a water marble tool from Bundle Monster. For how to apply decals, there are lots of useful tutorials on YouTube. I also topped all designs with my Cutex Quick Dry Top Coat.

Continue reading “Drag Marble Decals “

March Favourites! 


This is my first time in a while I’ve done a manicure round up! It’s been way too long. March saw my return to nail art, which has been really nice. I just don’t feel like myself when I don’t get to do my nails. March also saw my craving for Spring become real, which meant lots of Spring colours! 
From top left, here are my March manicures favourites

It’s so hard to chose my absolute favourite of all my designs this month (&always), but I really really love my Pink Drag Marble chevrons & my Spring Floral! 

Did you have a favourite design this month? Let me know in the comments below! 

Squishy Marble Nails

Now that we have baby on a bit of a schedule, I have a bit more time for nail painting! My goal is to try & use polishes I don’t reach for often, & colours that aren’t my typical shades. 

On top of that, I just want all the Spring colours. I decided to pull out a few polishes from deep in the back of my stash that I haven’t worn in ages for a fun squishy marble manicure. 

The polishes I used for this manicure were:

  • Sally Hansen X-treme Wear Pacific Blue
  • Nicole by OPI I’ll Have the Salmon
  • OPI  That’s Hula-rious
  • China Glaze Meet Me at the Mirage
  • Cutex Quick Dry Top Coat 

First off, trying out a brand new top coat so I hope to have a good review on that coming up soon! Secondly–how pretty is this mani?! I wasn’t so sure about pairing these colours together at first, but they ended up looking really awesome together! I’m not sure how others test mani shades, but I literally just brush my colours beside each other on paper until I find the ones that look best beside each other. I definitely need to download some of those nifty nail guides for designing manicures so I can plan more easily! 

What do you think of this manicure? What colours are your favourite to pair together? Let me know in the comments below! 

Grey Saran Wrap splatter nails. 

Happy Friday everyone! Who doesn’t love Friday?

 Today I have one of my favourite easy nail art techniques to share with you–Saran Wrap splatter! I’ve featured this technique a couple times, and I’m always in love with how they turn out. It really is one of those designs where you can’t really mess up (unlike water marble which I can’t not mess up!) because you can just keep dabbing polish on until you get a look you love. 

For this manicure, I used:

  • Essie Coat Couture
  • Essie Find Me An Oasis
  • Essie Gel Setter 
  • Crinkled up plastic bag. 

To achieve this look:

  1. Paint your nails with your base coat of choice, and then apply your base colour (I used Essie Coat Couture). 
  2. Apply a layer of top coat and let dry. I wait about 5-10 minutes. 
  3. In the mean time, take your Saran Wrap and crinkled up. You can also use a plastic grocery bag or any other crinkly plastic. I always use what I have on hand. 
  4. Once your base colour has dried enough you won’t ruin it, apply your second colour directly to your crinkled up plastic and dab onto your nail one at a time. Applying liquid latex around your nails helps minimize clean up. 
  5. If you feel like you’ve put too much of your secondary polish on your nail, you can go back with your base colour and dab again. Keep going until you like how your nail looks. 
  6. Once you look how your “splatter” looks, seal in your design with top coat. 

So what do you think of this technique? Have you ever tried out this design or would you try out this design? Let me know in the comments below! And if you do try out this technique, tag me on Instagram so I can see. ❤

Chevron Moons featuring Essie Lounge Lover And Pool Side Service. 

Good Morning Darlings!

I don’t know about where you are, but Spring finally seems to be hitting Halifax! So in honour of that, I’m sharing this mani using a couple of polishes from Essie’s Spring 2016 collection.

 I was at my local Lawtons the other night, and found a huge display of Essie on clearence for $2.54 each… So naturally I bought 6! I couldn’t wait to play around with my new polishes, so I grabbed some vinyls from MyNailsDid and created some Springy chevron moons. 

The polishes I used for this mani were:

  • Essie Lounge Lover
  • Essie Pool Side Service
  • Essie Peach Daiquiri
  •  ORLY Scenic Route
  • Essie Gel Setter 
  • MyNailsDid nail vinyls (chevrons)

What’s your favourite Spring 2016 polish so far? I absolutely need to find Shades On from this collection… Such a pretty purple! 💜 have a great day lovelies.