Marble Fluid Nails

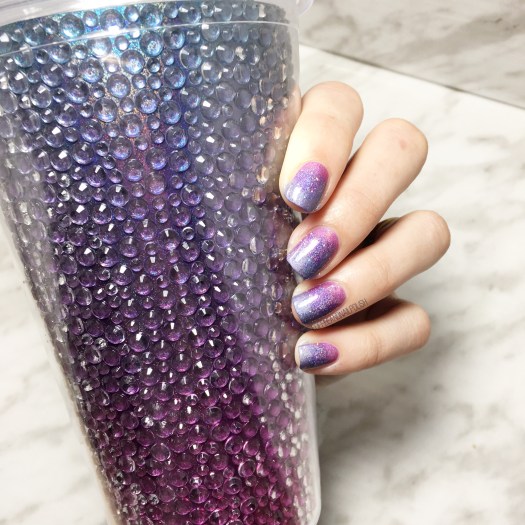
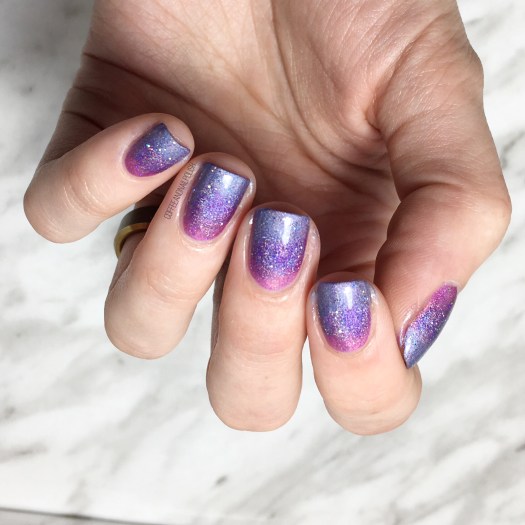
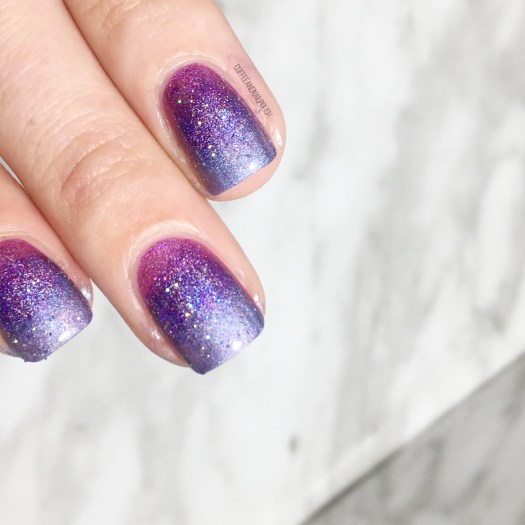
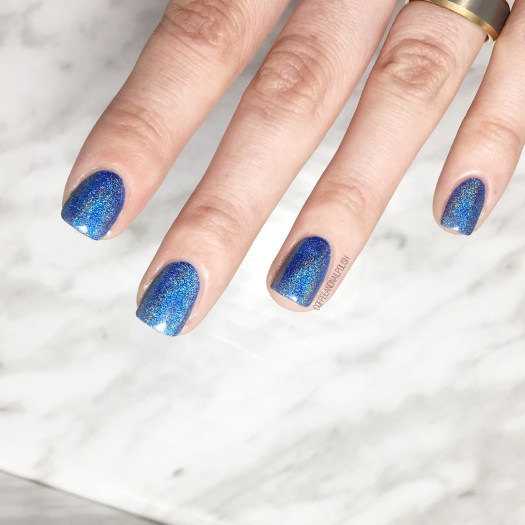
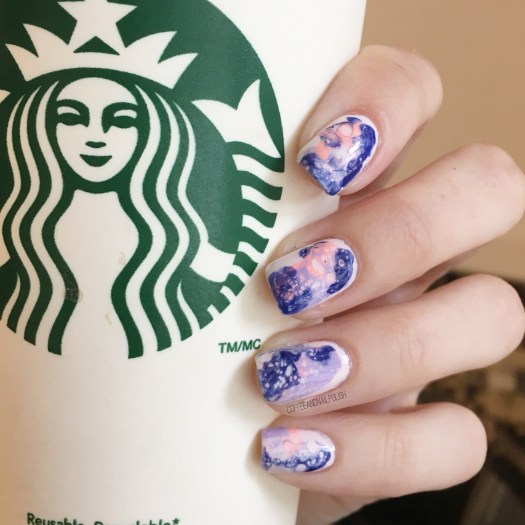
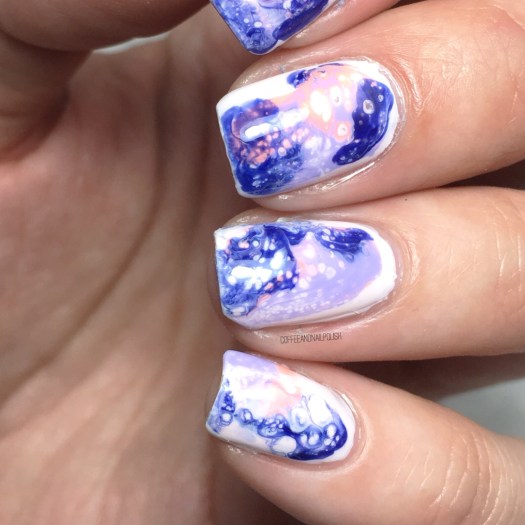
Good morning lovelies & happy Friday! Who else is excited for the weekend!? Today I have some brand new nails with a new to me technique I’ve been wanting to try for AGES: fluid nails.

This technique has been popping up on Instagram for a while & I’ve been obsessed with how they looked just as long — I even went out & bought a few of the Sinful Colours Hypnotic Transforming Top Coats that were released a few years ago, but was dawdling on actually giving the technique a try!

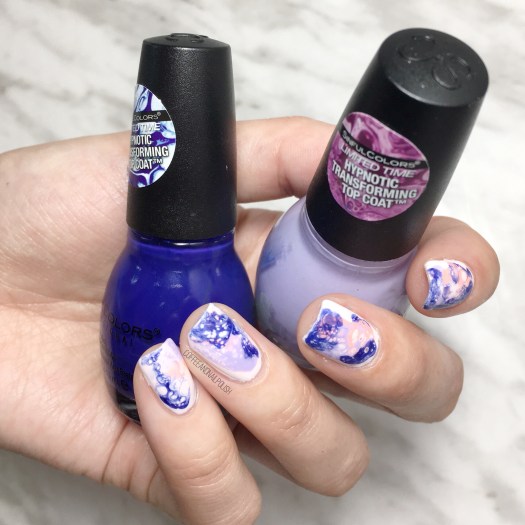
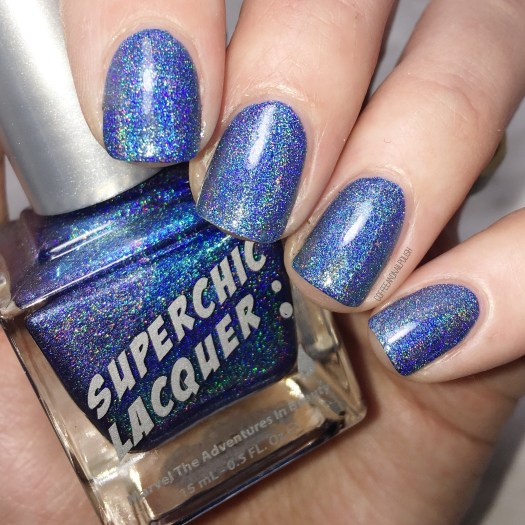
The polishes I used for this design were:

  • Base Coat: Sally Hansen Bamboo & Green Tea Strengthner
  • Top Coat: Essie Speed Setter
  • Sally Hansen Miracle Gel Pretty Peony
  • Sally Hansen Miracle Gel Neons Peach Please
  • Sinful Colors Hypnotic Transforming Top Coat Rebel Rebel
  • Sinful Colors Hypnotic Transforming Top Coat Purpunk
  • Stamper (I used my clear stamper from Nailsuff.ca)

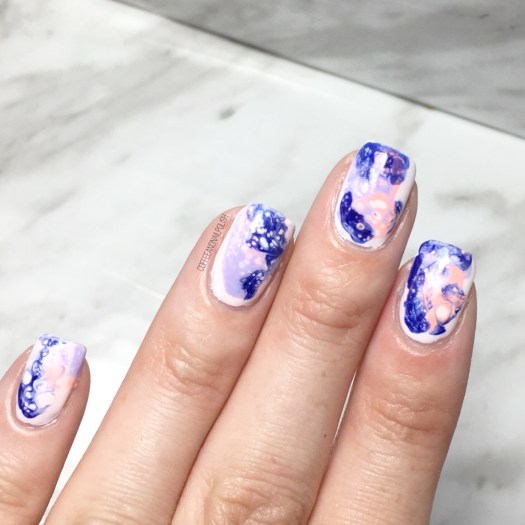
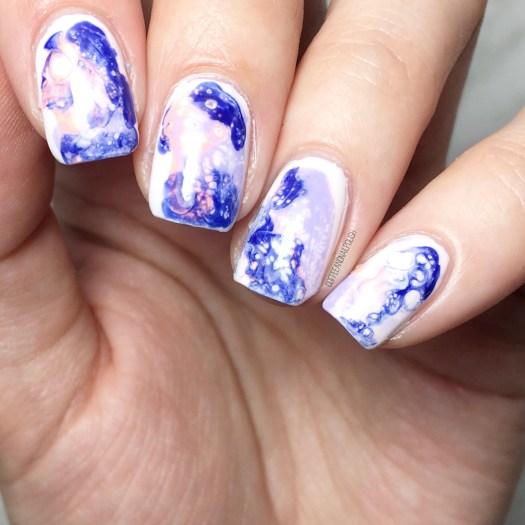
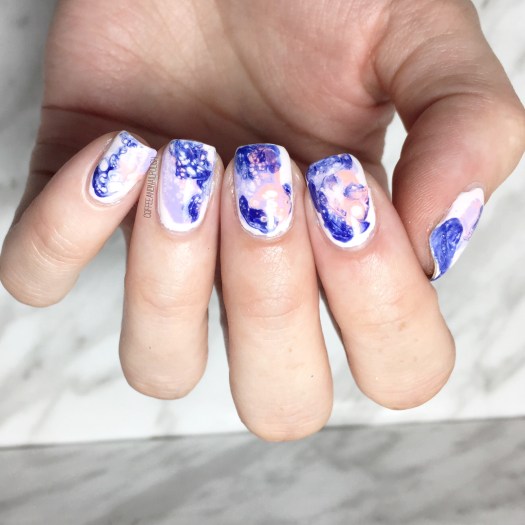
Most of the tutorials I saw involved creating decals to make your cells for the fluid look, but being lazy (& tired) I decided to see if I could use the smoosh technique to get a similar look. I painted my nails my base colour of choice & then applied drops of polish including my Sinful Colors Hypnotic Transforming Top Coats & then quickly pressed down using a stamper to smoosh my shades together. & it worked!

I was a little careful with application to keep mess to a minimal (couldn’t find my Edge Perfection & wasn’t in the mood for a ton of clean up) but you could definitely make the fluid look cover more of the nail if you applied more polish & smooshed down harder. I will definitely be trying this look again & seeing if I can do a fuller nail look. However, that being said my pinky was the first nail I did & it turned out my favourite!

Have you tried out the fluid nail art look yet? I know I’m about 2 years behind, but I’m so glad I finally gave it a try & finally used these awesome spotted polishes I’ve had in my stash forever!

What do you think of this look? Let me know in the comments below!

My Nails & My Cup — Holo Gradient Nails

Are you guys sick of the holo yet? I certainly hope not because I have another mani to share–this time I created a Holo gradient to match my new-ish tumbler that I picked up at Claire’s on clearance for $2. It came with cute little manicure tools inside, so I had to have it!

I posted on Instagram the other day what nail art I should do on my naked nails, while holding the above cup, & received an overwhelming amount of responses saying I should match my cup… so that’s what I decided to do!

For this manicure, the polishes I used were:

  • Base Coat: Sally Hansen Green Tea & Bamboo Strengthener
  • Top Coat: Seche Vive
  • China Glaze BFF
  • Color Club Eternal Beauty
  • China Glaze 2Nite
  • Quo by ORLY Falling Star
  • Latex free make up sponge
  • Creating the holo gradient may have been one of the easiest gradients I’ve ever done! I don’t know if it’s the sparkle or formula or what, but I was as to sponge on each colour separately (which kept from making a big old mess around my cuticles) & they blended together seamlessly!
  • I know the cup has a whole bunch of rhinestones, but I definitely did not have enough on hand to apply to my fingers (or enough colours that would match) so I decided a couple coats of a scattered holo top coat could give a similar look, so I grabbed Quo by Orly Falling Star because I find the glitters larger than some of my other holo toppers (like China Glaze Fairy Dust). Gave off just enough extra sparkle on the nail without being distracting!
  • so what do you think of the holo gradient? Which colour combination do you think I should try out next? Share your thoughts down in the comments below!

    Blurple Holo Chevron Moons 🌙

    Good morning lovelies & happy Tuesday. It is Tuesday, right? Now that I’m off work & on baby watch, I’m struggling to remember what day it is haha. All I know is it is a beautiful sunny day, & I have some more holo nails to share!

    If you follow me on Instagram, you would have seen my Instastories teasing this design. I was in the mood for some chevron half moons & some holo, so I combined the two into an awesome design!

    For this manicure, the polishes I used were:

    • Base Coat: OPI Nail Envy
    • Top Coat: Seche Vive
    • China Glaze 2Nite
    • China Glaze OMG
    • Kiss Nail Art Striper in Black
    • TheBaseCoat Stacked Chevron Nail vinyls

    Seriously, look at that holo beauty. I feel like warmer days & sunshine are reinvigorating my love for holo. Now I just need some neon holo polishes (are those a thing? We need to make them a thing) & I will be all ready for this Summer.

    & just for fun, I got an awesome sunshine shot of this manicure which just makes me love it even more. There is nothing better than holo in the sunshine. Look at that rainbow shift 😍

    What do you think of these holo Chevron moons? Let me know in the comments below!

    Now I’m off to paint my nails… but the question remains: holo or neon?! I need both!

    SWATCH SUNDAY — Superchic Lacquer Throwing Shade

    {PR sample}

    Good afternoon lovelies & happy Sunday!

    Today I have a fun gifted polish to shade from you, thank was so graciously sent to me by my friend over at Nailstuff.ca.

    On top of all the amazing nail art goodies, there is a fantastic selection of Indie polishes that you can also choose from! & today’s selection is from her awesome collection: Superchic Lacquer Throwing Shade.

    This gorgeous Indigo liner holo applies in one coat! & has a flawless application. Sometimes I find holo polishes can be thin & drag, but I had zero problems applying Throwing Shade. I started off with 2 coats of base coat (based on what I’ve read online) followed by one coat of my polish & then sealed everything in with a glossy top coat.

    Even with artificial lighting, you can see how awesome the shift of rainbows is both on the nail & in the bottle. If only we had another sunshine-y day to see it in all it’s true glory, but sadly we have another cloudy rainy day happening in Halifax. No worries… still completely distracted by how gorgeous this polish looks!

    & below you can see it with flash. So. Much. Holo!

    What do you think of this blue holo? What colour polish is your favourite holo? Share all your favourites down in the comments below!

    💙

    SWATCH SUNDAY — Sally Hansen Miracle Gel Summer 2019 Neons

    {PR Sample}

    Good morning lovelies & happy Sunday! Today I’m super excited to finally be able to share my swatches of these amazing Limited Edition polishes from Sally Hansen. I’ve been playing around with looks using these shades since I received them, & now I finally have the time to share these polishes with you.

    I was gifted these amazing polishes from Sally Hansen, which are currently popping up in stores for the Summer. The collection contains 6 brand new shades–my package also contained a bottle of Get Mod (white) as well Matte Top Coat.

    For my swatches below, I applied the polish just on its own–I started off trying it with the white undies, but it seemed like unnecessary layers of polish, so I decided to swatch all shades just on their own. & I was quite impressed with how they turned out!

    Continue reading “SWATCH SUNDAY — Sally Hansen Miracle Gel Summer 2019 Neons”