Deep & Dark Vintage Floral NailsĀ 

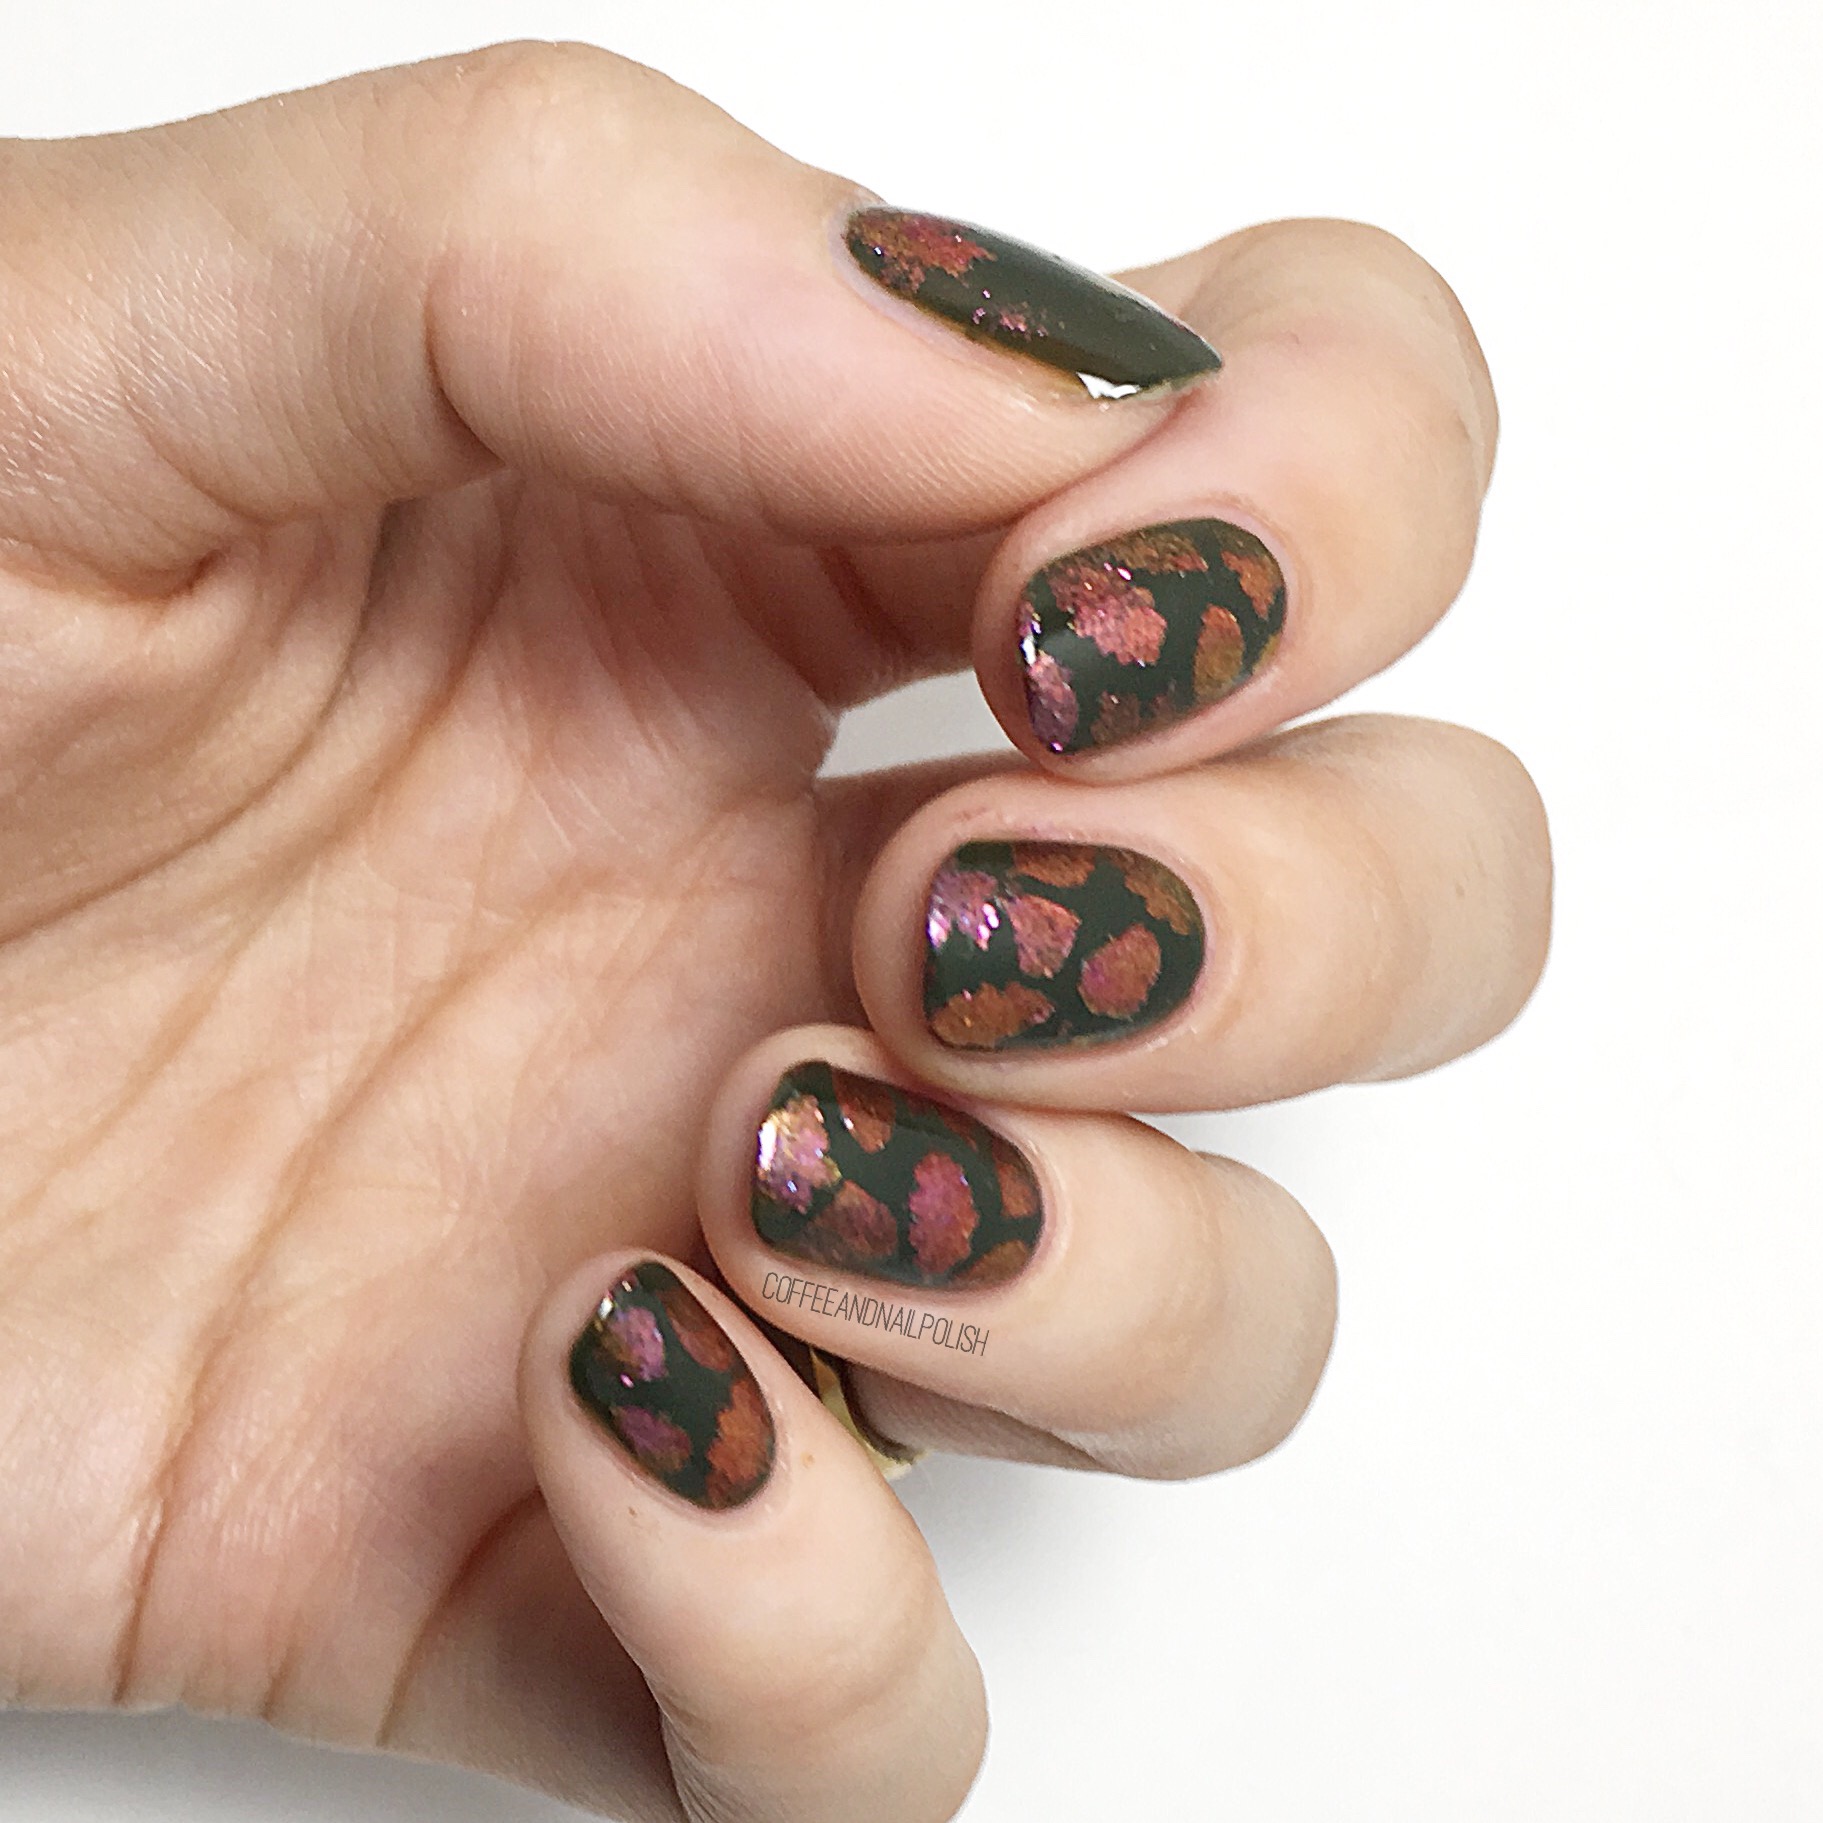
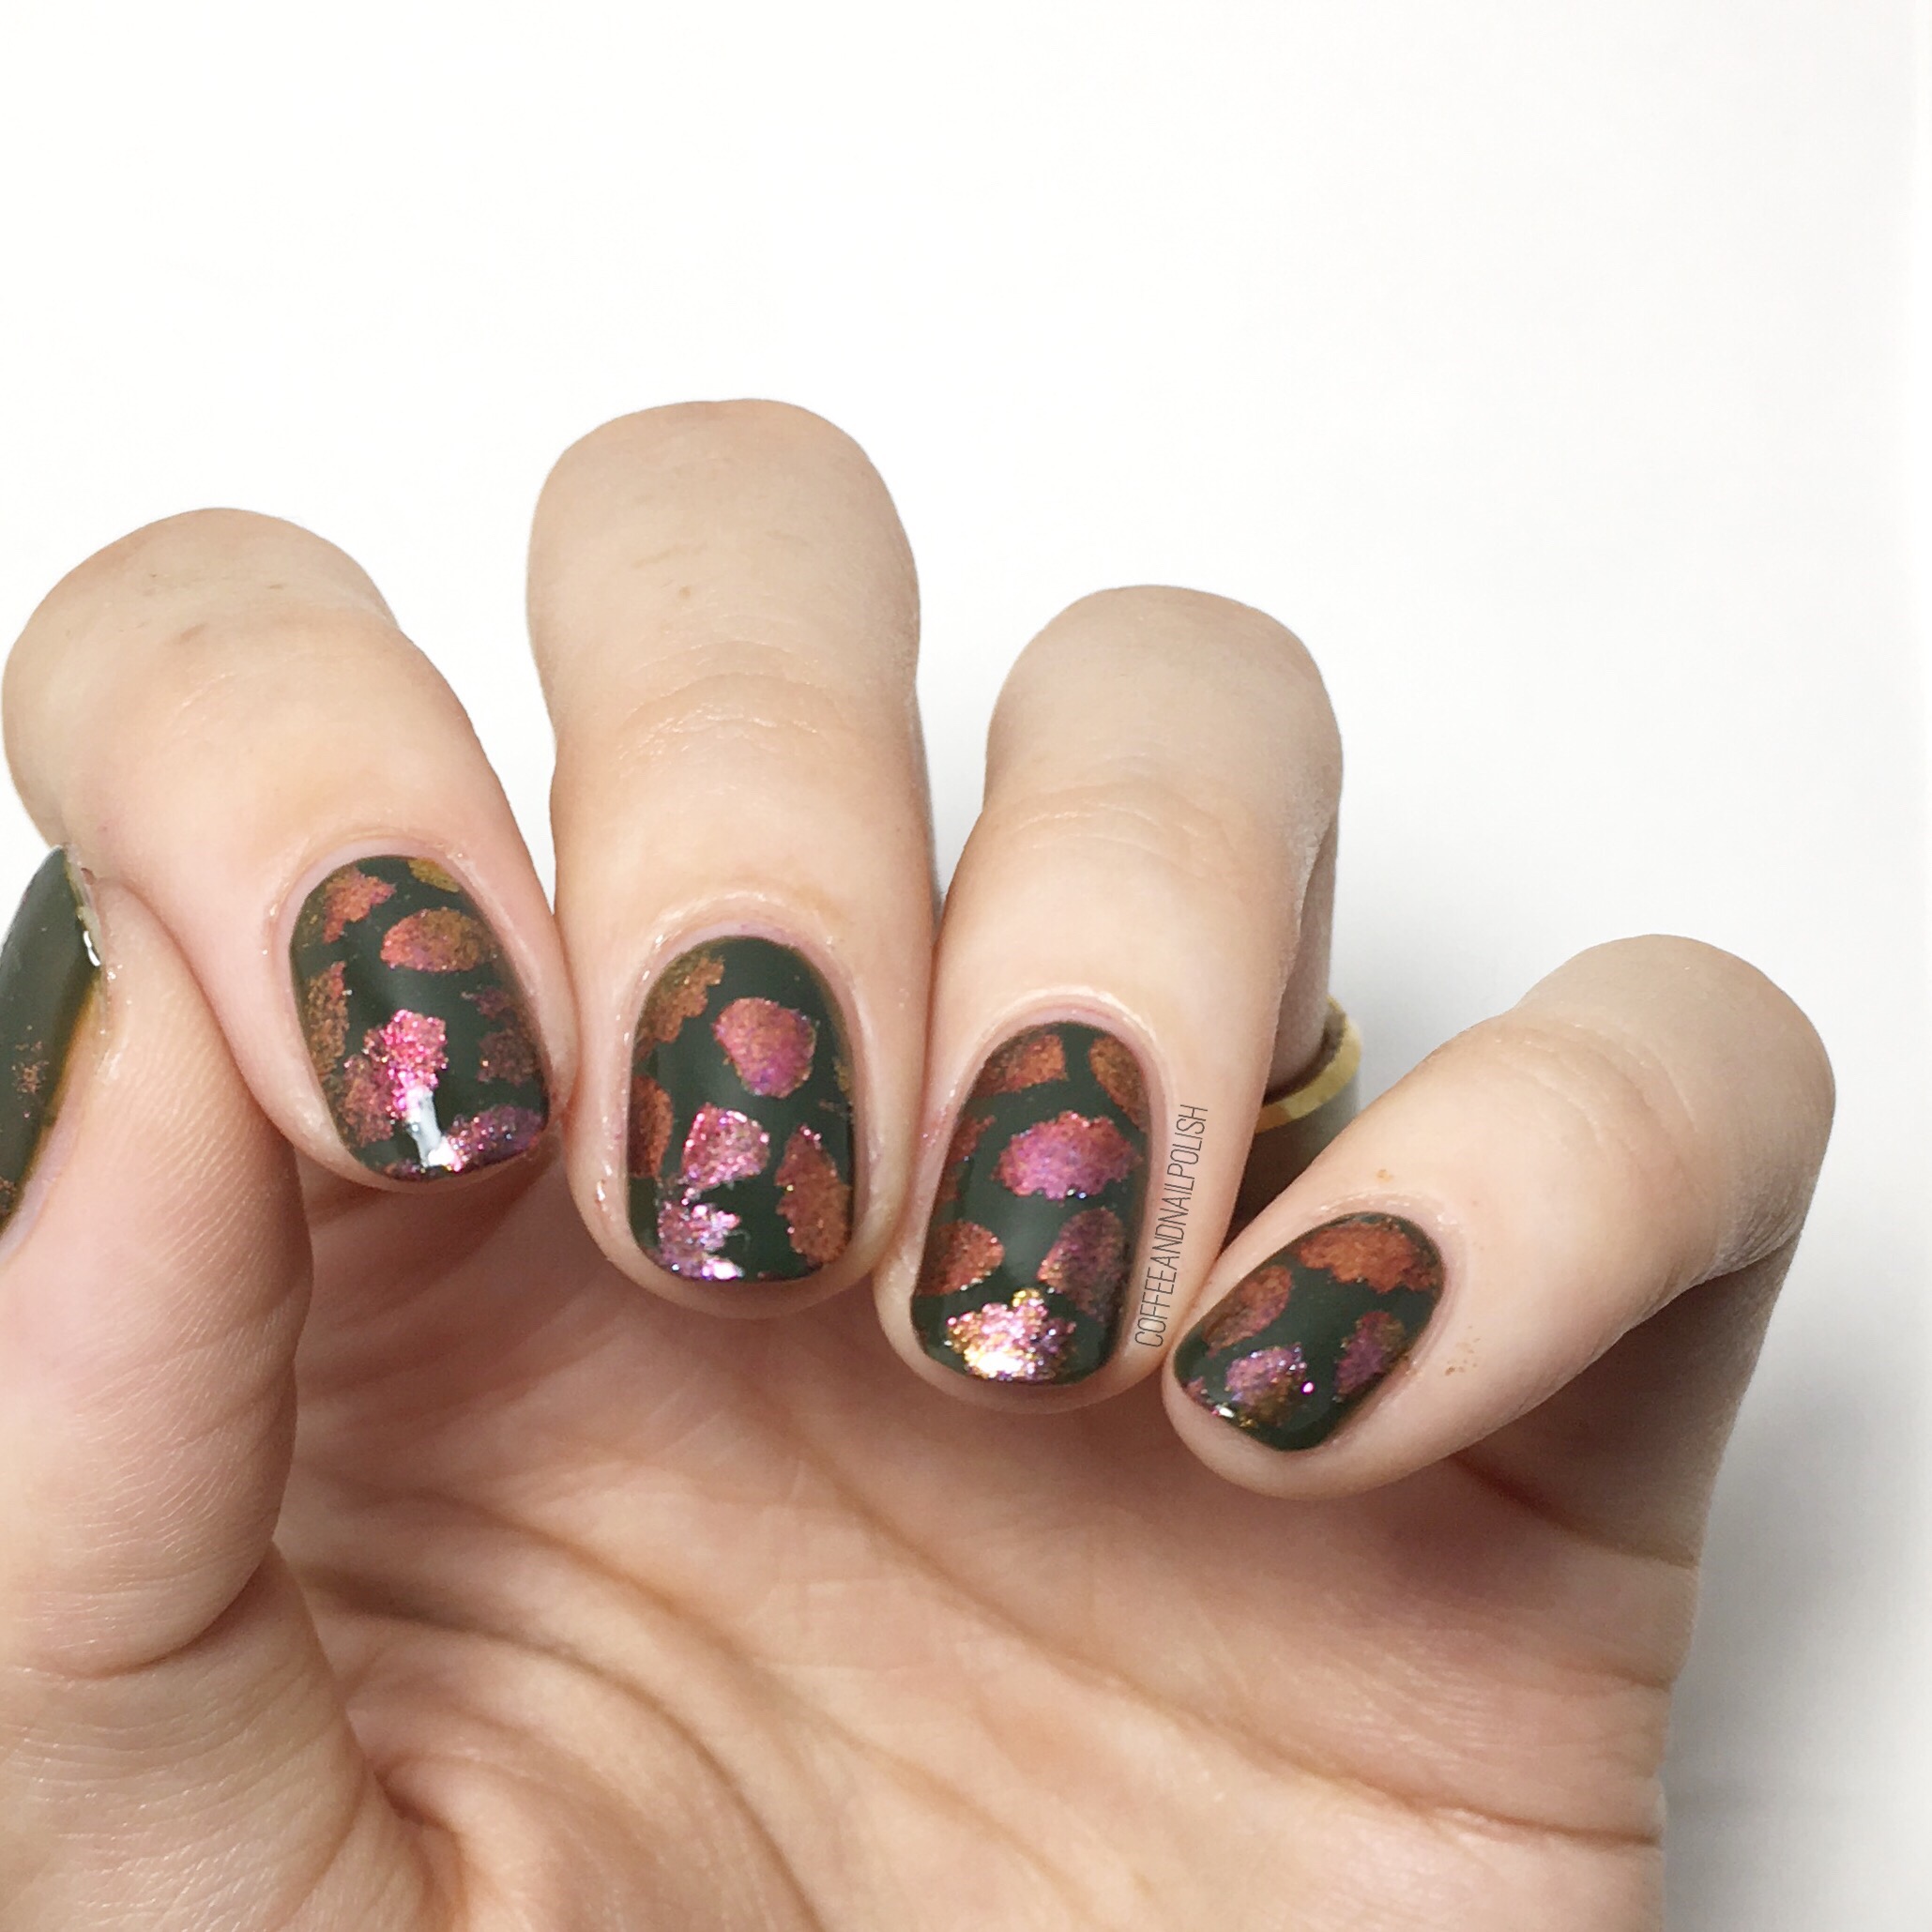
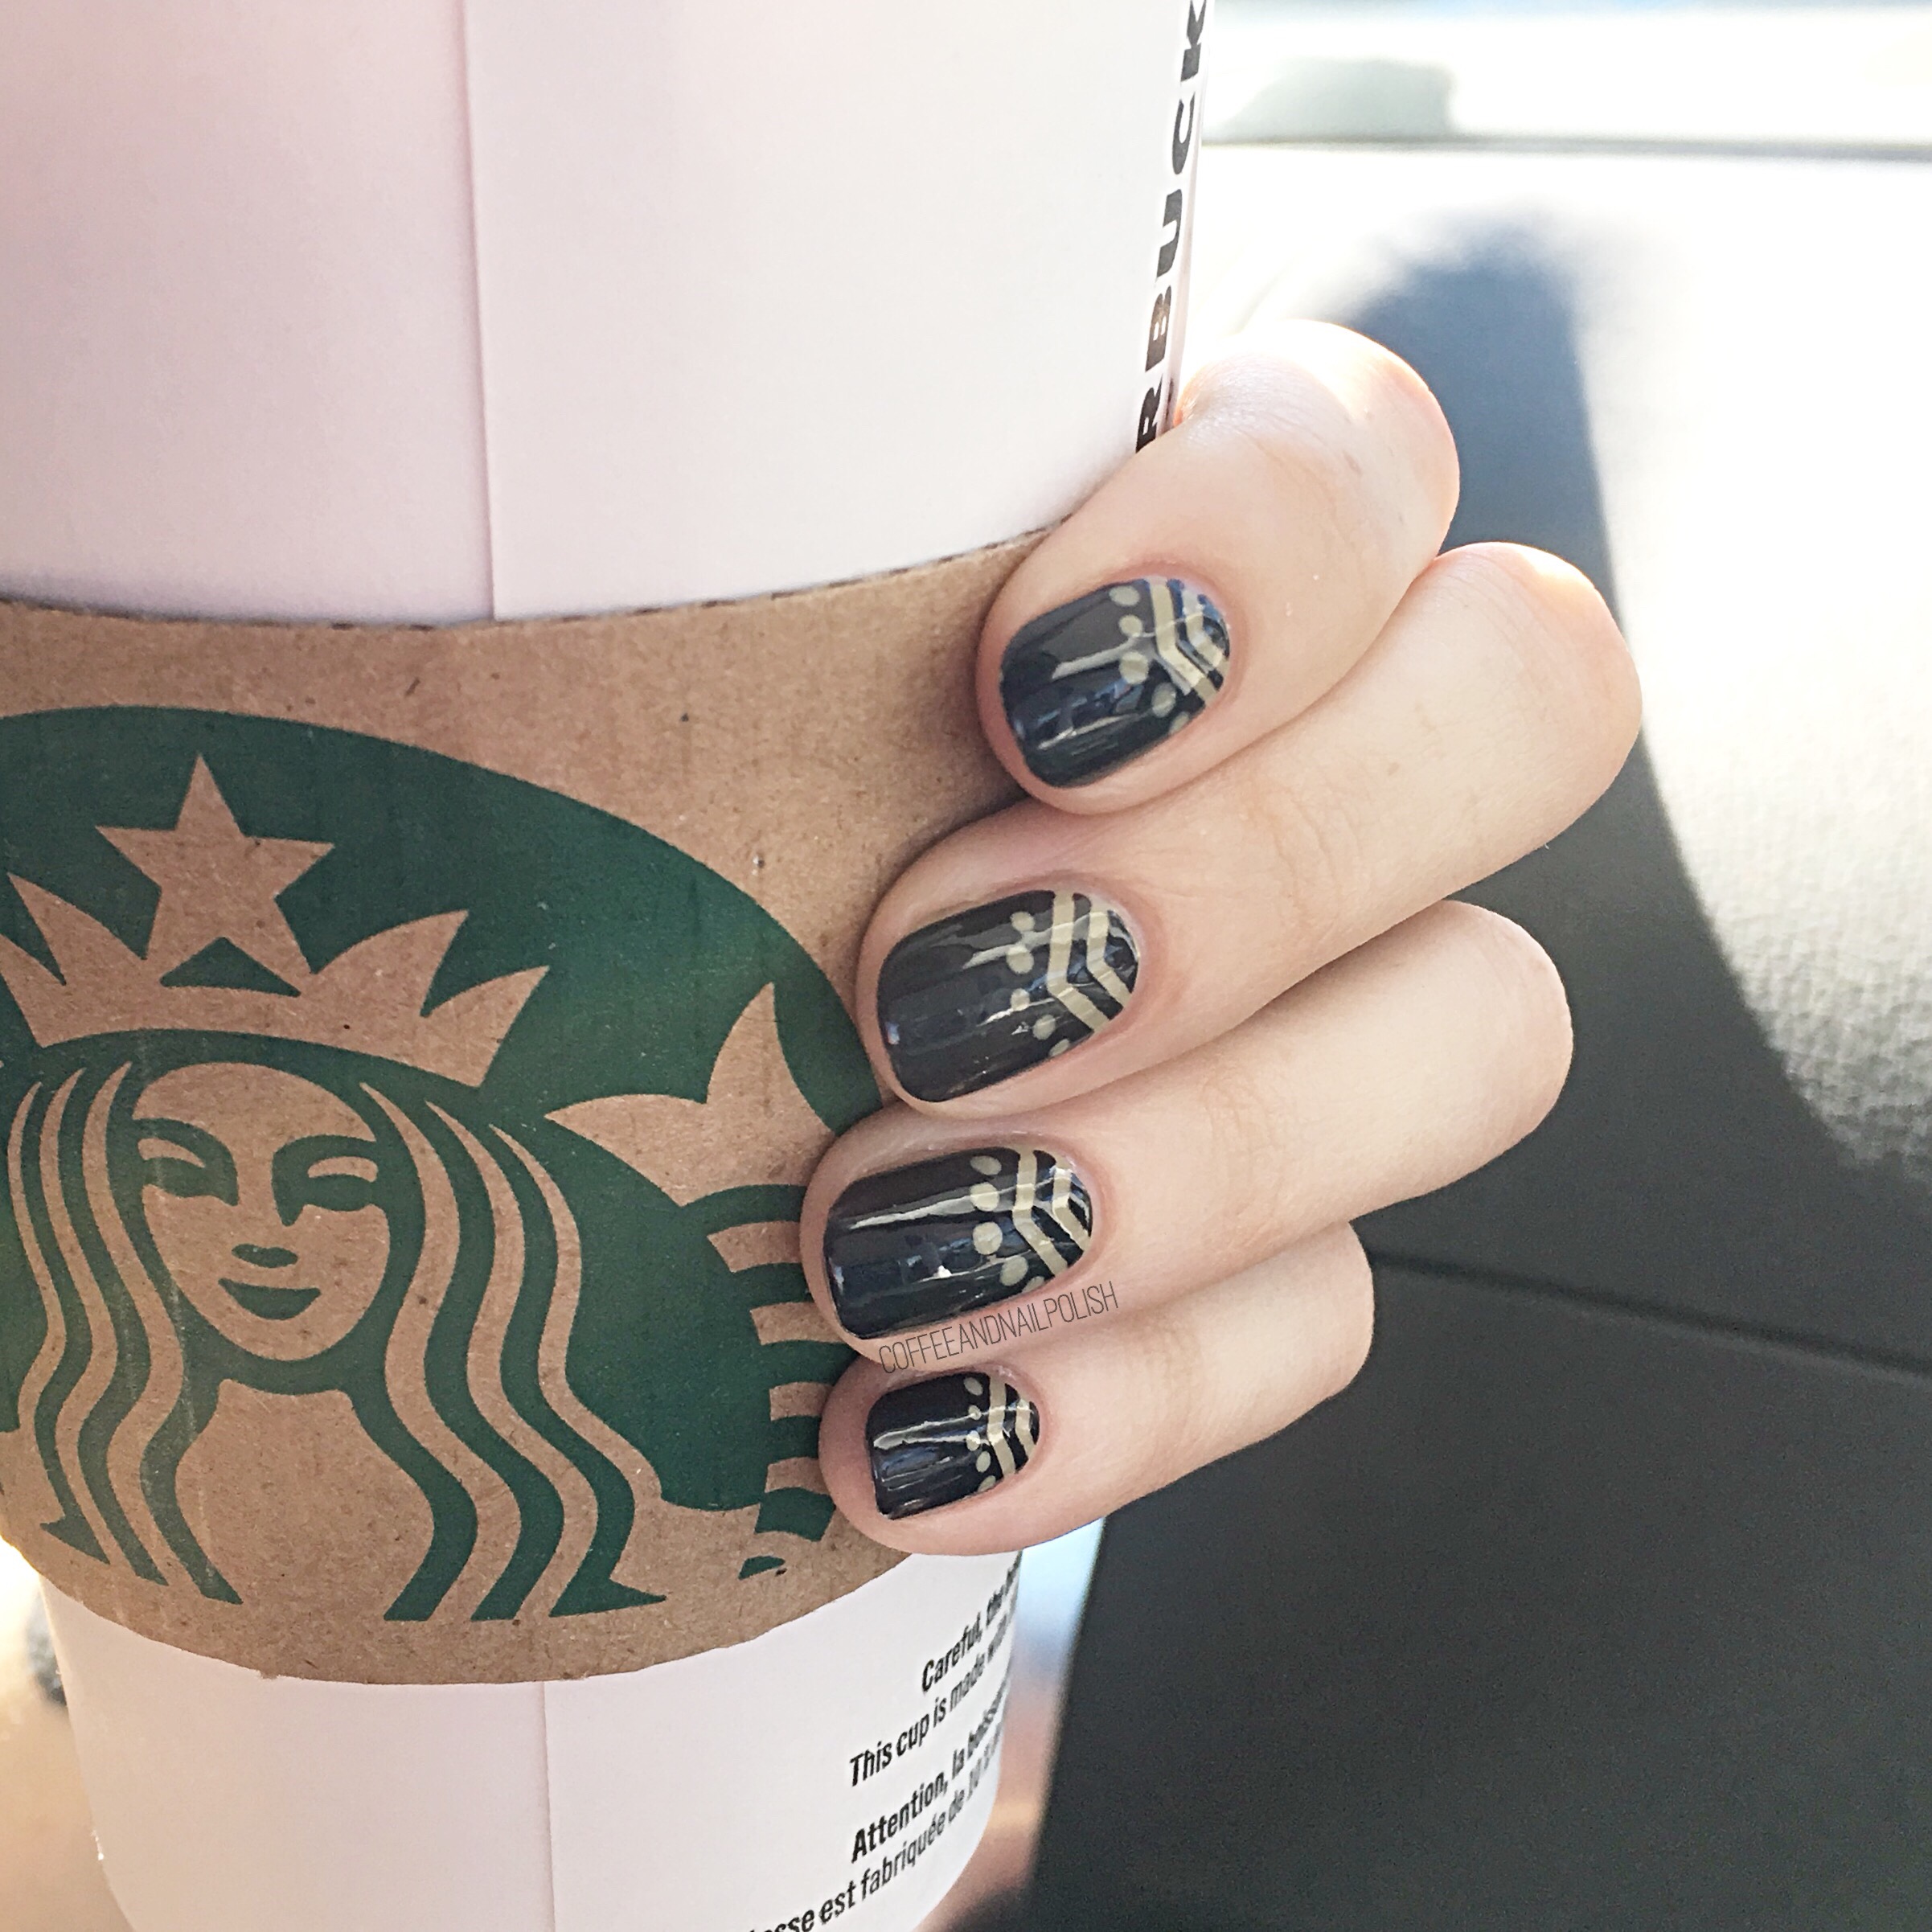
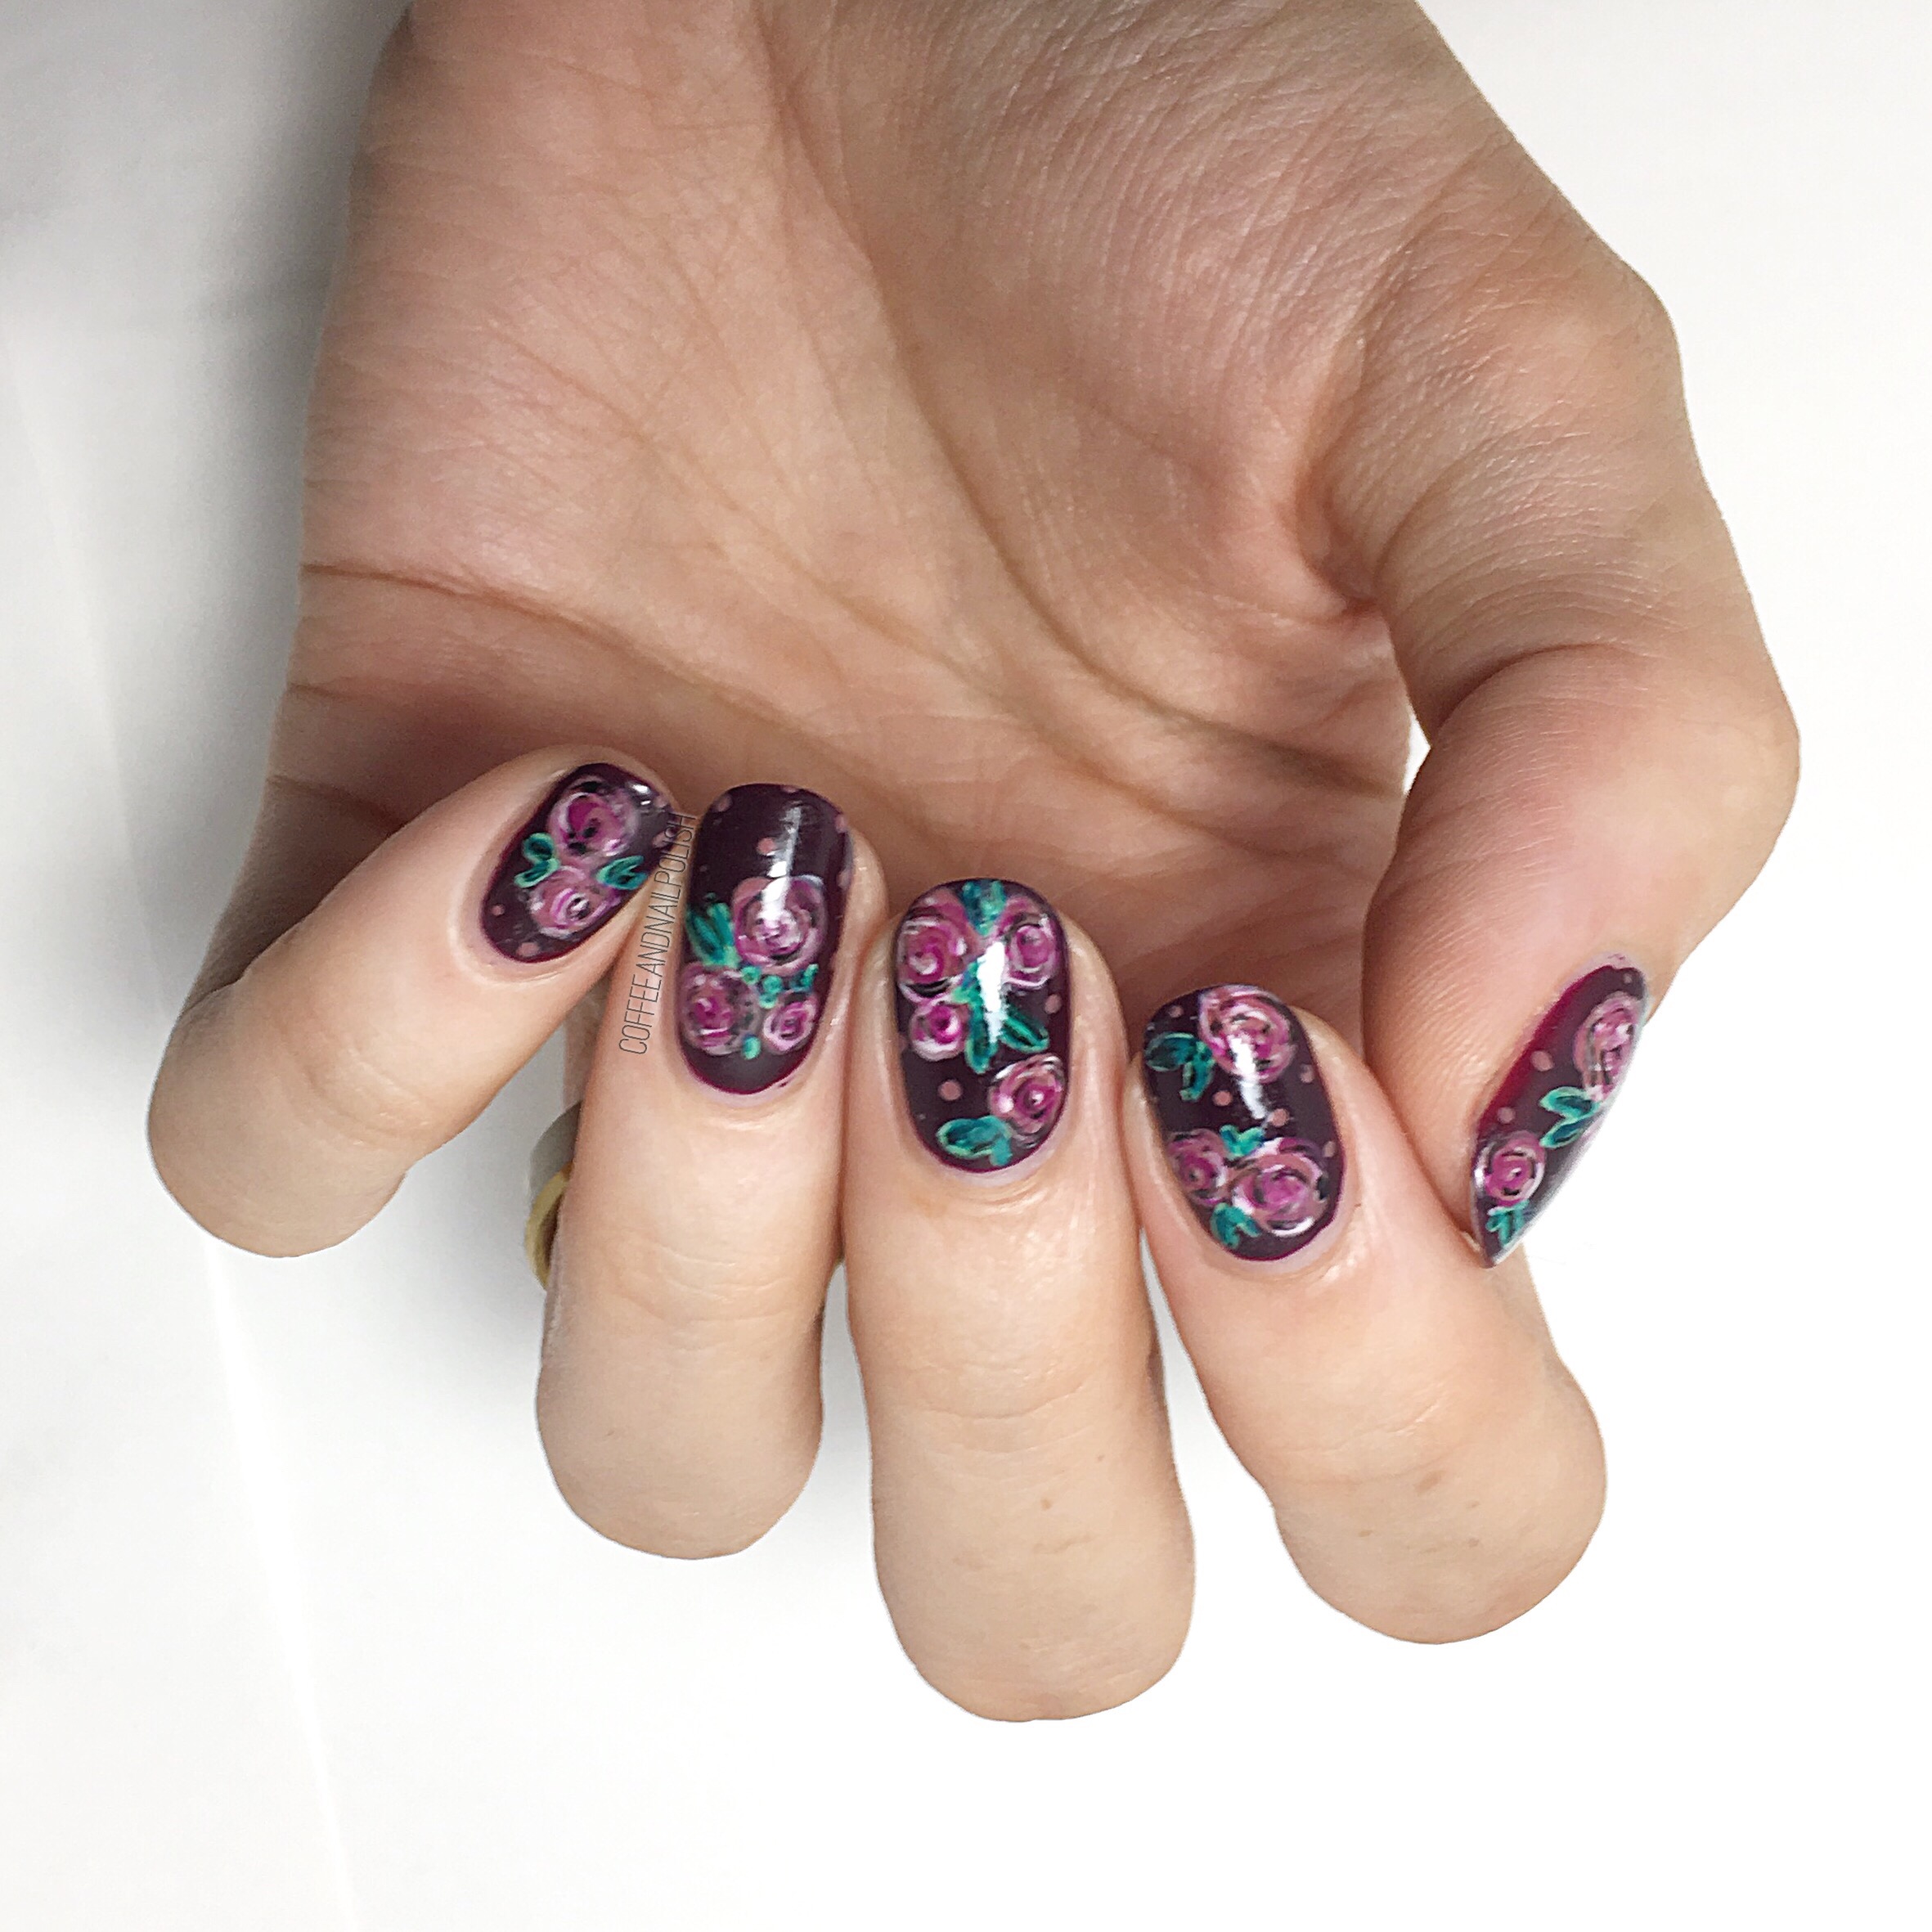
Okay so I know every time I paint floral on my nails I gush that they’re my absolute favourite floral… but I swear this time I really mean it! It may have something to do with the super vampy perfect-for-Fall base colour. These are definitely not a Spring floral & I think that’s why I love it so much. I am also really in love with the slightly messy look of this floral–they’re not perfect, & I think that’s what makes them so perfect to me. 

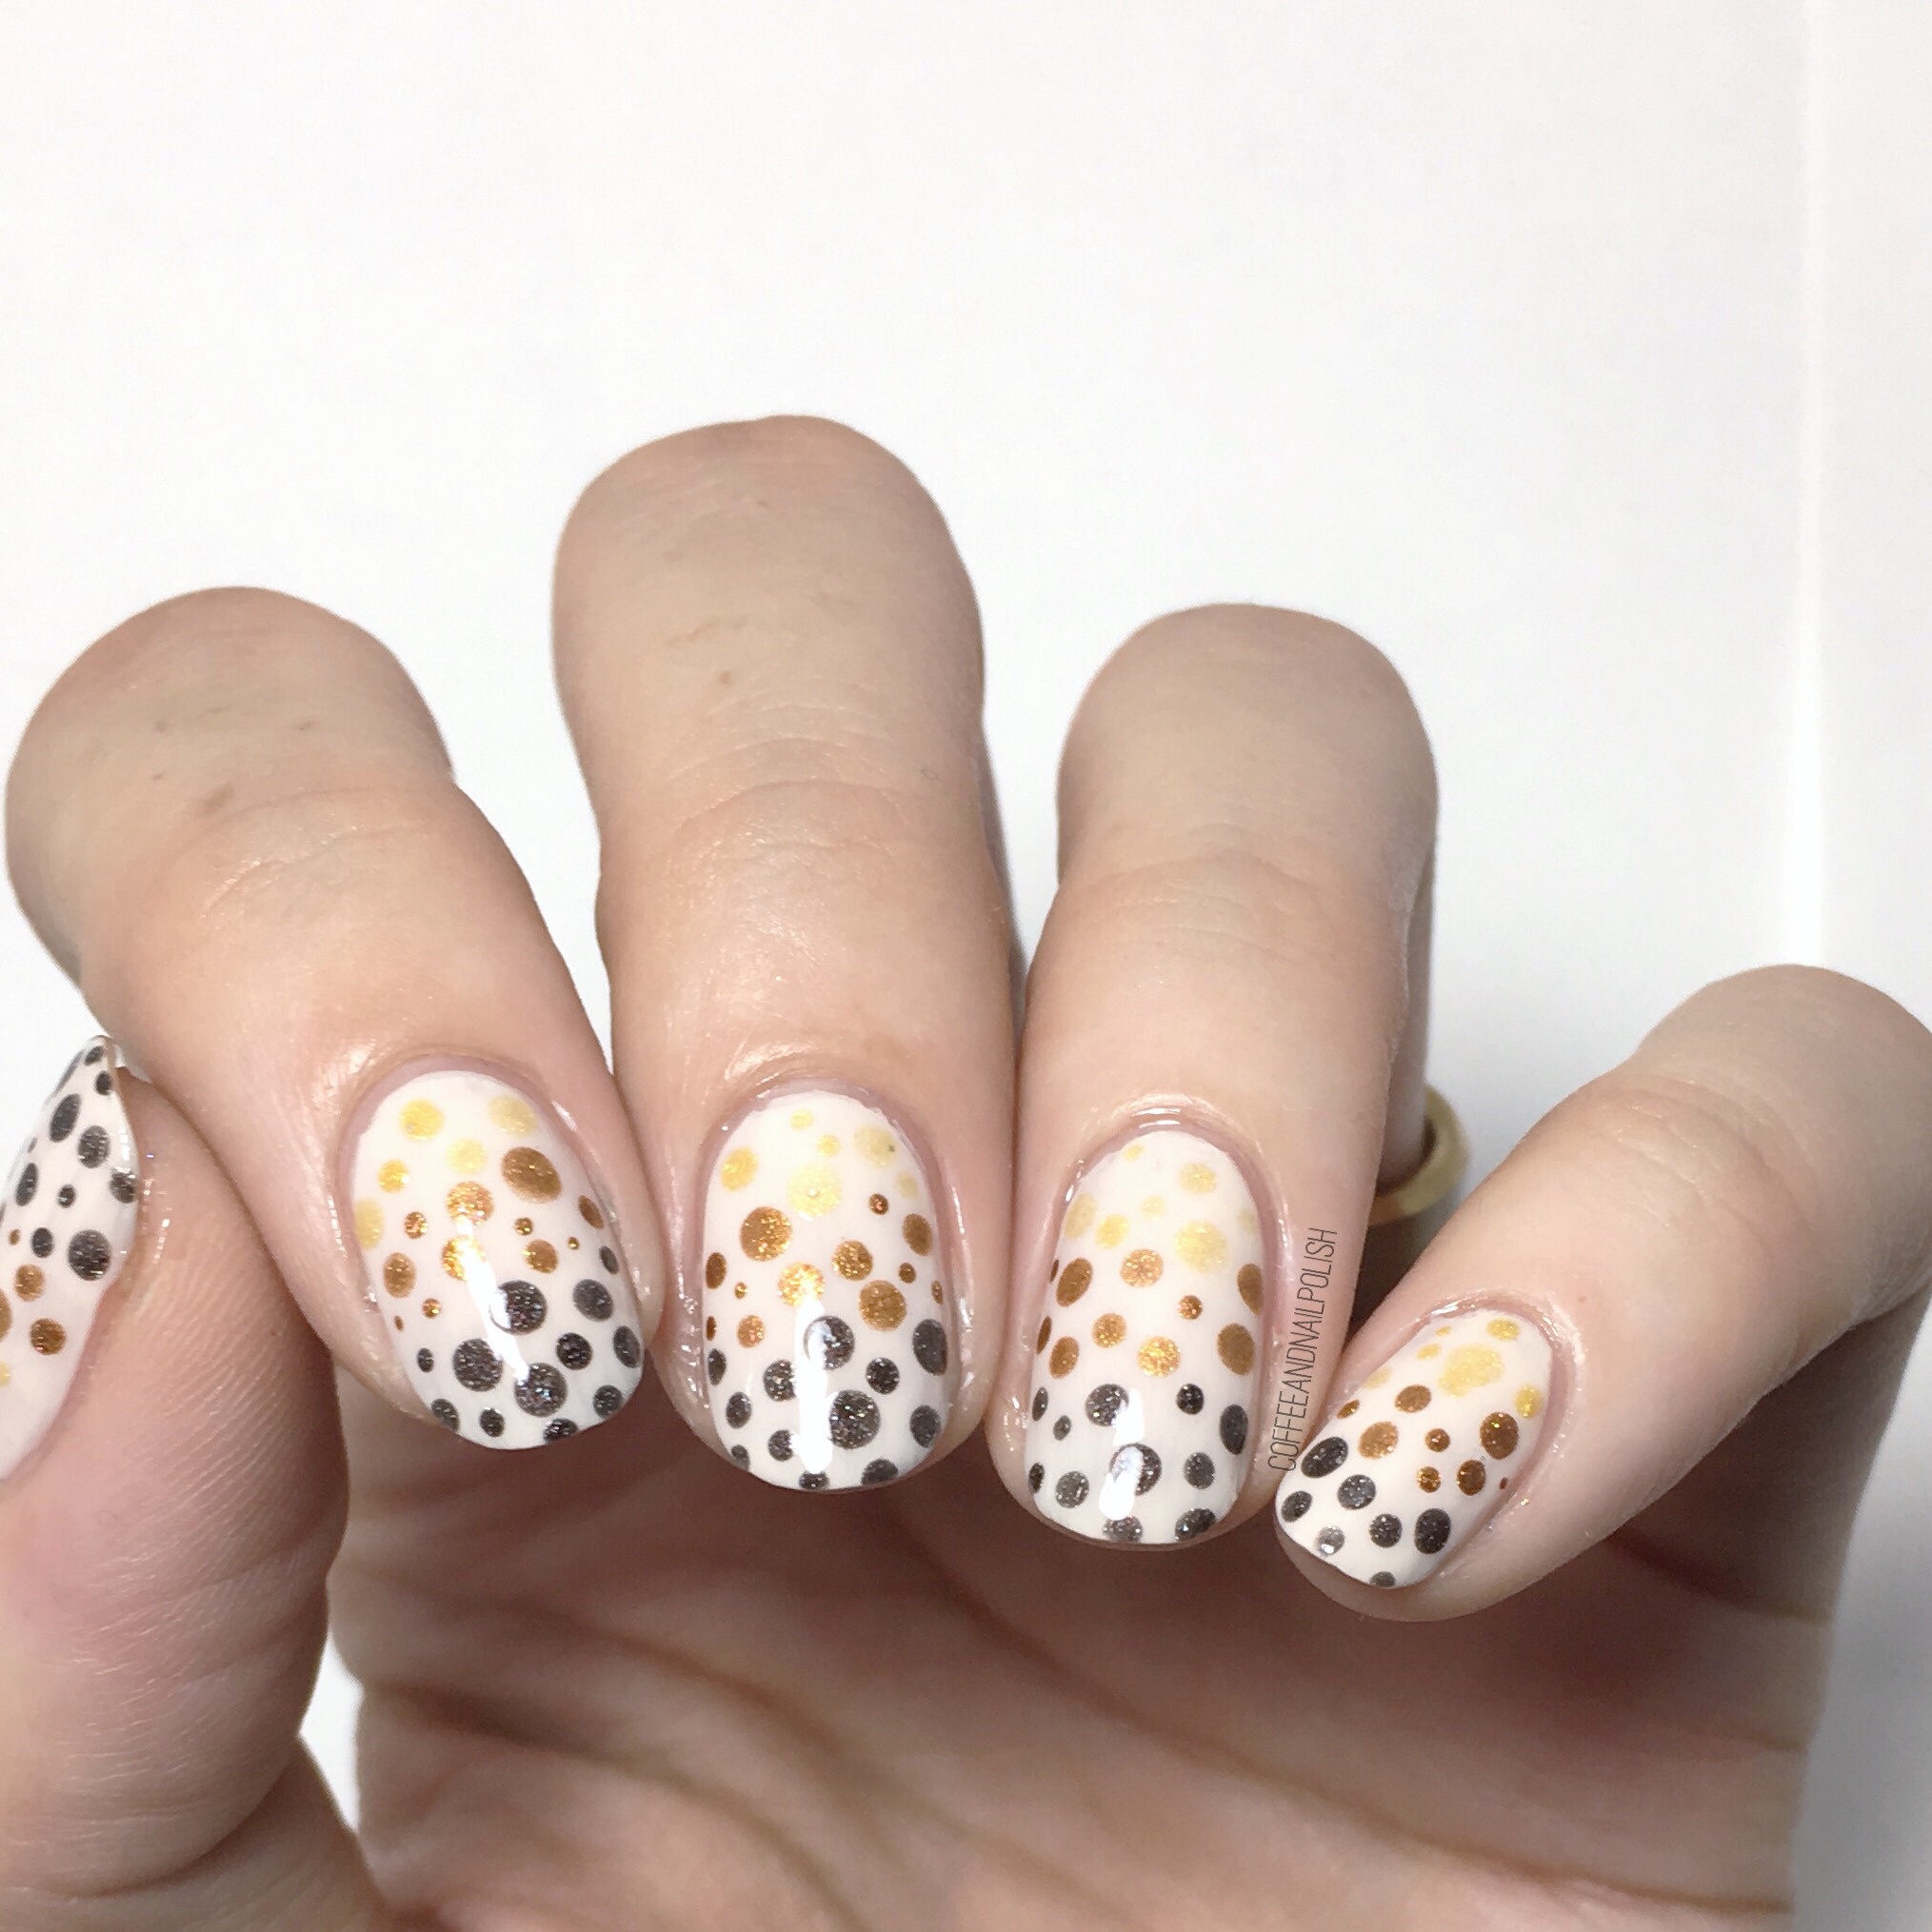
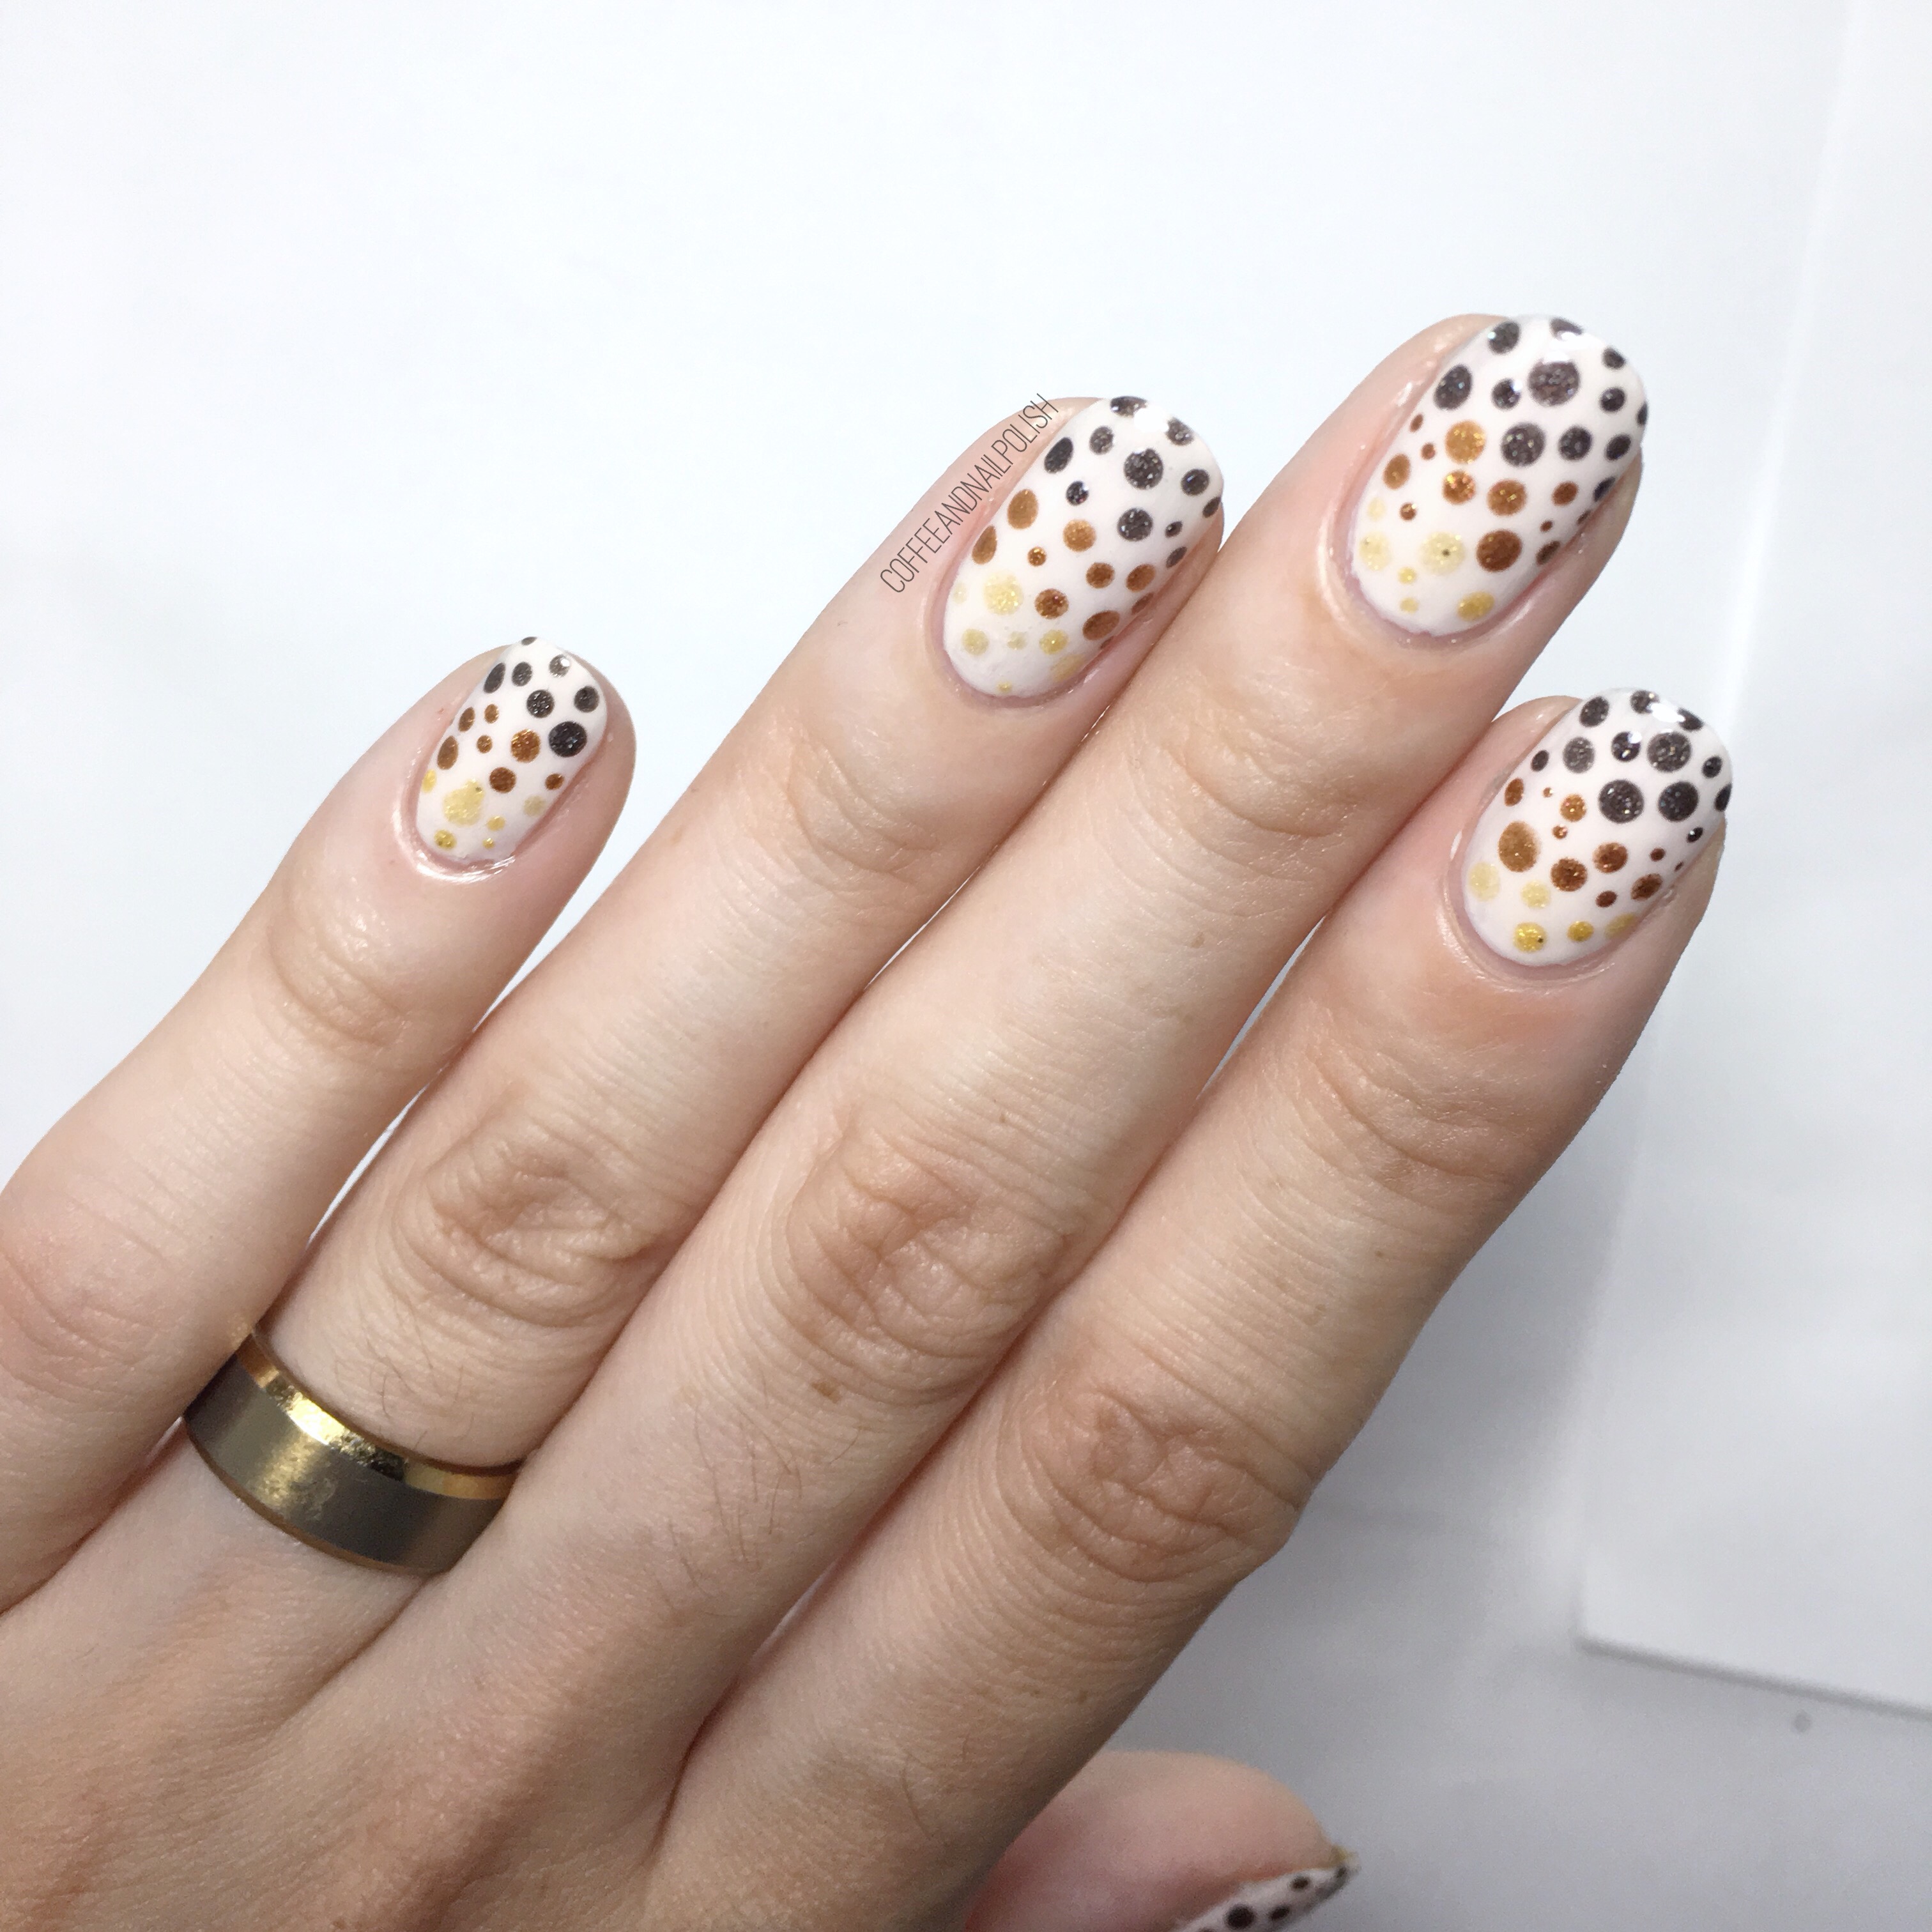
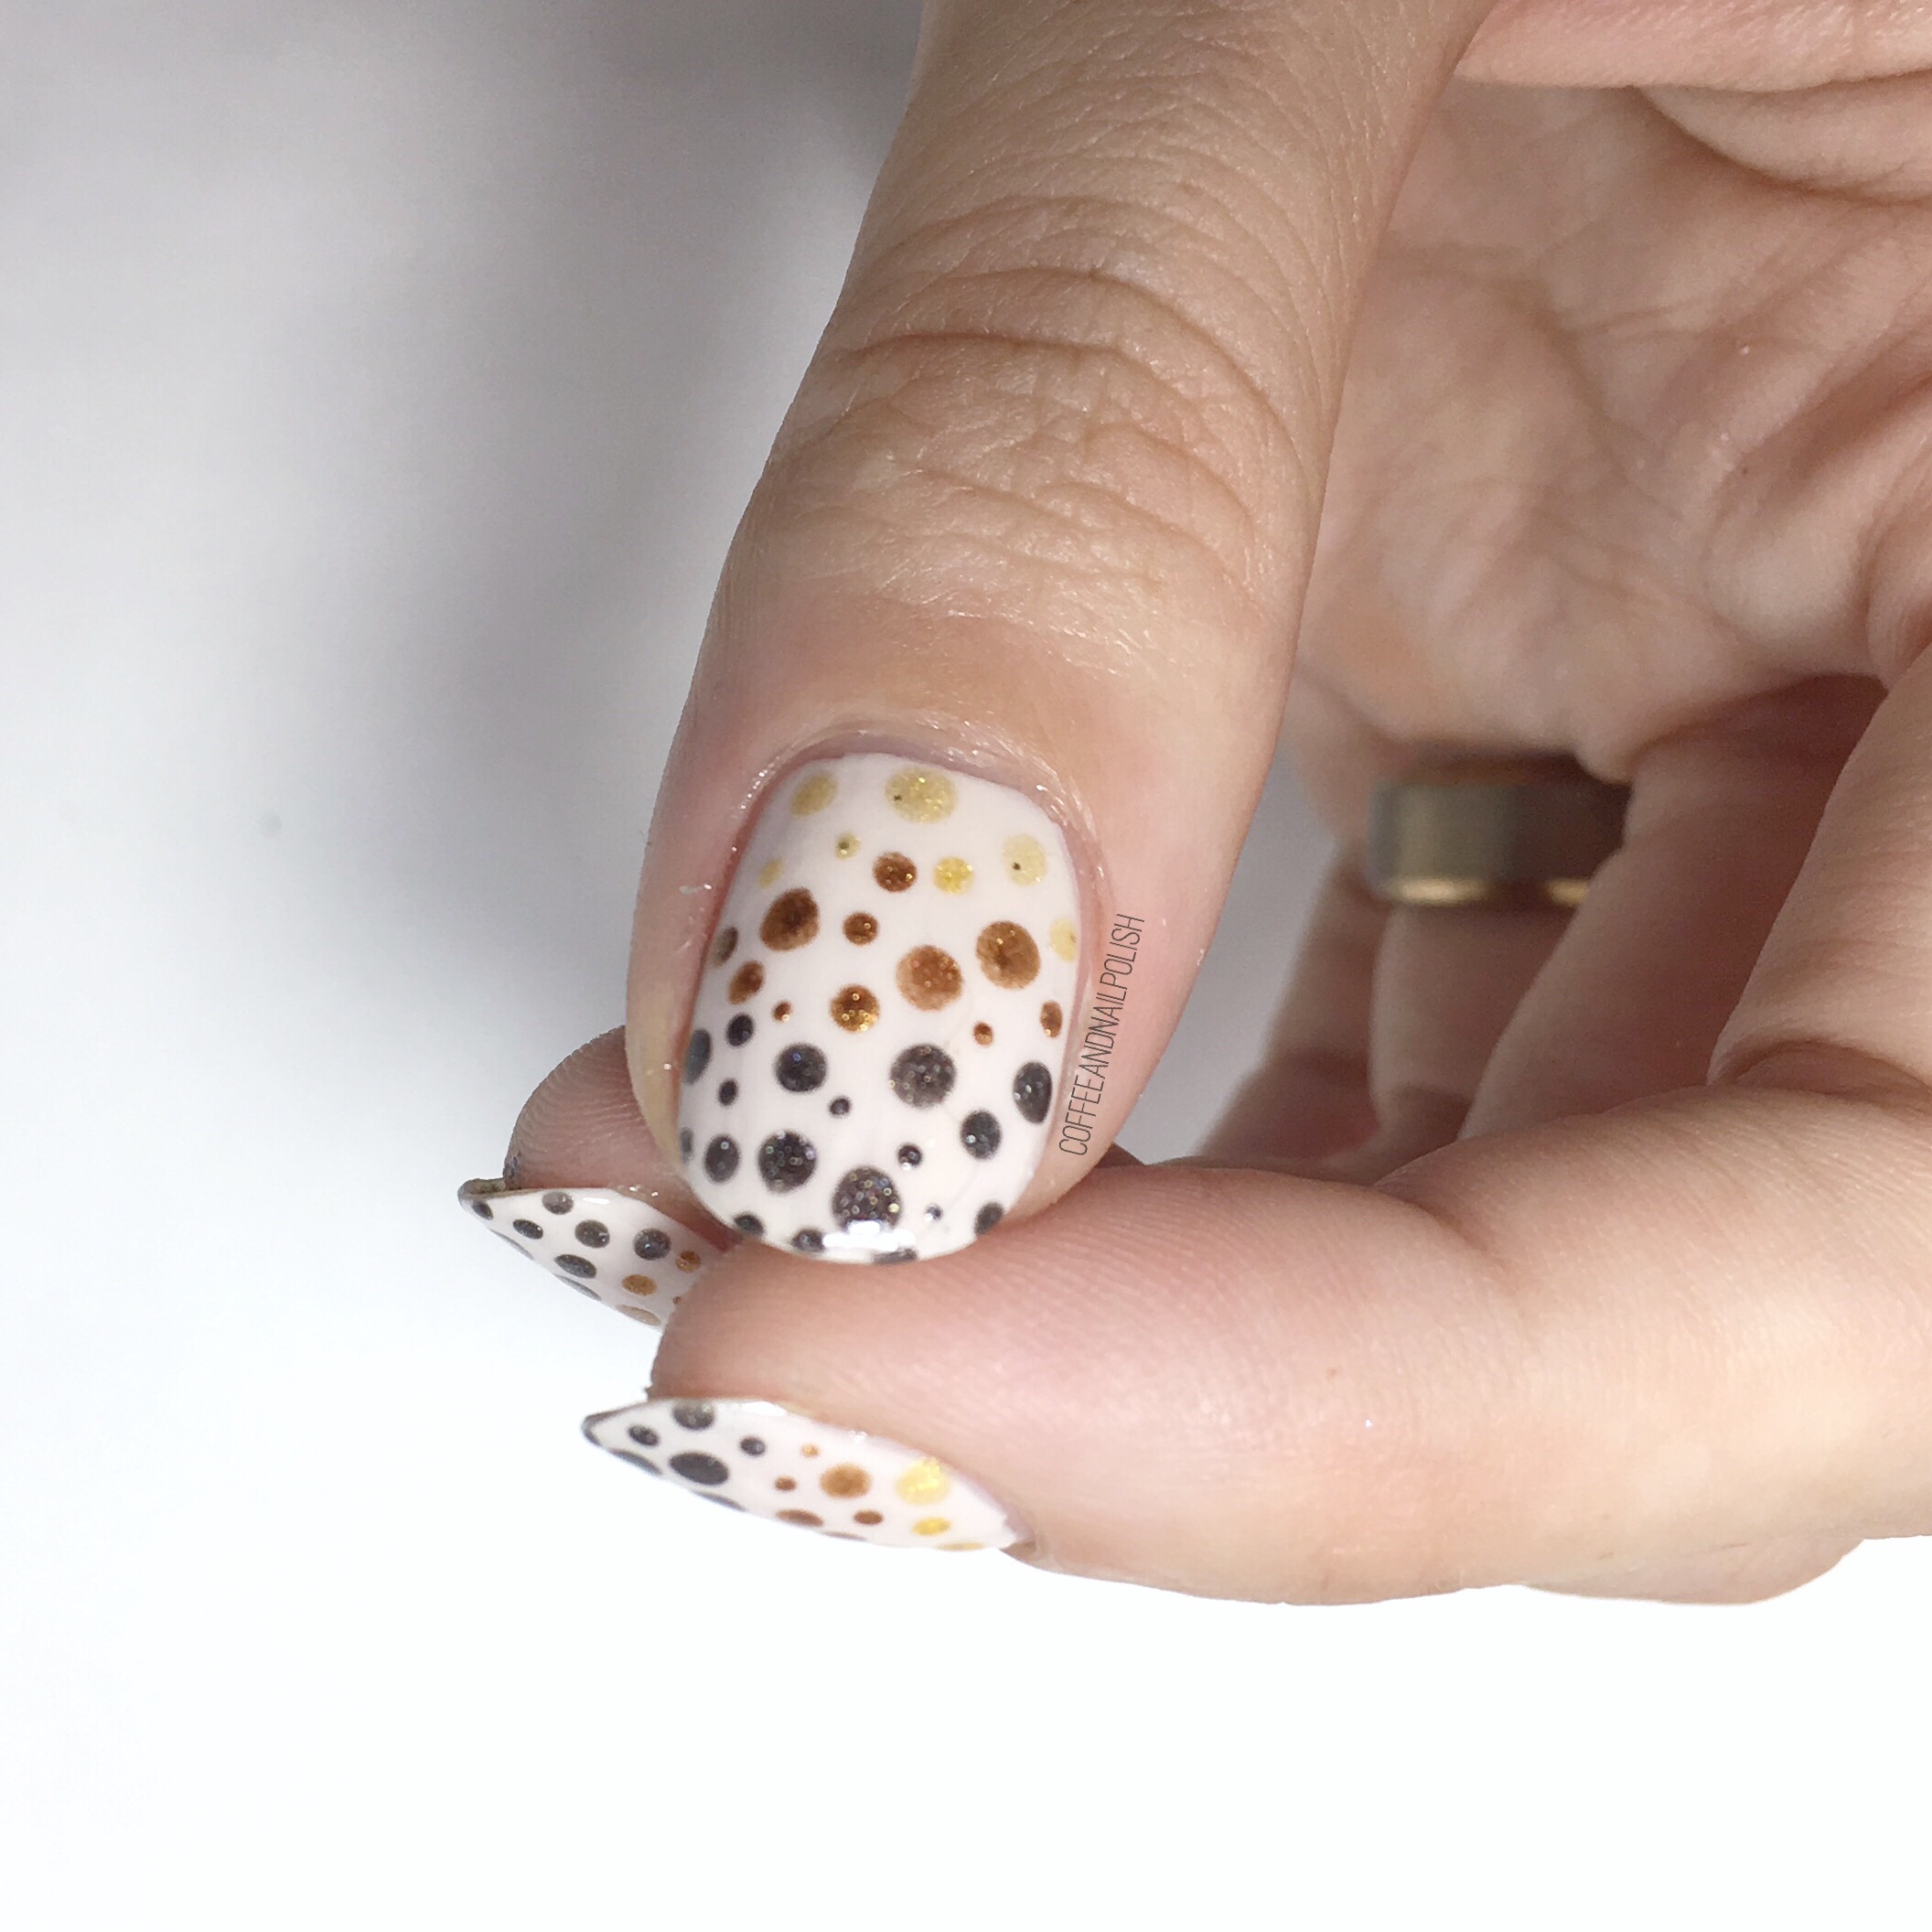
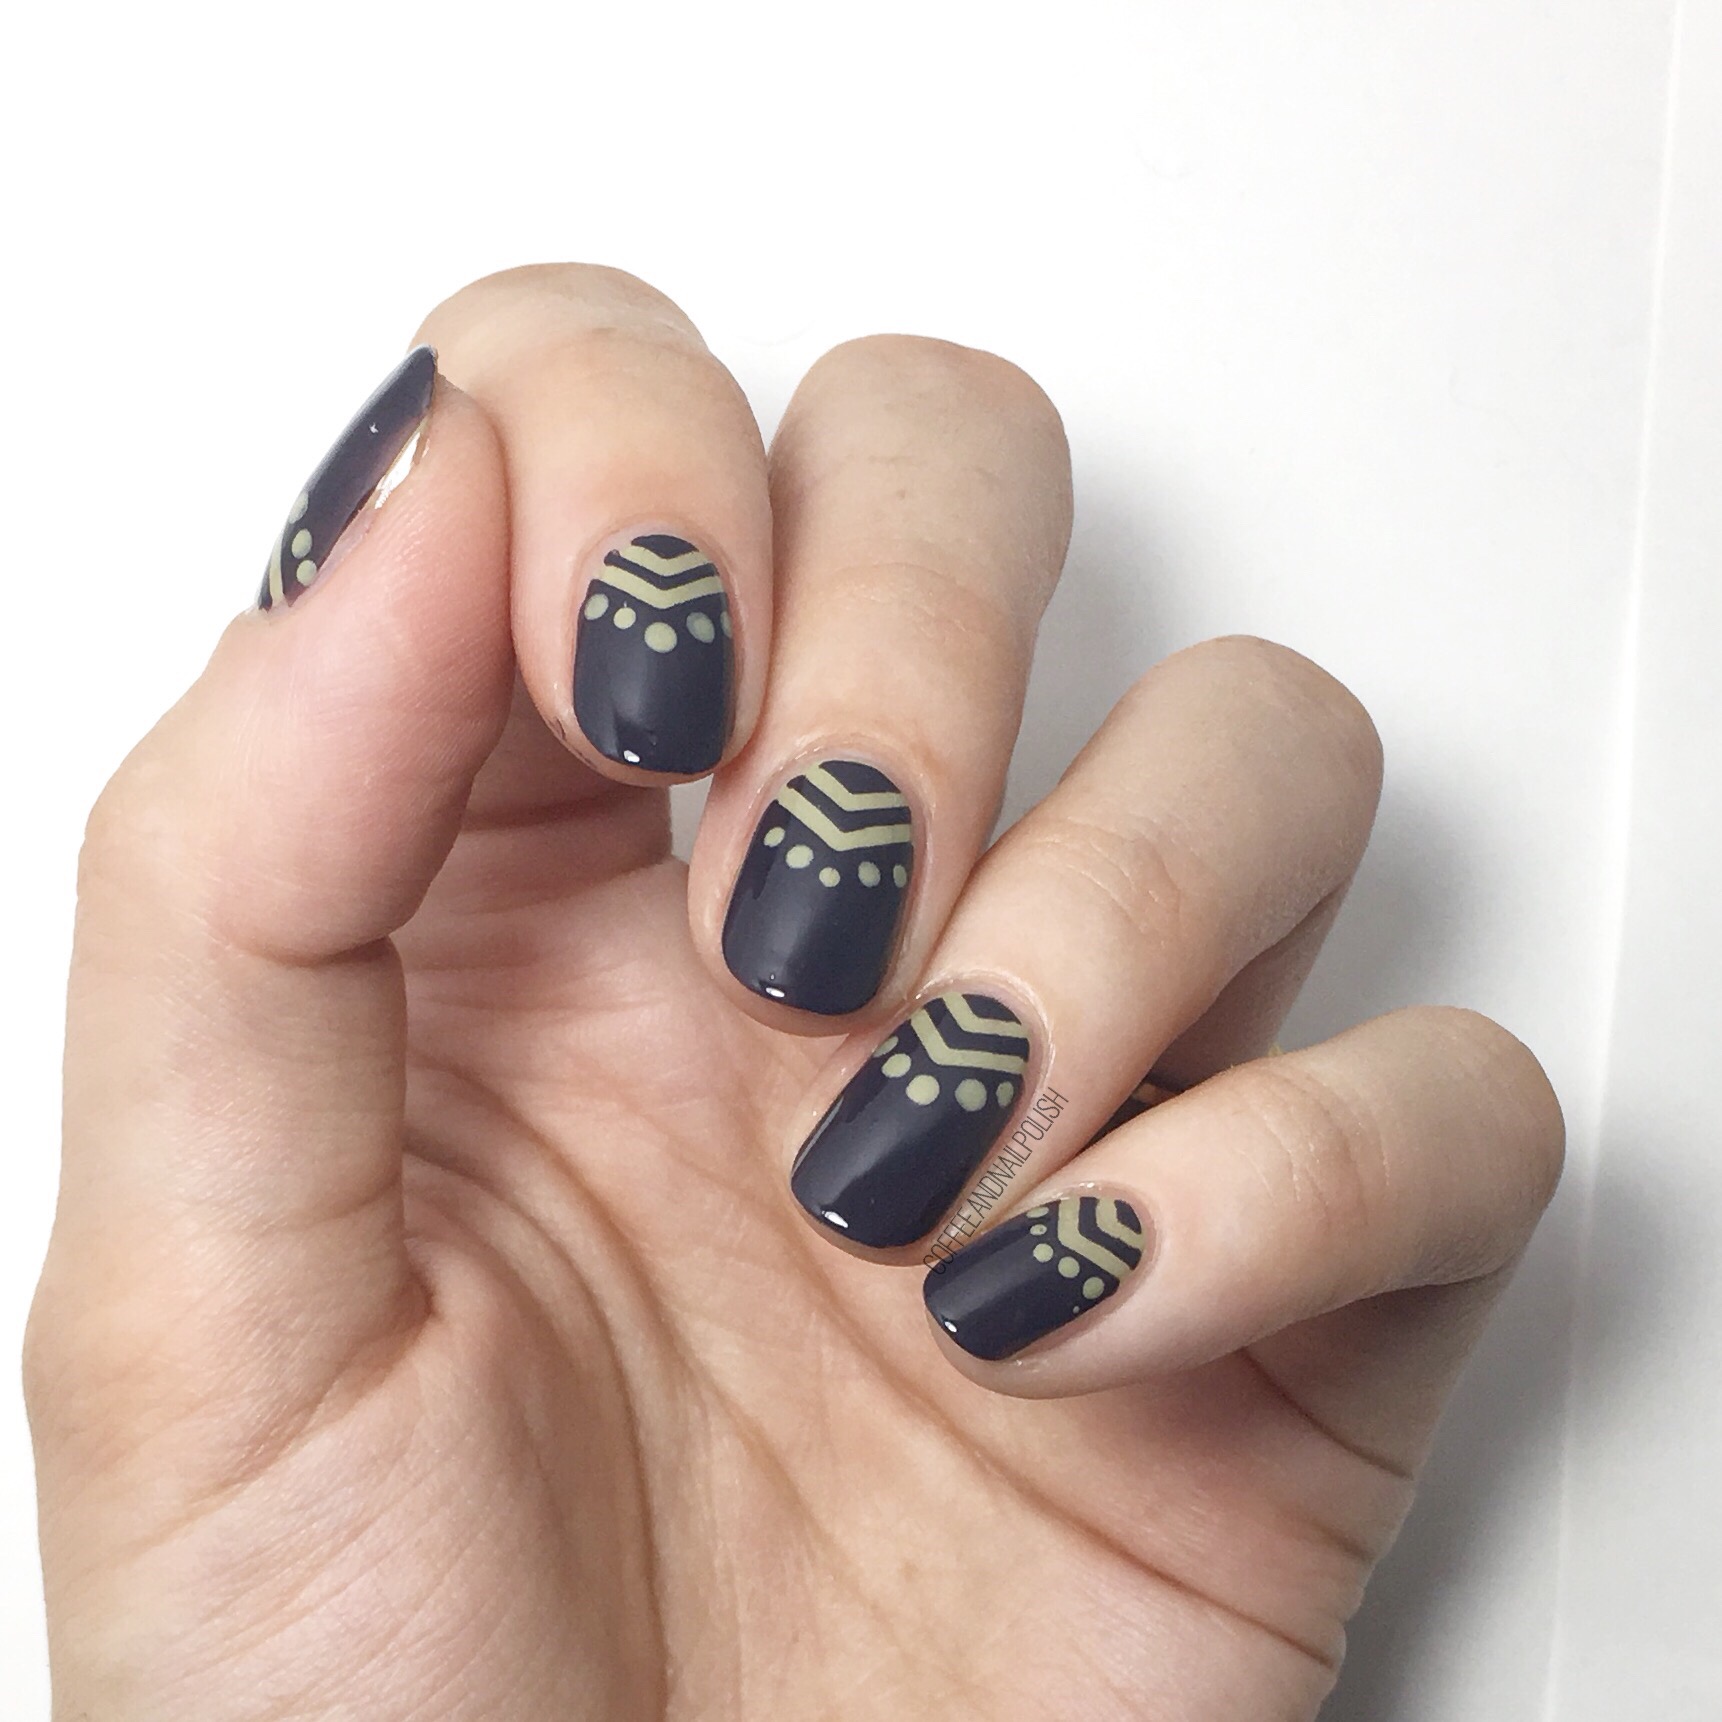
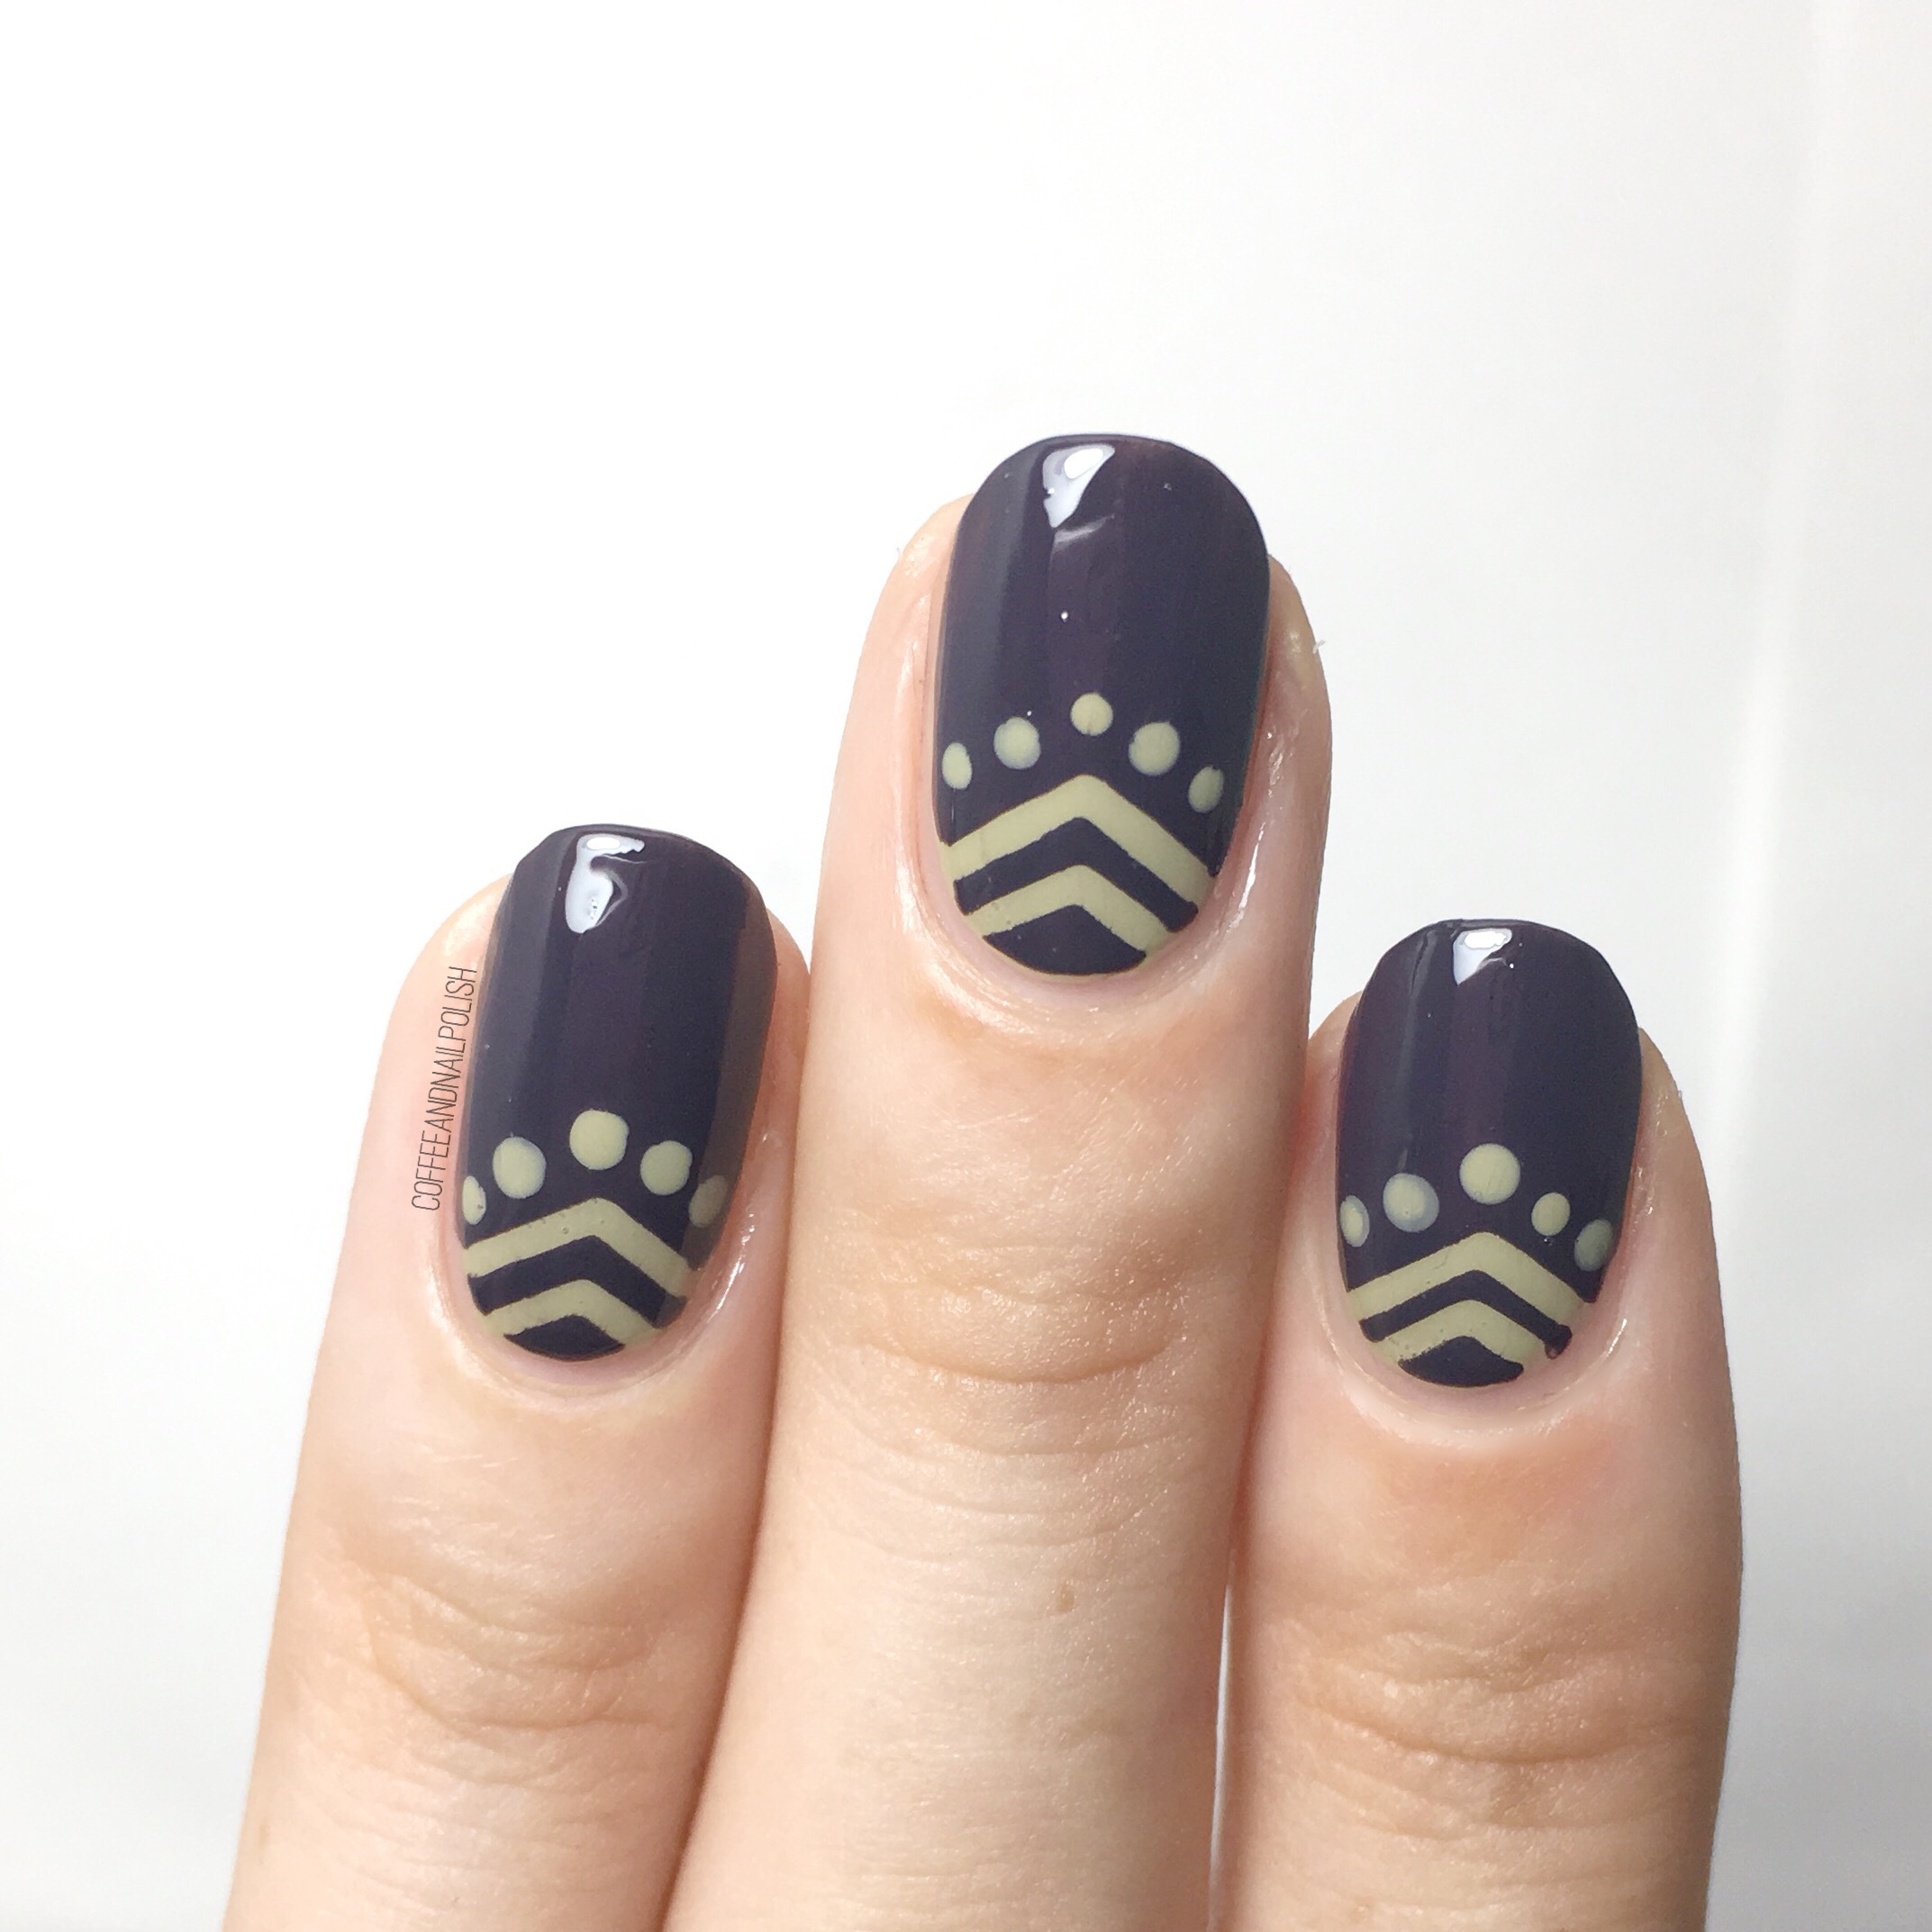
For this manicure, the polishes I used are:

  • Base Coat: OPI Natural Nail Base Coat
  • Top Coat: Sally Hansen Diamond Flash Top Coat
  • Essence Plump Power 
  • Sally Hansen X-treme Wear Mauve Over
  • Sally Hansen Miracle Gel Pretty Peony 
  • Sally Hansen Complete Salon Manicure Montley Hue
  • Sally Hansen Hard As Nails Black Heart
  • Sally Hansen I ā™„ļø Nail Art pen in Green
  • Sally Hansen X-treme Wear Kiwi Bikini
  • Quo by ORLY Diva 
  • Large & Small dotting tool 
  • Small detail brush from Bundle Monster

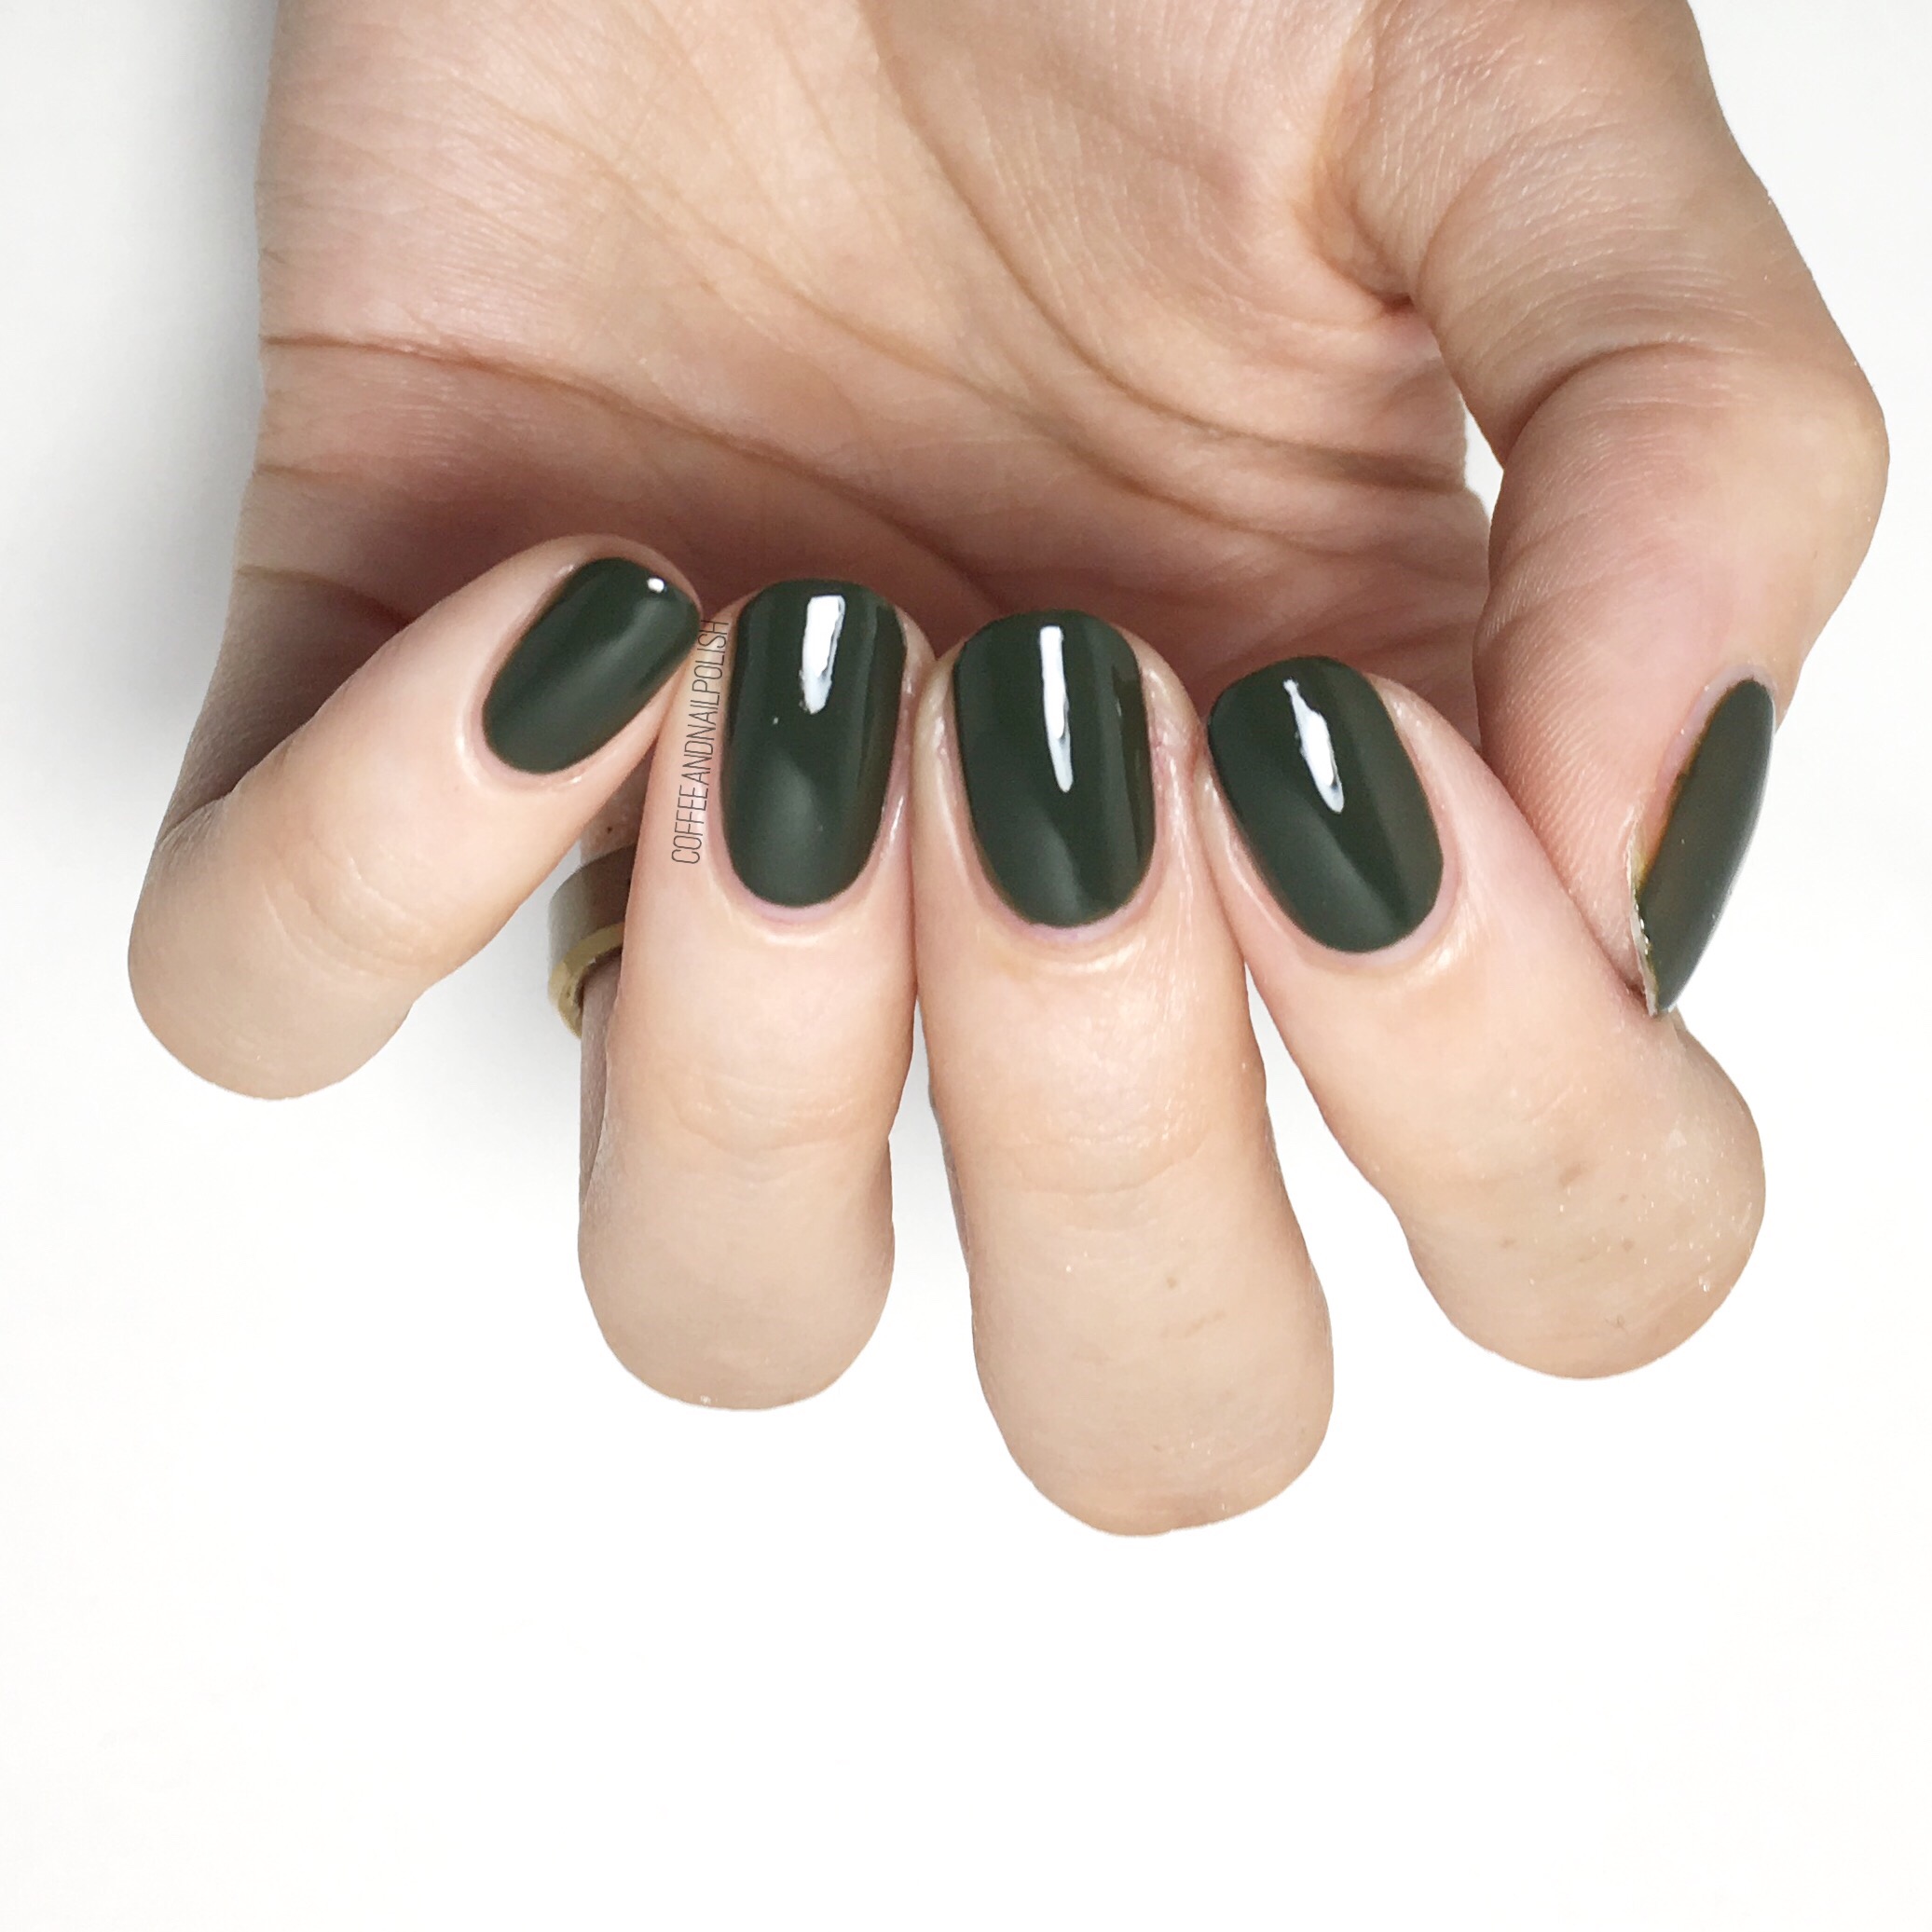
Obviously nothing could make me love this mani any more…. except adding Matte top coat to it! It’s been forever since I mattified anything, so it was long long over due. For this mani I used an inexpensive matte top coat I picked up on vacation this summer for a $1, but if you’re looking for suggestions my all time favourite Matte top coat is L’OrĆ©al The Matte Velvet top coat. 

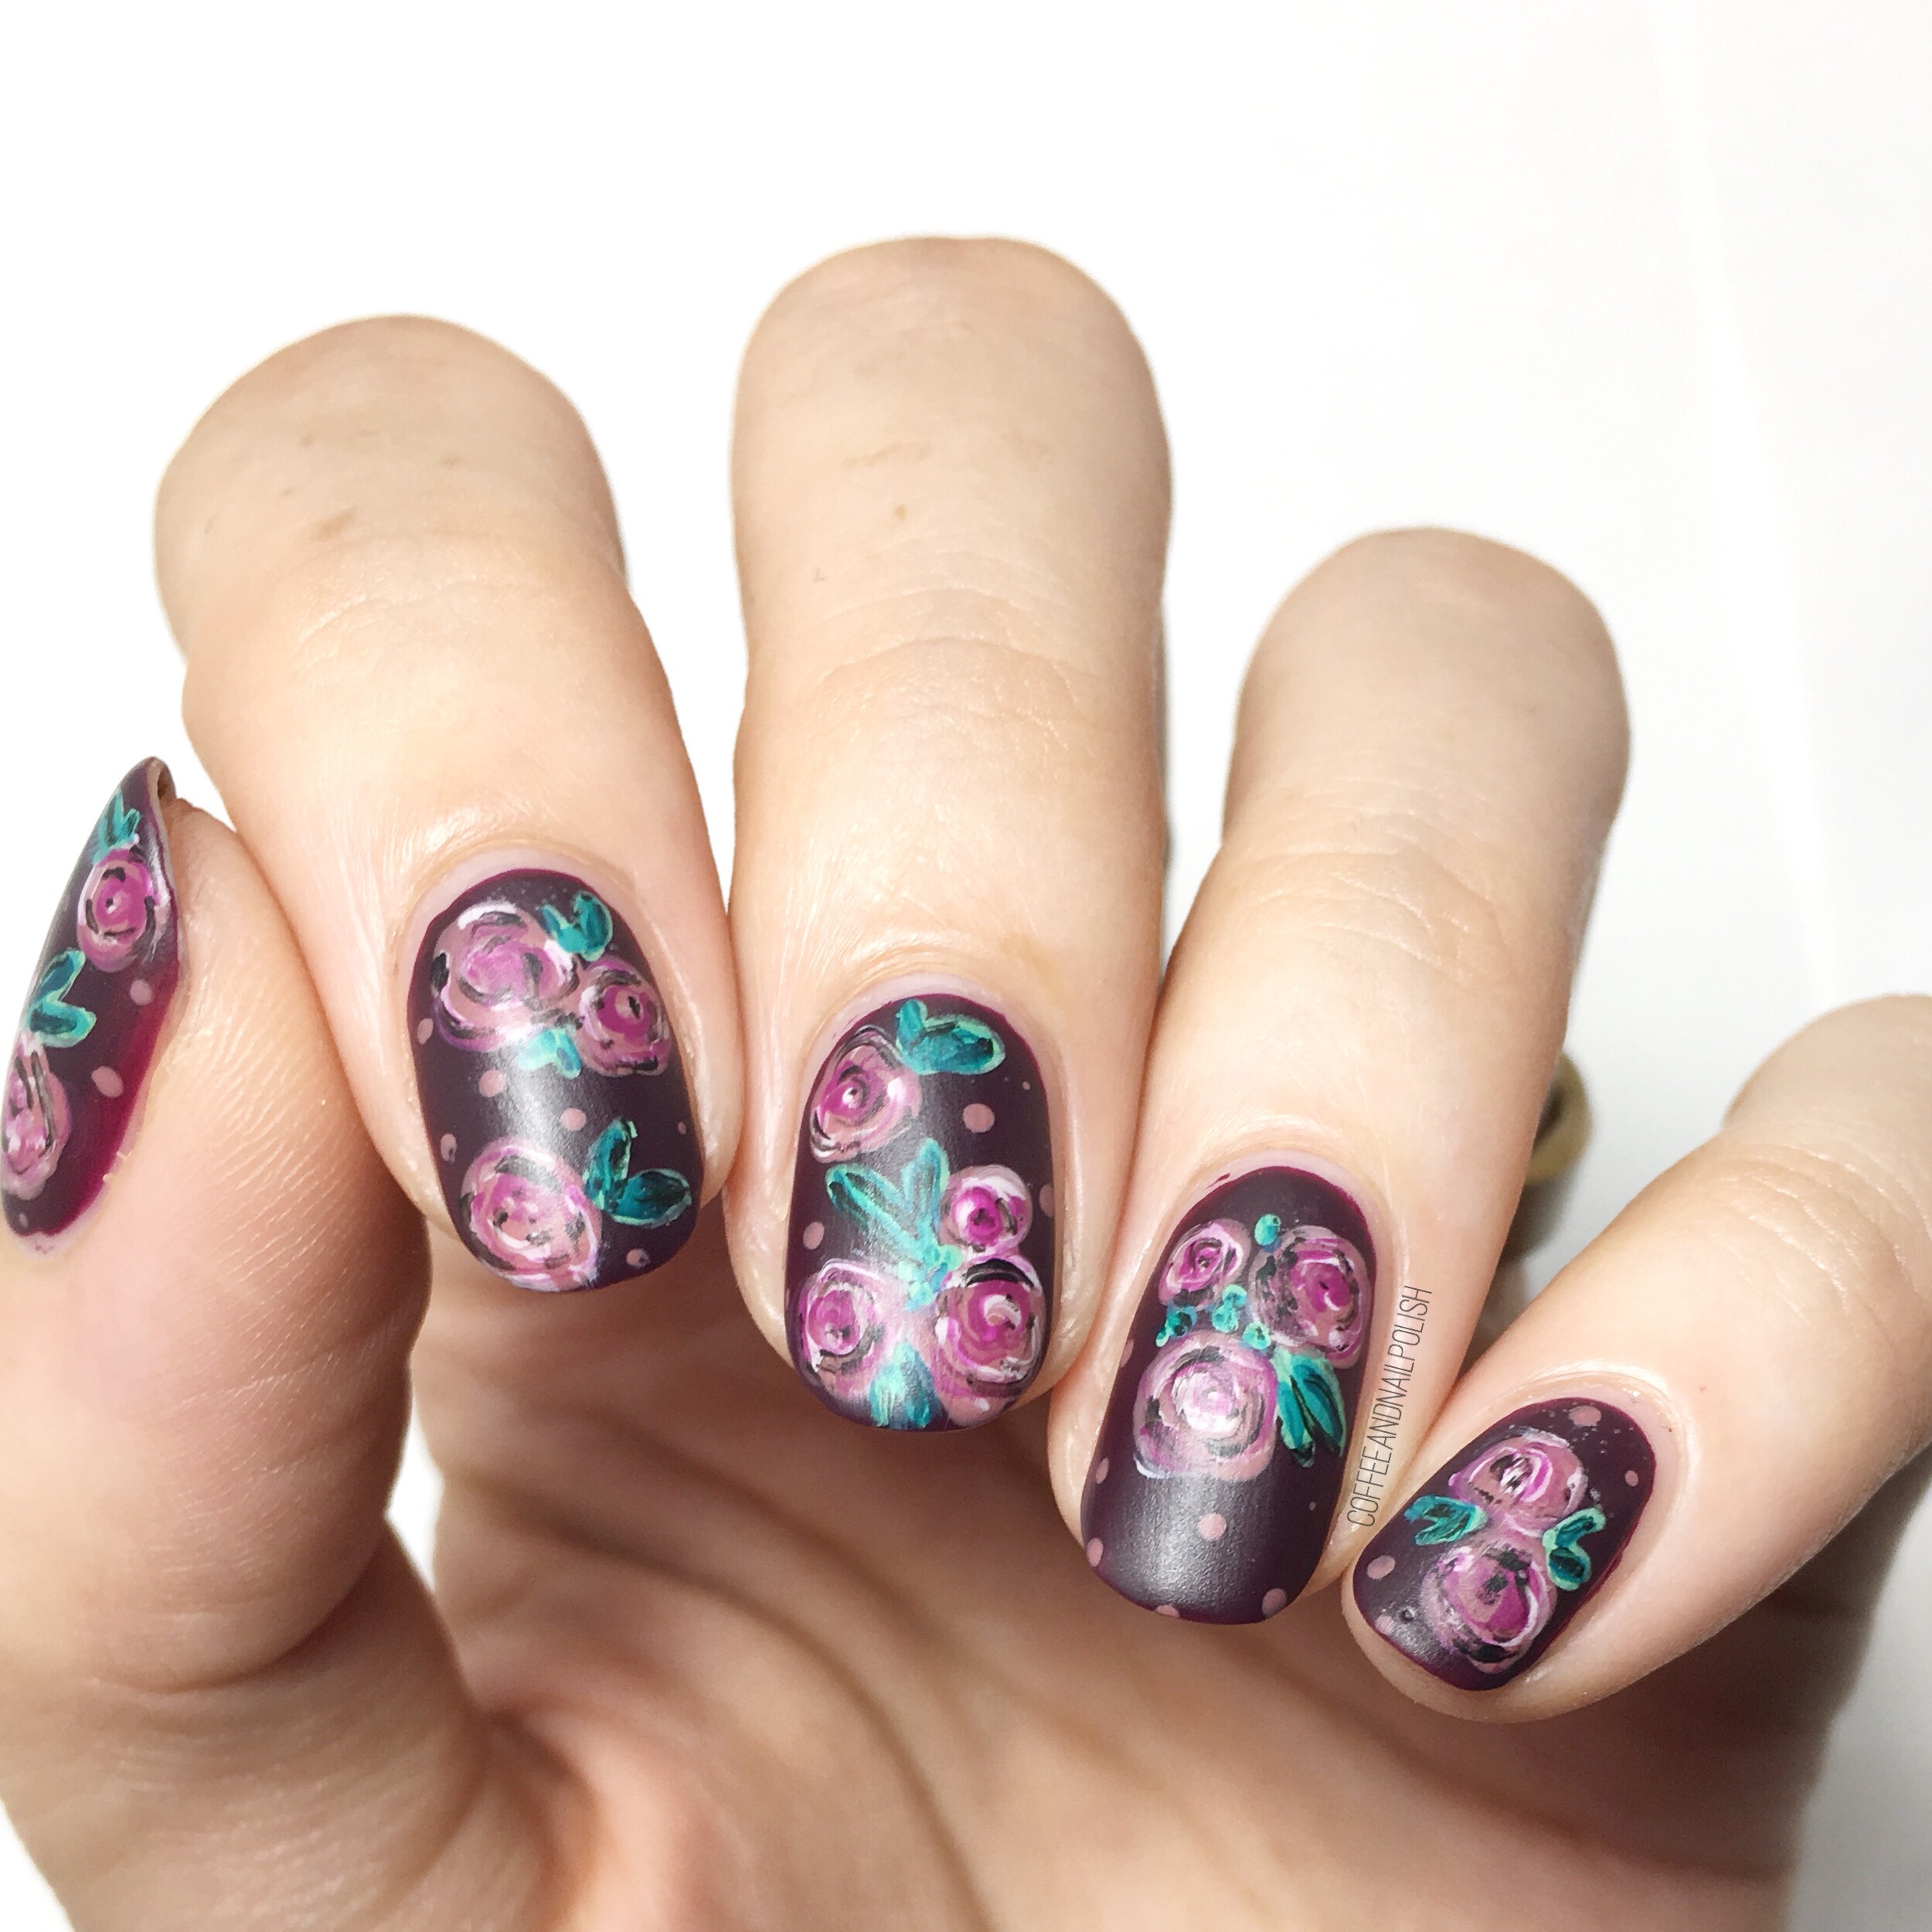
Anyone else just love love love Matte nails as the weather gets cooler & Fall creeps into the air? Maybe it’s because I always grab my darker shades & they look so fabulous mattified? Whatever the reason, it makes me very very happy! 


What do you think of this vintage floral design? Which do you like better–shiny or matte? Let me know your thoughts in the comments below! 

More Fall Leaves!Ā 

Oh yessssss. I swear I’ve been just waiting for September to come back again so I could pull out my Fall leaf nail vinyls. You know my obsession with nail vinyls knows no bounds, & I love that you can pretty much find vinyls or stencils for every occasion & season. These particular leaves vinyls are from The Base Coat (whose site is currently on hiatus) but you can definitely find a ton of different versions of these Autumn themed vinyls with a quick search online.  Xroma Polish & Vinyls sells these uniquely beautiful Autumn stencils while What’s Up Nails sells the more classic Fall leaf stencil.

  • Base Coat: OPI Natual Nail Base Coat
  • Top Coat: Sally Hansen Diamond Flash Top Coat
  • ACO by Ardene Jacob Green
  • Essie Leggy Legend
  • ORLY Brilliant Boysenberry (aka ORLY Space Cadet)
  • Nicole by OPI Best Pink Ever 
  • Revlon Spidey Sense
  • The Base Coat Fall Leaves Vinyls
  • Latex Free Make Up Sponge

I love the shiftiness achieved by combining all these shades together & I think they look really great over my base of my swatch of Jacob Green. The shimmer of these metallic shades really pops over the dark green base colour. It’s literally Fall on my nails & just makes me wish I had a pumpkin spice latte & plaid blanket scarf to go along with them. 


What do you think of these Fall Leaves? Would you rock this design while drinking your favourite Fall drink? Let me know what you think (& what your drink of choice is!) in the comments below. šŸ‚

Bestie Twin Nails with @torisprettythings


I always get really, really excited when I can team up with fellow nail polish addicts I love, admire & am inspired by. So I was really excited when I had the opportunity to team up with Tori of @torisprettythings

I’ve been friends with Tori on Instagram for a long time, but somehow we’ve never come together for a collaboration. 😳 Thankfully we’ve finally amended that with these fun Fall polka dot nails inspired by a mani she found on Pinterest originally by Oooh Shinies


For this manicure, the polishes I used were: 

  • Base Coat: OPI Natural Nail Base Coat
  • Top Coat: Sally Hansen Diamond Flash 
  • Essie Wrap Me Up
  • China Glaze Champagne Bubbles
  • Essie Leggy Legend
  • OPI My Private Jet
  • Small & tiny dotting tool. 

How perfectly Fall is this manicure? Both Tori & I are all about that Fall weather so we were pumped to team up on some Autumn inspired nails. I haven’t done a dotticure this fun in a while so it was really fun to sit down & play around. 

 Sometimes the simpler designs actually bring out your most creativity. This isn’t a super hard design & would be great for a nail art beginner! All you need is a dotting tool & some complimentary shades & people will be in awe of your nails. I am going to be doing a whole week of beginner nail art designs coming up (I’ve already been collecting & playing with manicure ideas) but this would definitely be on the list of great beginner designs. 

What do you think of this bestie twin nail collaboration? Don’t forget to check out Tori’s Instagram…. not just for all the beautiful nail art inspo she posts, but also her awesome OOTD & make up looks. 

SWATCH SUNDAY– ACO by Ardene Jacob Green

It’s Sunday, & you know what that means… it’s Swatch Sunday! This has pretty much become my favourite day of the week, because it’s been encouraging me to go through my stash & pull shades that aren’t in my everyday polish repertoire & from my many, many untrieds. 

 Today I’m showing off a shade I’ve owned for quite a while (I believe I bought it two Falls ago) but I’ve never worn. 

This is ACO by Ardene Jacob Green–a deep smooth Forrest green. I’ve written before that green isn’t a colour I’m usually attracted to. Most of the time the greens in my stash are saved for the leaves in my floral designs & Christmas or St Patrick’s Day designs. But there is something about this shade that I find just weirdly beautiful. For my swatch, I used two coats plus top coat, although I’ll be honest it was just as shiny before top coat. The formula is nice & buttery, & easy to apply. 

This is a great Fall shade & a great shade in general which is crazy for me to say. It’s crush worthy, & I really love it. Also there was absolutely no staining with removal which is always a fear for me when it comes to dark shades like this so it gets bonus points. 

For my Canadian girls, you can find ACO by Ardene shades at your local Ardene store usually on special for 3/$10 or something similar. Because this shade is from 2 years ago, your best bet for finding it would be an Ardene Outlet store. 

What do you think of this gorgeous green shade? Do you have a particular shade that is out of your comfort zone, but you can’t help but love? Let me know in the comments below!
Stay tuned because I’ll have some pretty nail art to share that I added over my swatch! 

Tribal-esque Chevron Nails

I’m still obsessing over the OPI Iceland collection, so I felt like pulling it out for some more nail art. This time, I decided on these chevrons which ended up looking slightly tribal-esque. 

Even better, this design was super quick & easy to do which is good because I’m still pretty run down from my gluten attack but still want to do my nails. Don’t get me wrong–I enjoy complicated freehand designs. But sometimes you just want to be able to have pretty complicated nails without having to spend 2 hours crafting them! & this design is definitely perfect for that. 

For this design, the polishes used are:

  • Base Coat: OPI Natural Nail Base Coat
  • Top Coat: Sally Hansen Diamond Flash Top Coat
  • OPI This Isn’t Greenland
  • OPI Suzi & the Artic Fox
  • Xroma Polish & Vinyls X Stencil (I used the inside pieces) 
  • Small dotting tool 

How great do these two colours look together? They compliment each other really, really well. But then again these OPI shades are so gorgeous, I think it would be impossible to create a design that didn’t look beautiful. & again, these were super simple to do:

  1. Paint your nails using your base colour (in this case, OPI This Isn’t Greenland) & apply quick dry top coat. 
  2. When your base colour is completely dry (about 20 minutes), apply your nail vinyls. I find it easier to go one hand at a time. 
  3. Going one nail at a time, paint over vinyls with your secondary shade (OPI Suzi & the Artic Fox). Remove nail vinyls as soon as you apply your polish. 
  4. Once you’ve done all nails, go back with a small dotting tool & your base colour & add your dots. 
  5. Apply top coat to seal in design. 
  6. Repeat on other hand. 

What do you think of this design? Let me know in the comments below! 

Some of these lovely polishes were all gifted to me by OPI as part of the #PreenMeVIP program.