SWATCH SUNDAY — Sally Hansen Complete Salon Manicure Let’s Snow

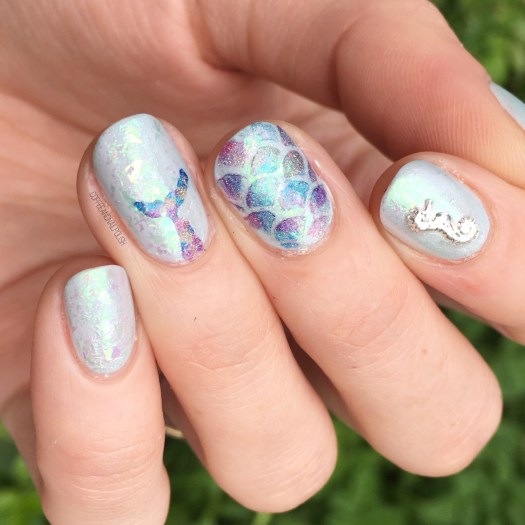
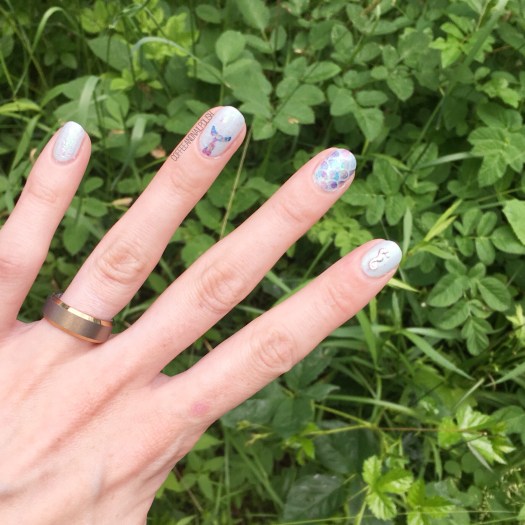
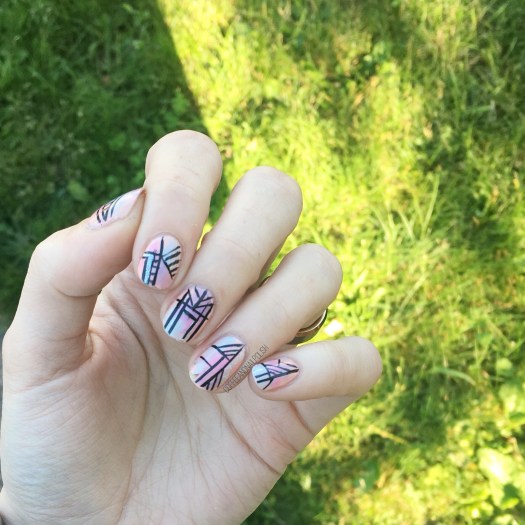
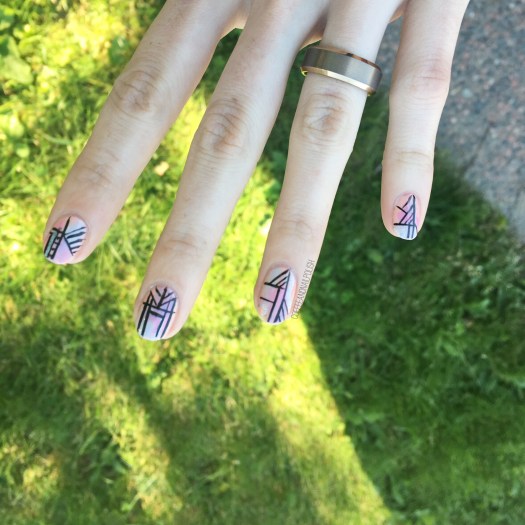
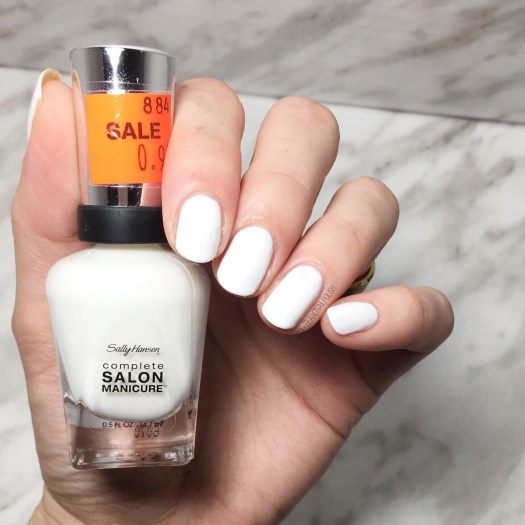
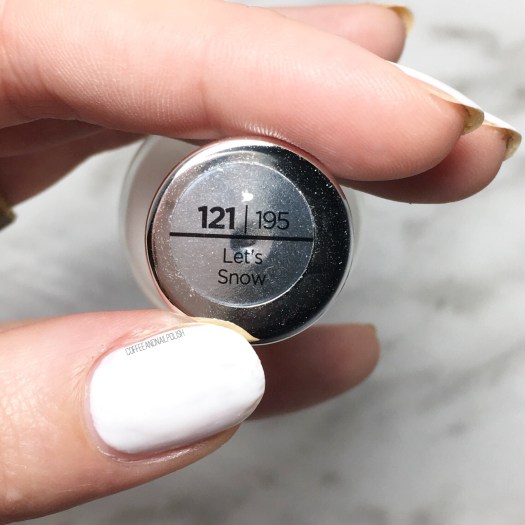
Good Morning Lovelies! It’s Sunday, so you know what that means… it’s Swatch Sunday! & today I’m sharing one of my favourite white polishes at the moment: Sally Hansen Complete Salon Manicure in Let’s Snow.

I picked up this polish at my local Lawton’s (another clearance find) for the amazing price of only 99 cents! I thought maybe that meant it was a discontinued polish because of the amazing price, but you can still find it on Amazon & Sally Hansen so I’m not 100% sure. I think maybe I just got really lucky, which I’m happy about because I’m definitely going to need back up bottles of this shade in my stash.

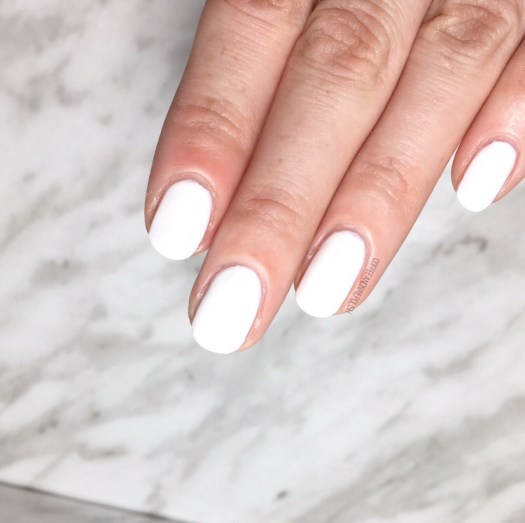
For today’s swatches, I used 2 coats + top coat. (Right now my top coat of choice is Essie Speed Setter.)

I find white polish can be tricky, because it can come off looking streaky or chalky. Let’s Snow definitely needs two coats for opacity & adding top coat just levels it perfectly. Before top coat, I found if slightly streaky. A third coat of could have fixed that out, but I figured top coat would be an easier option & it was.

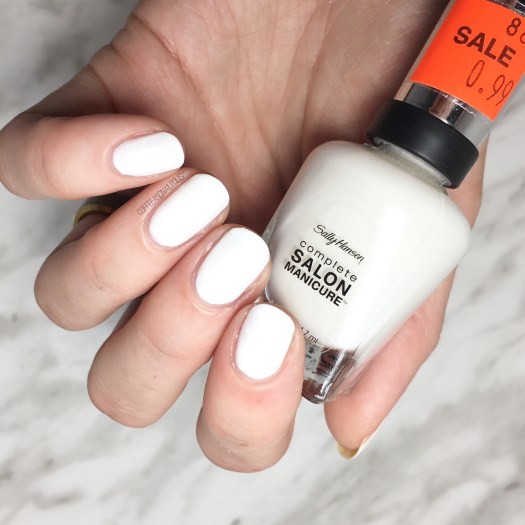
Also the brushes on the Complete Salon Manicure bottles are love. Seriously. I need every bottle of nail polish to apply so easily & perfectly.

Let’s Snow is definitely a true white, with no other undertones. I would call it a paper white, which is probably why it’s my current favourite go-to white for nail art–it’s the perfect black canvas. But I also like the fact it’s a very wearable white! You can use it for creating beautiful nail art, or you can just wear it on its own. From my own personable experience, that is a fine line to achieve. So when I find a white that does both, I automatically fall in love with it. Hence my current obsession with this shade!

If you’re looking for a great white in your life, I definitely recommend searching out this Sally Hansen shade & adding it to your stash. The formula is easy to apply, the brush is perfection, & this is a white that isn’t going to be chalky or streaky once applied. I definitely do recommend adding top coat though, just because it leads to a more perfect finish.

So what’s your favourite white nail polish? Do you prefer white polish on its own or as a base for nail art? Let me know what your favourite is down in the comments below!

Mermaid Nails

It feels like ages since I last pulled out my mermaid stencils for some mermaid nails. The other night I was playing with some new flakies from NailStuff.ca & after looking at them on my nails, I couldn’t help but think they would make an amazing base for a mermaid nail design! I’ve had this mermaid tail idea floating around a while, so I grabbed some more vinyls from What’s Up Nails (I believe it’s suppose to be a whale tail) & have it a go.

For this manicure, the polishes I used were:

  • Base Coat: OPI Nail Envy
  • Top Coat: Essie Speed Setter
  • FingerPaints Fun Peel Off Base Coat (to apply flakies)
  • Sally Hansen Miracle Gel Ocean Daze
  • NailStuff.ca Flakies — these guys aren’t currently available but there is a huge selection here!
  • What’s Up Nails Scale Stencils
  • What’s Up Nails Whale & Tale Stencils
  • Color Club Eternal Beauty
  • Layla Cosmetics Mermaid Spell
  • Color Club Crystal Baller
  • Wrenn Polish Mesmerizing
  • Wrenn Polish Summer Sands
  • NailStuff.ca Summer Nail Wheel — Silver seahorse stud

This design didn’t quite turn out how I pictured on my head, but that’s mostly the tail look on my ring finger. I really wish it was bigger. I do however love the holo scales over the flakie base just makes me so happy! I also wish I had done that look on the majority of my fingers with just the stud being my accent! (& if I had more of these nail vinyls left, I probably would have… going to need to buy some more ASAP!)

Also holo & flakies have to be the most beautiful combination. Definitely trying out these flakies OVER holo next!

What do you think of this mermaid nail design? Are you a fan of the holo & flakie combo? Let me know what you think down in the comments below! 🧜🏼‍♀️

Pastel Sponging & Freehand Geometric Lines

Happy Friday lovelies! Yesterday was spent surviving the craziness of the mall with the big Build-A-Bear event! Our store was insane, mostly from the people who gave up on waiting in the 8+ hour line. Props to anyone who stood in that line & waited it out… you’re the real brave people!

Today’s look was accomplished thanks to some brand new stripers from Kiss! I was in the need of some new ones, & found them on clearance so I knew I had to pick them up. A brand new striper is one of my favourite things for creating crisp lines. & since it had been so long since I’d done a geometric design, I decided to play around a little bit!

For this manicure, the polishes I used were:

  • Base Coat: OPI Nail Envy
  • Top Coat: Essie Speed Setter
  • Essie High Class Affair
  • L’Oréal Royalty Reinvented
  • Sally Hansen Miracle Gel Sweet Tea
  • Sally Hansen Miracle Gel Ocean Daze
  • Essie Splash of Grenadine
  • Kiss Products Striper in Black
  • Kiss Products Striper in White
  • Kiss Products Striper in Silver Glitter

Please excuse the tip wear & chip on my ring finger — I wore these nails for over 2 days before I thought to take a picture of them. I was just to enthralled with how they looked, I completely forgot about photographing them!

If I had to pick a favourite nail, I think it would probably be my middle finger. The design feels very Art Deco. Definitely going to need to try this design again over a gold or bronze. It was be very Gatsby, which is a style I haven’t tried a whole design over. I definitely think it looks really cool over my pastel sponging though.

what do you think about this geometric design? Which nail is your favourite? Let me know your thoughts in the comments below!

White & Purple Drag Marble 💜

Good Morning lovelies & happy Tuesday! Hope everyone had a fantastic beginning to their week.

Today I’m showing off some brand new nails & a design I haven’t done in a while: drag marble. I literally couldn’t remember the last time I attempted one–I’ve been trying so many awesome marbling techniques–that it felt like a good time to give an old favourite another try!

For this manicure, the polishes I used were:

  • Base Coat: OPI Nail Envy
  • Top Coat: Essie Gel Setter
  • Sally Hansen Complete Salon Manicure Lets Snow
  • Sally Hansen Miracle Gel Just Maui’d
  • Color Club Eternal Beauty
  • Bundle Monster drag tool.

Drag marbles were my first foray into marble nails because they seemed like the least messy option! Definitely takes a bit of practice to keep your nails from looking swampy (or one colour completely taking over the entire nail!) but once you get that down, the end result can be stunning!

Of all my nails, I think my ring finger probably turned out the best, followed by my middle finger. Sadly, I was using a more than half empty bottle of top coat, so there were way too many bubbles happening… but I guess that helps add to the marble effect! & thankfully you can’t really see them from far away. It was just me they bothered immensely.

What do you think of this drag marble design? What’s your favourite marble technique? Let me know all your thoughts down below!

Vintage Roses (take #17283)

You know when you did that perfect pair of jeans or shirt or outfit that looks amazing, & fits your perfectly, & just makes you look amazing? You wear it constantly (maybe more than you should), because it just looks so good? That is how I feel about floral & vintage rose nails. & that is why I have ANOTHER floral design to share with you.

This design is actually inspired by an old design of mine, this time using blues instead of pinks. Yep, I’ve done a different version of these simple roses a lot but they never get old to me, so hopefully they’re not tired to you.

For this manicure, to polishes I used were:

  • Base Coat: OPI Nail Envy
  • Top Coat: Essie Gel Setter
  • Essie Find Me an Oasis
  • OPI Angel with a Leadfoot
  • Sally Hansen Complete Salon Manicure Rose to the Occasion
  • Essie Bachelorette Bash
  • Sally Hansen Insta-dri Petal Pusher
  • YSL Beauty Vert D’Orient
  • Essie First Timer
  • NailStuff.ca Mixed Decoration Nail Wheel in Gold
  • Small dotting tool
  • Small detail brush from Bundle Monster

Oooooh these roses over white is definitely one of my favourite accent nails to do. I love all floral nails, but there is something about vintage roses that just looks so good: easy to do, but looks beautiful & complicated every time. Not to mention, roses are one of the easiest florals to do because I find (for me at least), they’re one of ten hardest florals to mess up.

My tutorial on how I do roses is Here.

So what do you think of this design? Are you a vintage roses person or do you prefer other floral? Share your thoughts down below!