{PR SAMPLE}
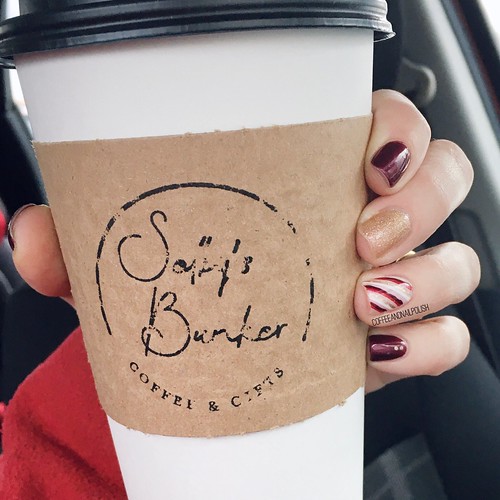
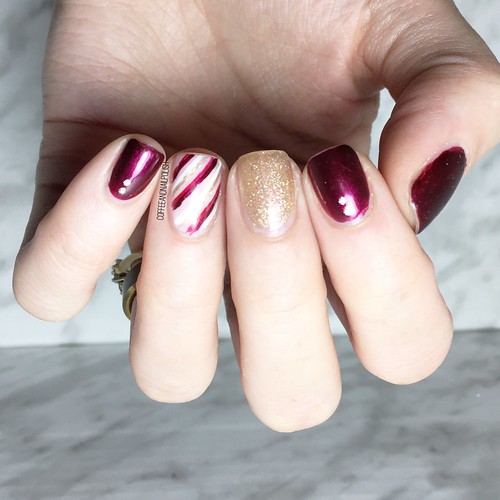
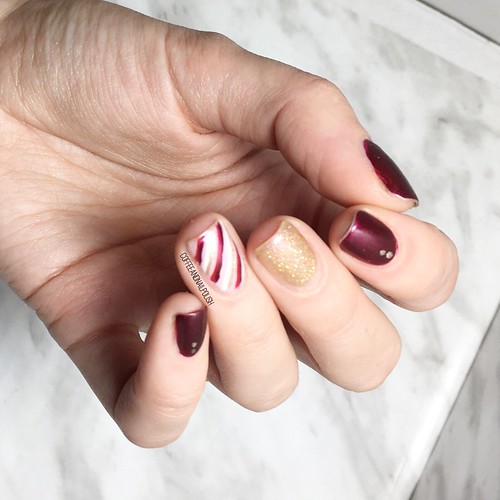
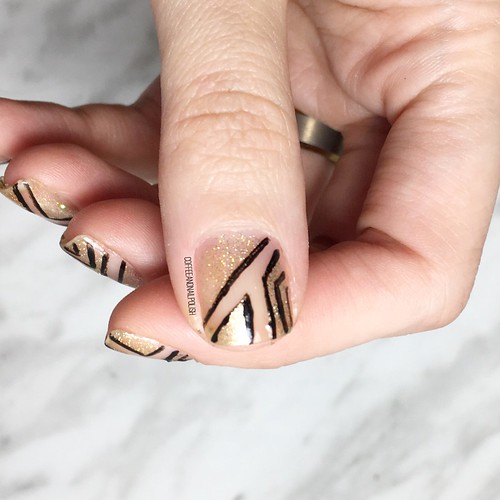
Happy New Years Eve lovelies! I couldn’t end this year without one more blog post, & I had created this Art Deco inspired look a few weeks back so I wanted to make sure to share it with you! My sister, like many I’m sure, is throwing a roaring 20s themed New Years Eve party, so I wanted to come up with a gorgeous Art Deco-esque look that would be perfect for the occasion. For this design, I used all three new shades from the Sally Hansen Miracle Gel Oh My Gold collection, which were so kindly gifted to me.
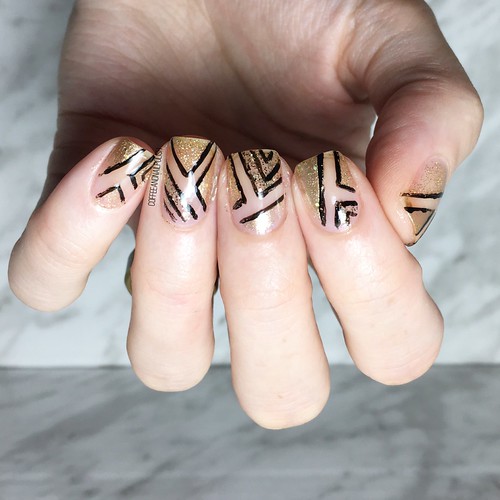

For this manicure, the polishes I used were:
- Base Coat: Sally Hansen Complete Salon Manicure Strengthening Base Coat
- Top Coat: Essie Speed Setter
- Sally Hansen Miracle Gel Goldie Rocks
- Sally Hansen MG Good As Gold
- Sally Hansen MG Five Golden Blings
- Sally Hansen MG Blacky-O
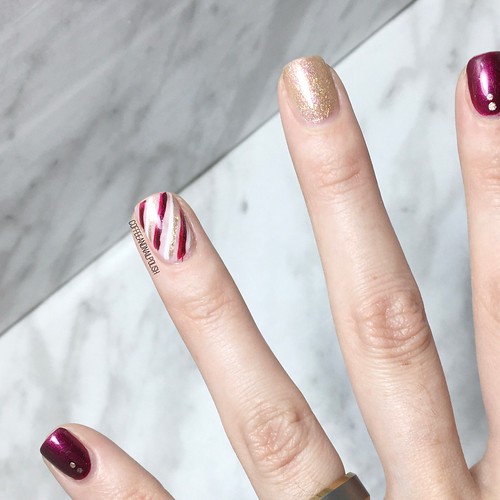
- NailStuff.ca 7mm detail brush(COFFEE10 to save 10%)
- Wide straight nail tape or wide striping tape — What’s Up Nails makes a great one.
.
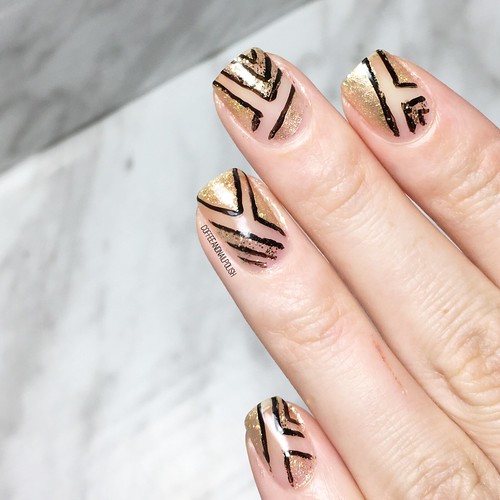


I started off by applying my base coat, then some quick dry top coat & let it dry. Then I applied my nail tape, & created my blocks of gold polish. I wanted each one to be fairly opaque, so I was pretty generous in my application. After all polish was applied, I removed my nail tape. Then I carefully went in with my black & my detail brush to create my lines. I used my 7mm detail brush, but for lines like this a bigger brush (like the 11mm or 16mm) would probably be easier.

I really wanted to come up with a design that was roaring 20s appropriate & I think I succeeded! It’s also a fairly quick & moderately easy design to f, so if you’re looking for a last minute nail art design to do, give it a try & ring in New Years Eve with some fabulously sparkly nails!

I just want to say a huge thank you for everyone who checks out this blog or my Instagram & leaves likes or love. This was my 5th year blogging here in this little space, & even though my life is a heck of a lot different than when I started, & it’s not always easy to make the time for my nails & for writing,I couldn’t imagine stopping now. I can’t wait to see what 2020 brings!
See you next year!