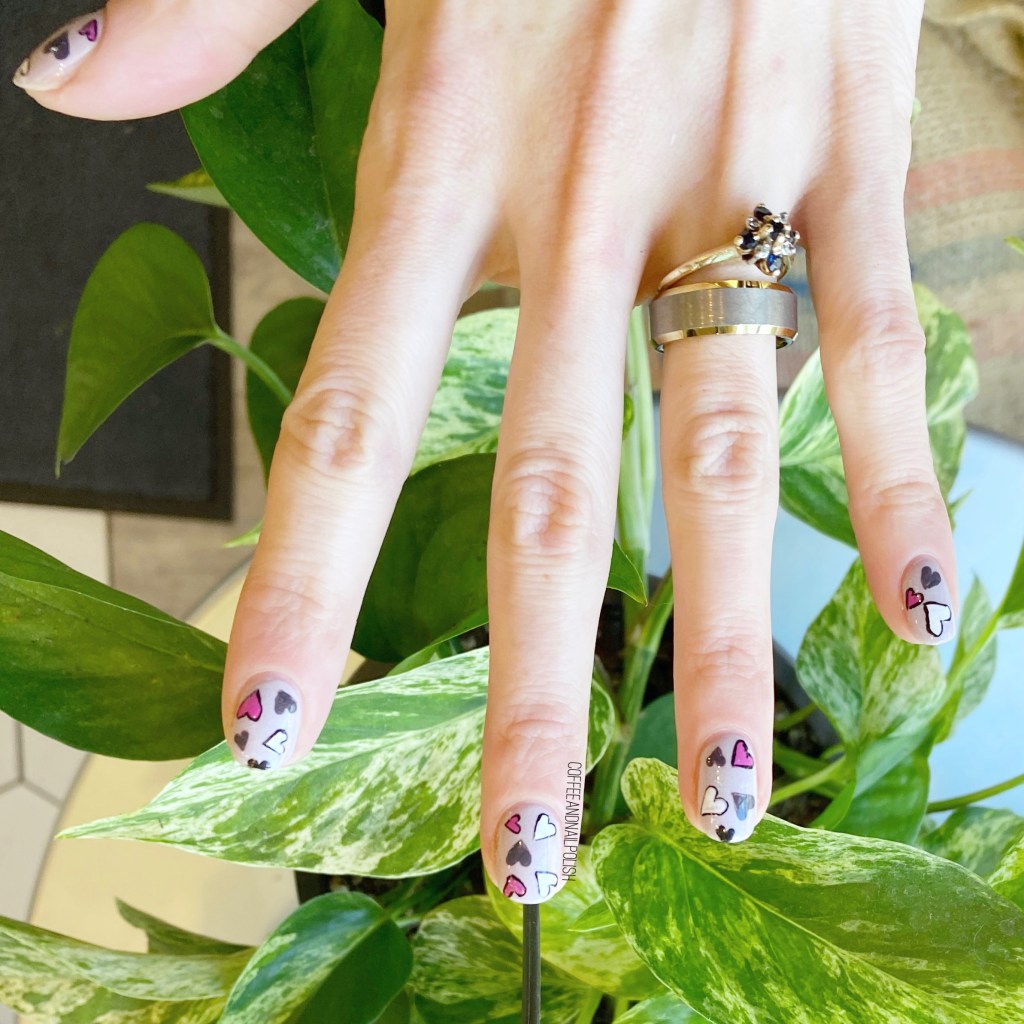
Hello lovelies & happy day after Valentine’s Day (aka 50% off Chocolate Day!).
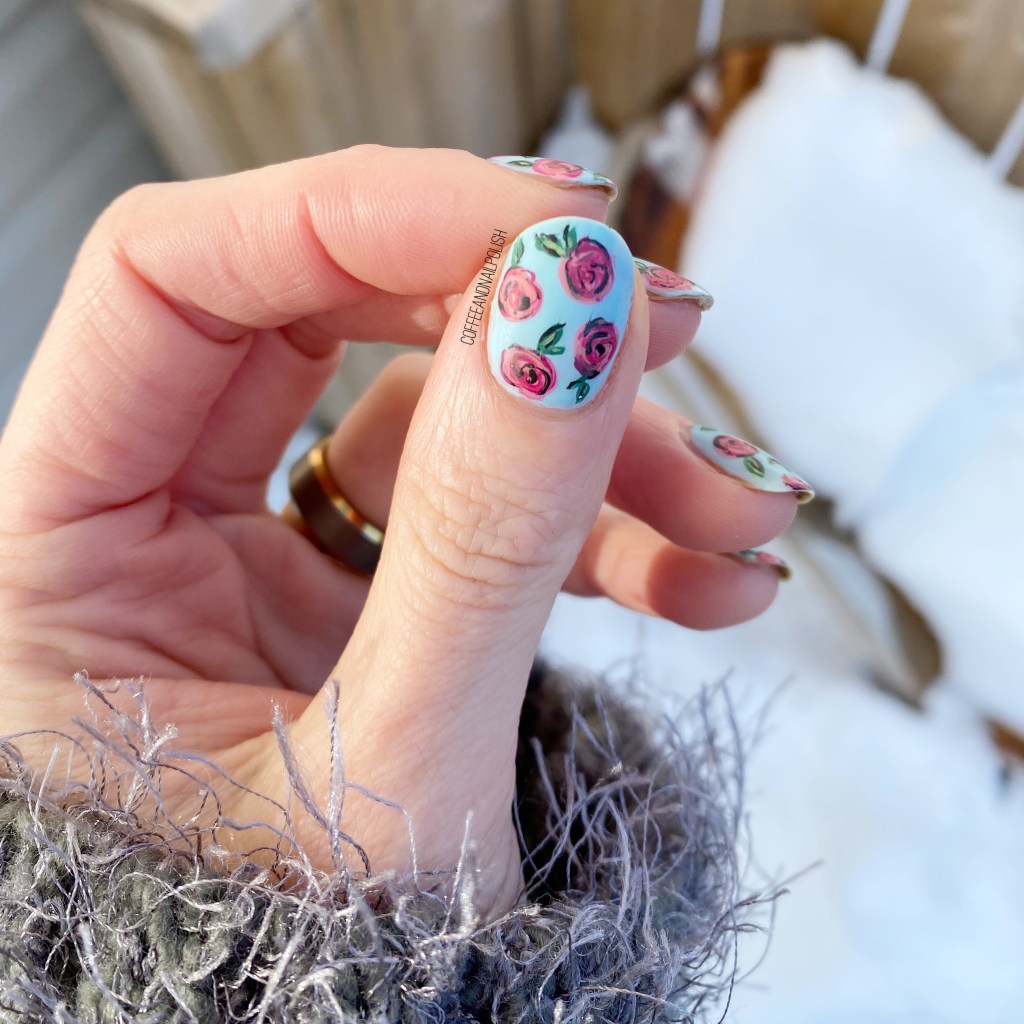
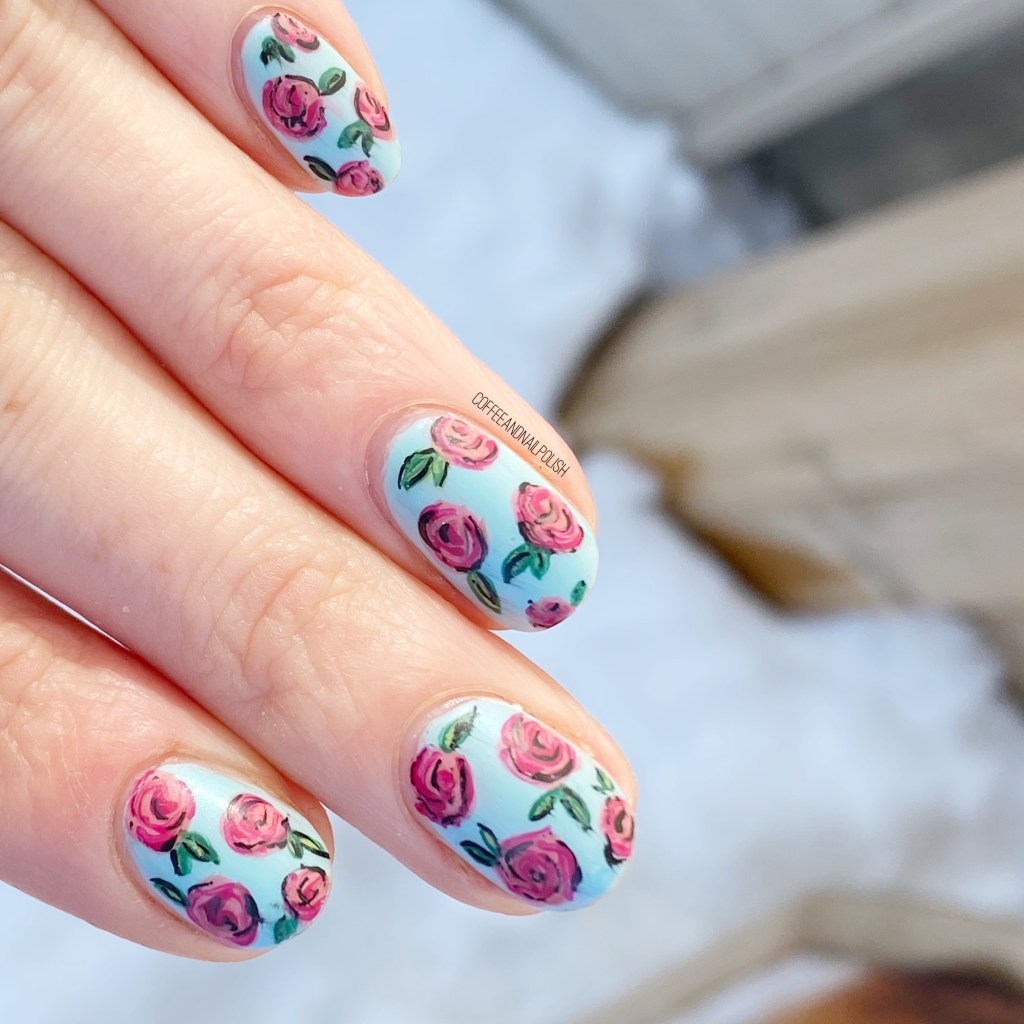
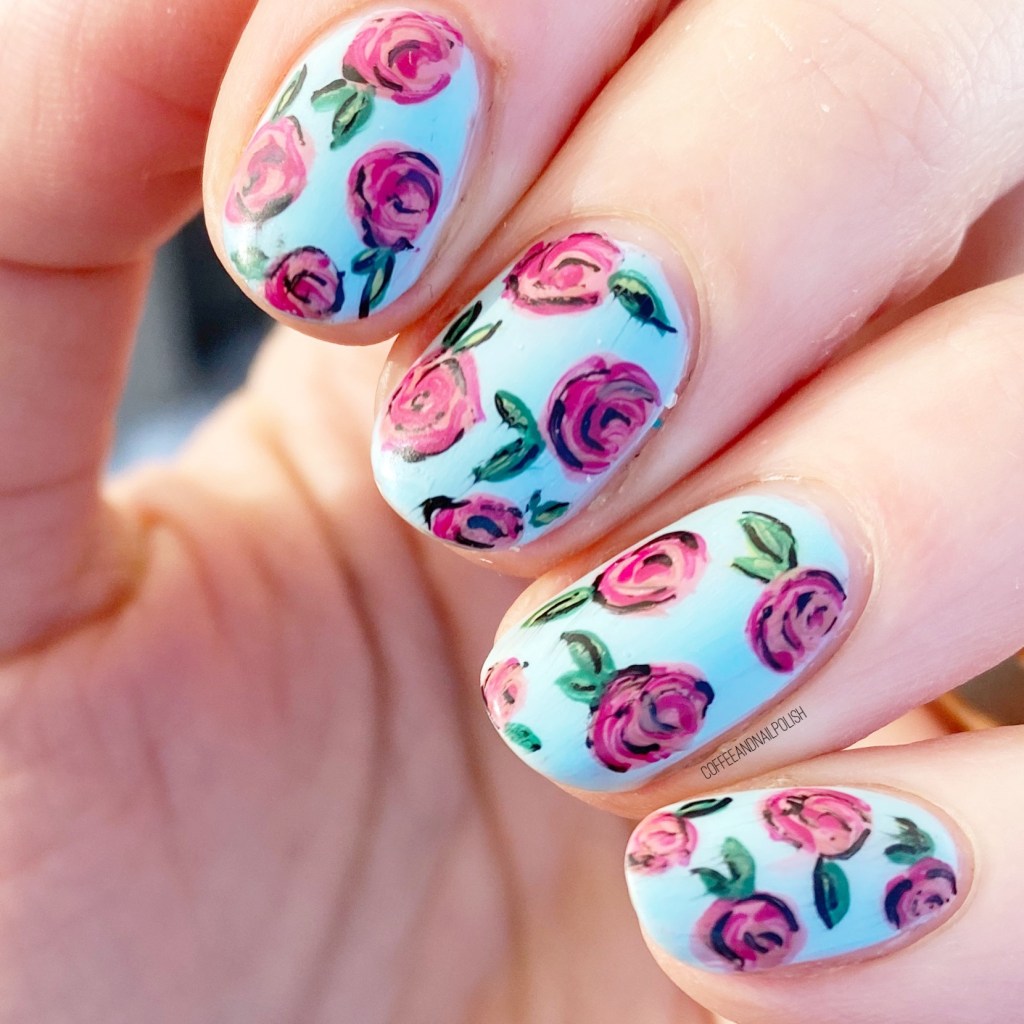
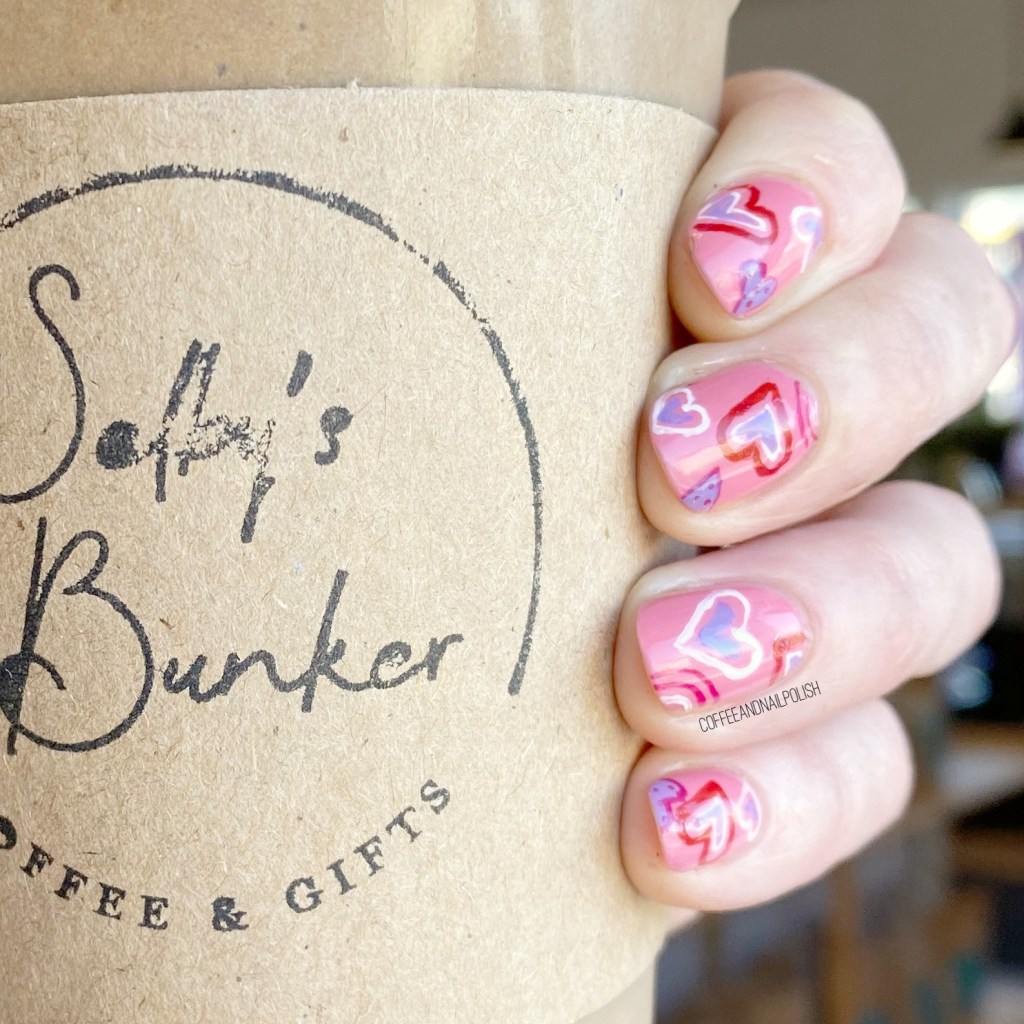
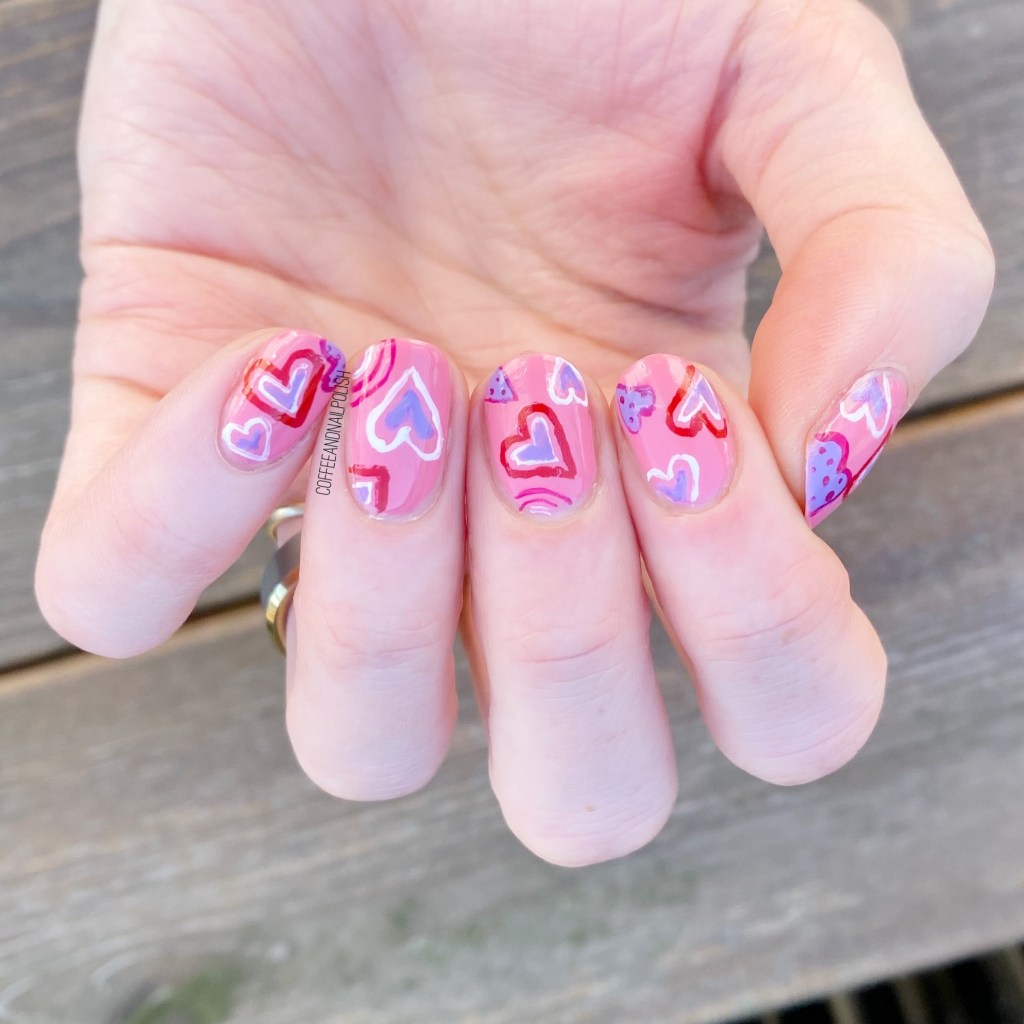
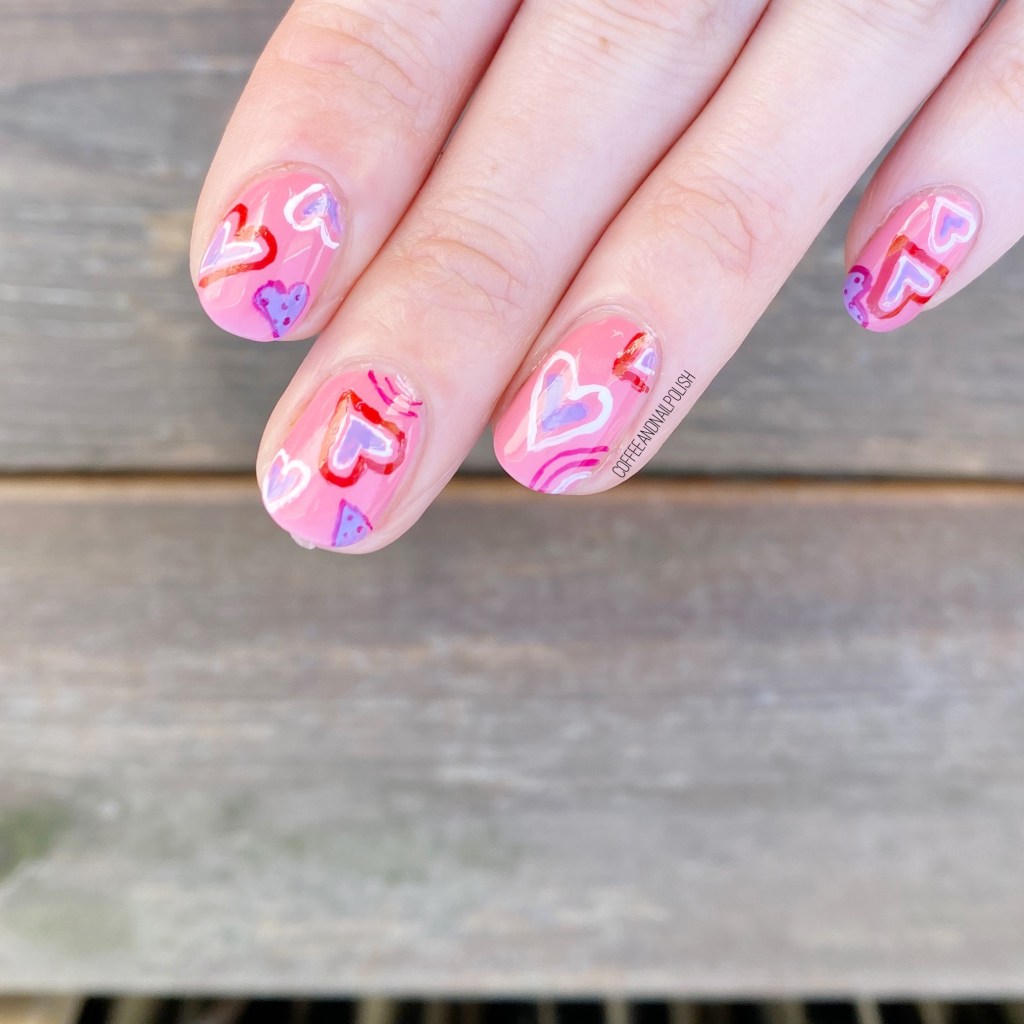
Today I’m sharing my design for yesterday’s prompt for GlamNailsChaengeFeb: Hearts! Which is a very fitting prompt for February 14th. 💗 This look was one of those ones that kind of just came to me as I was doing it, which are definitely the best kind. & I just adore the end result.

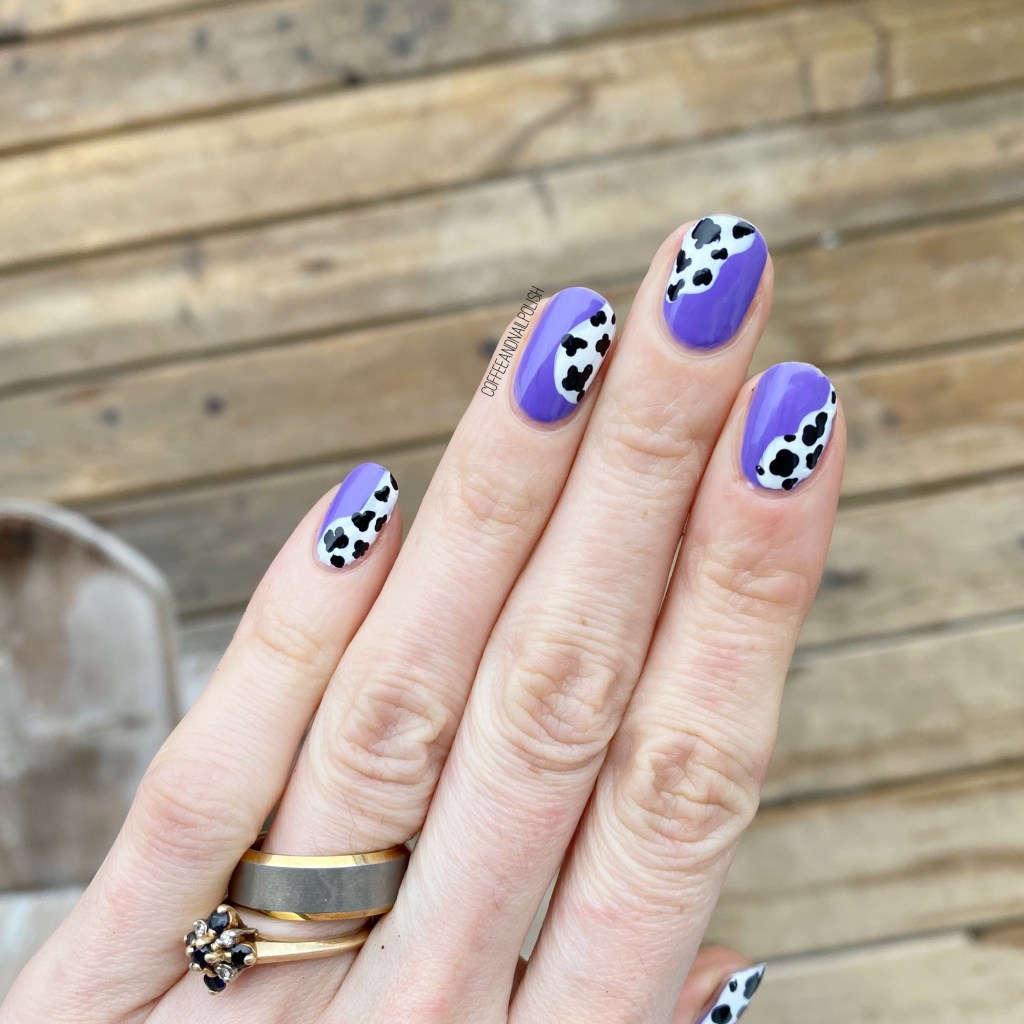
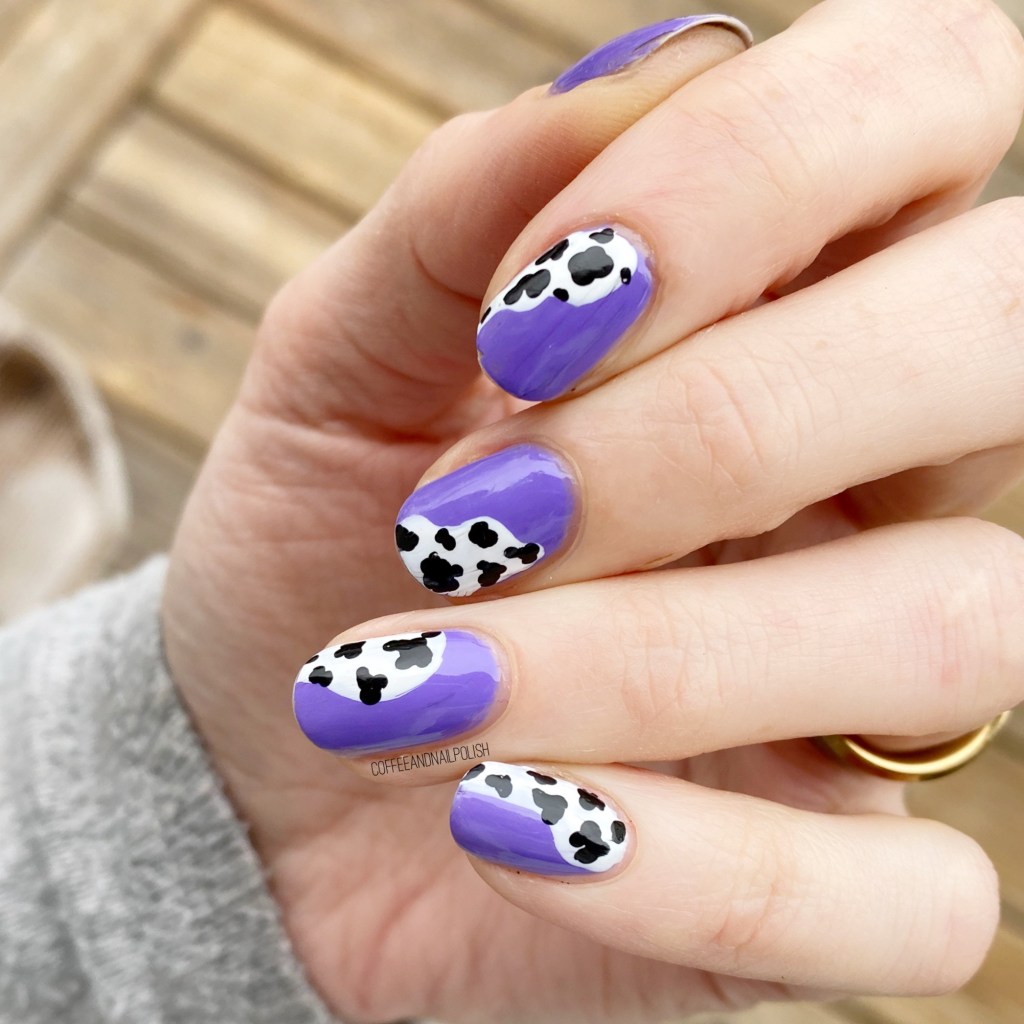
For this manicure, the polishes I used were:
- Base Coat: Sally Hansen Nailgrowth Miracle
- Top Coat: Essie Good to Go
- L’Oréal Jardin Des Roses
- OPI Koala Bear-y
- L’Oréal Royalty Reinvented
- Sally Hansen Miracle Gel Get Mod
- Sally Hansen Complete Salon Manicure Cherry Delightful
- NailStuff.ca 4mm Micro Detail Brush (COFFEE10 saves you 10%!)

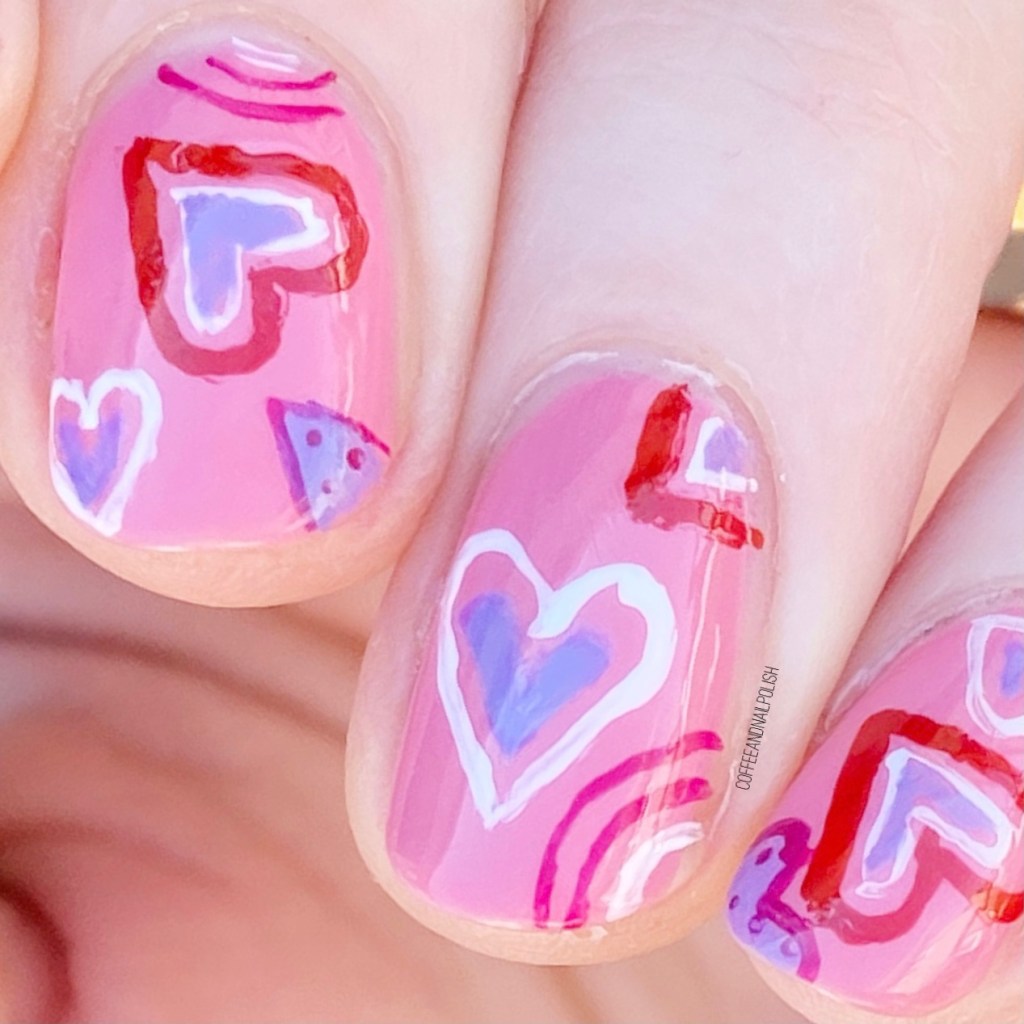
As you can see from my close up, this isn’t the most perfectly clean freehanding, but I kind of like it. It works with this kind of design. It sort of reminds me of another Valentine’s Day nail art look I did a few years back which was inspired by napkins I saw out & about.

What do you think about this hearts look? I’m definitely ready to be done with pink for a while — I think I’ve pink-ed myself out. Haha. But I’ve got a whole bunch more prompts to come, so stay tuned for some beautiful (not pink) nail art looks to come!