
Happy Monday! How was everyone else’s weekend? We’ve been starting to pack for moving which is about as much fun as it sounds… I hate packing & I hate moving. (& I haven’t even starting thinking about moving my 1000+ nail polishes yet.)
So what am I sharing to cheer myself up after a packing haze? One of my favourite go-to designs—the half moon. & thought I’d share a quick pictorial on how easy these actually are to create! & no special vinyls are needed!
The products used for this manicure were:
- Base Coat: OPI Natural Nail Base Coat
- Top Coat: Seche Vive
- China Glaze Fancy Pants
- China Glaze Glamcore
- NailStuff.ca gold Mixed Decoration Nail Wheel

Paint your base colour & apply quick dry top coat. Let dry completely, roughly about 20 minutes depending on the top coat you use.
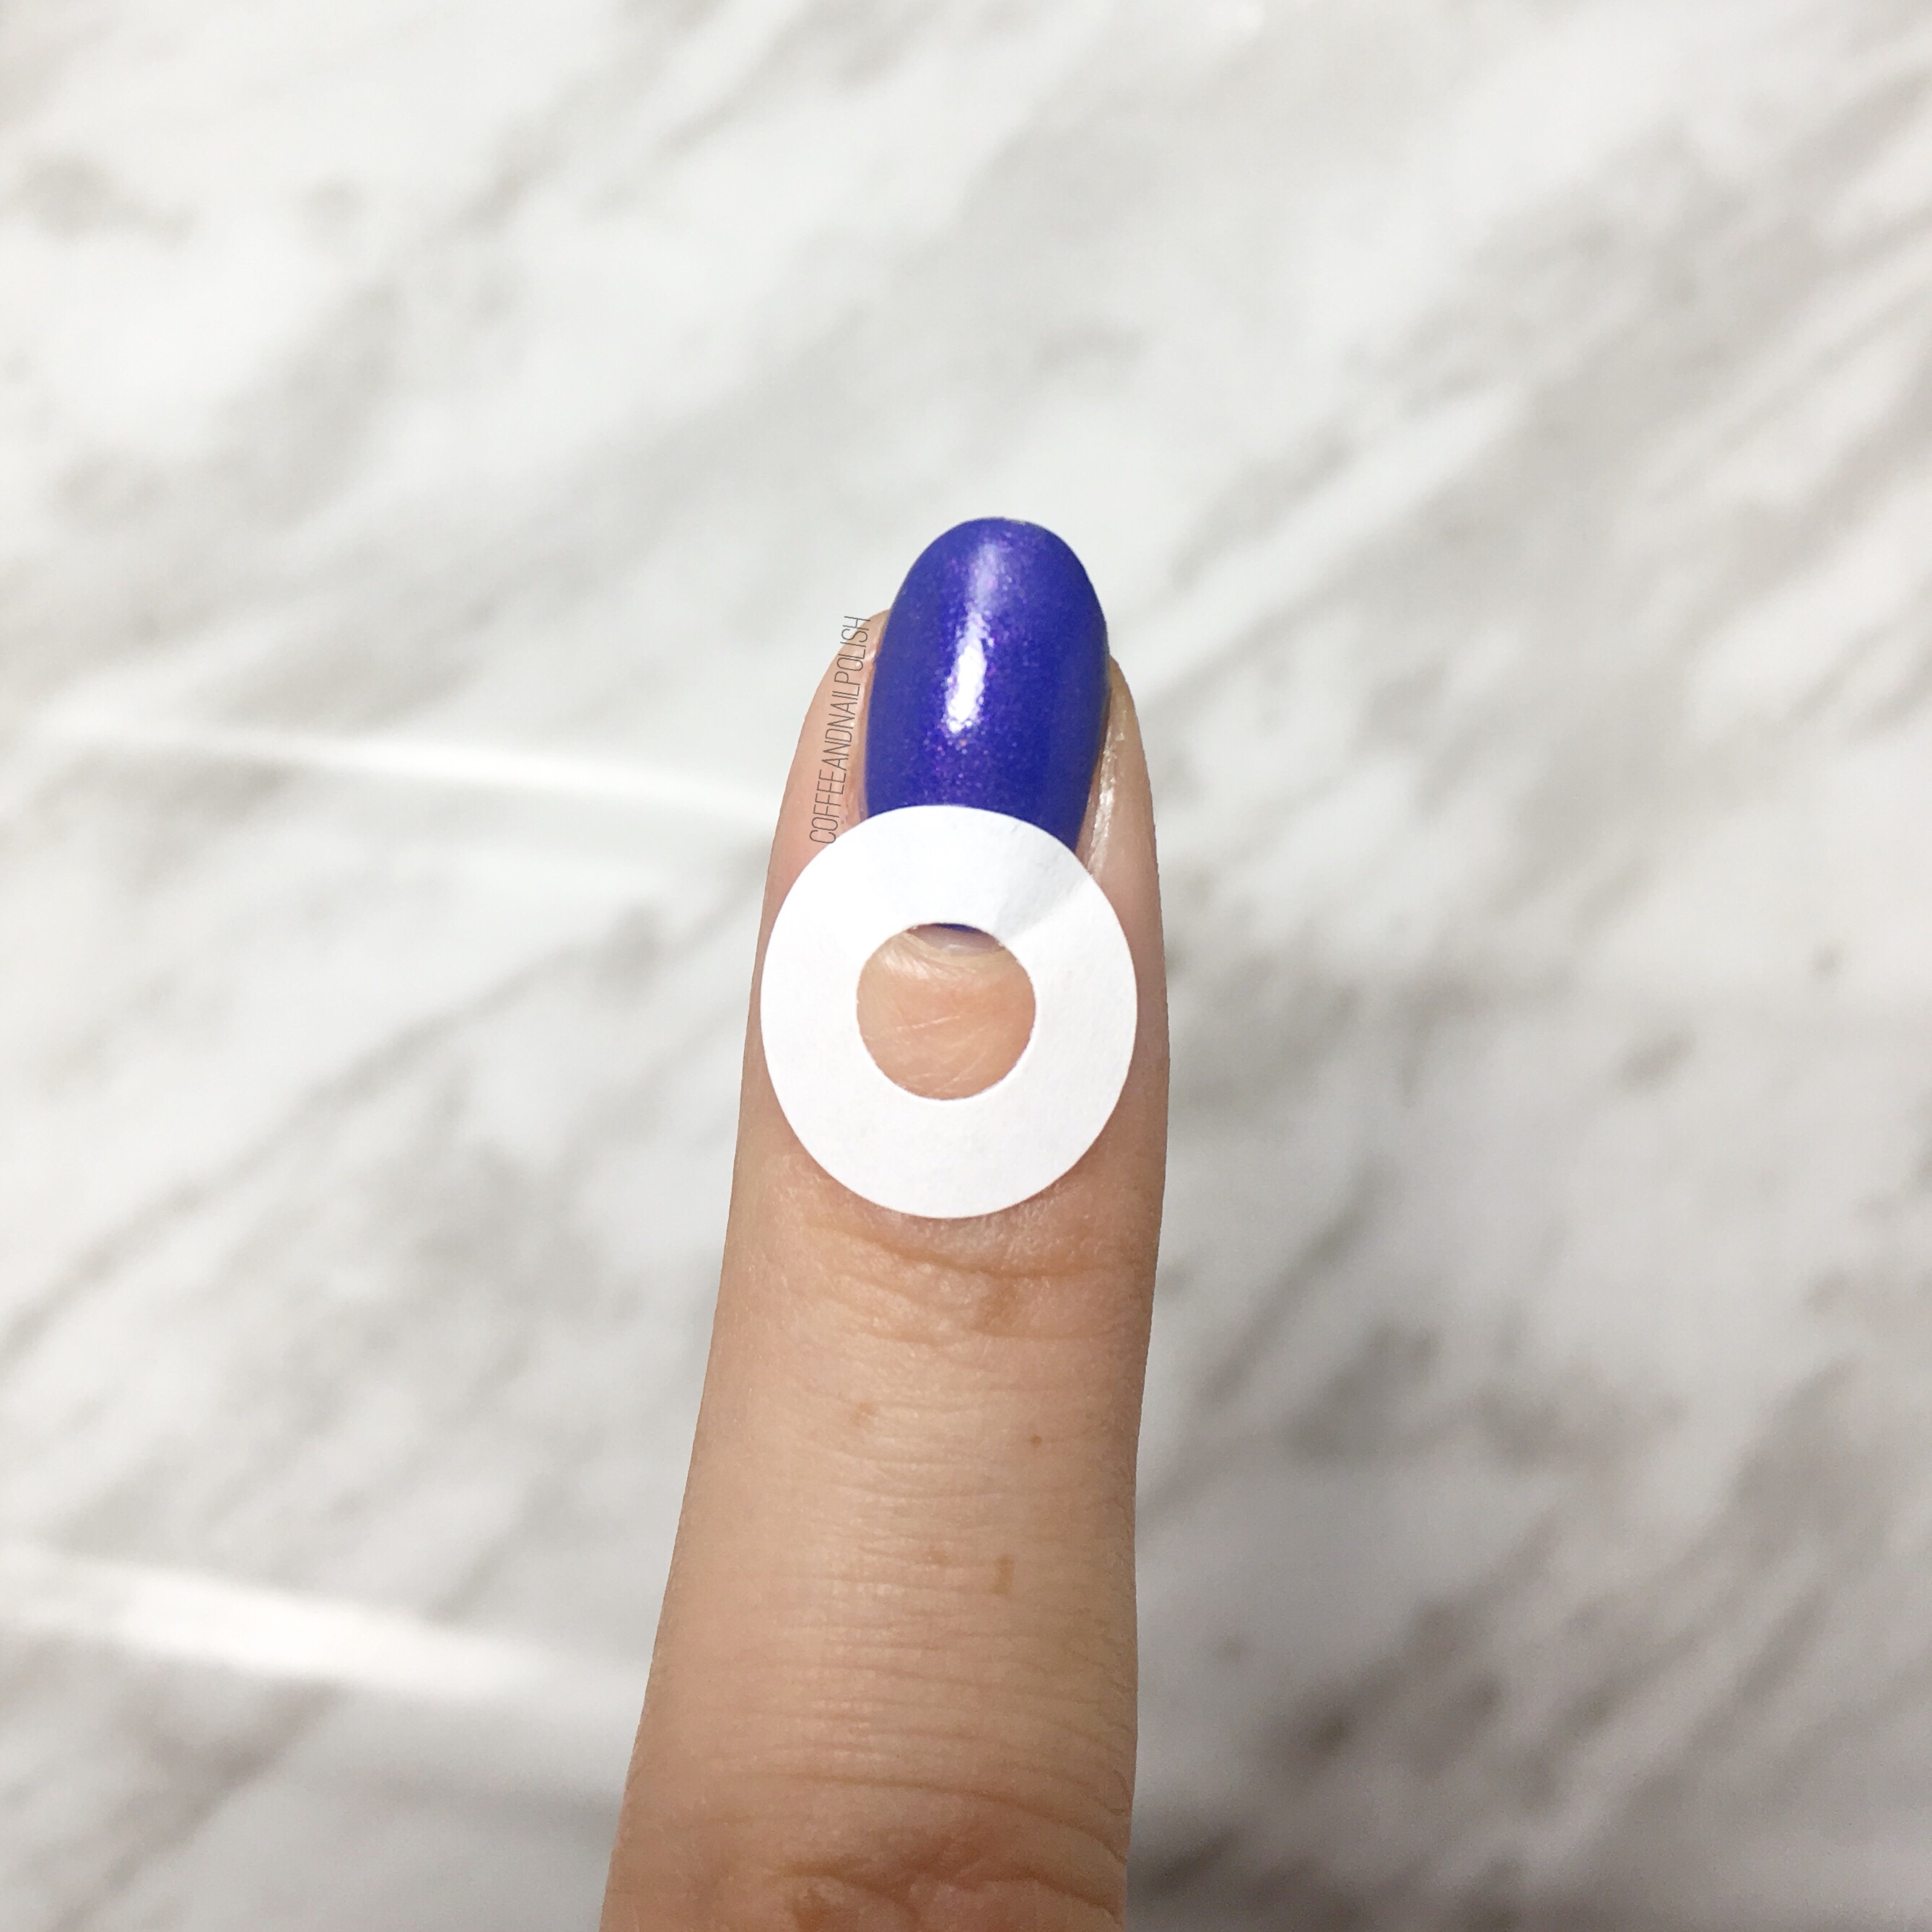
Once your nails are completely dry, pull out your pack of paper hole reinforcements & apply at the base of your nail. Make sure to press down at each end.

Repeat on all 5 nails. I always do one hand at a time.
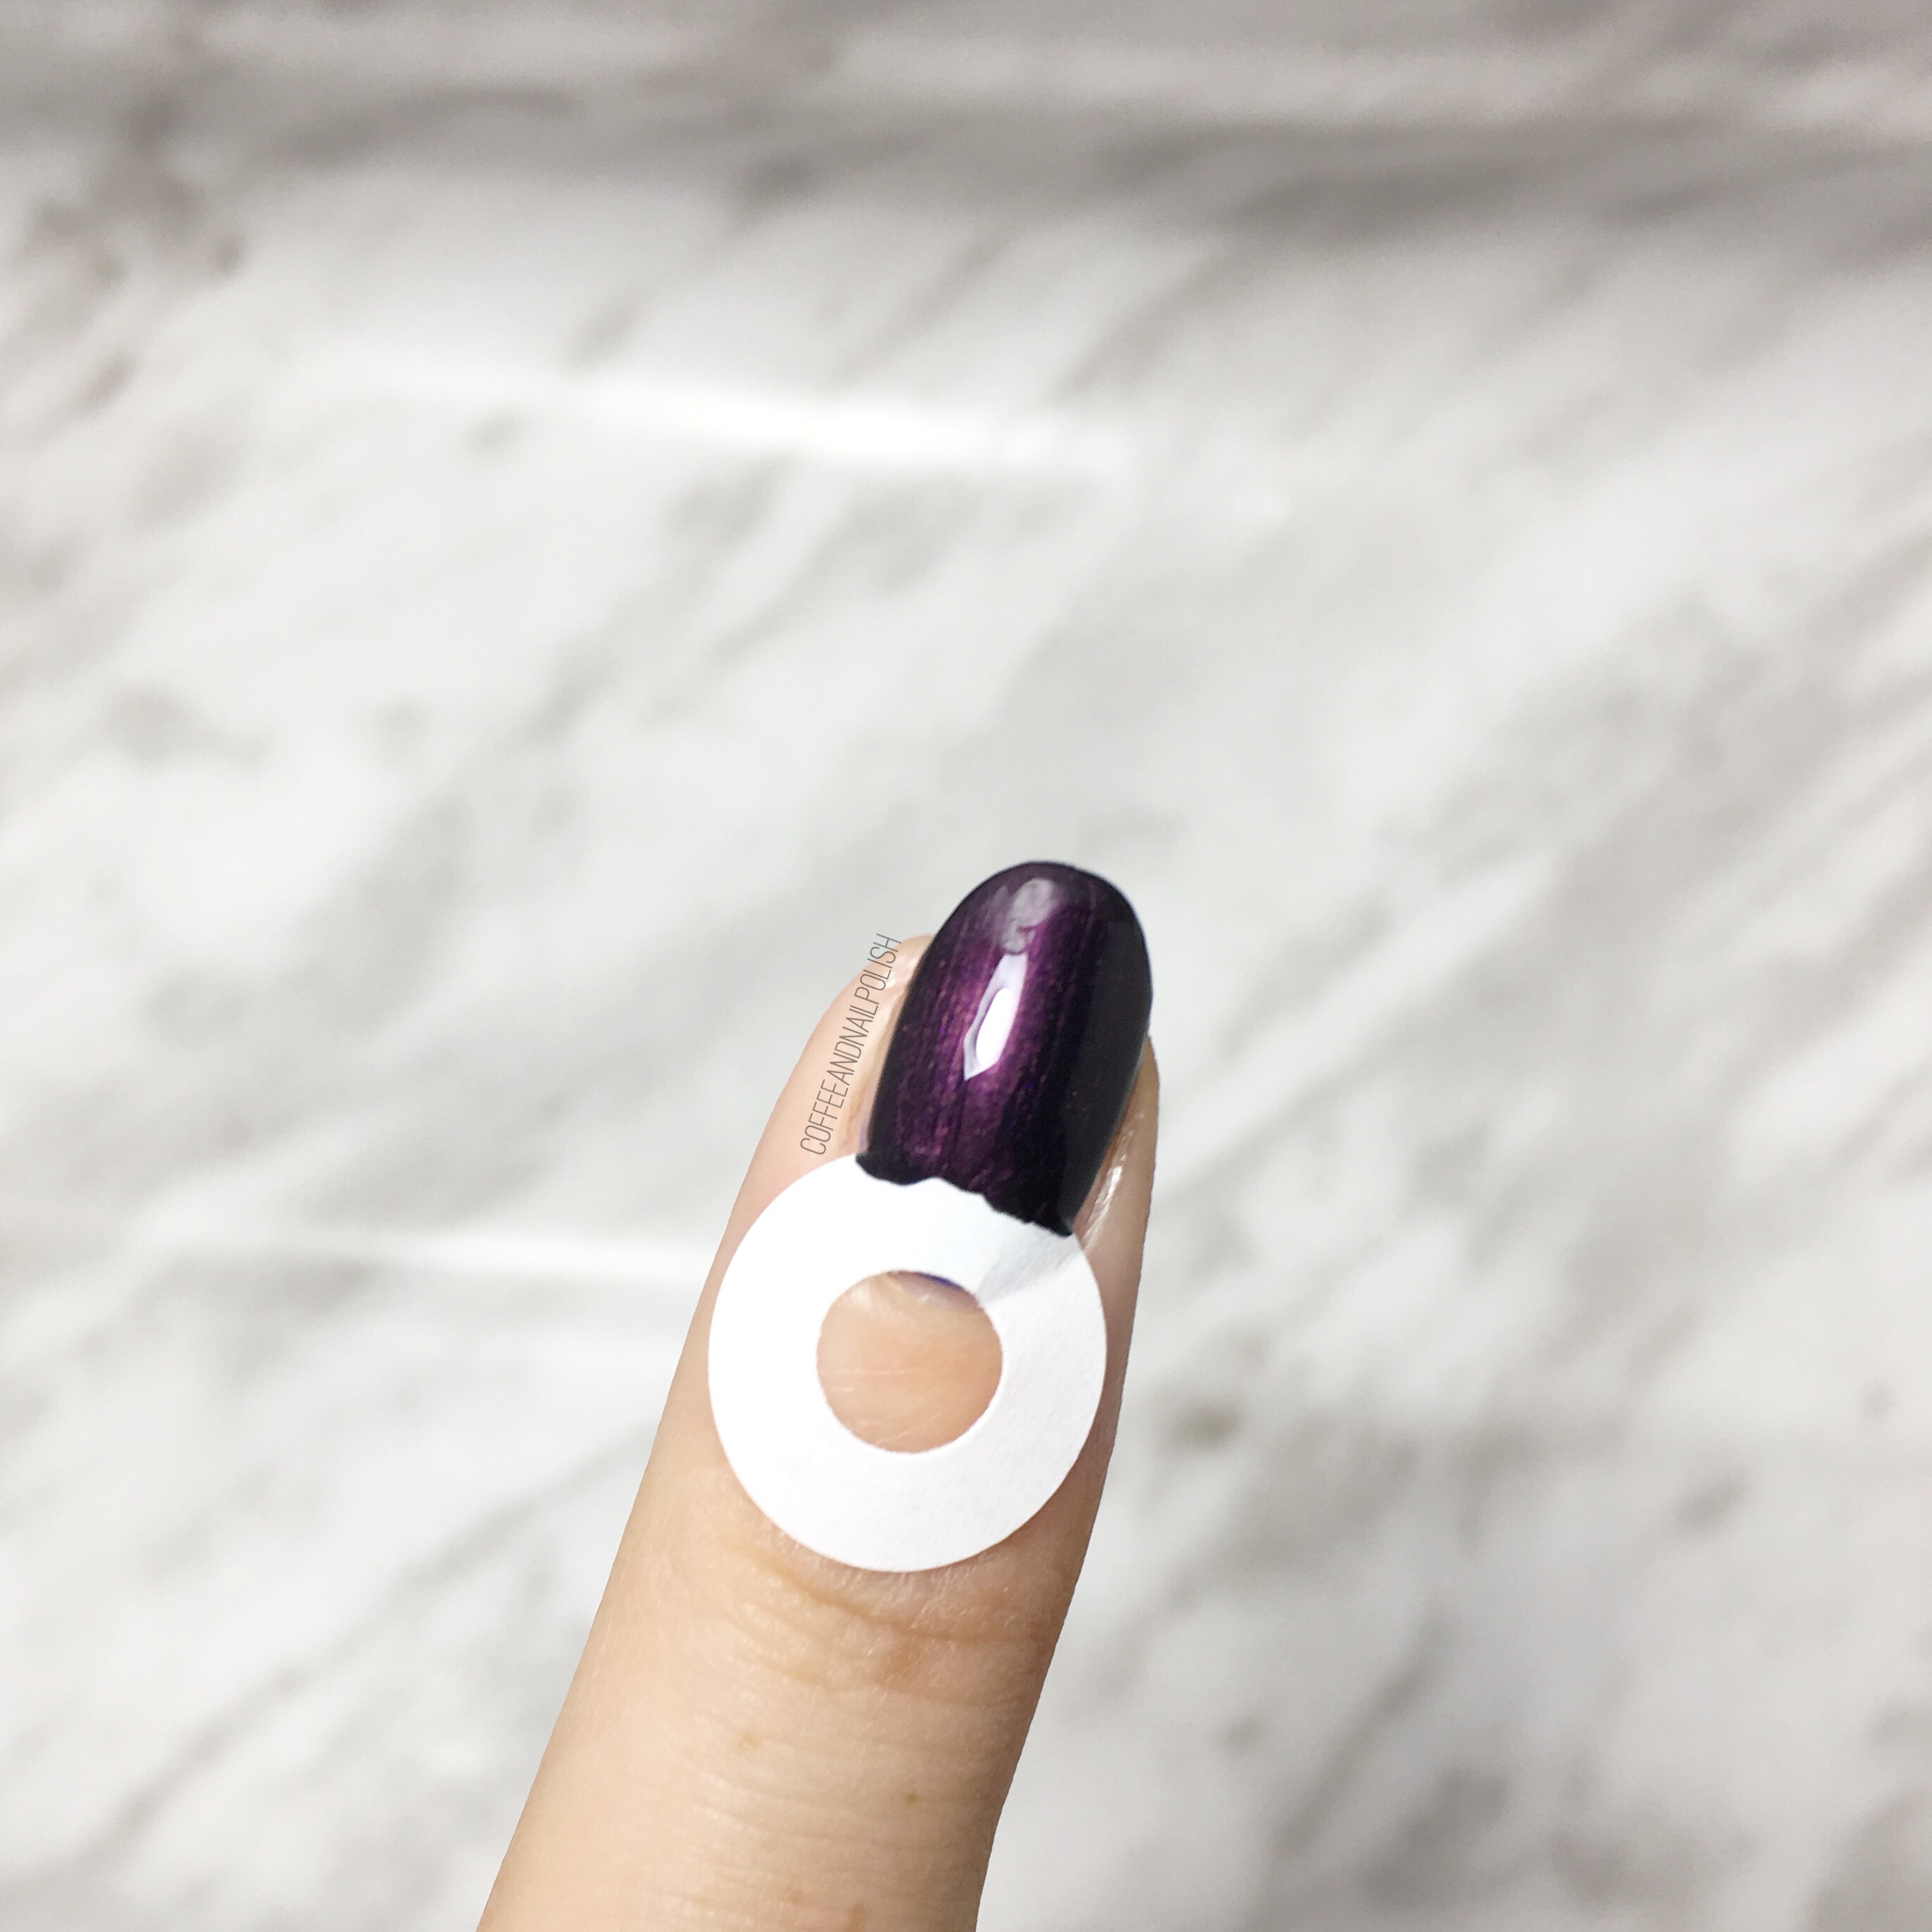
Press down each side of hole reinforcement (to make sure polish won’t bleed under) & then quickly paint second colour over top. A one coat polish works best, but she make sure base colour is covered.

Immediately remove your reinforcement.
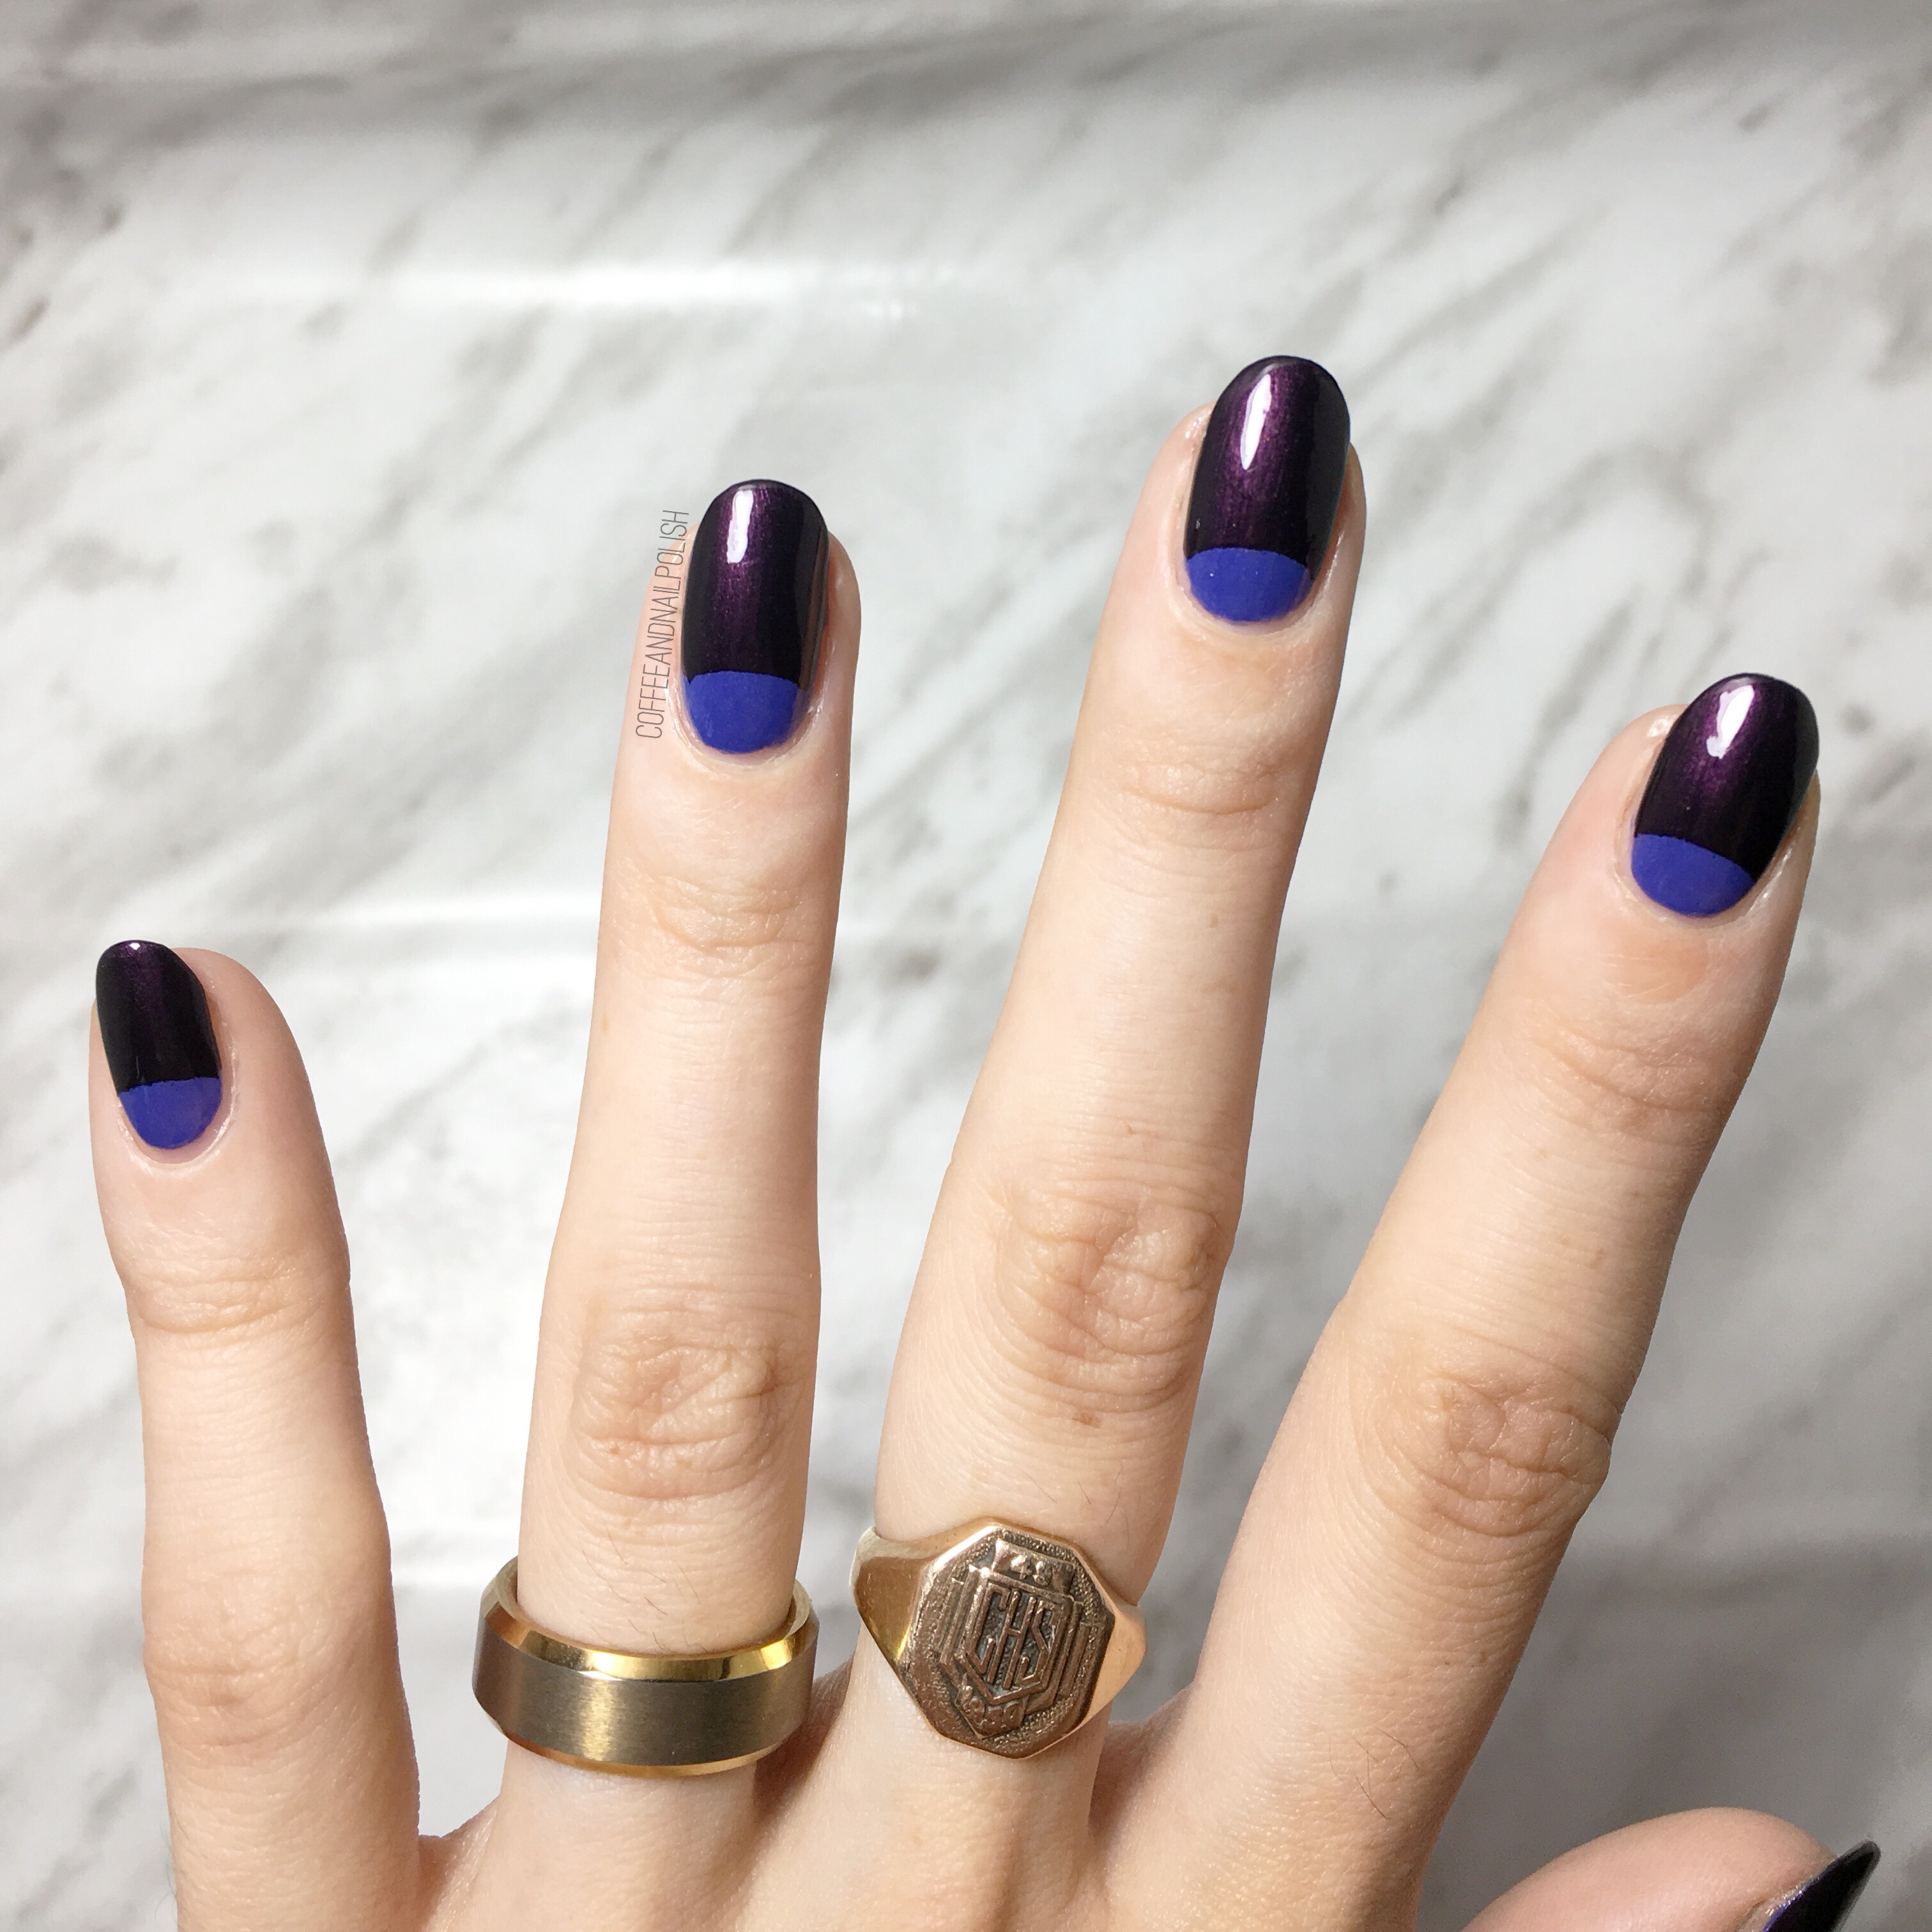
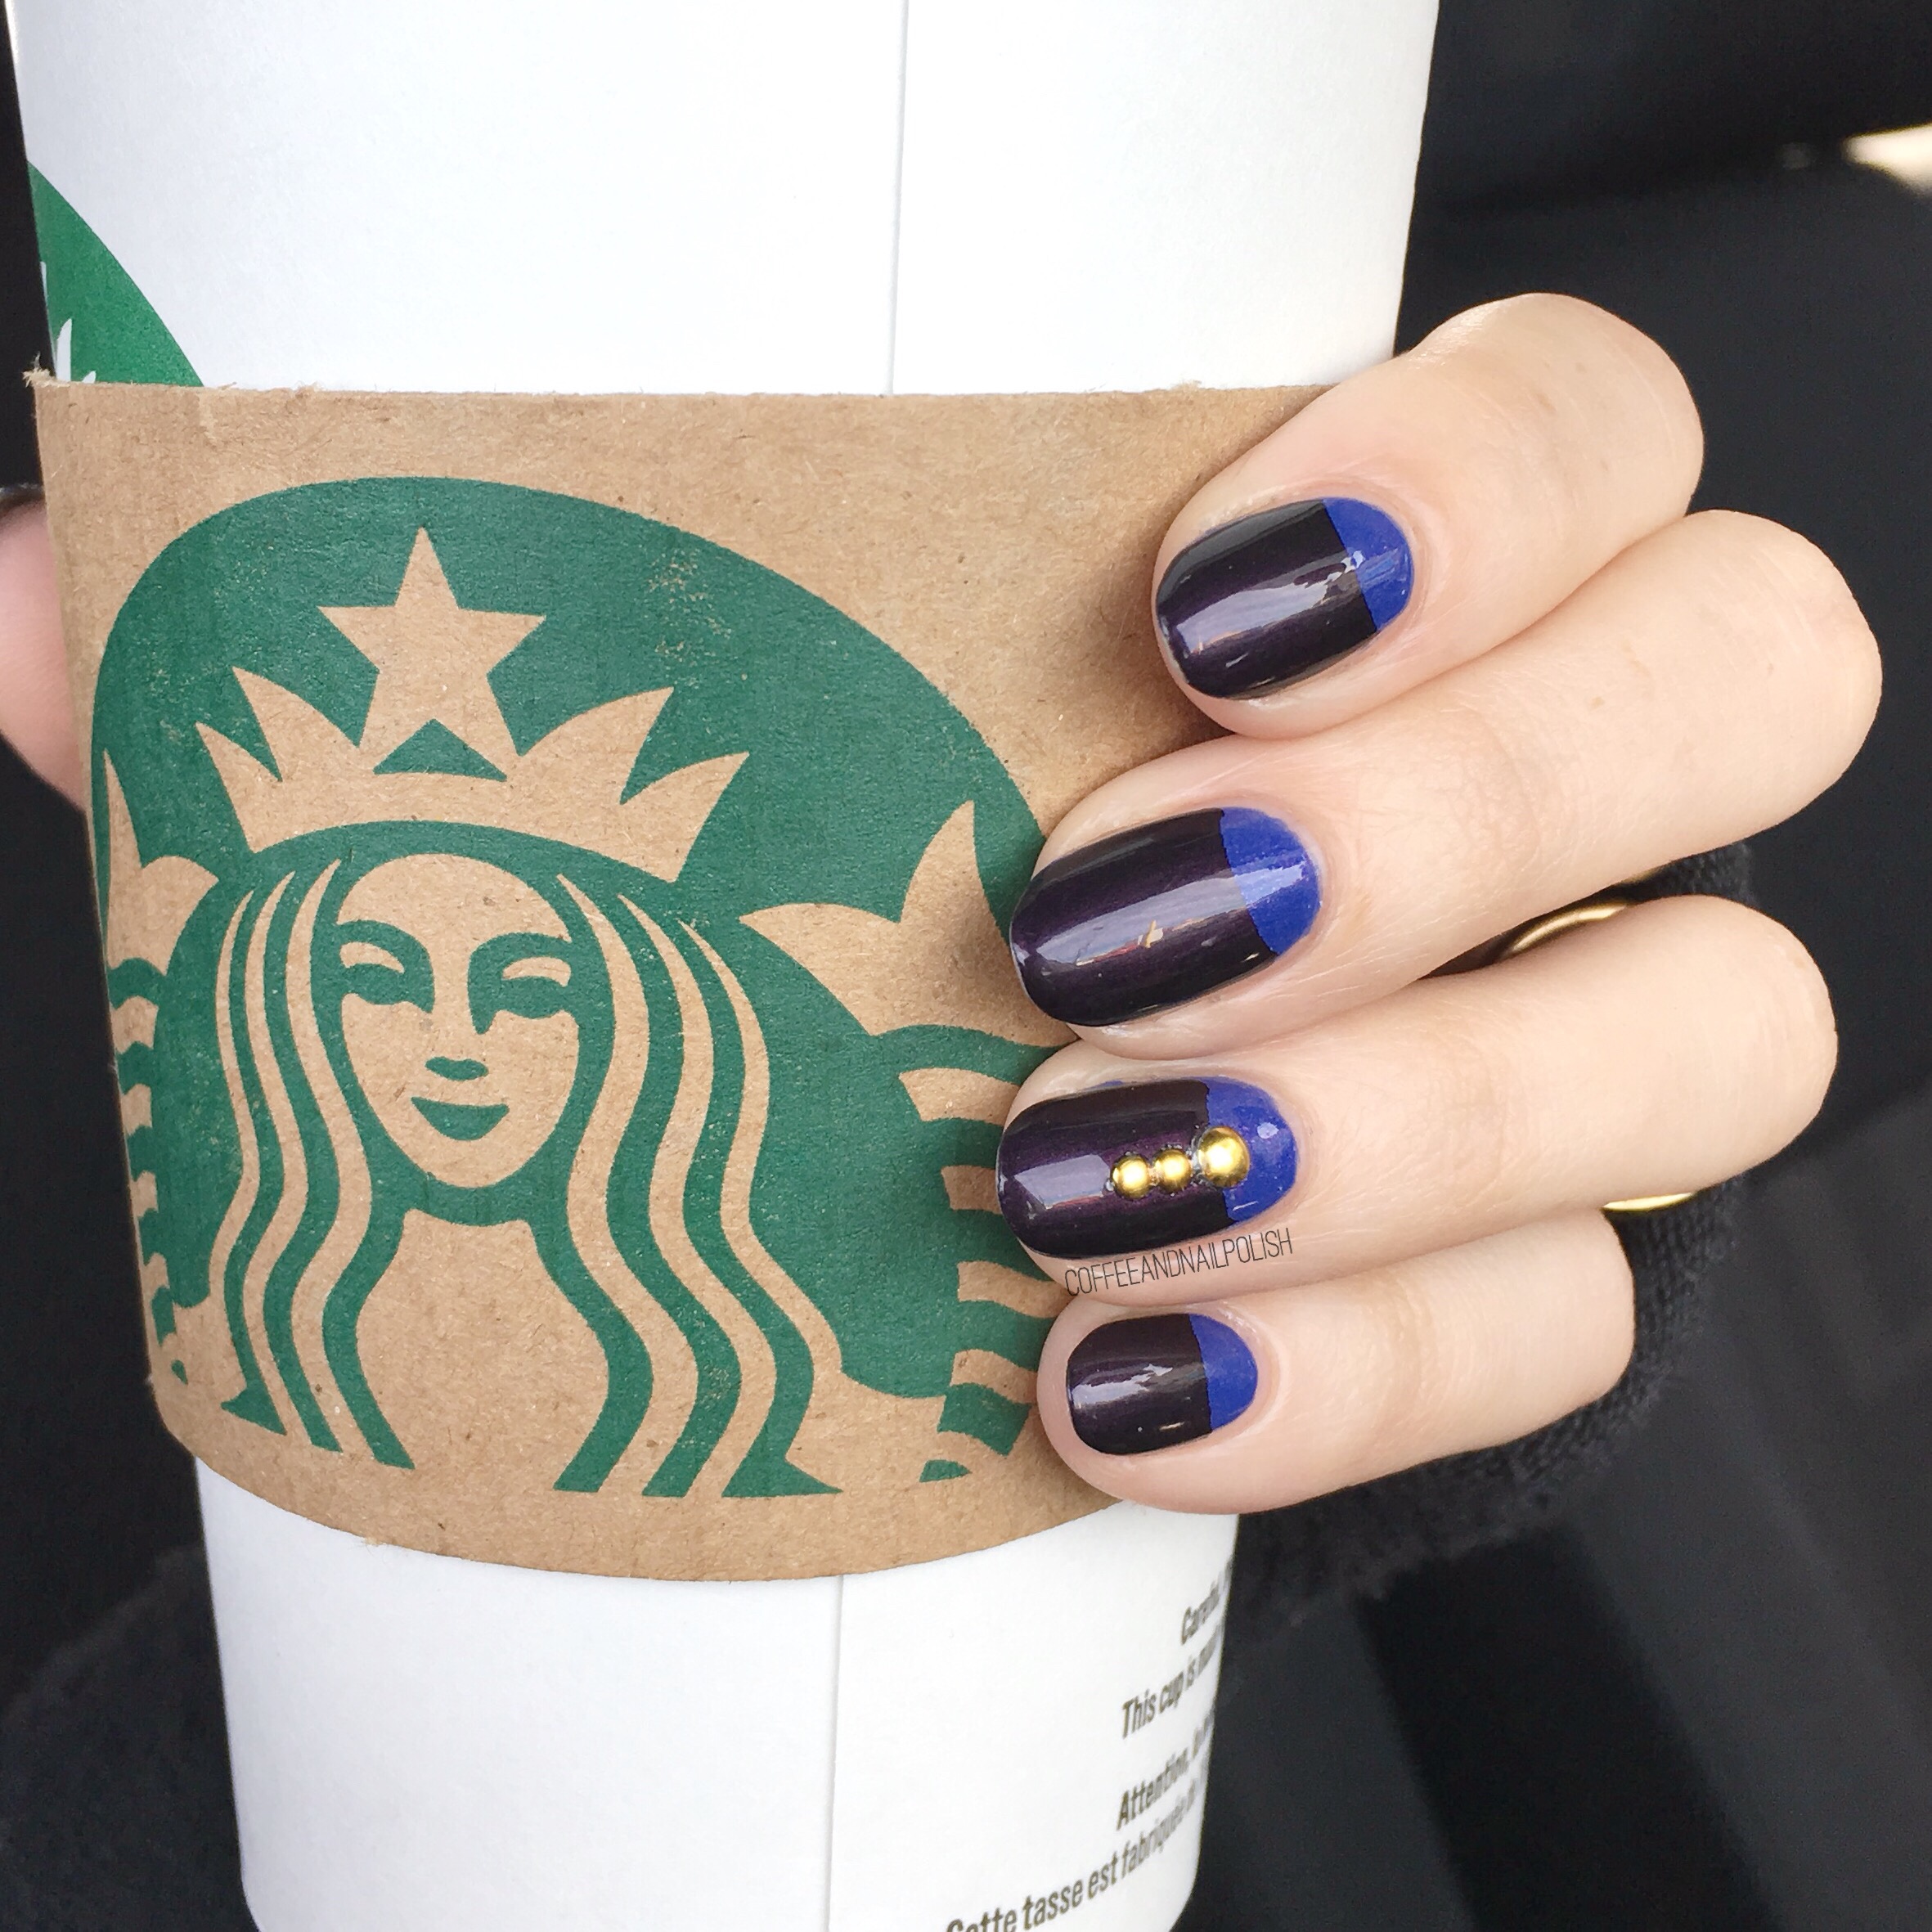
Repeat steps on all fingers & then seal in design with top coat. Bam! Almost instant half moons (with a few steps in between). I loved the blue with purple but I wanted to add a little more of a snazzy finish to my nails. I’ve been obsessing about this wheel of nail studs lately adding it to a lot of my manicures lately so I figured it would be the perfect addition to this design.


For my accent nail, I applied some blobs of coat, then picked up my studs with a wet nail art brush & arranged them. I always make sure to pull my studs out of the wheel ahead of applying them, as it takes less time trying to find them. Also, sometimes you will have to dab on more clear polish/top coat to make sure the studs stick. Also I always seal my studs in with top coat so no edges catch & get pulled off.


What do you think of this half moon? How do you create your half moon designs? Let me know in the comments below! 🌙