Jewel Toned Drag Marble

Hello lovelies & happy Thursday. This week is almost over (& this month!) Of course, there is a crazy Winter storm headed our way this weekend, so we’re not as close to Spring like weather as one would like. & I am so over Winter! Case in point: the super short nails that I’m now rocking thanks to crazy temperature fluctuations.

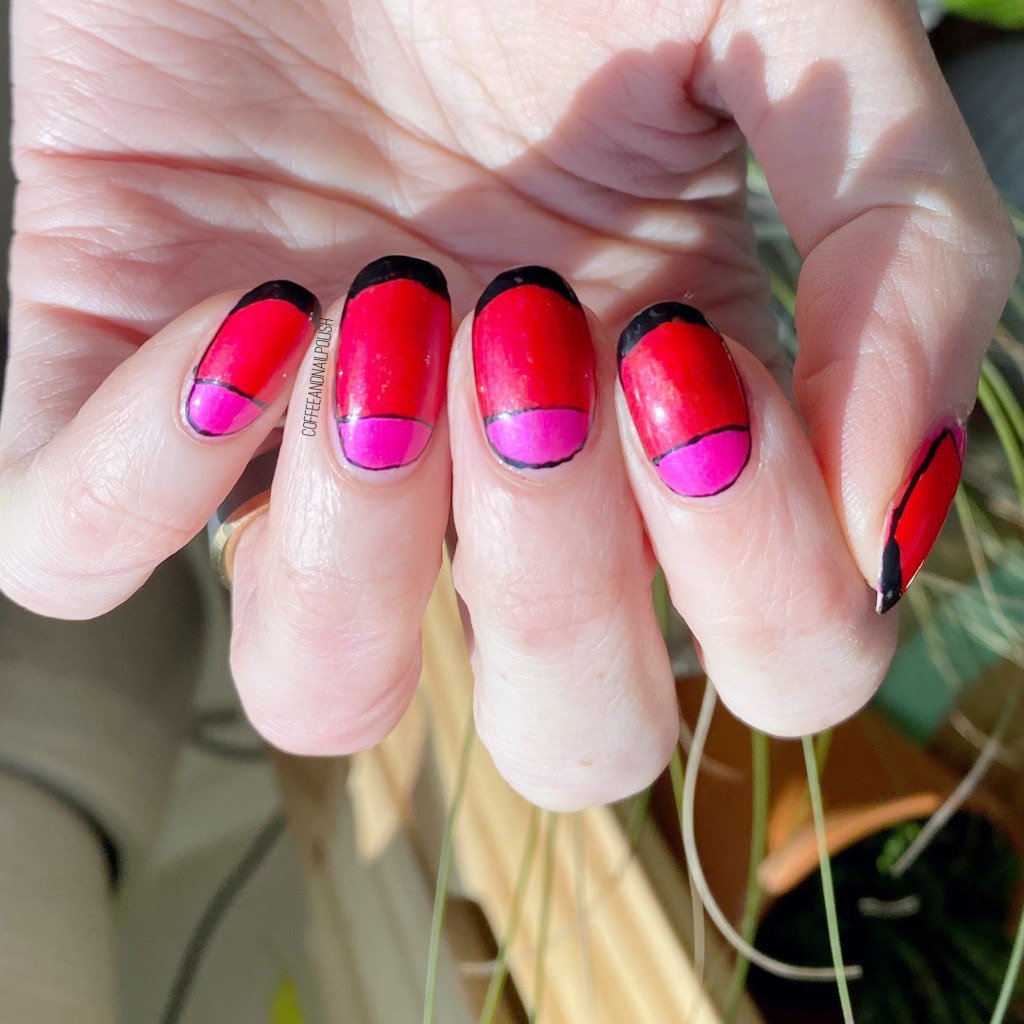
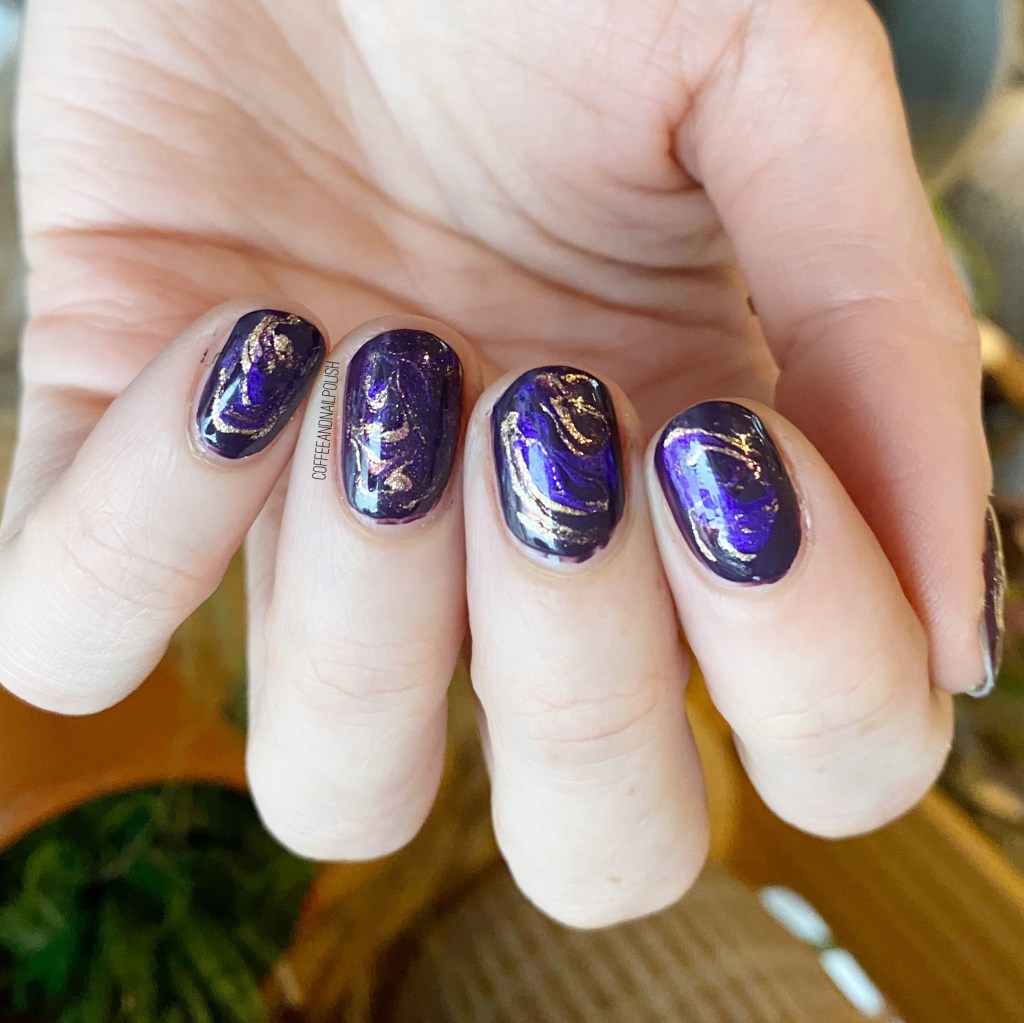
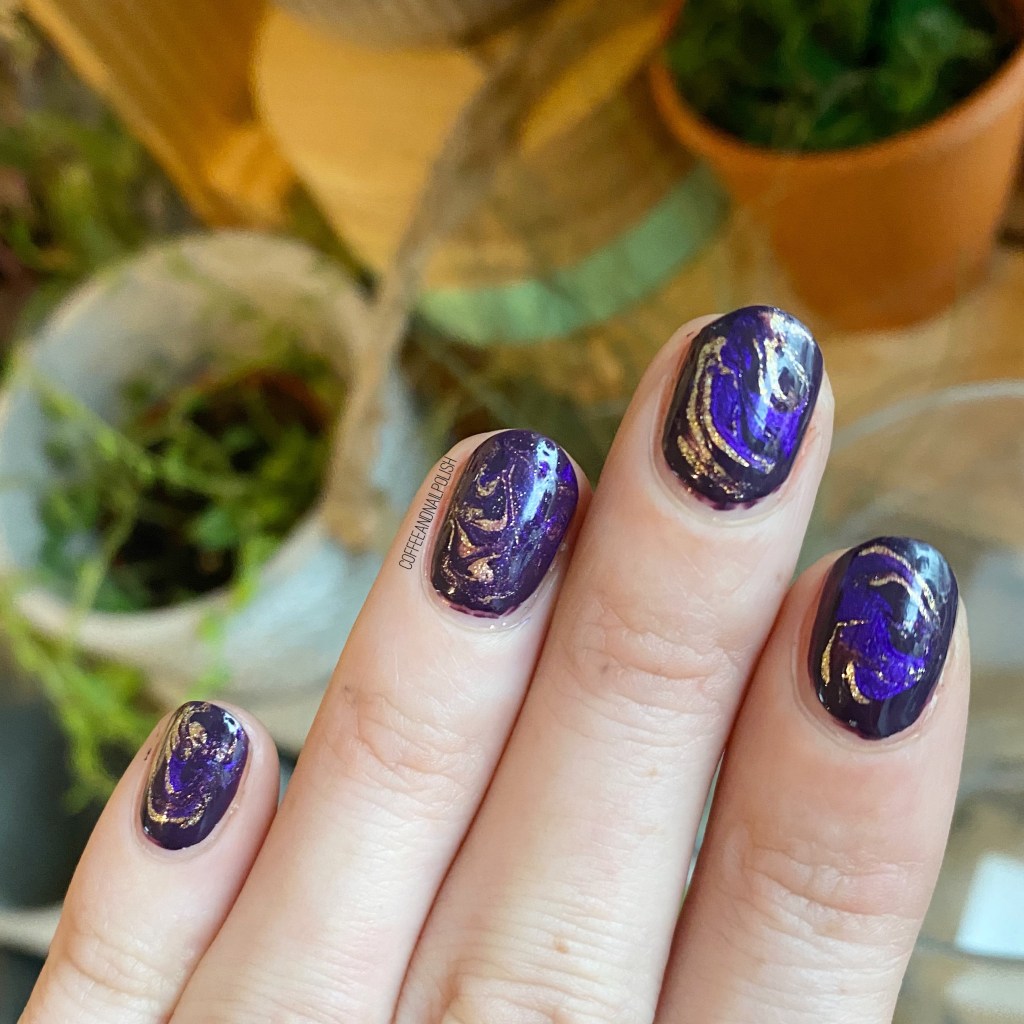
I won’t like: I’ve been struggling with what to paint on my extra short nails — my inspiration is lacking. I used to be so good at this! I decided on some pretty jewel toned drag marble nails, which is something I haven’t done in a while. Plus I thought it would be a nice way to “pretty up” my super short little nubs.

The polishes I used for this manicure are: 

  • Base Coat: Essie Millionails
  • Top Coat: Seche Vive
  • Essie Kimono Over
  • Essie Getting Groovy
  • Sally Hansen Xtreme Wear Late Night Lilac
  • NailStuff.ca Dotting Tool TrioI used the smallest tip to get the cleanest drag.

It’s been a while since I attempted a drag marble, & my ring finger is a little rough thanks to bumping it before it had a change to dry enough. But I think all 9 other nails turned out really gorgeous. The trick I’ve learned to drag marble is less movements turn out better than a ton. You really want to keep them down to a minimum, otherwise you end up getting a swampy look.

I’ve actually been turning to drag marbles more than I’ve even been photographing — they look complicated, but with the exception of dry time, they don’t take that long. & I love love love how they look — plus I always get a ton of compliments!

What do you think about this drag marble look? Is this something that you would wear on your nails? Let me know what colour combinations you would love to see!

Blue Valentine Nails 💙

Hello lovelies & happy Tuesday!

Today I have a fun early Valentine’s Day look to share with you I did before my tragic nail break last week. I was feeling something Valentines-y, but not pink, so I decided to recreate a look similar to one I did last year.

The polishes I used for this manicure are: 

  • Base Coat: Essie Millionails
  • Top Coat: Seche Vive
  • Sally Hansen Xtreme Wear Blue Blitz
  • Essie All the Wave
  • Dimension Nails Great Blue Heron (gifted c/o: NailStuff.ca)
  • China Glaze Secret Peri-wink-le
  • Sally Hansen Miracle Gel Get Mod!
  • Color Club On The List
  • NailStuff.ca 4mm Micro Detail Brush
  • NailStuff.ca Dotting Tool Trio

How pretty did these turn out? I love the blues all together, & it’s a fun alternative to your usual pink on pink Valentine’s Day designs. Also I’m pretty proud of how my hearts turned out.

I even took a picture of both hands, because people always ask me if I paint both hands when I do my own nails. My apologies for the potato quality photo, I took these in not the greatest lighting.

What do you think about these blue Valentine nails? Do you like untraditional colours when it comes to holiday nails?

Let me know all your thoughts on these nails down in the comments below, & let me know what untraditional colour scheme you would do for a Valentine’s Day look!

SWATCH SUNDAY — Smith & Cult The Message

Hello lovelies & happy Sunday! Today I have another fun new to me brand to share with you, that once again I found thanks to Winners! Smith & Cult The Message.

It actually came in a gift set, which included 2 other polishes & an adorable make up bag. & the price for all those goodies? $9 on clearance. Even if I wasn’t already itching to try out the brand, a deal like that cannot be passed up! Plus I’ve been following Smith & Cult on Instagram for YEARS but have never actually seen their polish in stores! So it was definitely meant to be.

2 coats + top coat

First things first — these are some heavy duty bottles. The feel very upscale compared to other nail polish brands, which is neat. Of course, finding a spot in my drawers took a second, but they’re definitely the kind of bottle you want to display. Also I originally thought that I had got a dented polish top, but all my shades were like that, & it appears to be intentional.

The formula of the polish itself was smooth & easy to work with. I needed two coats for full opacity. The shimmery red is very nice, which shows a bit more berry on my nails than straight up red.

The Message is definitely a red polish I could easily throw on if I was stuck on anything else to wear— red is always my go to in those moments— & also would be a lovely choice for Valentine’s Day! This would definitely be a lovely date night polish. I ended up topping my nails with some liner holo top coat (Starrily Eclipse… my go to), which I’ve been wearing for the last couple days. Excited to see how this polish holds up during an extended shift at work.

Like I mentioned, I found this shade at my local Winners — I’ve also seen some single bottles at Marshalls as well. If you’re not finding them at yours, or don’t have a Winners/Marshalls you can also purchase Smith & Cult polish through their website, as well as on Amazon. Although, I will say — the prices are considerably higher than the deal I got at Winners, so they’re definitely on the higher end of nail polish prices.

What do you think about this beauty of a red? Have you tried Smith & Cult The Message, or any of their other shades? Let me know all your thoughts down in the comments below & tell me what’s the most you’ve ever spent on a single nail polishes?

Colour Block Outlined Half Moons

Hello lovelies & happy Thursday!

Today I have another fun look to share with you. I was feeling some nails a bit out of my comfort zone, & these turned out exactly how I pictured in my head. I wanted some neon half moons, but I decided to take them to the next level with some black outlining, & the end result is AWESOME!

& the timing was perfect, because these nails ended up getting the spotlight they deserved during a special photoshoot at work this past weekend.

The polishes I used for this manicure are: 

  • Base Coat: Essie Millionails
  • Top Coat: Seche Vive
  • Orly Oh Cabana Boy
  • Orly Fireball
  • Starrily Vantablack
  • NailStuff.ca 4mm Micro Detail Brush
  • Paper Hole Reinforcement stickers

Oh man, I just love these.

I feel between the neon brightness & the graphic black lines, these are very unlike my usual manicure style, but that’s probably why I like them so much! They definitely took a few extra minutes (& more patience than I realized I had) but the end result is so worth it.

Plus they’re so pretty! & bright. I feel like with all the bitterly cold days we’ve been having, I’ve been craving neons & bright colours more than I usually do. But… also, this colour combination could also totally work for Valentine’s Day too.

What do you think about this look? Are you a fan of the outlined nail look? Do you like these two bright neons together?

Let me know down in the comments below!

Romantic Vintage Winter Roses

contains pr samples/gifted•

Hello lovelies & happy Tuesday! Hope everyone is having a lovely start to their week so far. It continues to be Winter here, & now that Christmas is over — I am definitely over it! Bring on Spring, please!

Today’s look is one I haven’t done in a while: roses. You know my love affair with anything floral, so I can’t believe it took me so long to paint another floral. Also does this count for as some Valentine’s Day inspiration?

The polishes I used for this manicure are: 

  • Base Coat: Essie Millionails
  • Top Coat: Seche Vive
  • Dimension Nails Hooded Seal c/o: @nailstuff.ca
  • Sally Hansen Complete Salon Manicure Berry Fancy
  • China Glaze Kiss & Spell
  • Sally Hansen CSM So Much Fawn
  • Dimension Nails Amazonian Manatee
  • China Glaze Treble Maker
  • NailStuff.ca 7mm detail brush
  • NailStuff.ca Dotting Tool Trio

How pretty did these turn out? I used Dimension Nails Hooded Seal for my base, which is from her brand new Winter collection. I love the holo shimmer, & the icy blue colour! It’s very, very pretty. I just wish it had been a sunnier day, so you could really see how beautiful the holo is!

I don’t know why, but I just love love love my roses with a blue background. Something just makes the roses always pop so beautifully. I decided to go with a deeper, darker rose because they just felt more Winter-y to me. & I love how they turned out. My middle finger turned out my favourite.

What do you think about this vintage rose design? Would you wear this look? Let me know down in the comments below!