Hello lovelies & happy Tuesday!
I hope everyone had an awesome weekend. I worked all weekend, but the weather is beautiful. It’s officially Summer as of yesterday, which is also very exciting. Of course, here on the East Coast we’re awaiting the remains of a Hurricane which means it’s soggy & gross.
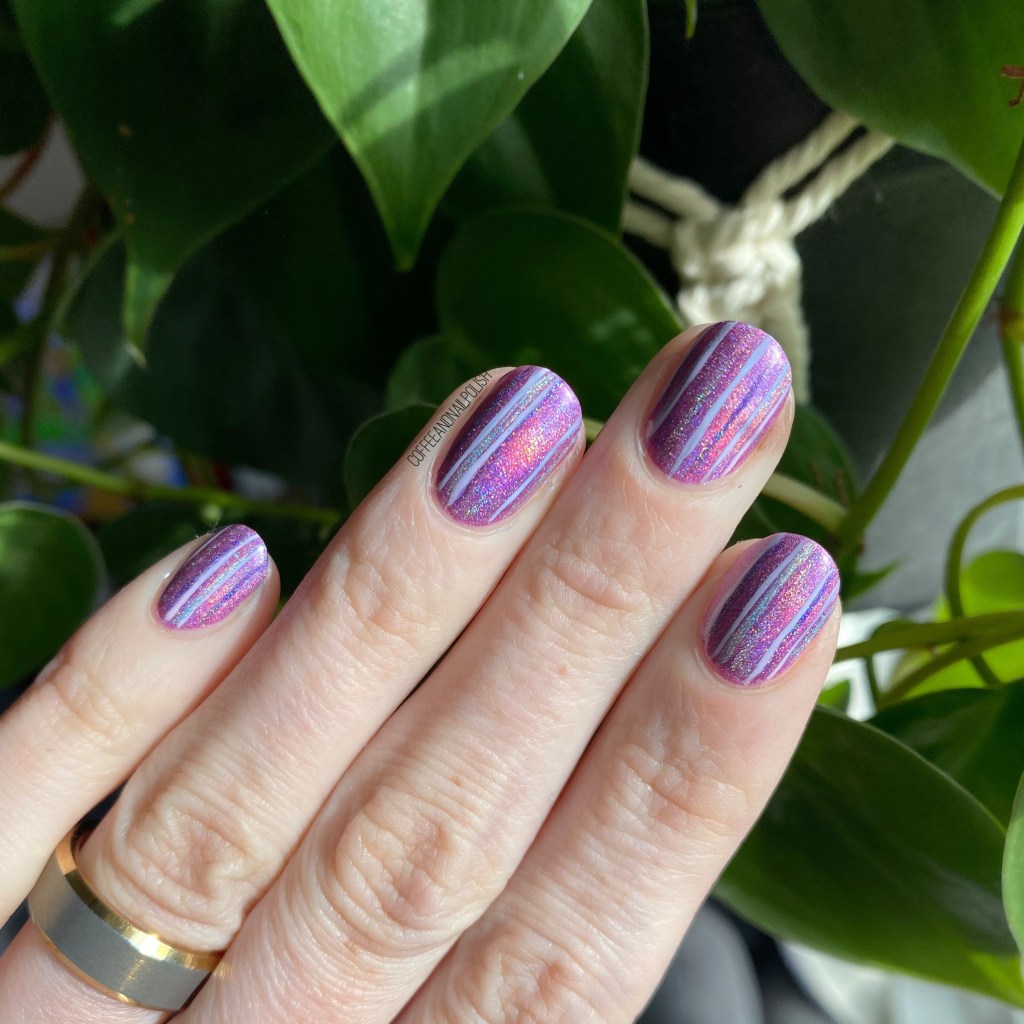
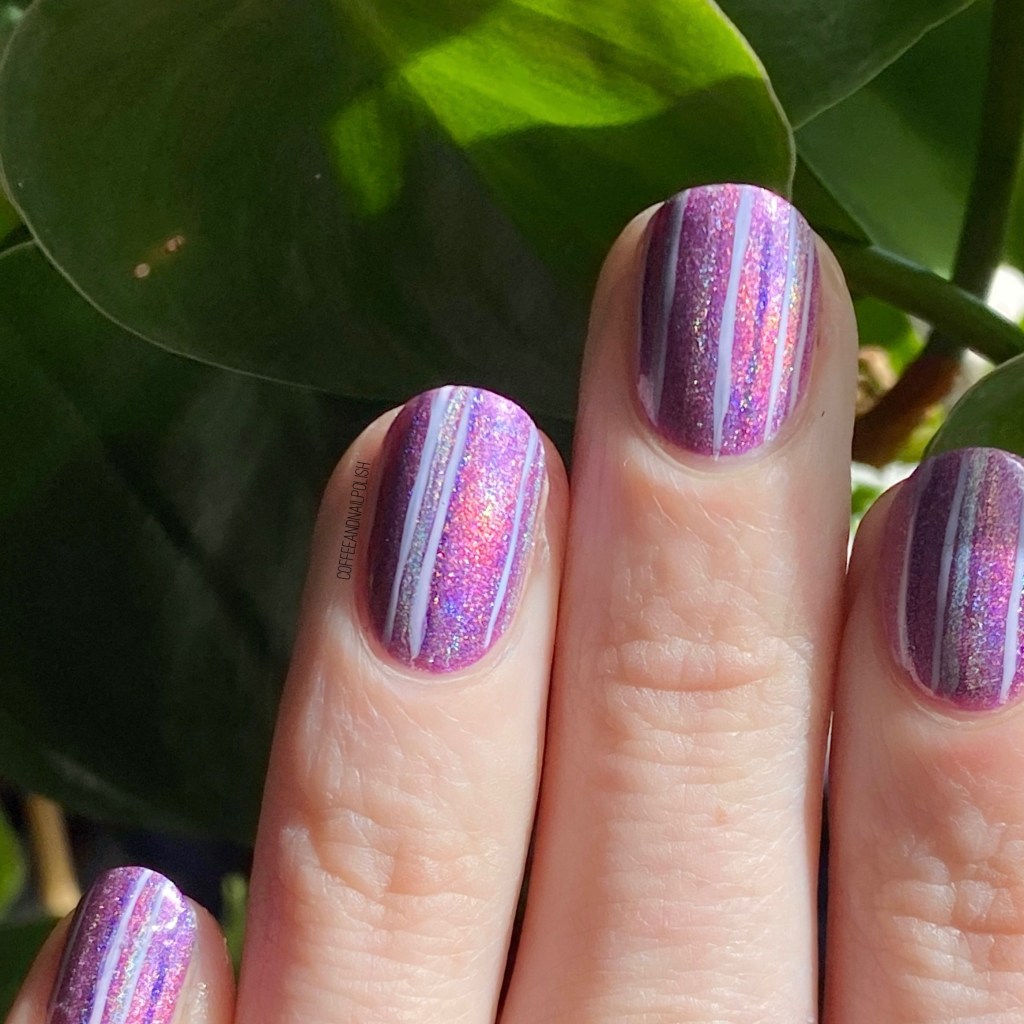
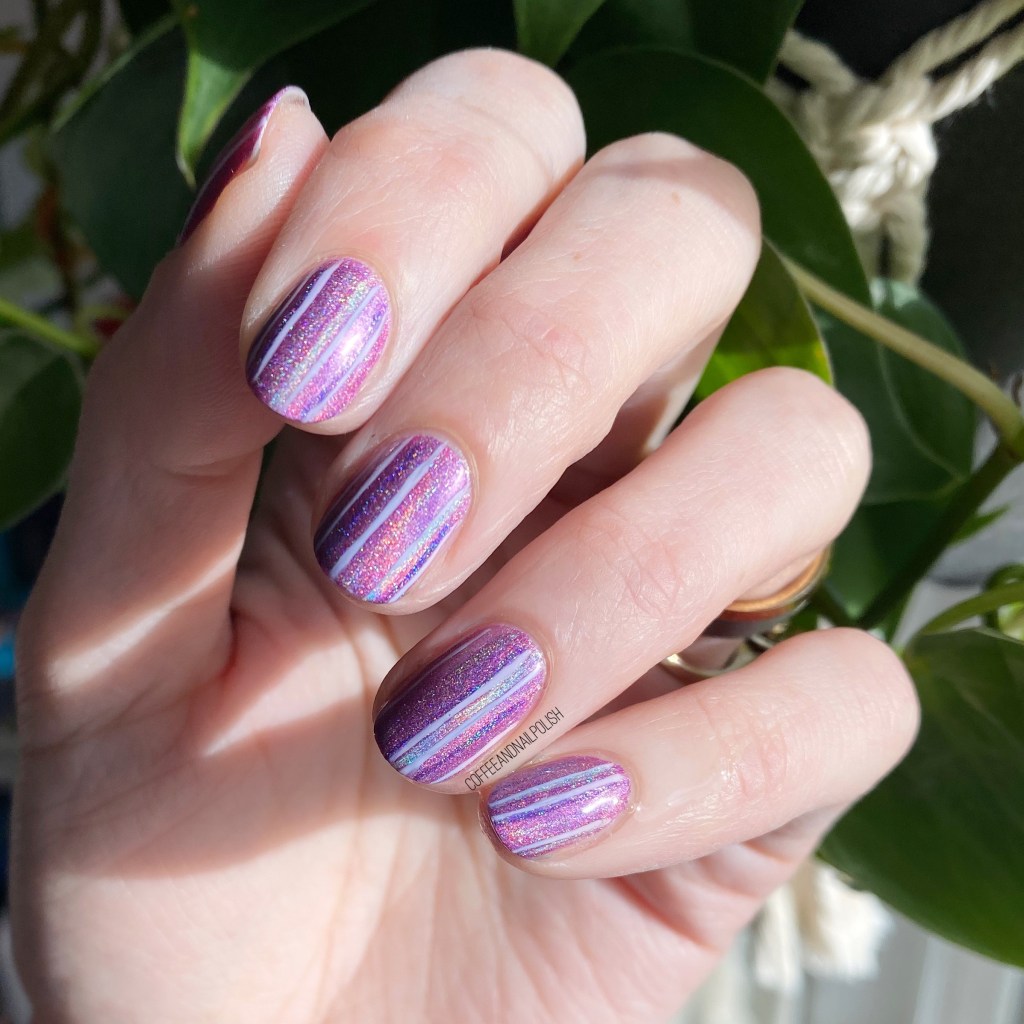
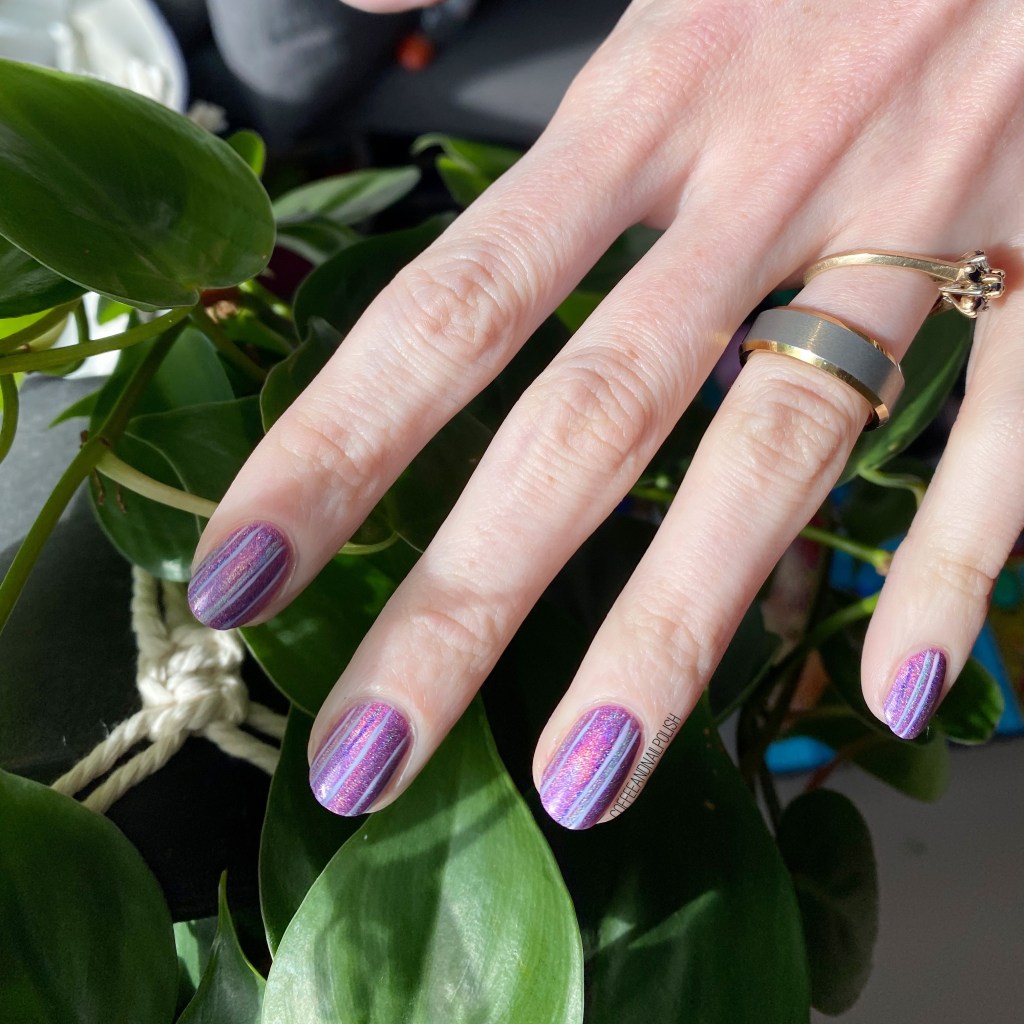
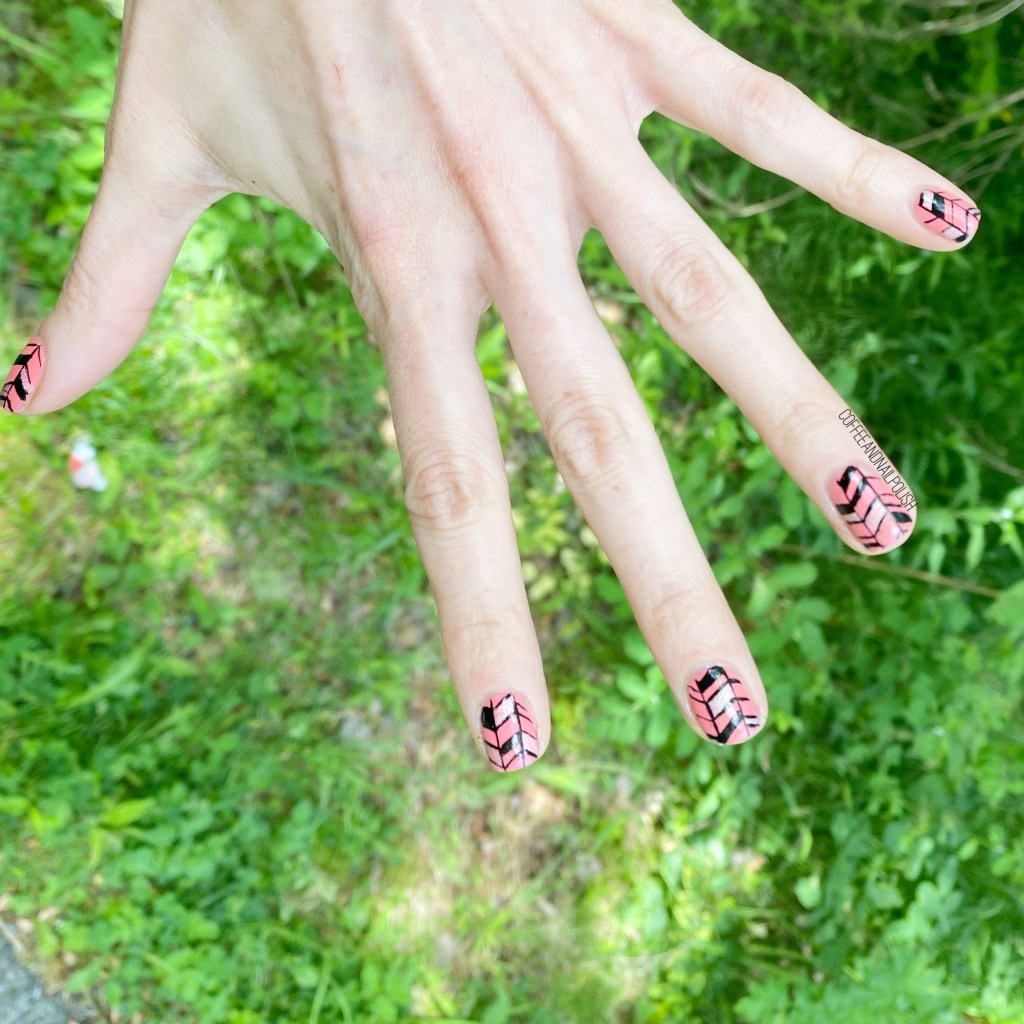
But at least my nails look cute! I did these herringbone nails last week, when I wanted nail art but I was short on time (& inspiration). I feel like I’ve been doing a lot of line work like this lately because I can do it without having to wait for my base to be fully dry.

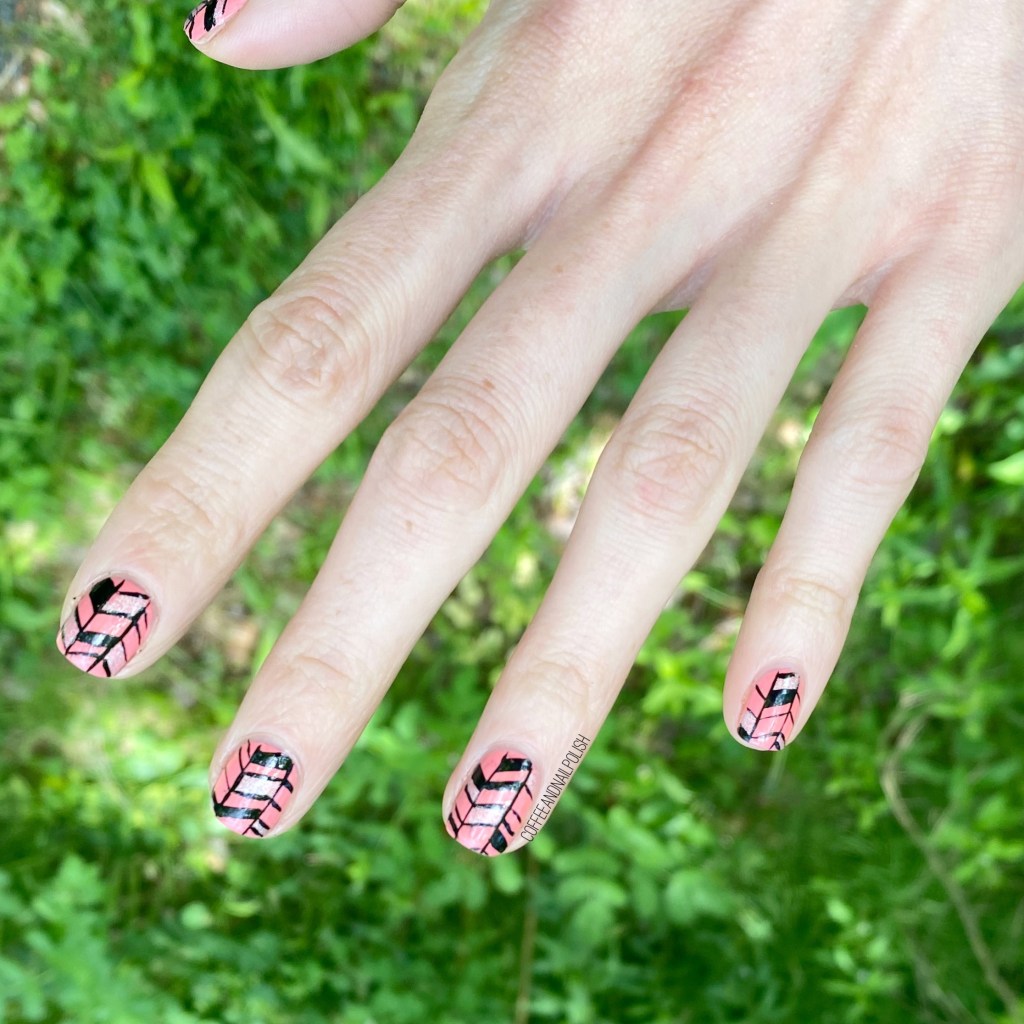
For this manicure, the polishes I used were:
- Base Coat: Sally Hansen Nailgrowth Miracle
- Top Coat: Essie Speed Setter
- Essie Lounge Lover
- Starrily Vantablack
- Essence Outta Space Stories We Will Spock You
- NailStuff.ca 16mm Striper Brush


Ah, like riding a bike. I’ll be honest, at night when I first did these I wasn’t 100% sure if I liked how they turned out; they seemed messy & awful at 10pm. But I was tired, so I left them on, because awful nails are better than no nails at all (& I was way too tired to repaint them). But as soon as the sun came up, & I took another look I actually really liked how they looked, & they didn’t seem as messy as I originally had thought.
& I really kind of love them.
What do you think about this herringbone look? What nail art designs have you been living for lately? Let me know in the comments below!