Hello lovelies — & happy Wednesday!
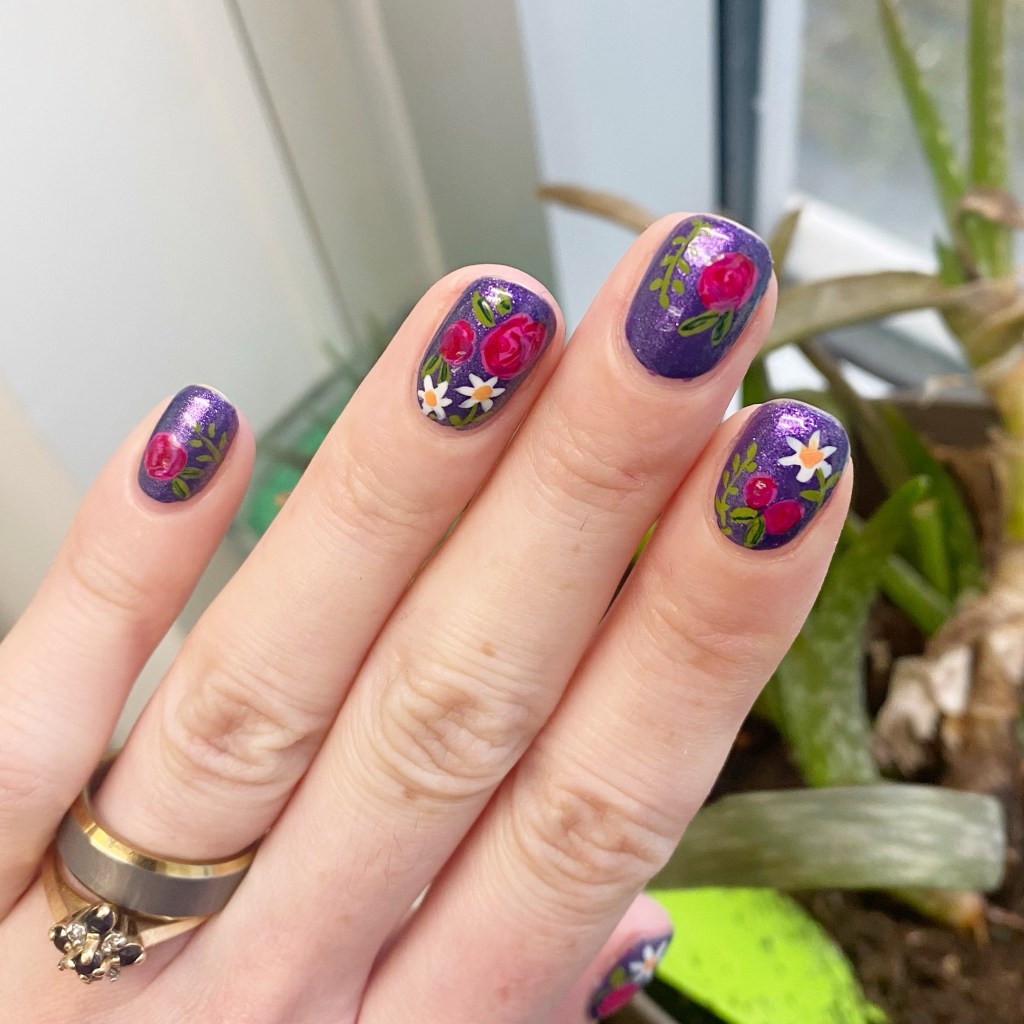
& Happy April 1st. I hope everyone’s week is going okay. I don’t know about where you are, but here on the East Coast of Canada the weather is miserable–which is just more reason for Spring-y designs. The flowers may not be showing themselves in our garden, but at least I can wear them on my nails.
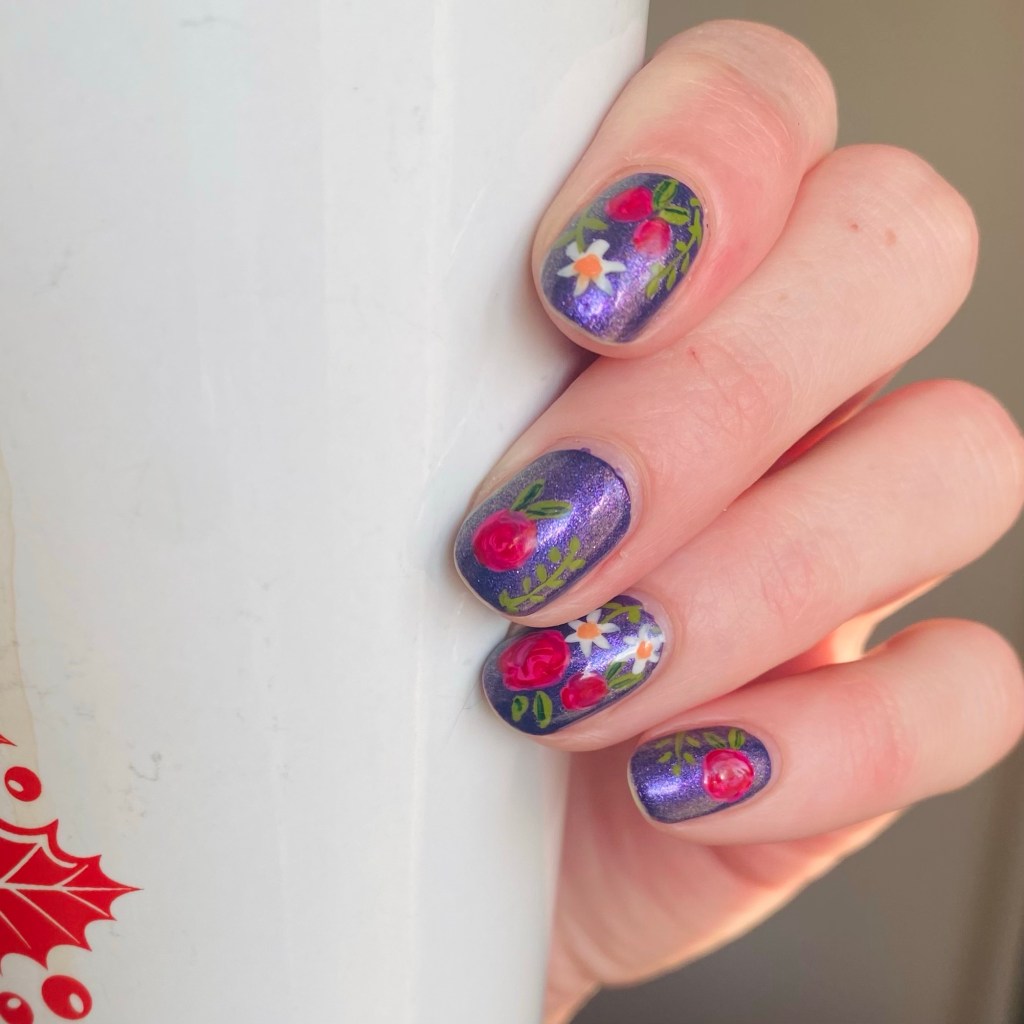
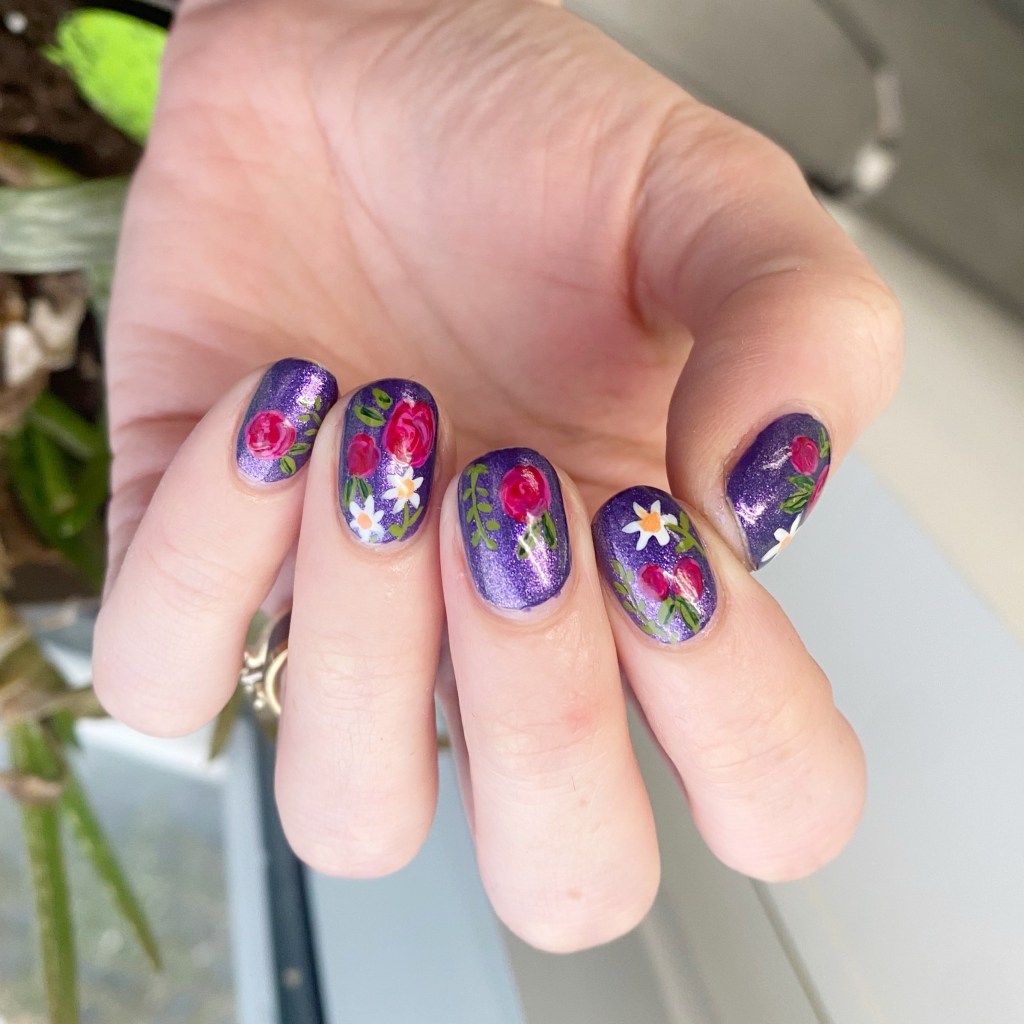
Today’s look is me wistfully wishing for some warmer, Spring-like days. Which, obviously, means floral!
The polishes I used for this manicure are:
- Base Coat: Sally Hansen Maximum Growth
- Top Coat: Seche Vive Gel Like Top Coat
- OPI Infinite Shine Mariachi Makes My Day
- OPI Infinite Shine Shaking My Sugarplums
- Essie Willow in the Wind
- Essie Off Tropic
- OPI I Cannoli Wear OPI
- OPI Where Did Suzi’s Man-go?
- Sally Hansen Complete Salon Manicure Red My Lips
- Sally Hansen Good. Kind. Pure. Peony Origins
- Sally Hansen Miracle Gel Montley Hue
- NailStuff.ca 7mm Mermaid Tail Brush
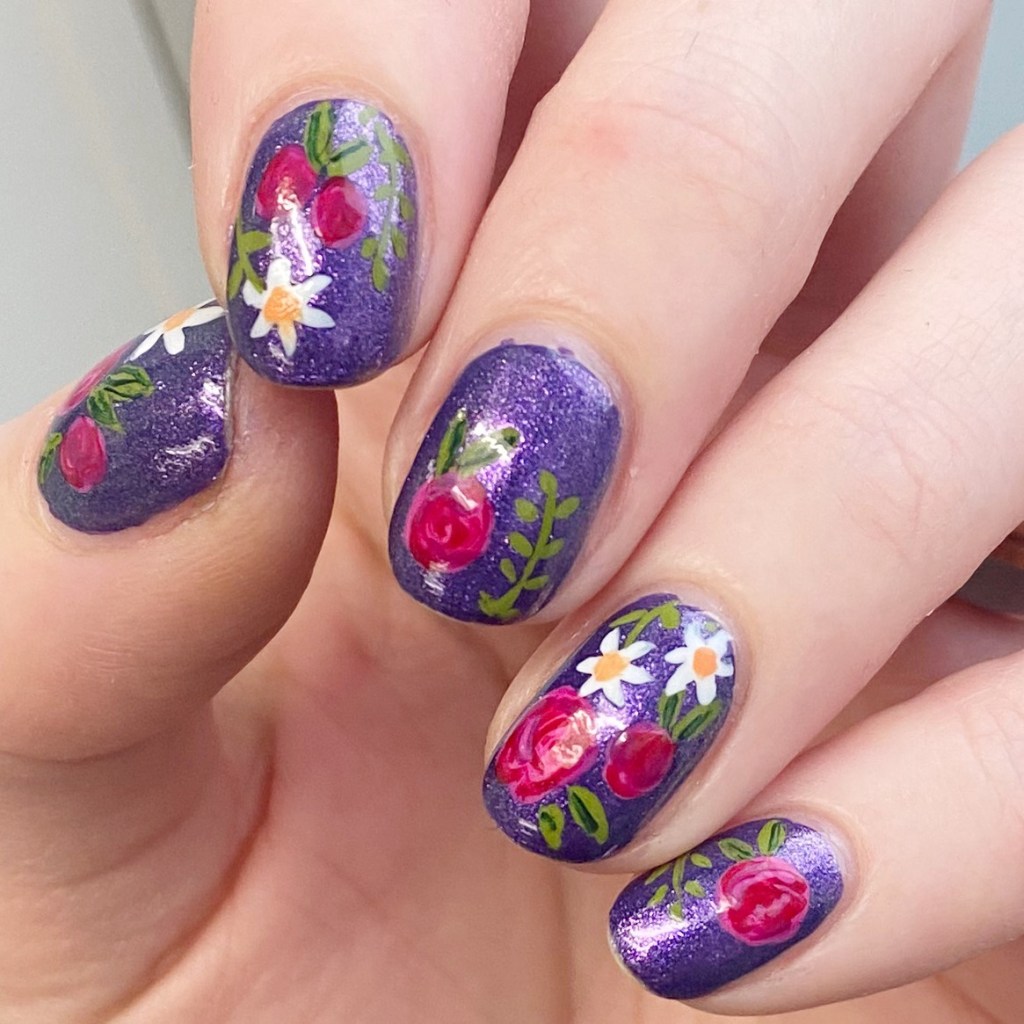
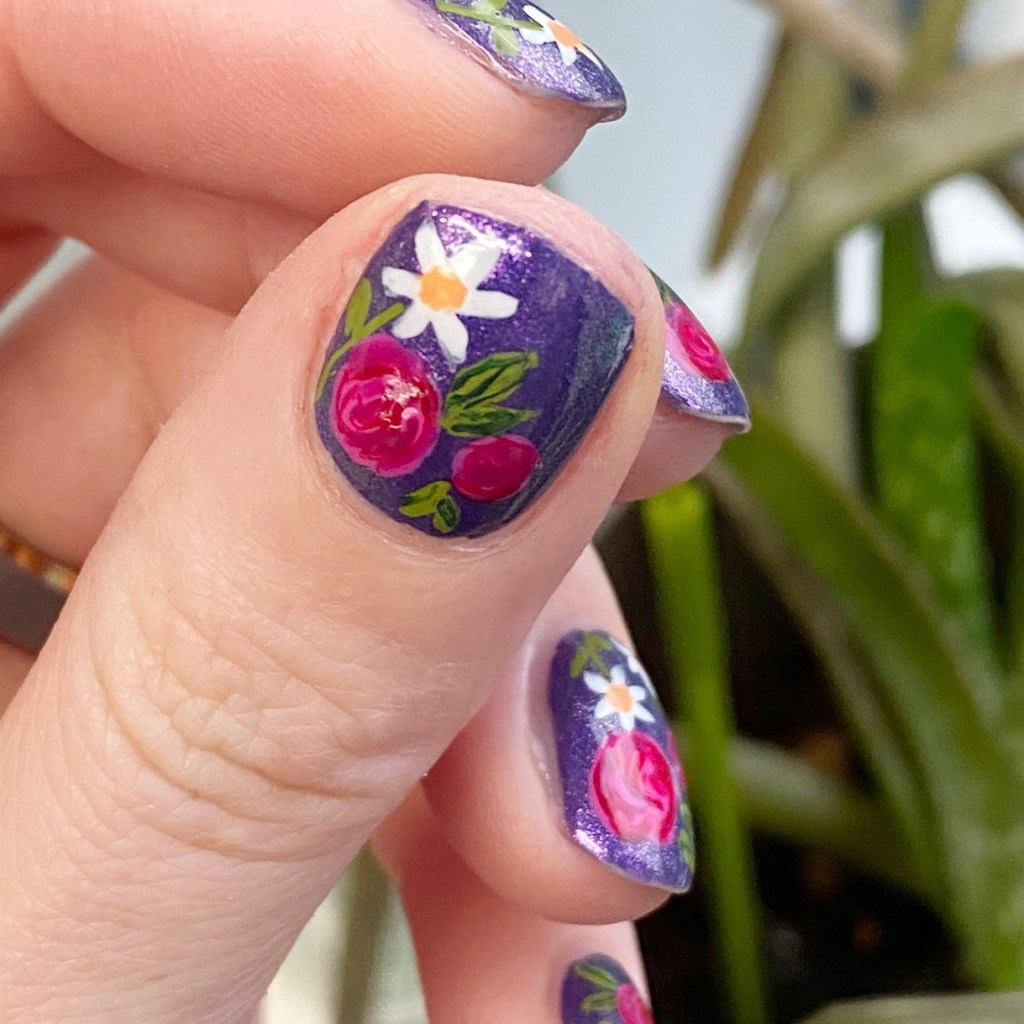
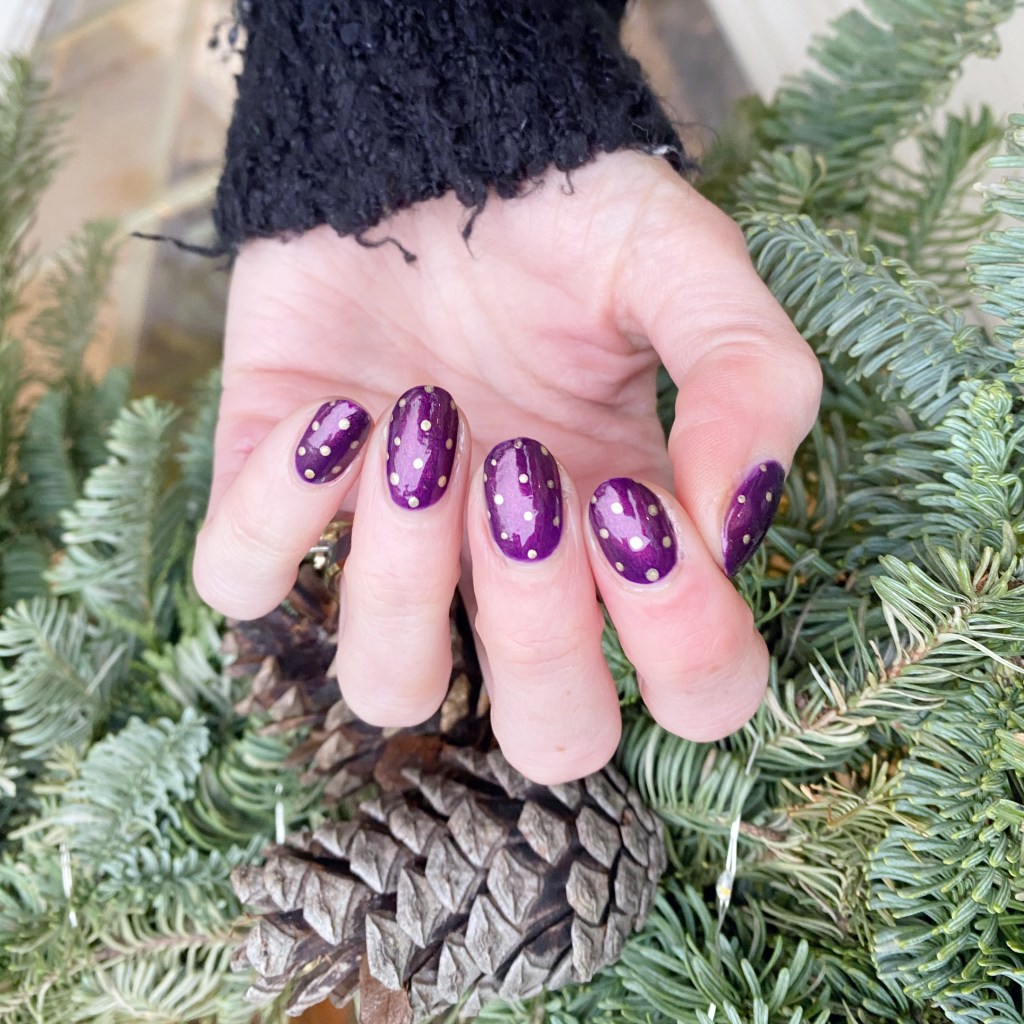
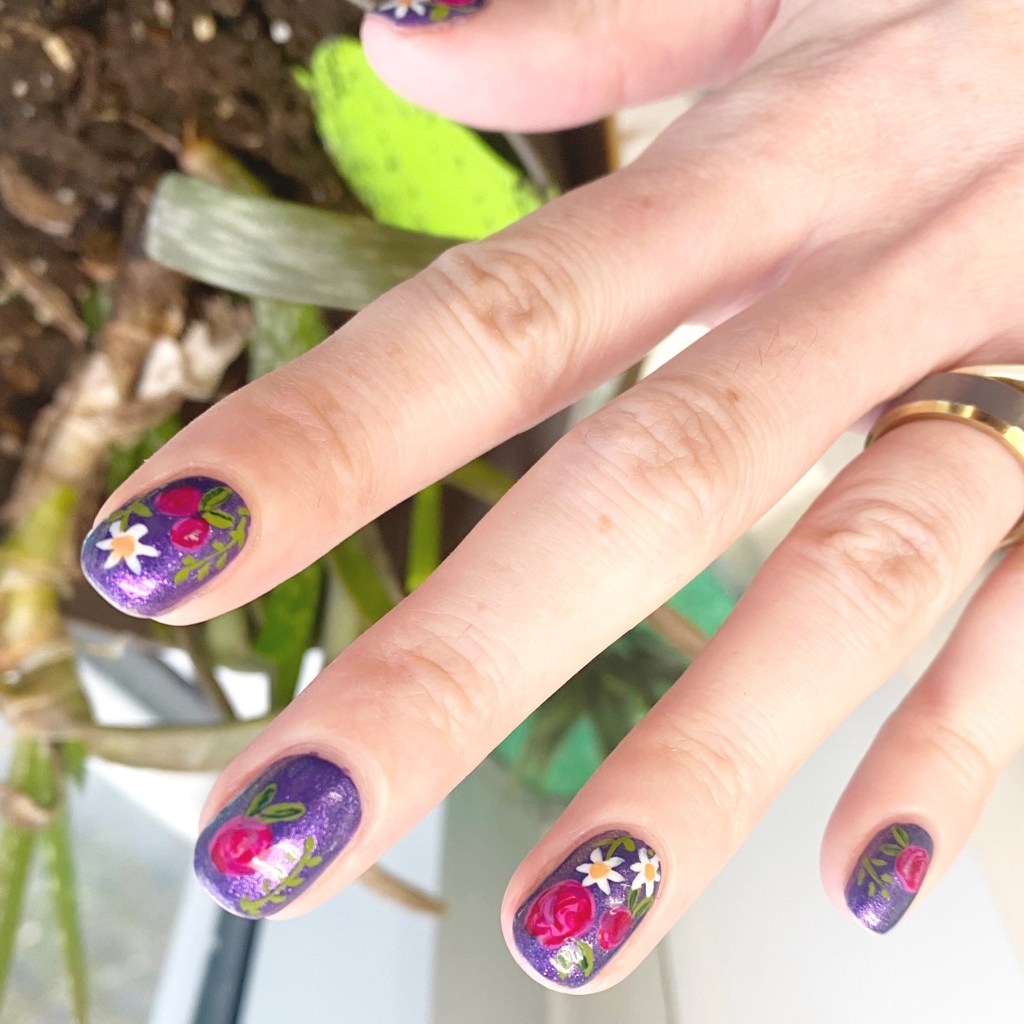
This design started off as simply just a rose design, but after I had painted my roses I realized that something was missing, so I added a bit more greenery, & then a few of the white flowers (sort of daisies, but not really). & once I added my white flowers, I felt like it pulled everything together perfectly.
Is it a totally original floral look? Well, no.
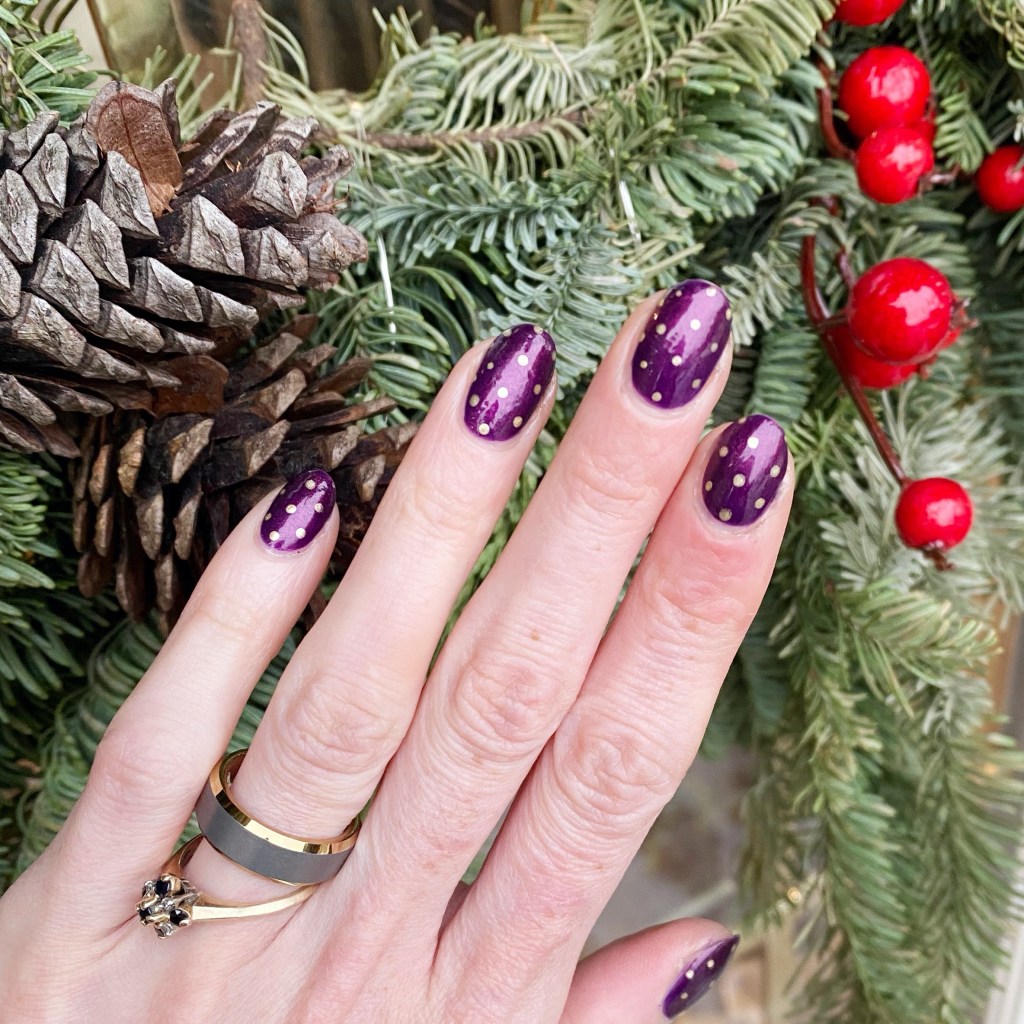
Do I still absolutely adore the end result? Absolutely, yes. Especially where my nails are so short at this current moment in time, I feel like a floral design looks so beautiful & put together. Plus, the darker purple base is a little bit end of winter, with the floral adding the touch of Spring I’m desperately craving.
What do you think of this floral look? Do you like the combination of colours? Does it have you craving Spring as much as I am craving spring? Let me know all your thoughts down in the comments below.
& if it’s feeling like Spring where you are, I’d love to know! Give me some hope so warmer, sunnier days to come.
♥︎