Hello Lovelies & happy Monday! I hope everyone had a fantastic week. I’m getting prepped for a busy week ahead–it’s March Break week which means that it’s going to be busy busy busy for me at work! I’m still getting used to being back to work but that’s why they invented espresso, am I right? I’m also getting used to fitting in doing my nails to my daily routine on top of working & being a Mom–it definitely takes practice! So I’ve been leaning more towards easy nail art looks.
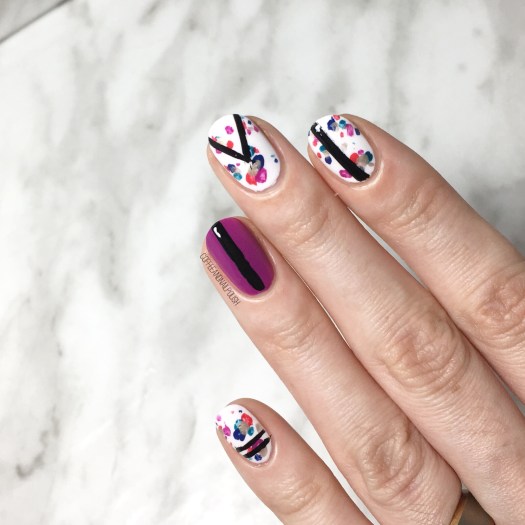
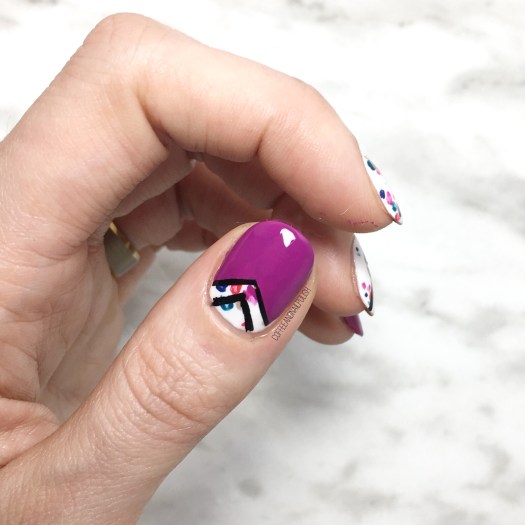
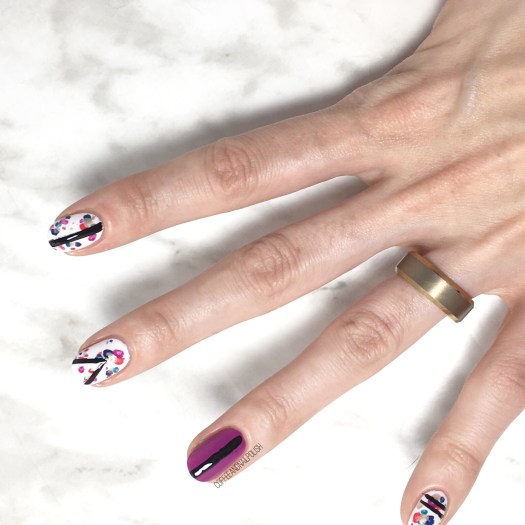
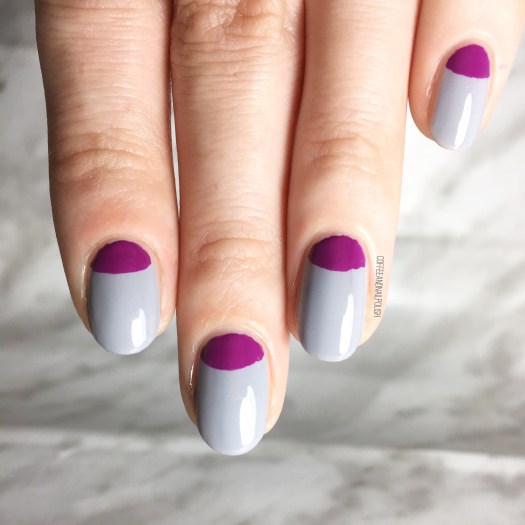
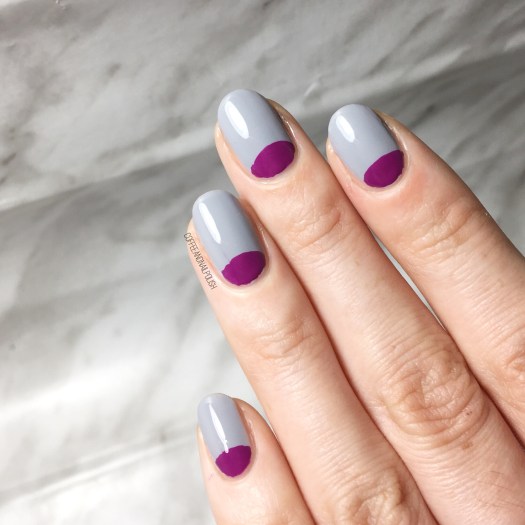
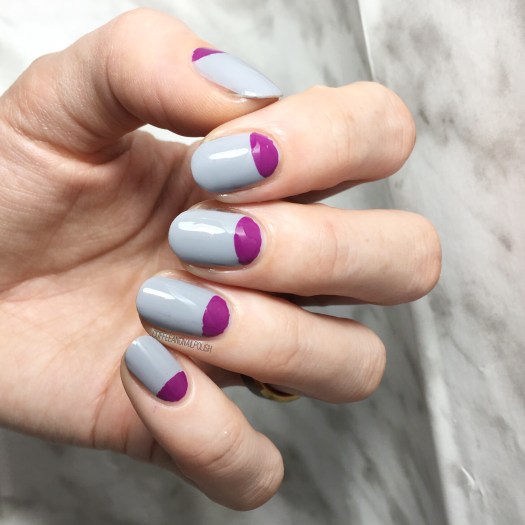
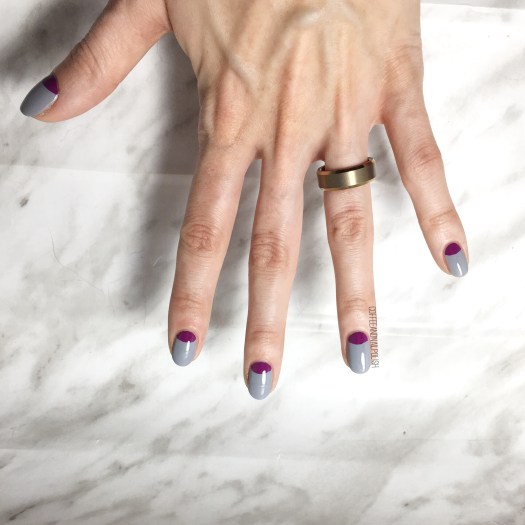
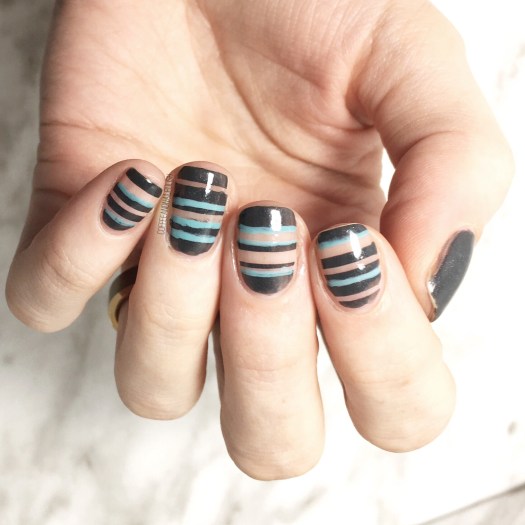
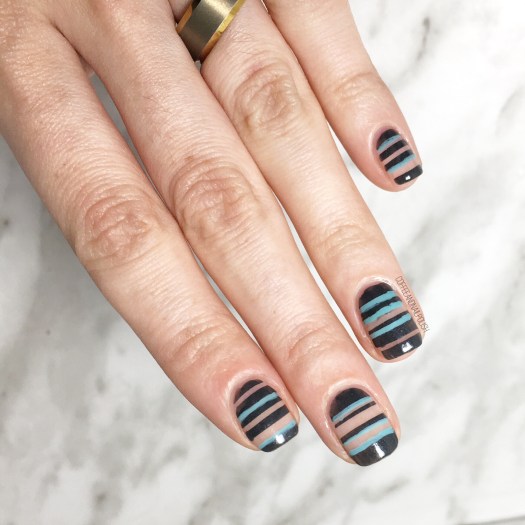
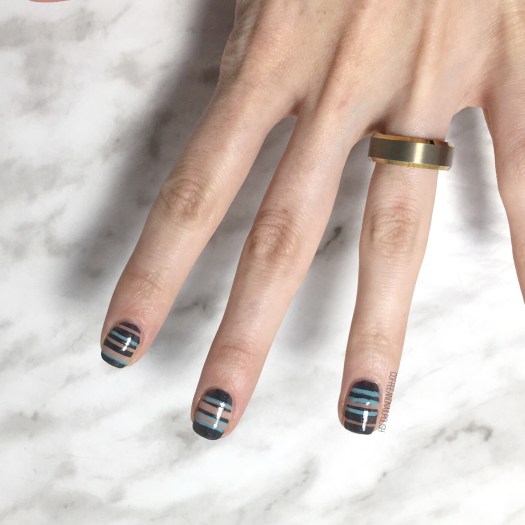
Today’s nails were done using some striping tape from Born Pretty Store (Item #40423) that I recently bought. I picked up a three pack of different sizes that I thought would be perfect for achieving different sized stripes. Plus it’s pretty & purple… & I love purple!

For this manicure, the polishes I used were:
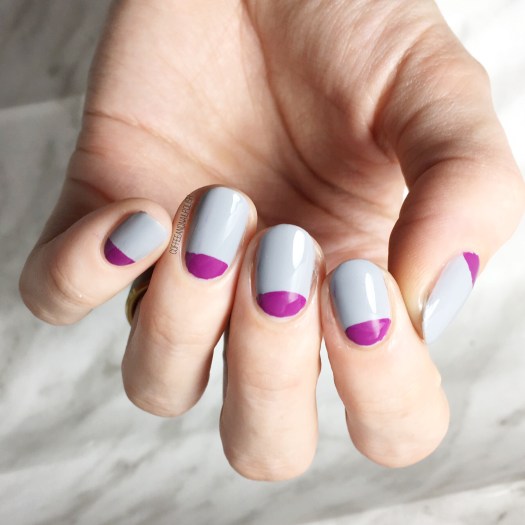
- Base Coat: Quo by ORLY Kiss Me, I’m Kind
- Top Coat: Seche Vive
- Essie Cashmere Bathrobe
- Essie Where’s My Chauffeur?
- Born Pretty Store Aurora Rainbow Nail Striping Tape (item #40423)
- Small detail brush from Bundle Monster

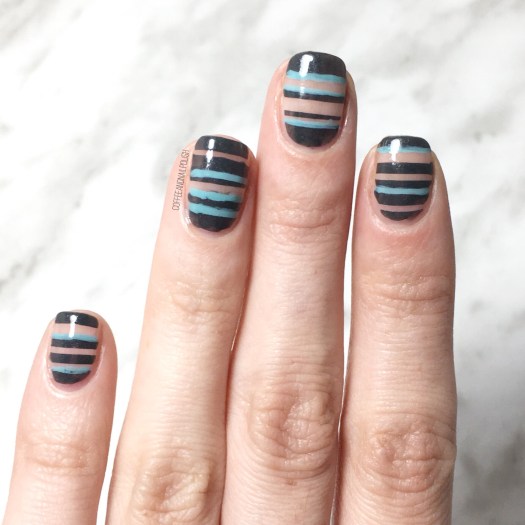
These were so simple to do & I love the pop of colour against the dark grey polish. All I did was apply my different sizes of striping tape over my completely dry base coat, & then painted over top with Cashmere Bathrobe. Then I took my small detail brush & added stripes of Where’s My Chauffeur? freehand. Definitely one of my favourite Spring polishes & it works so well with Cashmere Bathrobe because it stands out so much! You can never go wrong with a good turquoise nail polish.
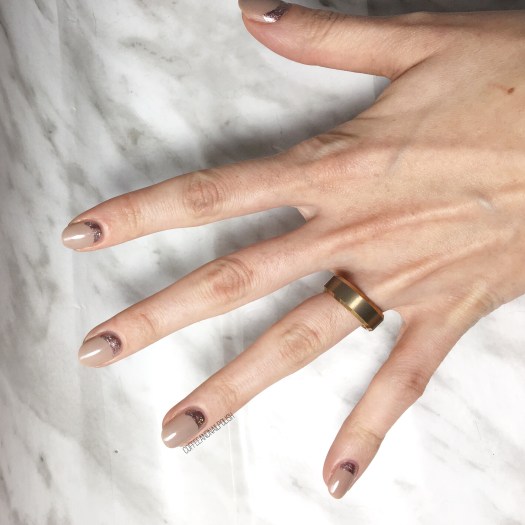
Also negative space makes me so happy. Like–it’s such an easy way to make your nails look fancy without a lot of work. & I’m all about quick & easy while still looking fancy.
What nails are you rocking to start off your week? What do you think of this negative space look? Let me know your thoughts in the comments below!