Hot Pink Stamped Floral

Good morning loves & happy Tuesday! I hope everyone survived the weekend & Monday relatively unscathed. It was rainy here all weekend which absolutely sucked. It was absolutely torrential.

Spring… you can come anytime!

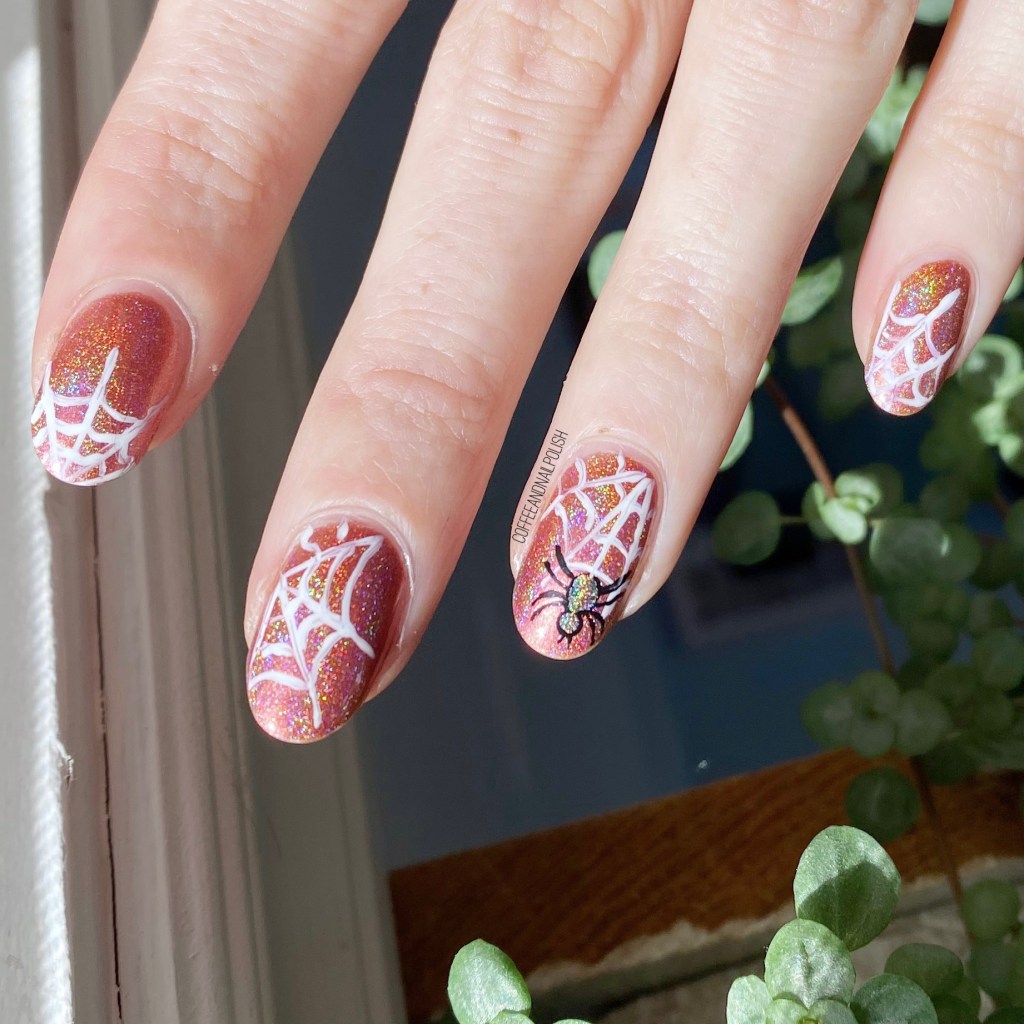
So I’m honour of our cold & wet days, I decided I needed some hot pink nails. & why not throw some floral stamping on there too, just for fun.

The polishes I used for this manicure are: 

  • Base Coat: Essie Hard To Resist Glow & Shine 
  • Top Coat: Seche Vite Fast Dry Top Coat
  • China Glaze Strawberry Fields
  • Starrily Vantablack
  • Discontinued Born Pretty Store floral pattern stamping plate (featured here)
  • Nailstuff.ca clear stamper & scraper set

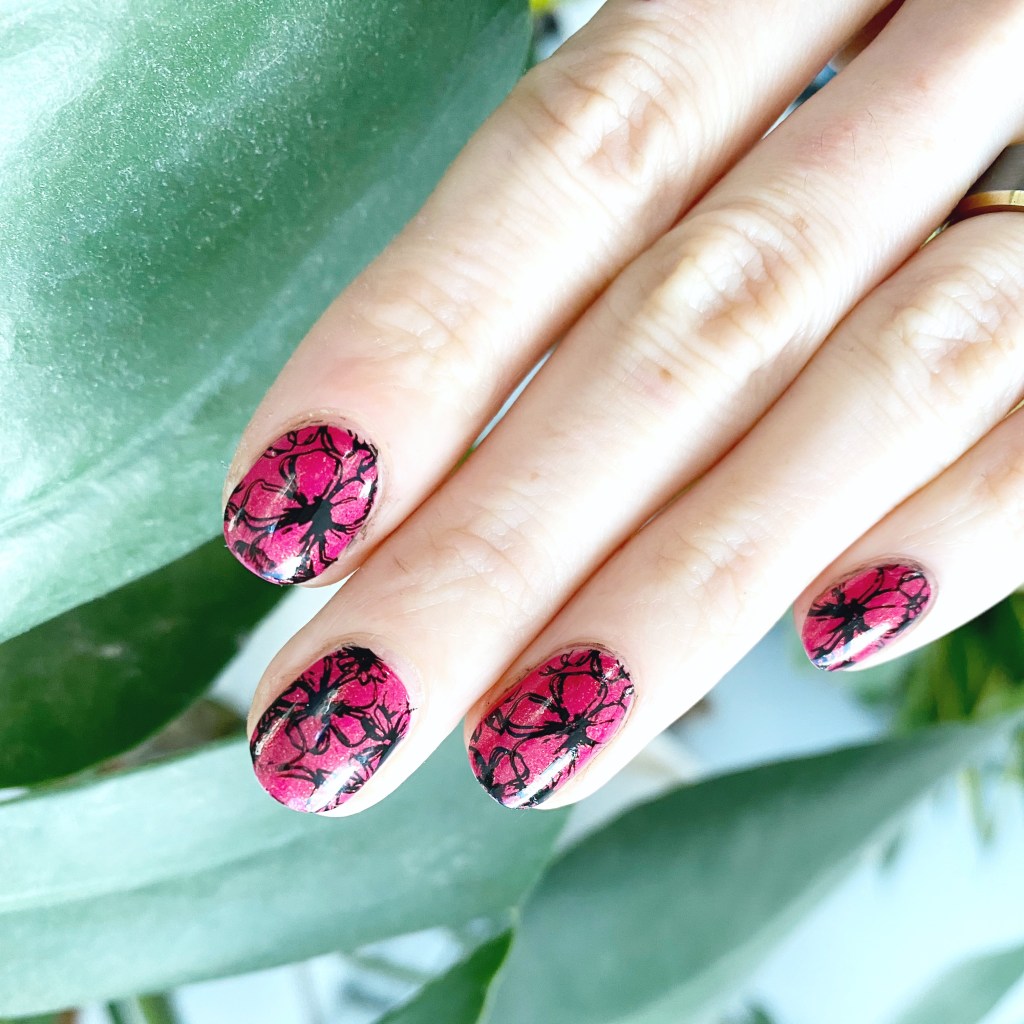
How pretty are these? I hope they’re pretty because oh boy did I struggle with clean up! I don’t know what was happening, because usually I don’t have so many issues, but my cuticle line just wanted to be stained black.

& also I’m so over this both of Seche Vite & it shrinking every manicure I do. I’ve never had a bottle shrink so bad! Look at my middle finger! So beyond frustrating. But regardless of the issues, my nails did turn out pretty. China Glaze Strawberry Fields is so pretty, I can’t believe I don’t wear it more often!

What do you think of this floral design? Are you feeling early Spring vibes in the middle of January? & to my friends on the other side of the world in the middle of Summer… how is it there? Is it nice?

Have a lovely Tuesday darlings!

Glam Nails Challenge October — Spider 🕸

Hello lovelies & happy Wednesday! Half way through the week already — can you believe it?! We’re also already on our second prompt for GlamNailsChallengeOctober… & my second Halloween design of the season.

Today’s prompt: Spider. 🕷🕸

Which, anyone who knows me, knows is one of my least favourite things in the whole wide world. But for nail art, I guess I can do it. So I decided, why not do some holo-ween spiders! Because holo makes everything better!

The polishes I used for this manicure are: 

  • Base Coat: Essie First Base
  • Top Coat: Seche Vive
  • Color Club Sidewalk Psychic
  • Sally Hansen Miracle Gel Get Mod!
  • Starrily Vantablack
  • Layla Cosmetics Flash Black
  • NailStuff.ca 16mm Striper Brush
  • NailStuff.ca Dotting Tool Trio

How much fun are these? Again, spiders are not my favourite thing. In fact, I’ve been known to run screaming away from a spider, usually in tears. But these holo spiders turned out pretty cute, so I don’t mind wearing them on my nails.

October is the one month a year where spiders on my nails are okay, haha.

I really, really wanted to rock some holographic nails for this look. I thought this holographic orange-y colour was perfect as the base for this nail art. Plus we’ve had some beautiful sunny days the last few days, which were just calling for some holo.

What do you think about this nail art look? Are you currently rocking any Halloween designs? What is your favourite Halloween nail art design to do? Let me know in the comments below!

My Nails & My Cup — Holo Gradient Nails

Are you guys sick of the holo yet? I certainly hope not because I have another mani to share–this time I created a Holo gradient to match my new-ish tumbler that I picked up at Claire’s on clearance for $2. It came with cute little manicure tools inside, so I had to have it!

I posted on Instagram the other day what nail art I should do on my naked nails, while holding the above cup, & received an overwhelming amount of responses saying I should match my cup… so that’s what I decided to do!

For this manicure, the polishes I used were:

  • Base Coat: Sally Hansen Green Tea & Bamboo Strengthener
  • Top Coat: Seche Vive
  • China Glaze BFF
  • Color Club Eternal Beauty
  • China Glaze 2Nite
  • Quo by ORLY Falling Star
  • Latex free make up sponge
  • Creating the holo gradient may have been one of the easiest gradients I’ve ever done! I don’t know if it’s the sparkle or formula or what, but I was as to sponge on each colour separately (which kept from making a big old mess around my cuticles) & they blended together seamlessly!
  • I know the cup has a whole bunch of rhinestones, but I definitely did not have enough on hand to apply to my fingers (or enough colours that would match) so I decided a couple coats of a scattered holo top coat could give a similar look, so I grabbed Quo by Orly Falling Star because I find the glitters larger than some of my other holo toppers (like China Glaze Fairy Dust). Gave off just enough extra sparkle on the nail without being distracting!
  • so what do you think of the holo gradient? Which colour combination do you think I should try out next? Share your thoughts down in the comments below!

    Blue & Holo Negative Space Colour Blocking

    Good morning lovelies & Happy Friday! The countdown to the weekend is officially on… unless you work in retail or customer service & then what is a weekend? Haha.

    Today I have another new manicure to share with you — I know, I’m on a roll. This time I’m throwing it back with some negative space colour blocking. This manicure idea popped in my head the other night when I was trying to figure out what to do on my nails including exactly the colours that I needed to use. & thankfully the sun decided to come around so I could show you this manicure in the light it deserves.

    For this manicure, the polishes I used were:

    It’s been so long, too long, since I pulled out my bottle of A Pirate’s Life from Wrenn Polish & I thought it would look so pretty with a holo accent so I grabbed Happy Thoughts too. In regular light the holo kind of hides a bit, but as soon as you hit bright light BAM! 💥 There it is! You can’t miss those gorgeous rainbows. & I just love how this design turned out, especially since the whole manicure took me less than 20 minutes & didn’t need any tools or tape — just a steady hand.

    what are you wearing on your nails for the weekend? I’m going to (hopefully) redo my nails tonight so leave any nail art suggestions down in the comments below!

    Gradient Cactus Nails

    Good afternoon & happy May everyone! Who else excited for warmer days. I feel like I’m saying this every post, but I’m just. so. ready. This winter has felt just so darn long & I’m craving neons & brights.

    I was also craving a gradient as it felt like absolute ages since I had created one, so I decided to go with a blue toned look. & to finish off the look I added these absolutely adorable cactus stickers that Victoria from NailStuff.ca sent to me because she knows my love for cacti! 🌵 Have you checked out her collection of nail stickers & nail decals? I’m obsessed. So many fun designs for easy nail art this Summer.

    For this manicure, the polishes I used were:

    • Base Coat: OPI Nail Envy
    • Top Coat: Seche Vive
    • Essie Fashion Playground
    • Sally Hansen Miracle Gel Sugar Fix {PR sample}
    • China Glaze I’ve Got A Blue Attitude
    • Sally Hansen MG Make It N-Ice {PR sample}
    • Edge Perfection Cuticle Barrier {PR sample}
    • Cacti Nail Stickers {gift from Nailstuff.ca}

    My gradient skills were a little rusty, but I love this look so much. The colours used almost give the gradient a thermal polish feel & obviously I couldn’t do a gradient without adding a little glitter. & finishing off the look with the stickers just made them a little more fun!

    What do you think of this look? Share your thoughts down in the comments below!