Diamond Pattern Accent Nails

I keep telling myself “It’s Summer! Wear Summer colours!” & then immediately reach for some questionably Fall tones. That’s what August does to me–the calendar flips to August & I start thinking about Fall, & pumpkin spice & sweater weather & it’s always reflected in my polish choices. 

For this mani, I tried to go Summery… but they ended up feeling Fall-like anyways. For this mani I grabbed a bunch of shades that I won from Essie Canada thanks to their Suddenly Summer contest! (I won 10 Essie shades & a very cool InstaMax 9 Camera!) These nails remind me a lot of argyle… I used the diamond pattern vinyls & if you added a couple thin lines overtop I think it would make for some great argyle pattern nails. Going to keep that in mind for some future Fall nails. 

For this mani, the polishes I used are:

  • Base Coat: Cutex Brittle Nail Fix
  • Top Coat: Cutex Quick Dry Top Coat
  • Essie Flowerista
  • Essie Wrap Me Up
  • Essie Bikini So Teeny
  • Essie Pool Side Service
  • Essie Splash of Grenadine
  • Xroma Polish & Vinyls Diamond Stencils (applied sideways) 


When do you start feeling a craving for Fall? I’m used to retail life so it’s usually end of July, early August when all the back to school shopping starts popping up in store (& when all the Fall polish collections start coming out). 

Let me know what you think of this mani by leaving a comment below & let me know what Fall polish shade (or collection) you’re looking forward to the most! 

SWATCH SUNDAY: Madam Glam One Step Soak Off Gel Polish 

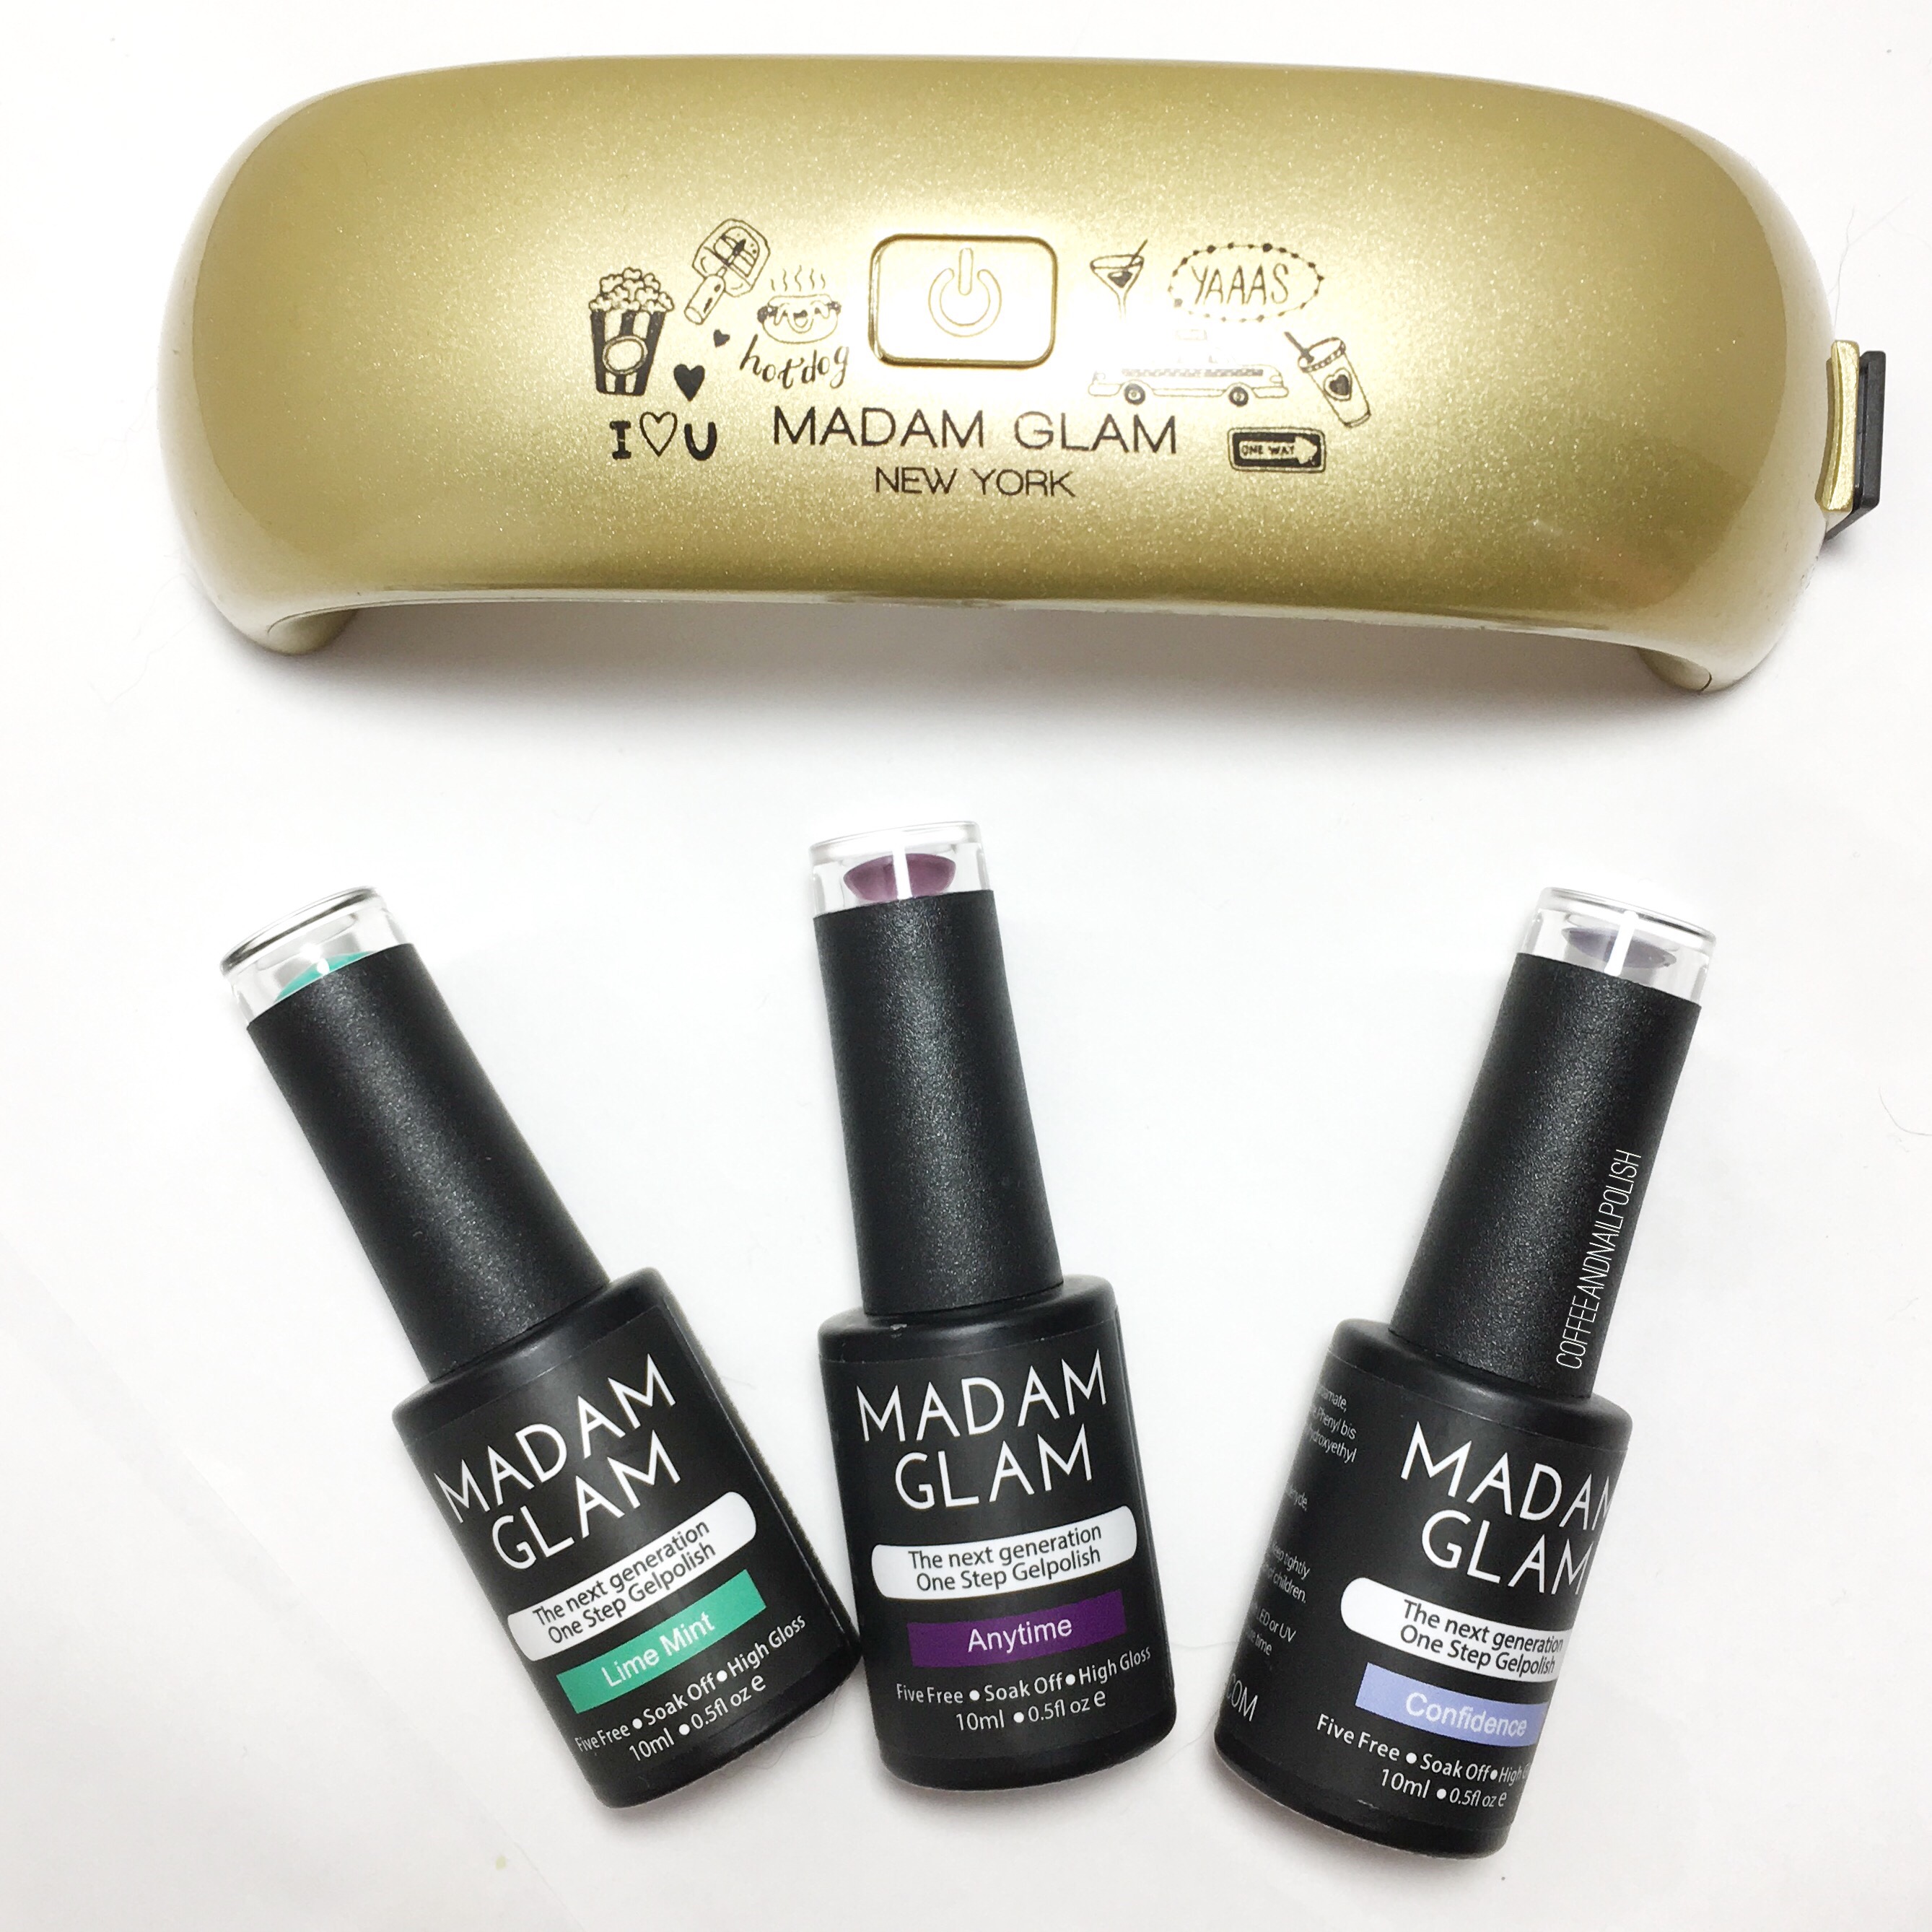
Happy Sunday everyone! Kicking off this Swatch Sunday with my first expirence with soak of gel polish! Madam Glam was kind enough to send me these one step soak of gel polishes to try out & review & I’m excited to show off these swatches & share my expirence. 

As someone who has never really used soak off gel polish, I wasn’t quite sure to expect. I decided that the one step gel polishes would be perfect for me to try out as they don’t require a base or top coat–all you need to apply is the colour which makes it quicker. & as you know, with a teething almost 6 month old I’m all about the quicker the better when it comes to my nails. Even better, these one step gels are similar in formula to real nail polish. Most of the shades took 3 coats to reach opacity & you cure each coat with your LED Lamp. 
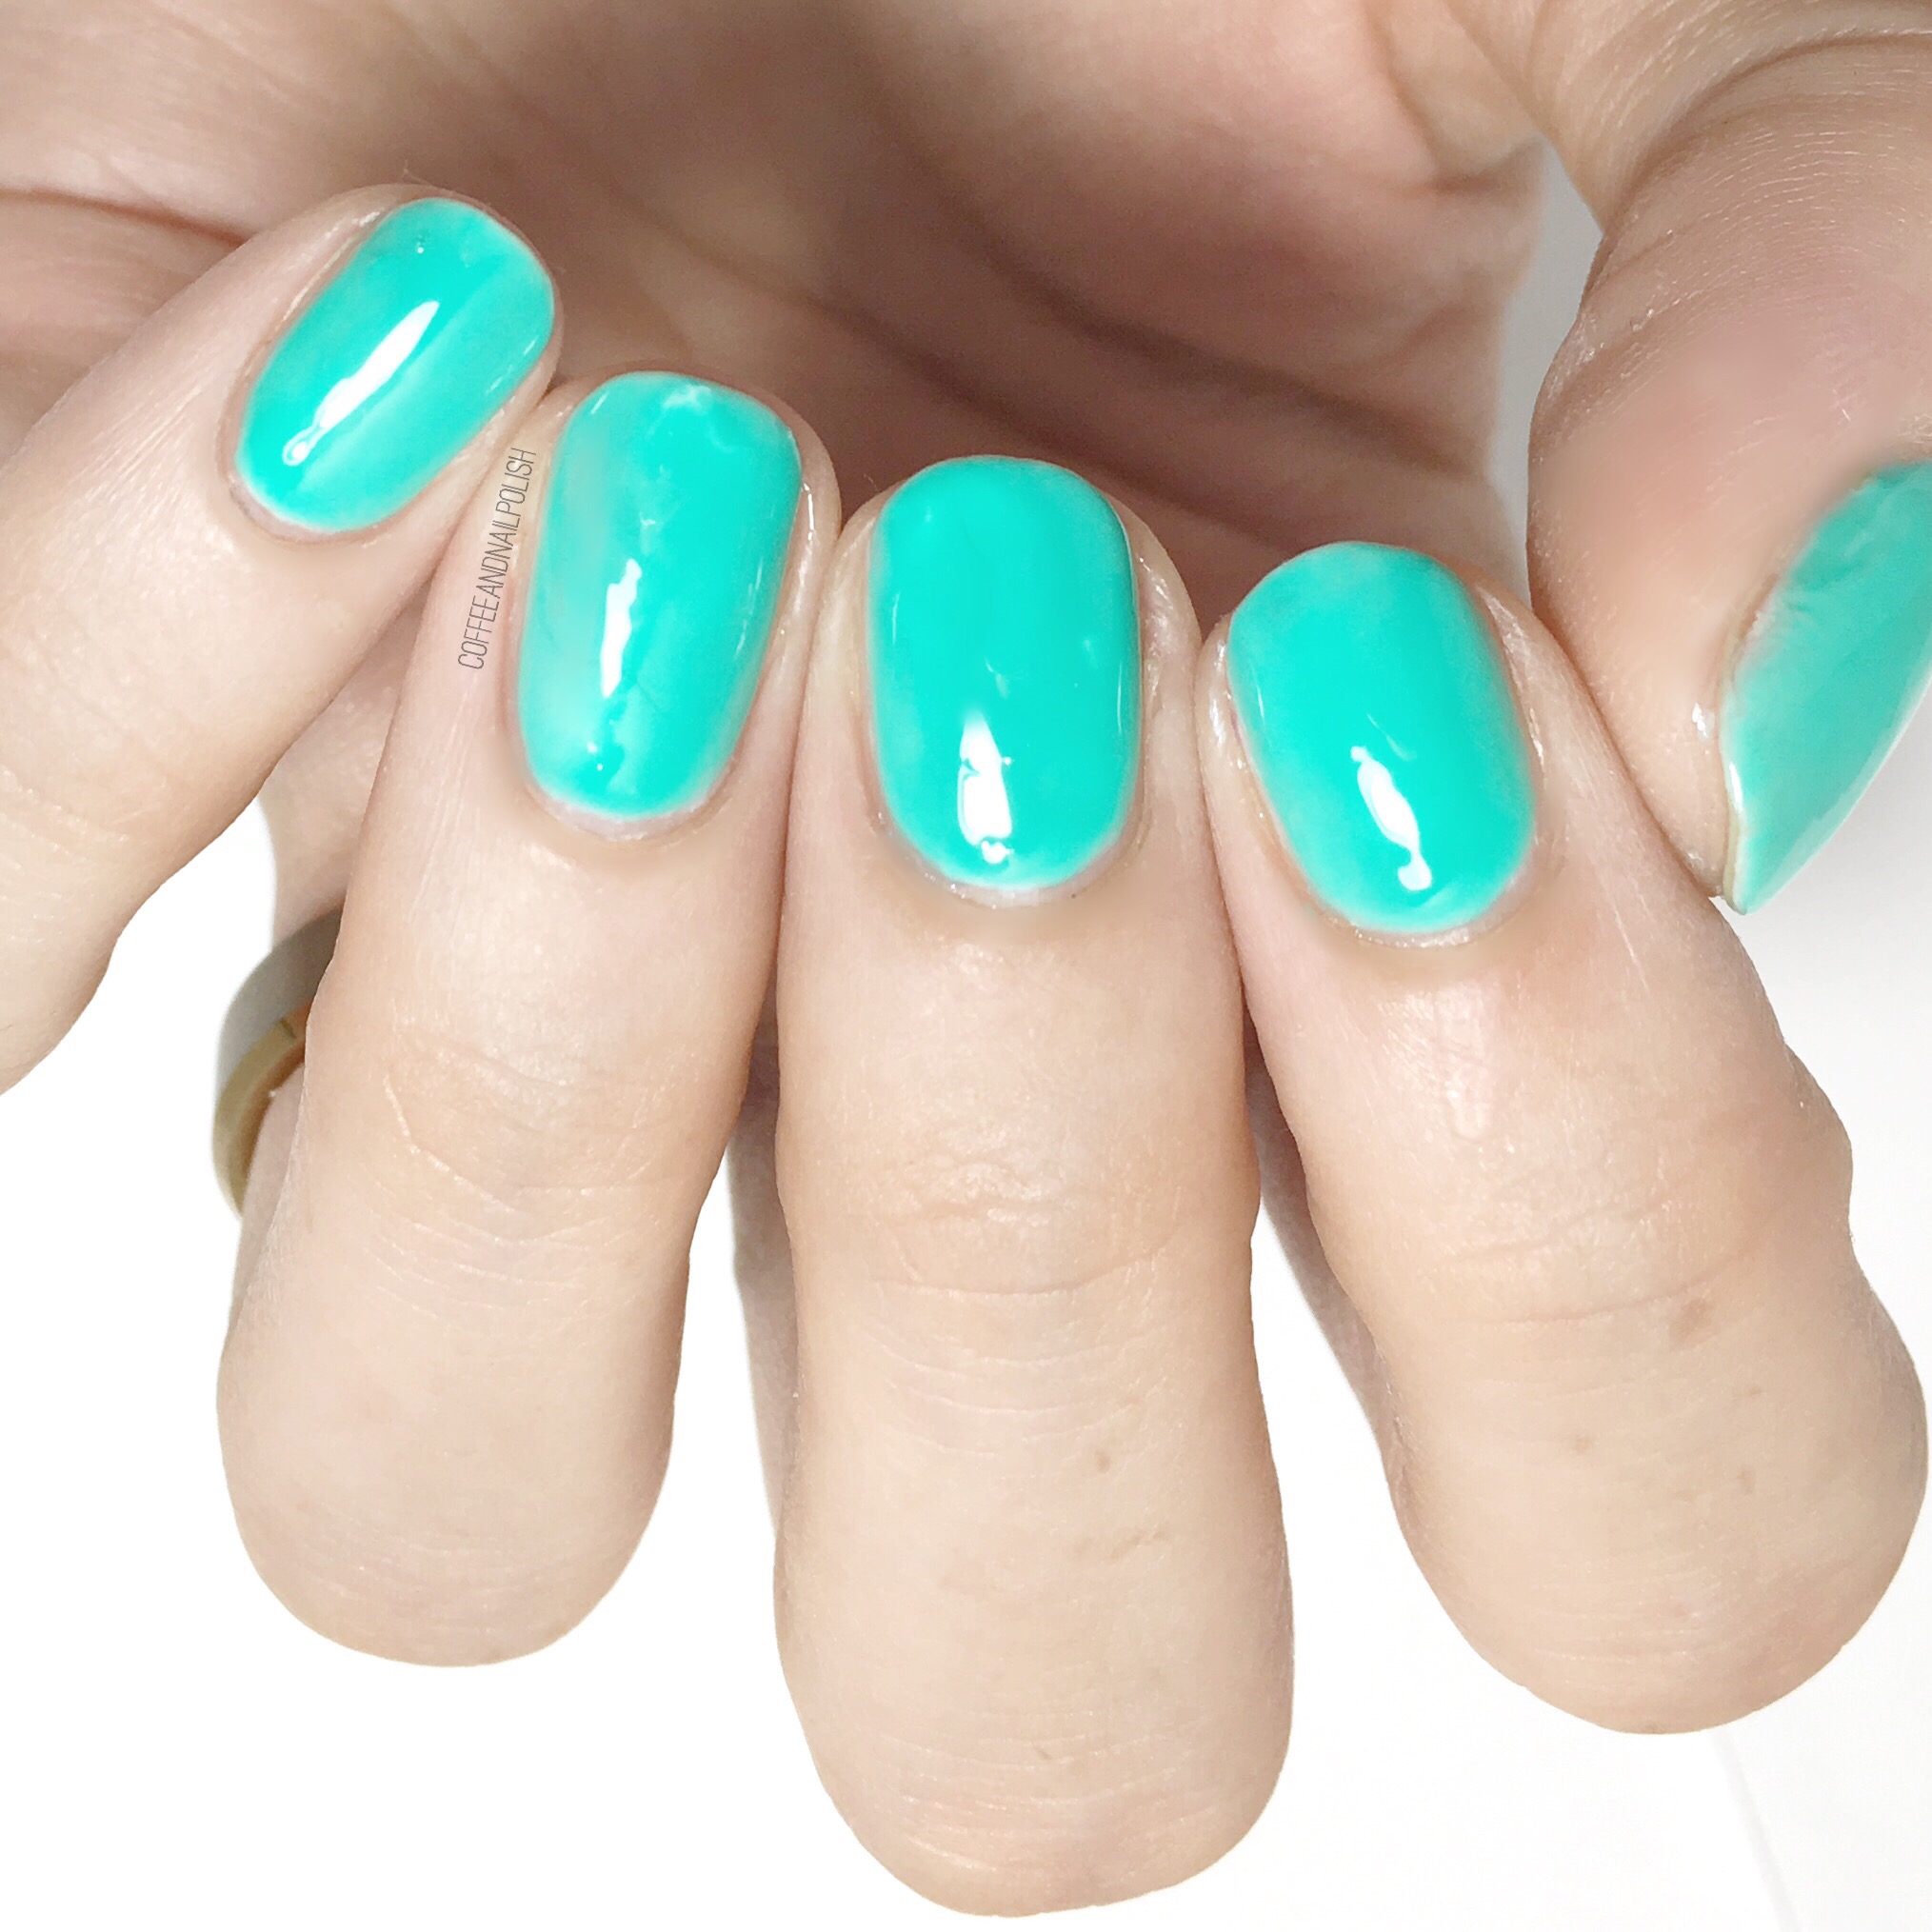
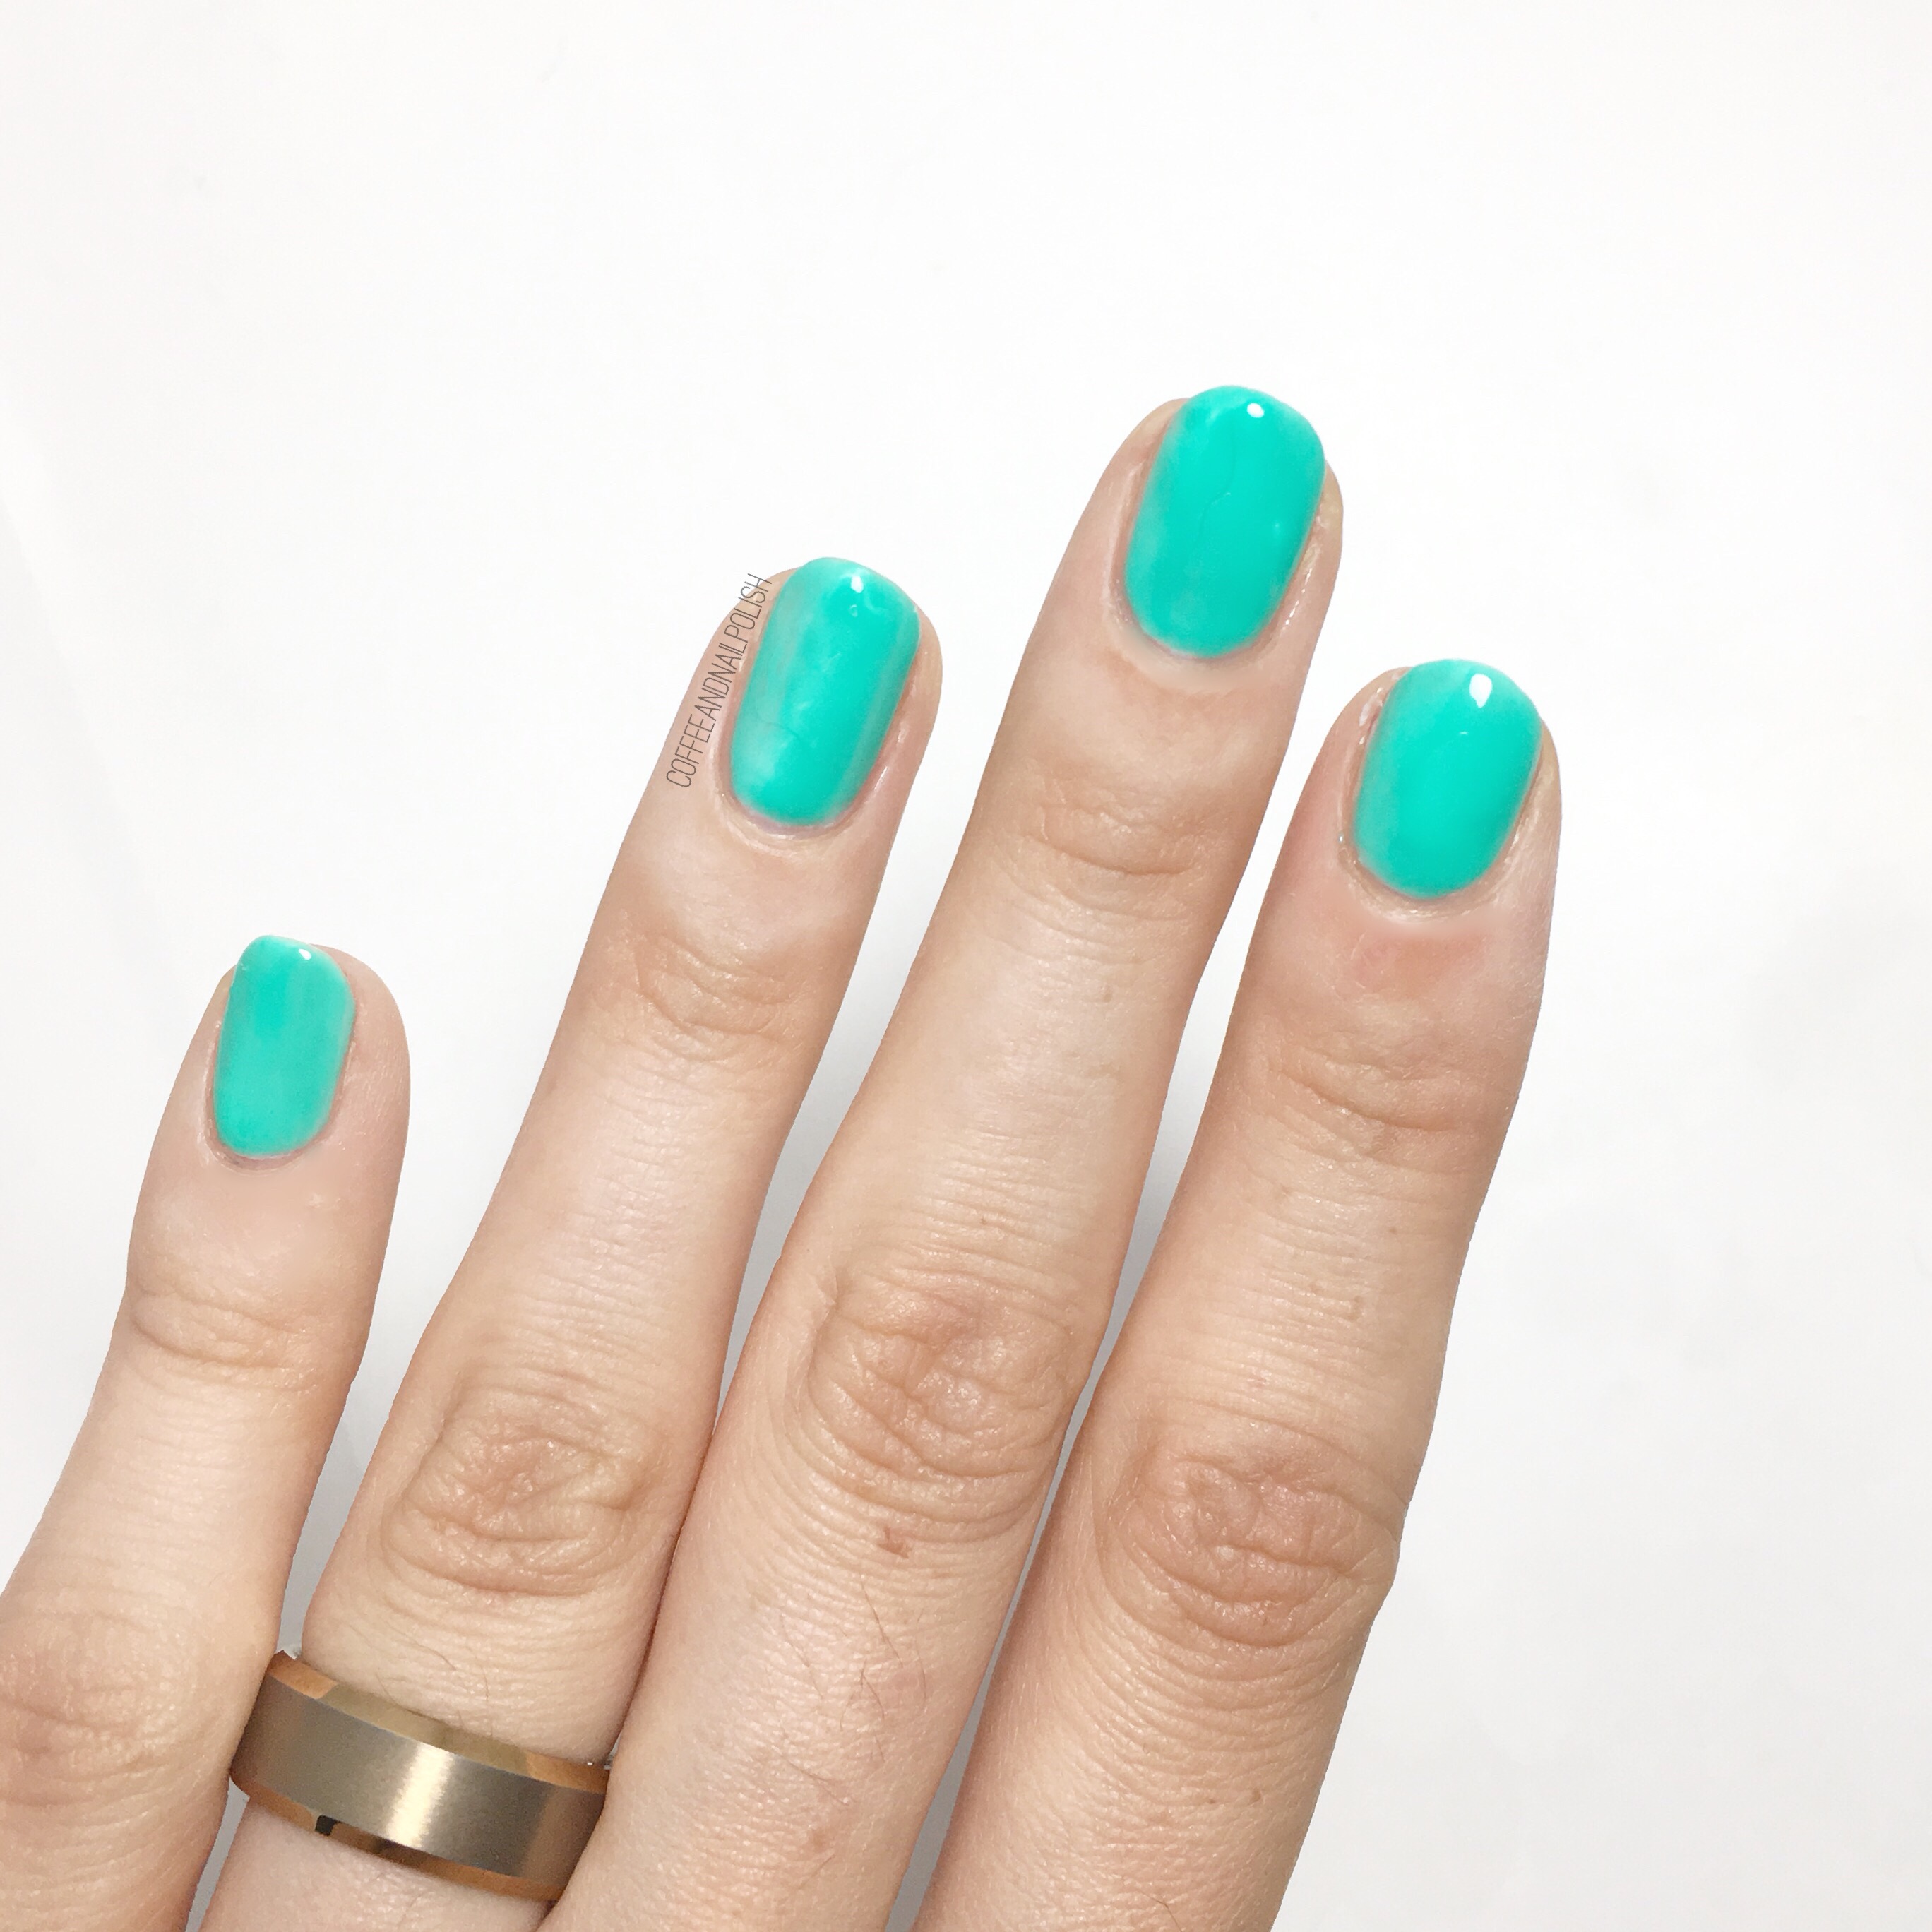
Lime Mint


Lime Mint is a neon mint shade that took three coats with a little bit of streakiness (you can see it a bit on my ring finger). That could be attributed to my total lack of gel polish expirence. The colour though is awesome & as vibrant on the nails as you see here. This would definitely be a great shade to slap on your nails for Summer vacation! 
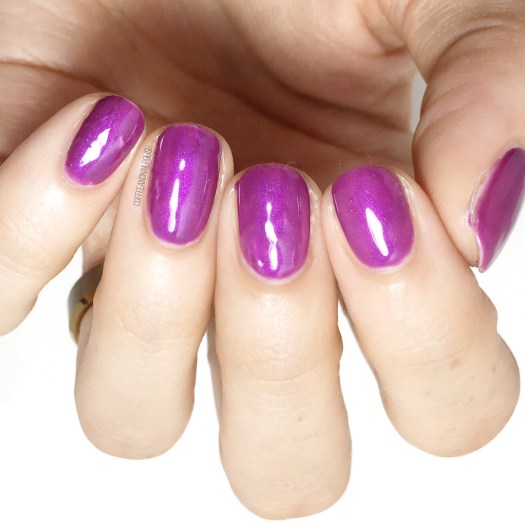

Anytime

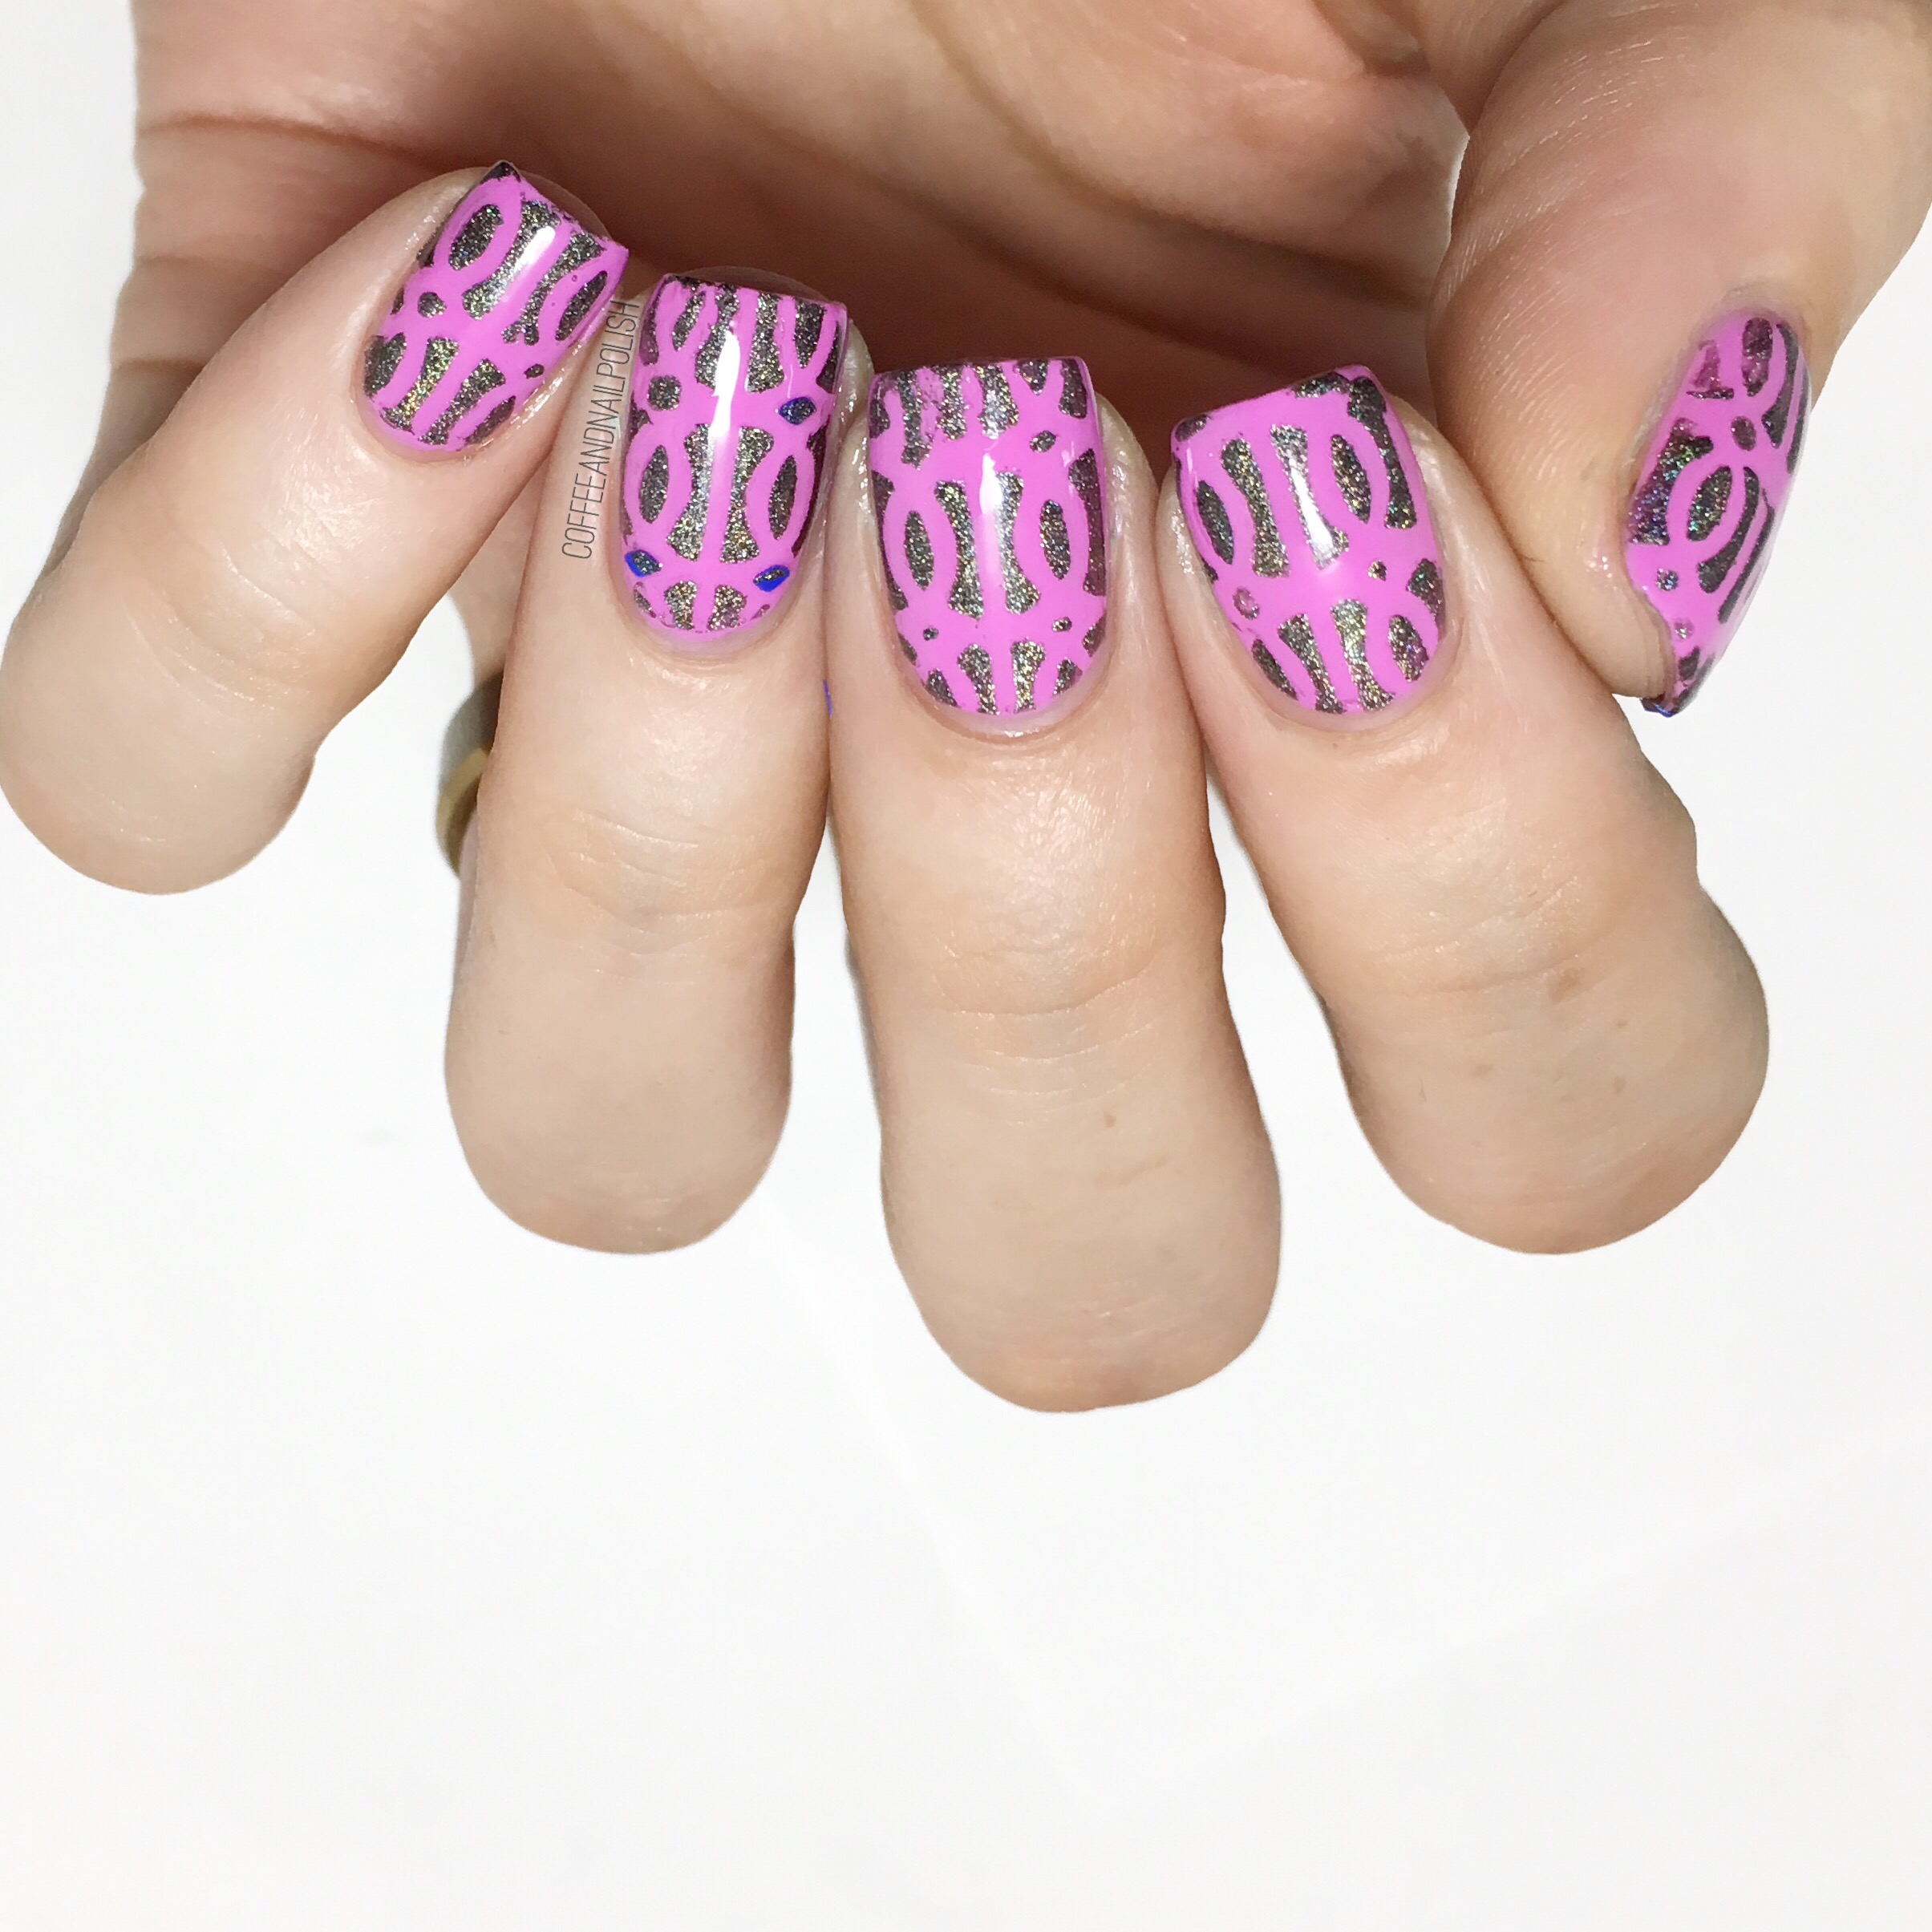
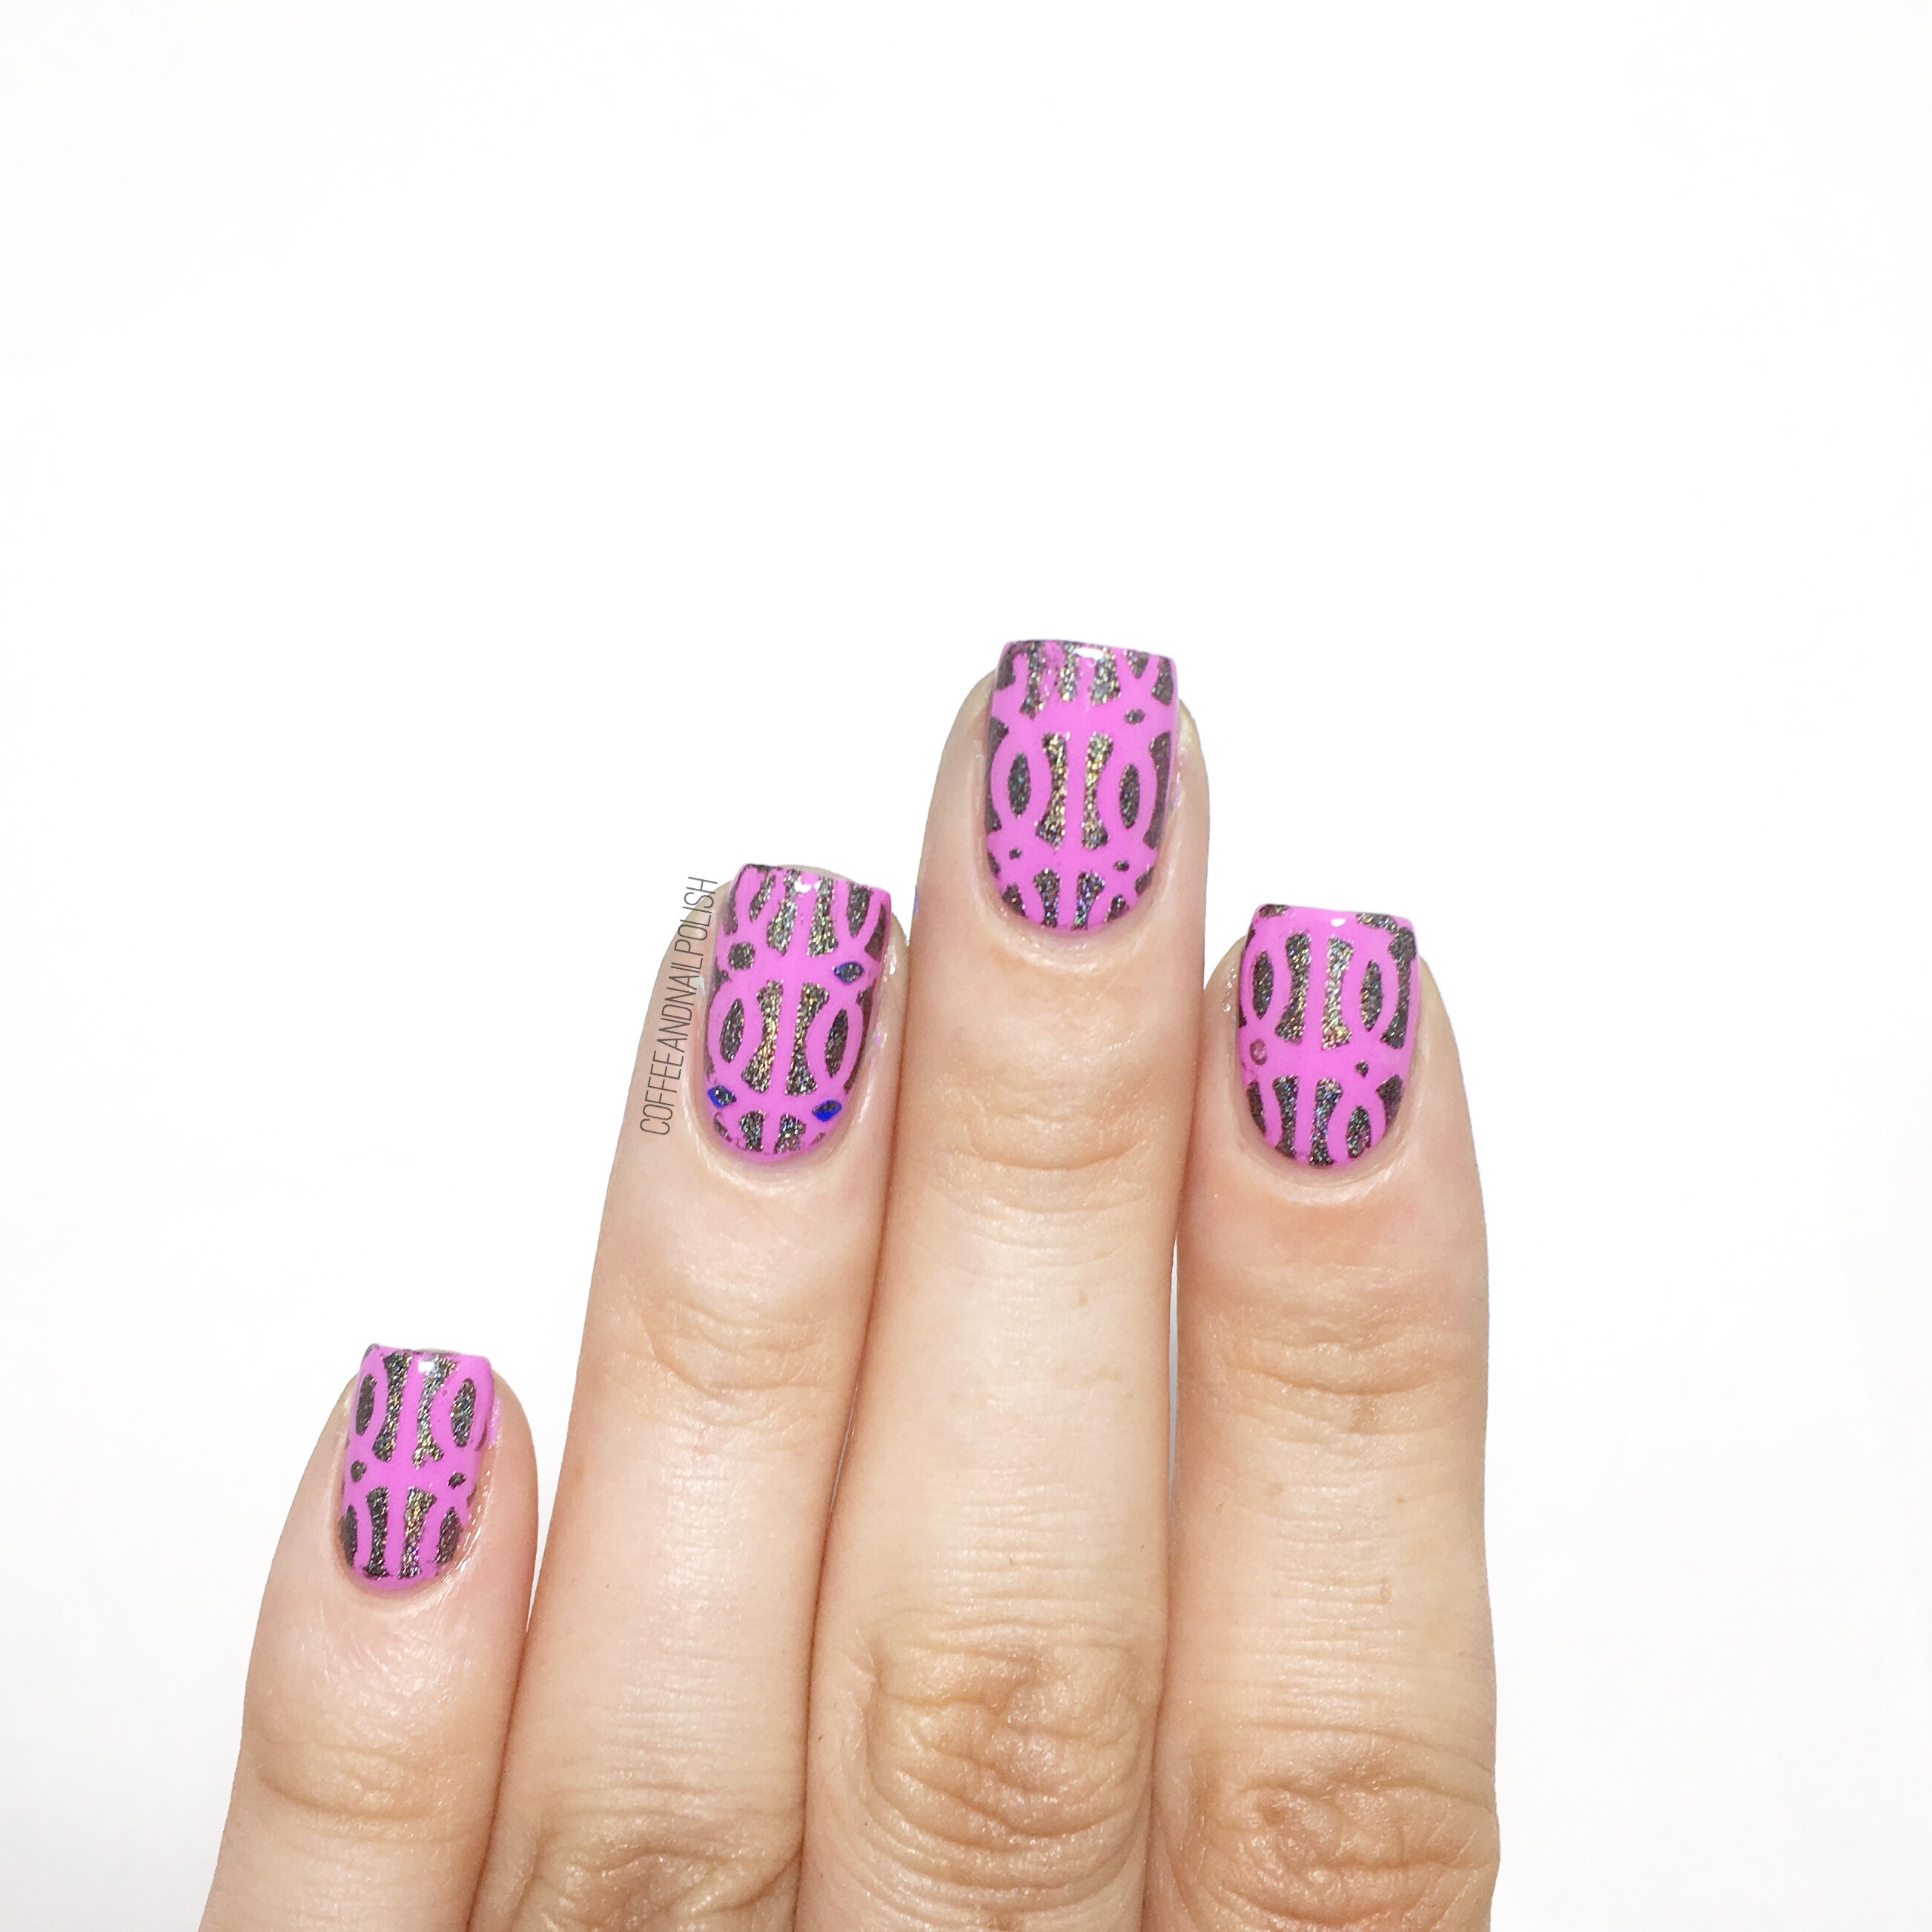
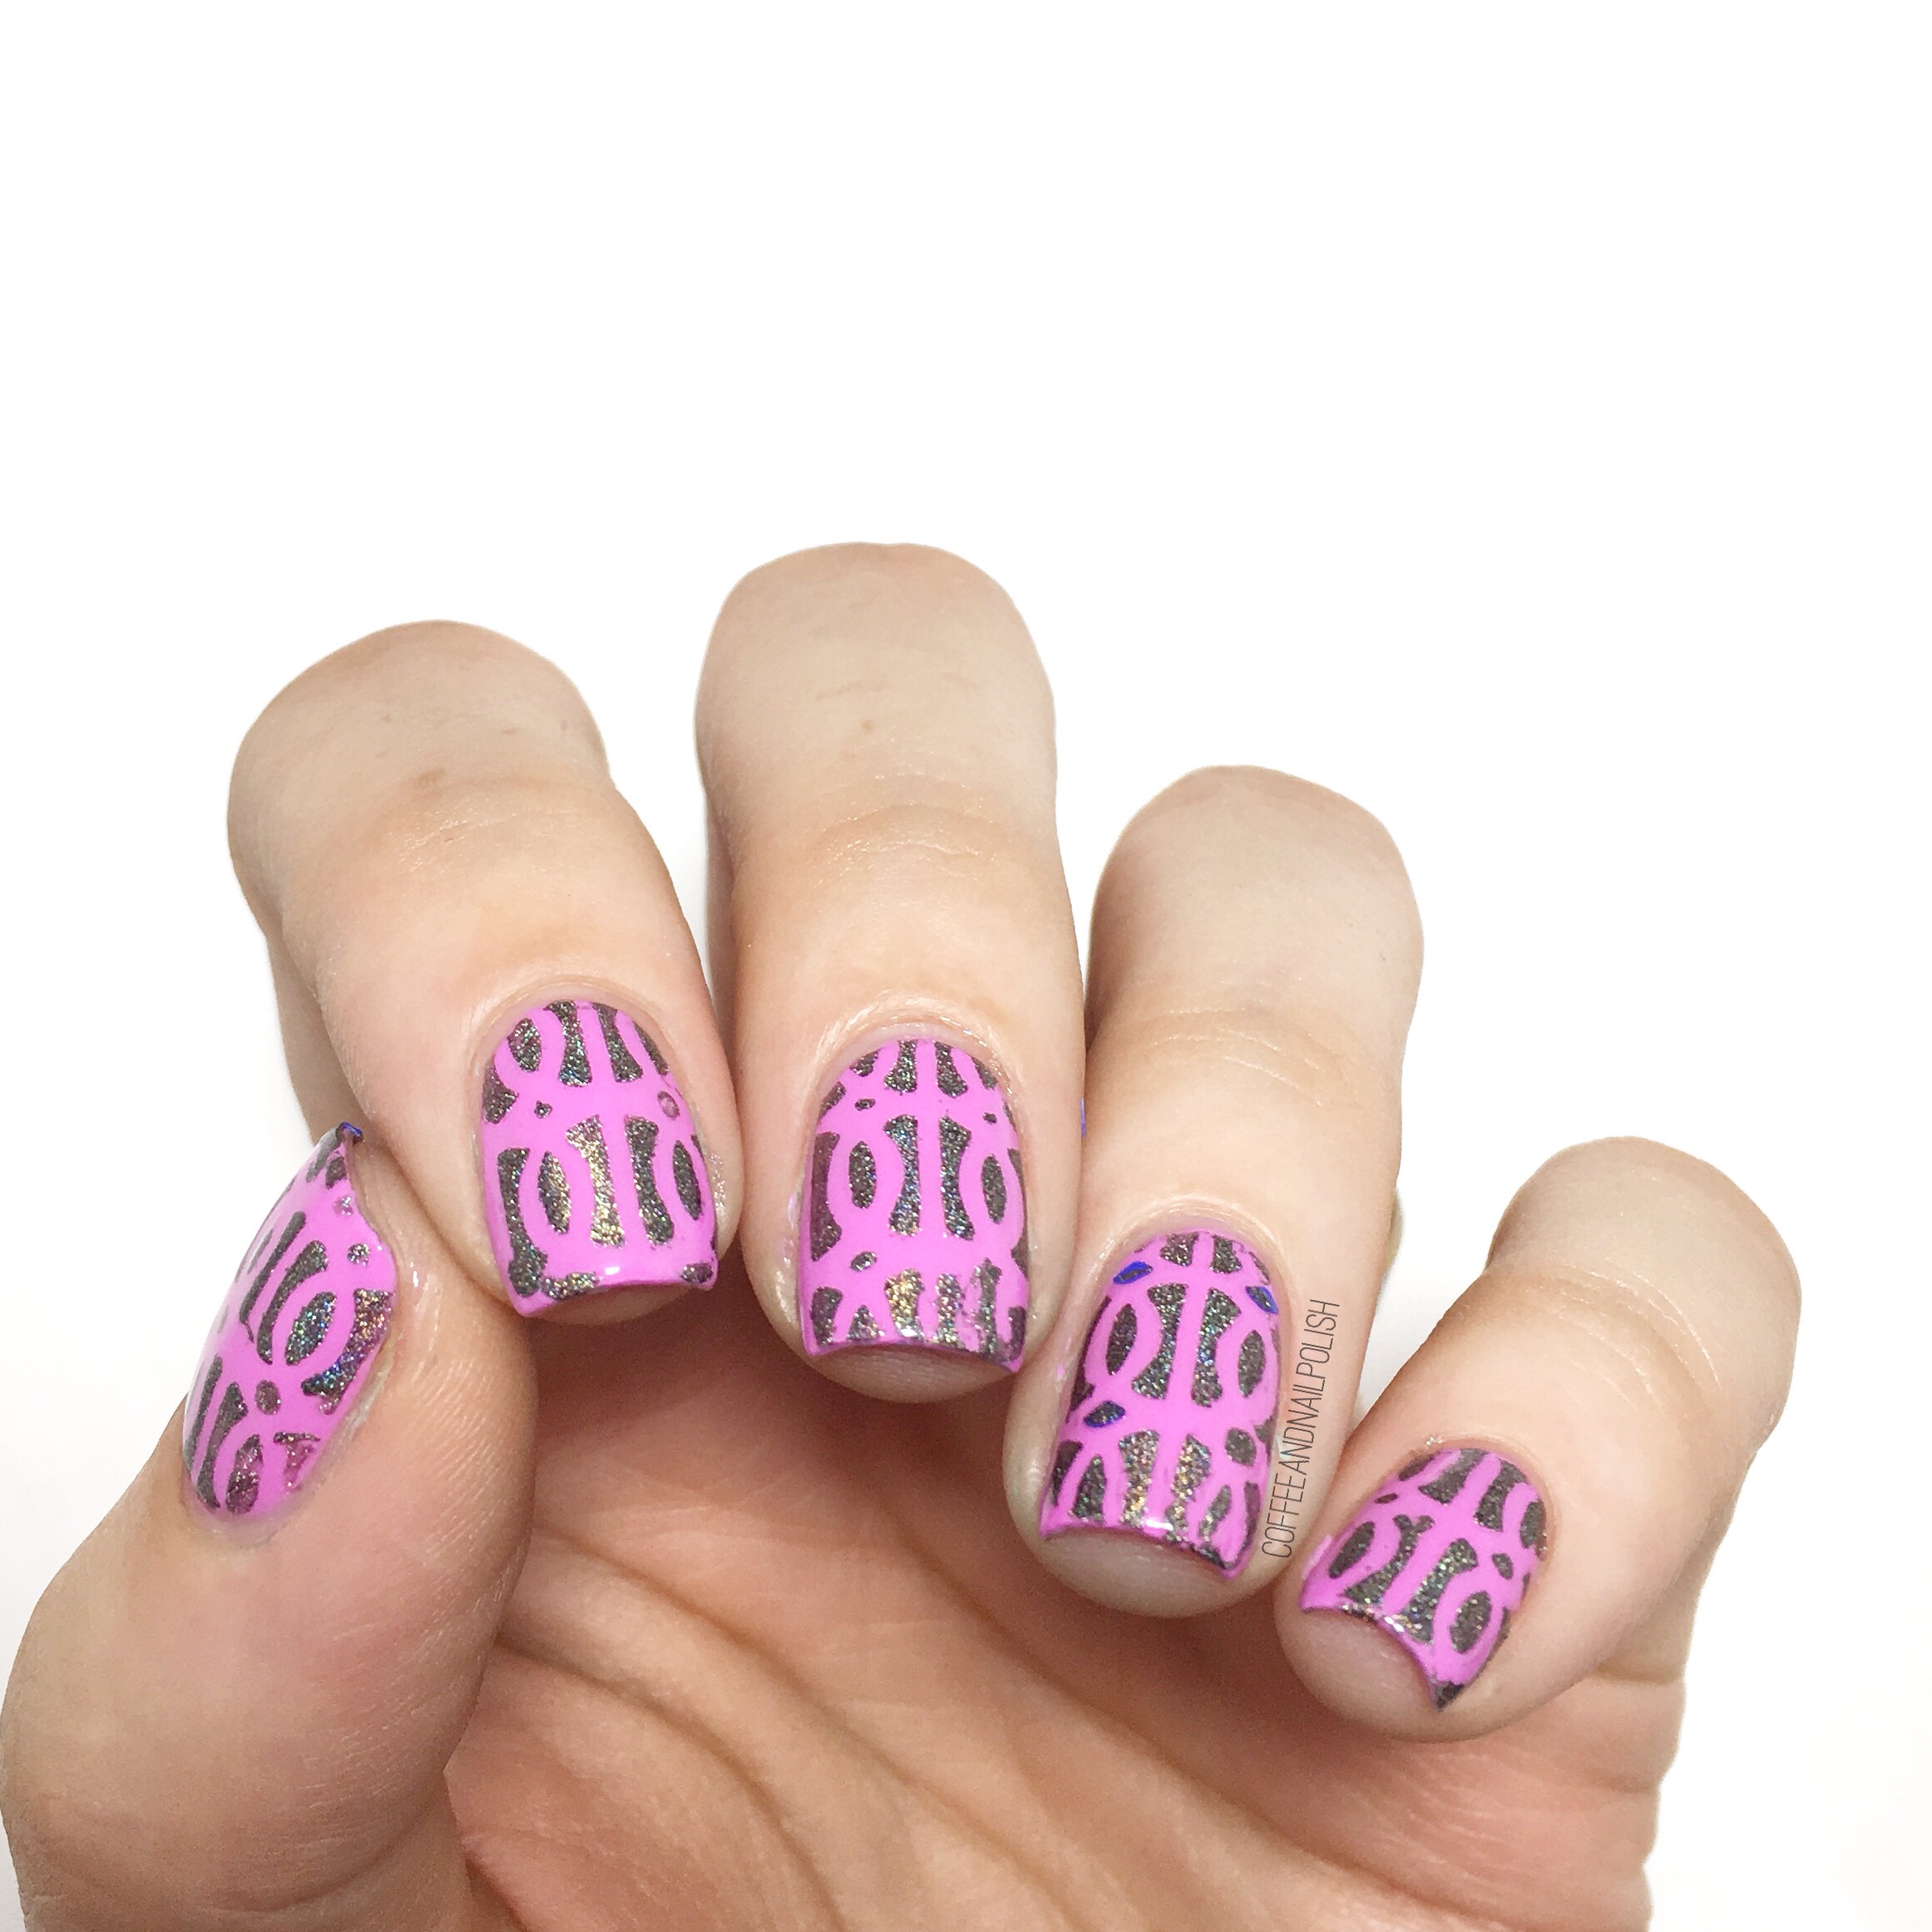
Anytime is a shimmery pink leaning purple shade that also took 3 coats for the swatches you see. I’ll be honest–this is the shade I thought I was going to love the most, but it was also the shade I had the most trouble applying. It was definitely a bit more watery compared to the other two shades (maybe because it was a shimmer as opposed to a creme like the other two?) & took a bit more care for application. The shade though is gorgeous. I love purple & this purple is perfect even if it takes a bit more work to get it right. 
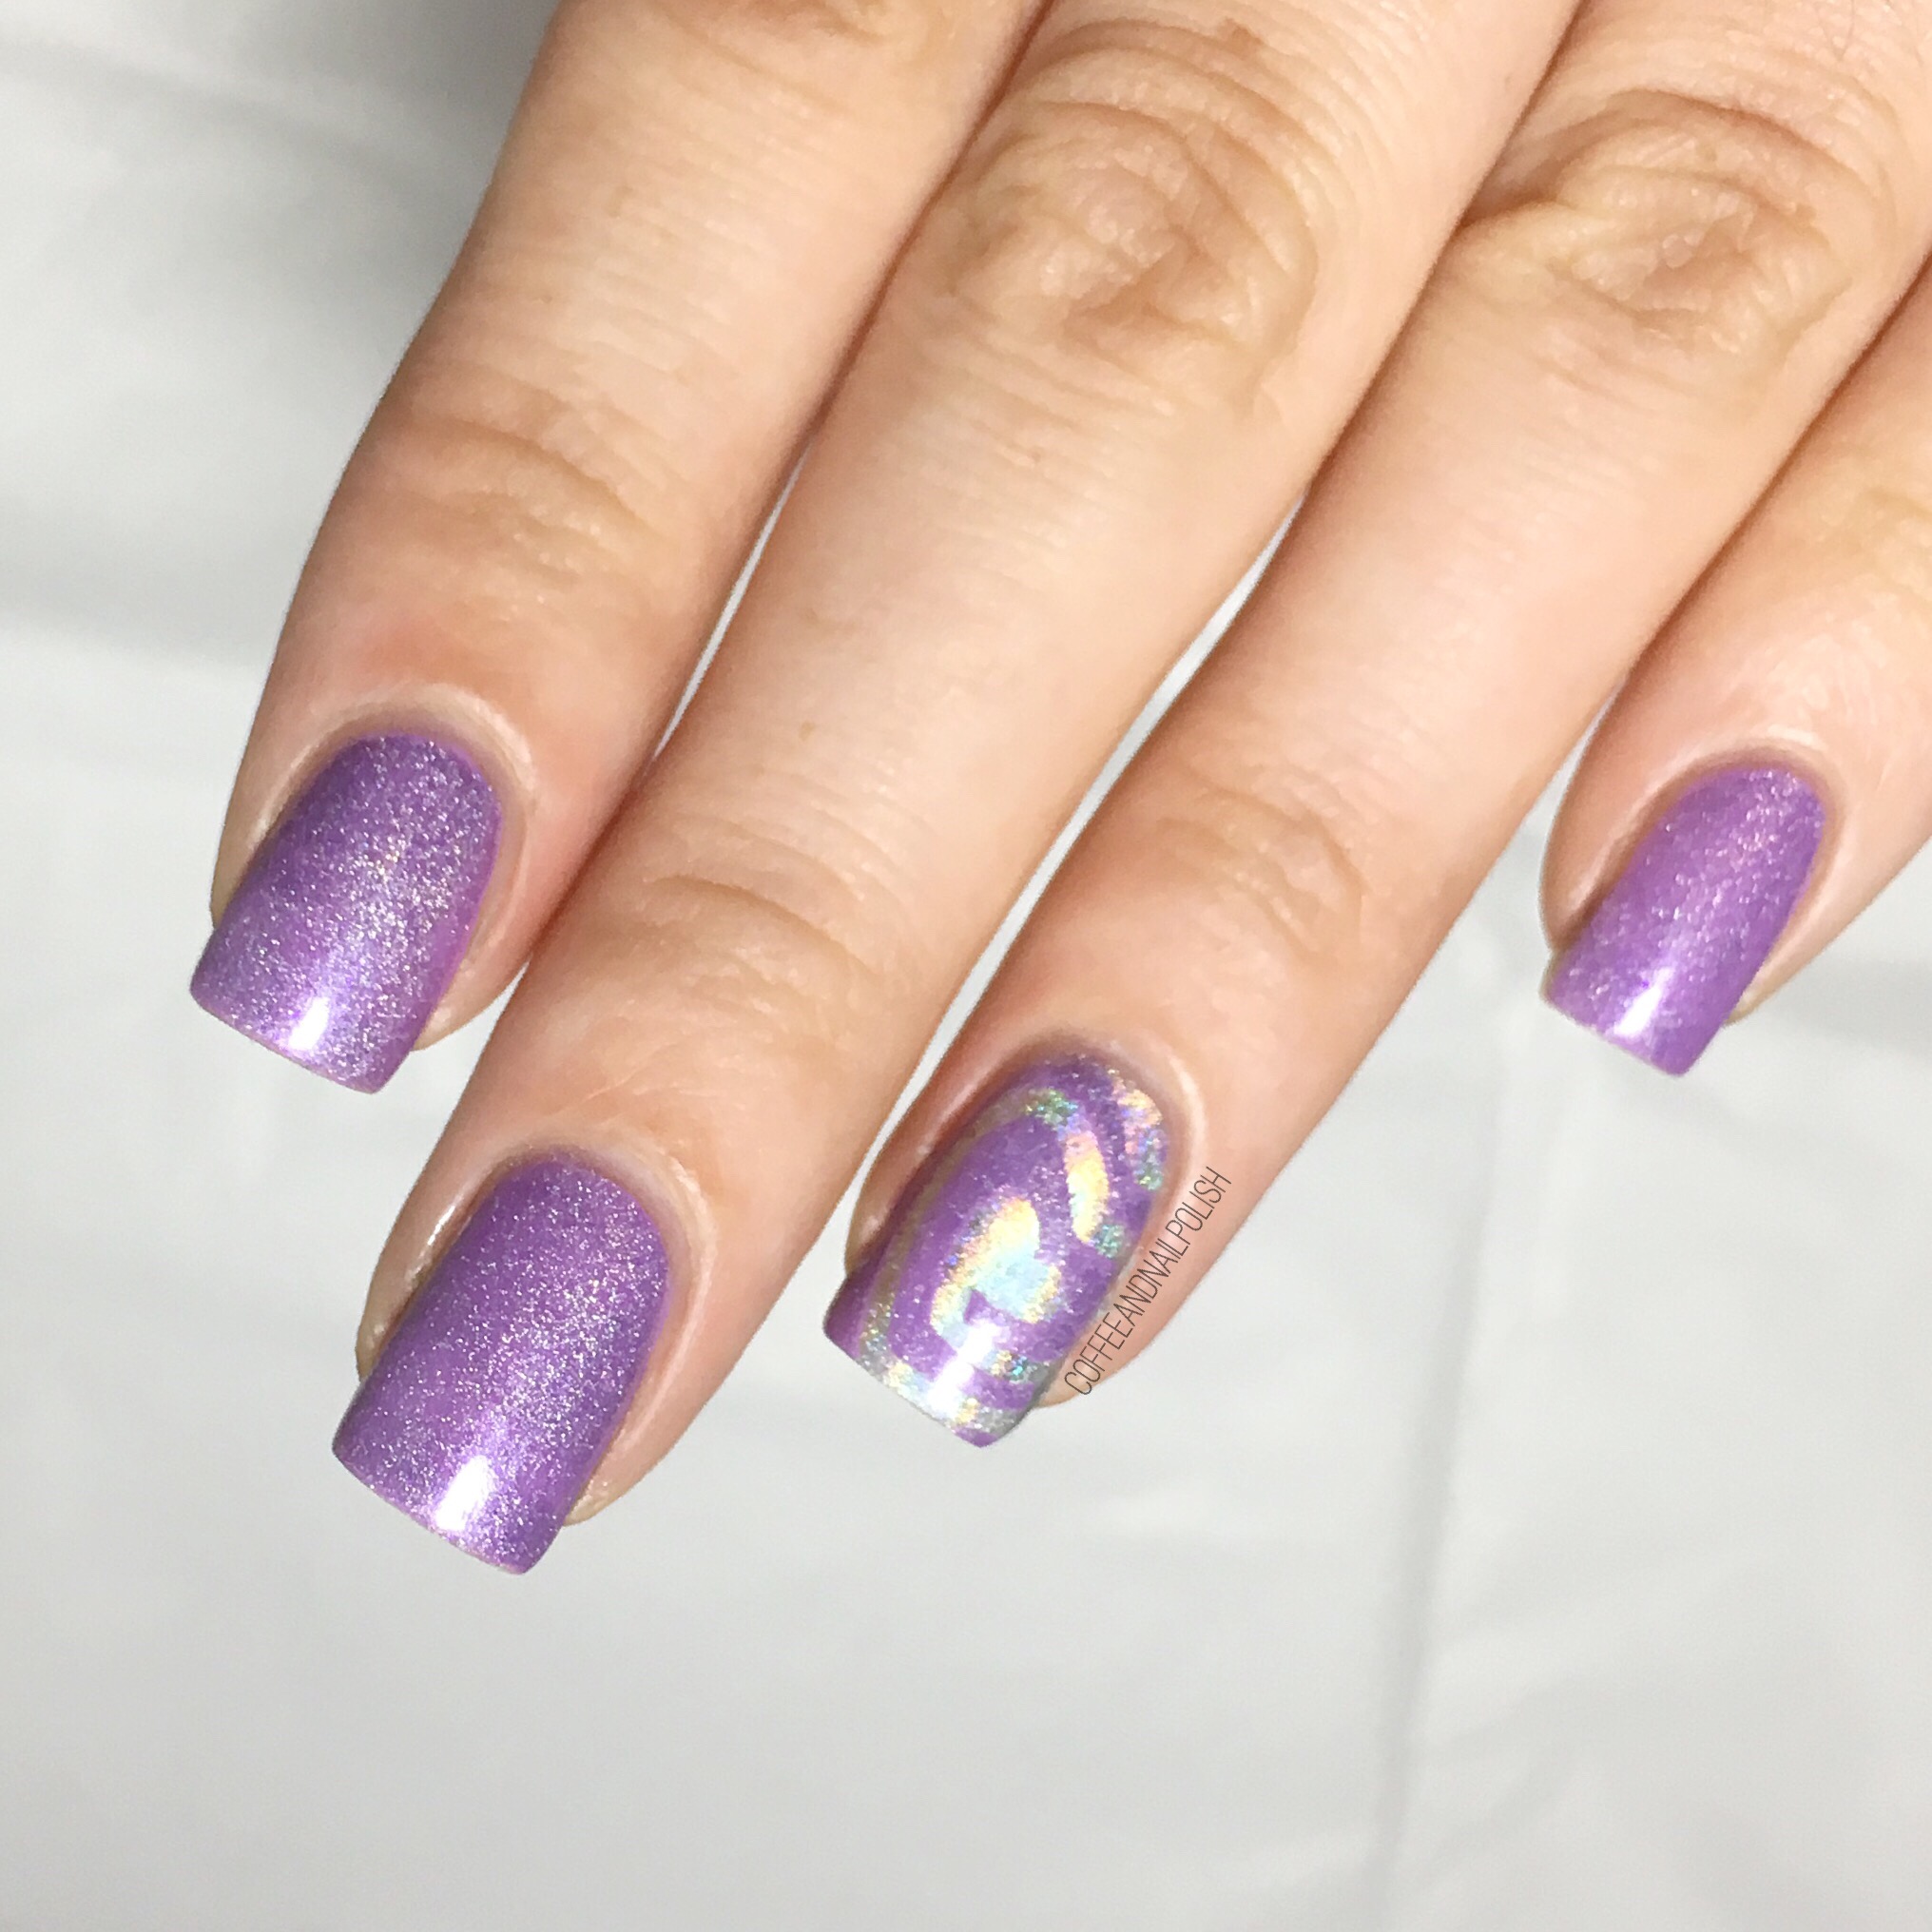
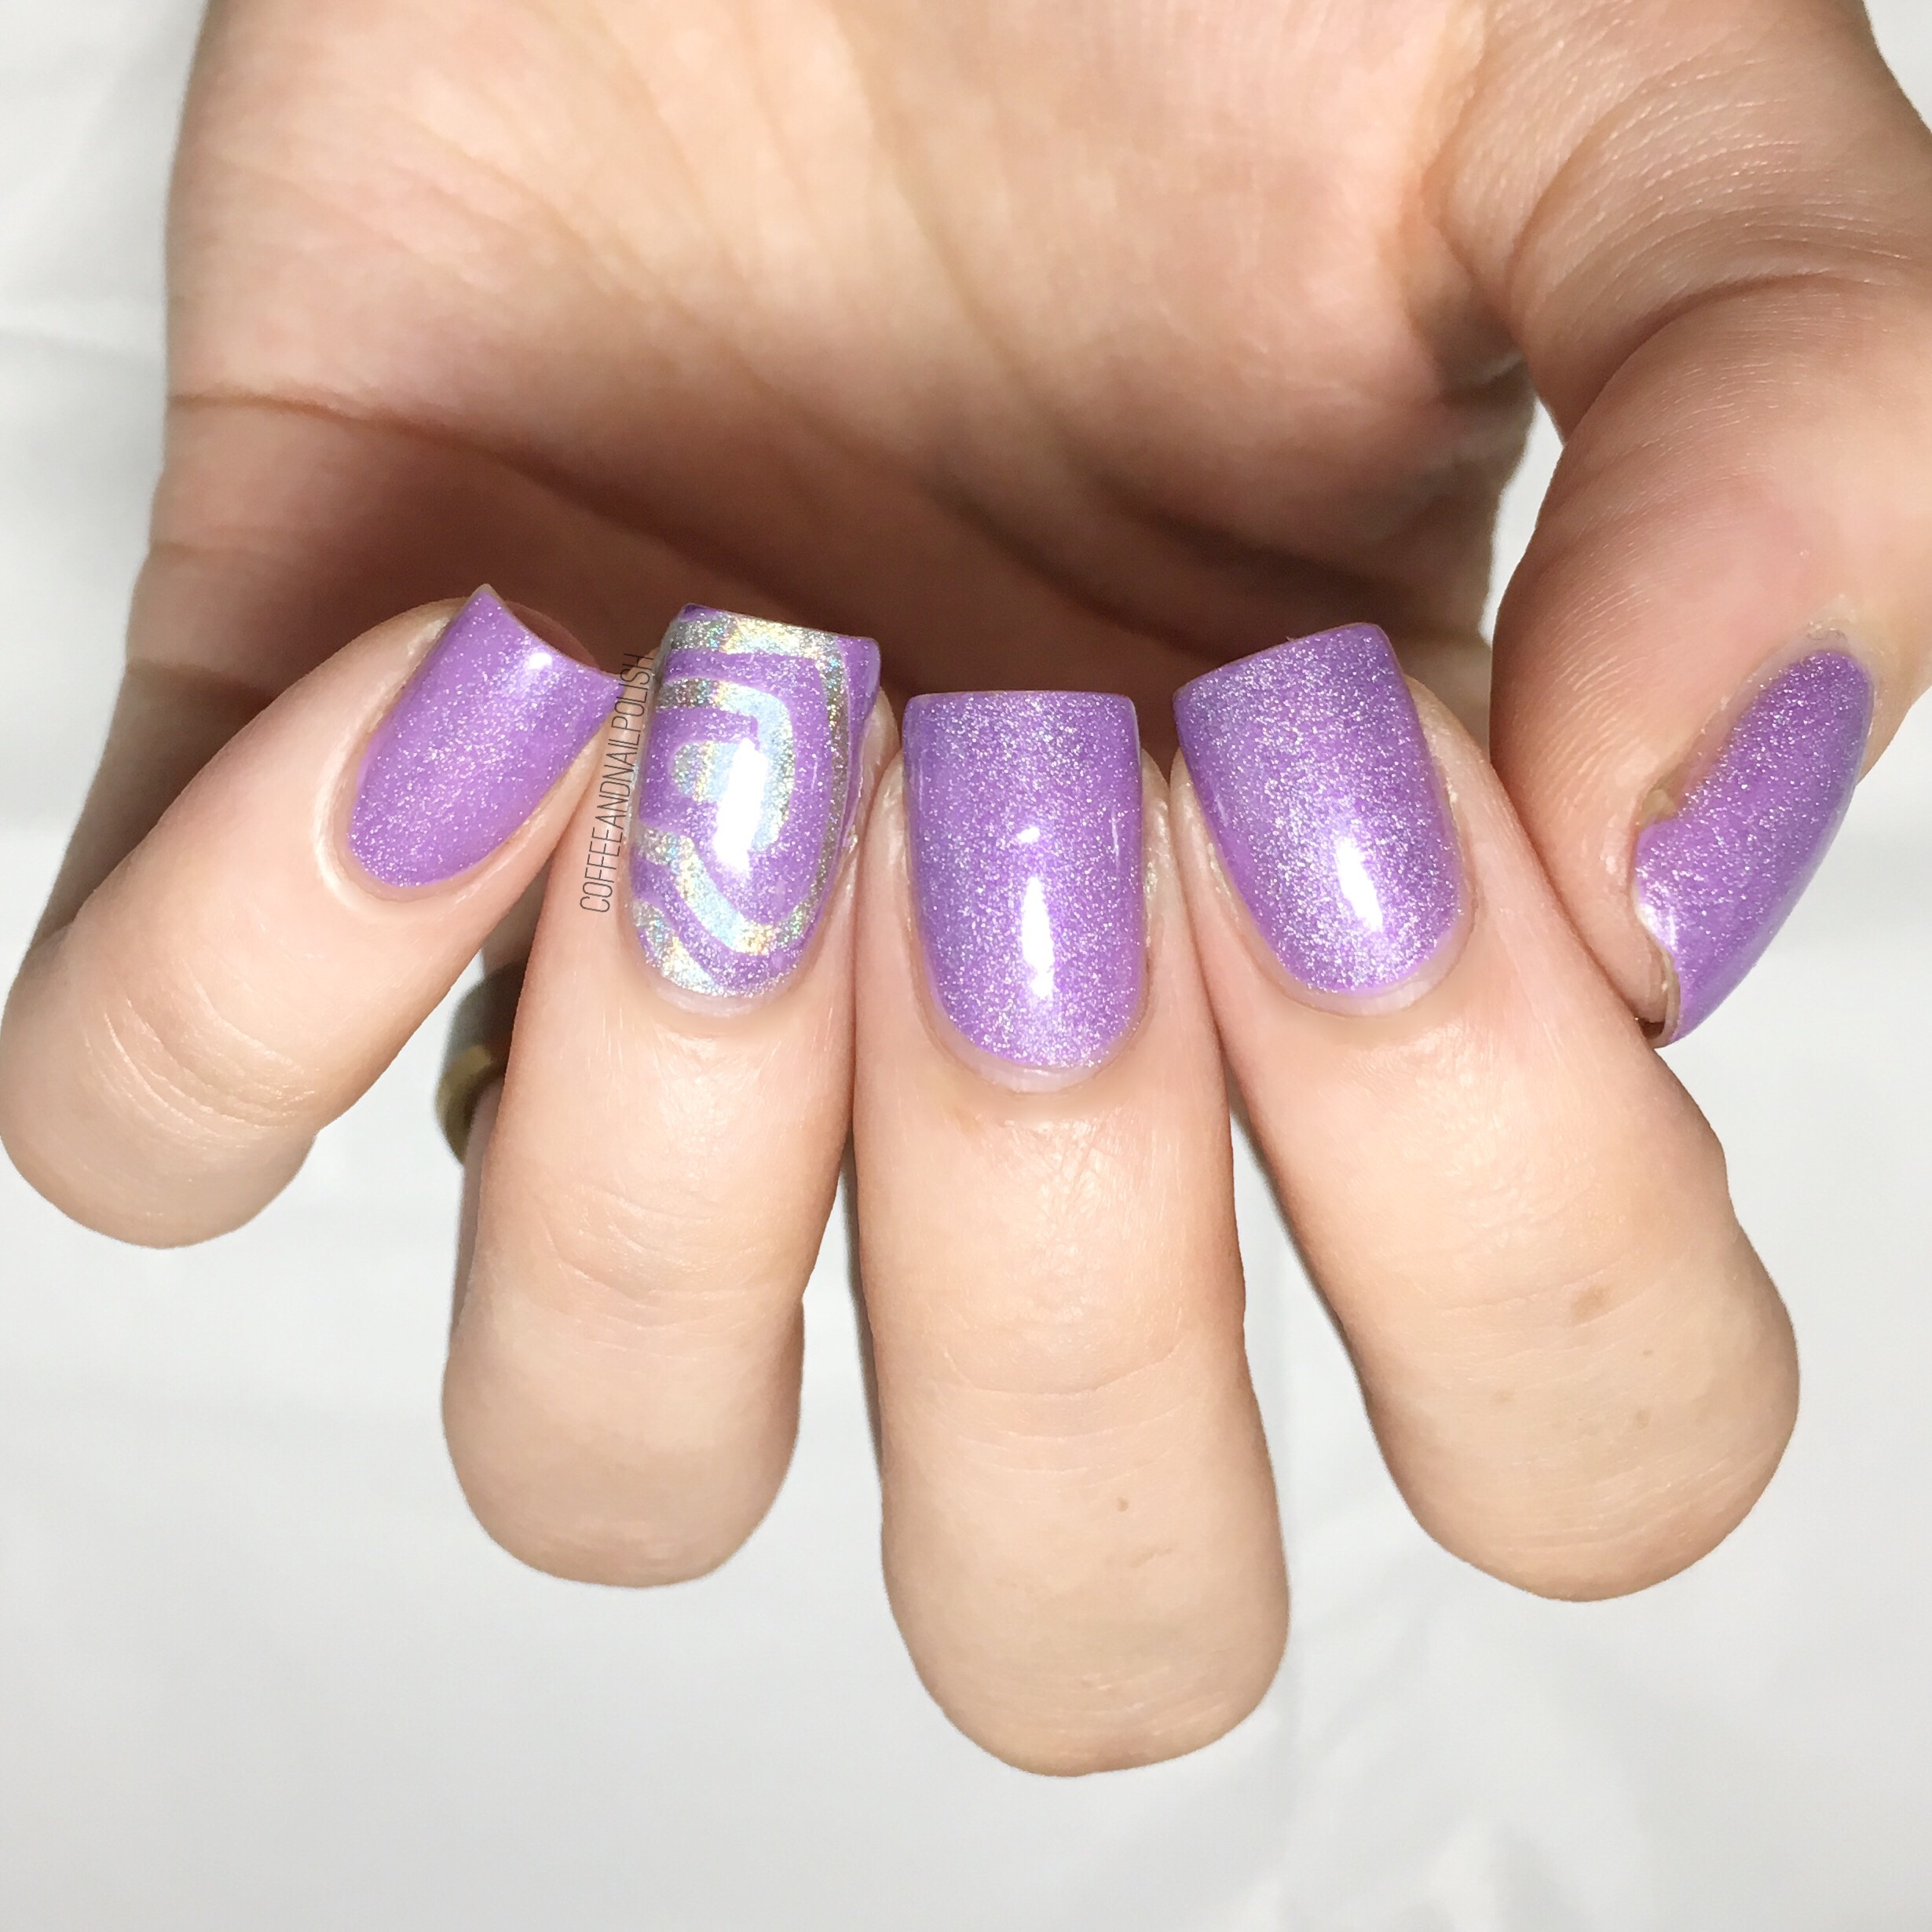
Confidence 

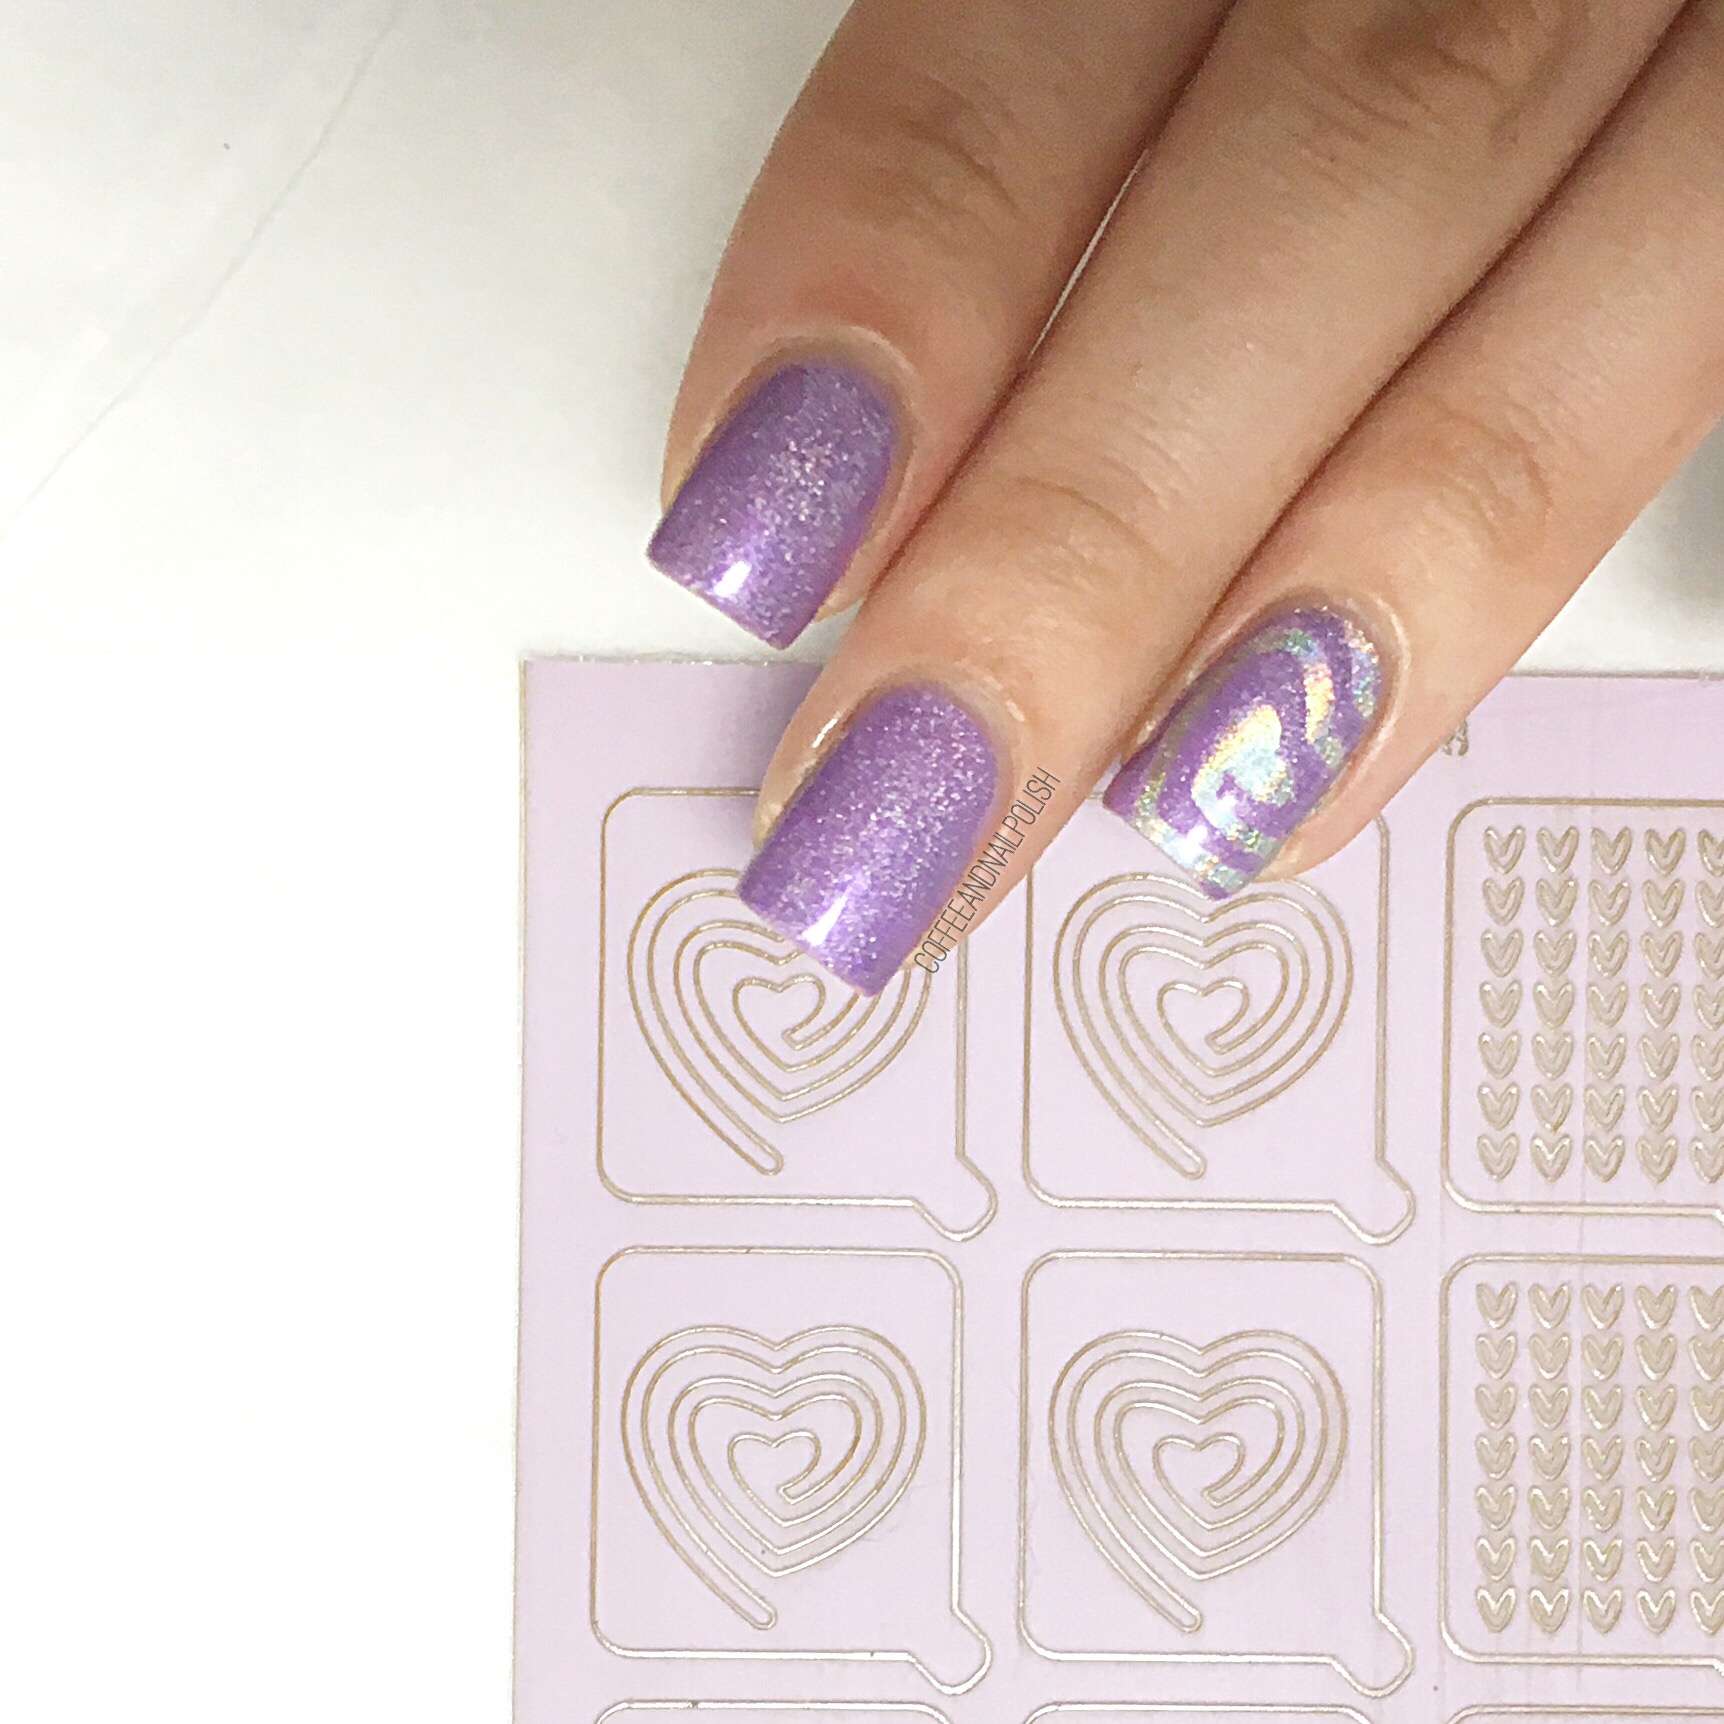
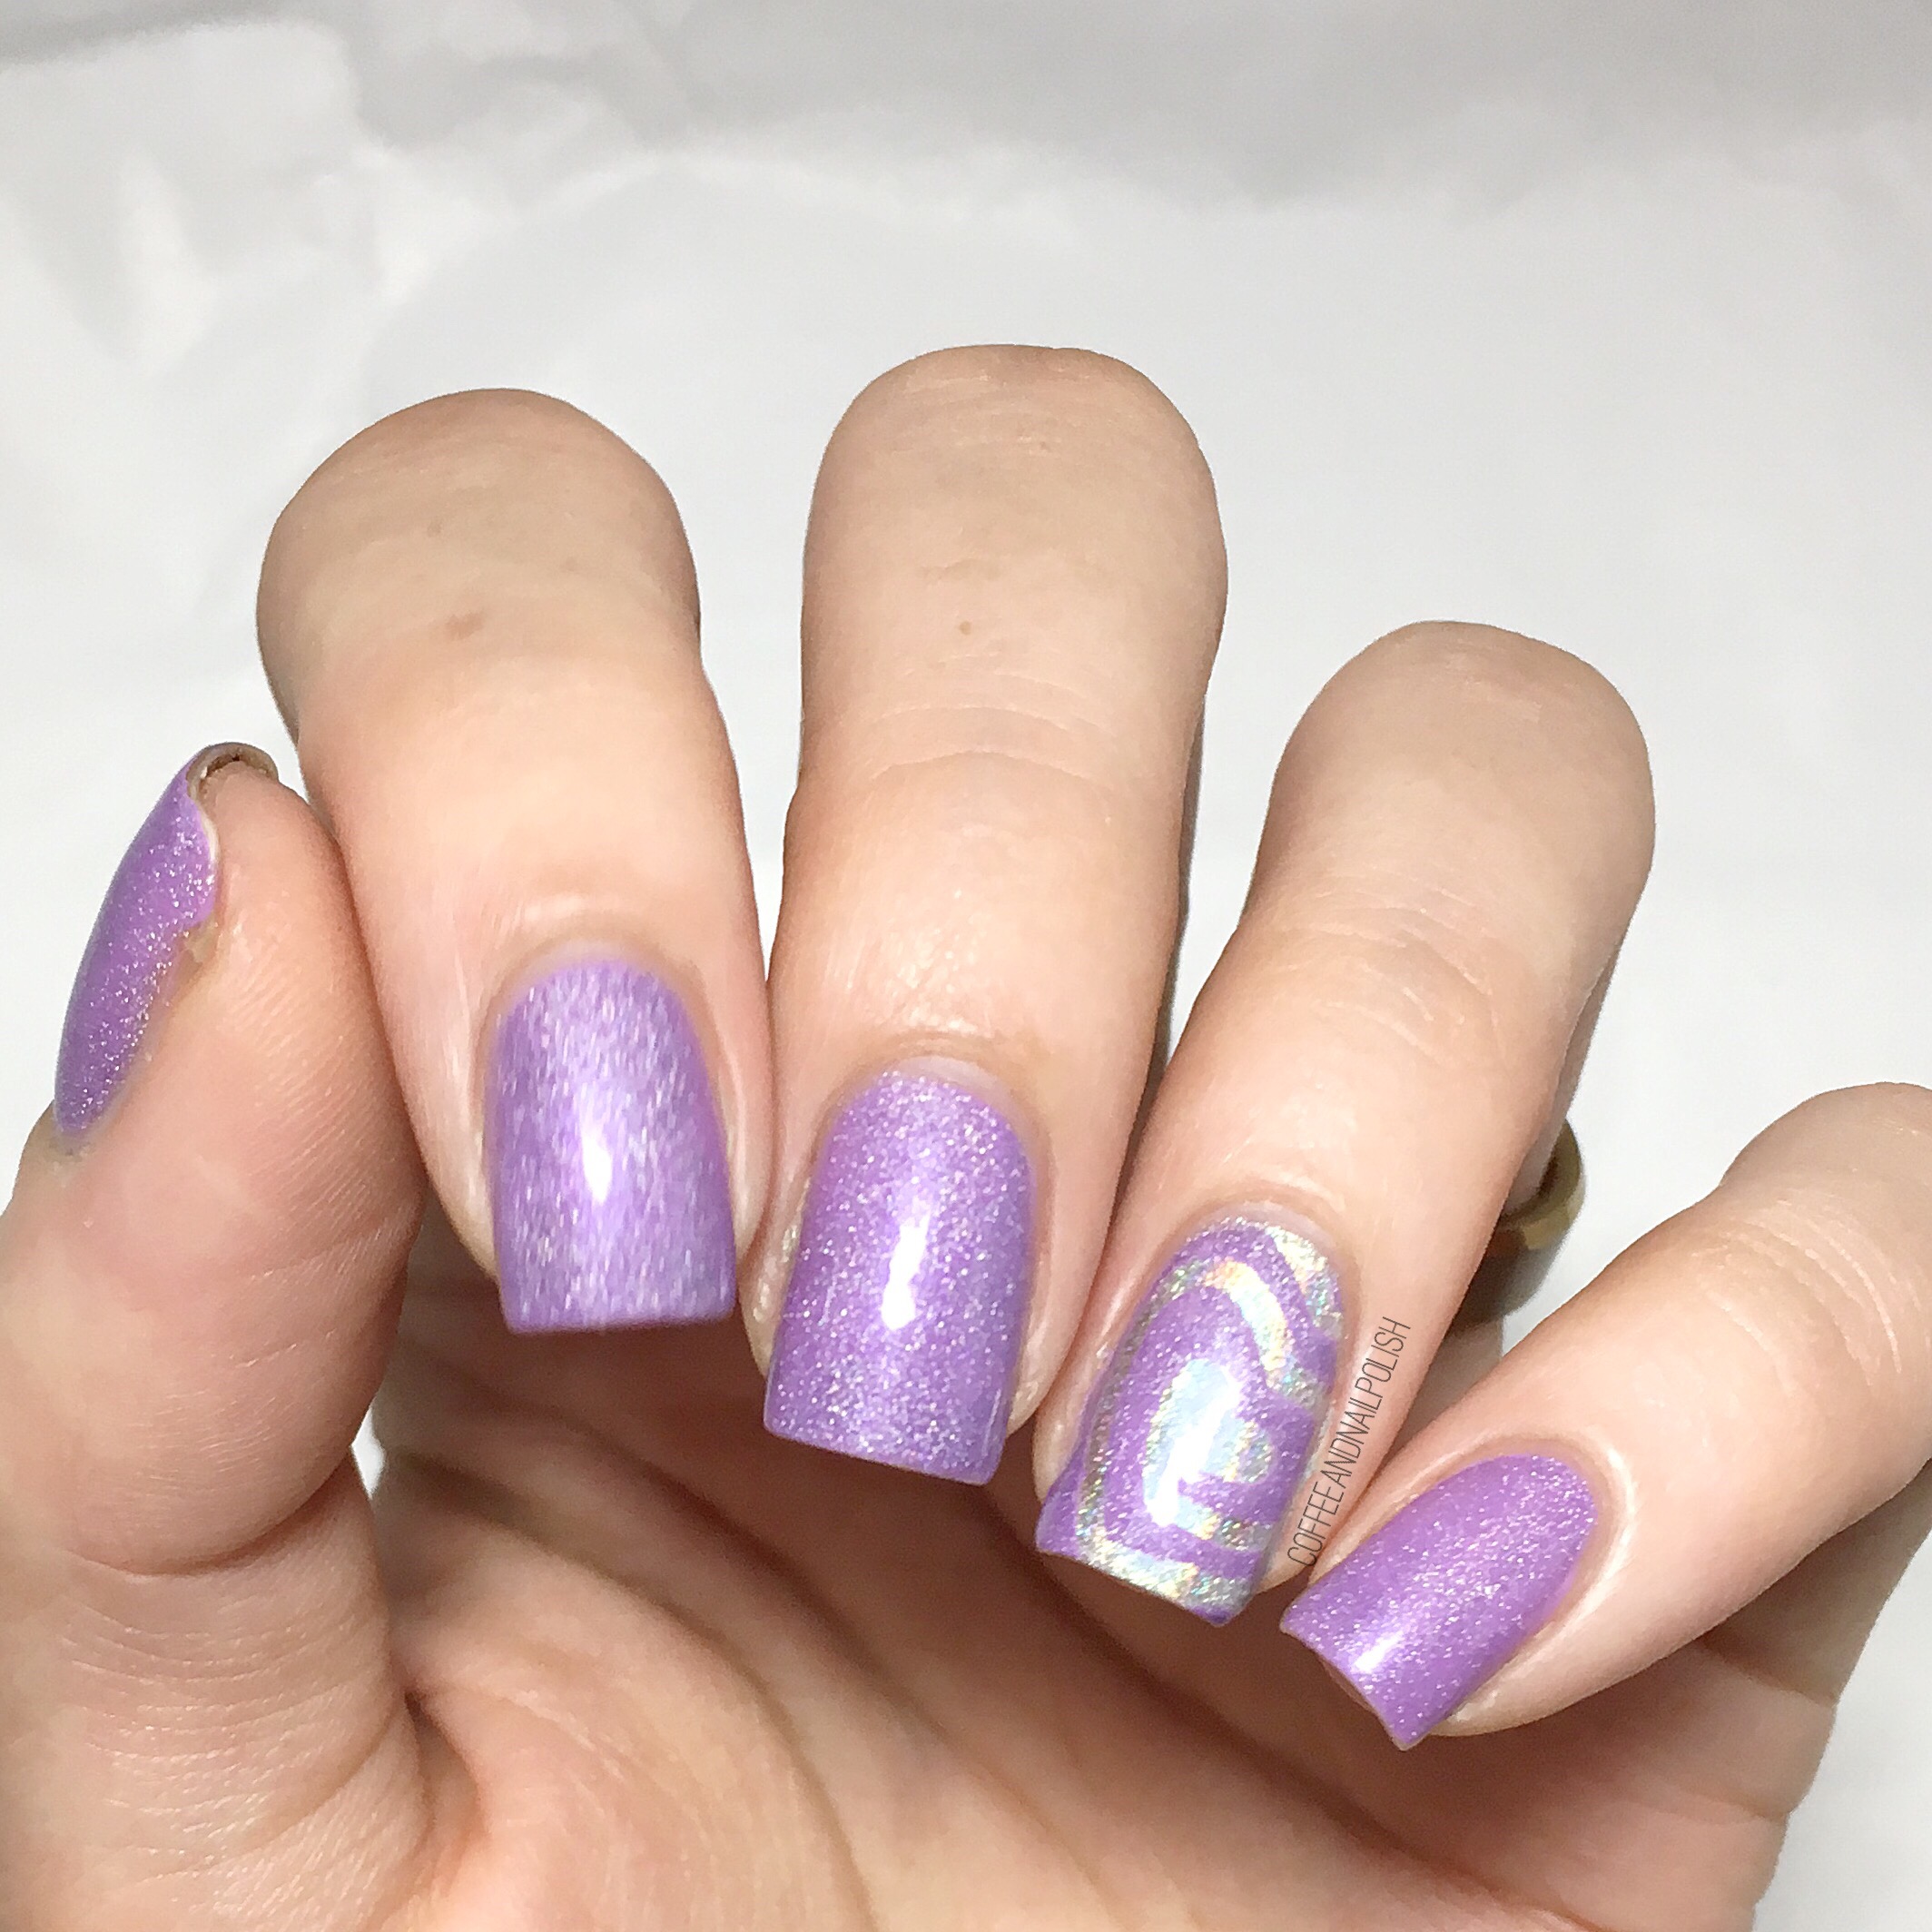
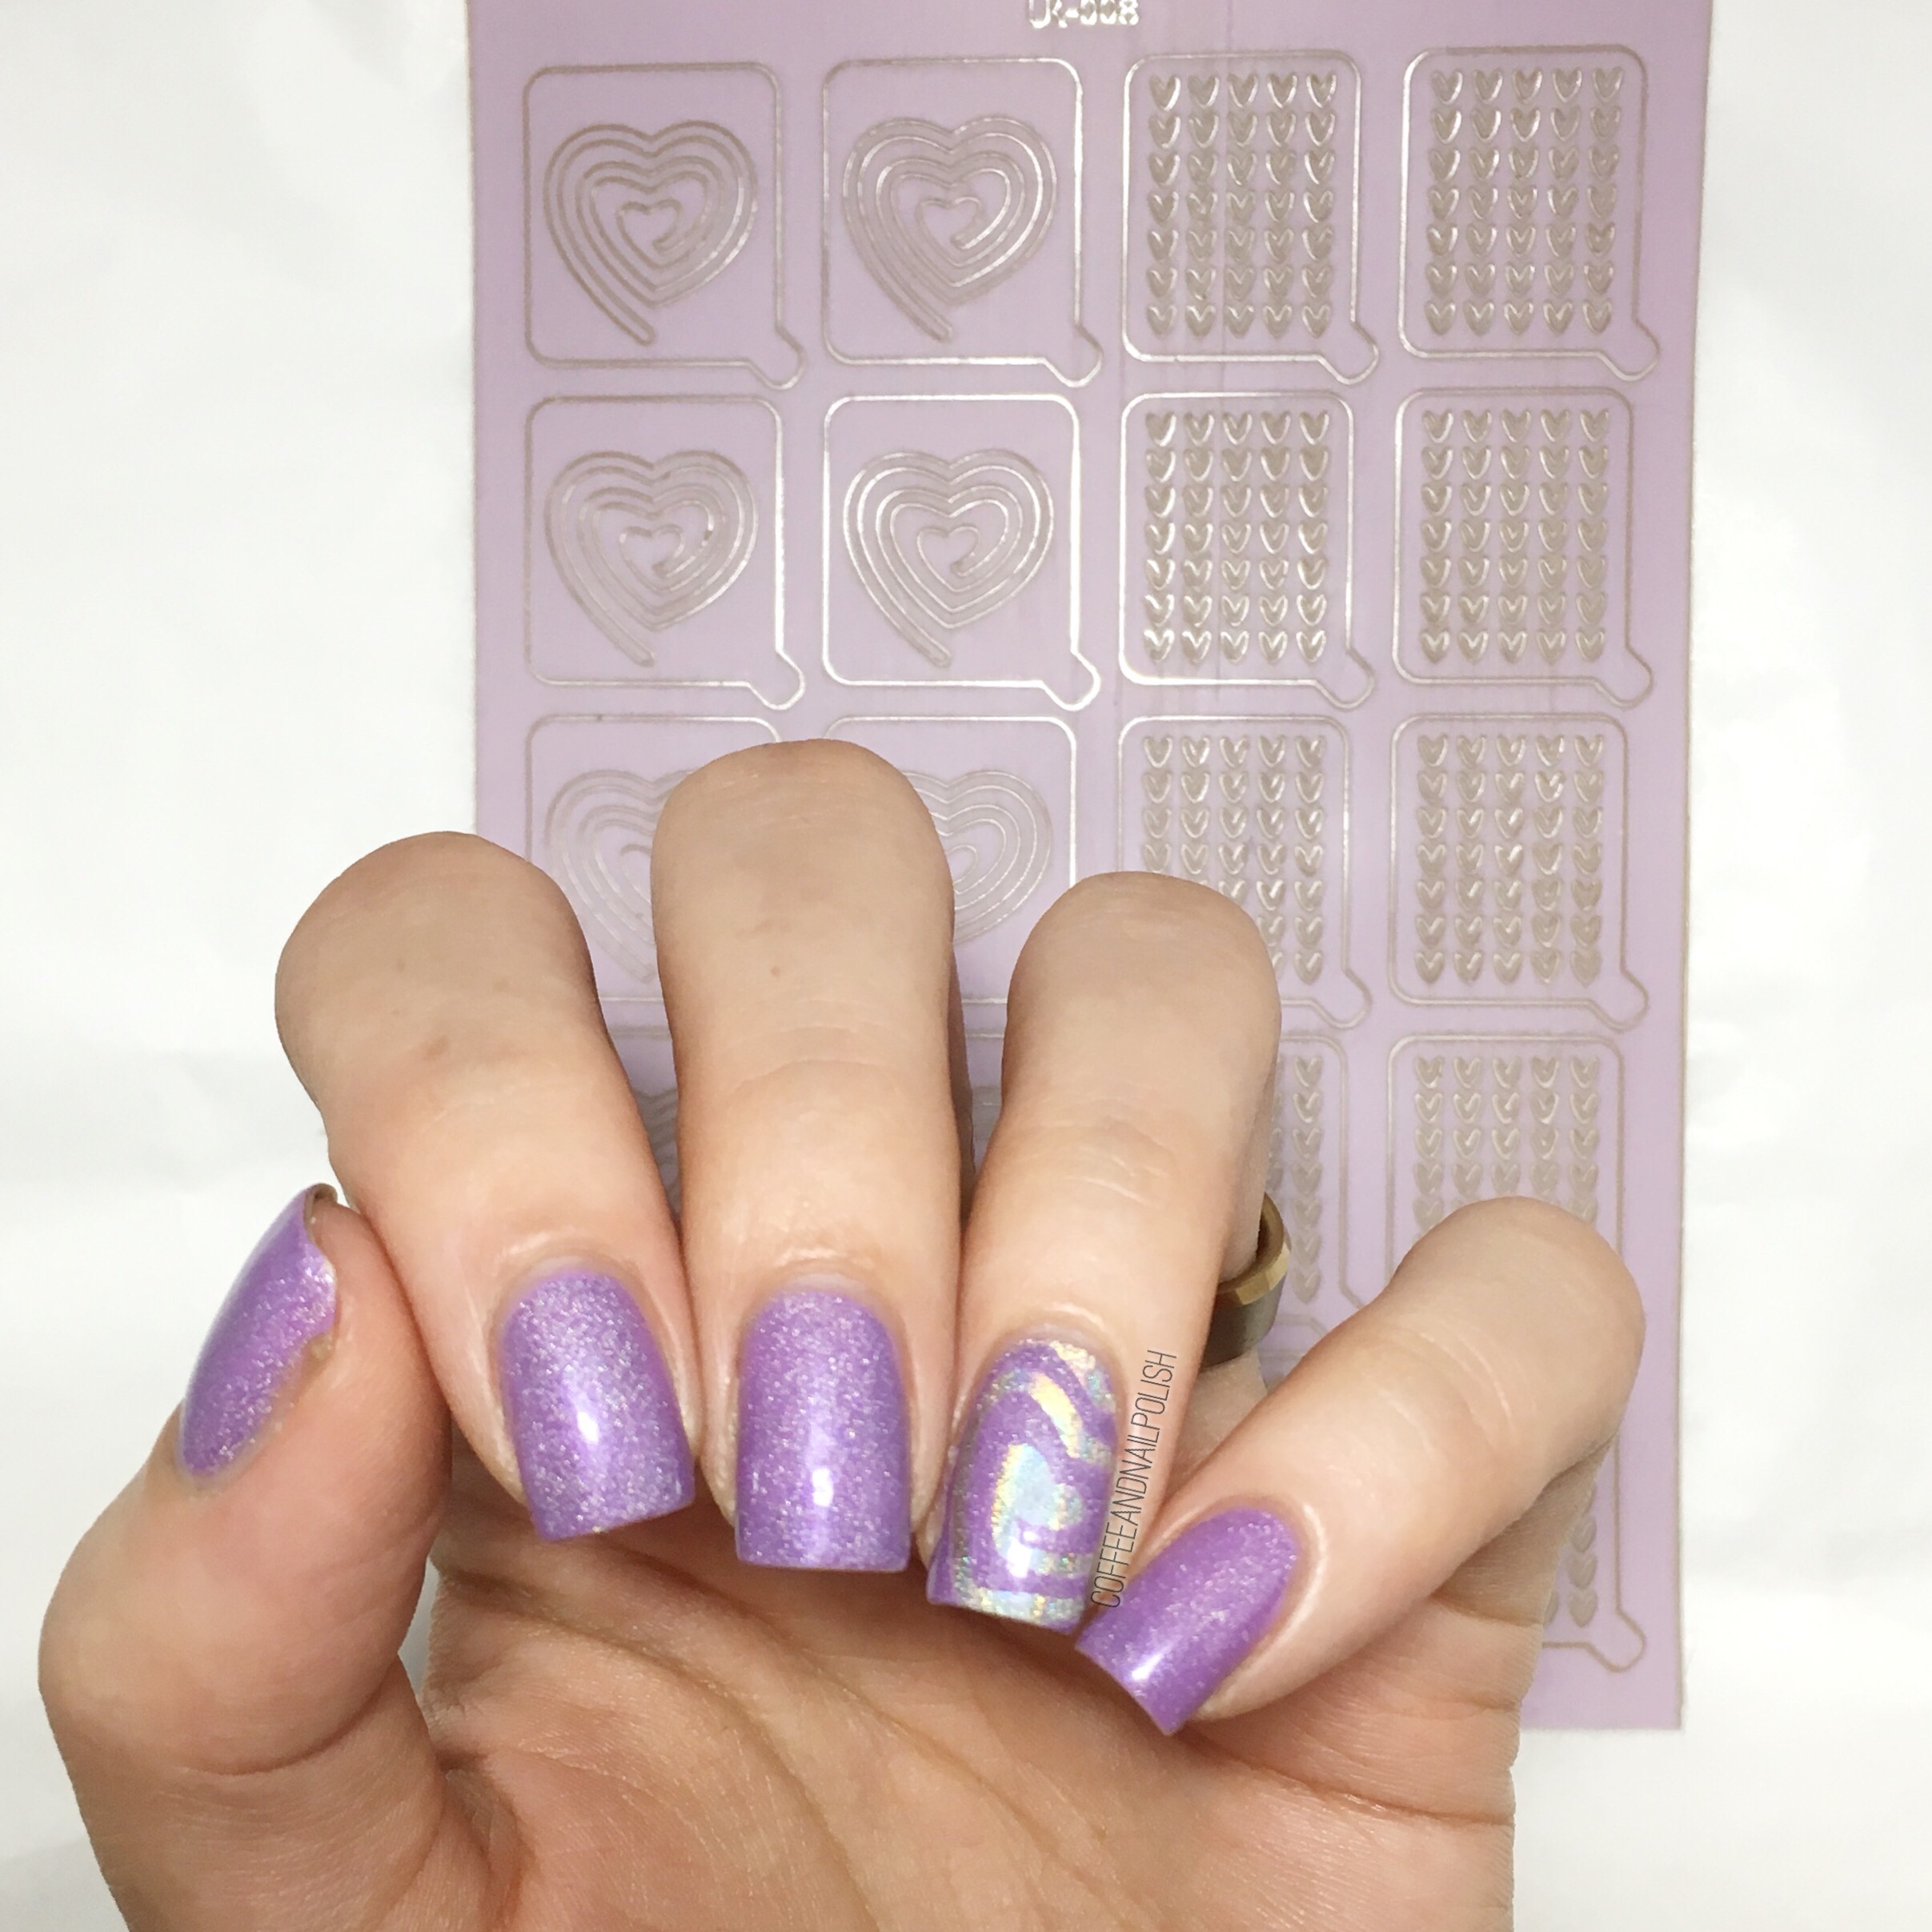
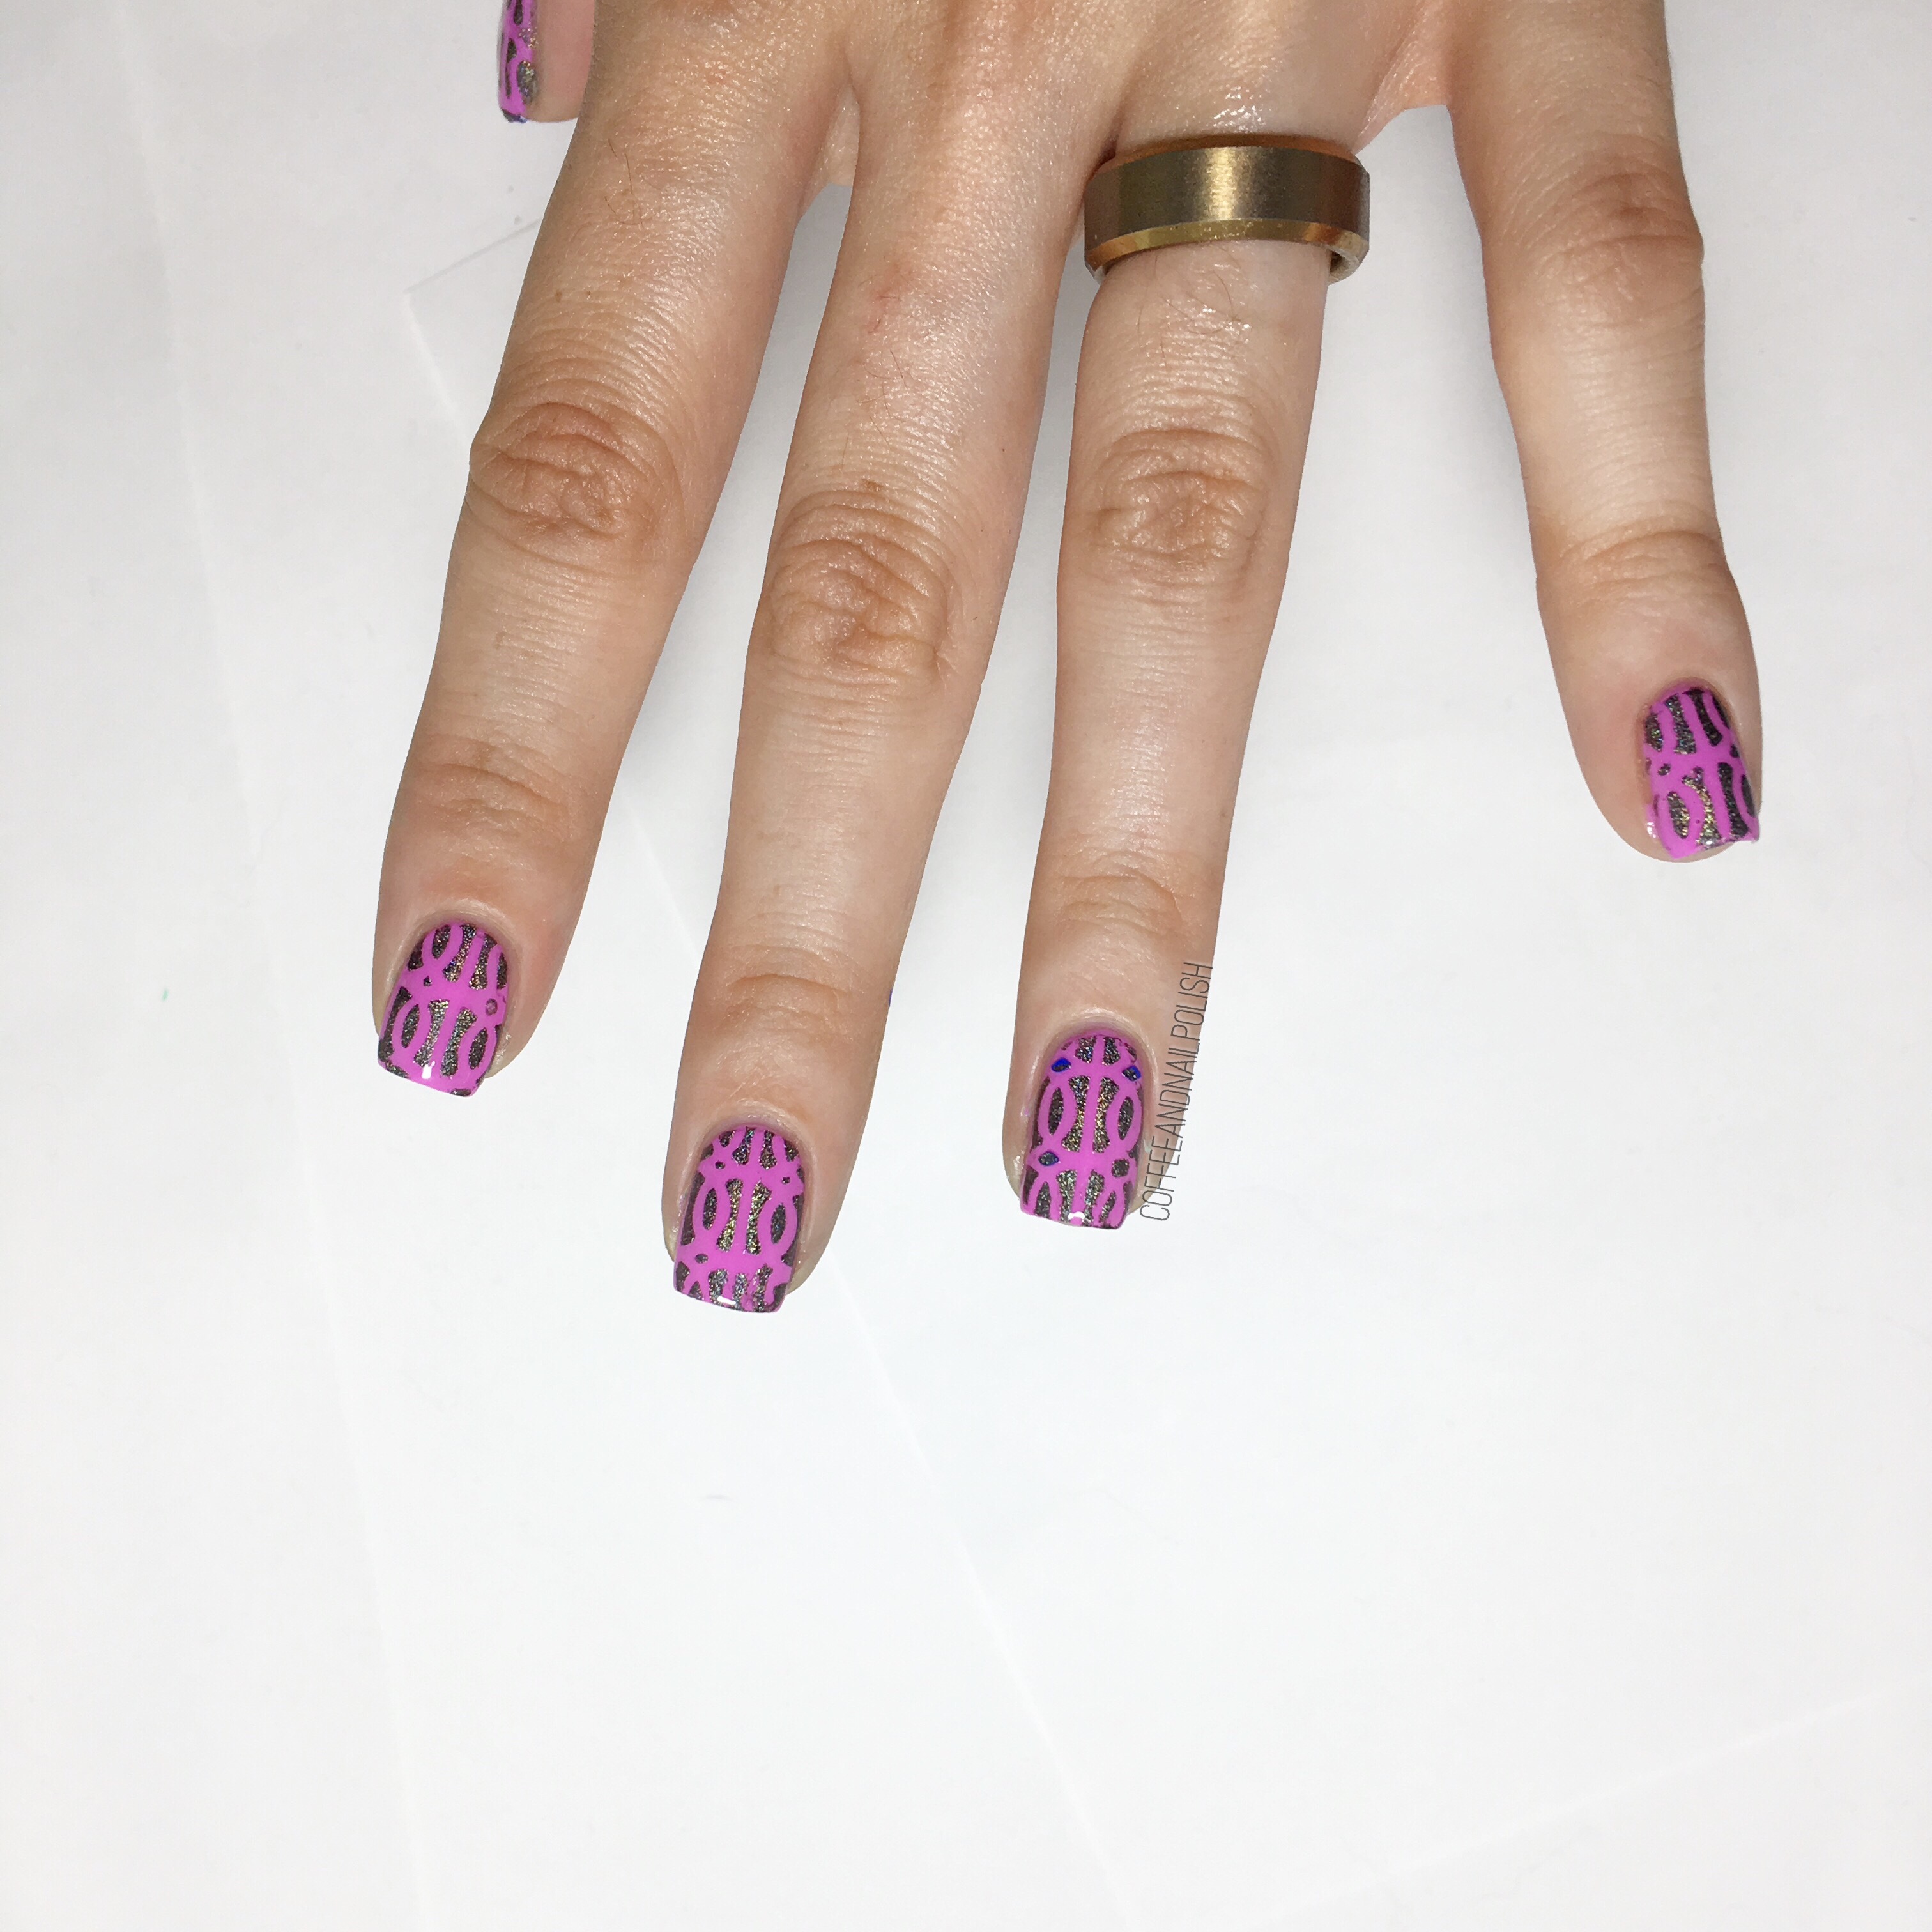
Confidence is a light lilac purple & of the three shades I revived it’s definitely my favourite. I managed to get it opaque & levelled in two even-ish coats. This is a great shade for those who want a fun gel colour, but still need something that can be worn everyday to work. It’s not boring like nude, but also isn’t crazy bright like a green. It also would make a great base to add nail art over top! 

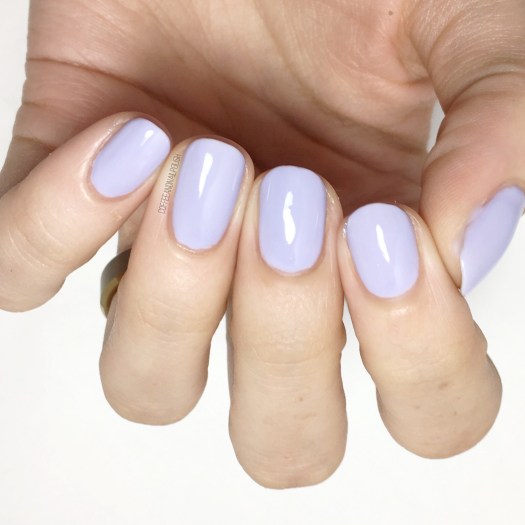
As far as lasting, I wore Confidence for almost two weeks while on vacation. I had good growth at my nail beds but the polish had held up pretty good with a little dulling to the shine. Removal was pretty easy–all you do is buff off the shine with a nail file & let it soak in foil wrapped nail polish pads for 10 minutes or so to loosen up the colour enough to peel/rub off. I personally didn’t have any trouble with removing the gel using these remover pads that I received along with the polishes. 
All in all, I think these are great colours for those looking to try out soak off gels, but are a little nervous. Because there is no base coat or top coat required, it’s great for a newbie. An even application takes a minute figure out, but once you do the end result not only looks great, but lasts much longer than your typical non gel polish. Check out Madam Glam’s crazy range of polish options yourself! They have even colour you could possibly dream of to chose from. 

*PR SAMPLE* Some of these items were sent to me for review. However, all opinions are my own. 
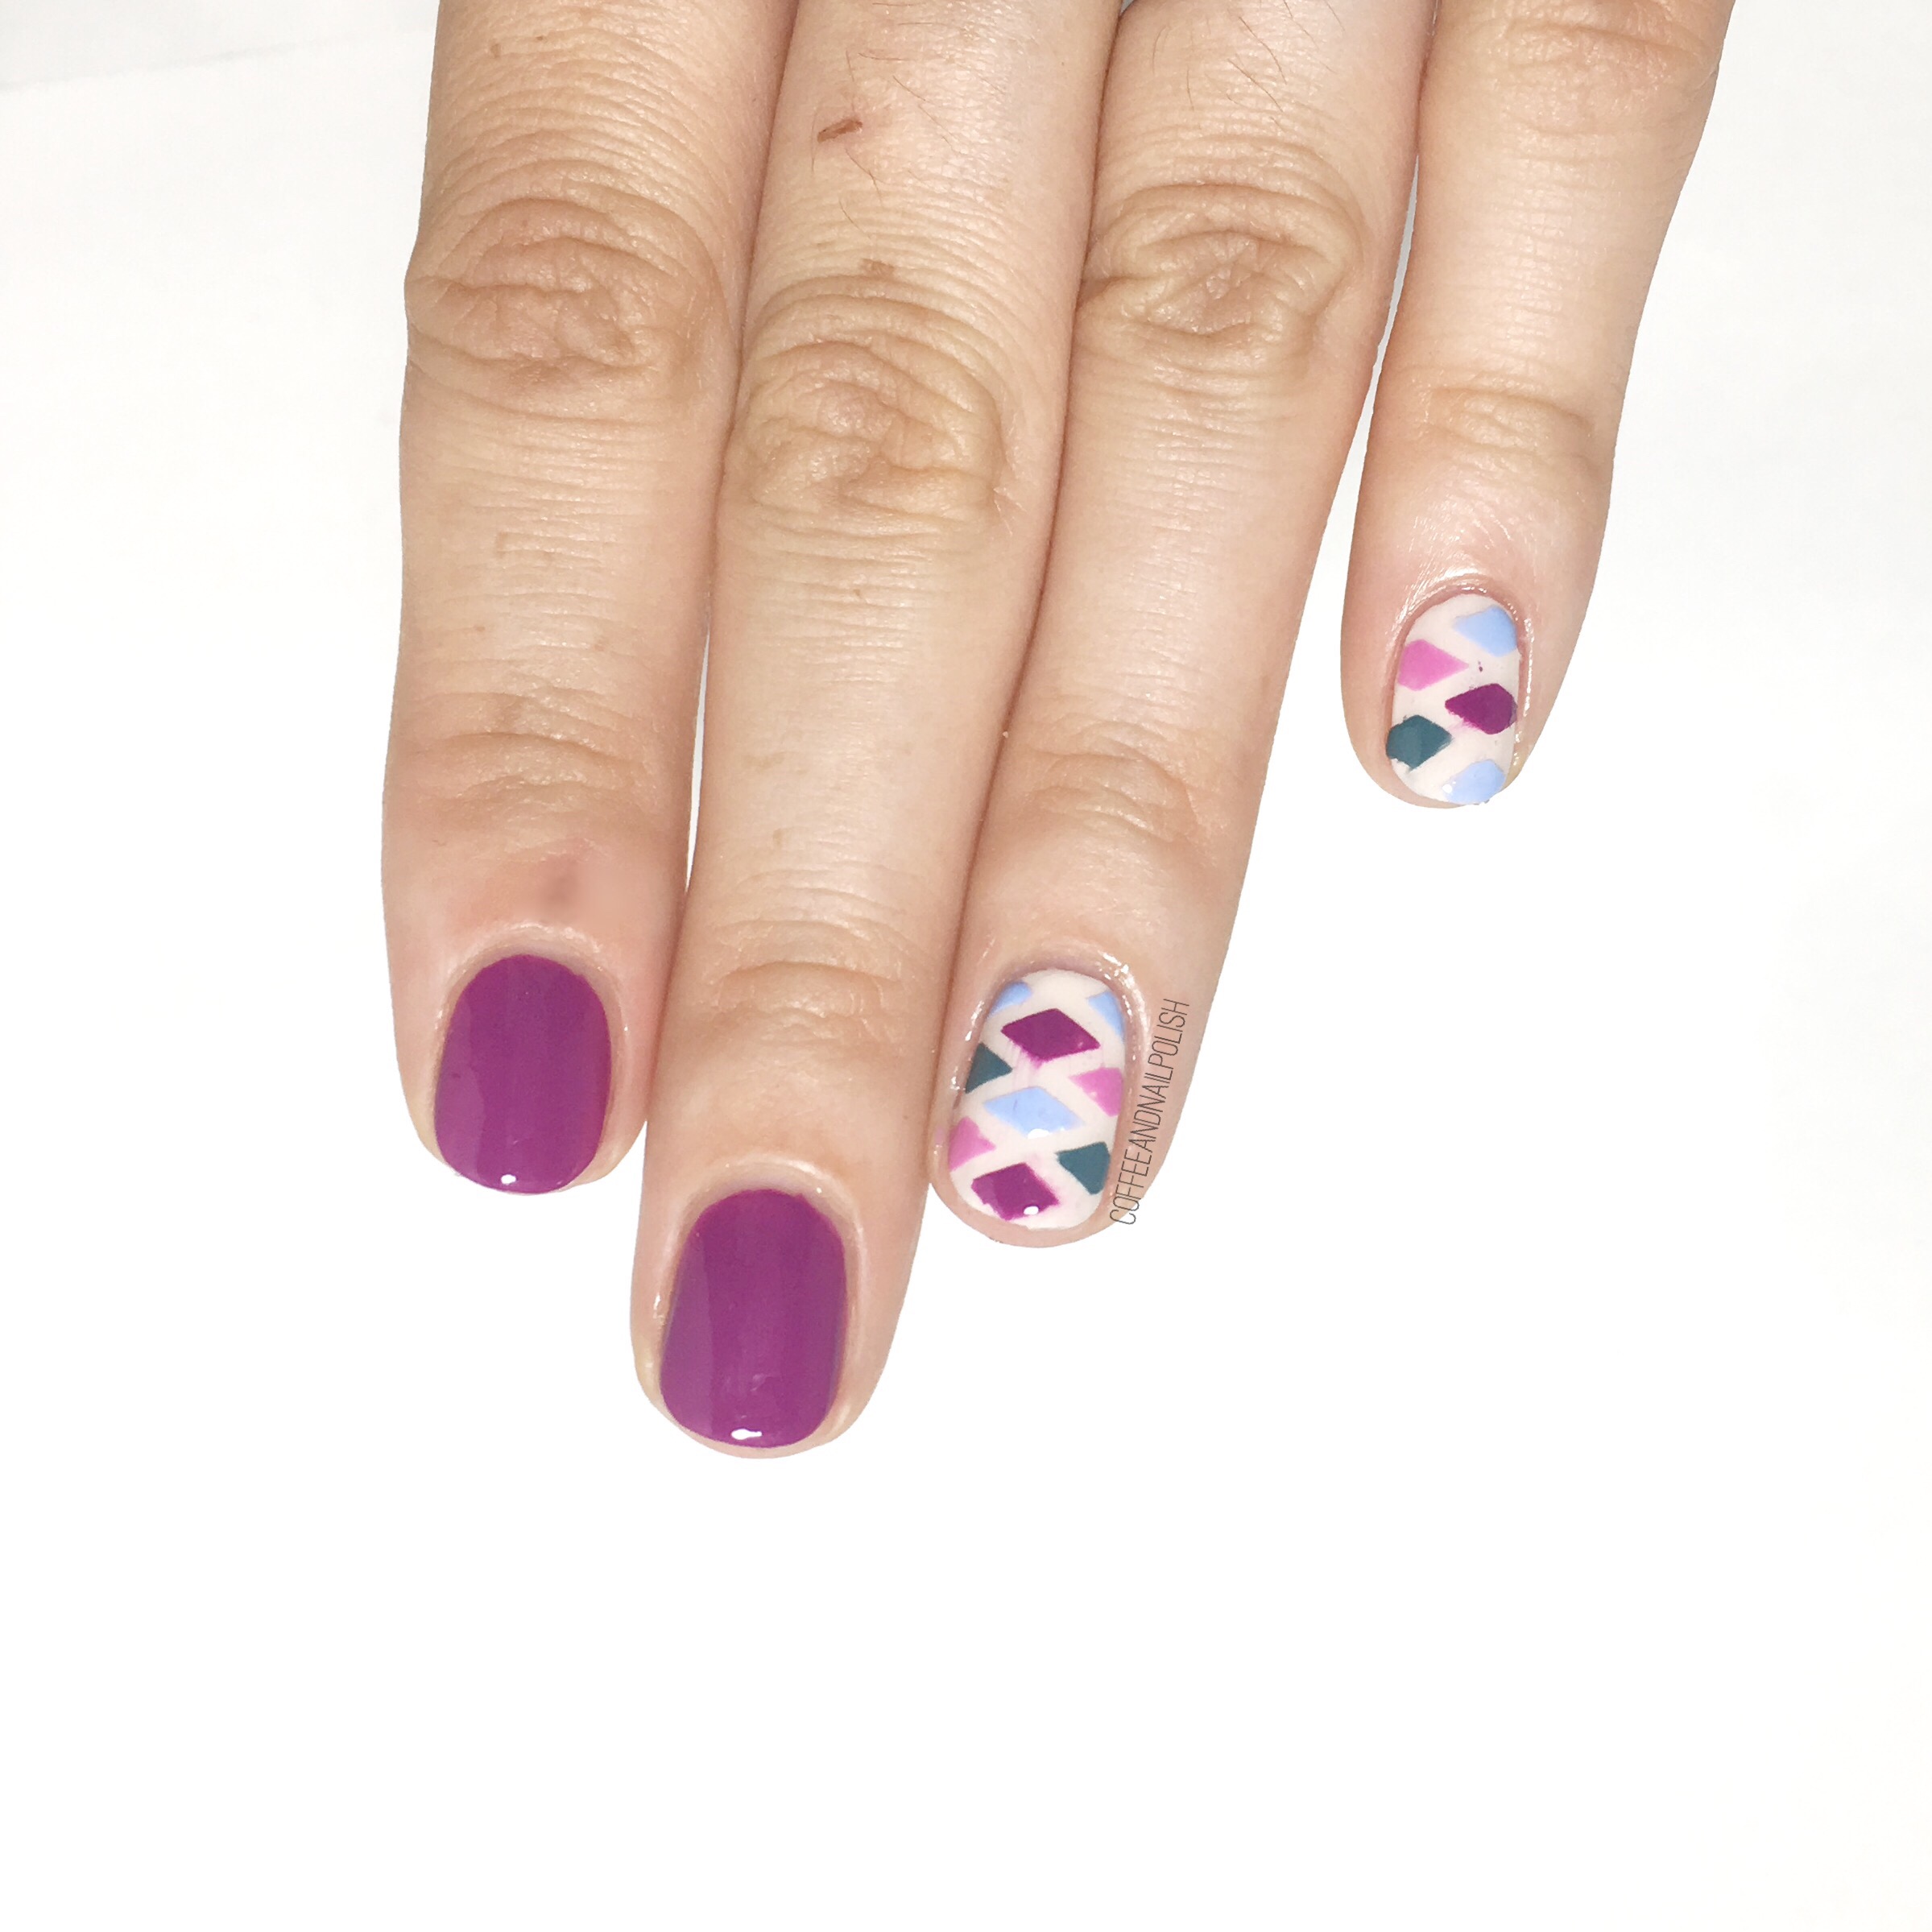
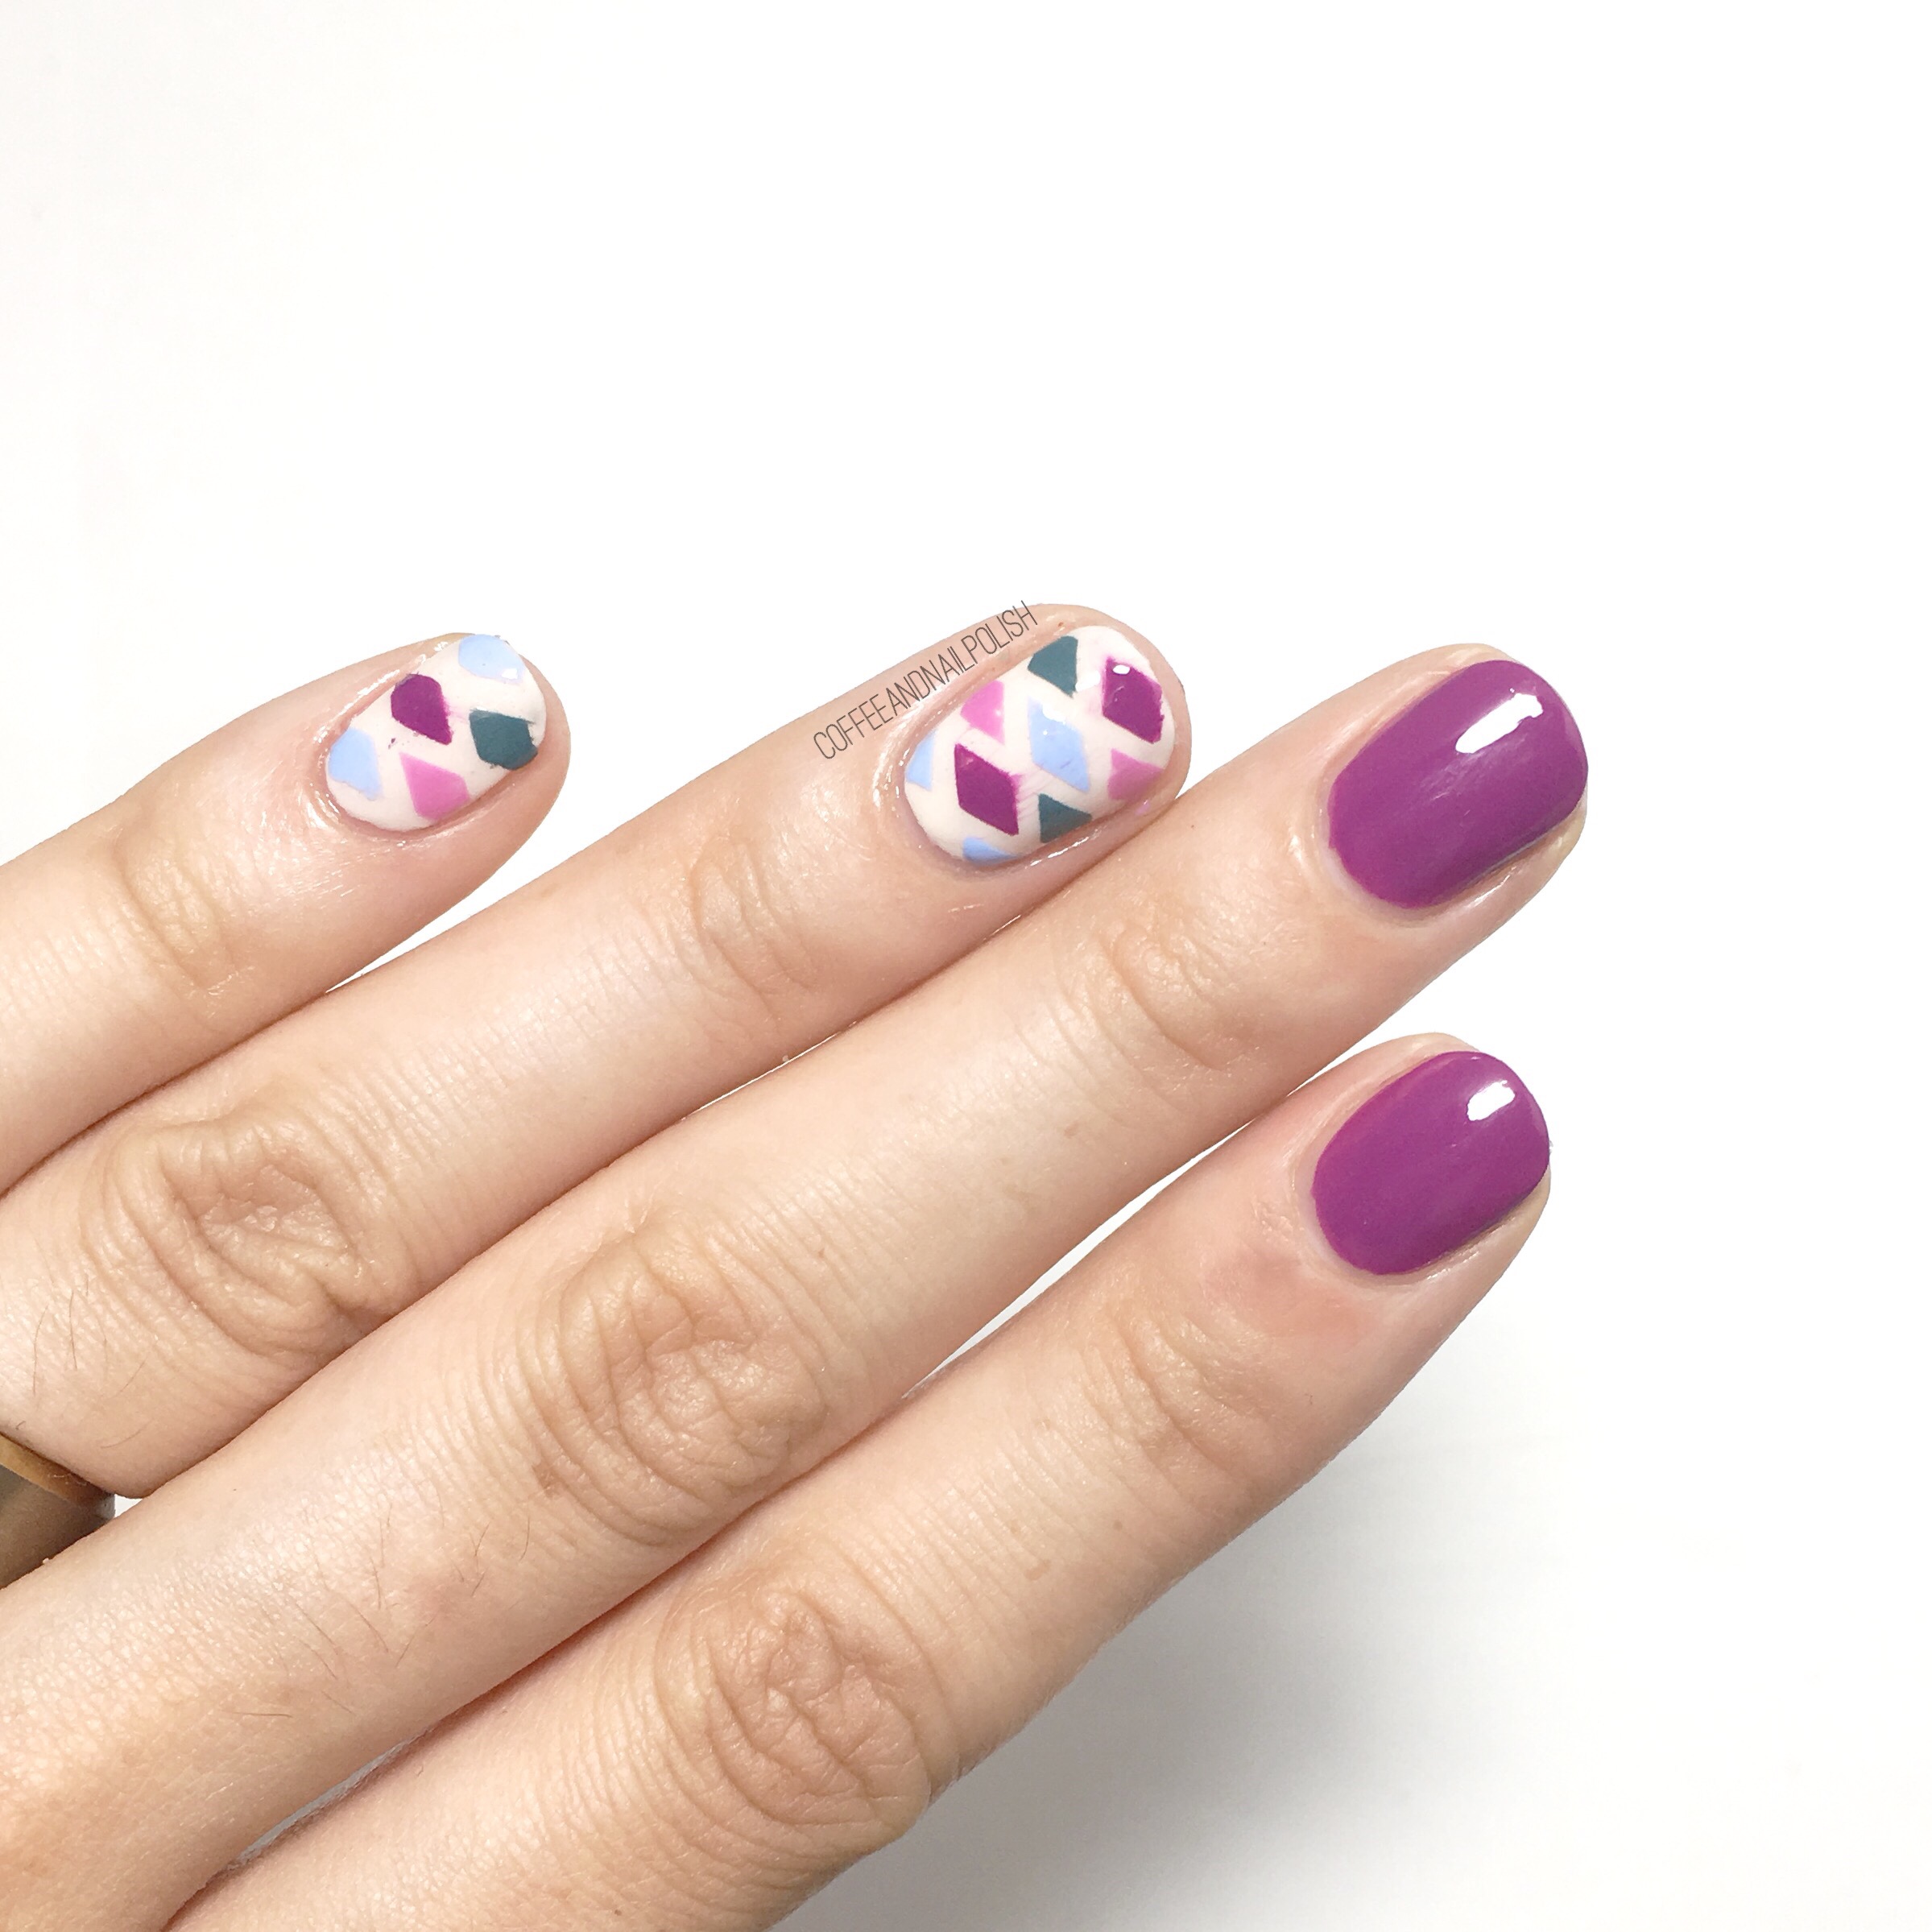
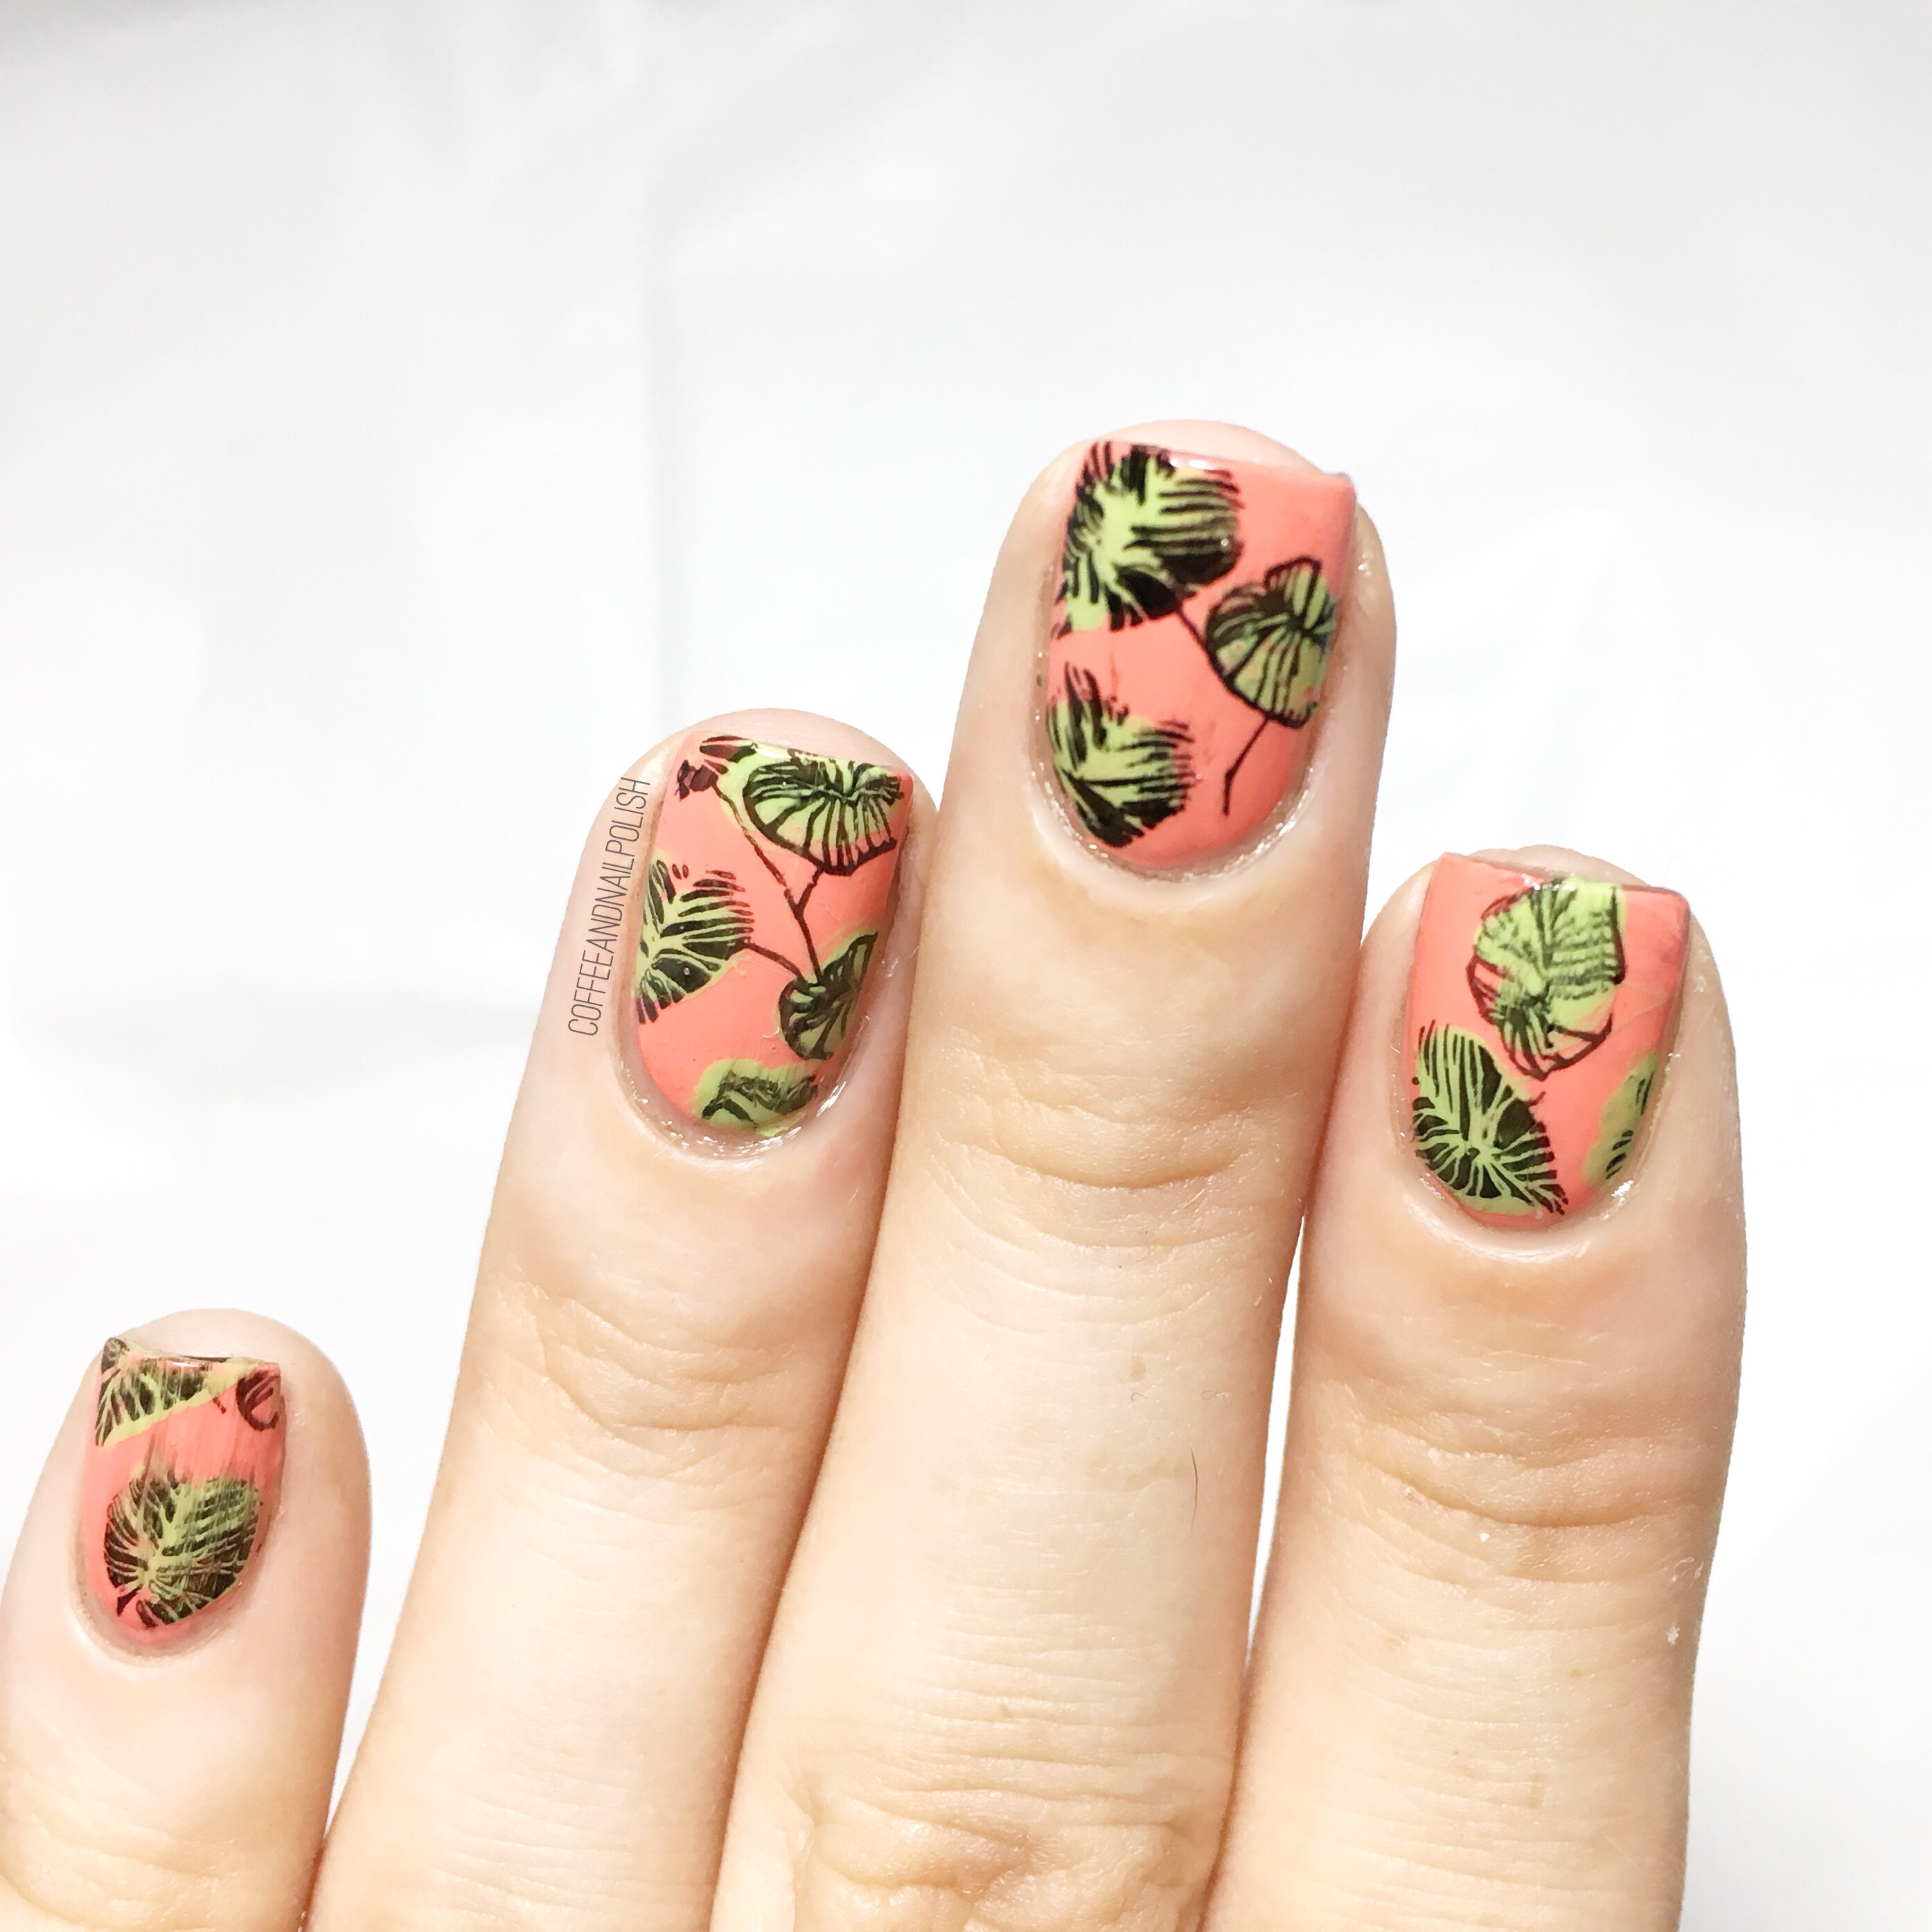
Born Pretty Store Review — BORN PRETTY Stamping Polish Plate Set Flower Leaf Tree Image Template item #39933. 


Hey lovelies! I know… I disappeared a bit. A lot has been going on since getting home from vacation. But that’s okay! Because today I have another review of one of the items I received for review from Born Pretty Store–the flower leaf image stamping plate set item #39933. 

As I’ve said with all my reviews, I still consider myself a stamping newbie but I definitely feel like I’ve gotten better with all this practice. For today’s nails I played around with the BORN PRETTY Stamping Polish Plate Set Flower Leaf Tree Image Template item #39933 which comes with two stamping plates (a large square plate, & a smaller round floral plate) plus two stamping polishes. 

For this design I used:

As I’ve written before, I find their is a learning curve that comes along with stamping. Or maybe just natural talent. Either way I think this is a great set for beginners because it has so many image options & comes with stamping polishes. Now personally I’m not a fan of the stamping polishes, not because they don’t stamp (they do!) but I just haven’t found a way to use them that doesn’t make a huge mess! If anyone has any tips, please please share because I love the end result. But if you’re just trying out stamping I think this set would be a good introduction for you. 

Personally I liked the larger square stamping plate over the smaller round plate. I tried reverse stamping a rose, but it didn’t turn out exactly how I hoped. That plate took a few more tries to get things right, but I did eventually accomplish my goal (even if it wasn’t the prettiest). The smaller plate definitely worked better for me when I was just stamping the image straight onto my nails, & not taking time to be fancy. 


All in all, I would definitely recommend this set to anyone itching to try out stamping, but would warn practice does make perfect. Don’t be frustrated if it takes a bit of time to get things looking perfect because the end result is worth it. 

If you’re interested in ordering this stamping set (or something else) from Born Pretty Store feel free to use my discount code COFFK31 to save 10% off any regular price items! I’ve been ordering from them for years, & I love the wide variety of products you can find for all your nail polish addict needs! 

Born Pretty Store Review — UR Sugar Adhesive Nail Vinyls Heart Pattern Nail Art item # 39723 


Good morning & happy Friday! Today I’m sharing another review of a fun item from Born Pretty Store. This time I’m reviewing some sugar adhesive heart pattern nail vinyls (item #39723). These vinyls comes with two different styles — the swirly hearts & the multiple hearts. Let’s consider this part one as I’m just reviewing the swirly hearts. 

For this manicure, I used:

  • Base Coat: L’Oréal All in One
  • Top Coat: Essie Speed Setter
  • Quo by ORLY Color Amp’d Paparazzi 
  • Layla Cosmetics Hologram Effect Mercury Twilight
  • UR Sugar Adhesive Nail Vinyls Heart Pattern item # 39723 

I’ve used a lot of nail vinyls over the last little while & I have to say these are definitely high up on the list. They are easy to peel off their backing & stick to the nail–easily adjustable but not so flimsy that they just stick together & crumple. Also they stick really, really well. I had zero issues with colour bleeding underneath. Also, you get two stencils in one with the heart swirls, which means you can do 20 nails total! I also really like that they have the useful little tab for pulling up your vinyl. 

All in all, I really like these vinyls. They’re easy to peel off & apply, they don’t bleed & they just work really well. Using nail vinyls can be difficult sometimes, but these make it easy! I also like the fact you get 2 different designs per sheet which can be used separately or combined together. I can definitely see myself using these again & would say anyone who is curious about trying out nail vinyls should give them a shot! 

& for fun—a shot of this holo manicure in action. 


If you’re interested in ordering these nail vinyls (or something else) from Born Pretty Store feel free to use my discount code COFFK31 to save 10% off any regular price items! I’ve been ordering from them for years, & I love the wide variety of products you can find for all your nail polish addict needs! 

Black Holo & Pink Ring Pattern Nails


Is anyone else amazed by the fact that June is almost over? It’s crazy how quickly time to flying by! Before you know in, we will all be rocking Christmas manis again! But in the mean time, I have some Summer worthy nails to show off. I pulled out more of my Xroma nail vinyl stencils because I’m kind of obsessed. I really like these ring stencils because they seem kind of Art Deco to me. 

For this manicure, I used:

  • Base Coat: L’Oréal All In One
  • Top Coat: Essie Speed Setter
  • OPI Two Timing The Zones
  • Layla Cosmetics Hologram Effect Black Flash 
  • Xroma Polish & Vinyls Rings Stencil

Is there anything better than holo nails on a sunny day? I’ve been pulling out my holo polishes a lot lately to embrace the sunshine we’ve been having. The Layla polishes I own especially show off the rainbow effect (which I love). I also really love using the dark holo over the right pink.  I was going for a kind of Art Deco look, & I feel like I was successful. 

What shades do you love wearing on Summery days? What do you think of these ring pattern stencils? Let me know in the comments below!