SWATCH SUNDAY — China Glaze Flip Flop Fantasy

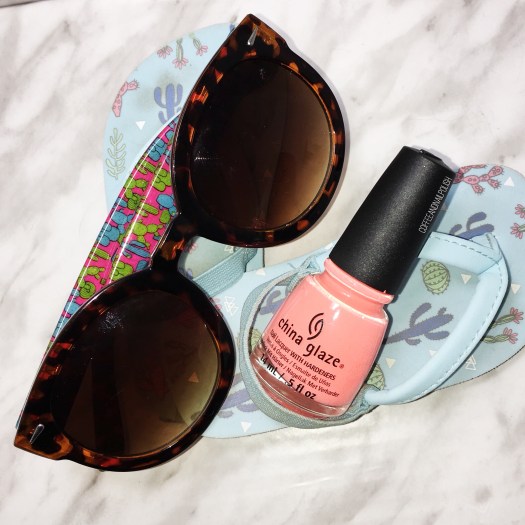
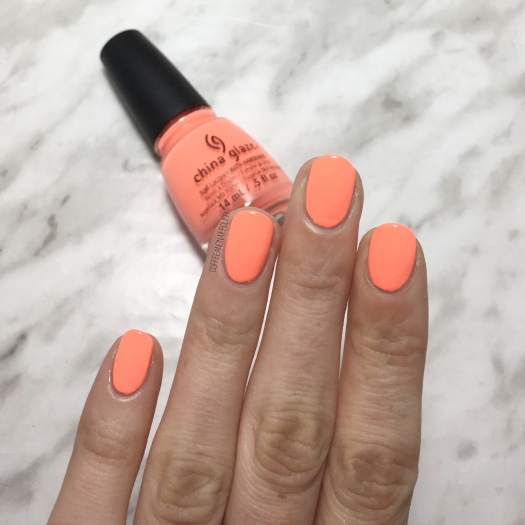
Hello lovelies! Today I’m sharing a fun polish for my Swatch Sunday pick! Today’s polish is cult favourite China Glaze Flip Flop Fantasy. Sadly I don’t have the original version of this shade which was a bit pinker, but I do have the new formulation & it’s one of my summer favourites. Who doesn’t love a blinding neon coral? The perfect shade for emphasizing that summer tan (or giving you the illusion of a tan when you spend 40 hours a week inside the mall).

Like most neons, Flip Flop Fantasy dries matte which means it dries quickly & can make application tricky. For my swatches below, I did Base Coat, & then two coats of Flip Flop Fantasy. When I started trying to photograph my swatches I realized how crazy the neon-ness was making my camera so I tried three different lighting situations to see if I could accurately capture the colour.

Normal light box lighting (daylight bulb):

Light box no lighting:

Natural lighting:

As you can see from above, my pictures outside my light box with natural lighting were the most colour accurate. The light box with daylight bulb made it look almost yellow-ish & without lighting it looked kind of peachy. #3 really shows off the neon colour true to that shade you see in the bottle. This is just one of those shades which is beautiful on the Nails, but hates to be photographed.

Down below I have my swatches, this time with glossy top coat (Seche Vive) added. I almost managed to capture the polish true to colour in my second photo!

Do you have China Glaze Flip Flop Fantasy in your stash… original formula or new? Share your thoughts on this shade down in the comments below!

SWATCH SUNDAY — Sally Hansen Miracle Gel Travel in Colour collection.

PR Sample — sent to me free for testing & review.

Happy Sunday lovelies! I know this week has been pretty quiet from me (60 hour work weeks will do that to a girl) but I have some beautiful & fun swatches to share with you today! Sally Hansen has recently come up with a new Miracle Gel Spring collection called Travel in Colour, “inspired by the vibrancy of California & the liveliness of Summer music festivals”. I thought with Coachella starting this weekend it was the perfect time to share these beautiful shades! Especially as I’m sitting in below freezing temperatures with two sweaters on, wishing I was wearing flower crowns & maxi dresses.

I’m all about the Spring vibes right now & anything to get me out of that post-Winter-but-it’s-not-quite-Spring-yet state of mind. I’ve been obsessively using this collection since I received it & it’s hands down my favourite Spring collection I’ve seen so far. There is a shade from every Spring moment you might have.

Continue reading “SWATCH SUNDAY — Sally Hansen Miracle Gel Travel in Colour collection.”

Spring-y Saran Wrap Nails

Happy Saturday! I know I don’t usually post on Saturdays, but since this week has been a bit weird, I thought I would throw an extra post in! Today is a recreation of a design I did originally 4 years ago. I’m still trying to summon Spring through my nail polish choices (although it doesn’t seem to be working very well) so I though these Saran wrap nails were a perfect choice! Now if only they’d encourage some warmer, sunnier days. Just give me a little bit of sunshine!☀️

For this manicure, the polishes I used were:

  • Base Coat: Quo by ORLY Breathable Kiss Me, I’m Kind
  • Top Coat: Seche Vive
  • Essie Mint Candy Apple
  • Essie Peach Side Babe
  • NailStuff.ca Mixed Decoration Nail Wheel in Gold
  • Plastic wrap (Saran Wrap) crinkled up
  • Edge Perfection Cuticle Barrier

How long has it been since I did any Saran Wrap Nails? A while for sure! I definitely love how bright & colourful these are! So Spring-y for sure. 🌸 Of course it looks nothing like Spring outside but at least my nails are ready for nicer days. Even if I’m still stuck wearing my Uggs outside because it snowed… again.

I also love how easy these were to do. I did used my Edge Perfection to protect my cuticles because I was in no mood for cuticle clean up! All I did was paint my base colour (Essie Mint Candy Apple) & then once it was dry-ish painted over top with my second colour (Essie Peach Side Babe) & dabbed my crinkled Saran Wrap into the wet polish to create the textured effect. So easy!

What do you think of these Spring-y Saran Wrap Nails? Do you love this colour combination. Working on doing a Spring polish pick post for this week’s Swatch Sunday post, so if you have any polish suggestions for your favourite Spring polish picks, let me know!

Happy Saturday lovelies! 💜

Throwback Thursday Halloween Nails

October is quickly speeding by, so I need to amp up my Halloween designs! 🎃

 This time I decided to recreate a design I did all the way back in 2014 (originally done with @mynailpolish_addiction as part of a bestie twin nail collab.) Even though I had spiders, I always thought this design was adorable so I wanted to recreate it. 

For this manicure, the polishes used were:

  • Base Coat: OPI Natural Nail Base Coat
  • Top Coat: Cutex Quick Dry Top Coat
  • L’Oréal Orange You Jealous?
  • Color Club Wham! Pow!
  • OPI I Cannoli Wear OPI 
  • Sally Hansen Hard To Get Black Heart
  • Essie No Place like Chrome
  • Revlon Holographic Pearls
  • Sally Hansen Xtreme Wear Pacific Blue
  • The Base Coat Spiderweb nail stencil 
  • Small detail brush from Bundle Monster
  • Latex Free Make Up Sponge 

I thought these nails were super cute when I did them originally, & I still think they’re super cute. & I definitely feel like they turned out a little less wonky this time around. Sometimes when I feel like my nails suck & I have no talent & I’m feeling especially hard on myself it’s nice to do these recreations to see how far I’ve come. I may not be the most insanely talented nail artist, but I’m hugely proud of how far I’ve come. 

What do you think of this Halloween design? Let me know your thoughts in the comments below! 

Halloween Glitter Gradient 

Who else is super excited for October? I am! Obviously I love Fall & the fact the weather has cooled down to much more seasonable temperatures (I got to wear my Uggs the other day!) has me pumped for the month to come. Thanksgiving, my birthday, & especially Halloween! 🎃 October is full of lots of fun, & I’m ready for all the accompanying nail art designs. So I thought I would start off with a quick & easy Halloween-esque glitter gradient. 

For this manicure, the polishes I used were:

  • Base Coat: OPI Natural Nail Base Coat
  • Top Coat: Sally Hansen Diamond Flash
  • OPI Lincoln Park After Dark
  • Sinful Colors Pumpkin Spice
  • Latex Free Make Up Sponge

Please excuse the bubbles in my mani… my top coat is reaching the end of its life & starting to get a little thick & bubbly. Thankfully the glitter hides a lot of the bubbles. Even still, I love this combo—it just screams Halloween to me without being too over the top! It’s also a super easy design that anyone can do without too much fuss. 

Sinful Colors Pumpkin Spice is such a great Fall glitter shade, & not just because it caters to my latte loving inner basic white girl! I bought my bottle a few (I think close to 3) years ago, but I saw it at my local Lawtons yesterday so definitely check in store if you’re looking for it! I believe it’s a seasonal shade that Sinful Colors releases every year. 

I have a whole list of Halloween manicures I’m planning (thank you Pinterest!) so stay tuned for lots of fun nail art designs. Also still trying to come up with something fun to wear on my birthday. So if you have any design suggestions, let me know in the comments below!