Hello lovelies & happy Sunday!
I’m going to be honest — originally I had a different polish plan for this Sunday — new shades from the Sally Hansen Good. Kind. Pure. reformulation, as well as the OPI Nature Strong shades featured in my previous post. But I’ve been struggling with the cold from Hell this week, which means I’ve not been up to much, especially swatching 9 polishes, & wasn’t able to get the shades swatched.
I didn’t want to skip this week entirely though, so I decided why not go with my all time favourite OPI red: OPI Race Red.

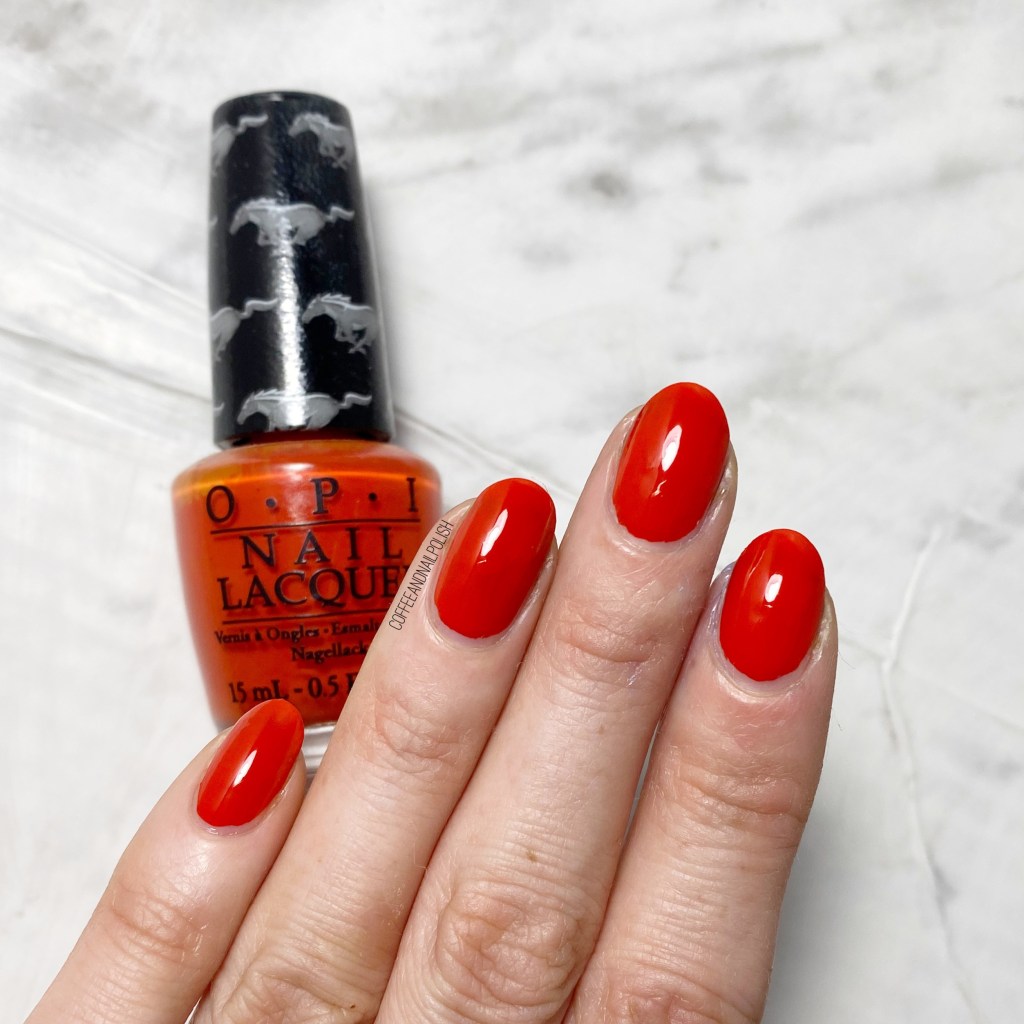
2 coats, no top coat
This collection was originally released as part of the 2014 OPI Mustang Collection. I have a few of the shades from the collection in my stash that I’ve picked up over the years, either on clearance or at the Dollarama, but Race Red has always been my favourite. In fact, it’s probably one of my favourite red nail polishes of all time.
The colour itself is an orange leaning red. It’s a beautiful cream that applies in 2 easy smooth coats. Even after 8 years, & a whole lot of wears, it still applies like perfection for me.


Look how pretty that colour is! It’s actually very similar to the colour of our Suzuki, which is another reason why I love this shade so much. But my love of red nail polish knows no bounds, & this is no secret.
Obviously, my bottle is looking a little dusty & worn, but the polish is still perfection. My only sadness is that I only ever bought one bottle of this beauty.

As mentioned, this OPI Mustang Collection was released circa 2014, so these shades have long since gone out of mainstream circulation. I did find a few spots online, like Ebay, with bottles listed. I’m definitely going to need to find myself a dupe soon, because I’ll be very sad when my polish officially runs out.
What do you think about this OPI shade? Do you have OPI Race Red in your stash? What is your favourite OPI shade? Let me know down in the comments below!
Also stay tuned this week, because I’m determined to get those other shades swatches this week, which might mean this whole week will see some beautiful shades featured on this page!