SWATCH SUNDAY — Maybelline Color Show Blue Marks The Spot

Hello lovelies & happy Sunday!

It’s another snowy Sunday here, which is not what I was hoping for. But it matches well with the nail polish I picked for this week’s Swatch Sunday pick: Maybelline Color Show Blue Marks The Spot. This shade is actually a super oldie, going back to (I think) 2013! I picked my bottle up on Clearance a few years ago, after Maybelline had stopped making the Color Show brand.

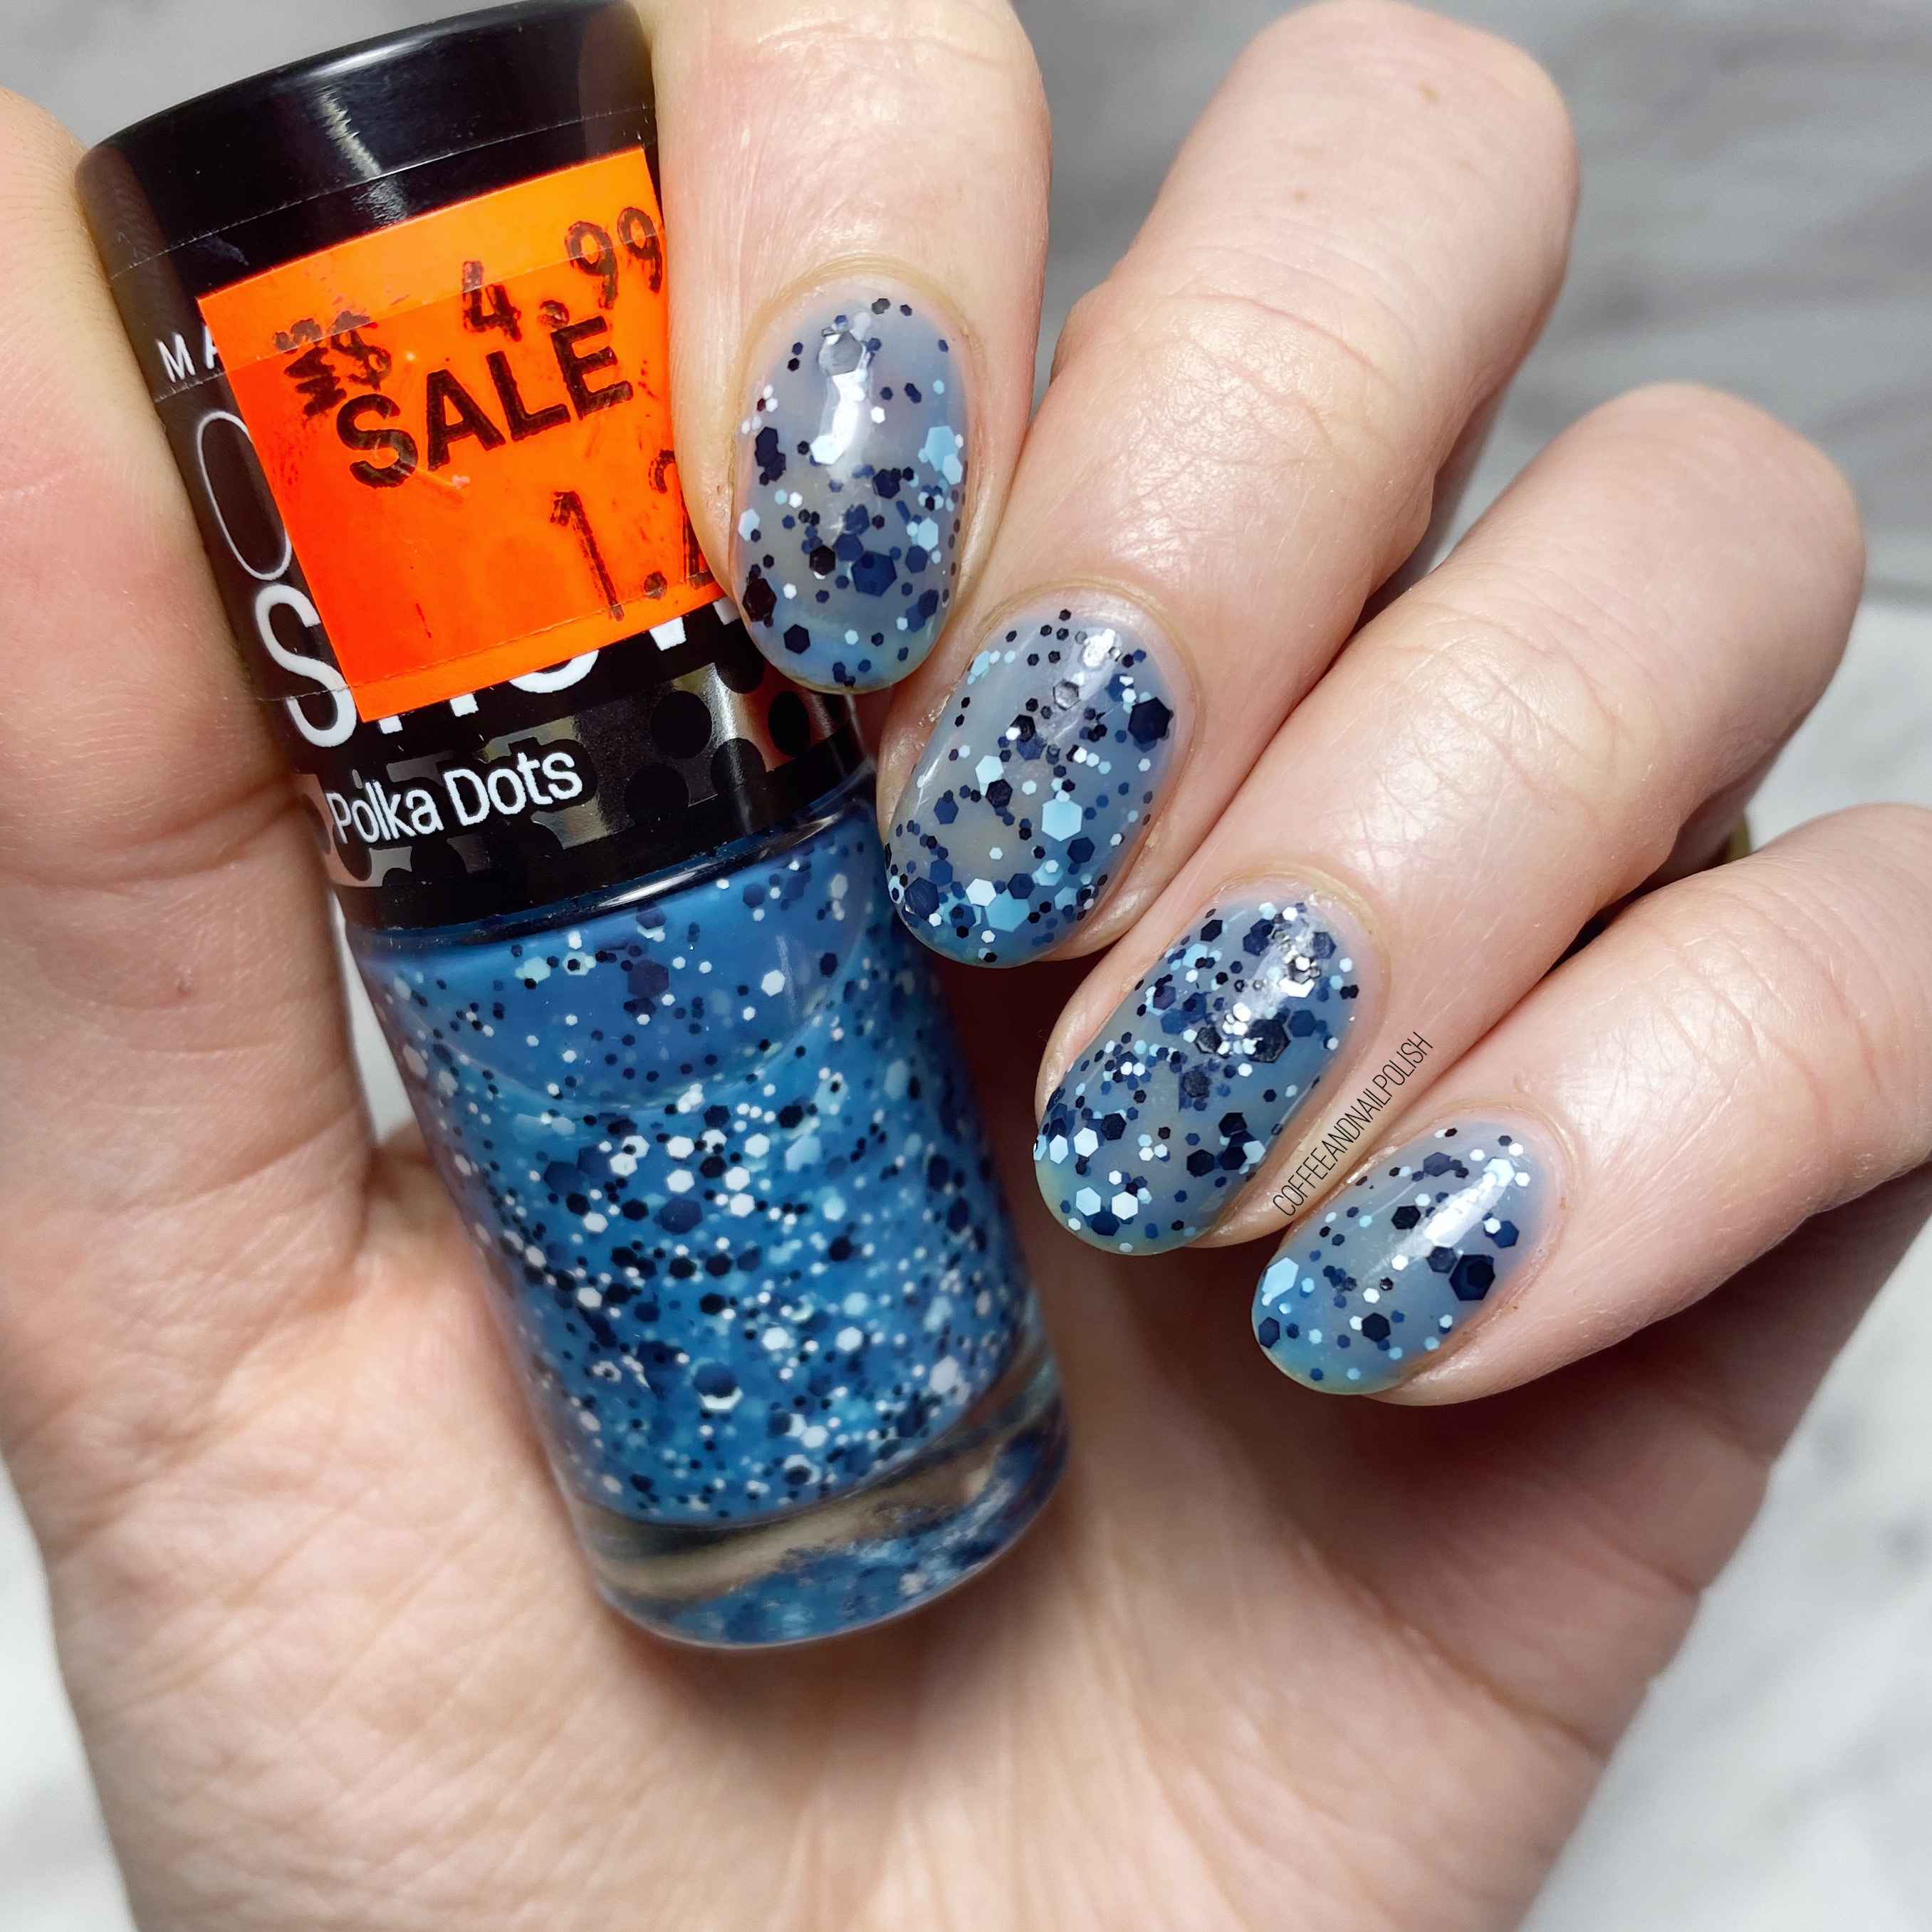
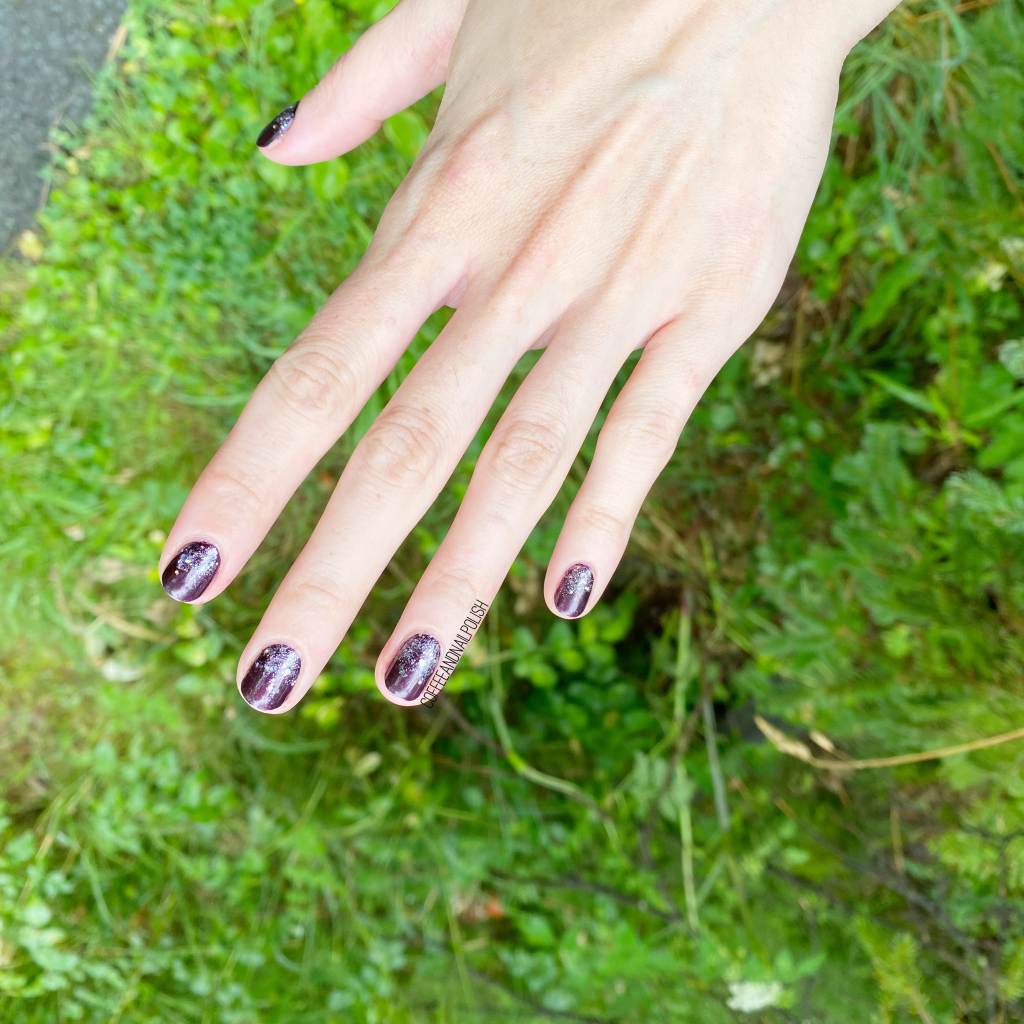
3 coats, no Top Coat.

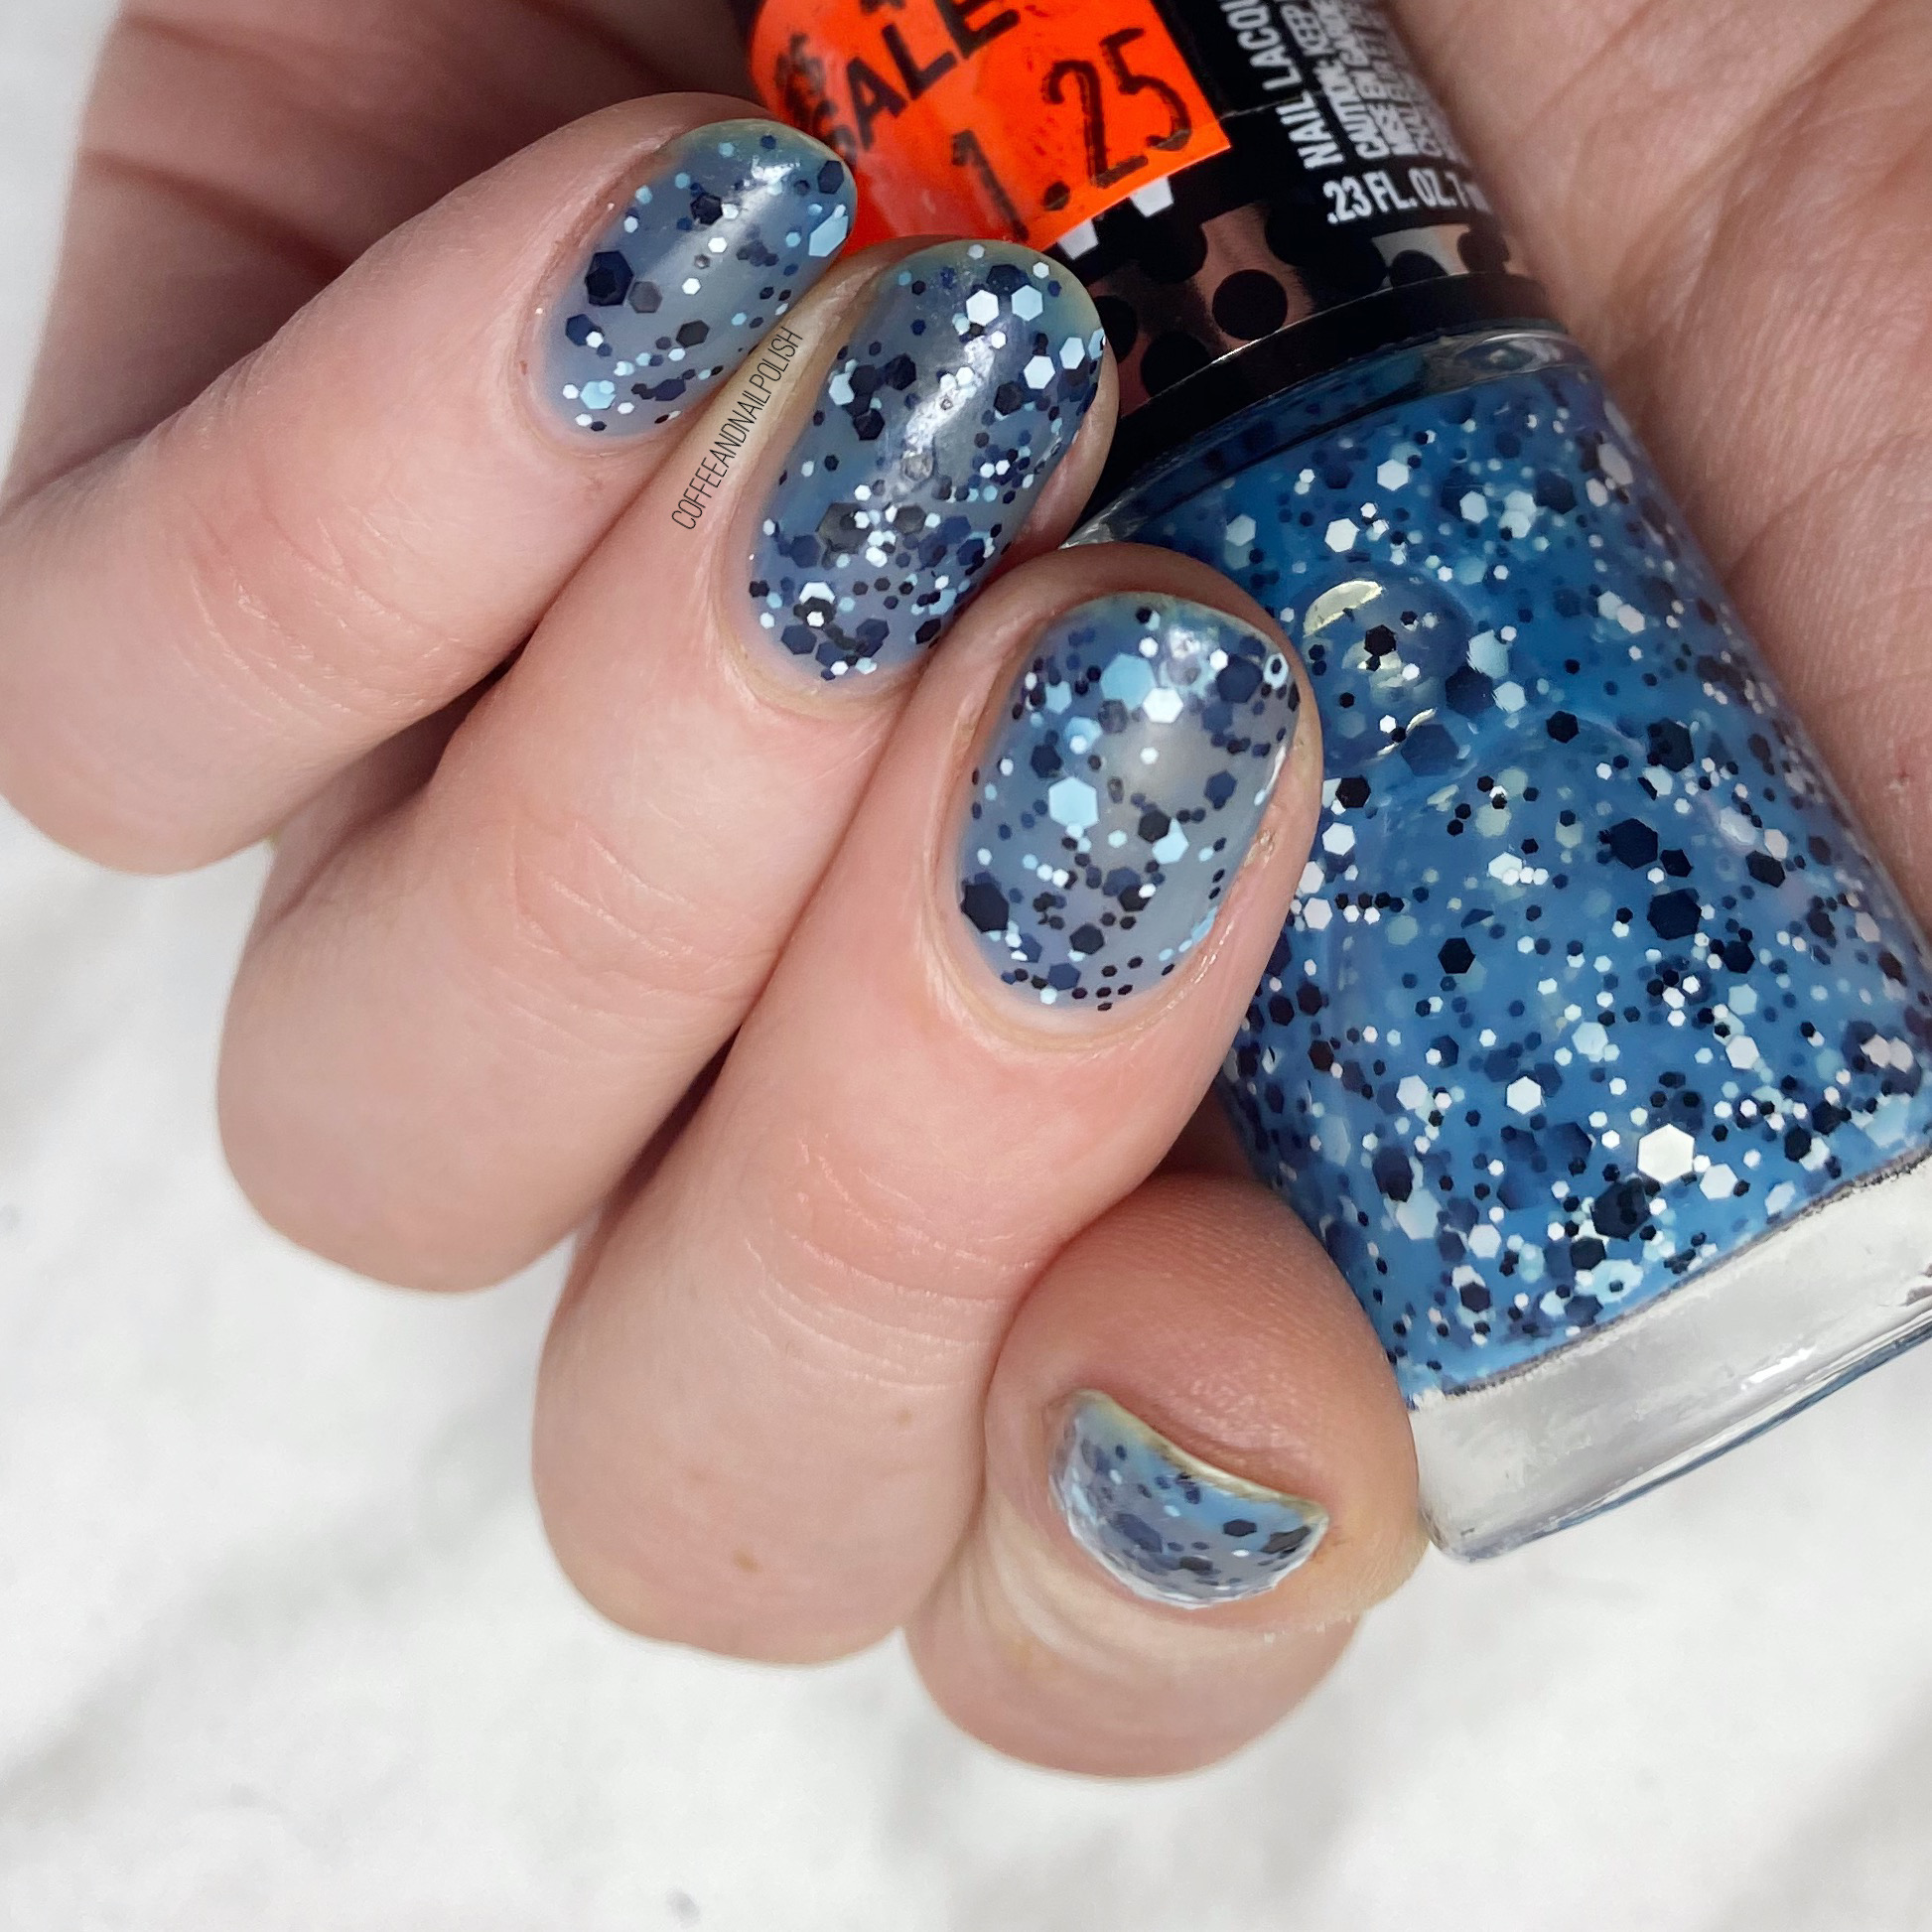
The first thing about Blue Marks The Spot is that it is very, very thin. This is 3 coats of polish, & you can still see the nail below. I’m not sure how many coats you would actually need for full opacity, but I’m going to guess it’s more than I would want to do haha. You could definitely do a white or blue base, though, if you wanted to the sheerness.

The formula is sheer, like I said, but other than that it’s not too hard to work with. The coats dry quickly, & the glitters are very well dispersed so you don’t have to worry about digging around trying to find them.

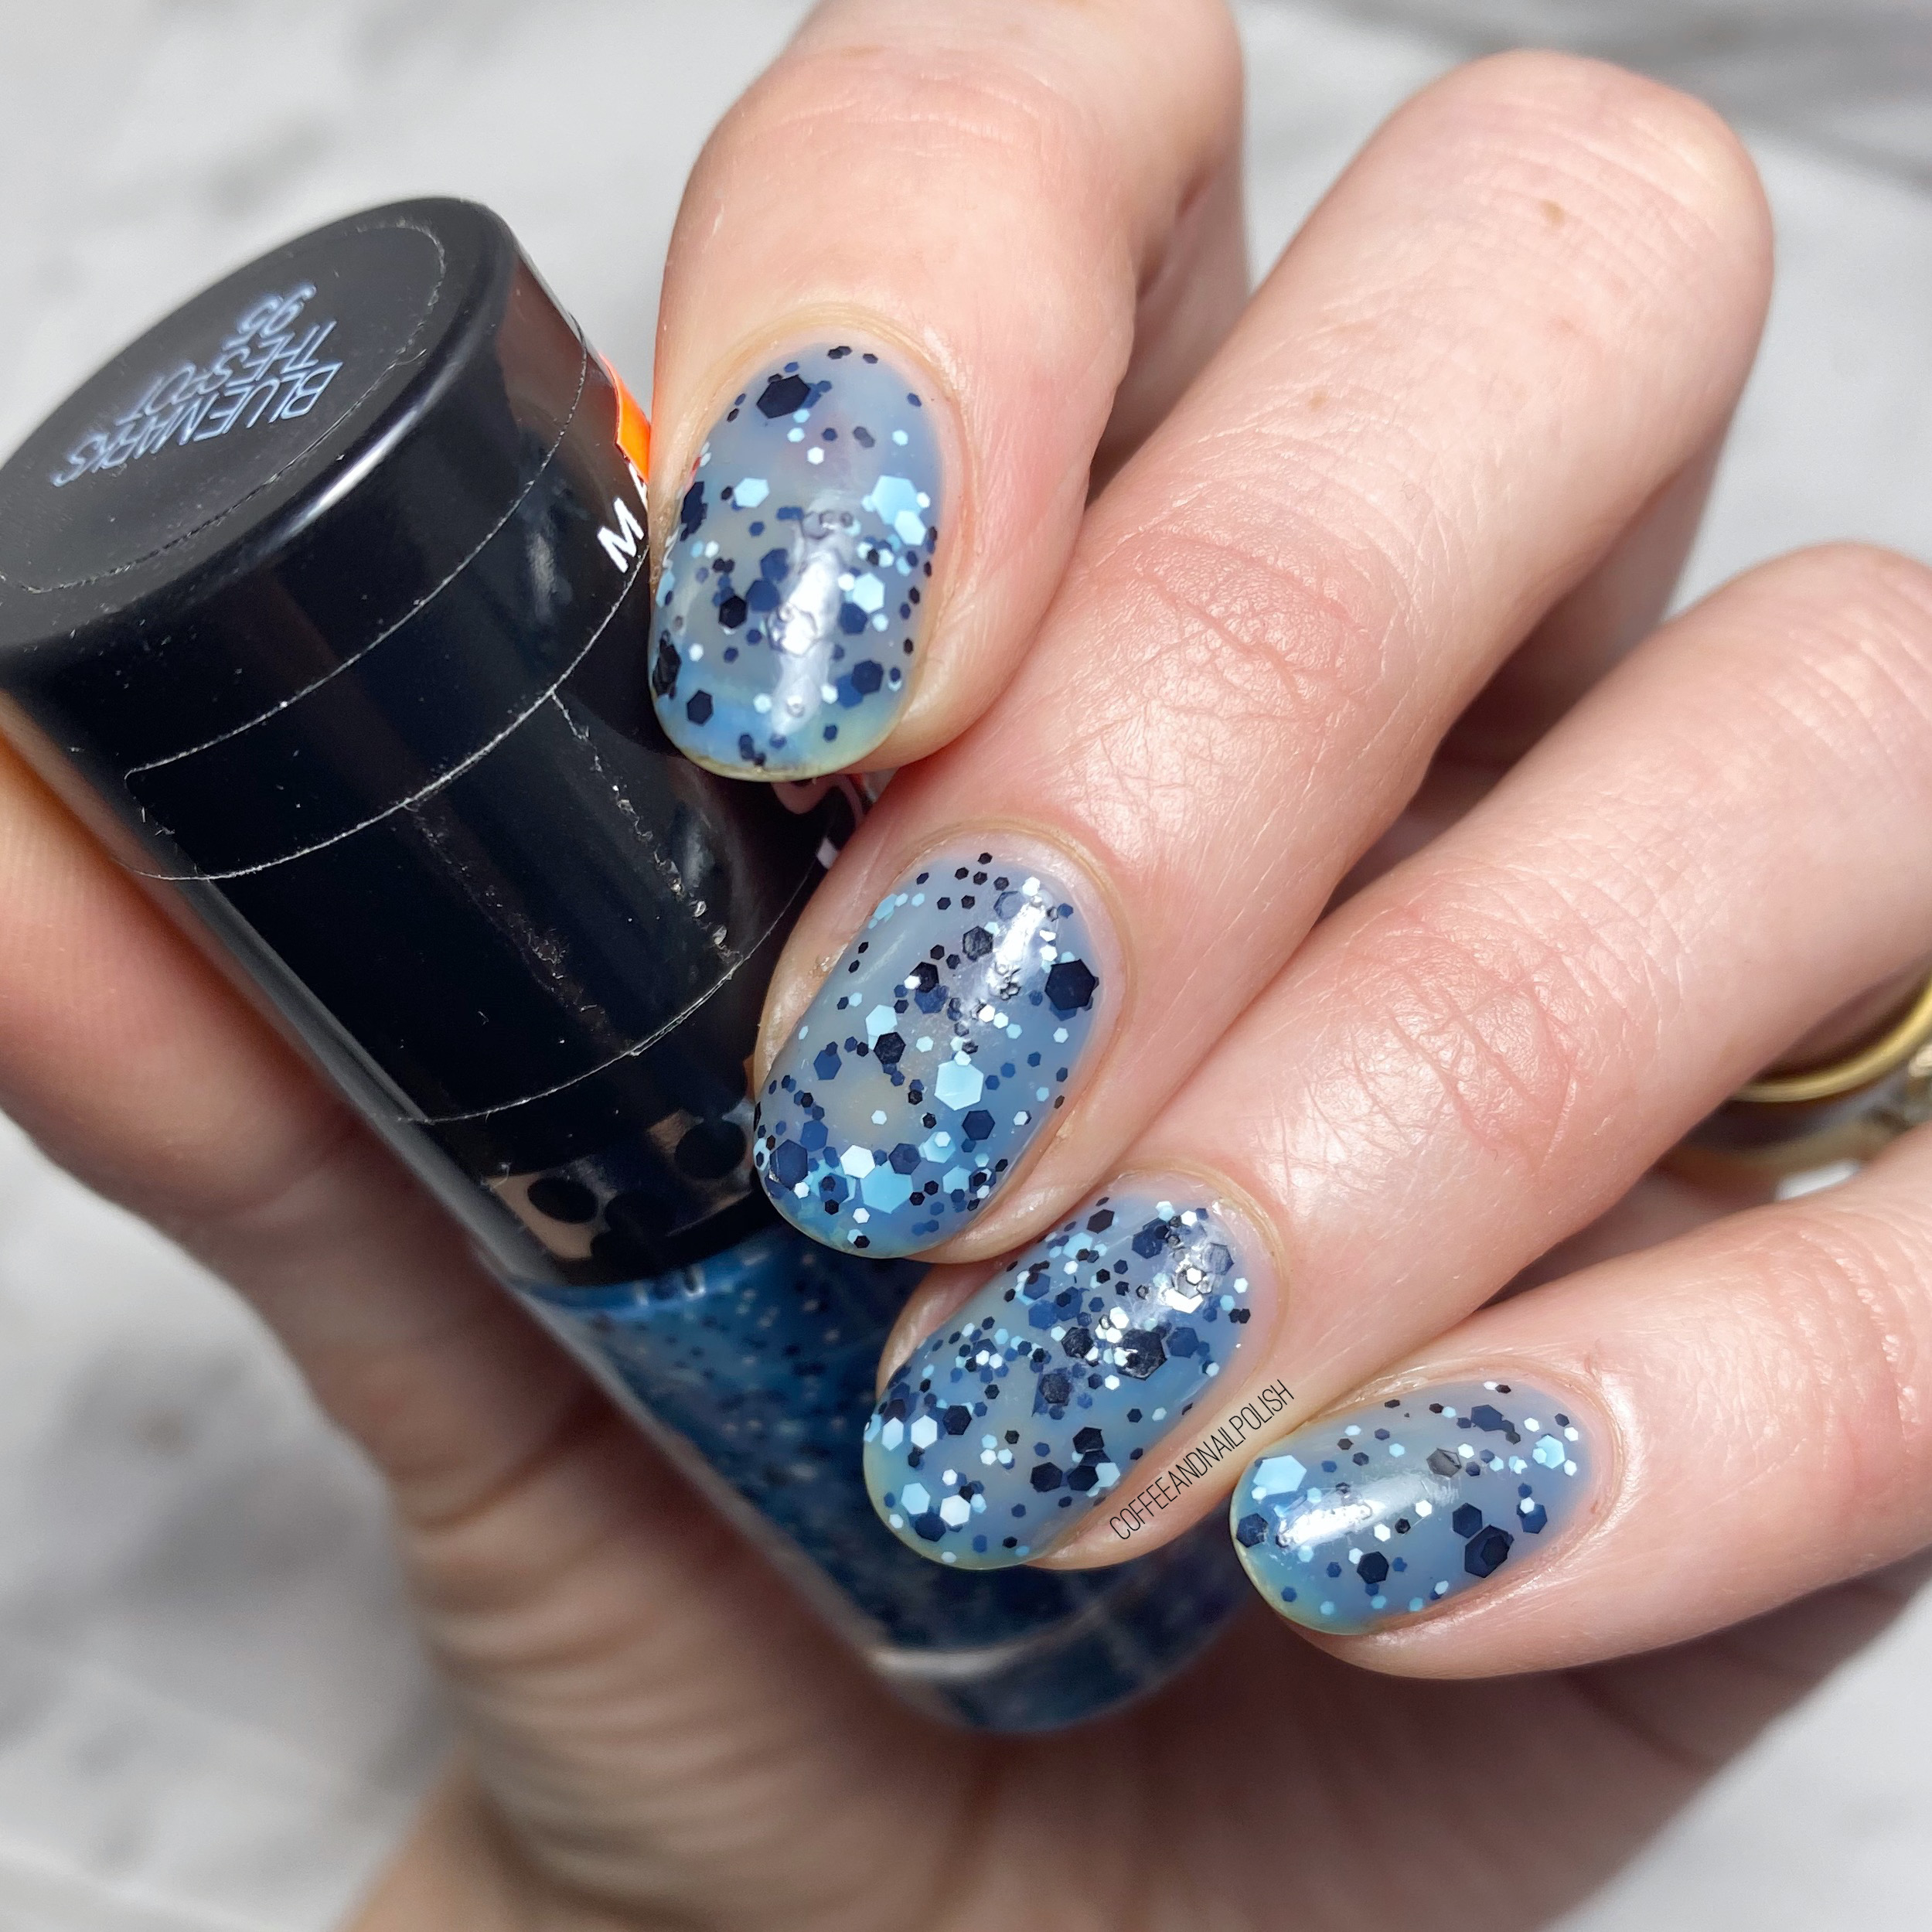
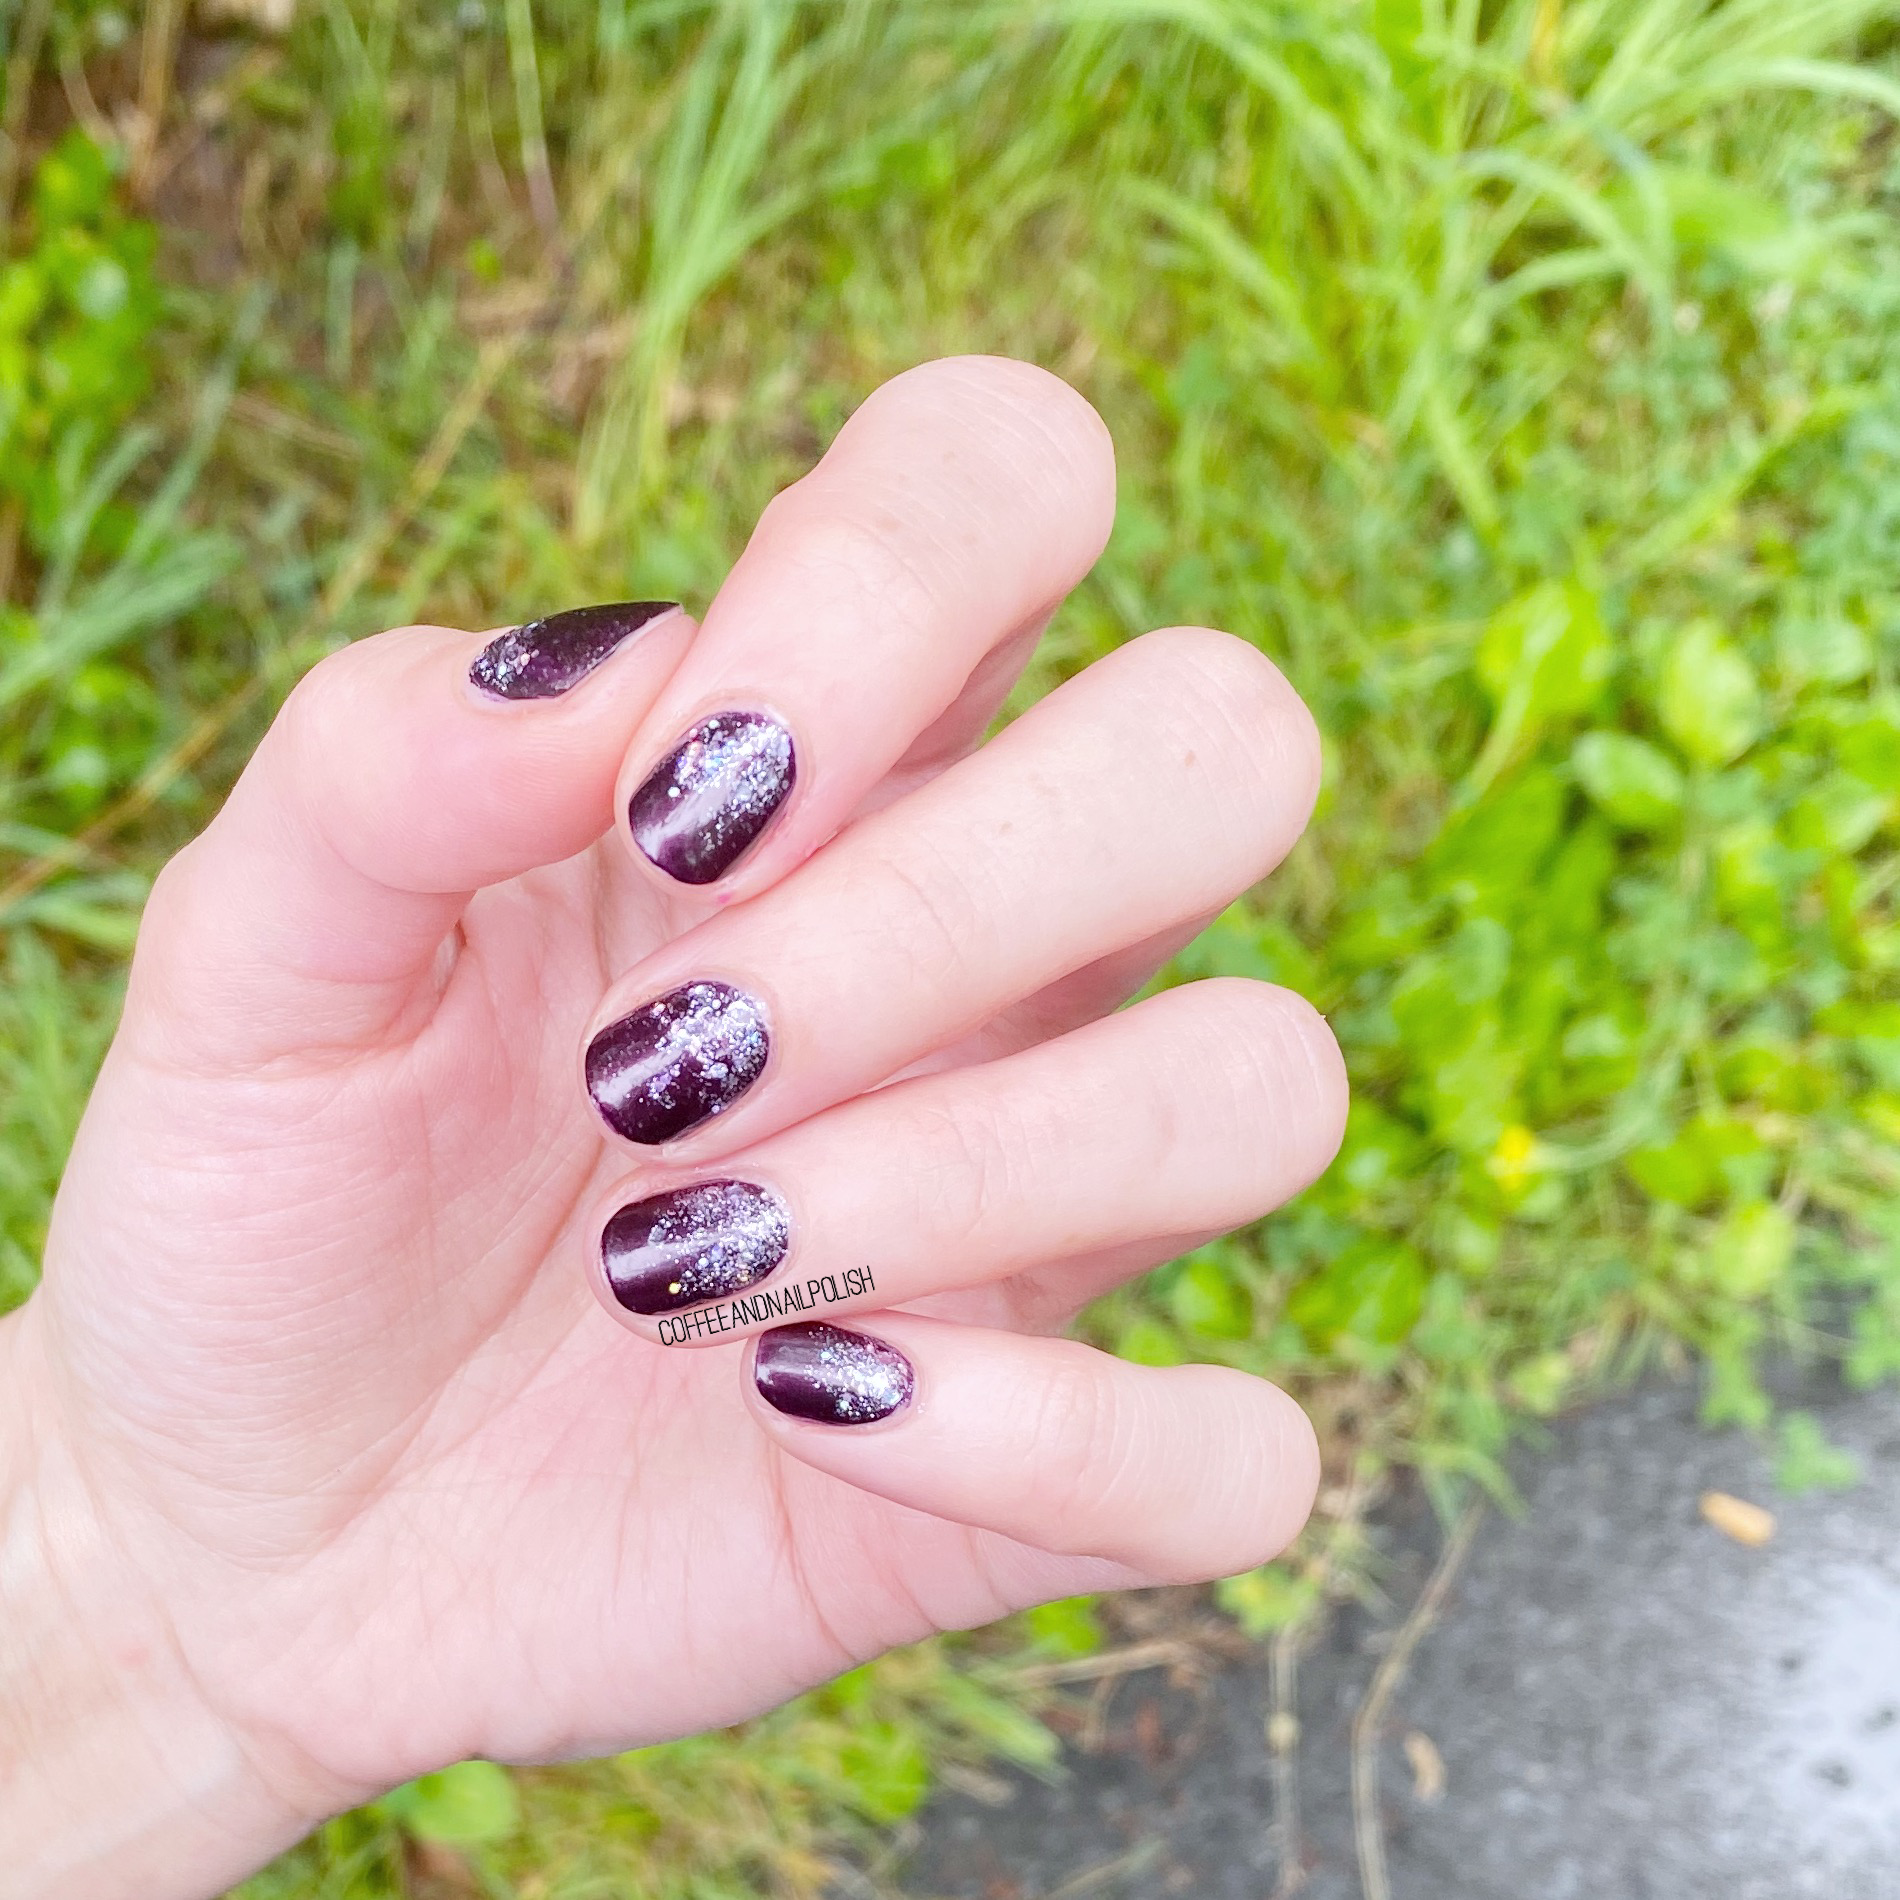
Obligatory macro shot.

I used to be so, so scared of glitter nail polishes & never want to wear them because removal would be impossible. Obviously, taking off glitter polish isn’t my favourite thing, but I’m not quite so scared of wearing my glitters like I used to be. Which, is good, because I love, love, love these spotted polishes & have quite a few in my stash from different brands.

What do you think about this fun spotty nail polish? Do you remember the Maybelline Color Show line, & these spotted polishes in particular. I also have the green one, Drops of Jade, I’m kind of sad I didn’t get the whole range of these shades were they were out, but maybe some day I’ll discover more in the bottom of a clearance bin to complete my collection haha.

Have a lovely Sunday!

Fall Inspired Glitter Gradient

Hello lovelies, happy Tuesday!

It’s been… well I can’t even remember how long since I last wore a glitter gradient. Even though it’s been hot & balmy weather, I was feeling some darker, Fall-esque nails. So I decided to grab a few fun (& Autumn appropriate shades) from deep, deep in my nail polish stash.

I mean, if Starbucks can release Pumpkin Spice today, I think a little dark polish is okay.

For this manicure, the polishes I used were:

  • Base Coat: Sally Hansen Hard As Nails
  • Top Coat: Essie Speed Setter
  • Hard Candy Zombie
  • Maybelline Color Show Rose Bling

I’ve always really enjoyed glitter gradients because they’re so quick & easy. In fact, I created this gradient without even using a sponge… just the bottle brush itself! So it really does cut down on application time, & the clean up is even more minimal!

& Oh my, after wearing this combination, I really I think I want to find some more fun glitters — most of my glitter is like pink, or purple, or silver, or gold. I need some bronze-y shades, or something! A nice Fall shade that will pair with a dark purple or burgundy perfectly! I might need to go through my stash a bit better, & see what glitters I’ve forgotten about.

What do you think about this glitter gradient? Are you enjoying this Fall manicure transition or would you like to see a bit more brightness or neon before September? Let me know in the comments below!

GlamnailschallengeDec — Candles

73B9C26F-4AE2-4311-989A-967ABD9AEA3F

Good morning lovelies & Happy December 2nd! I thought since December is one of my favourite times of year for nail art, it would be fun to join in another round of GlamnailschallengeDec. I’ve had a ton of fun joining in on these challenges, & I thought this would be a fun way to come up with some new & creative holiday looks!

The first prompt for this month is Candles! At first I was a little stuck on what I wanted to do for this prompt, but after some Pinterest stalking I saw this manicure & decided to use it as my inspiration!

2314F280-CE8E-4962-87D7-E4CF741EB031

202DD4B3-0634-4C42-A59F-7CDBD071A3C9

  • Base Coat: Sally Hansen Green Tea & Bamboo Strengthener
  • Top Coat: YSL Beauty Quick Dry Top Coat
  • Maybelline Color Show Auburn Ablaze
  • Acrylic paint
  • NailStuff.ca 7mm detail brush (use COFFEE10 to save 10%) {PR sample}

.

121892B1-A1C1-4516-941B-75EFBB7CF0FC

9A84599F-2902-4BE9-BC7C-87A637AA196F

This was my first time attempting a design like this–maybe aside from a birthday candle look forever ago–so I was a little nervous about how they would turn out. But you know what… I absolutely am obsessed with how they turned out. The dark base colour reminds me of the early darkness that comes as we approach Christmas, & the glow of the candles in the window. It really gives me all the fuzzy feelings just staring at my nails.

AADBA850-6A1D-4F4F-8501-670BFA3CAE2D

5547CC70-C0B8-4843-A6DC-6D50D10E21FD

What do you think about this look? Are you excited for another month of prompts for GlamnailschallengeDec?! Don’t forget following along with all the designs by checking out #glamnailschallengeDec on Instagram to see all the fun & festive designs to come!

GlamnailschallengeOct—Skull

673395C9-DDCC-4272-BC89-930C1C5D6DAA

Good morning lovelies & Happy Monday! Can you believe this month is almost over? The countdown to Halloween is officially on & I’m both excited to celebrate, & sad for my favourite month to be over! But since we have a few more Halloween looks to go, I’m going to keep the excitement rolling with our second last #glamnailschallengeOct prompt which is Skull. A similar idea to skeleton, so I wanted to try & do something way different from my skeleton design.

& it was the perfect opportunity to use some nail tattoos by Maybelline that I recently purchased on extreme clearance at my local pharmacy (& favourite place for nail polish deals!) These nail tattoos were pretty cool, & I couldn’t think of a better opportunity to use them.

0840CA9C-45C1-46F2-BA50-014DB280969C

24BFF24E-3B11-48E5-A03E-2CCF4DECE8F9

For this manicure, the polishes I used were:

  • Base Coat: Sally Hansen Green Tea Bamboo Strengthener
  • Base Coat: Duri Rejuvocate
  • Top coat: YSL Beauty Quick Dry Top Coat
  • Sally Hansen Color Therapy Slicks & Stones
  • Acrylic Paint
  • NailStuff.ca 7mm detail brush
  • NailStuff.ca dotting tool trio

.

324E0048-EC0F-41F3-9186-ACB3BFD4DD4C

860C1A90-01C7-4DF1-B761-ED9E5D9BA7B8

How much fun! This was also my first time in a long time wearing Sally Hansen Slicks & Stones which is just such a pretty shade for Autumn. It also goes really well with the orange & blues of my skull tattoo. It turned out more celebratory than scary, which is fun for this time of year as well. I’m digging it! & I added roses to add to the sugar skull feel.

F27C0626-8B02-4581-9E45-04551F158FC9

6835FFC3-A62F-4DAF-810C-23E36AEC59CF

Close up look at that nail tattoo. This makes me excited to use a few more of the designs that came in the packs I got. Definitely fun for fancy nails when you’re on a time limit… I definitely couldn’t draw that skull design in the 60 seconds it took me to apply that tattoo & add my top coat.

09659B8E-B7AF-4D82-8382-CF32A306D232

What do you think about these sugar skull nails?  Remember you can check out the other  #glamnailschallengeOct looks on Instagram. There is just one more prompt to go!

GlamnailschallengeOct—Graveyard

F8BE6792-595A-4D59-B704-2C83751D9DE2

Hello lovelies & happy Wednesday! This has been a busy week for manicures & it’s not over yet. Today I’ve got the next prompt for GlamnailschalleneOct: Graveyard! For this look, I wanted to channel the look of gravestones as my background sky & then create a little landscape graveyard near my cuticles.

EBAFEFFF-791E-4579-90C3-A91447C6B211

09640F49-48F7-456E-917A-0518E14FE3CB

For this manicure, the polishes I used were:

  • Base Coat: Duri Rejuvocate
  • Top Coat: YSL Beauty Quick Dry Top Coat
  • Sally Hansen Xtreme Wear Grey Area
  • Maybelline Audacious Asphalt
  • Sally Hansen Miracle Gel Get Mod
  • Essence Black is Back
  • NailStuff.ca 7mm liner brush

.

B7A18CDF-74B2-4ACF-8BAD-D374F600EFAF

4BD3B4A5-4670-4A61-AA2B-099BCAE4DD27

I had this idea in my heart to create this grungy grey background, I feel like it was kind of successful? Not exactly how I pictured in my head, but I still really like it. Next time I would probably add a dark dusky purple or blue to add a bit of colour to the mix. But over all, I think this design captures the spookiness of a graveyard, & when it comes to Halloween designs that’s what is most important, am I right?

5D2BA561-7E3B-4A1B-A6BF-1B400241E394

A5E79DD4-C927-4B09-AC13-69405E4DF92D

I think my dry brush background might be one of my favourite parts of this look. Instead of doing short brush strokes, I brushed the polish brush up almost the entire length of my nail. It really helped capture the haunting quality of gravestones/graveyards, which I am really excited about. I will say though, next time I would probably pull out my What’s Up Nails graveyard stencils for the gravestones.

9F6ACCBB-B9A4-4A11-B23D-AC284D2466DA

what do you think about this grungy graveyard design? Are you already planning your Halloween nail art looks?

& don’t forget you can keep up with #glamnailschallengeOct on Instagram for everyone else’s amazing designs this month! There are still a few more fun design looks coming up for the rest of the month!