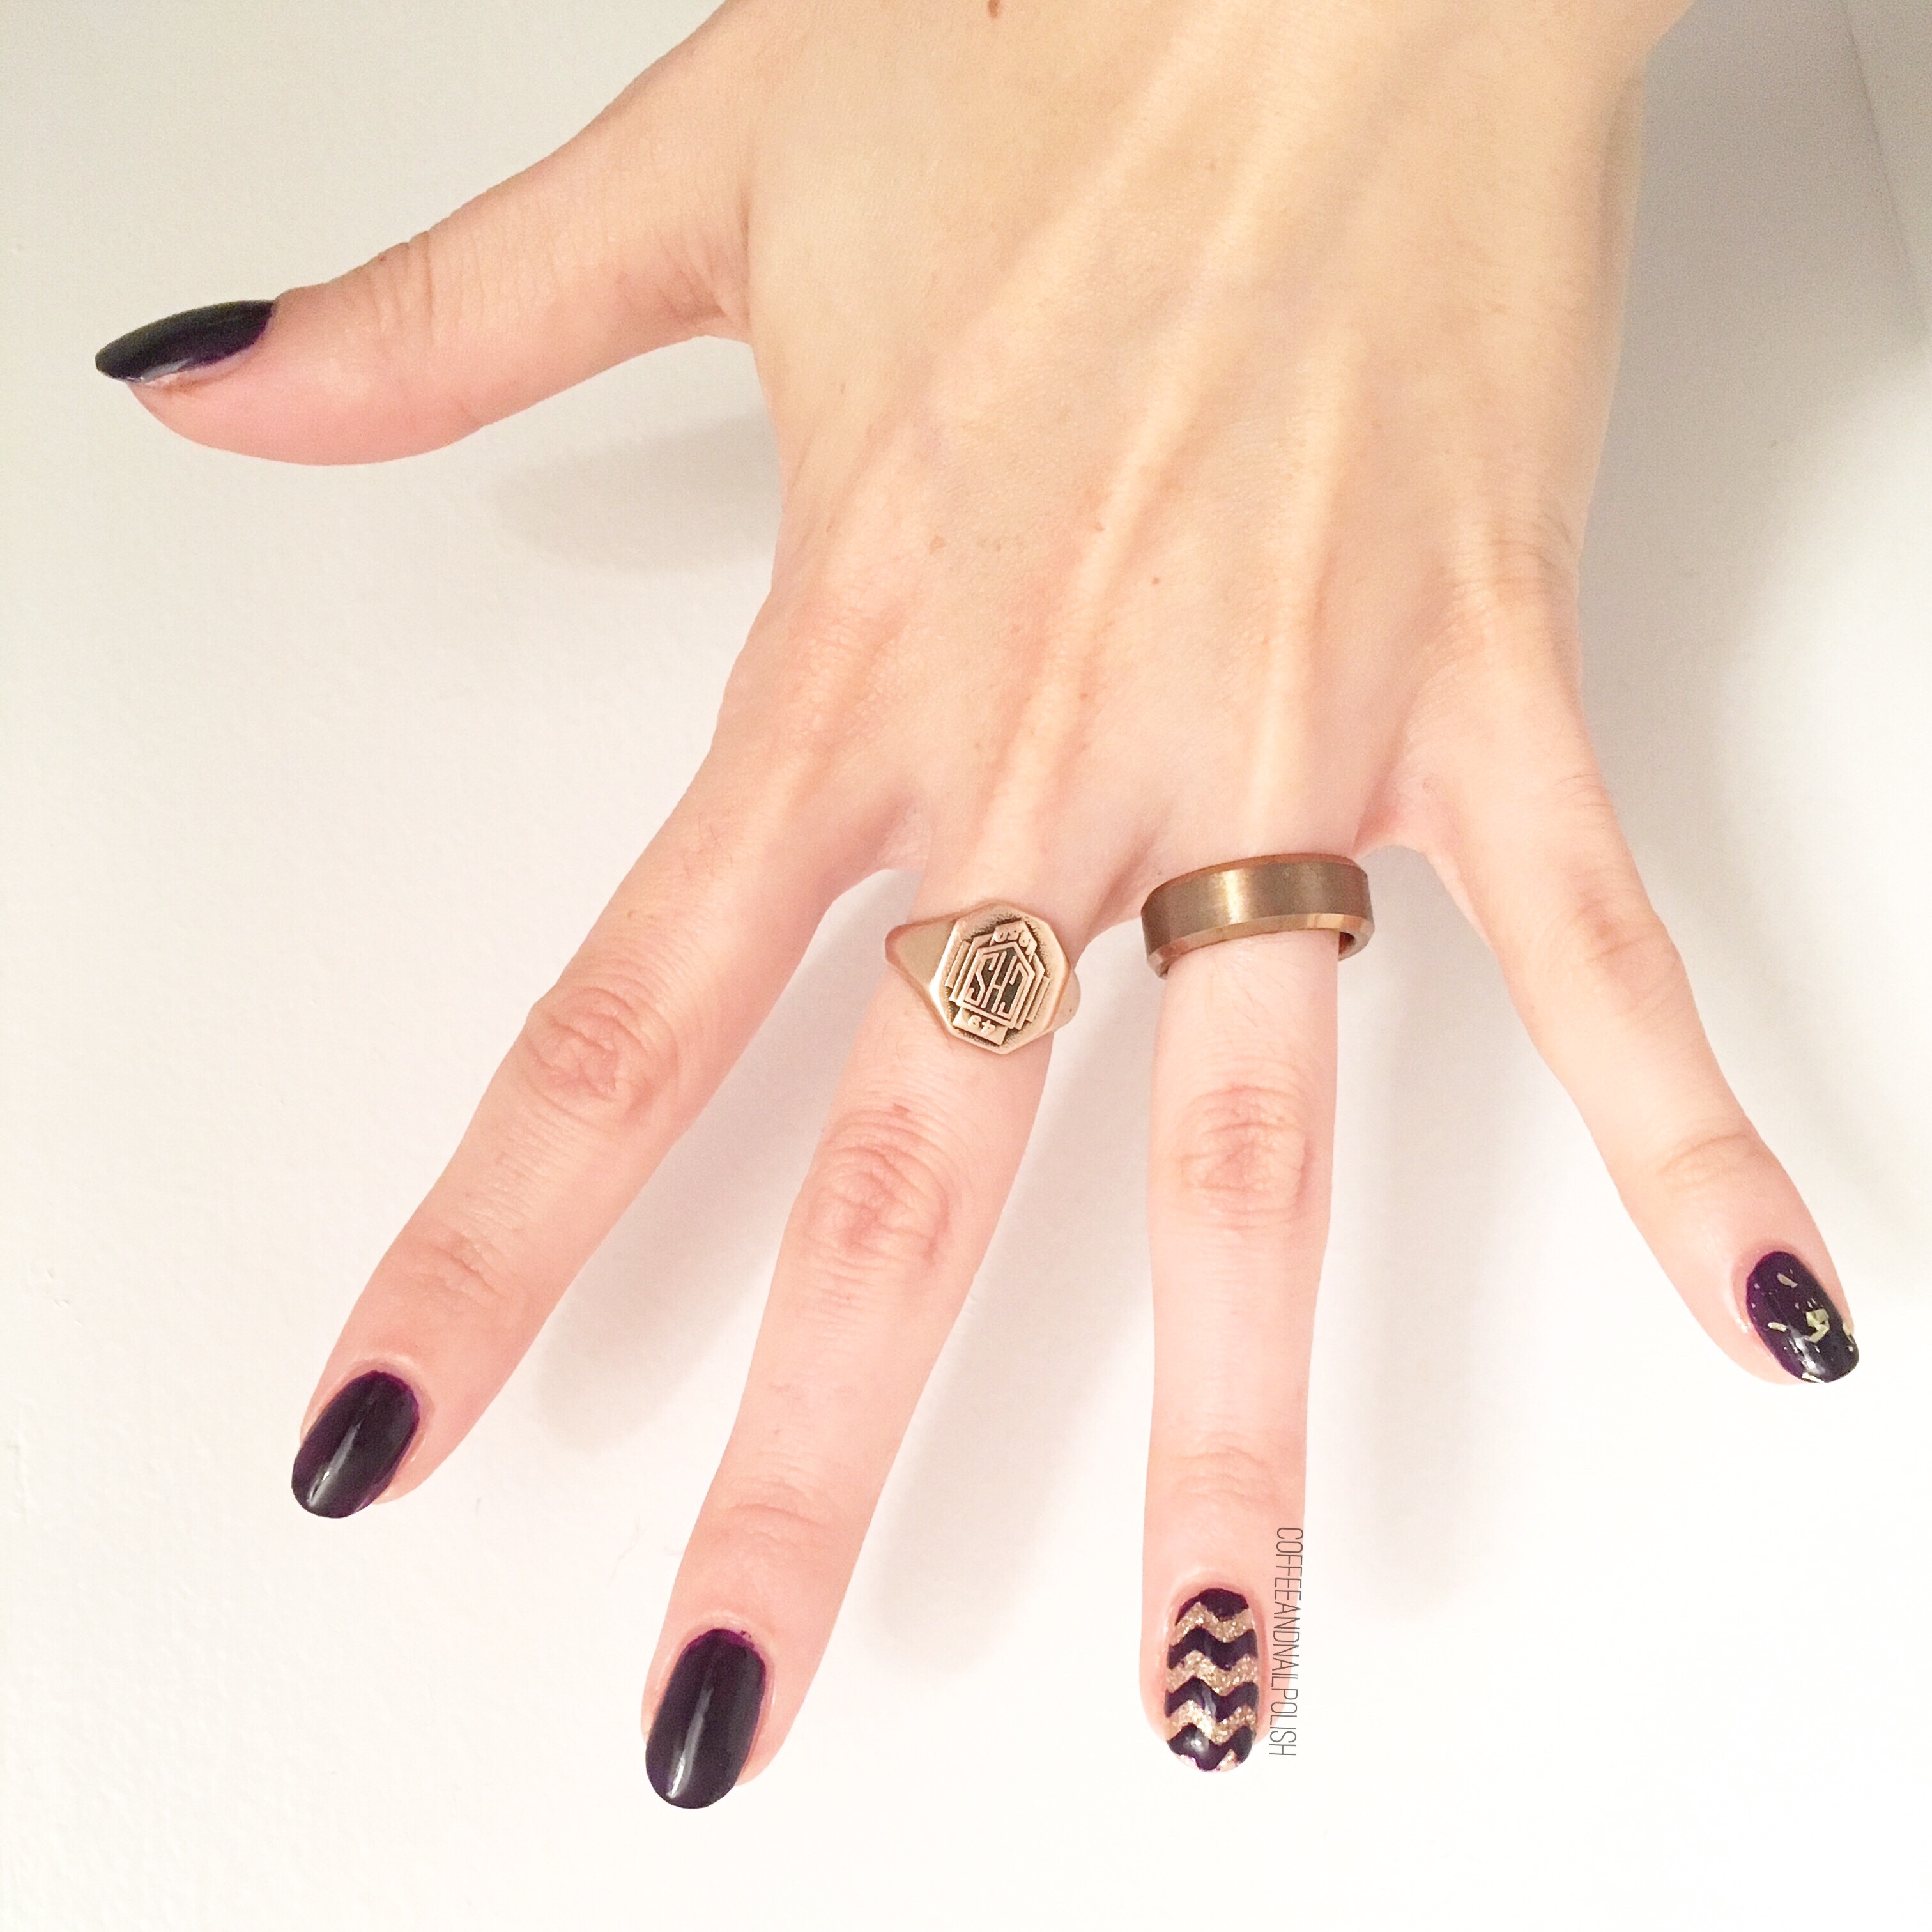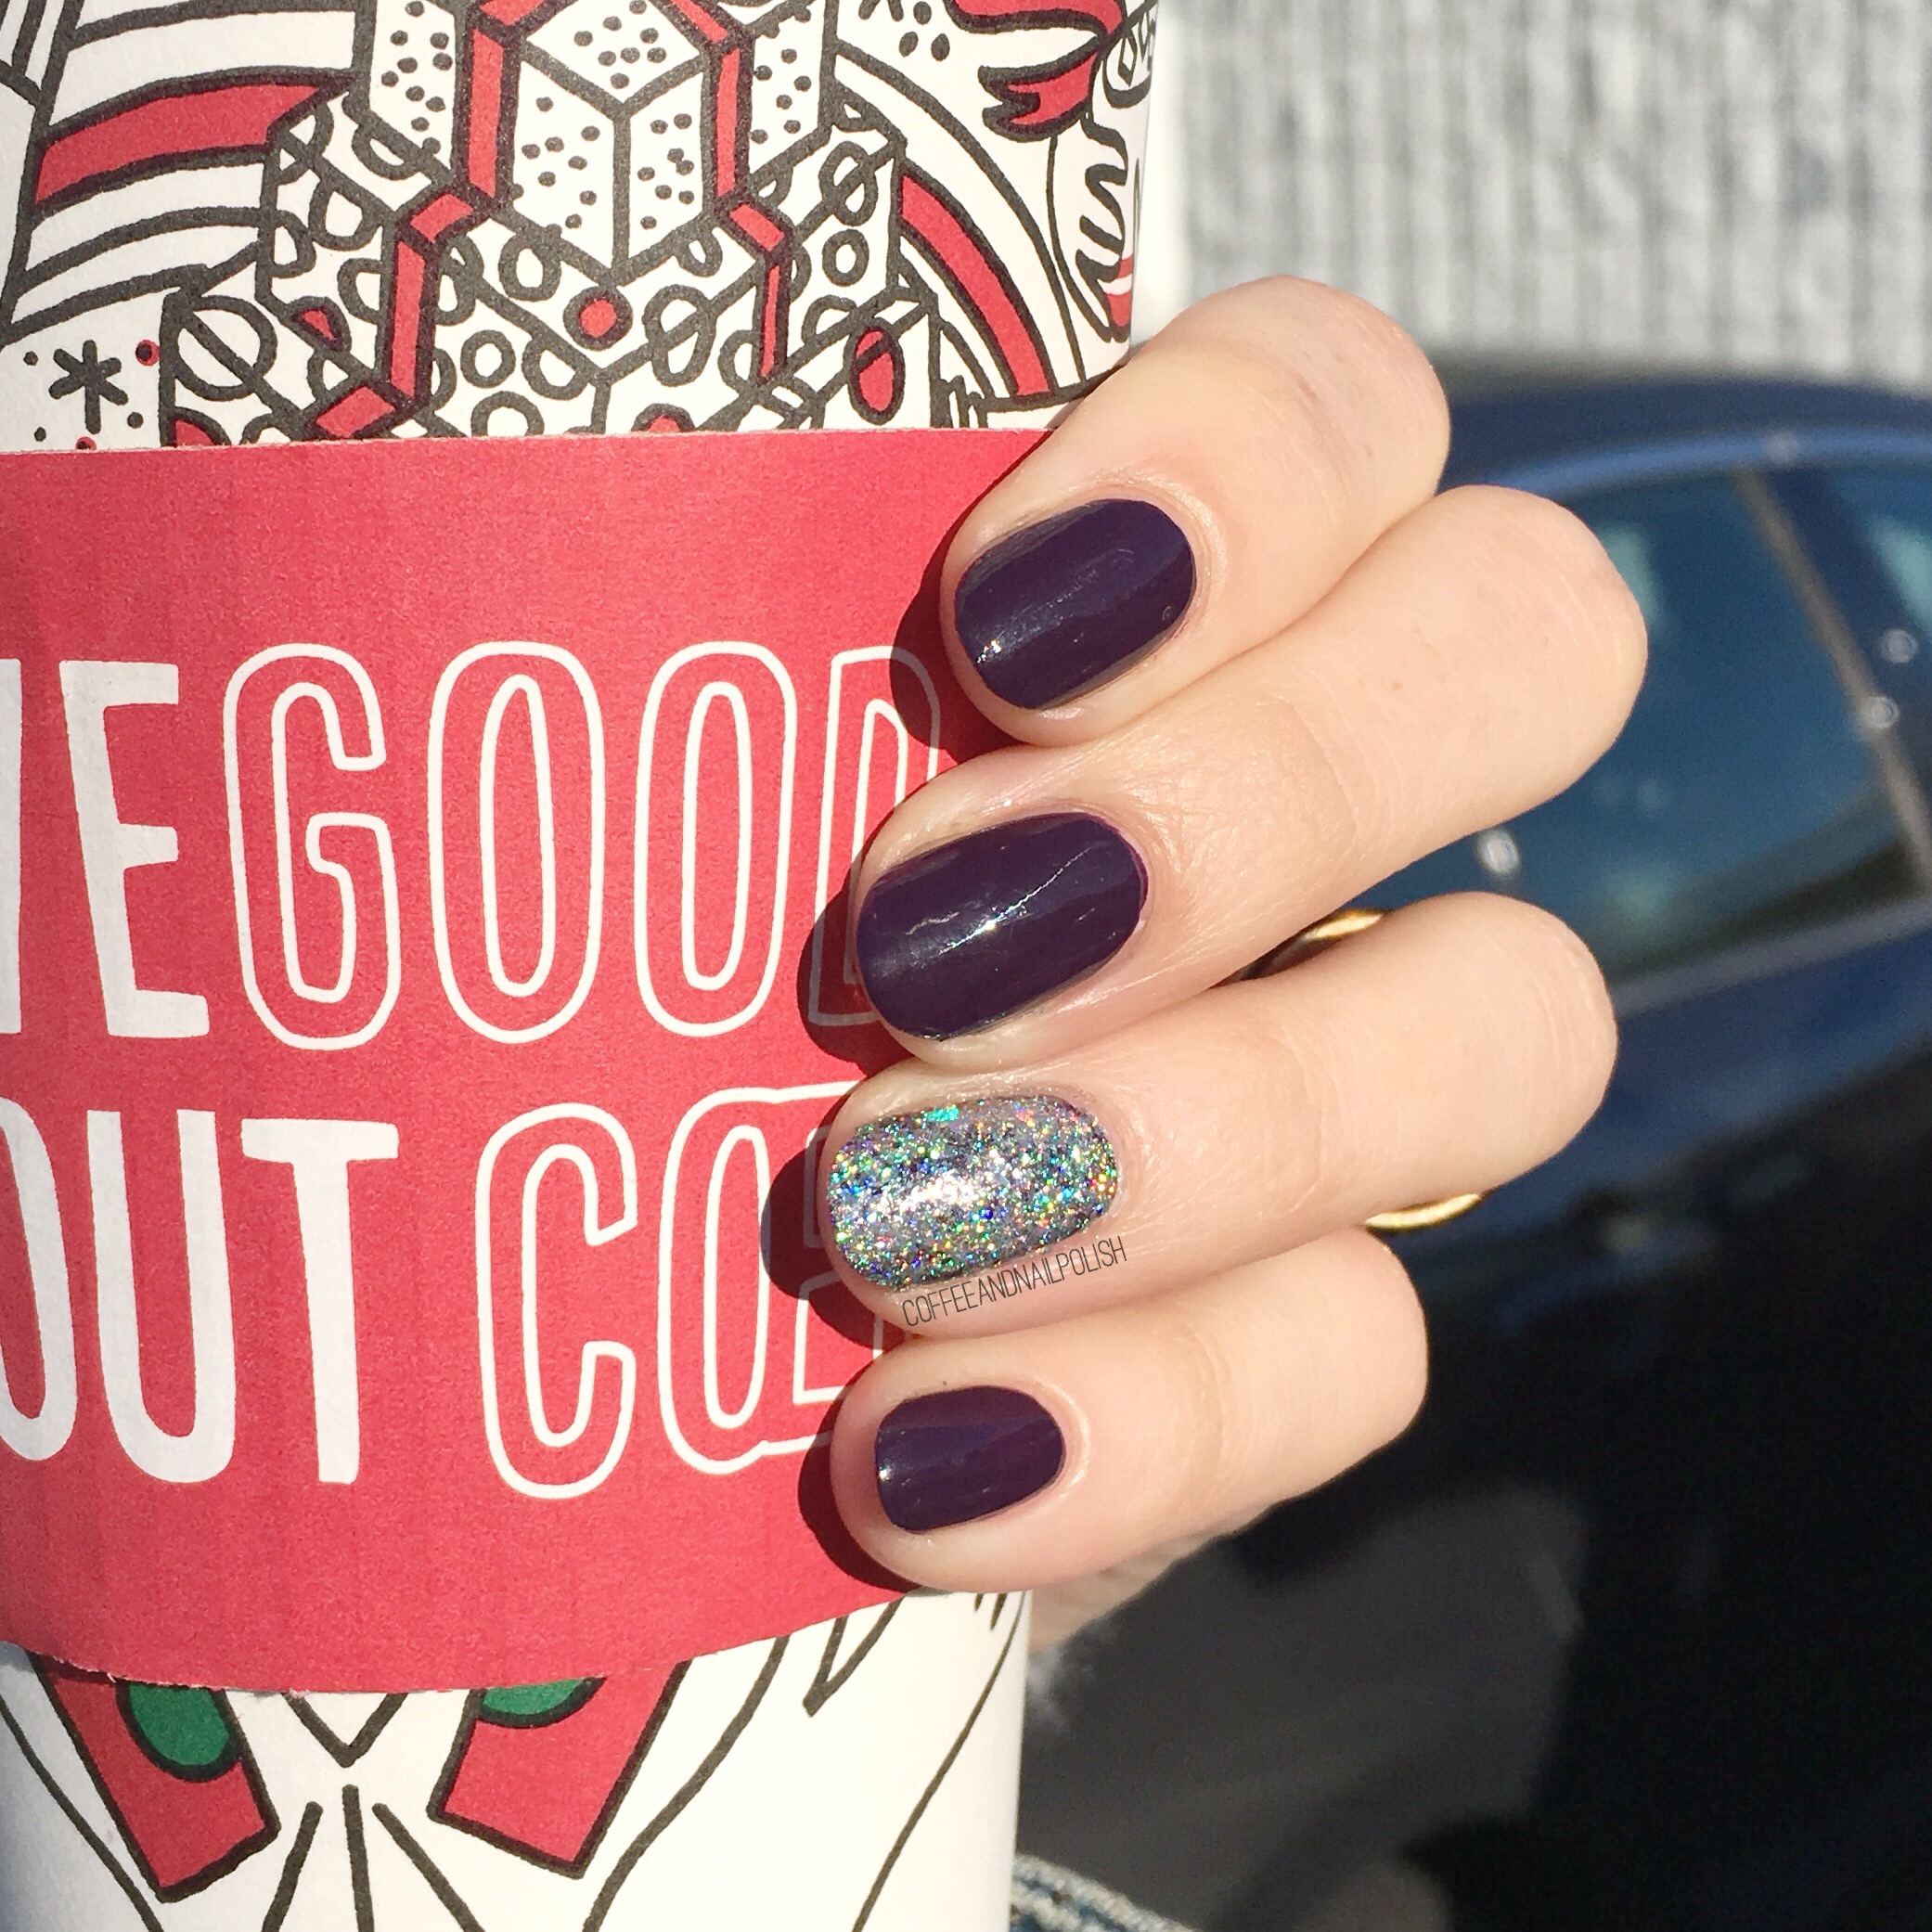
Happy Wednesday everyone! The week is already speeding by, which is crazy—halfway to the weekend. To get us over this mid week slump, today I’ve got another item I was so kindly sent to try out by NailStuff.ca: holo pigment flakies.
This is my first time ever using any kind of pigment for the nails (I know, I’m so behind on the times) so I was super excited to give it a whirl & also totally unsure of how to go about it. I know these pigments work really well over gel nails, but I change my nails too often for that so I decided to create these holo nails using just nail polish! So after watch a bunch of YouTube & Instagram videos, I felt pretty confident I could do this!

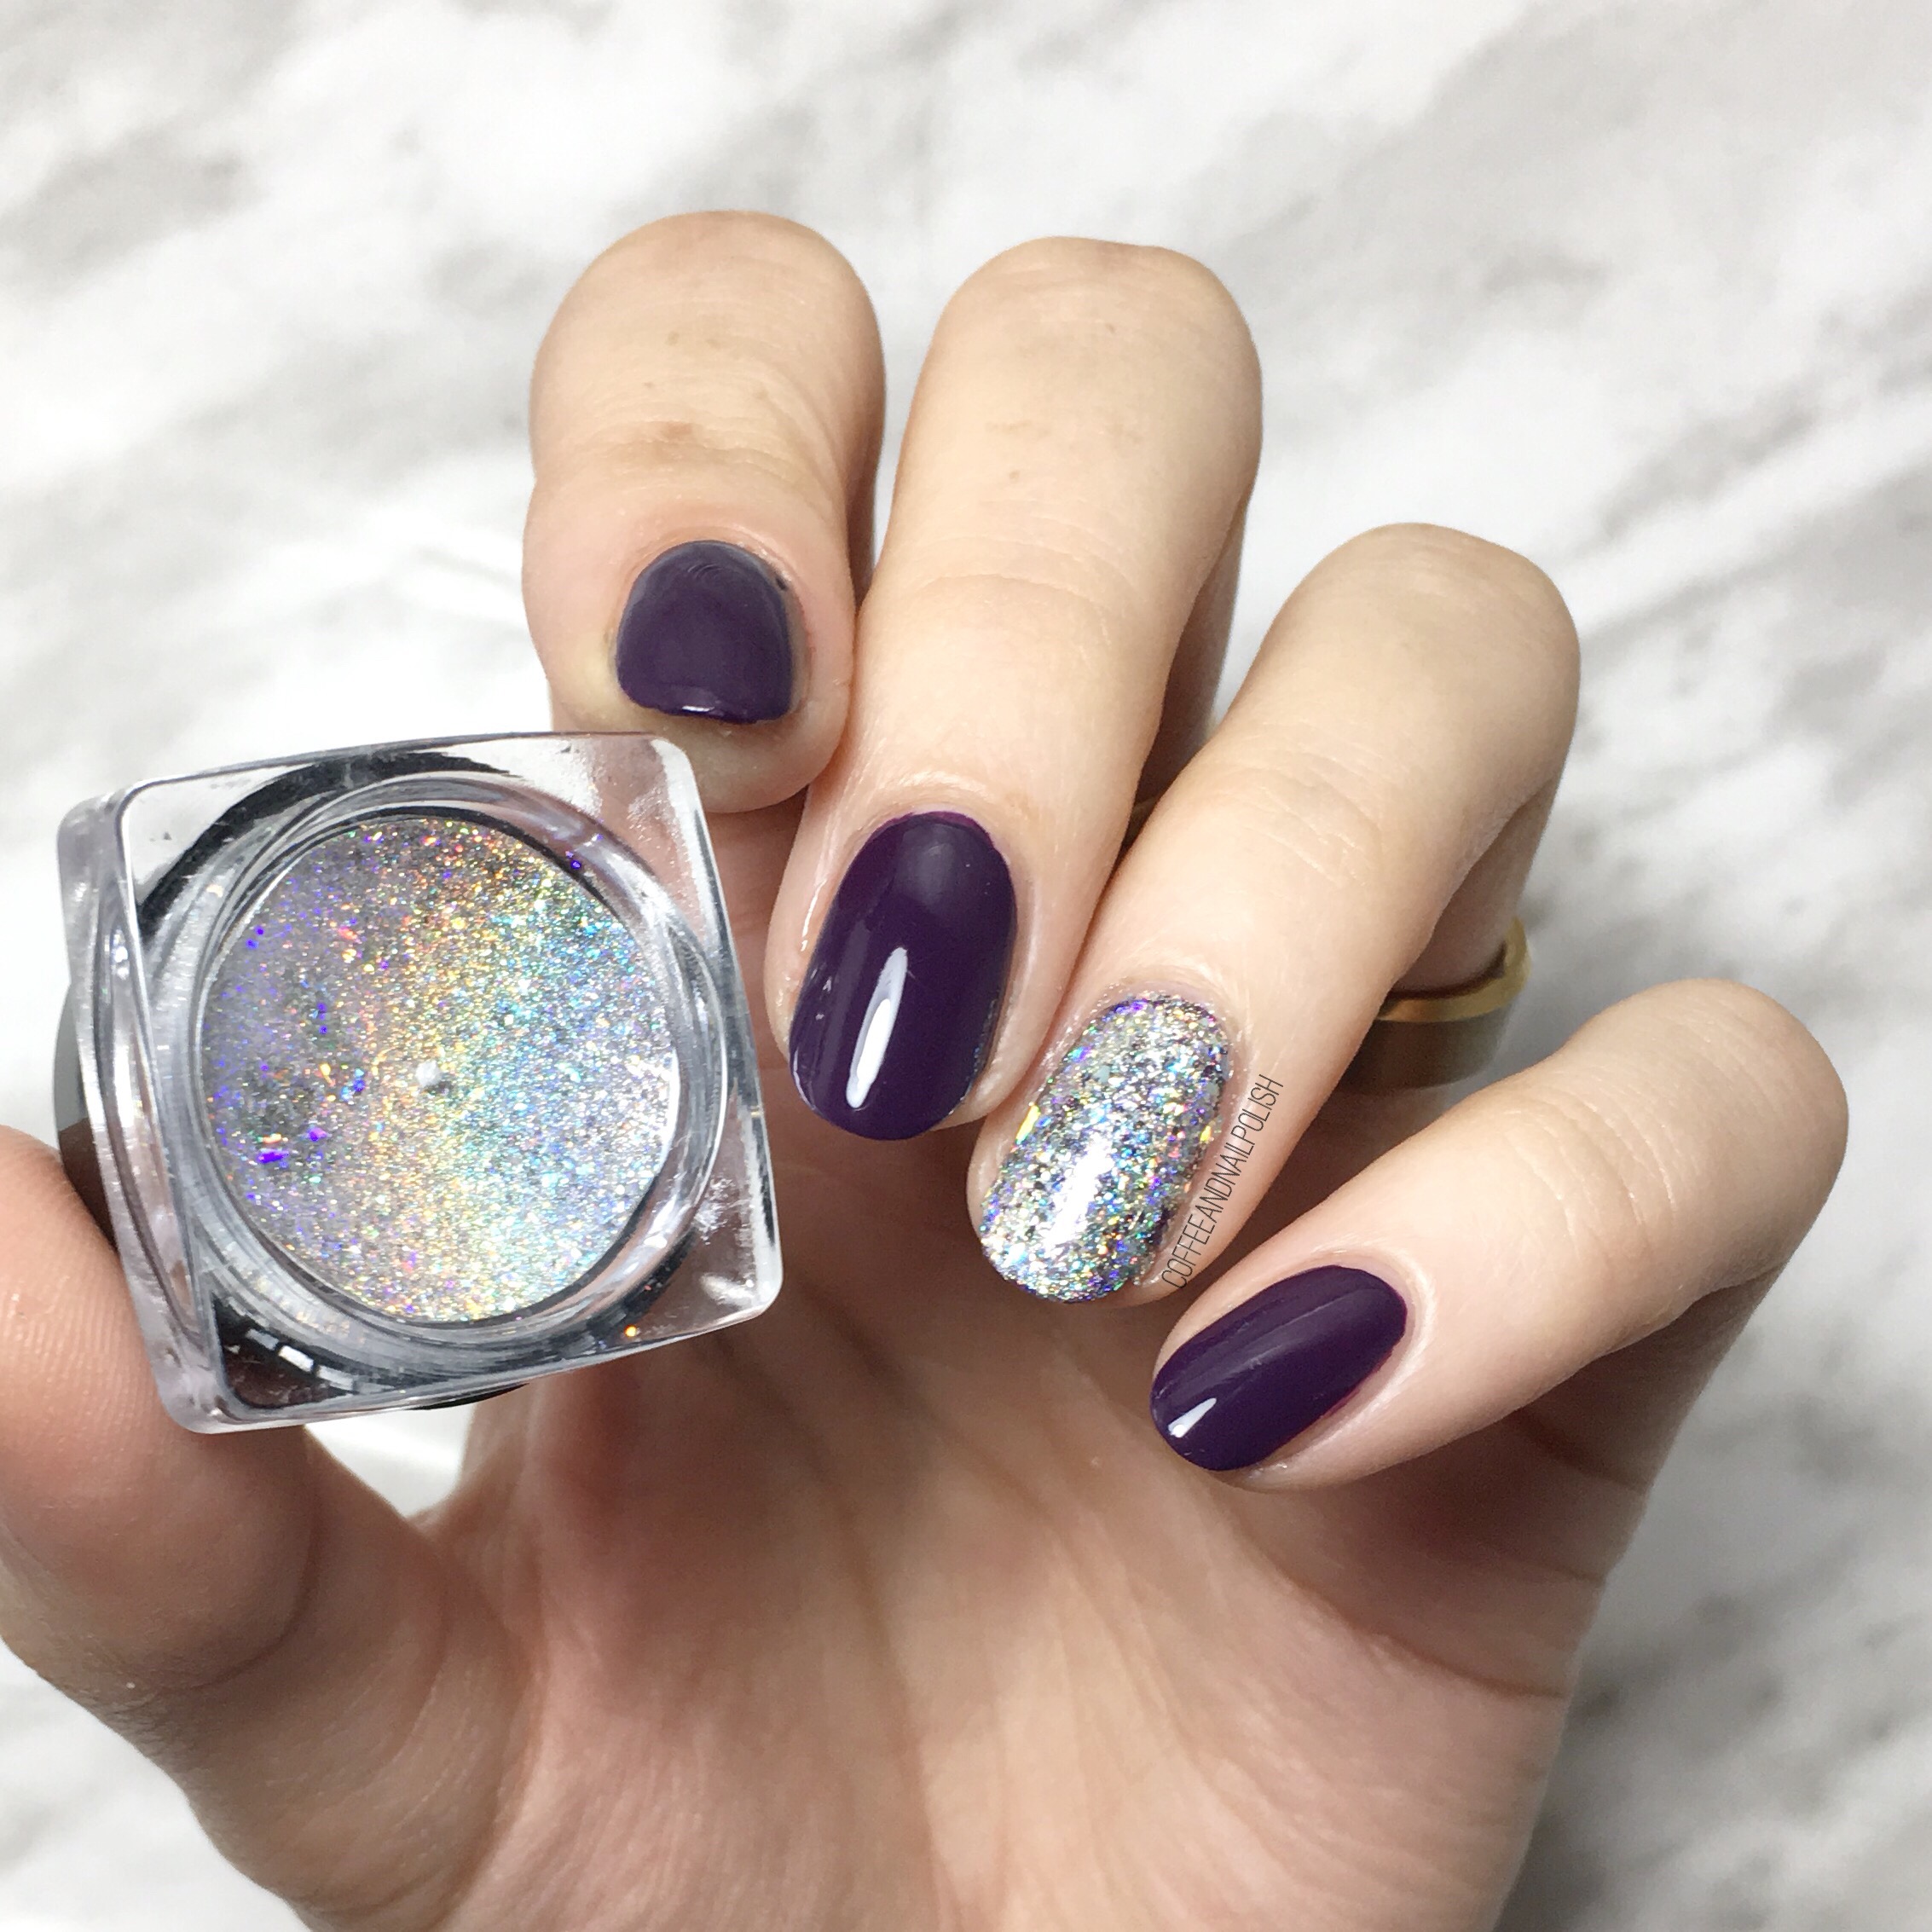
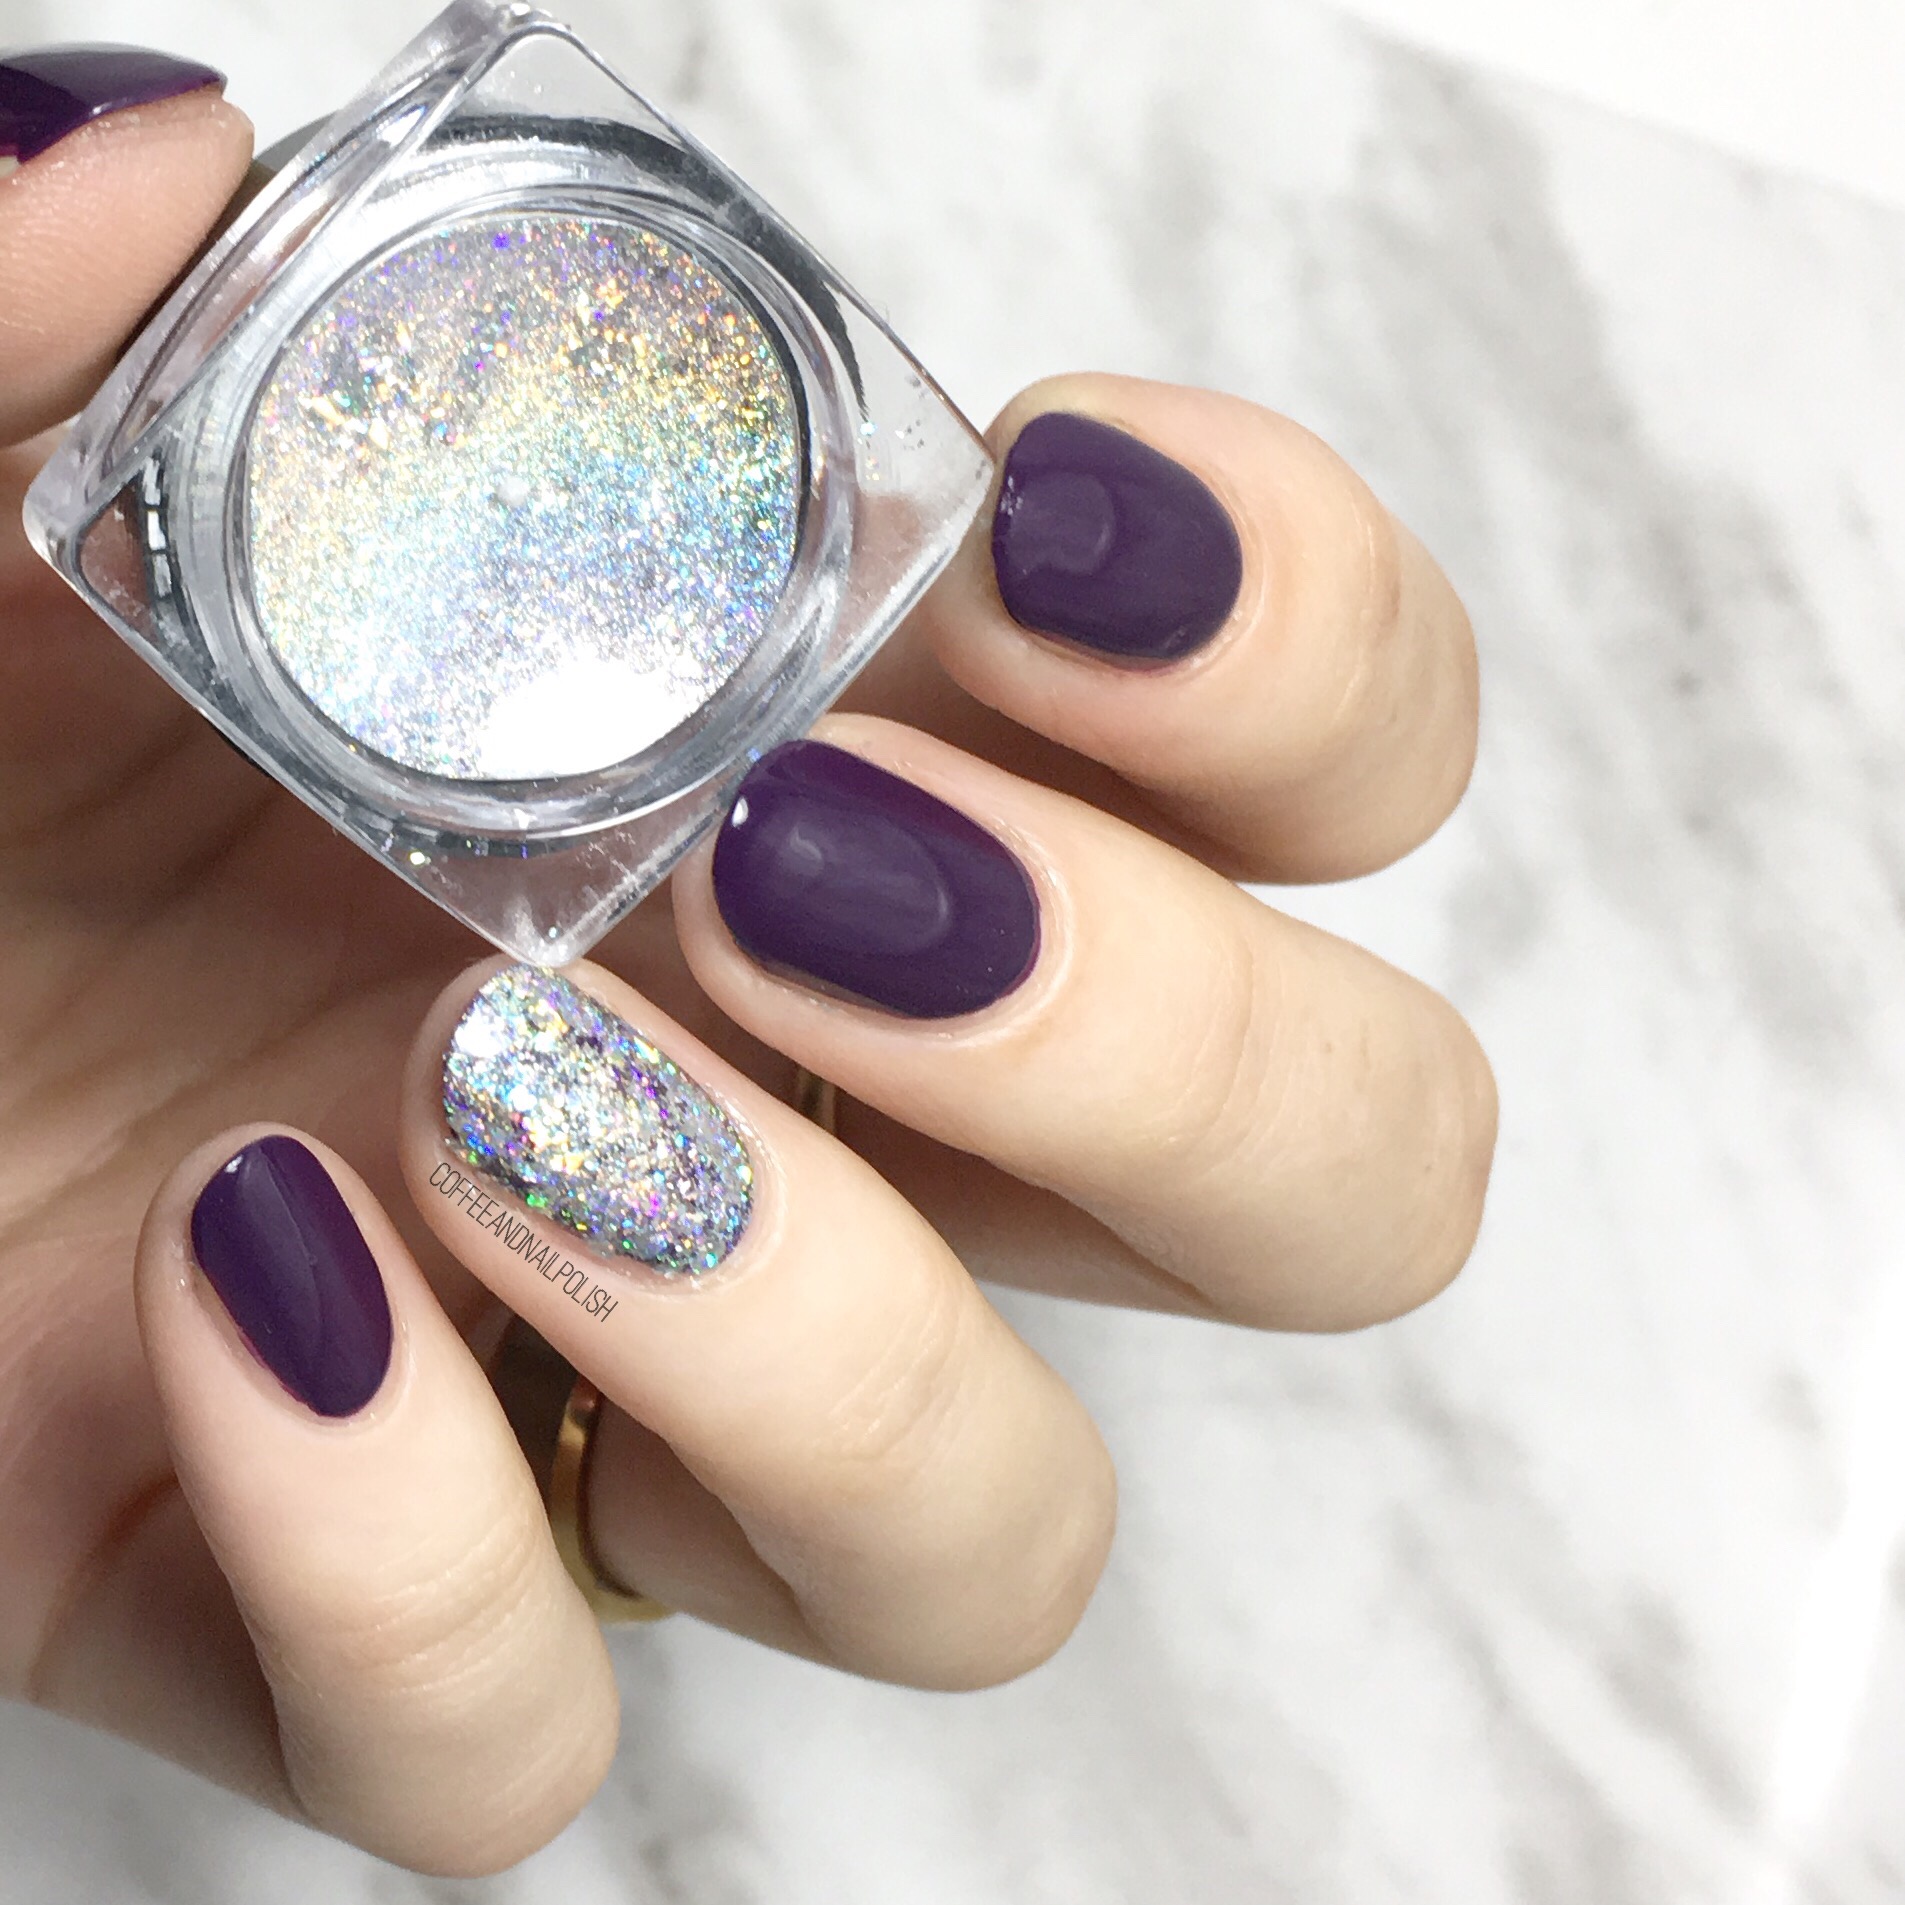
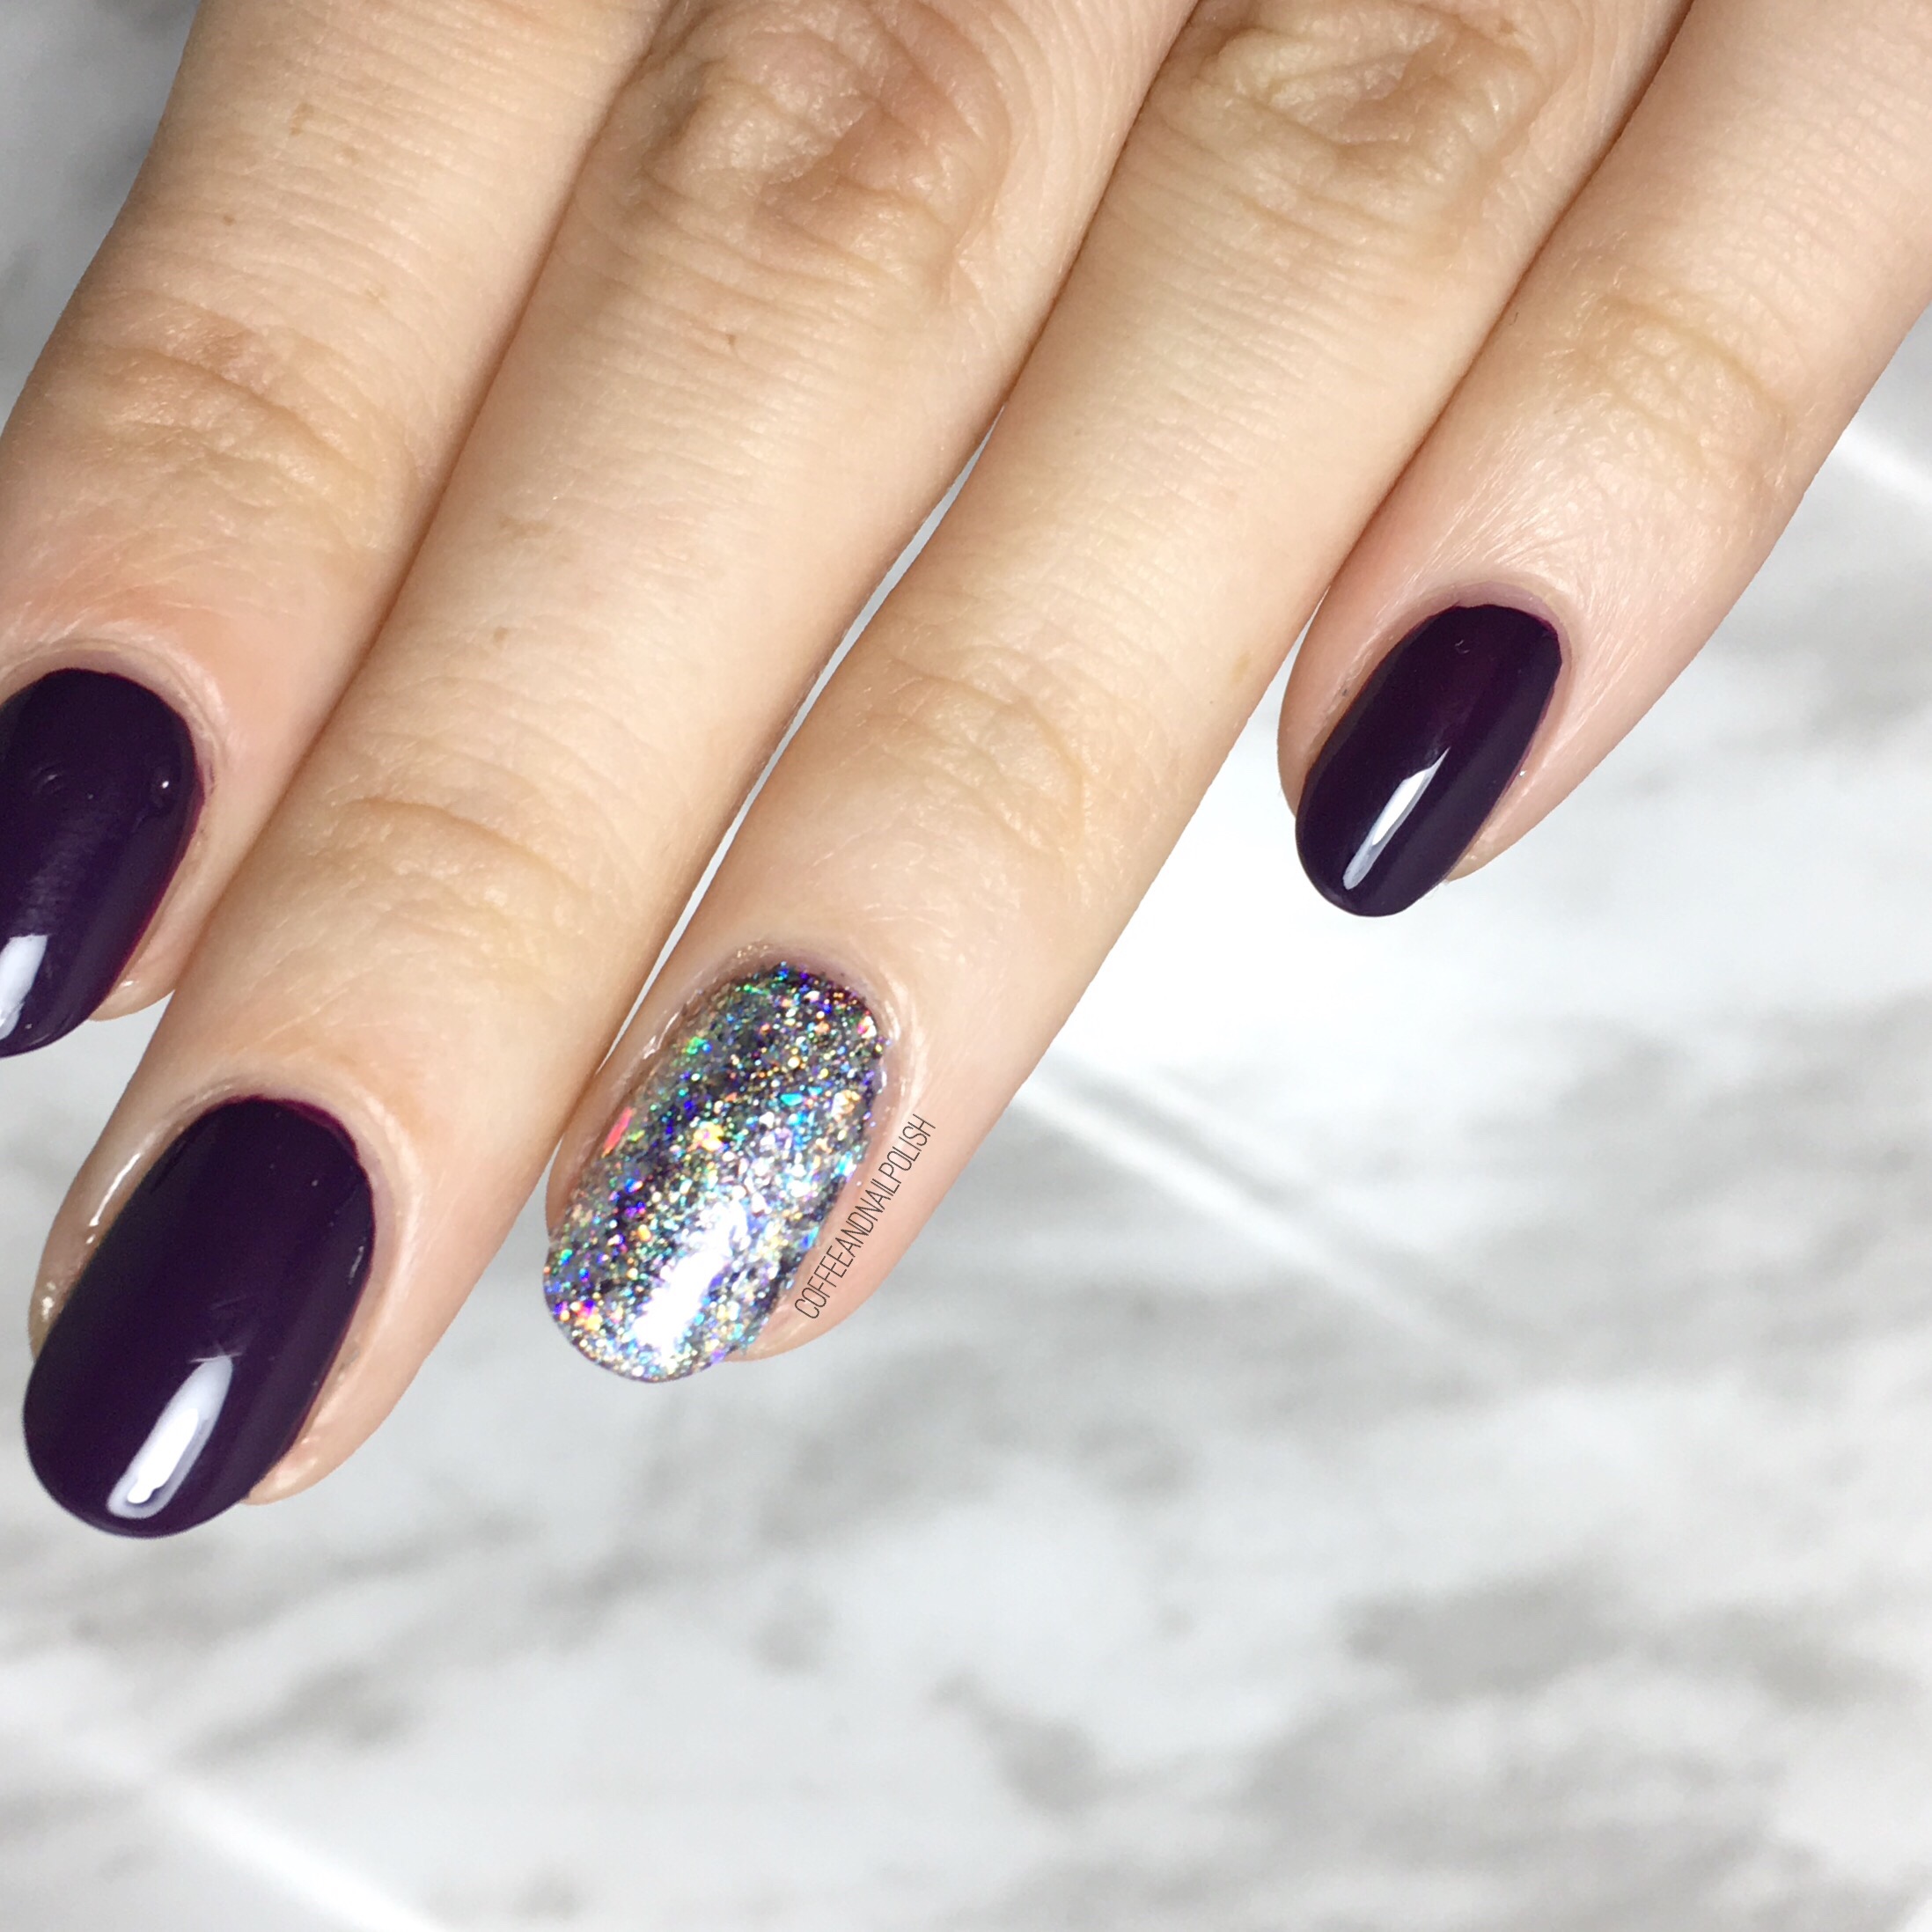
For this manicure, the polishes I used were:
- Base Coat: Essie Grow Stronger
- Top Coat: Seche Vive
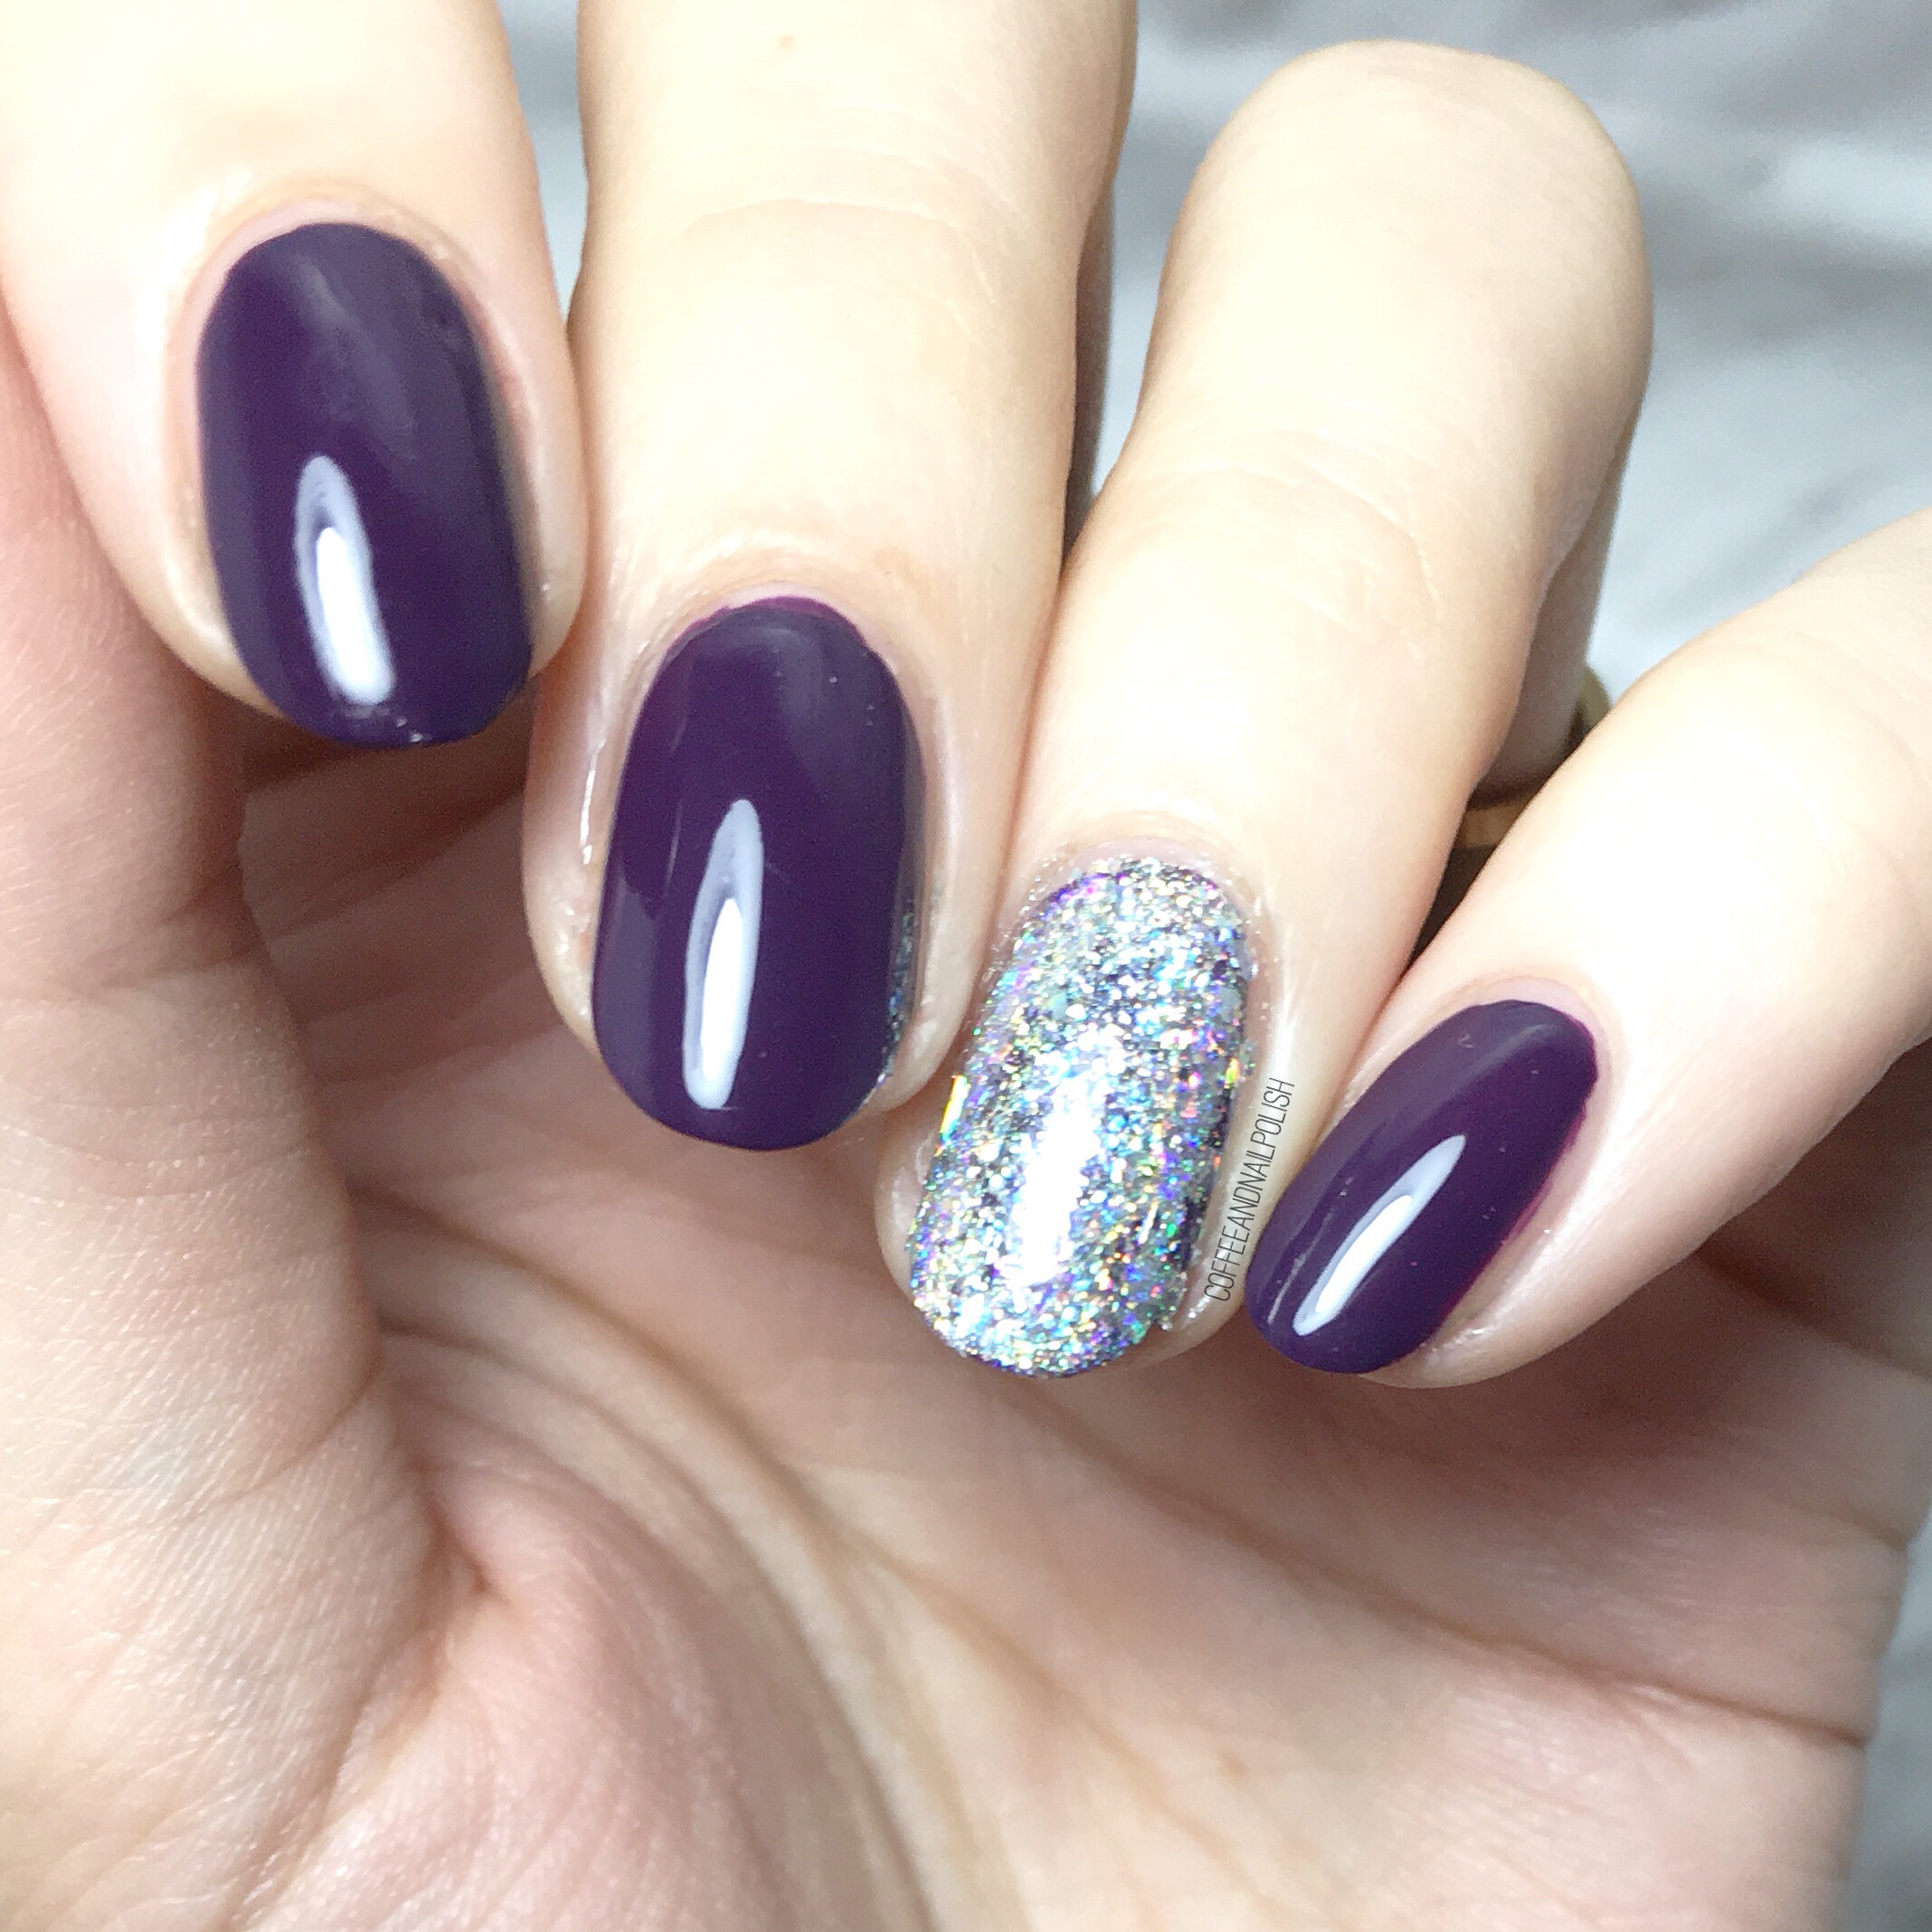
- L’Oréal Pino Purple
- NailStuff.ca Holo Pigment Flakies
- Fingerpaints Peel Off Base Coat
- Edge Perfection Cuticle Barrier

To accomplish this look:
- I painted all my nails with L’Oréal Pino Purple (including my ring finger.)
- I applied top coat to all my fingers except my ring finger & on that nail I applied Fingerpaints Peel Off Base Coat. (I originally tried used just wet nail polish but found the flakies didn’t stick as well for me.)
- Next I applied my Edge Perfection Cuticle Barrier around my ring finger & let it dry completely.
- I then took the small eyeshadow applicator that comes with the flakies, & patted them down onto the nail & tried to rub them in some. It took about 2 applications to completely cover my base. (You can see at the edge of my nails where I missed a few spots.)
- Seal in flakies with top coat (I used Seche Vive for that shine.)
Super simple & only slightly messy. I did end up getting holo flakies in my bed (where I do my nails pretty much always) which in turn ended up sticking to my son for a couple of days but nothing wrong with a little holo glitter!
I will say, my second attempt using a sticky base coat over my polish worked much better (as opposed to using just my base of polish). The first time I tried half the flakies came off with my top coat, but it could be my polish had dried too much for the flakies to really stick.
Have you used holo flakies before? Any tips for application that you’ve discovered? Leave all your thoughts below!
*PR SAMPLE* Some of these items were sent to me for review. However, all opinions are my own.