Yep! I’m showing off more prom inspired nails. Last week I created some nails that I thought would be beautiful to wear to prom, & today I’m sharing a manicure inspired by one of my own prom dresses! I totally got nostalgic thinking about prom after my last post, & started looking through old prom pictures on Facebook & figured why not create a mani inspired by those pretty dresses.

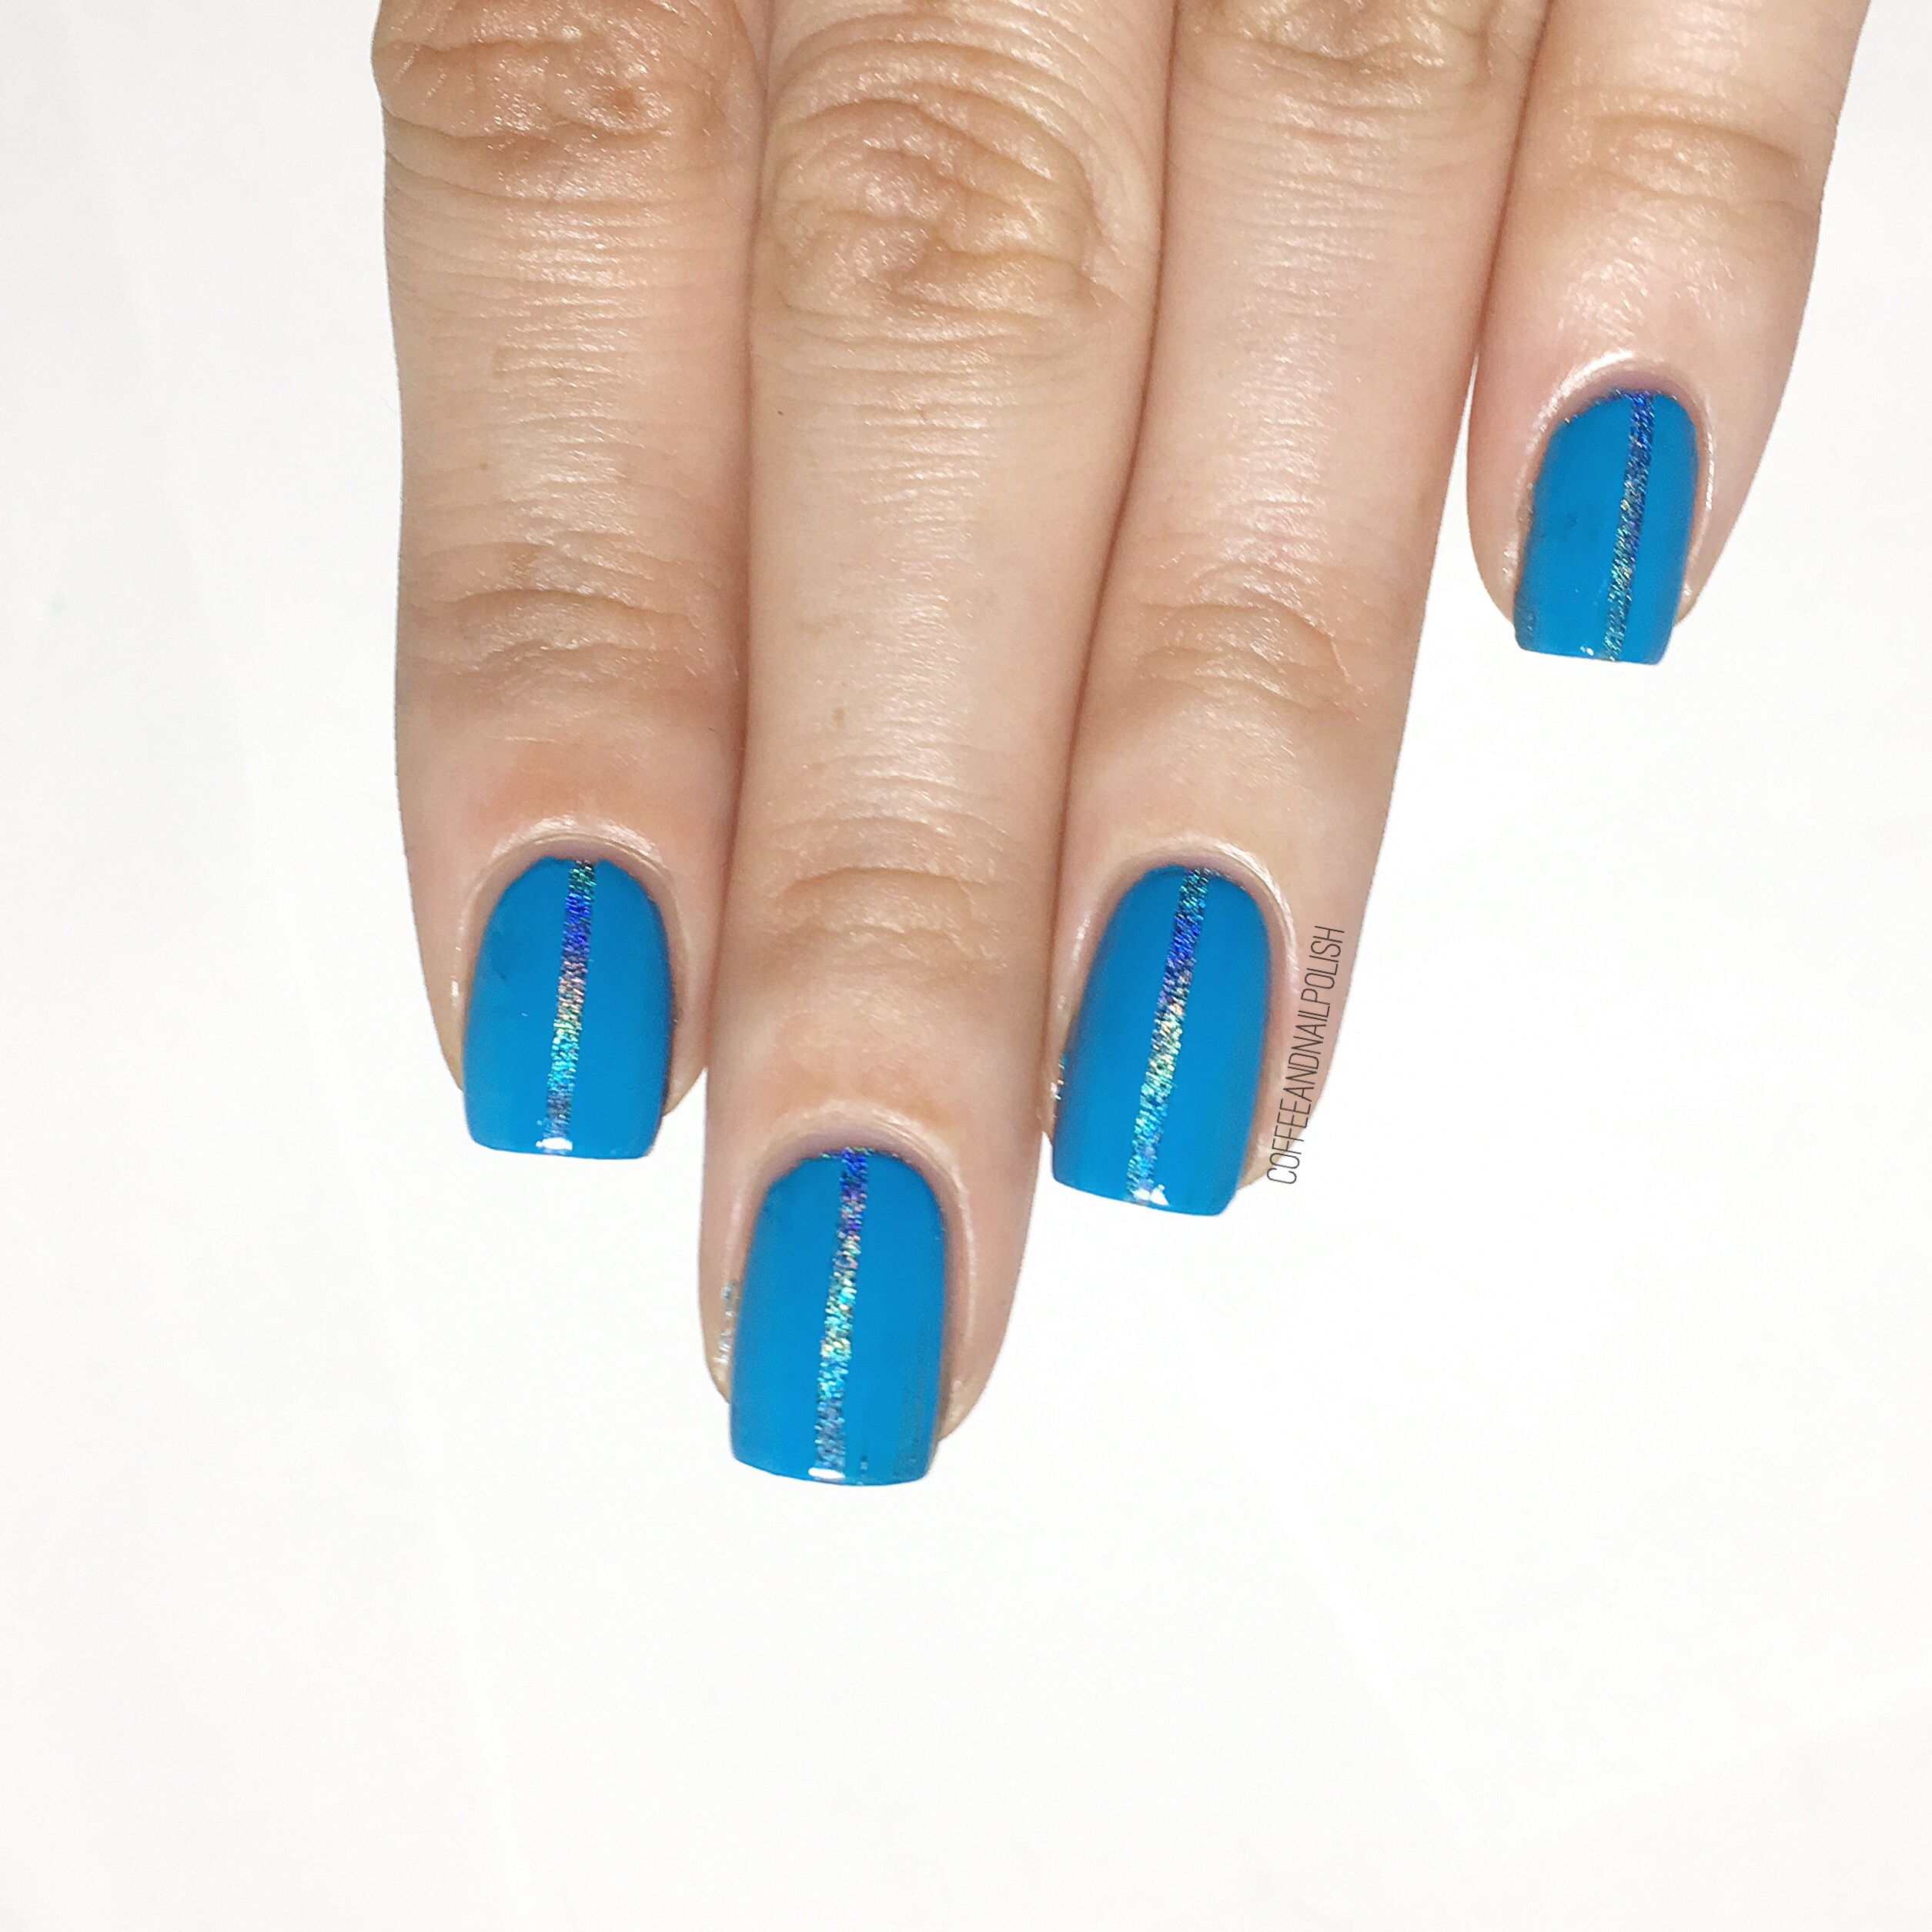
My inspiration above. 🔺 Can you believe me that dress only cost me $17 & I still adore it so much. Man, if only we had occasions to wear formal dresses more often! Now obviously this is a simple look, so I thought a simple line of holo would perfectly represent the sparkly sequin belt on my dress.

For this manicure, I used:
- Base Coat: L’Oréal One Stop Base
- Top Coat: Essie Speed Setter
- Layla Cosmetics Ocean Rush
- Sally Hansen Insta-Dri Brisk Blue
- Xroma Polish & Vinyls Skinny Straight Nail Vinyls


Who doesn’t love holo? This is a serious question… I would love to meet this person. I’d put Layla Cosmetics Ocean Rush on their nails, because it would definitely change their minds. I mean just look at it–even though it’s a small line of holo, it just shines. You can see some serious rainbows.

What do you think of these nails inspired by my very own prom dress? I hope you like them, because I may have accidentally clicked “like” on a prom picture of my high school boyfriend & I while trying to scroll through & find a picture of this dress on Facebook & that’s awkward. Haha.
Would you ever create nails based on a favourite dress of yours? Let me know in the comments below! 💙