Glam Nails Challenge October— Spooky Sky

Hello lovelies & happy Tuesday!

Can you believe it is the last week of October already? Halloween is 5 days away! That’s just…. crazy. But today I have another fun prompt for GlamNailsChallengeOct: spooky sky.

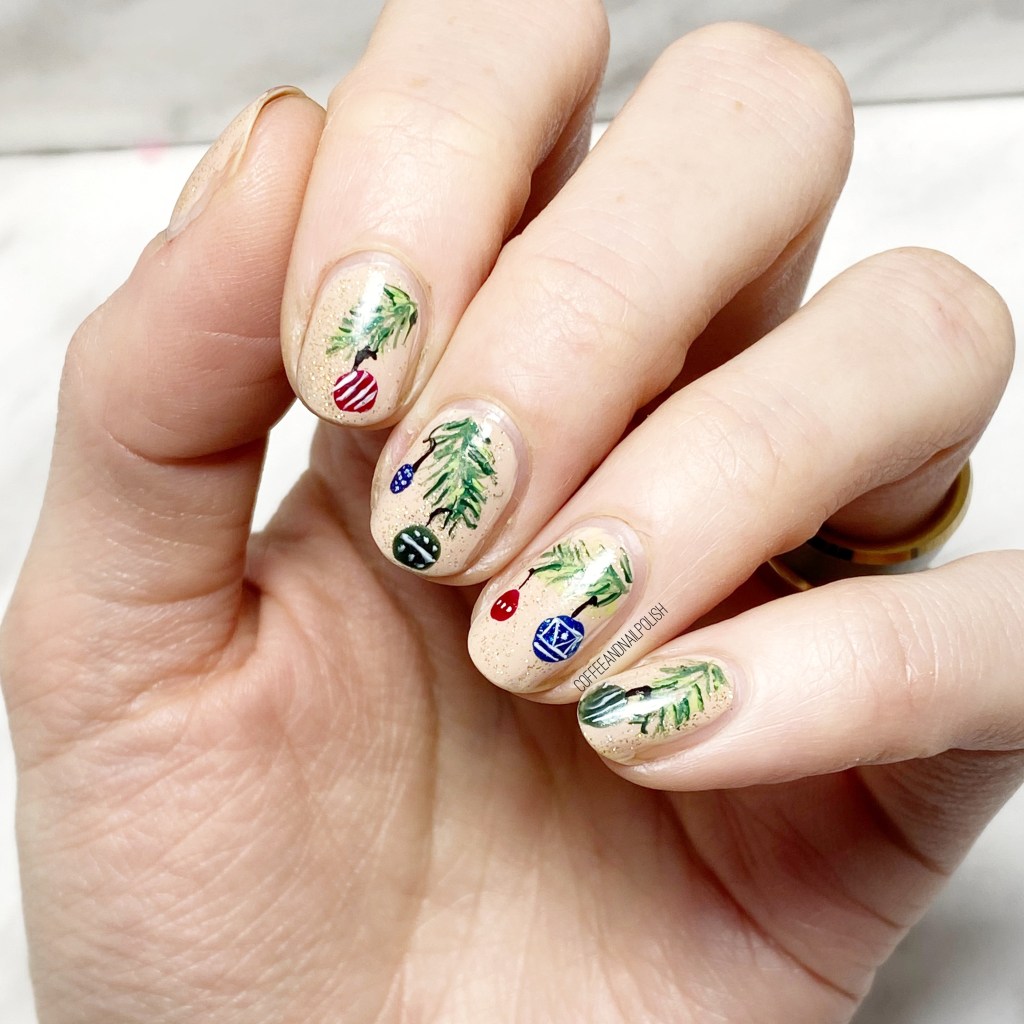
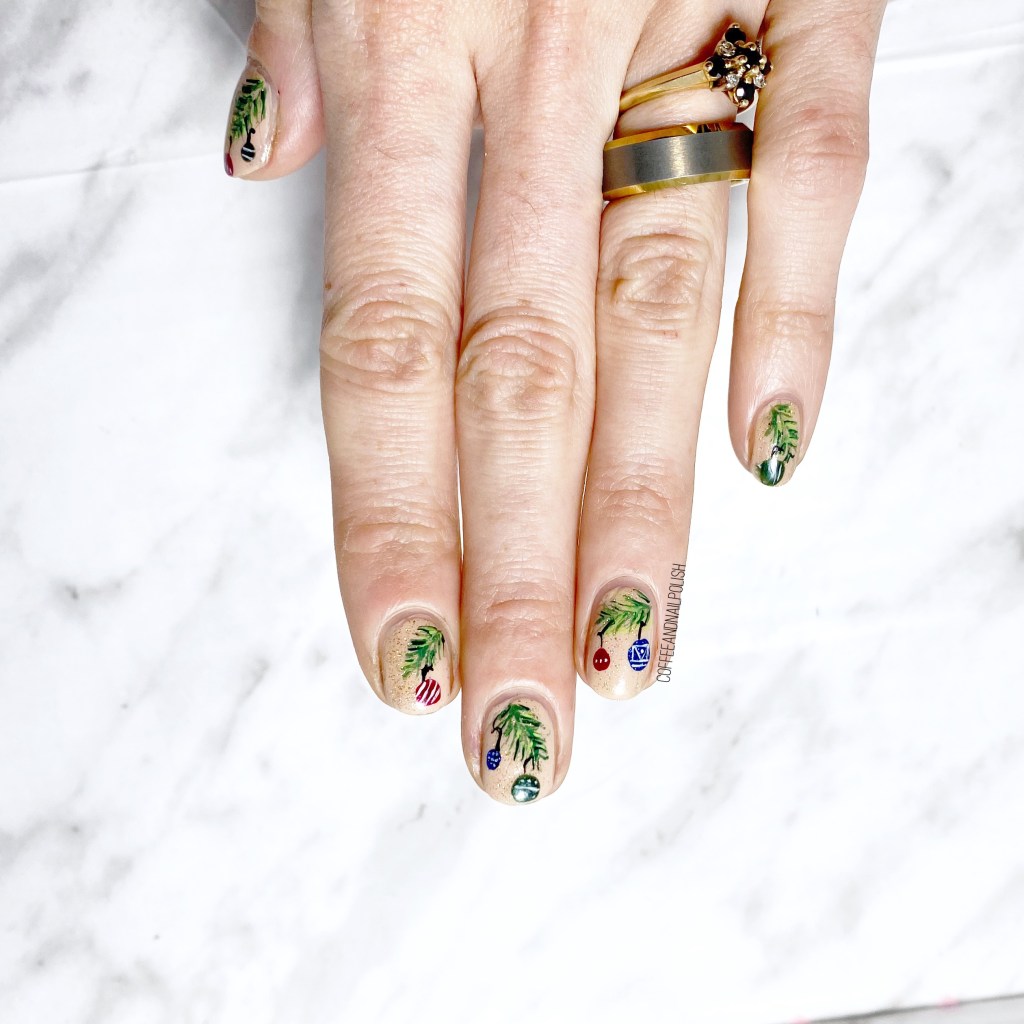
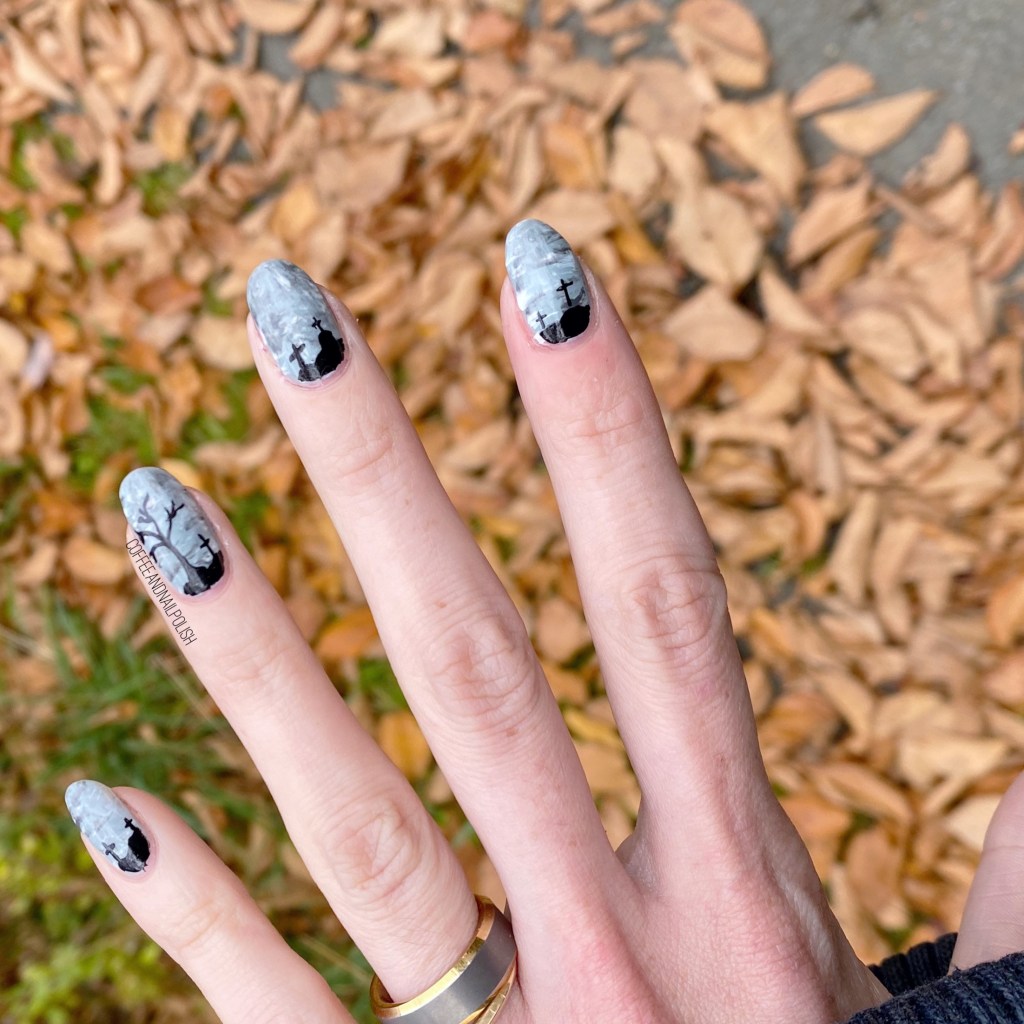
I’ll admit — initially stumped me a bit on what I should do. Spooky sky is a prompt that could encapsulate so many different ideas, but I finally I decided on a grey toned sky, with some creepy trees & graves.

The polishes I used for this manicure are: 

  • Base Coat: Essie First Base
  • Top Coat: Seche Vive
  • Sally Hansen Miracle Gel Get Mod
  • Essence Rock My World
  • China Glaze Intelligence, Integrity & Courage
  • Starrily Vantablack
  • Fan Brush (I think mine is just a cheap one I bought from Icing years ago…)
  • NailStuff.ca 7mm detail brush

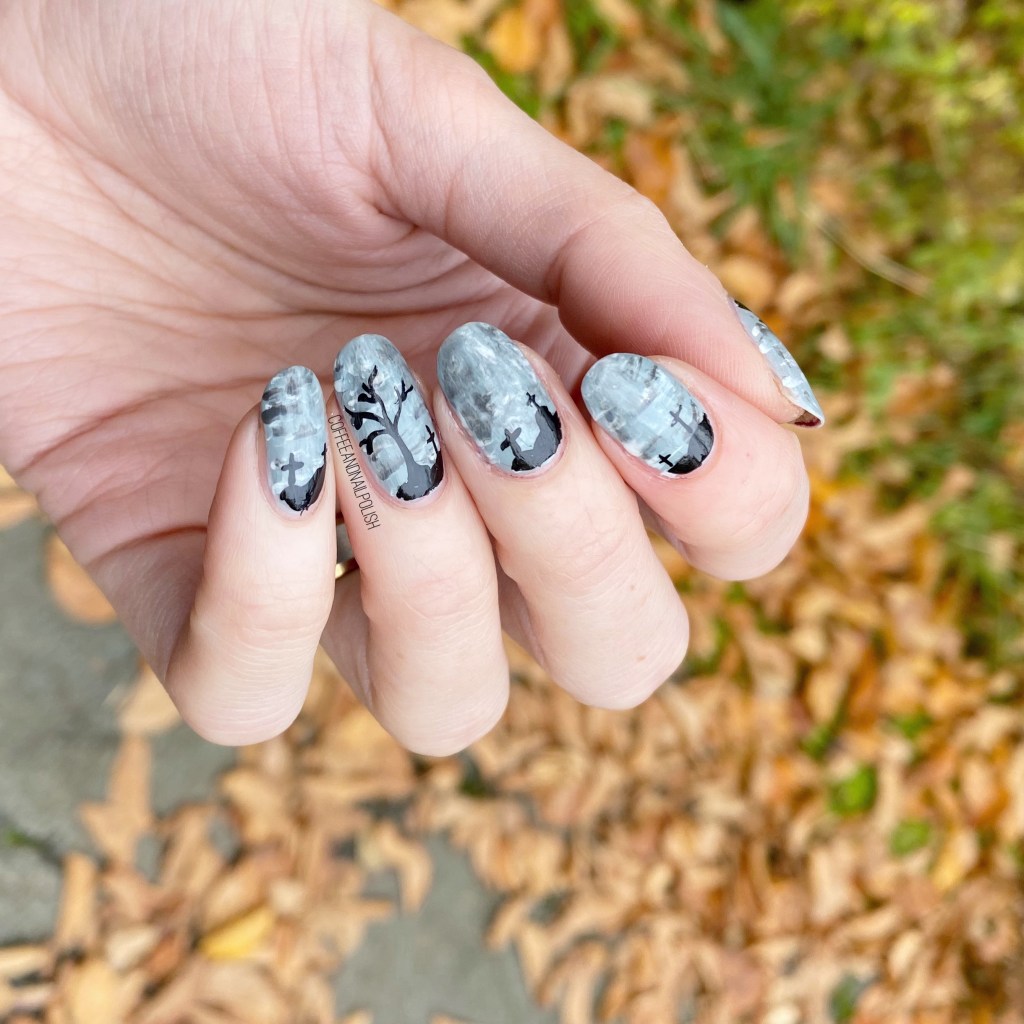
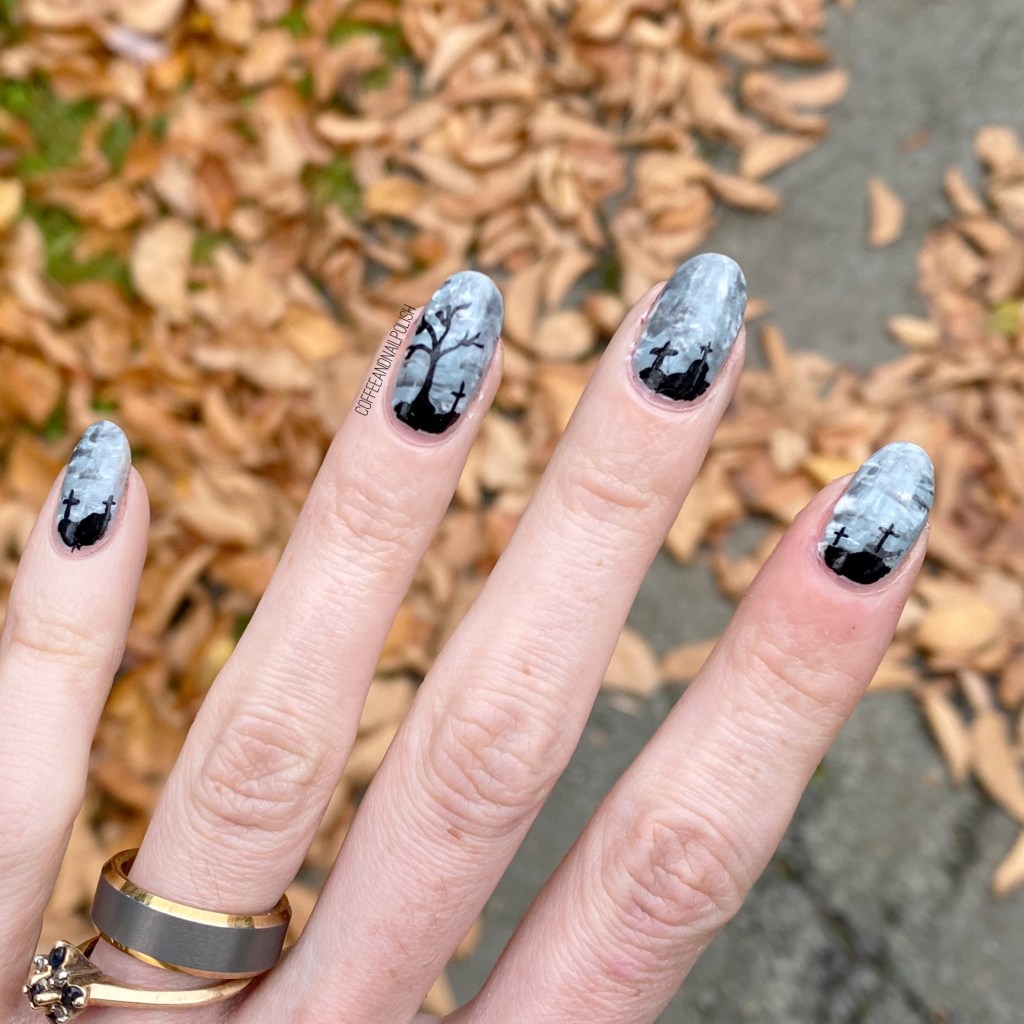
I really had this vision in my head of this decrepit tree against a spooky, grey toned sky — so that was the look I went for. I wanted something that you would see before the big killer was revealed in a horror film. & I think I managed to achieve what I was going for. I think my thumb turned out my favourite of all my nails too — between the layered polishes which really mimicked clouds, to the tree, it might be my favourite of all my nails.

& I got so many compliments on my nails at work, which always make me happy. Especially when people ask me where I got them done, or are shocked when I say I did them myself. That always makes me feel awesome!

What do you think about this look? Do these spooky sky nails gives you all the Halloween feels? Are you celebrating Halloween this year — a party, trick or treating, eating an entire box of Halloween bars to yourself? What are your Halloween plans… let me know down in the comments below!

& Stay tuned, because we have just two more prompts for GlamNailsChallengeOctober to come before this month is over!

Pretty & Bright Spring Floral

Hello lovelies & happy Tuesday! Can you believe it’s Tuesday already? Hope everyone had the most lovely weekend. I was so into family time this weekend, that I totally forgot that yesterday was Coffee & Nail Polishes’ 7th birthday! So happy birthday to this fun little blog of mine. 🥳👑🎂

I would say I celebrated with cake, but all I wanted after the last 4 days was a huge salad.

But today I have another Spring floral to share with you! Will floral ever get boring to me? Nope! It’s still my absolute favourite design to do, & that hasn’t changed in 7 years.

For this manicure, the polishes I used were:

  • Base Coat: Sally Hansen Nailgrowth Miracle
  • Top Coat: Essie Good to Go
  • Icing Matte Effect 60217
  • Sally Hansen Good Kind Pure Peony Origins
  • Sally Hansen Good Kind Pure Eco-Rose
  • Sally Hansen Insta-Dri Racing Rose
  • Essie Check Your Baggage
  • Sally Hansen Miracle Gel Get Mod
  • Sally Hansen I ♥️ Nail Art pen in Purple
  • Essie Go Ginza
  • Essie Off Tropic
  • Essie First Timer
  • Essence The Green & The Grunge
  • NailStuff.ca 7mm detail brush
  • NailStuff.ca Dotting Tool Trio

So, so many polishes but the end result is absolutely perfect. The colours are so bright & eye catching, which is my favourite kind of floral. We’ve had way, way too many days of clouds & rain, so we could really use some bright & sunny days. Maybe this manicure will encourage Mother Nature a little bit to send some sunshine our way.

&, if not, at least there is a little bit of sunshine on my nails to cheer me up.

What do you think about this design? Are you sick of the floral yet? (I hope not!) let me know all your thoughts down in the comments below! & share what Spring nail art trends you’re loving right now.

Christmas Eve Ornament Nails

Hello lovelies & Merry Christmas Eve! Hope everyone is having a not too stressful start to their Christmas (or December 24th, for those who don’t celebrate.)

Today I have one final pre Christmas look to share with you — some Christmas ornament nails. This is actually a recreation/new take on a design I did five years ago. I thought a new version would be a fun design!

For this manicure, the polishes I used were:

  • Base Coat: Sally Hansen Hard As Nails
  • Top Coat: Sally Hansen Miracle Gel Shiny Top Coat
  • Sally Hansen Good Kind Pure Almond Tan
  • Sally Hansen Miracle Gel Five Golden Blings
  • Icing Emerald City
  • Essie Off Tropic
  • Random icky green (haha)
  • Sally Hansen Miracle Gel Can’t Beet Royalty
  • Starrily Diamond Rain
  • Zoya Ray
  • Starrily Vantablack
  • Sally Hansen Miracle Gel Get Mod
  • NailStuff.ca 4mm Micro Detail Brush (COFFEE10 saves you 10%!)
  • NailStuff.ca Dotting Tool Trio

I’m actually obsessed with these. They turned out so perfect—-better than I had even imagined! I really wanted to do some kind of ornament design, & these just turned out so cute. I also didn’t have a ton of time to do my nails, & all the painting was (relatively) quick! Also I’m super proud of my teeny tiny little designs on the ornaments themselves, mostly because I was stumped on what designs to even put!

It’s the perfect Christmas Eve design, especially for the hours of wrapping I have to do tonight after the kids go to bed! Haha.

I hope everyone has the most lovely next couple days filled. I know this year is so much different than Christmas past, & so many people are away from the people they love most, but I’m sending love to all, & wishing no matter your situation, your days are filled with peace.

Merry Christmas & Happy Holidays lovelies! 💗🎄

Christmas-y Glitter Gradient 🎄❄️

Hello lovelies & happy Tuesday! I know, I’m switching this thing up by posting on a Tuesday. I decided this week that I’m doing to (try) & post a Christmas design every day leading up to Christmas Eve! I just have so many design ideas I want to share!

Today is a simple but effect look — a glitter gradient. Glitter gradients are definitely one of the best I-have-no-time-to-do-nail-art-but-I-want-fancy-nails designs but they take virtually not extra time to do. This one especially doesn’t require any tools at all—I just dabbed the glitter on using the nail polish bottle brush.

For this manicure, the polishes I used were:

  • Base Coat: Sally Hansen Hard As Nails
  • Top Coat: Sally Hansen Miracle Gel Glossy Top Coat
  • Icing Emerald City
  • Icing Santa Baby

How cute is that glitter on top of the green of Icing Emerald City? This is one of my favourite Christmas glitters of all time (I shared swatches of it last year), & I’ve done some version of this glitter gradient every year, with different base colours, because it works so well.

Also the polish is scented like candy canes when dry, even 5 years after I bought it, which I think is so much fun! The glitter also has a variety of different shaped glitters, which I really like, because it gives good dimension to the gradient so that it pops on the nail! In fact, I had a lot of people comment on my nails at work, which always brings a smile to my face!

What do you think of this glitter gradient? Are you a fan of this type of easy nail art design? What holiday design/polish are you currently wearing? I’d love to know, so please share down in the comments below!

SWATCH SUNDAY — Icing Emerald City

Good morning lovelies & happy Sunday! It’s 4 sleeps until Christmas, can you believe it? I definitely can’t.

I was searching through my stash to find a Christmas-y green to share, & realized that I don’t really have a lot of green polishes (that aren’t neon) in my stash. I did stumble across this beauty from years past, & thought it would be a great to share!

Today’s polish pick is Icing Emerald City, which is a beautiful emerald green shimmer with a soft “cashmere” finish. This shade was originally purchased circa 2013-2014 (I’m guessing).

2 coats, no top coat.

For an old polish, the formula is easy to work with. It’s thick, so it applied well, but not clumpy or weird (which is good for an old shade). I did need 2 coats for full opacity, but that was just because of a few streaky spots. I love the brushes on these old bottles, because of how wide they are—it really makes the polish easy to apply. As for the finish, I was kind of expecting it to be more matte for a “cashmere” finish, & while it wasn’t super shiny, it wasn’t super matte either. Now, that’s not a bad thing, but I’d probably add a matte top coat over top if I was looking for a really true “cashmere” finish.

Check out that macro! You can really see the blue & green micro glitters that make up the shimmer. I’m kind of obsessed. Such a beautiful green, & it really is great for a Christmas look!

What do you think about this old school shade? What is your favourite Christmas green? After looking in my stash, I’m realizing I really need to get a few more in my stash! Let me know your picks down in the comments below!