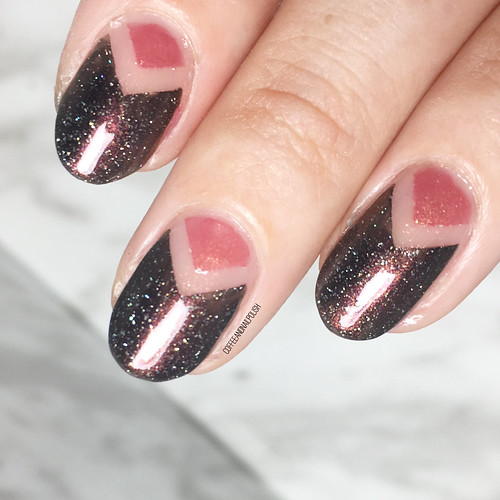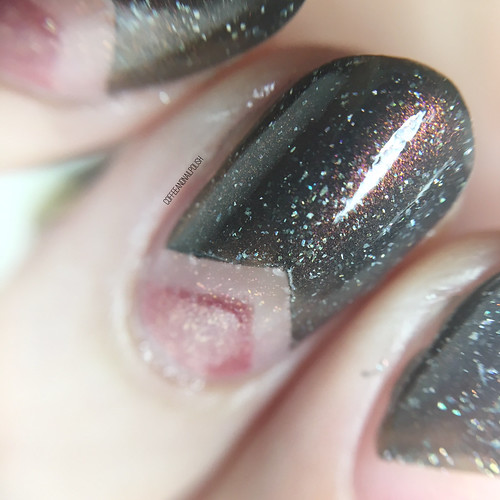
SWATCH SUNDAY — China Glaze Fall 2019 Gone West Collection

EBA5EF39-A911-413B-B051-15FF806107CD

PR SAMPLE

Good morning lovelies! Today I am so excited because I am officially diving into some BRAND NEW Fall polishes for 2019!

E77F6133-3BCE-43ED-BE55-8ADD21DF9B6D

I was recently gifted the China Glaze Gone West Fall 2019 collection courtesy of China Glaze themselves! I’d been admiring this collection & all its shades since it was first announced, so to say I was excited to receive all 8 polishes would be an understatement! & I couldn’t wait to get a chance to try each shade on & share them all with you!

& now some swatches!

Continue reading “SWATCH SUNDAY — China Glaze Fall 2019 Gone West Collection”

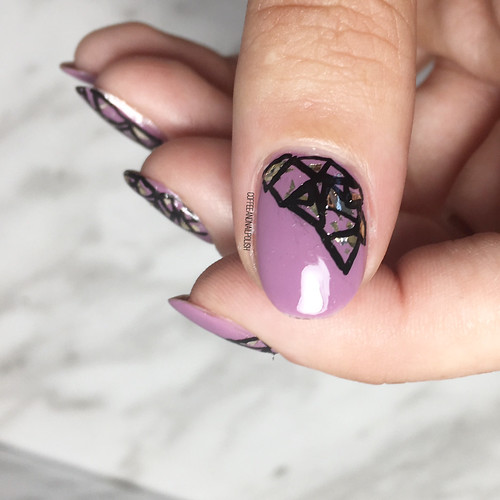
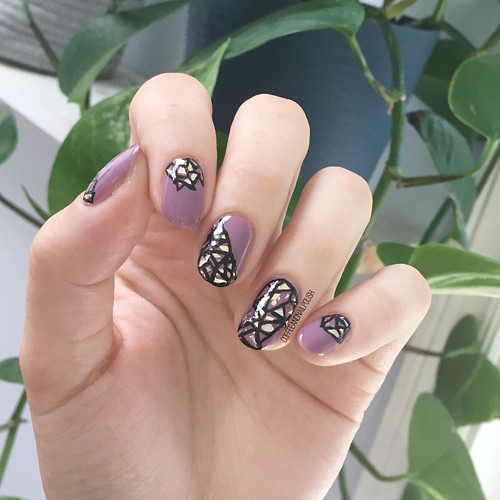
Stained Glass Nails for #glamnailschallengeaug

FBAB67AC-50EB-4888-BF2B-B1EA0636BA4D

43A74F1F-F1D5-45CE-8123-225CC0FEE596

Good morning lovelies! Another day, another fun manicure created for Glam Nails Challenge August! I’ve really been having a lot of fun creating new designs for the challenge this month, getting out of my usual comfort zone.

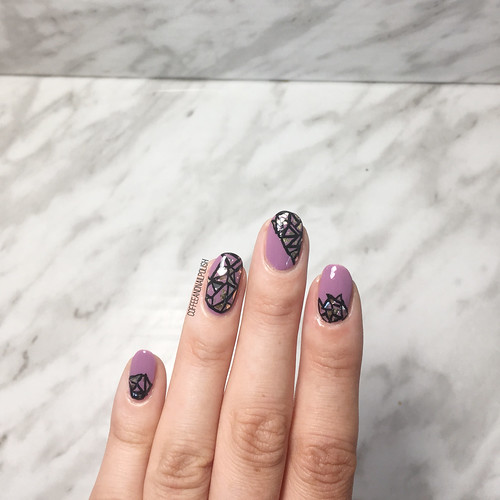
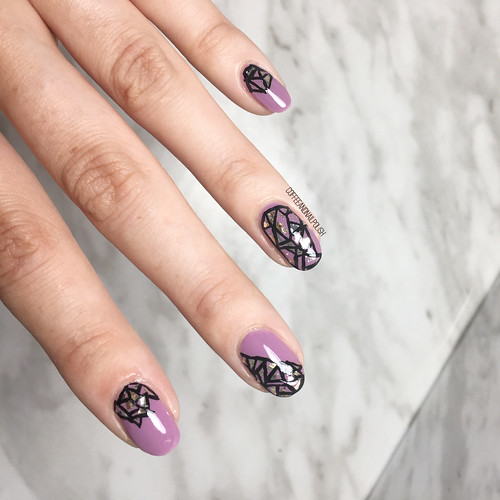
Today’s manicure prompt is Stained Glass. I used to so shattered glass manicure a lot back in the day, but it’s been a while since I attempted one. Glitter placement can be a bit time consuming, so that’s probably why it’s been so long. So I was super excited to give it another try! & because the prompt is stained glass & not shattered glass, I decided to add some freehanded framing around my glitter to complete the look!

4611FA17-21BF-4033-883B-38B90E2B6A7C

B60162F1-AD44-410F-8A39-10D1197353B1

For this manicure, the polishes that I used were:

  • Base Coat: Sally Hansen Complete Salon Manicure Strengthening Base Coat
  • Base Coat: Quo by ORLY Bonder
  • Top Coat: Essie Gel Setter
  • OPI One Heckla Of A Color {PR sample}
  • OPI Gaining Mole-mentum
  • Black Acrylic Paint
  • Nailstuff.ca 4mm Micro Detail Brush {PR sample}
  • Nailstuff.ca Dotting Tool Trio {PR sample}

8E765E11-C7D8-4B4F-904F-AAFAD96B9C36

0209CA00-7D3A-42E1-AF89-CD5394E4A2D7

First time I’ve used acrylic paint for nail art in a while. I decided to use acrylic paint because I wasn’t sure if I was going to like the black framing & I wanted to be able to wash it off my base if I hated it, without destroying my base nail art. Thankfully I didn’t have to worry about hating it, because the black looked really good with the glitters!

9C7D405B-2499-4849-9CFC-184F1EC03BEC

F57D04C4-4E8B-4486-870B-E34EE317BEDA

This look just makes me so happy, & makes me realize I miss doing shattered glass manicures. Could you imagine this look with holo flakes/glitters? I’m getting Fall manicure inspiration with maybe like an emerald green & maybe some negative space with the glitters.

Ooooh I can see it now! I can’t wait!

D0D4219A-5F40-4FB4-9D9A-CDC99756C9A0

What do you think of this manicure? Have you been following along with the challenge on Instagram? Don’t forget to check out #glamnailschallengeaug to see everyone’s amazing manicures!

Mermaid Nails for #glamnailschallengeaug

3DA7F91A-CA98-4C30-BB84-F02BCF14961B

ABB287C1-2545-45F2-8644-9BFEF5A2000D

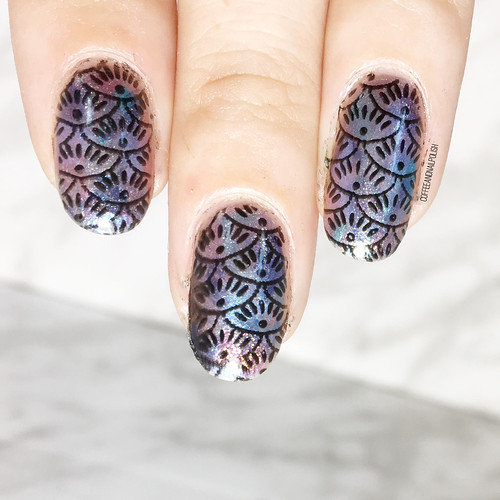
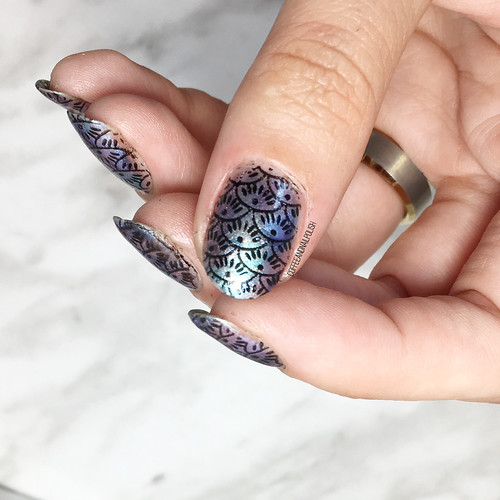
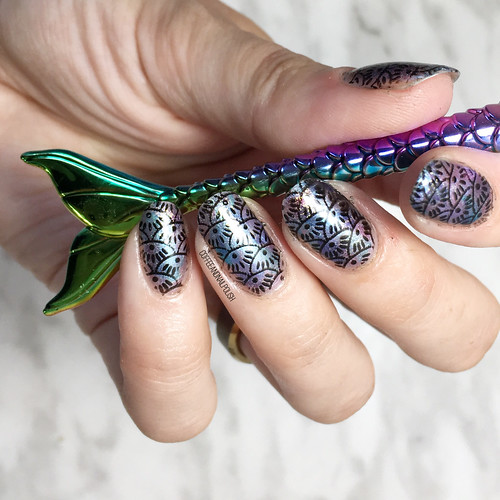
Hello lovelies & happy Wednesday! Today I have another manicure to share with you for the August Glam Nails Challenge! Today’s prompt is Mermaid, which is always a fun design to do. Sadly, I’ve run out of my mermaid pattern nail vinyls, so I decided to stamp my scale pattern onto my nail, since I was pretty sure I wouldn’t be able to freehand them.

I had a pretty specific idea in my mind of what I wanted this manicure to look like, & unfortunately I didn’t have an actual mermaid scale stamping plate, so I went through the plates I do have to find the one which would work best!

4A867BBB-341D-4CAA-A728-D2047D7A84F5

CB9591C1-09CC-4F85-AB61-CB3B9701ADCC

For this manicure, the polishes I used were:

  • Base Coat: Sally Hansen Complete Salon Manicure Strengthening Base Coat
  • Base Coat: Quo by ORLY Bonder
  • Top Coat: Essie Gel Couture Top Coat
  • Essence Across the Universe
  • Essence Mermaid of the Galaxy
  • Essence Guardians of the Unicorn
  • Essence Space Glam
  • Essence Intergalactic Adventure
  • Essence Black in Black
  • NailStuff.ca Clear Stamper & Scraper (gifted)
  • BornPrettyStore stamping plate BP-LO32 (item #23268)

6F1E9417-AF8A-4CA3-9B03-D18C8330FAE8

1C220597-DB87-4B94-B4B7-1845306587AD

Please excuse the remaining mess around my cuticles. I forgot to use my cuticle barrier because I was rushing, & trying to clean up the polish on my fingers was tricky. That’s what you get when you try for a nap time manicure & want to get your nails done before the babes wake up!

But even if my cuticles aren’t perfect, I’m still so in love with how this manicure turned out! The Essence Out Of Space Stories polishes work so well for this fantasy type design. Especially with the duo/multichrome finishes they have.

04A858B6-6C6C-4129-A4EA-6B8FC7A79509

837477B9-6F58-47B1-B2C6-70890ADFBCF2

Posing with my mermaid nail art brush because it’s the only mermaid-y item I think I own. I feel like even though I didn’t use a traditional mermaid image, they still came out very mermaid-esque. I actually think I like this pattern even better!

BEBF5EA9-61BB-4B13-A16F-6FF7CE47168B

What do you think about these mermaid pattern nails? 🧜🏼‍♀️ share your thoughts down in the comments below!

Gorgeous Galaxy Nails 🌌

Hello lovelies & happy Thursday! Today I have what might possibly be my favourite & most gorgeous nail art ever to share with you.

Today’s look is a galaxy design, which I haven’t done in over two years! After browsing all my duo & multichrome polishes (while thinking about my favourite Fall shades), I decided it would be fun to pair a few in a galaxy design. 🌌 & oh boy did it turn out beautiful!

For this manicure, the polishes I used were:

  • Base Coat: Sally Hansen Complete Salon Manicure Strengthening Base Coat
  • Top Coat: Essie Gel Couture Top Coat
  • Essie Spun in Luxe
  • Quo by ORLY Breathable Power Packed
  • Sally Hansen Complete Salon Manicure
  • FingerPaints Surreal Sunset
  • FingerPaints Hues Blue
  • Claire’s Venomous
  • Claire’s Poison Apple
  • Claire’s Chromance
  • Sally Hansen Miracle Gel Get Mod
  • Nailstuff.ca Mermaid Tail detail brush
  • Nailstuff.ca Dotting Tool
  • Latex Free Make Up Sponge (ripped into small pieces)
  • Tweezers

Look at the close up & those glitters! How gorgeous! It really does look like some far off galaxy.

I always forget how easy Galaxy nails can be until I start doing them. I love the fat they don’t have to be perfectly crafted, you kind of just go in with your collection of colours & see how they turn out, maybe adding some polka dots for stars. I actually created a tutorial for galaxy nails in the very early days of my blog which can be found here. I will definitely say that the longer your nails are, the better your galaxies will turn out.

Again, just check out that close up action & those glitters! Have you ever seen anything more beautiful? I’m just so, so happy with how this design turned out. Which, let’s be honest you can probably tell because I took about 1000 pictures of this look to share!

I just can’t stop staring… why has it taken me so long to do another galaxy design? I never want to take these off!

So what are we thinking about these galaxy nails?

Do you have favourite polishes for creating a galaxy look?

Let me know your thoughts down in the comments below!

Rainbow Glitter Gradient (Party on my Nails!)

Hello lovelies! Hope everyone is having a fantastic week so far. I’m super excited today because I finally did something other than just a single colour on my nails! 🎉 I managed to add a fun glitter gradient to my Swatch Sunday shade for this week & I’m loving how much fun this simple nail art turned out!

Seeing as it is Pride Week here in Halifax, I thought a colourful rainbow glitter gradient would be perfect for the occasion.

For this manicure, the polishes I used were:

  • Base Coat: Sally Hansen Complete Salon Manicure Strengthening Base Coat
  • Top Coat: Essie Gel Setter
  • ORLY Fireball
  • China Glaze Point Me To The Party
  • ACO by Ardene DAFUQ

I know I’ve written before my love for glitter gradients–they’re just so easy to do! & for those of us who might not have a lot of time, they can give you fun & fancy nails with minimal effort.

For this look, I started with my base colour & then took my first glitter (China Glaze Point Me To The Party) & after brushing off some of the polish, started at my cuticle line & brushes the glitter upwards. I went over the same spot a few times to build up the glitter amount. Finally I decided that we needed some blue, so I grabbed a blue glitter topper (ACO by Ardene DAFUQ) & dabbed on some blue glitters as well. Lastly, I sealed everything in with a thick coat of Essie Gel Setter to give this look some lasting power.

& now my nails are ready to party! 💅🏻

I’m really digging the combination of Fireball with this glitter. Makes me think of a fiesta, & feels very Summer-y to me. & even though I won’t be able to partake in any of the amazing Pride events happening this week, my nails are totally ready (just in case).

What do you think of this design? Where would you wear this design? Let me know down in the comments below! & share any nail art you’d love to see me do now that I’m (slowly) getting back my posting mojo.

🌈