SWATCH SUNDAY — Deborah Lippmann Stronger

8221BB08-097F-42CB-B733-4492529F39E2

A6625F46-1D88-4DDE-932A-D7E83749E63F

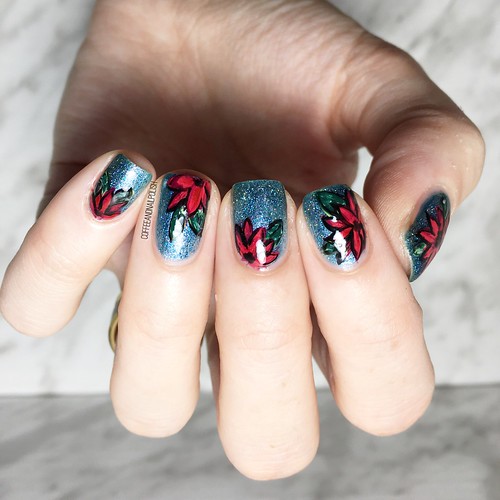
Hello lovelies & Happy Sunday! I’m currently on a very, very long drive to Northern New Brunswick to start our Christmas celebrations, but I wanted to make sure I got a Swatch Sunday post done for today! & I thought since we are only 3 days away from Christmas, we needed to get glittery! & boy, are we going all out!

Today’s Swatch Sunday pick is Deborah Lippmann Stronger. This shade was originally released in 2013 & created in part with Kelly Clarkson. I picked up my particular bottle at Winners/Marshall’s a few years back, probably on sale because that’s usually the way.

74DBF70D-5DA6-46BA-B9DF-D60482E11A3C

1C7C5C60-EB98-4548-8AF6-D9A3B776CE46

17EBA10F-9BF9-443D-B403-03AD9331C76B

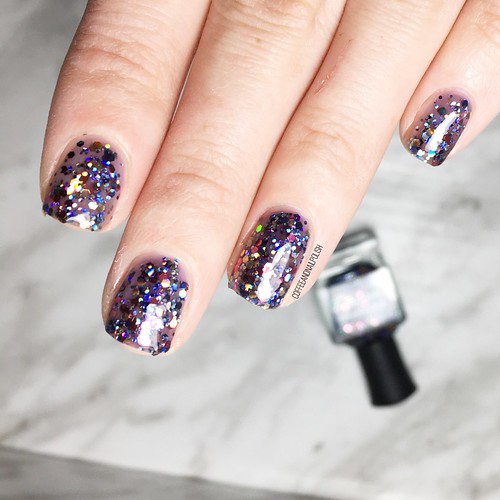
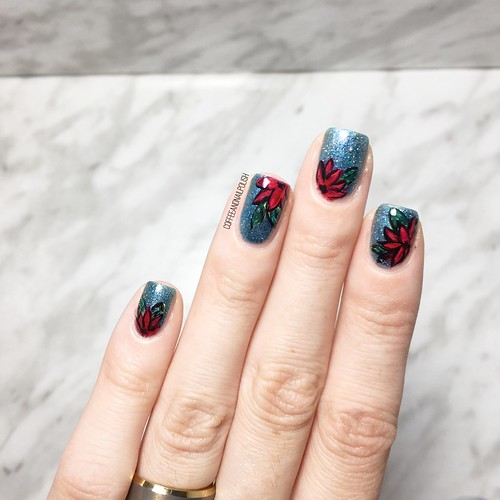
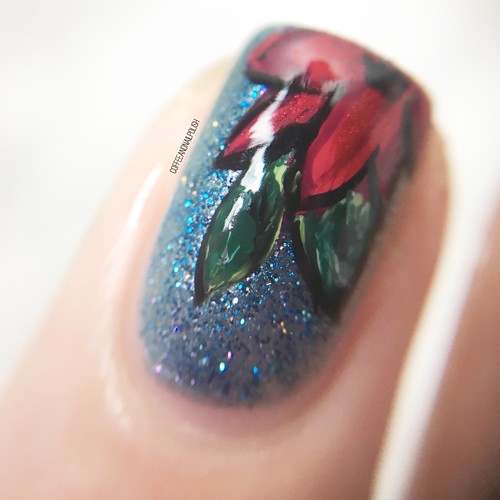
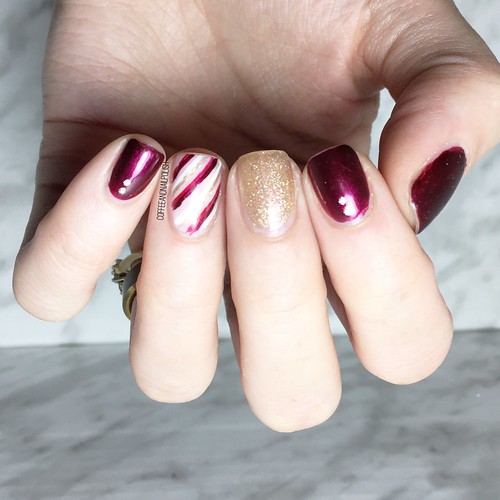
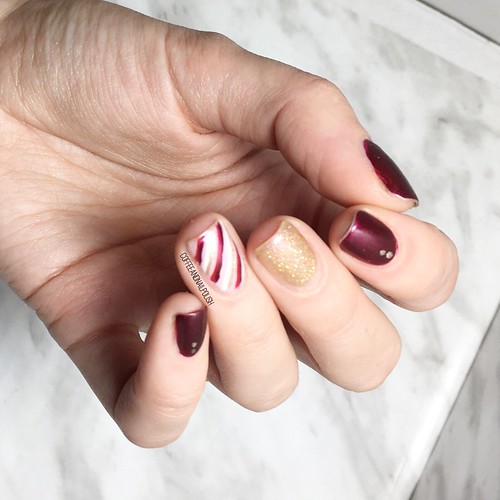
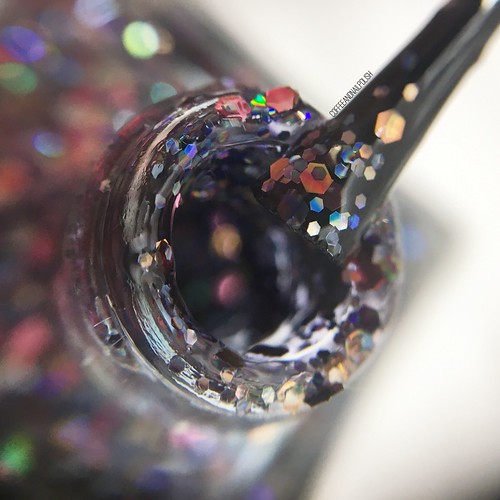
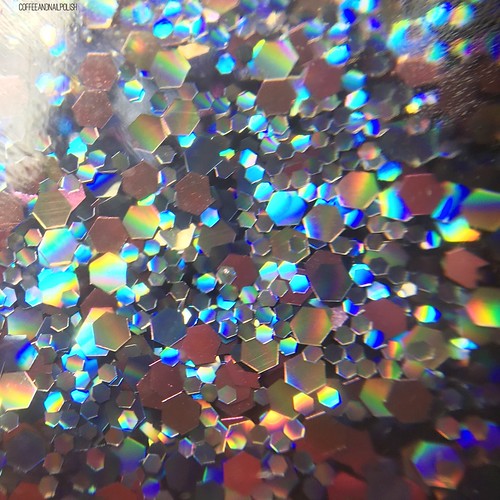
The polish itself is a smoky purple jelly base which is packed full, & I mean full, of multi coloured & holo glitters. There are varying sizes as well, which you can really see in my macro shots. Absolutely stunning. This is definitely what I like to call a party glitter — the kind of polish designed for a special occasion, like Christmas or New Years Eve, when you just want everything about you to sparkle. Or maybe if you’re having a down day, & you want eye catching movie star worthy nails for buying bananas.

53A1CE58-152E-42EE-BD08-CCA607234049

091818EF-3D9C-4883-98AB-05A9E24223E6

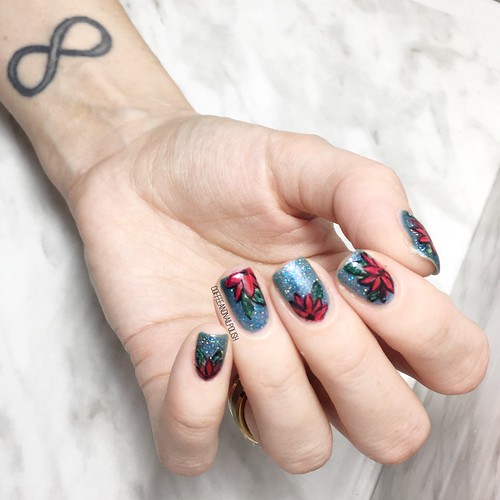
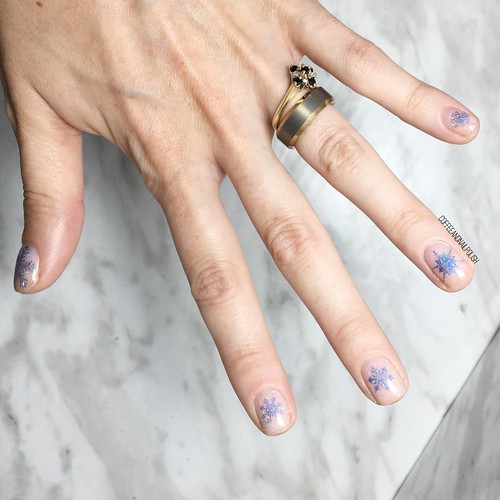
Normally a shade like this, I would wear layered over a corresponding shade like dark purple or navy blue. This cuts down on the coats you need, which helps make removal easier & saves on polish. For my swatches though, I pulled out my UNT peel off base coat & applied the polish all on it’s own to see it in it’s true glory.

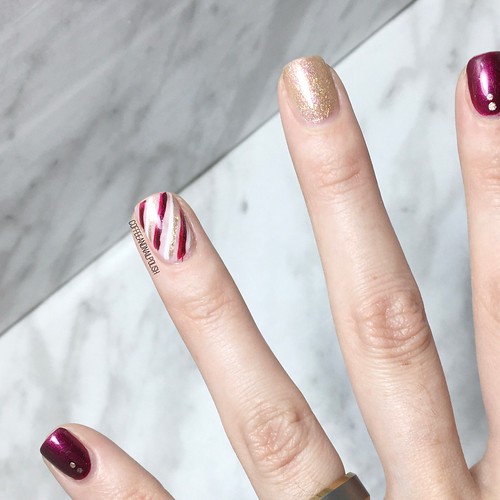
For my swatches I did 2 coats of polish which for me was enough, but wasn’t completely 100% opacity. I feel with the holo though, it fills in the gaps & you don’t even notice you can kind of see my naked nail. If I really wanted full coverage, sponging would be the way to go, especially when you have a bit of a trickier formula due to the dense glitter.

0EB33746-EDE2-452B-872F-814FD32818FB

6D9CFD4D-B7CA-4124-8CB7-39AC1D66B692

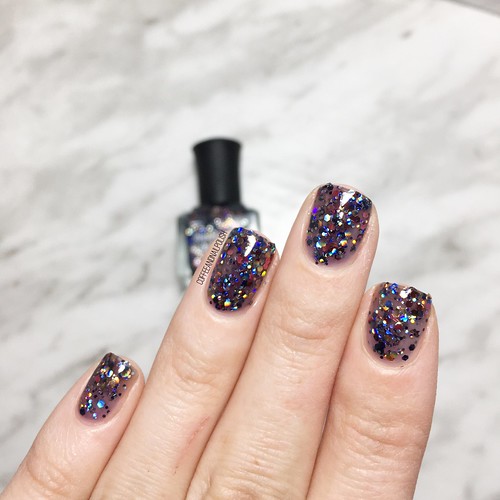
I applied two coats of top coat to my nails to seal & smooth my glitter. One layer of super quick dry top coat (YSL Beauty Quick Dry Top Coat) & then a thicker glossy top coat (Essie Gel Setter) just to smooth everything out.

I definitely recommend wearing a peel off base coat with glitters like this, just because it makes removal so much easier than trying to soak off a thick layer of glitter. I’ve done it–it takes way too long, uses way too much nail polish remover, & is no fun at all. Peel off base coats, like UNT Ready for Take Off, make life so much easier because you can just pop it off & move into the next manicure. & that makes me happy!

23E2EBC1-889A-4C4E-84B4-7769C3609CB0

So what do you think about Deborah Lippmann Stronger? Do you have a favourite glitter like this? Any secrets to removal you can share? Hop on over to my Instagram, & let me know what you think!

#GlamNailsChallengeDec — Poinsettias

6E2004E1-733B-44DC-9243-5DE209FEC791

Good morning lovelies & happy Wednesday. & happy week until Christmas, for those who celebrate! Is everyone else rushing around like a chicken with no head trying to finish up their shopping/organizing/wrapping, or is it just me? 😅

Today’s post is another entry into #GlamNailsChallengeDec — poinsettias. & fun fact: even though I love love love a good floral, I don’t think I’ve ever attempted a poinsettia design! Kind of crazy, but I was excited to give it a try.

8E1C47D9-2570-4EB8-A5EB-EB3CFE3C70C6

88F45EEE-9436-41DE-90B5-FC39EC4DB4EA

For this manicure, the polishes I used were:

  • Base Coat: Sally Hansen Complete Salon Manicure Strengthening Base Coat
  • Top Coat: Essie Speed Setter
  • China Glaze December to Remember
  • China Glaze Feeling Twinkly
  • China Glaze Fairy Dust
  • Sally Hansen CSM Red It Online
  • Sally Hansen CSM Berry Fancy
  • Sally Hansen Miracle Gel Good Cheer-y
  • Essie Off Tropic
  • Essie First Timer
  • Essence Black Is Back
  • NailStuff.ca 7mm detail brush (COFFEE10 to save 10%)
  • NailStuff.ca Dotting Tool Trio 

.

E7763034-087F-4827-9A4F-61C4CC4FBD05

3DB14FAD-ED59-4A07-ACC0-7869BAE25F11

5A2327E8-CC1E-410C-99FC-B5C0BA696E1D

So for this look, I started off by creating a super sparkly base using December to Remember, Feeling Twinkly & Fairy Dust. I really really wanted a super dense glitter for the poinsettias to pop against, I feel like the layering on these three shades really achieved that look. Next I hand painted my poinsettias using all nail polish. I know I’ve been using acrylic paint a lot lately, but I don’t actually have any red acrylic paint in my stash so I went old school & used nail polish.

It was a little time consuming, but the end result I feel like turned out really well. The only place I really struggled was with the leaves, & they’re definitely not perfect, but over all I think my design turned out pretty close to its inspiration!

C9BD3B51-F46B-49CC-97FF-527FE0C5B90C

C0818A1E-9280-4845-8965-669DA2ED09D1

Is there ever such a thing as too much sparkle during the holidays? I don’t think so. The only downside is glitter removal, but thanks to peel off base coat, if you just want extra glittery nails for a night, you are in luck! Can’t go wrong with that!

5C5EB3CE-D233-41B6-B5F1-36B9D79AFC4D

Absolutely loving these poinsettias & excited to finally mark this off my bucket list! If you like this look, hop over to Instagram & let me know. & while you’re there, check out the other beautiful poinsettia looks as part of #glamnailschallengeDec. I love going through & seeing everyone’s interpretations of the same prompt! It’s so much fun!

SWATCH SUNDAY—Dimension Nails Amazonian Manatee & Pygmy Sloth

F71ACF40-7440-4E44-8724-3B1987F390E2

{ PR SAMPLE }

Hello lovelies & happy Sunday! How crazy is it we only have 2 Sundays left until Christmas? I’m still attempted to get my Christmas presents together… the stress level is real!

But, I was lucky enough to receive an awesome gifted package from my girl Victoria at NailStuff.ca featuring some fun new goodies. If you follow me on Instagram or Facebook you would have gotten a sneak peak already, but Victoria sent me 3 brand new polishes from 2 new-to-me brands. & first up we’re taking about Dimension Nails!

Dimension Nails is a vegan, cruelty free Indie brand that is 10 free. That means it’s free of 10 not good for you ingredients including formaldehyde, toluene, & other really bad for you ingredients. Love that! Nailstuff.ca is a seller for the brand here in Canada, but you can also purchase directly from the Dimension Nails website as well. Also interesting is the fact that some of her shades–including the two I received–are collab shades with others which is so cool!

Now let’s get to the swatches!

Continue reading “SWATCH SUNDAY—Dimension Nails Amazonian Manatee & Pygmy Sloth”

Glitzy Candy Cane Stripes

86975CF6-804C-47B1-BFA2-E70E4C25CF04

60719FE5-A481-4EFD-BAB8-3BABB0A8D728

{PR SAMPLE}

Good morning lovelies & Happy Friday!

Friday the 13th to be exact. Hopefully you’re morning & day hasn’t gotten off to scary of a start. Today I’m sharing a design that is isn’t part of the GlamNailChallenge, but is an awesome Christmas/Holiday look to wear this time of year: Candy Cane stripes! Again, this is one of those designs I love to return to, year after year, but trying to put a new spin on it each time.

This year I decided to go with a more grown up candy cane accent nails. This would be the perfect look for a Christmas party, or even to wear to celebrate your Christmas dinner. & it’s super quick & easy to do, which I feel like is a must need this time of year (at least it is in my house!)

1C9A3FBA-8D04-4CD7-BB0A-6FE47FF73FE5

ED931BAD-5B54-4AC4-8666-1F47DF9D0864

For this manicure, the polishes I used were:

  • Base Coat: Sally Hansen Complete Salon Manicure Strengthening Base Coat
  • Top Coat: Essie Speed Setter
  • Sally Hansen Miracle Gel Frosted Berries
  • Sally Hansen MG In The Sheer
  • Sally Hansen MG Five Golden Blings {Oh My Gold! Collection}
  • Sally Hansen MG Goldie Rocks {Oh My Gold! Collection}
  • Sally Hansen MG Get Mod
  • Sally Hansen MG Good Cheery
  • Sally Hansen MG Golden Glow
  • NailStuff 11mm liner brush (COFFEE10 to save 10%)
  • Small dotting tool — I used the NailStuff dotting tool trio

.

FD910AE6-7790-4F94-A426-4E27B4C4FAC7

17D5C11F-6A6F-4E3D-8327-8373450FB738

I’ve done this look before, like I said, but usually I use striping tape or nail vinyls to create my stripes. I’m proud that I 100% freehanded these! & they didn’t turn out wonky at all! Also who doesn’t love a good flash of glitter — I used two of the 3 new Sally Hansen Miracle Gel Oh My Gold! shades in this manicure. They really are the most perfect polishes for the holidays.

ADF3B823-CC5E-431C-93EA-25F1C7F570F4

CC47DEAA-7610-4036-A280-1A0582DEFE94

What do you think about this manicure design? Would you rock this look at your next holiday manicure? & don’t forget that the Sally Hansen Miracle Gel Oh My Gold! collection can still be found in stores, so if you’re on the hunt for the perfect gold for the holidays, look no further!

These items were gifted to me free for review. However, all opinions are my own.

GlamnailschallengeDec— Snowflakes ❄️

295D3F82-9BCB-4A72-B323-B61C9863E1F9

Good morning lovelies & Happy Wednesday! We’re already halfway through our week, how crazy is that?! & even crazier we’re almost half way to Christmas! (I haven’t even begun to process the fact this year, no DECADE, is almost over…) Today I have another manicure to share with you as part of #glamnailschallengeDec — Snowflakes!

Snowflake designs are actually one of my favourite nail art looks for this time of year, because there are so many ways to create snowflakes: stamping, stickers, freehand, & even just glitter! For today’s look, I decided some more stamping was in order because I have about 5 different stamping plates with snowflakes on them. I really wanted to feature one snowflake per each nail & I love how these turned out because they remind me a lot of Frozen. ❄️

30922547-10AF-4821-8253-B5E14F868D79

656FC76D-444E-4F24-BDFB-1A4DFC92BD9C

For this manicure, the polishes I used were:

  • Base Coat: Sally Hansen Complete Salon Manicure Strengthening Base Coat
  • Top Coat: Essie Speed Setter
  • Quo by ORLY Breathable Kiss Me I’m Kind
  • Sally Hansen Xtreme Wear Ice Pop
  • ACO by Ardene Style Icon
  • Superchic Lacquer Throwing Shade (c/o: NailStuff.ca — COFFEE10 to save 10%)
  • Nailstuff.ca clear stamper & scraper set 
  • Assortment of BornPretty stamping platesthis one has an assortment of similar snowflake images.

.

20866F10-C3D4-45F0-BA6E-C6CE21C837EF

63583769-6AFD-4338-8C11-791FCD5E0B91

B5590443-2DBB-4488-8D4D-9ADB83892420

I started this look off by creating a glitter sandwich using Kiss Me I’m Kind, Ice Pop & Style Icon. I wanted a really soft, delicate base for my snowflakes. If you don’t know what a glitter sandwich is, basically you start off by applying a layer of jelly/sheer polish, a layer or two of glitter & then finishing it with another layer of your jelly/sheer polish over your glitter. It really gives the glitter a softer look, which I love. It looks really beautiful all on it’s own or as the base for nail art. I thought it would be perfect for this particular design because it gives the effect of snow in the background (or at least that’s what it reminds me of.)

EE2C064B-596F-42C4-AAFD-FA775BF0AB3A

1CB11F12-791C-44E5-B92E-24A72B5AC10E

Victoria (aka @nailstuffca) was the one who told me how amazing the Superchic polishes were for stamping, which is why I grabbed Throwing Shade for my snowflakes, & she was so right! I was very impressed with how well it showed up on my nail, especially because I had such a light base to start. I can’t wait to try again over a darker base colour (a navy blue such as Essie Bobbing for Baubles perhaps? Stay turned!)

Seriously though, can you go wrong with holo snowflakes? I really don’t think you can! Who doesn’t want to feel like an Ice Queen.

A07541D0-8E44-4597-AE10-5DBDEC97C659

Who else loves a good snowflake design? I really really love wearing snowflakes on my nails, especially when the actual white stuff seems to be keeping its distance. It just doesn’t really feel like Christmas to me, until there is a little snow on the ground.

As always, don’t forget to check out #glamnailschallengeDec over on Instagram to see everyone’s fun snowflake looks. & stay tuned, because there are still a ton of fun designs to come!