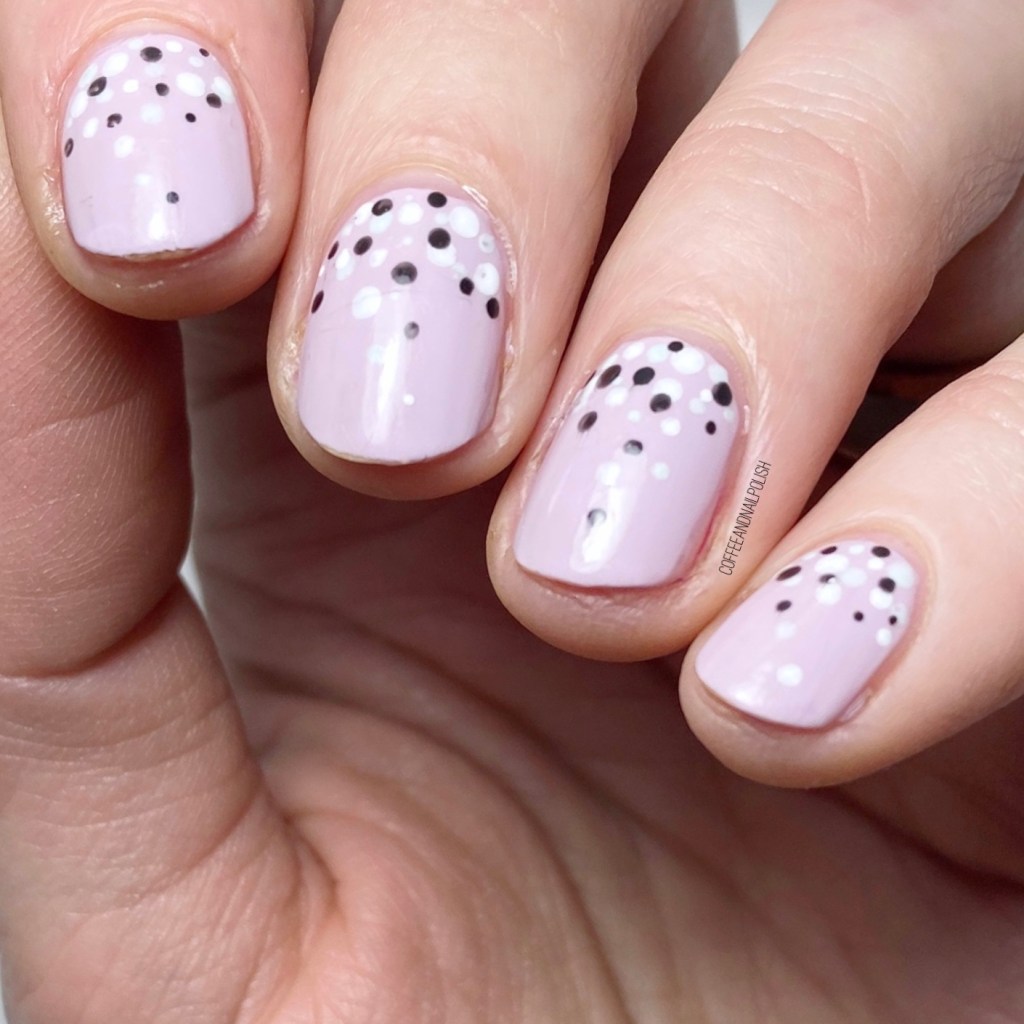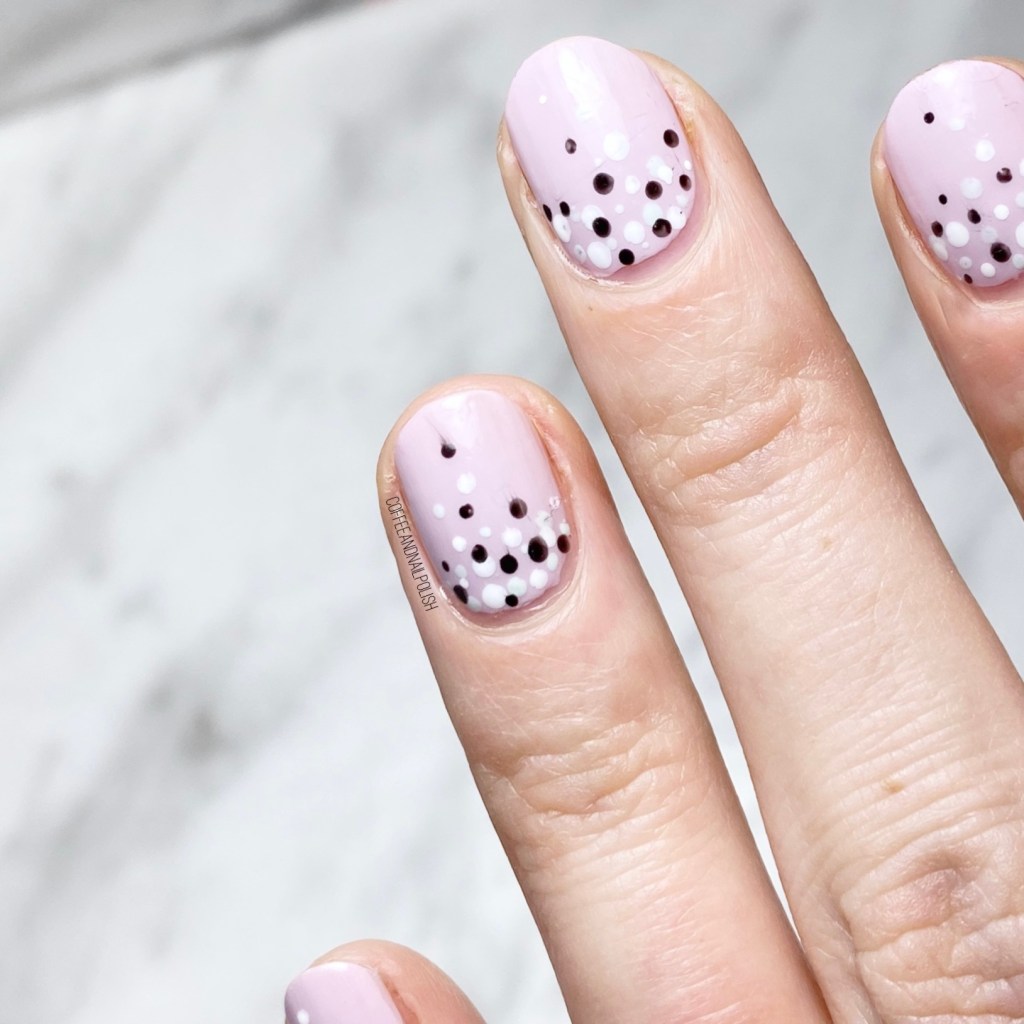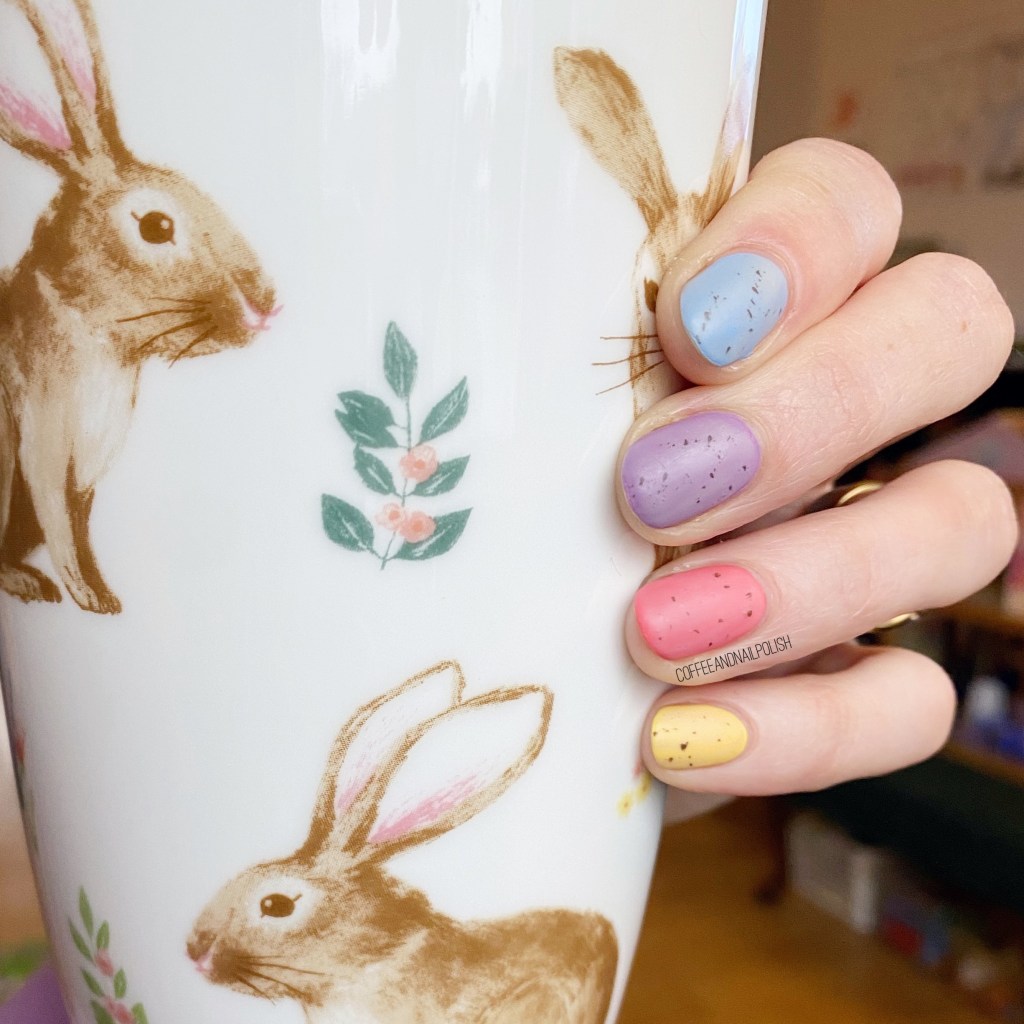
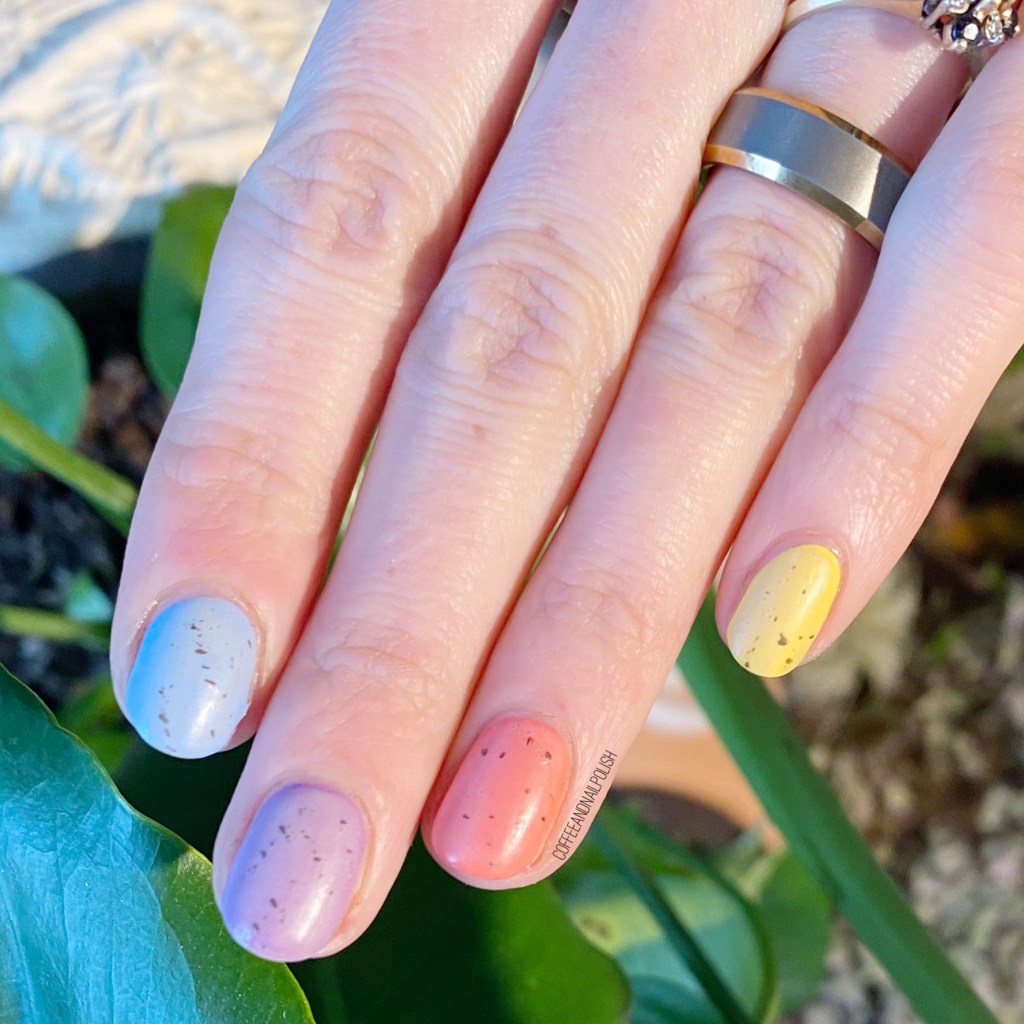
Hello loves & happy Tuesday! I hope everyone is having a lovely week so far. It’s almost Easter, so I thought it was about time to share a somewhat Easter-y design. & what is more fun than a speckled Easter egg design!
I literally do a version of this look every year, & if never gets old to me. It’s such an easy & festive look to do. Plus I always joke since I can’t actually eat mini eggs, wearing them on my nails is the next best thing!

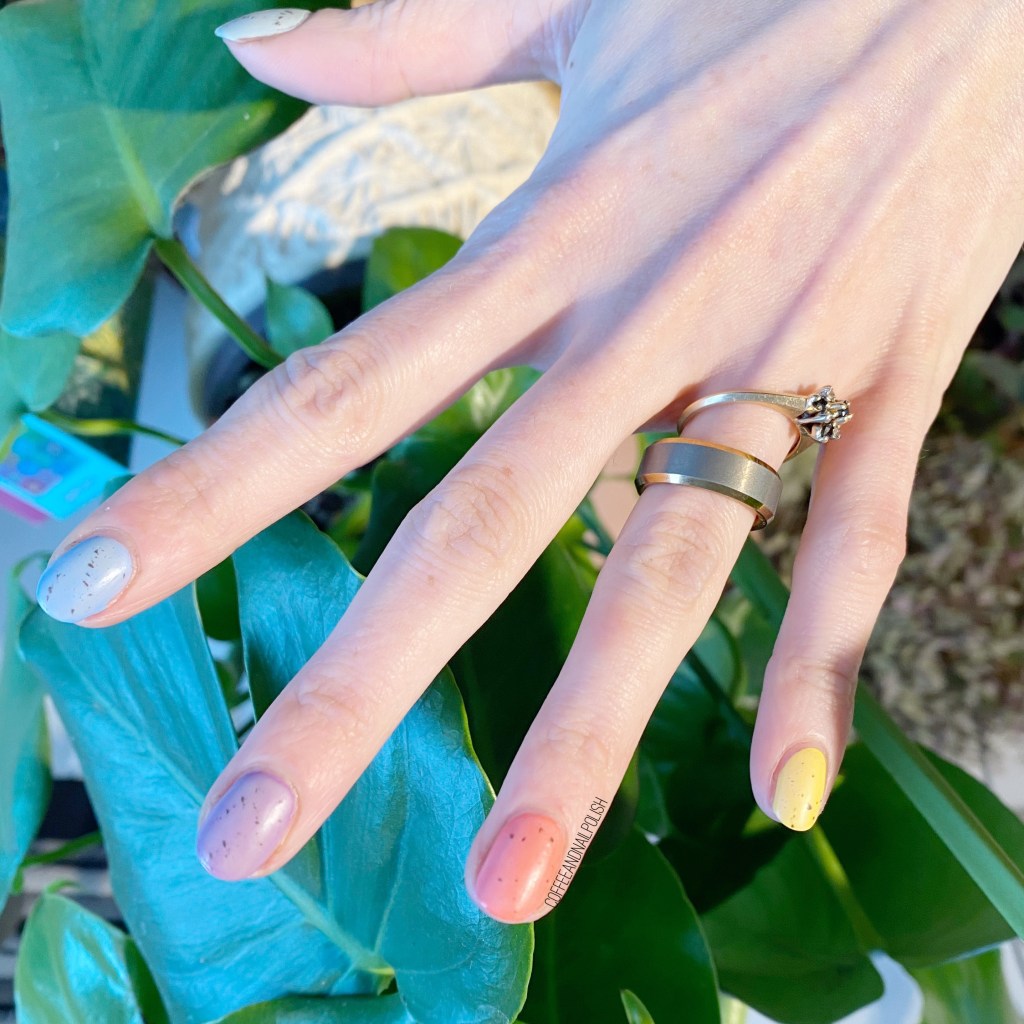
The polishes I used for this manicure are:
- Base Coat: Sally Hansen Good. Kind. Pure Hardener
- Top Coat: Essie Speed Setter
- Matte Top Coat: Sally Hansen Miracle Gel Matte Top Coat
- Julep Alyssa (thumb)
- Sally Hansen Miracle Gel Sugar Fix (pointer)
- Essie Play Date (Middle)
- Essie Gel Couture On The List (ring)
- Sinful Colors Yolo Yellow (pinky)
- Wet N Wild 2% Milk
- OPI How Great Is Your Dane?
- Fan Brush
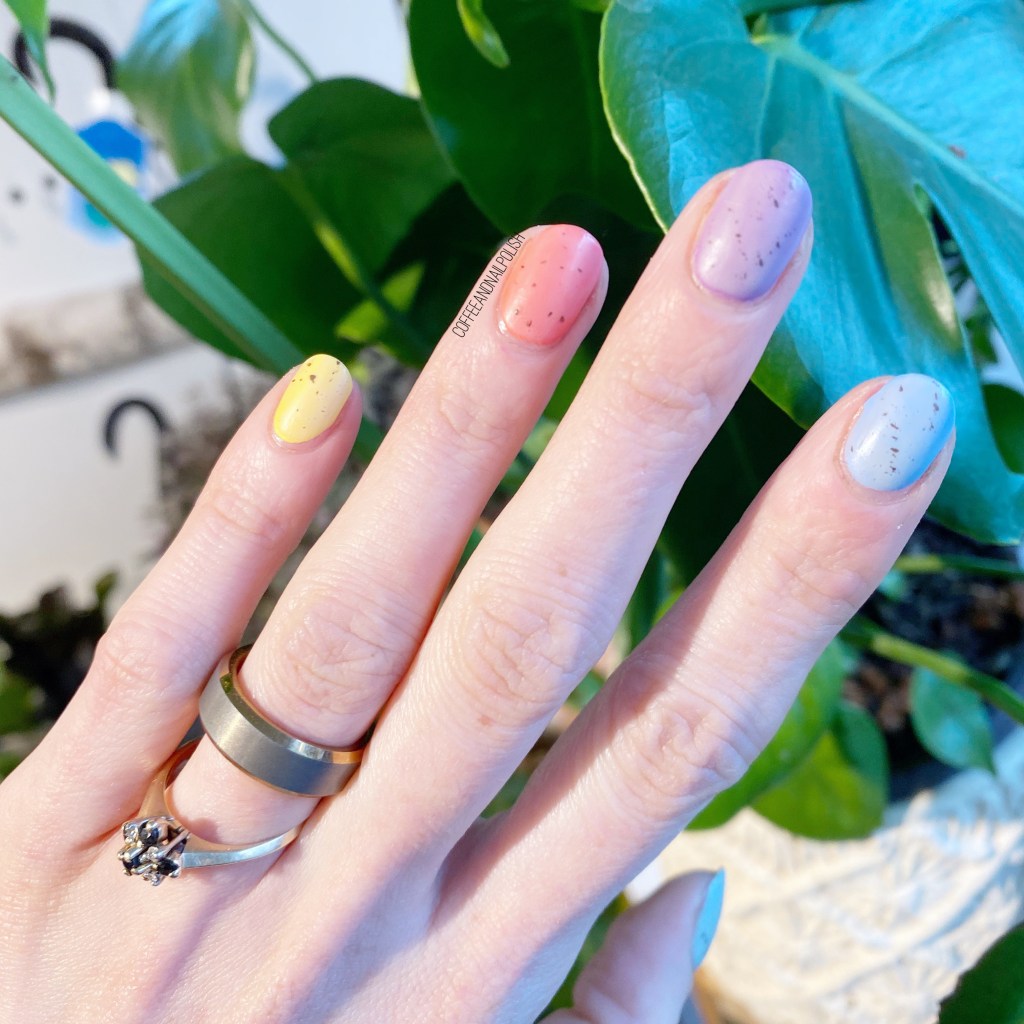
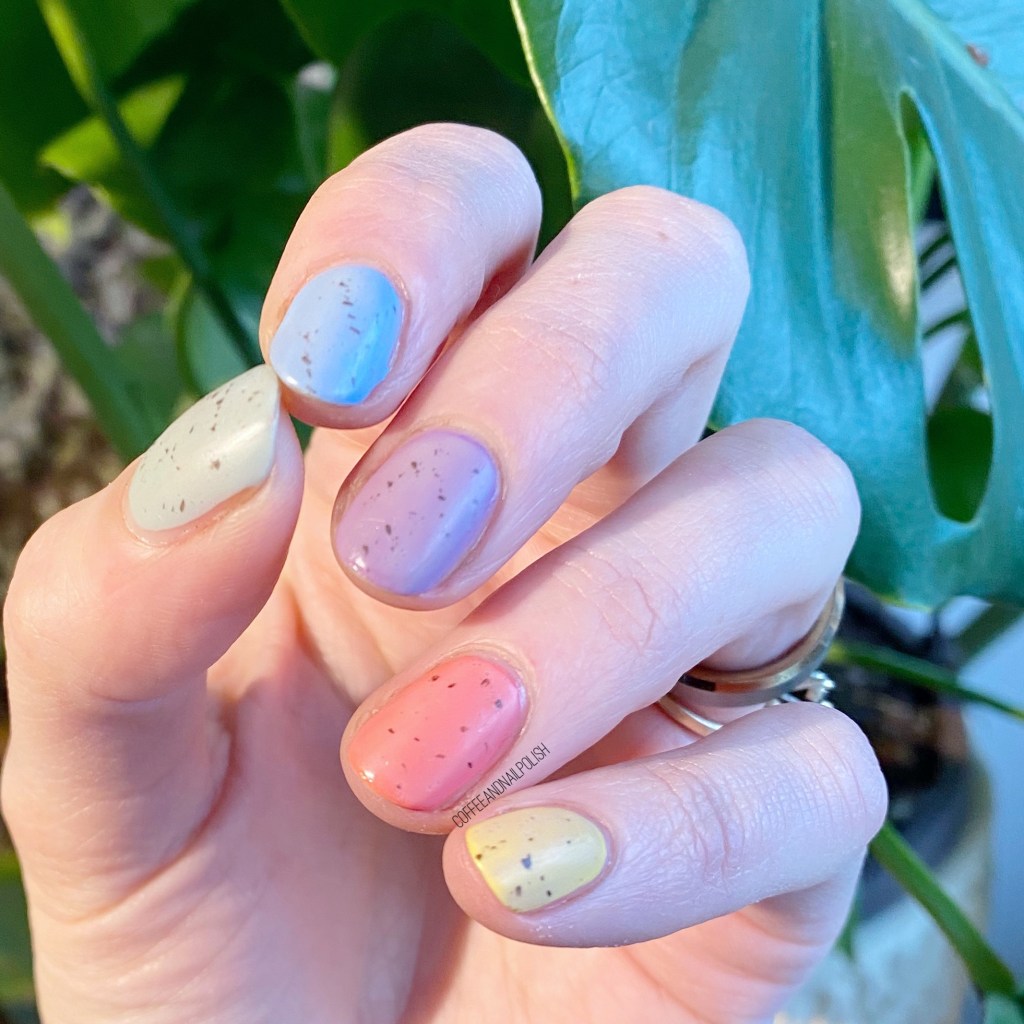
I’ve tried a few different versions of this look over the years, like I said, but (I think) this was my first time attempting using a fan brush for the speckled look. Usually I used the saran wrap splatter look, but I think I like using a fan brush even more! It gives a much daintier speckled effect. I think this look is much more true to actual speckled eggs, & I’m obsessed.
What do you think about this speckled nail look? Would you wear these for your own Easter festivities? Let me know all your thoughts down in the comments below!