Cozy Plaid Nails

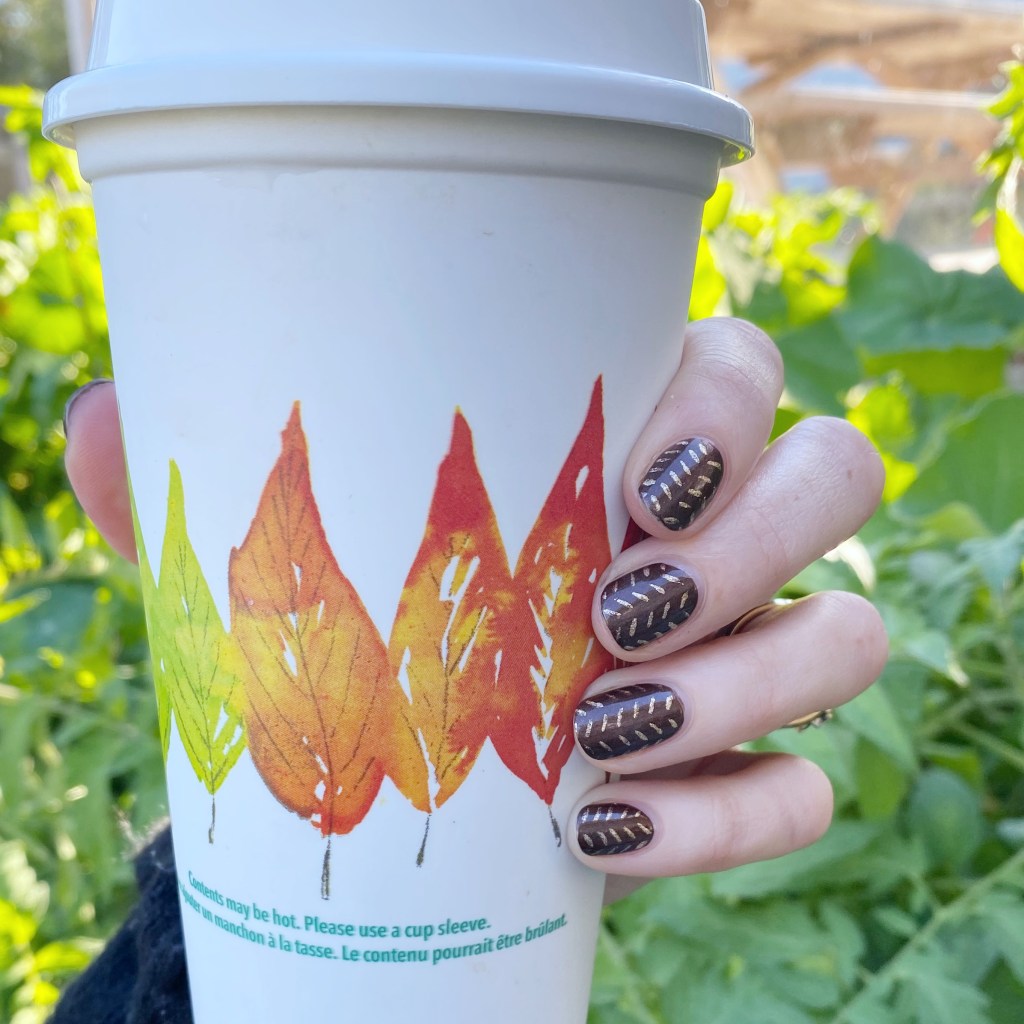
Hello lovelies & happy Friday! I know, a post on a Friday… I’m feeling crazy. But I have a few cute Autumn nail art looks I haven’t yet posted, so I thought I would try to sneak a few in between Glam Nails Challenge looks.

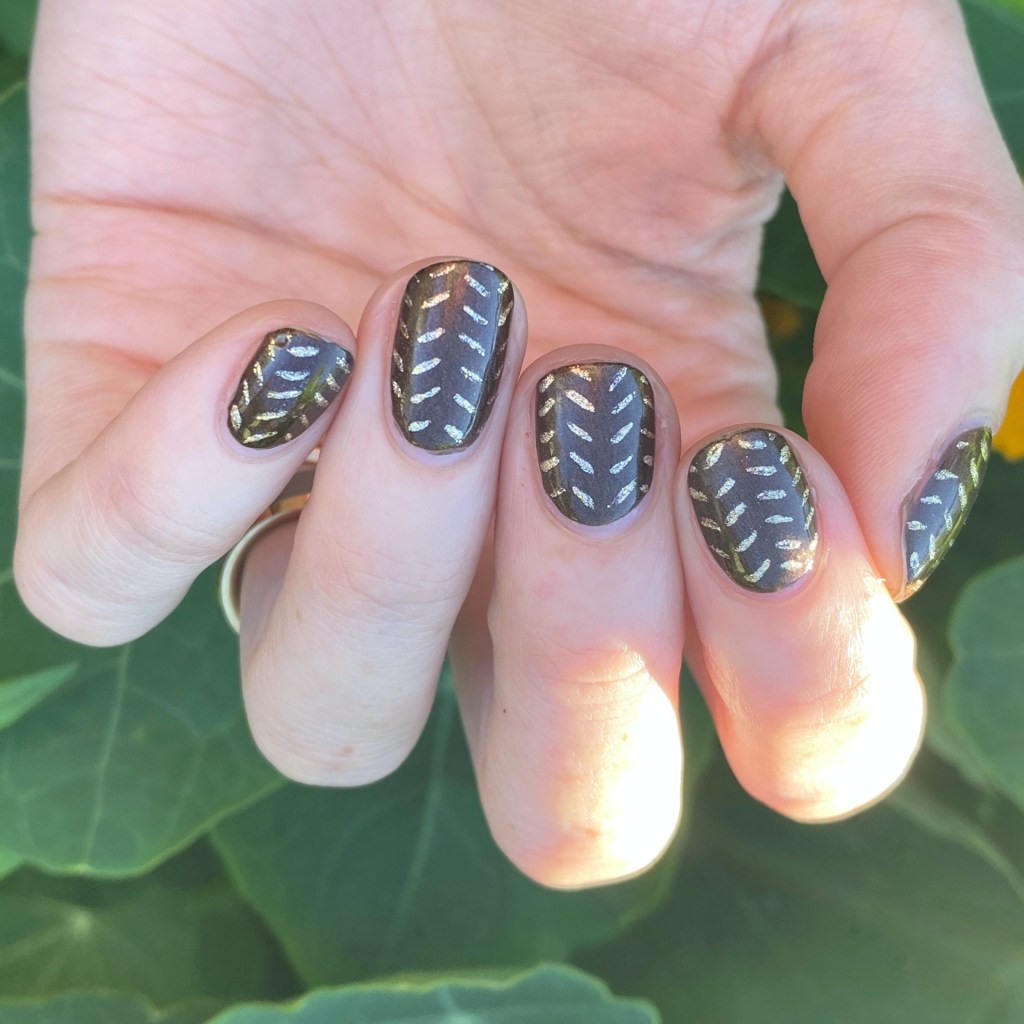
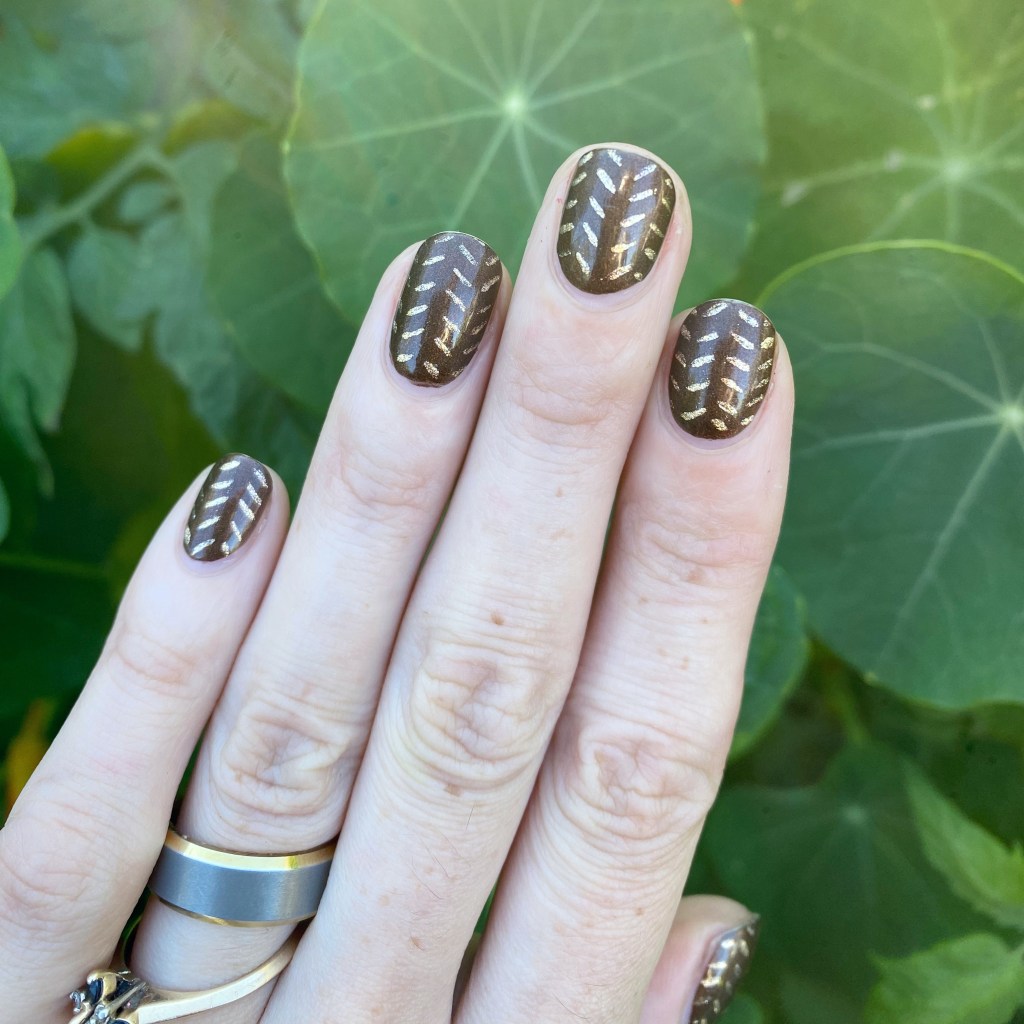
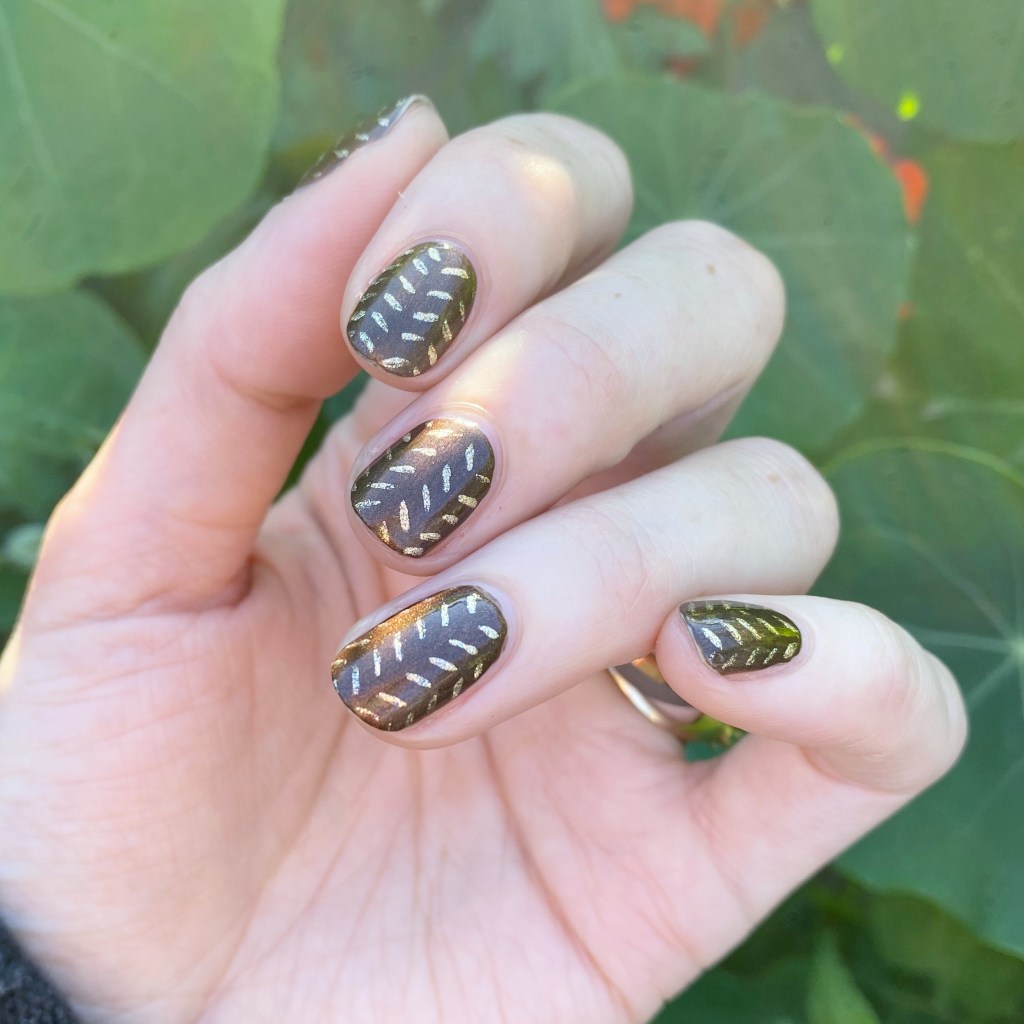
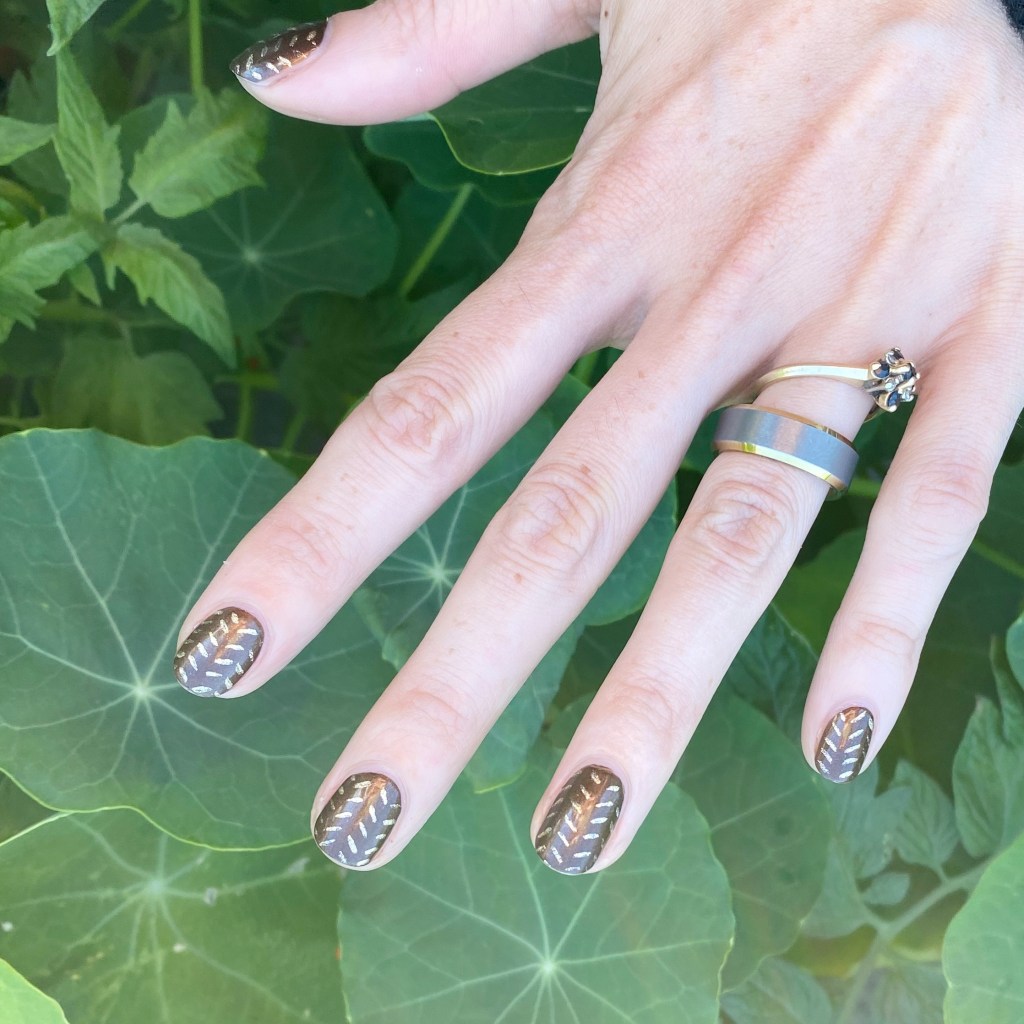
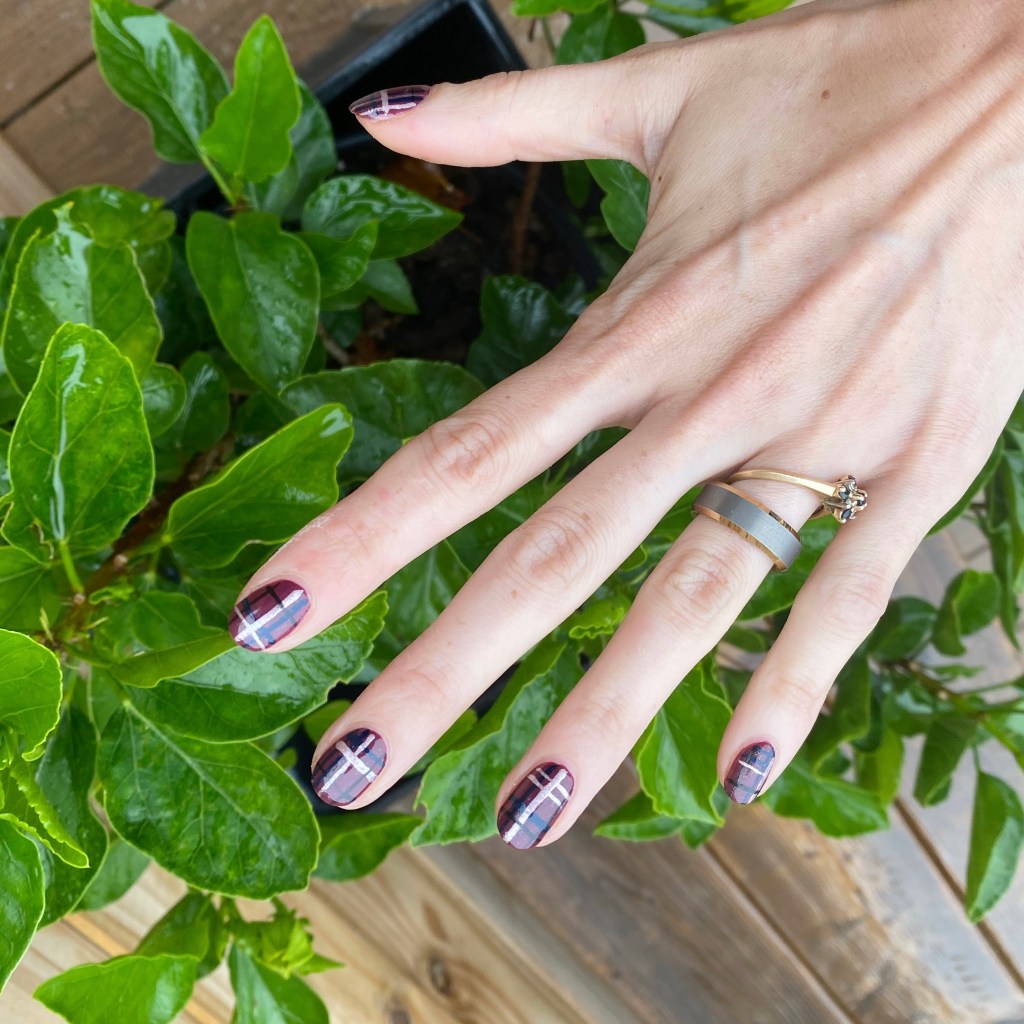
Today is a simple look, but a repeat favourite. Plaid nails! I’ve been doing this style of nail art a long time, & I never get tired of them. They just make a plain colour a little more fun. Plus, obviously plaid screams Fall as well.

The polishes I used for this manicure are: 

  • Base Coat: Essie Hard To Resist Glow & Shine 
  • Top Coat: Sally Hansen Complete Salon Manicure Fast Dry Top Coat
  • Sally Hansen Complete Salon Manicure Berry Fancy
  • Sally Hansen InstaDri Midnight Drive
  • Sally Hansen InstaDri Pedal to the Metal
  • Sally Hansen Miracle Gel Blacky-O
  • NailStuff.ca 16mm Striper Brush

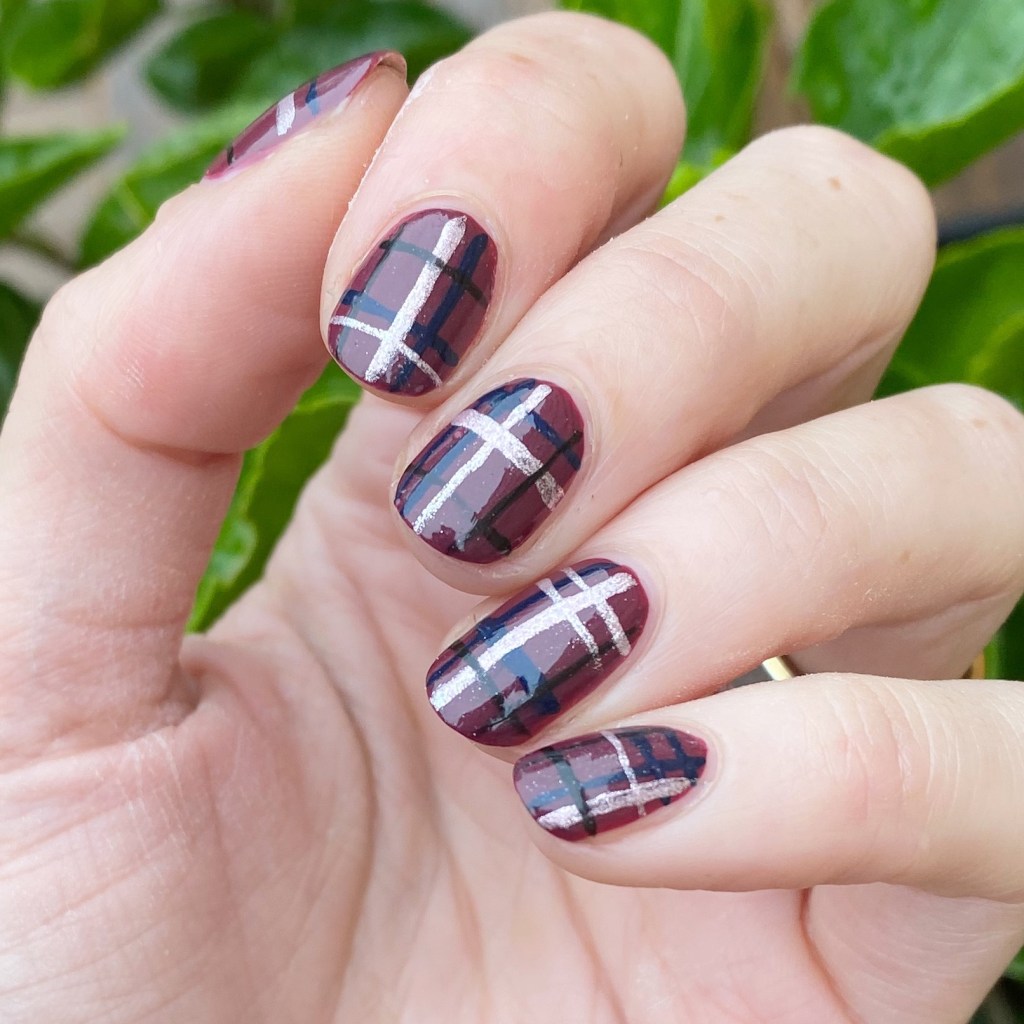
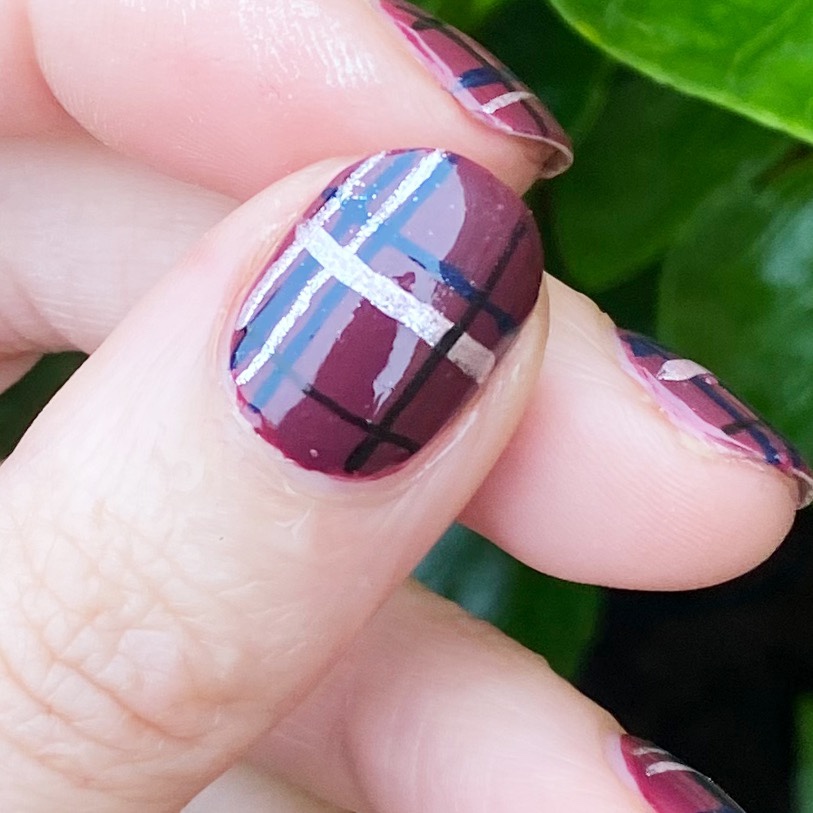
This look was super easy to do. Nails painted a simple colour, & then just (carefully) paint some straight lines along the nail to create your plaid pattern. There are definitely a few different ways you can create a plaid pattern, but this is definitely my favourite way to do it. Plus, it’s probably the easiest way to create them as well.

What do you think about this nail art look? Do you like plaid nail art? Are my fellow Canadians excited about Thanksgiving this weekend? Let me know all your thoughts down in the comments below!

Autumnal Knit Sweater Nails 🍂🌻

Happy Tuesday Lovelies!

I’m very happy to be writing from the world of power, which is a very lovely place to be. We survived our off grid experience, & I feel very lucky to have power, & warm food, because a lot of my fellow Atlantic Canadians are still going without.

Today I’m showing off some fun Autumnal nails I did pre-Hurricane. This look was actually inspired by a nail art look I did last year, & the year before — which was originally inspired by one of my favourite nail bloggers on Instagram: @xglitzandpolishx.

The polishes I used for this manicure are: 

  • Base Coat: Essie Hard To Resist Glow & Shine 
  • Top Coat: Sally Hansen Complete Salon Manicure Fast Dry Top Coat
  • Giorgio Armani #214 Woodstone
  • Essie Mosiac On Down
  • NailStuff.ca 4mm Micro Detail Brush

This is such an easy, fun look to wear. I decided that the gold with the shimmery bronze-y brown would be the perfect Fall combination, & I was right! It just screams AUTUMN VIBES to me, & that makes me so happy. I mean, this is my favourite time of year, & I’m feeling inspired to paint my nails, which is always a good thing. Sure, it means there are probably a whole lot of herringbone & sweater nail art looks headed your way, but that’s not a bad thing! Plus we’re days away from October, & I’ll be participating in Glam Nails Challenge October since it’s a Halloween theme.

So more fun nail art is coming!

What do you think about this version of the knit sweater nails? Would you wear this nail art look? What nail art/colour are you rocking this week? Let me know all your thoughts in the comments below — including what colour combination I should try next!

Bronze-y Abstract Stripes (Featuring OPI)

Hello lovelies & happy Tuesday. It’s a rainy Tuesday here — in fact it’s supposed to be rainy all week, capping off with a potential Hurricane on Saturday. So that’s… fun. We’ve had such beautiful weather the last few weeks, I think I got spoiled, because I am not here for rainy days.

But! I have a fun nail art look to share that I wore last week during sunnier times. I was feeling some Autumnal colours, & decided to pull a few beauties from my OPI display to create this fun abstract stripe look. It’s giving me 70s vibes.

The polishes I used for this manicure are: 

  • Base Coat: Essie Hard To Resist Glow & Shine 
  • Top Coat: Sally Hansen Complete Salon Manicure Fast Dry Top Coat
  • OPI I’ll Have A Gin & Tectonic
  • OPI Bronzed to Perfection
  • OPI Icelanded A Bottle of OPI
  • OPI I Sing In Color
  • NailStuff.ca 16mm Striper Brush

How fun are these!? Obviously, with my super short nails, I’ve been struggling a bit on inspiration, but abstract stripes always make me happy to paint my nails. Plus these colours look awesome together. Thankfully, my middle finger nail is finally growing out enough I can shape it to match the others.

What do you think about this abstract stripe look? Do you think this colour combination is as fun as I do? Let me know all your thoughts down in the comments below, & share what you’re wearing on your nails right now!

Dainty Grey Dotticure Accent Nails

Hello lovelies & happy Thursday!

I hope everyone’s week is going swimmingly so far. It’s almost the weekend! Today I’m showing off a pretty, easy & dainty nail art look that I wore recently.

As you might have noticed, I have been rocking short short short nails lately, thanks to a break on my middle finger nail, & I’ve been waiting (impatiently) for it to grow out. So it hasn’t left me super inspired when it comes to painting my nails, which I think has been showing. However, you know what always looks good? Polka Dots!

The polishes I used for this manicure are: 

  • Base Coat: Essie Hard To Resist Glow & Shine 
  • Top Coat: Essie Gel Setter
  • Essie Merino Cool
  • Essie Cocktail Bling
  • Essie Mosiac On Down
  • NailStuff.ca Dotting Tool Trio

What do you think of this colour combination on this dotticure look? I love grey on grey, & I thought it would be a perfect Fall transition look. Plus the little hints of gold are a nice touch.

Also I’m super happy with how my polka dots turned out — sometimes super dainty polka dots can be a struggle, but I think these look so perfect.

Over all, this reminds me of an old school Coffee & Nail Polish look, circa 2015/2016, & I’m not made about it. Plus, like I said, it fancies up my itty bit nails just a little bit more.

What do you think about this nail art look? Are you a fan of these teeny, tiny polka dots? Would you wear this look? Let me known down in the comments below!

Gold & Plum Splatter Nails

Hello lovelies & happy Tuesday! A beautiful Autumn Tuesday at that.

Today I’m showing off yet another fun splatter look, this time inspired by a tutorial by @nailsdnt on Instagram. She used a stamper & cuticle oil to achieve a fun bubbly splatter look, & as soon as I saw her tutorial I knew I needed to give it a try! I just love a good splatter design, & this seemed like such an easy way to achieve it.

The polishes I used for this manicure are: 

  • Base Coat: Essie Hard To Resist Glow & Shine 
  • Top Coat: Essie Gel Setter
  • Matte Top Coat: Sally Hansen Miracle Gel Matte Top Coat
  • Color Club Twice Bitten
  • L’Oreal Feeling Kilty
  • Nailstuff.ca clear stamper
  • Revlon Cuticle Oil

So obviously, first thing is first: I apologize for my weird cuticle area. Between an older top coat, & some weird matte top coat effect, it kind of gave me a messy finish. I’m definitely due for a new bottle of top coat.

Second, as you can see my nails did turn out pretty cool, although there are some differences between my splatter finish & the original design. While the original tutorial used a nail cuticle pen, I chose to use my bottle of Revlon cuticle oil, which I think lead to too much oil on the stamper. Her’s had more of a bubbly effect, while mine reminds me more a classic splatter.

But either way I love the end result. It’s so pretty! & the matte top coat just makes it look even more beautiful — I think the matte top coat just completes the look.

What do you think about this look? Are you enjoying these splatter nails I’ve been wearing lately? Let me know down in the comments below.