Pastel Geometric Lines

Contains PR

Hello loves & happy Thursday!

I hope everyone’s week has been going well. It’s be hot hot hot here on the East Coast, which I will never complain about! I love me a hot Summer day. Today it’s definitely cooler & just kind of muggy.

But you’re here for nails, not weather reports — & I have been busy trying to come up with fun nails to share! I’ll admit, after 11 years it can be hard to come up with brand new nail art designs for you. So, instead, I guess I’ll keep reinventing my old favourites.

The polishes I used for this manicure are: 

  • Top Coat: Essie Gel Setter Top Coat 
  • Base Coat: China Glaze Calcium Gel Fortifier
  • Madam Glam Mimi Pink *
  • Madam Glam Minty Greek *
  • Madam Glam Birds Fairy *
  • Madam Glam Warm Up *
  • Quo by Orly Black Nail Art Striper

**pr/gifted

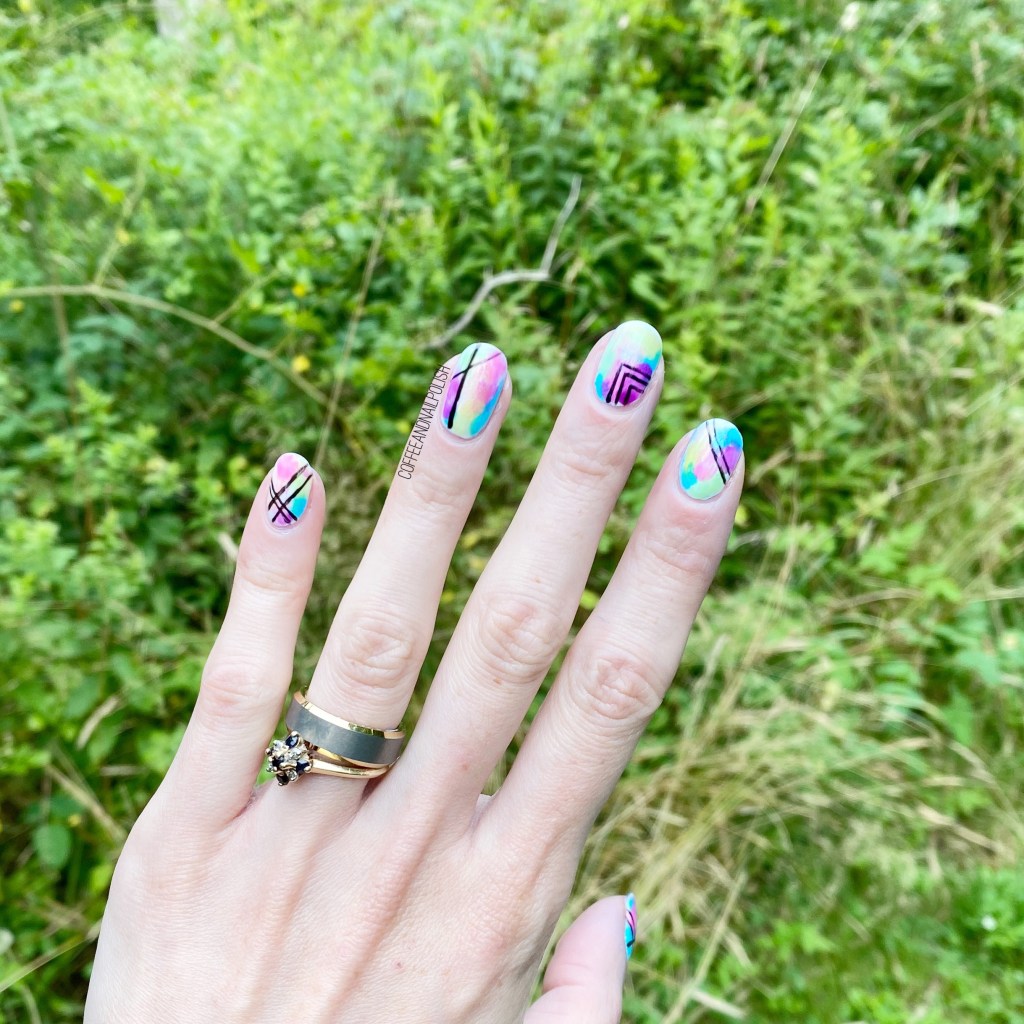
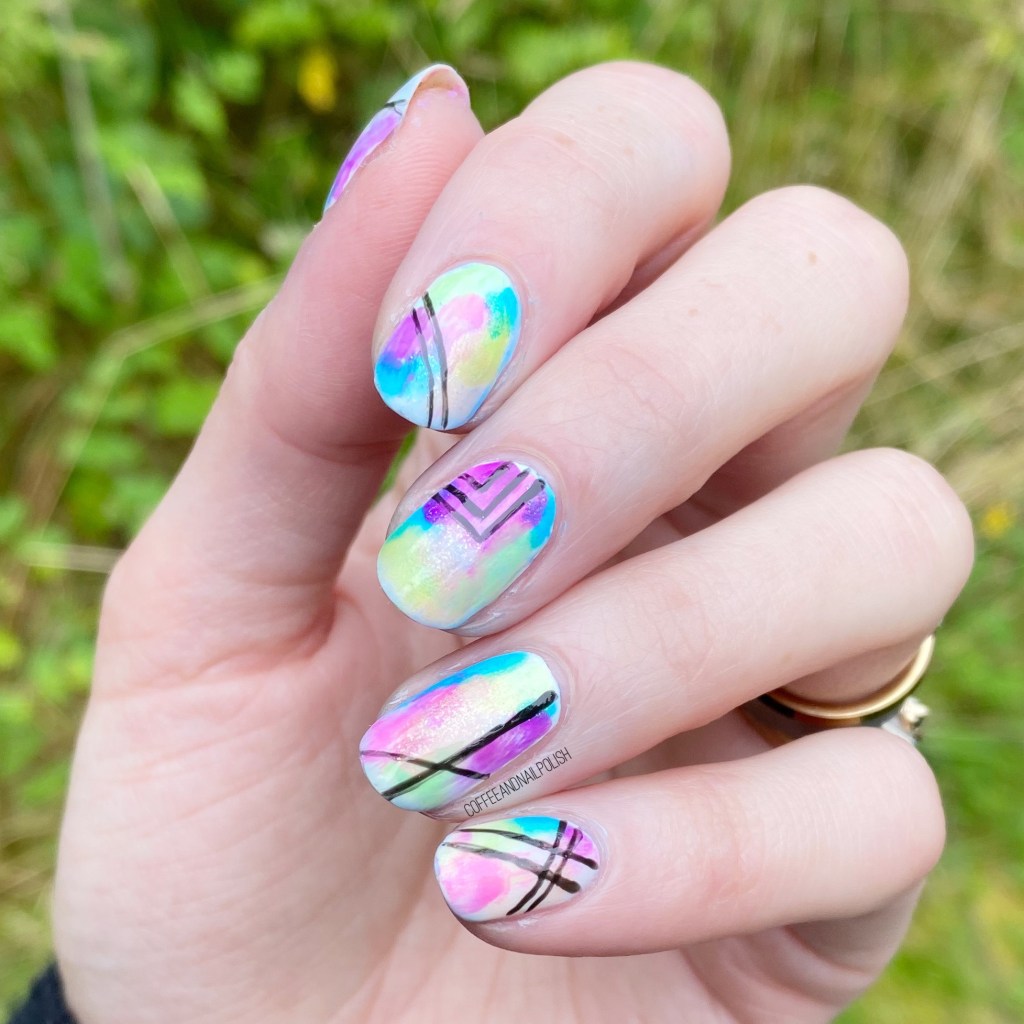
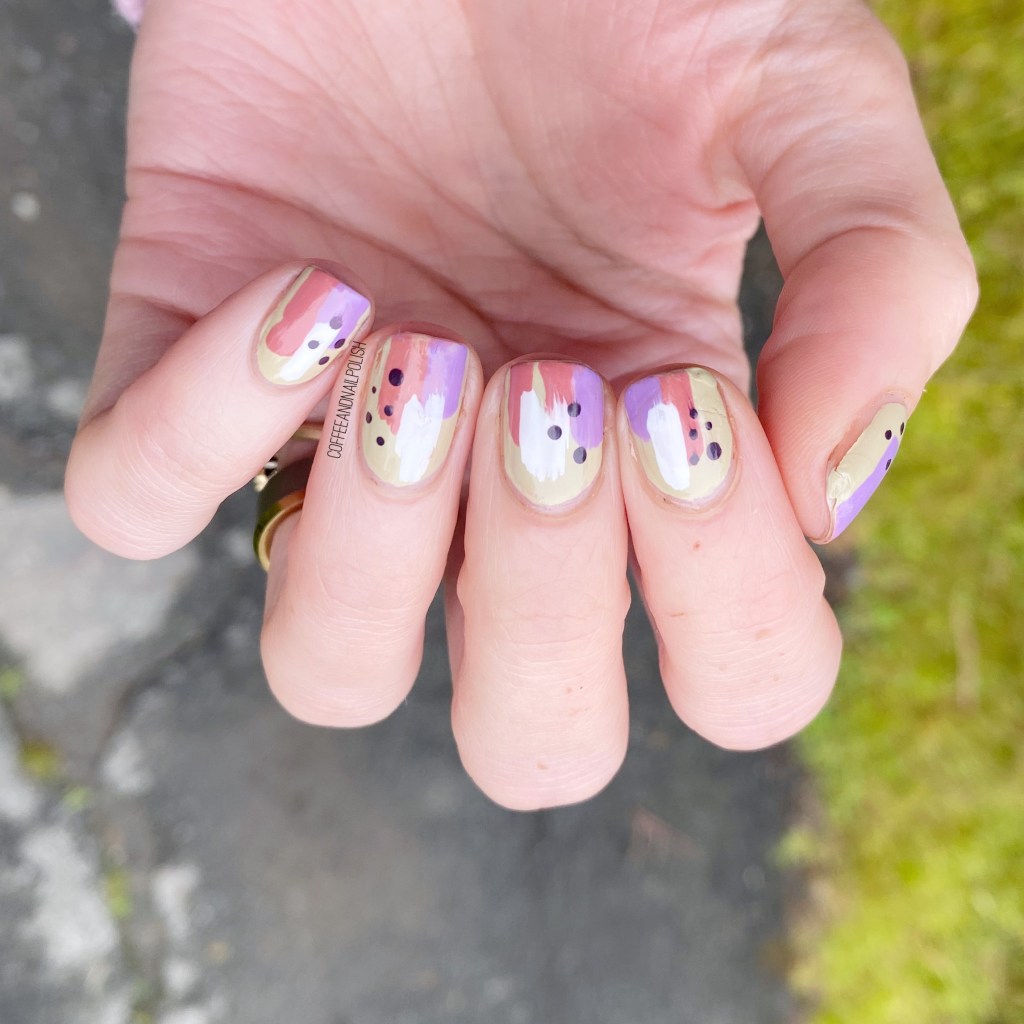
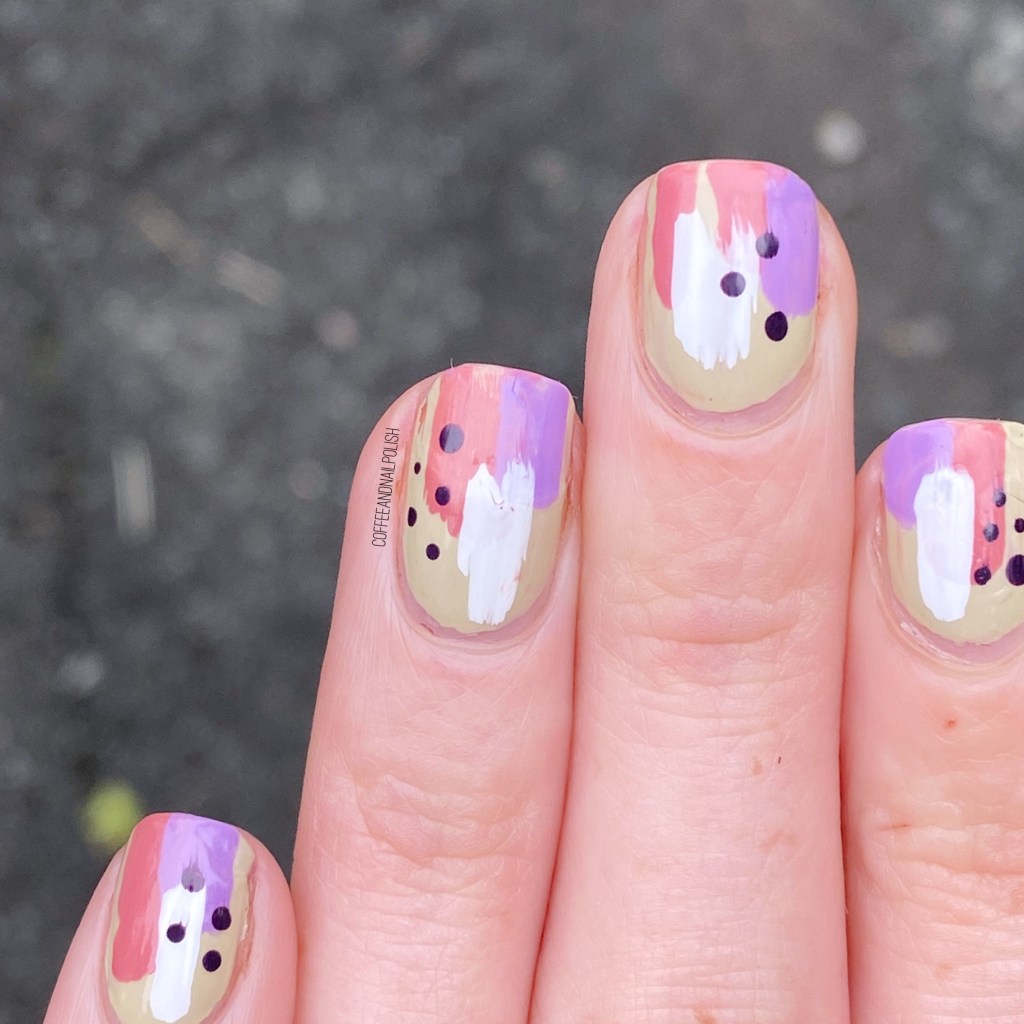
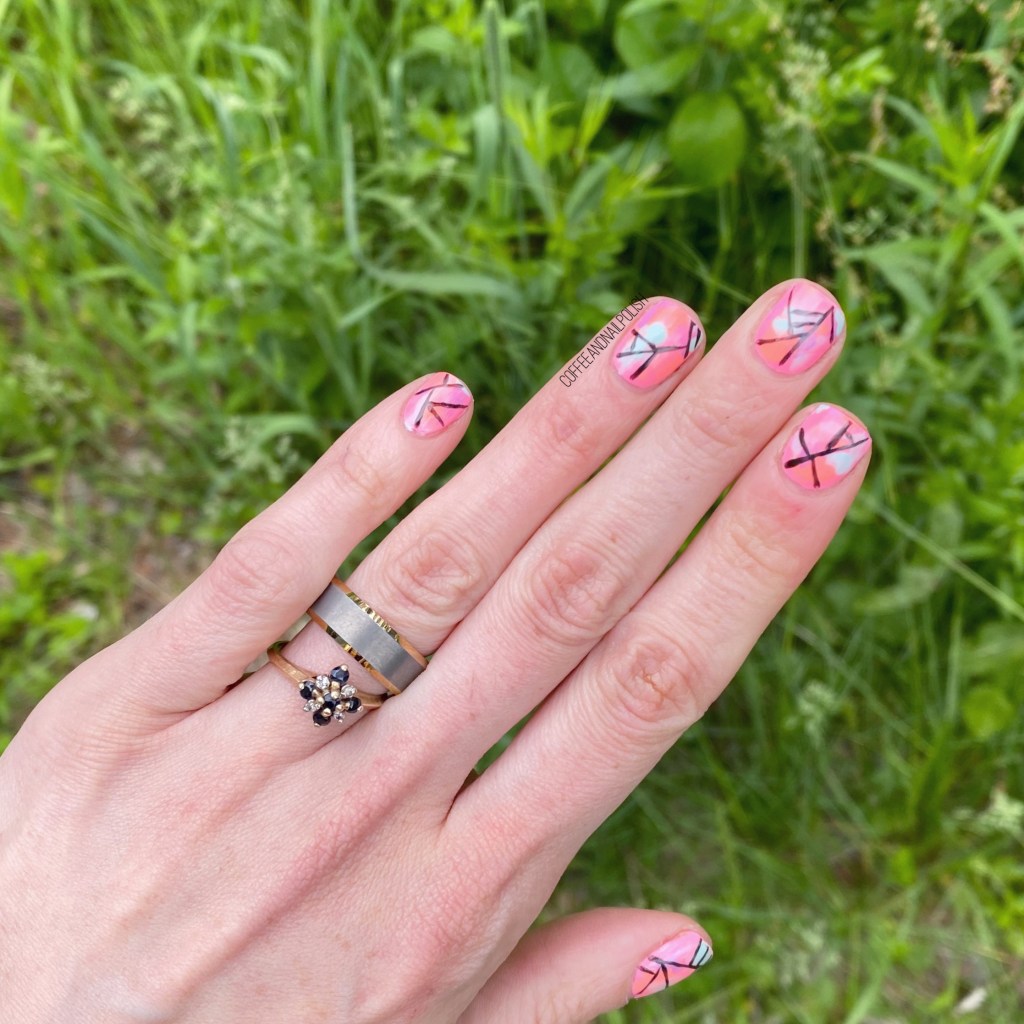
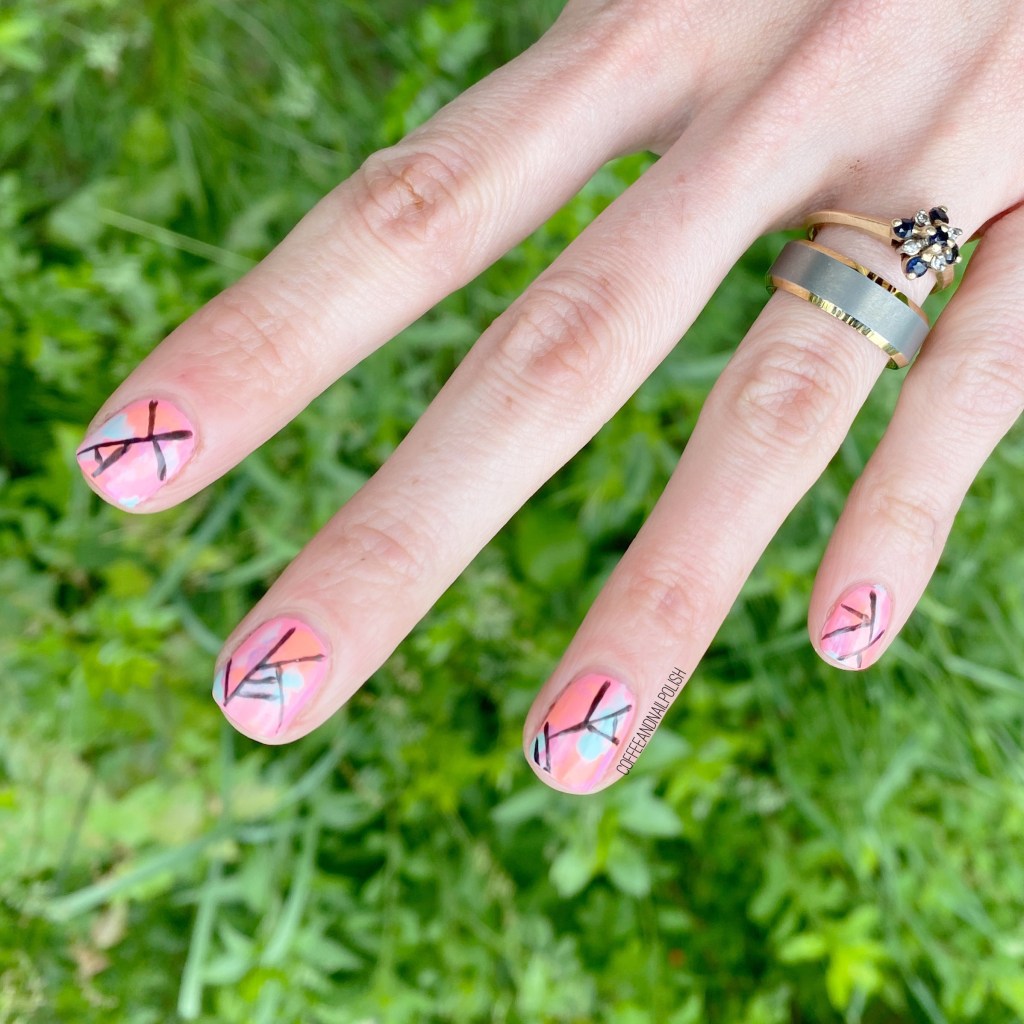
You can never go wrong with a dry brush geometric design!

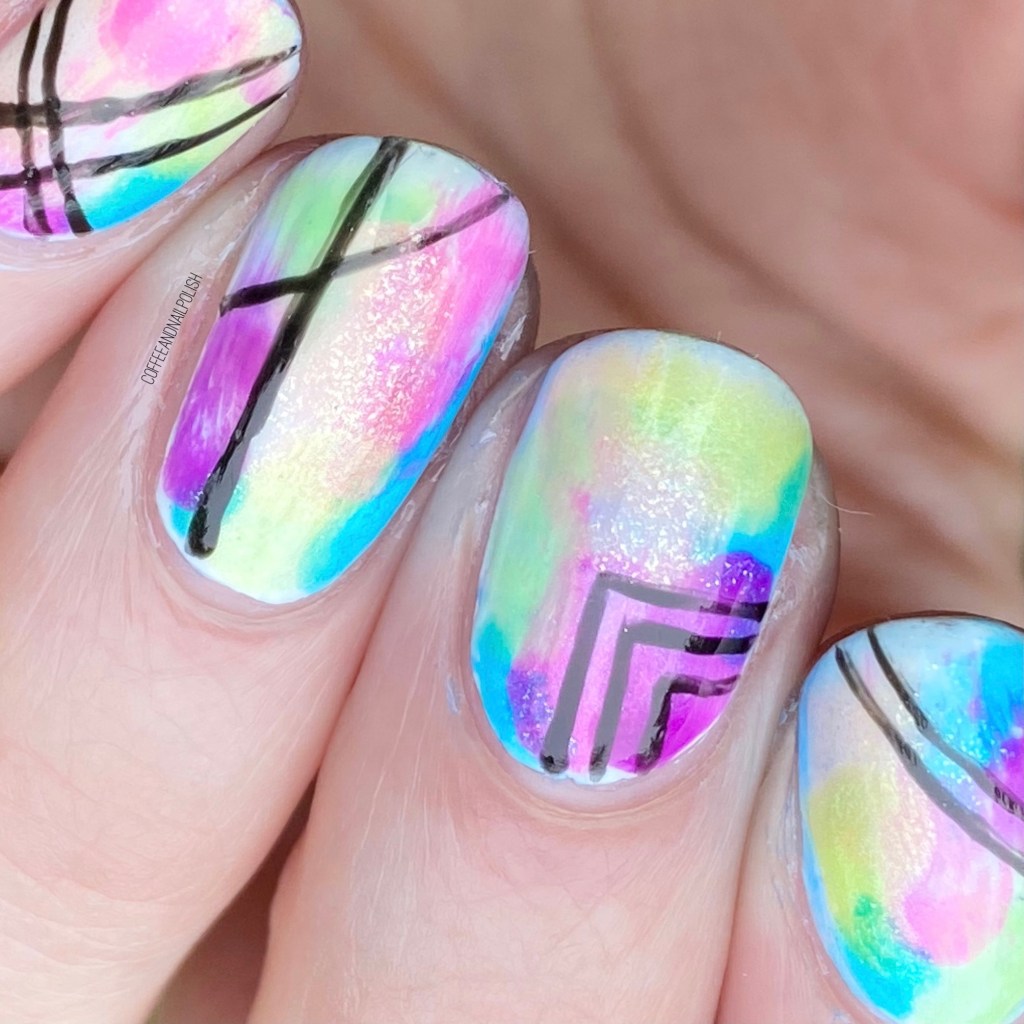
These were so easy to do. Started off with the dry brush as my base using my 4 Madam Glam pastels–which blended together so well–& then used my striper to create the geometric design. The hardest part is probably drawing the black lines & making sure they don’t end up too thick (always my struggle, at least), but no matter what I think this is a striking design to do & wear!

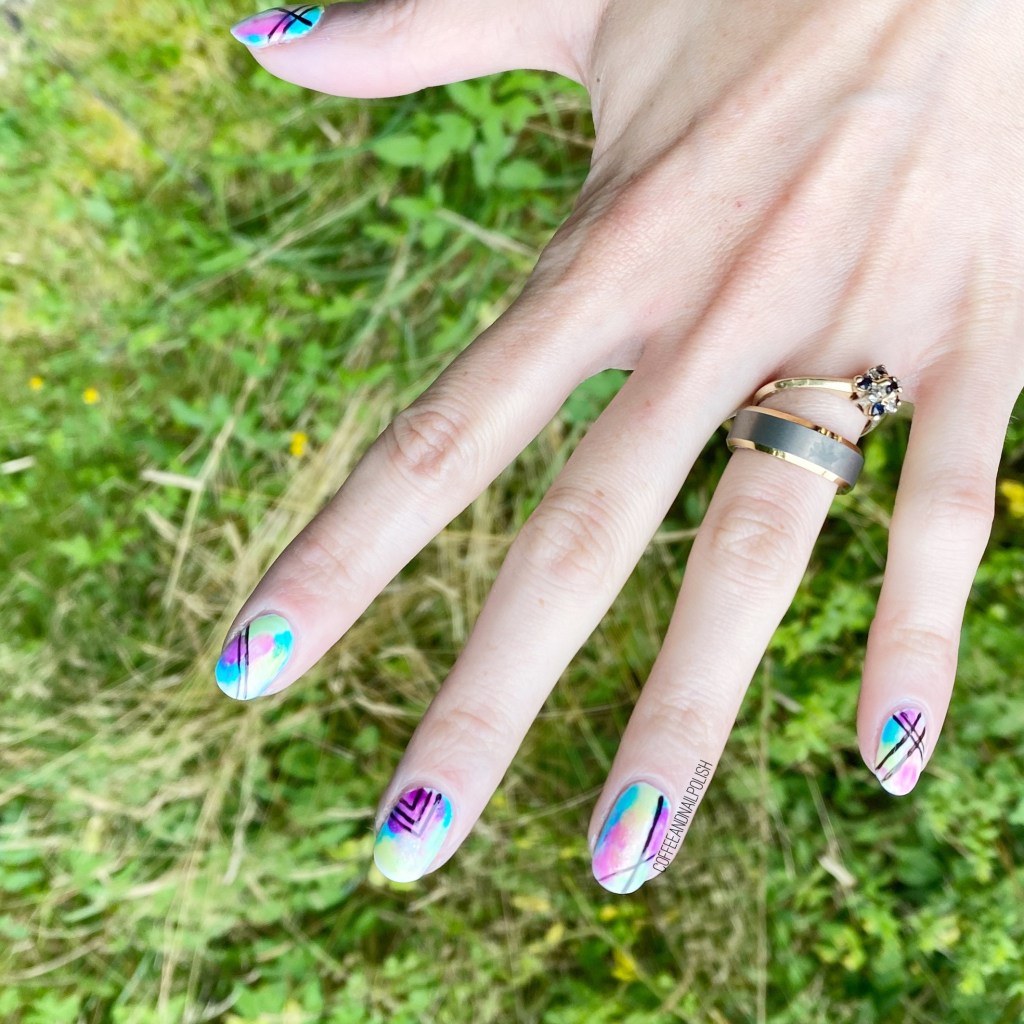
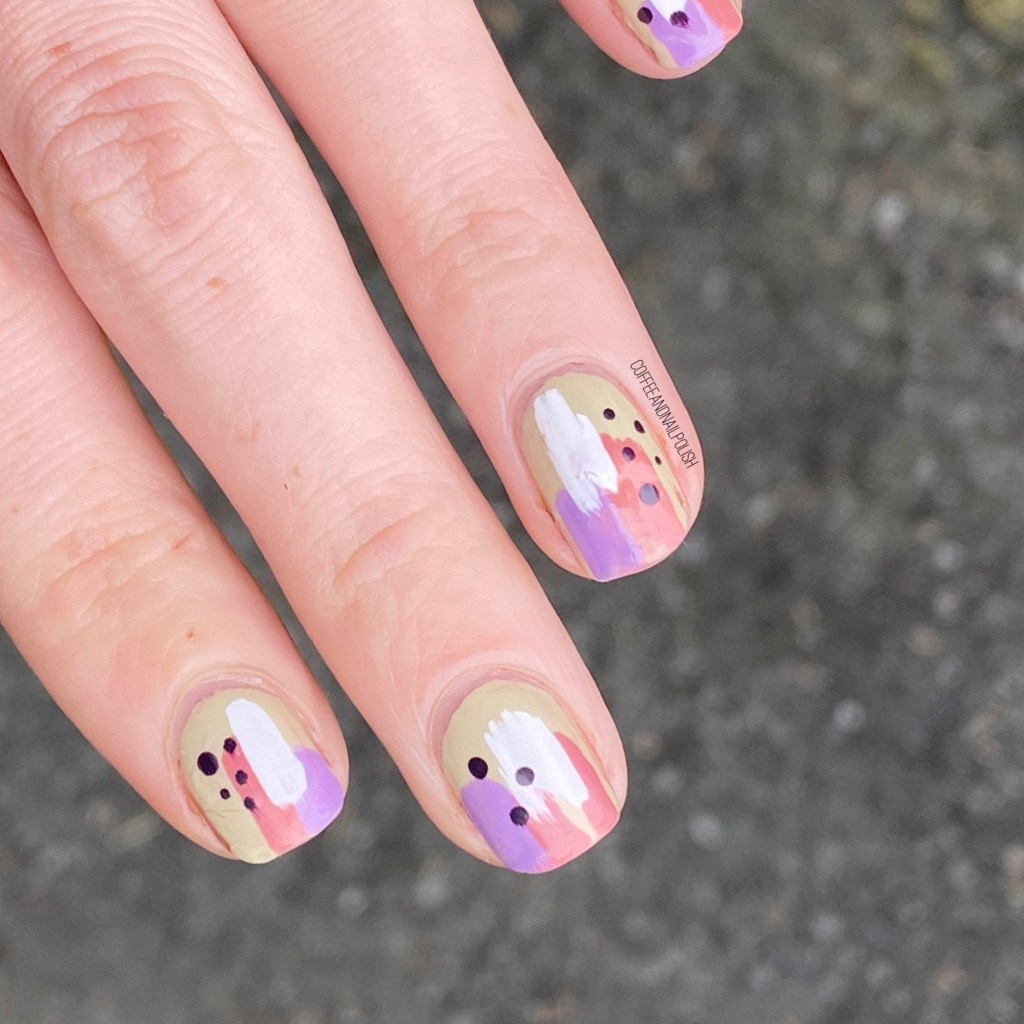
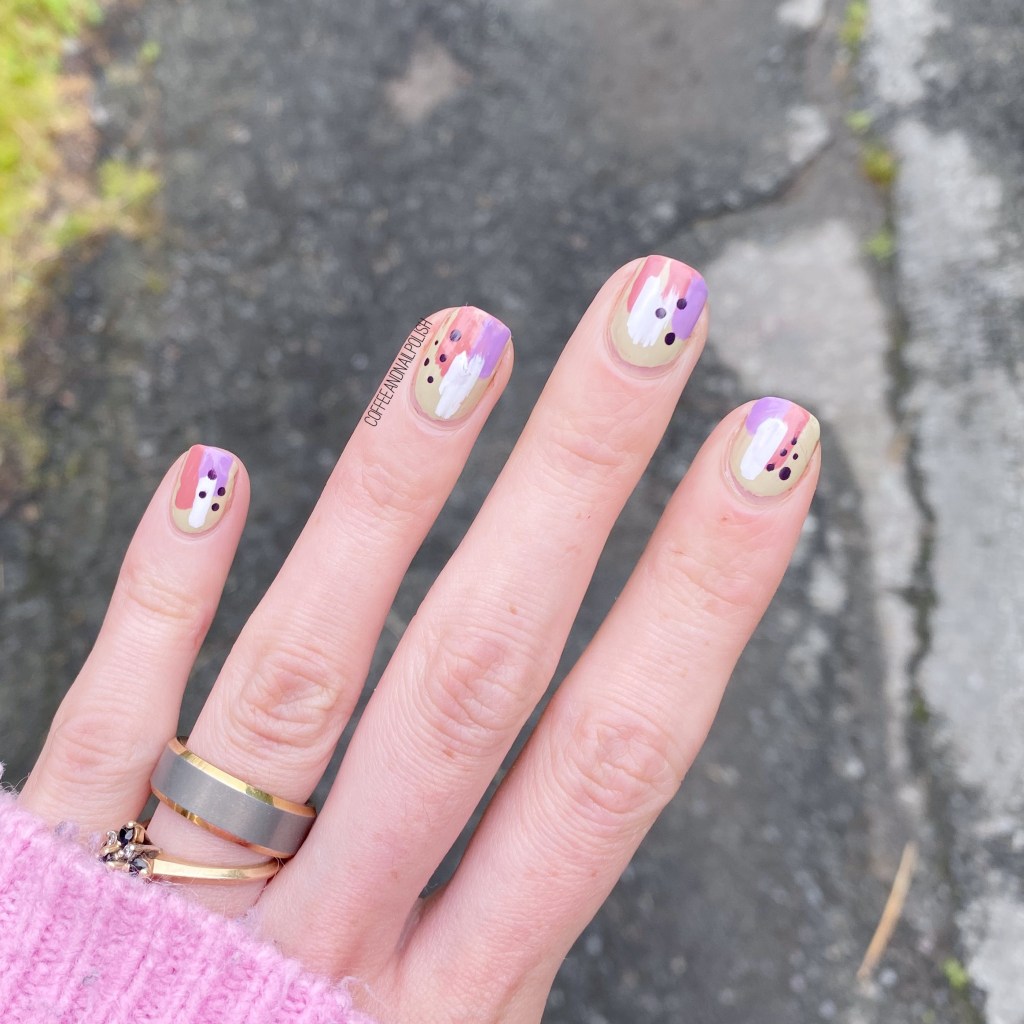
What do you think about these pastel geometric design? She’s an oldie but a goodie!

I’m still on the hunt for new nail art designs to try, so feel free to share any designs you’d love to see me attempt! I’m trying not to go straight into craving Autumn designs (my favourite season for nail art) so help a girl out! I would be eternally grateful.

Happy Thursday!

Glam Nails Challenge October— Spooky Sky

Hello lovelies & happy Tuesday!

Can you believe it is the last week of October already? Halloween is 5 days away! That’s just…. crazy. But today I have another fun prompt for GlamNailsChallengeOct: spooky sky.

I’ll admit — initially stumped me a bit on what I should do. Spooky sky is a prompt that could encapsulate so many different ideas, but I finally I decided on a grey toned sky, with some creepy trees & graves.

The polishes I used for this manicure are: 

  • Base Coat: Essie First Base
  • Top Coat: Seche Vive
  • Sally Hansen Miracle Gel Get Mod
  • Essence Rock My World
  • China Glaze Intelligence, Integrity & Courage
  • Starrily Vantablack
  • Fan Brush (I think mine is just a cheap one I bought from Icing years ago…)
  • NailStuff.ca 7mm detail brush

I really had this vision in my head of this decrepit tree against a spooky, grey toned sky — so that was the look I went for. I wanted something that you would see before the big killer was revealed in a horror film. & I think I managed to achieve what I was going for. I think my thumb turned out my favourite of all my nails too — between the layered polishes which really mimicked clouds, to the tree, it might be my favourite of all my nails.

& I got so many compliments on my nails at work, which always make me happy. Especially when people ask me where I got them done, or are shocked when I say I did them myself. That always makes me feel awesome!

What do you think about this look? Do these spooky sky nails gives you all the Halloween feels? Are you celebrating Halloween this year — a party, trick or treating, eating an entire box of Halloween bars to yourself? What are your Halloween plans… let me know down in the comments below!

& Stay tuned, because we have just two more prompts for GlamNailsChallengeOctober to come before this month is over!

Neon Dry Brush

•pr•

Hello lovelies & happy Friday. It’s almost the weekend! & today I’m keeping the Summer time vibes up with a neon dry brush design featuring the new Sally Hansen neons I recently shared!

As much as I want Fall designs, it’s kind of hard to think of Fall of when it feels like 38 degree outside. So I guess I’ll keep the Summertime vibes going just a wee bit longer — at least until the cooler temperatures forecasted this weekend.

The polishes I used for this manicure are:

  • Base Coat: Essie First Base
  • Top Coat: Essie Gel Setter
  • Sally Hansen Miracle Gel Get Mod
  • Sally Hansen Miracle Gel Sun-Shine On
  • Sally Hansen Miracle Gel Squeeze the Day
  • Sally Hansen Miracle Gel FlorescPink
  • Sally Hansen Miracle Gel Feeling Grape
  • Sally Hansen Miracle Gel Chill Out
  • Sally Hansen Miracle Gel Electri-Lime
  • Sally Hansen Miracle Gel Blacky-O
  • NailStuff.ca 16mm Striper Brush

Seriously, how much fun are these?

The Miracle Gel neons are perfect for this kind of design because of the thinner formulas—especially to get them to smudge when applying your top coat. You get that blended effect, which I adore. & obviously I had to add some graphic lines over my base to complete the whole look—it just adds something to the manicure overall; gives it a little extra POP!

What are we thinking about this neon look — yey or nay? Let me know down in the comments below.

& stay tuned because I have a ton of Fall/Autumn worthy shades (just ordered the China Glaze Autumn Spice collection yesterday!) coming soon.

Muted Dry Brush

Hello lovelies & happy Thursday! Whoa… how is it Thursday already?! The weekend is almost here. I wish it was beautiful & sunny day but nope… 80% chance of Thundershowers haha.

Today I’m keeping up with the nail art, & sharing this brush stroke look. I haven’t done one of these in forever, but it was another case my previous mani had started to chip, & I needed something to cover it up, but didn’t have time to repaint my full nail. So bring on the sneaky nail art!

For this manicure, the polishes I used were:

  • Base Coat: Sally Hansen Nailgrowth Miracle
  • Top Coat: Essie Speed Setter
  • Essie Cacti on the Prize
  • Essie Shop Til You Drop
  • Essie Worth the Tassel
  • Essie Blanc
  • Essie Kimono Over
  • NailStuff.ca Dotting Tool Trio

This is such a simple & easy to do look! Literally anyone can do it, & it looks way more fancy than it actually is. I thought about adding a little gold flakies, but decided to just keep it more simple & muted, & I’m really glad that I did! I even ended up wearing this design for 2 whole days, which I feel like I never, ever do anymore. But it was just too pretty.

How are we feeling about this muted dry brush? Have you ever done a dry brush look like this before?

I’ve been (sort of) thinking about getting back into making short tutorial videos again — would that be something you’d be interested in seeing? Let me know in the comments below!

Neon with Freehand Lines

Hello Summer, how you doing?

Hello lovelies & happy Tuesday. I hope everyone had a wonderful weekend. We celebrated my little girls 2nd birthday this weekend with lots of cake, a fun play date, more cake, & some actual sunshine. It was very exciting!

Now we’re set for a rainy, muggy, thunder-y week. At least I get a little bit of brightness through my nails! This neon look is a throwback to some nails I did (more than) a few years back. Something about short nails just makes me want to rock neons & graphic lines. & my nails have been pretty short lately.

For this manicure, the polishes I used were:

  • Base Coat: Sally Hansen Nailgrowth Miracle
  • Top Coat: Essie Speed Setter
  • China Glaze Flip Flop Fantasy
  • China Glaze Shocking Pink
  • Essie Mint Candy Apple
  • Essie Worth The Tassel
  • Sally Hansen Miracle Gel Blacky-O
  • NailStuff.ca 16mm Striper Brush

So bright!

So this base was an attempt to cover up a chipped manicure, & then a saw how pretty it was & thought it would be perfect for some graphic black line work. I find these kind of designs much easier to freehand over the straight horizontal lines. Which sucks, because I have a few looks in my head I’m itching to try, but scared of mucking up with uneven lines.

What do you think of this design? What nail art looks are you planning for this week? Let me know in the comments!