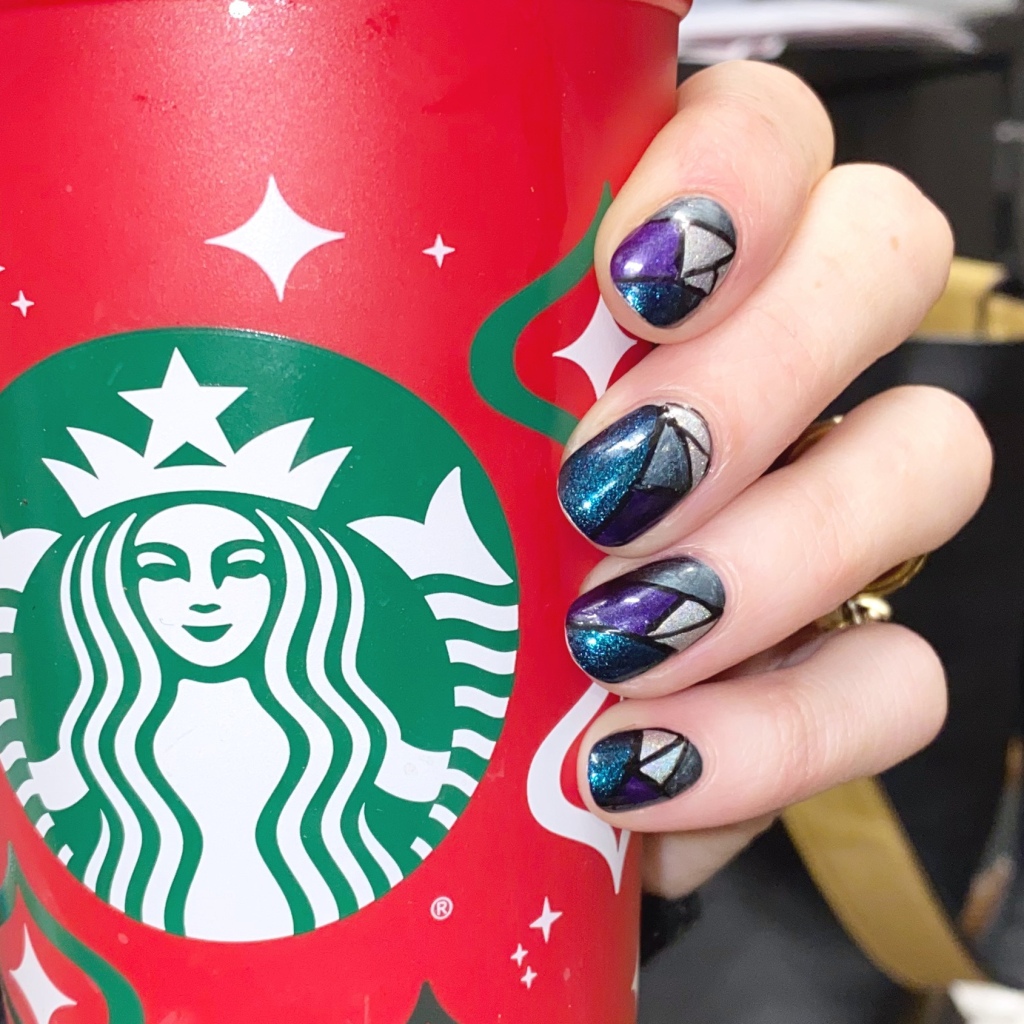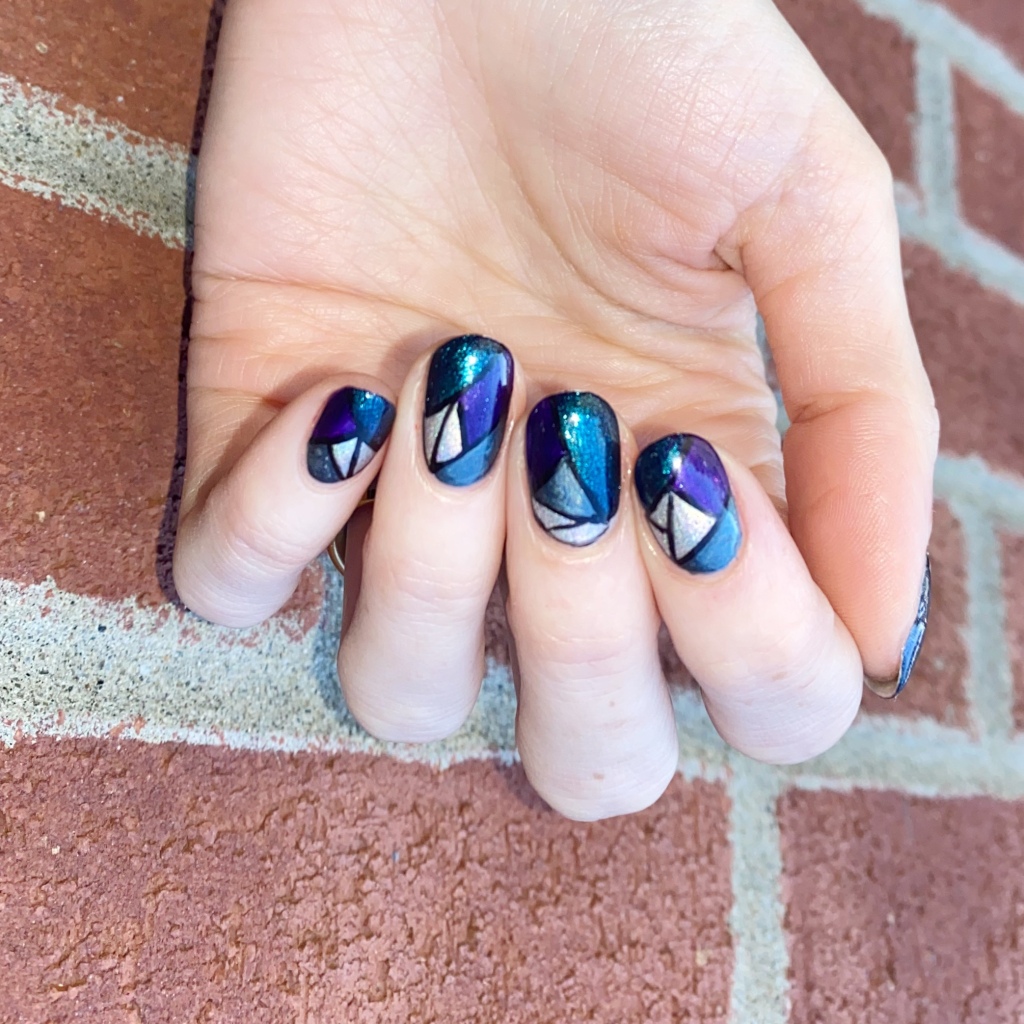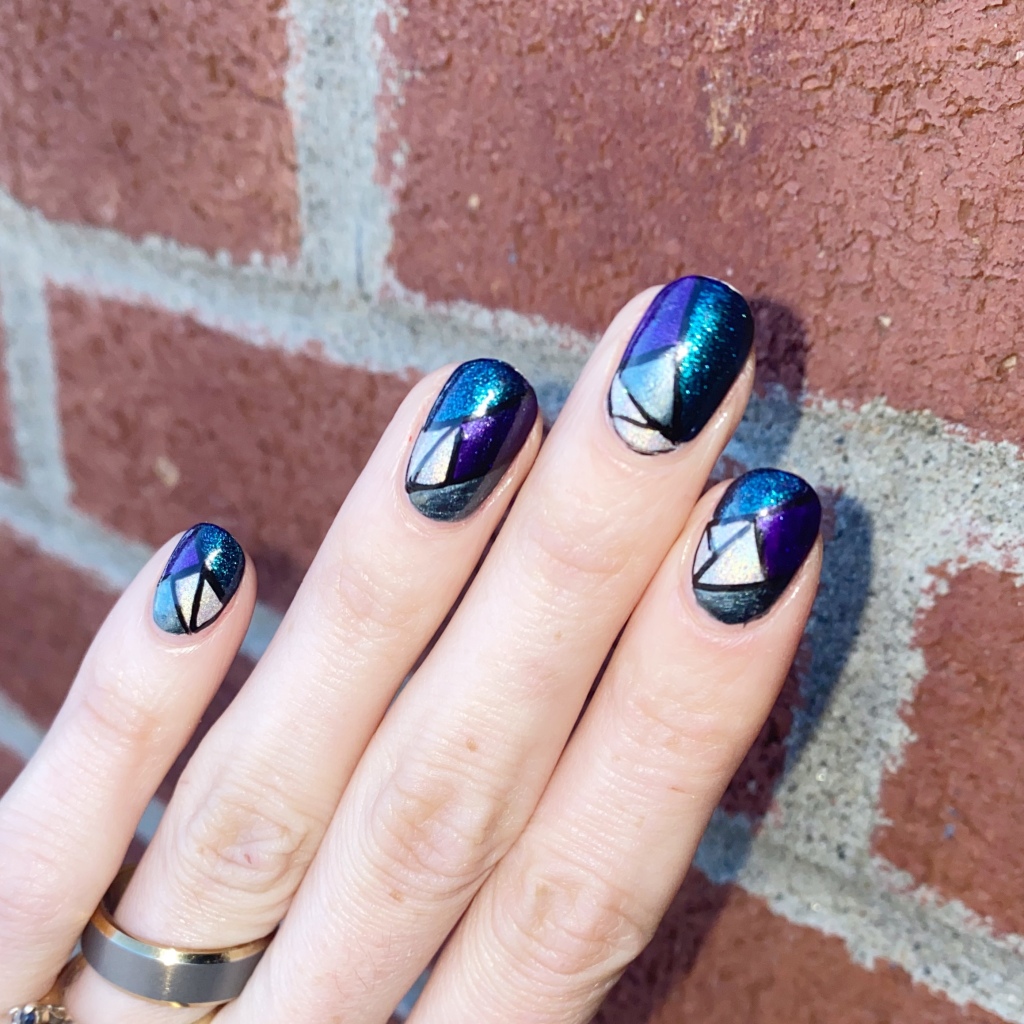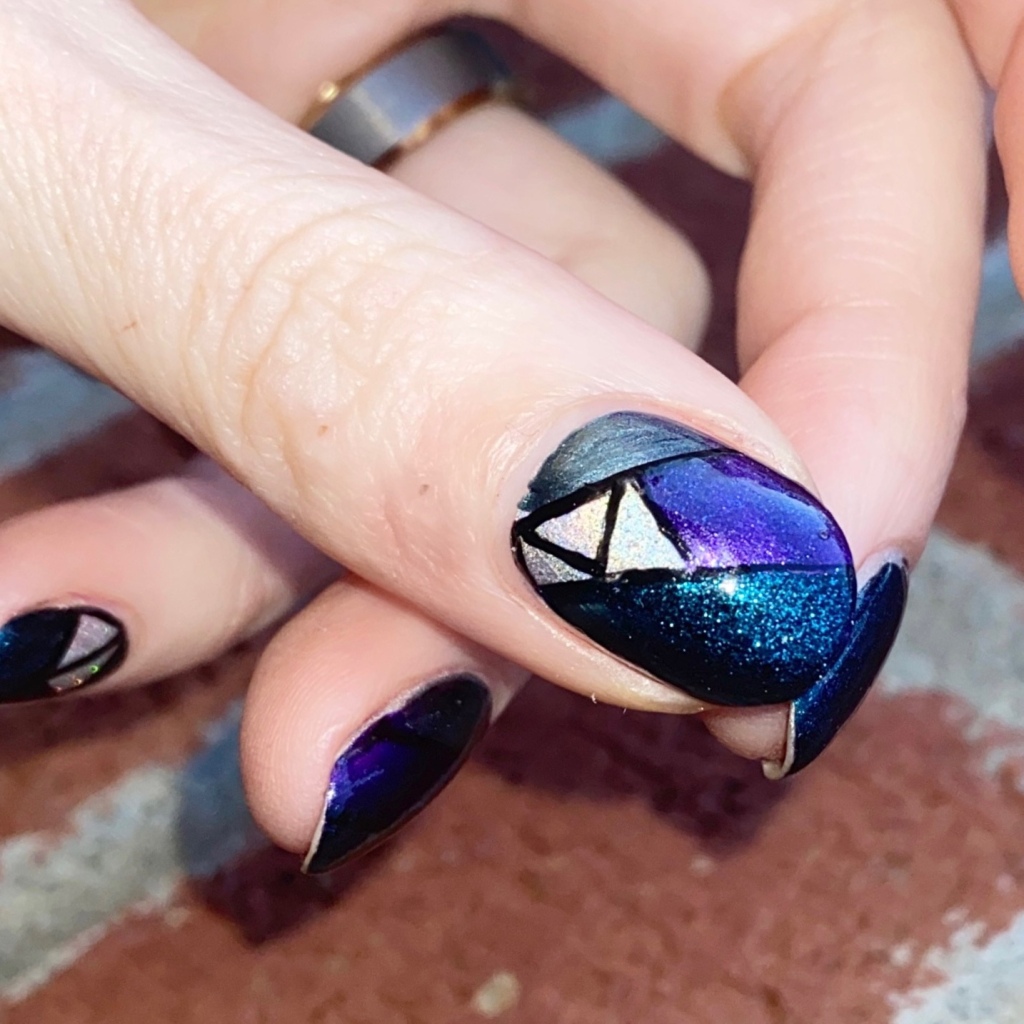
Happy Black Friday lovelies!
I suppose “happy” is a subjective term. But it is Black Friday, & that means that the holiday season is about to kick into high gear. I work in retail, though, which means I’m just trying to survive the weekend! So in honour of this crazy day, I thought I would create a black manicure to represent the day.
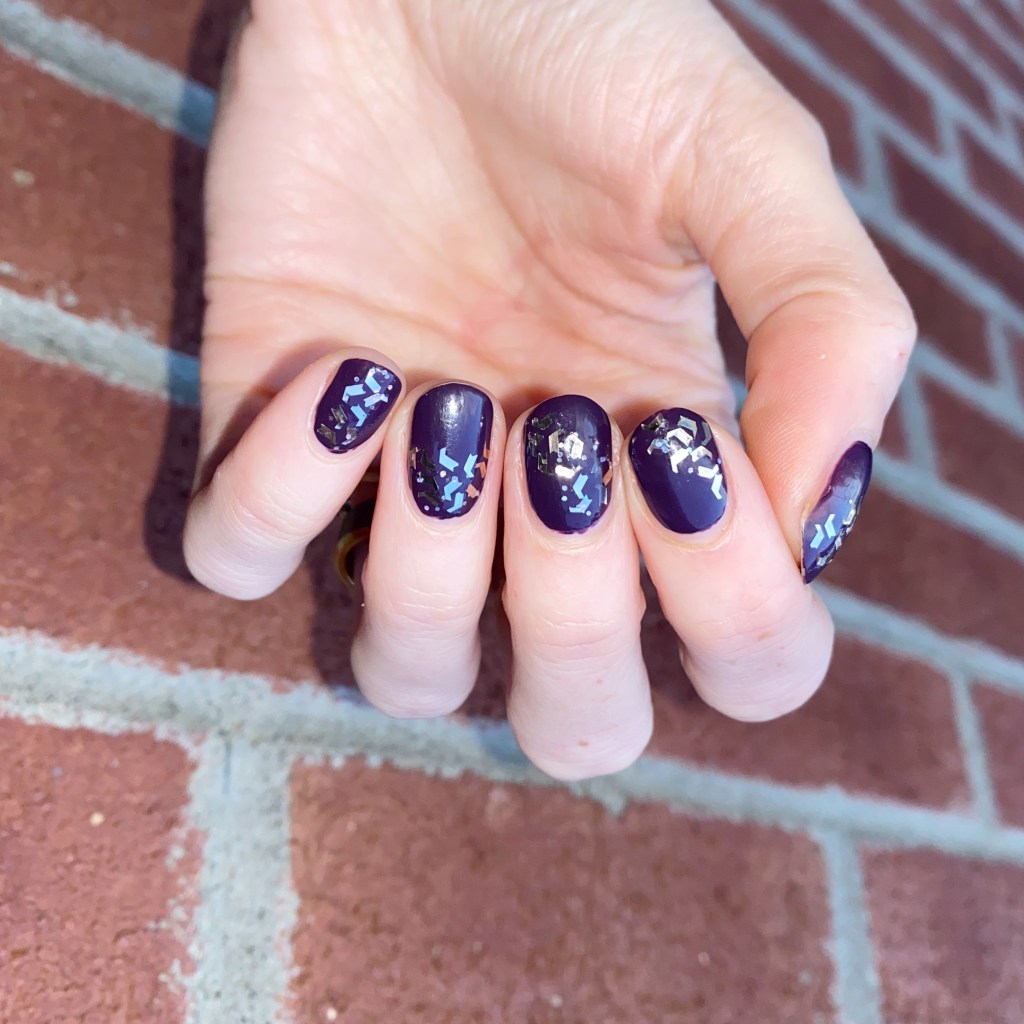
The polishes I used for this manicure are:
- Base Coat: Sally Hansen Miracle Gel Colour Grip Primer Base Coat
- Top Coat: Seche Vive
- Mary Kay Salon Direct Moonlight
- Essence Here’s My Number
- Paper Hole Reinforcements
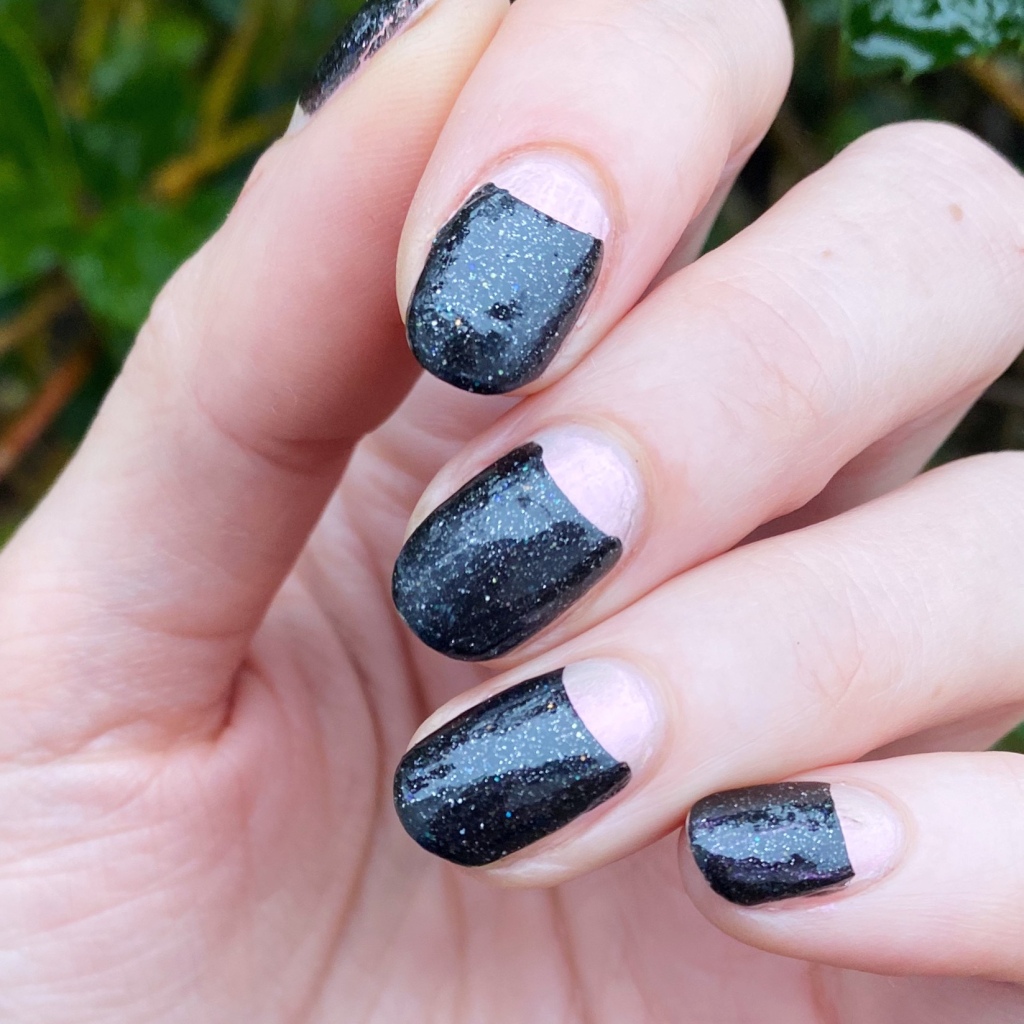
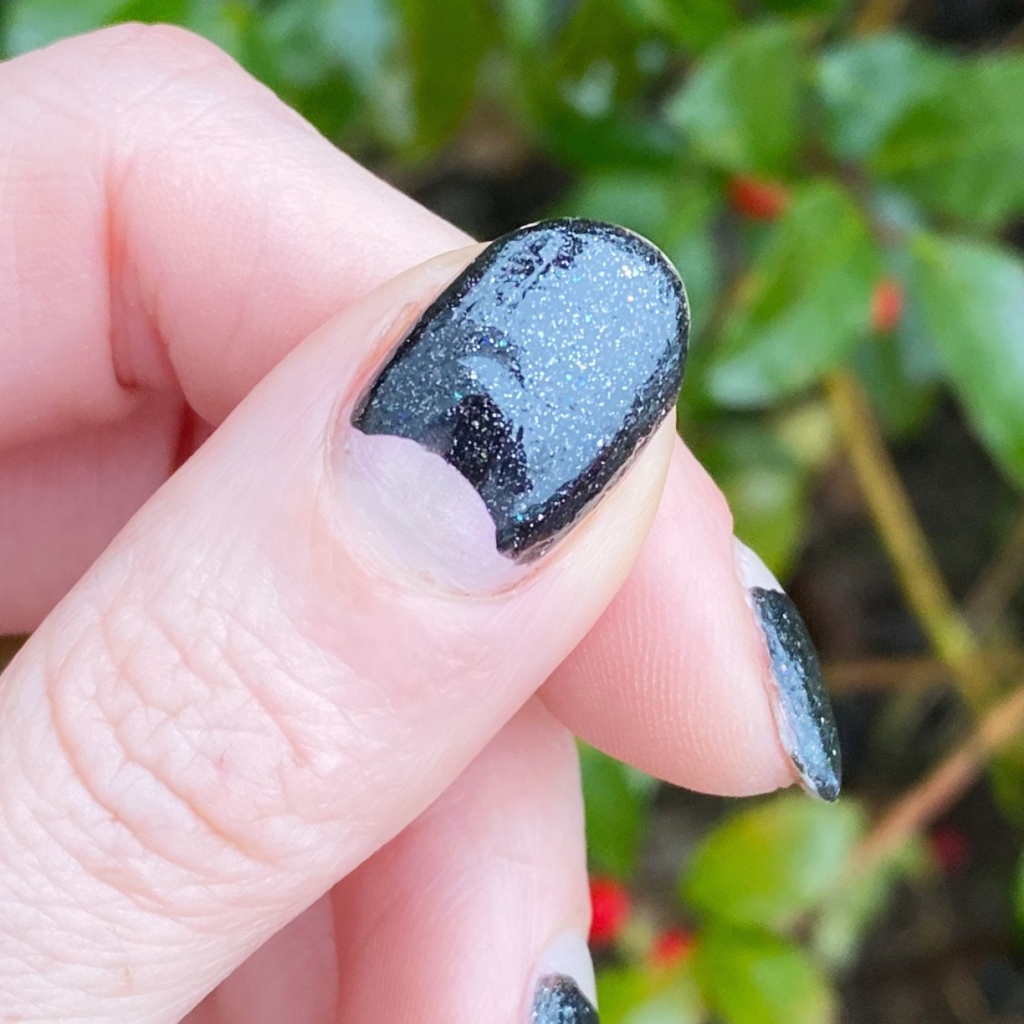
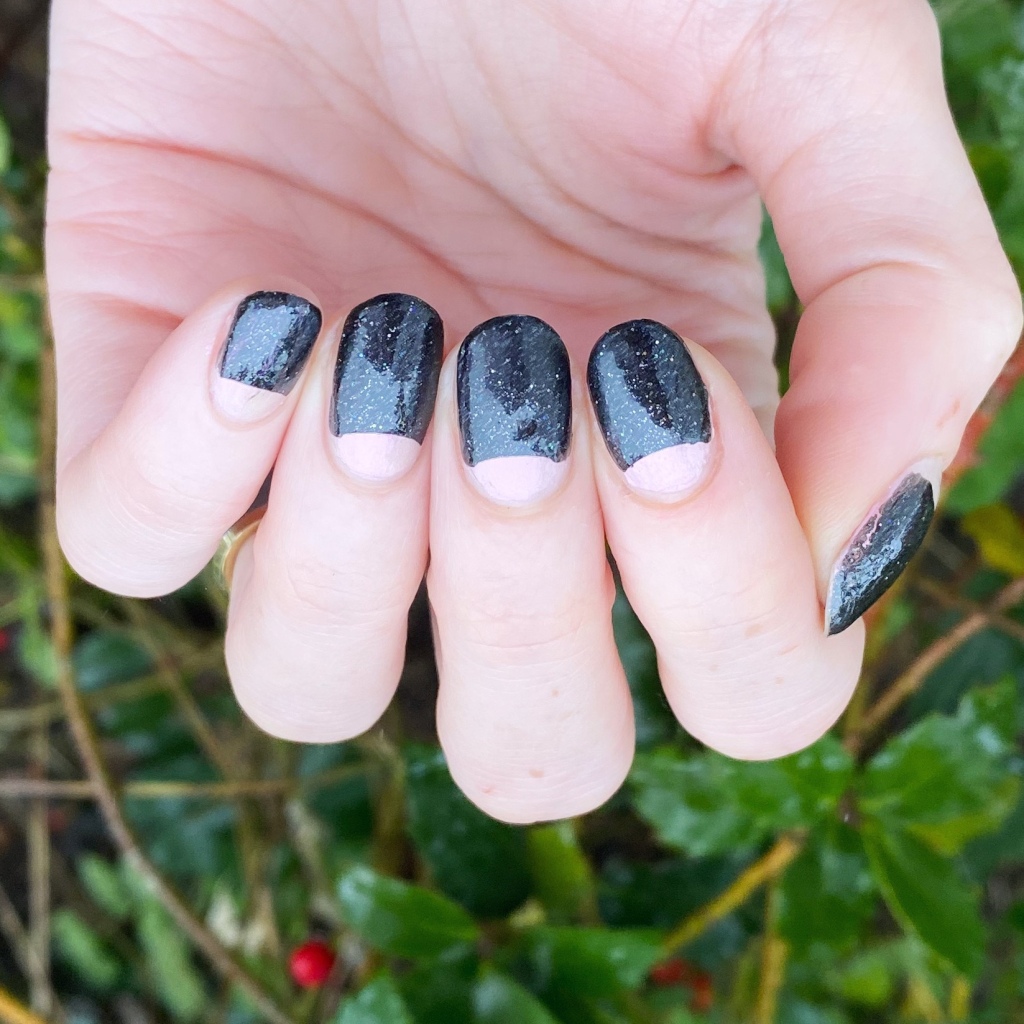
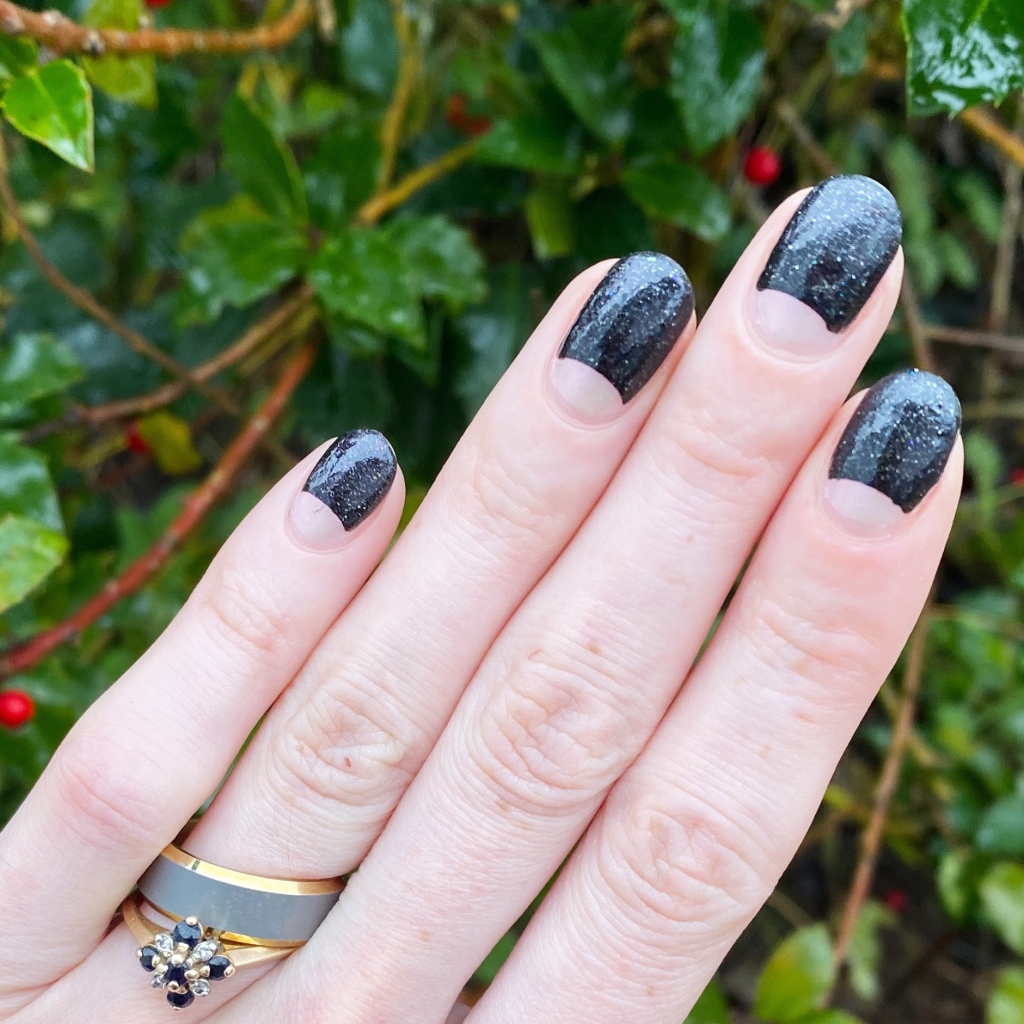
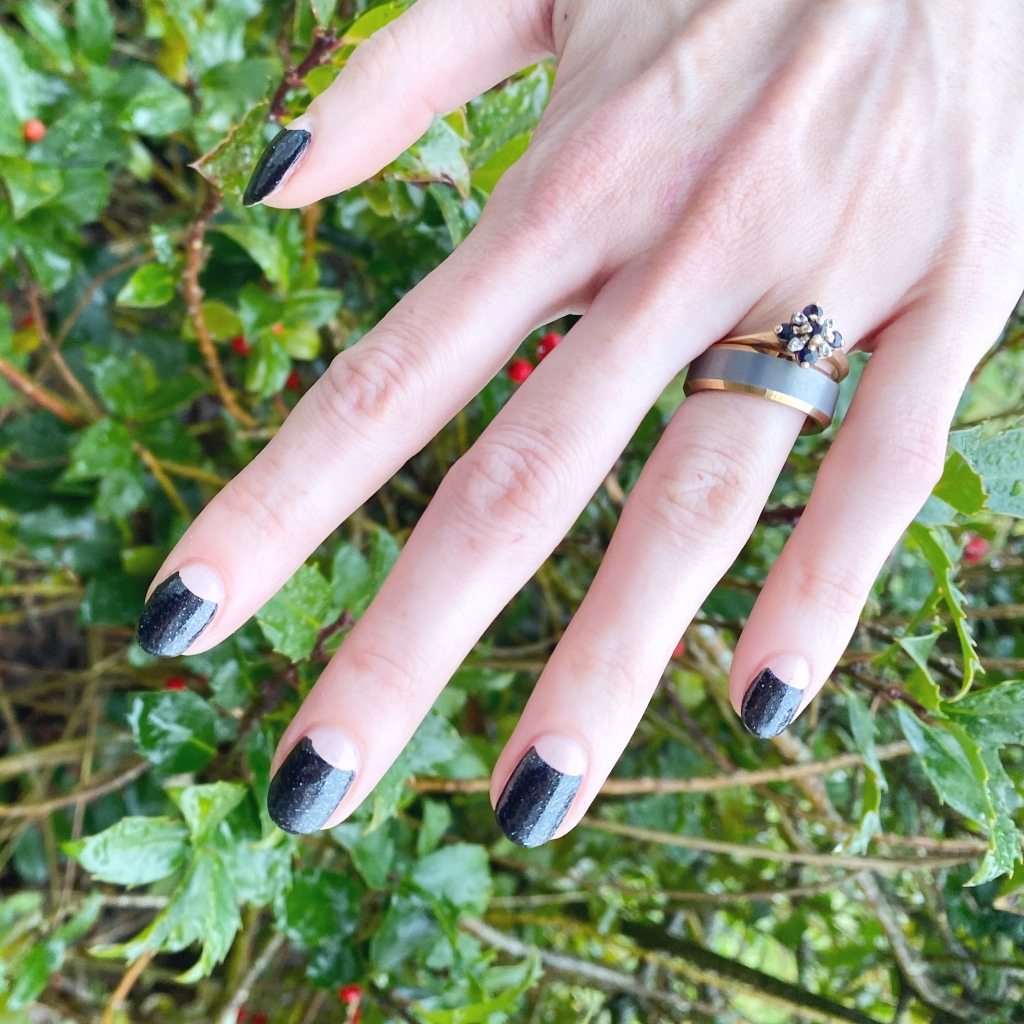
I wanted black nails, but with a twist, & I think this nail art look was just what I needed. I used a lot of top coat to smooth out Essence Here’s My Number as it’s a sparkle sand effect polish. I think the subtle pearlescent shimmer of Moonlight pairs really well with the more obvious sparkle of Here’s My Number. It’s a very chic look, which half moon designs always are to me, but then you have the black & white pairing, which just makes it feel even more chic.
Also it’s a very easy look, that anyone can do. The perfect nail art look for going into battle for retail war.
What do you think of these Black Friday half moons? Do you think this is as chic a look as I do? Let me know all your thoughts down in the comments below!
Happy Shopping darlings! 🖤