SWATCH SUNDAY — Orly Naughty

Hello lovelies & happy Sunday! I feel like it’s been ages since my last Swatch Sunday post (because I took last Sunday off) but we’re back, & back to business!

As is tradition, I was gifted some Winners/Marshalls gift cards for Christmas, so naturally I always have to peruse the nail section to see what they have going on. I’m always looking for shades that are different from ones I already own, but within my wheelhouse, & when I saw this shade on the shelf I knew I needed to add it to my stash.

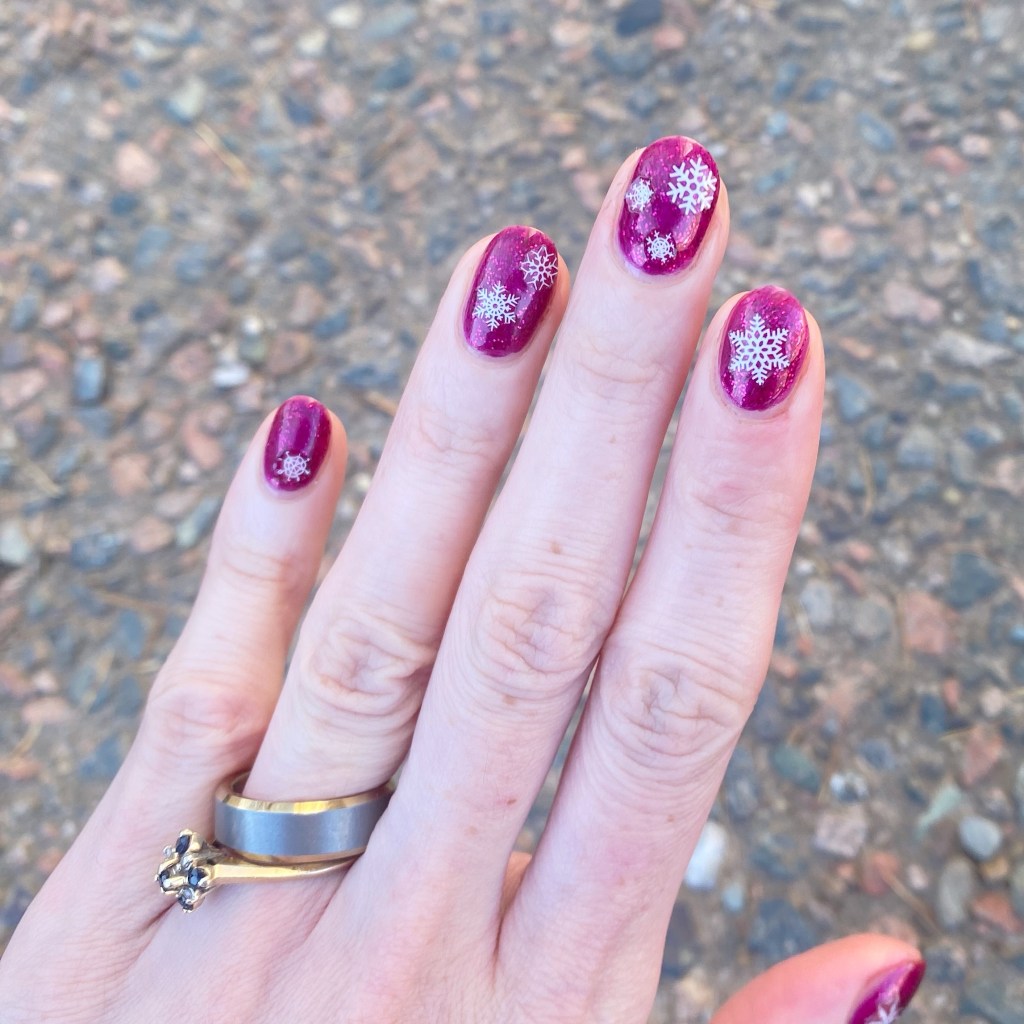
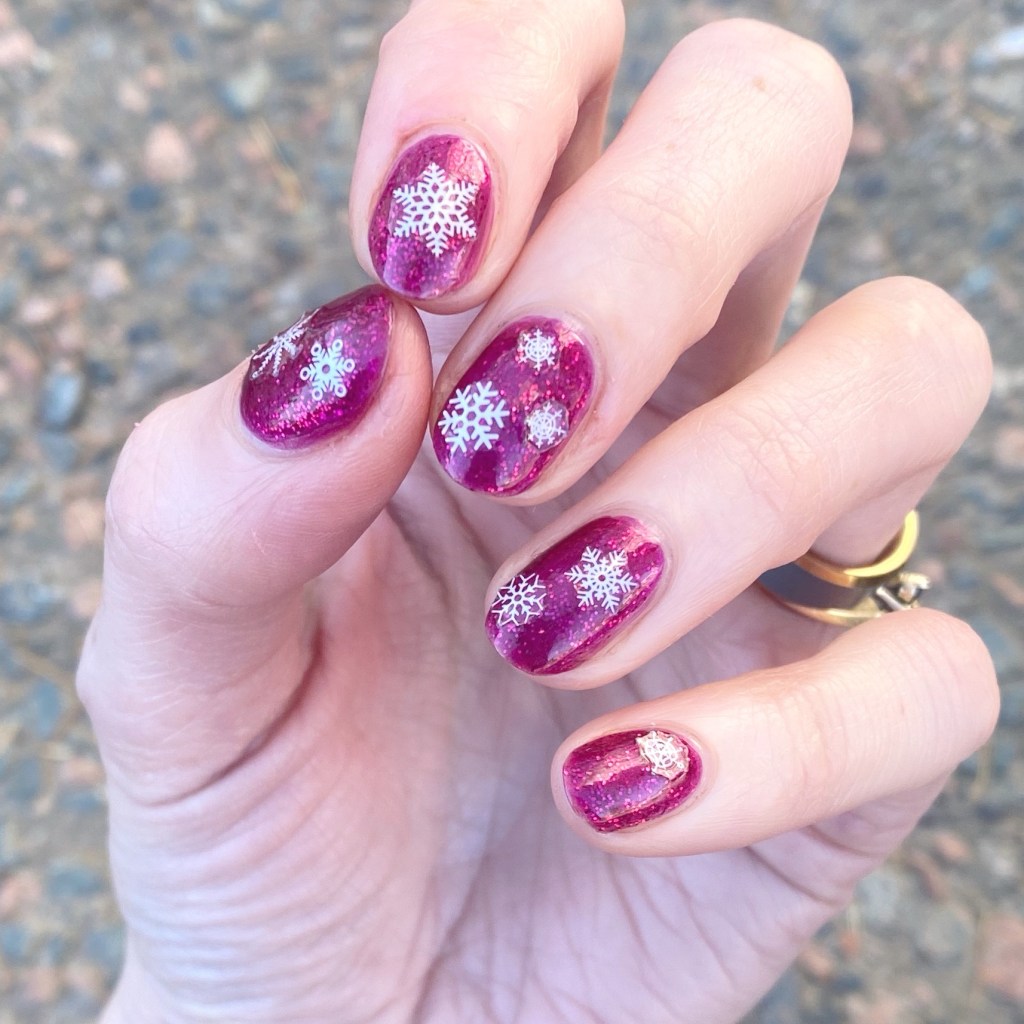
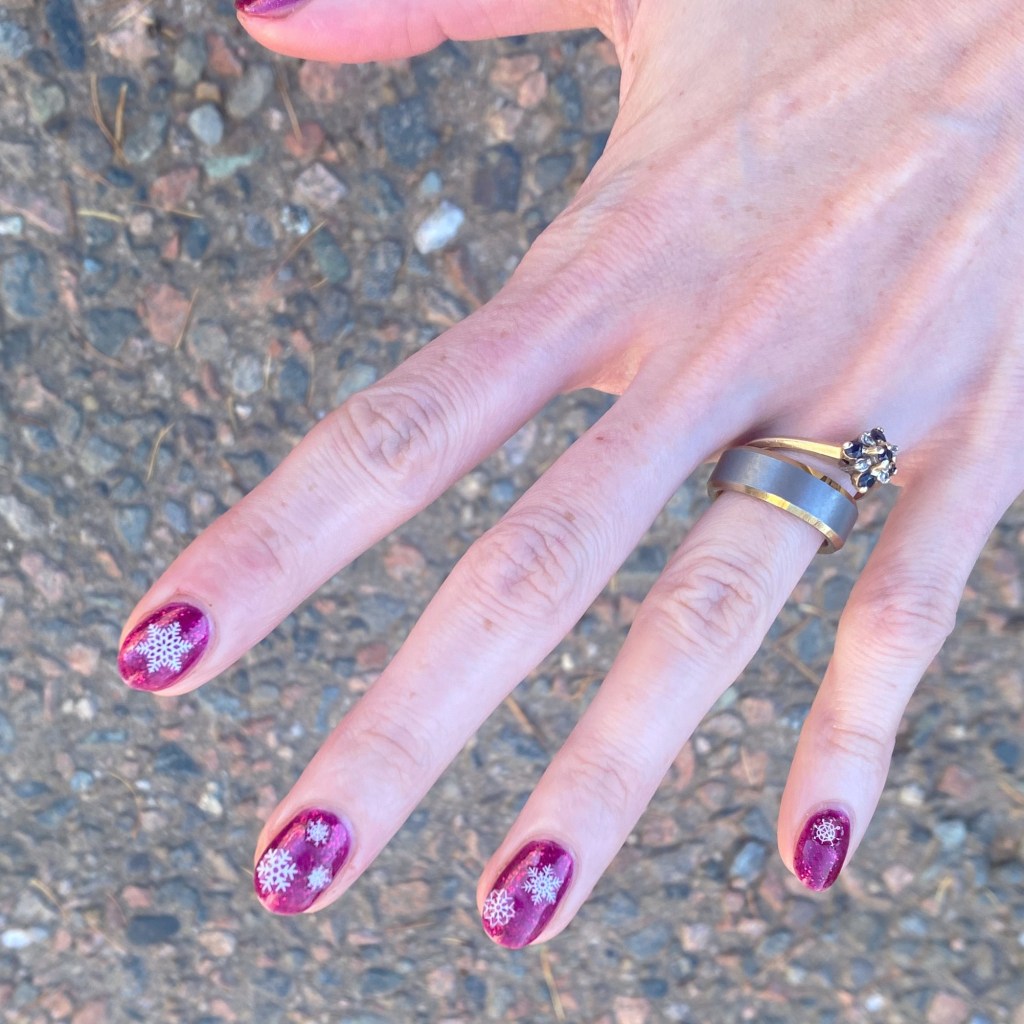
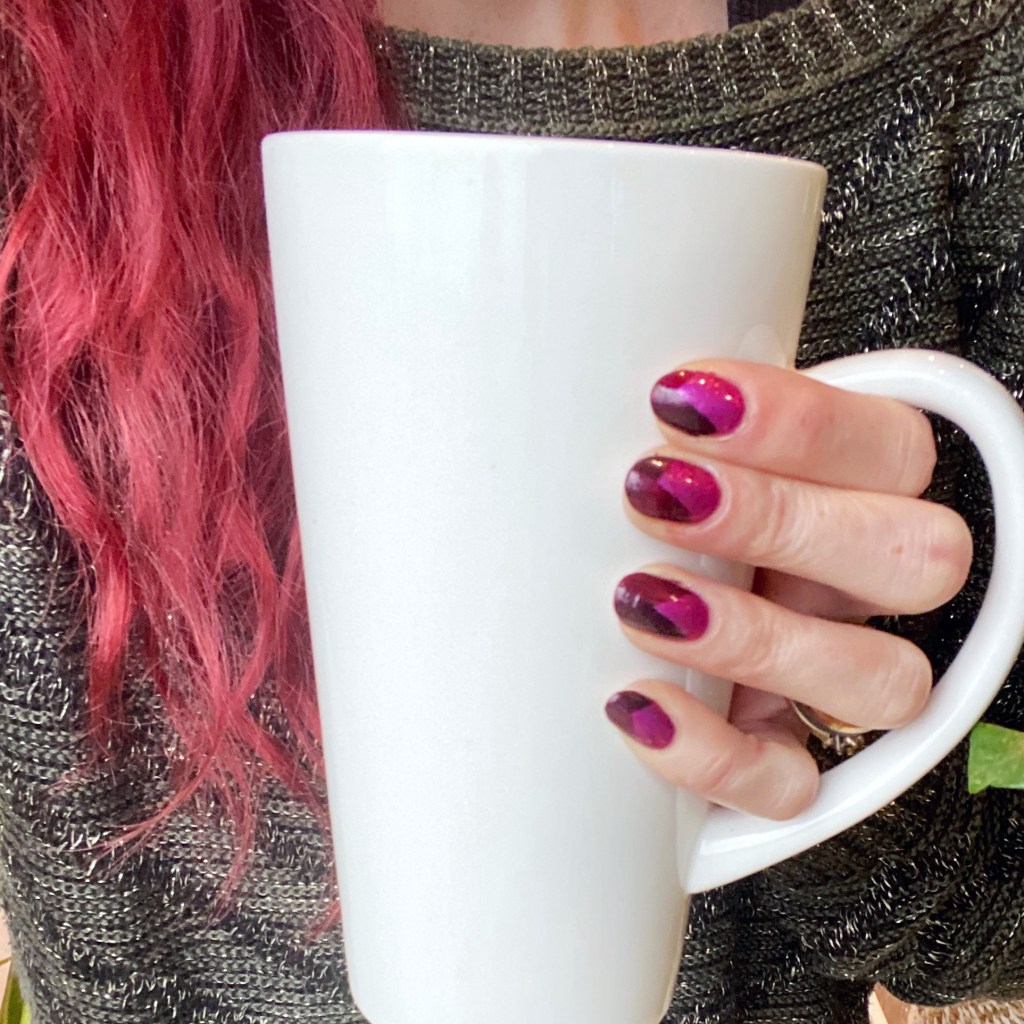
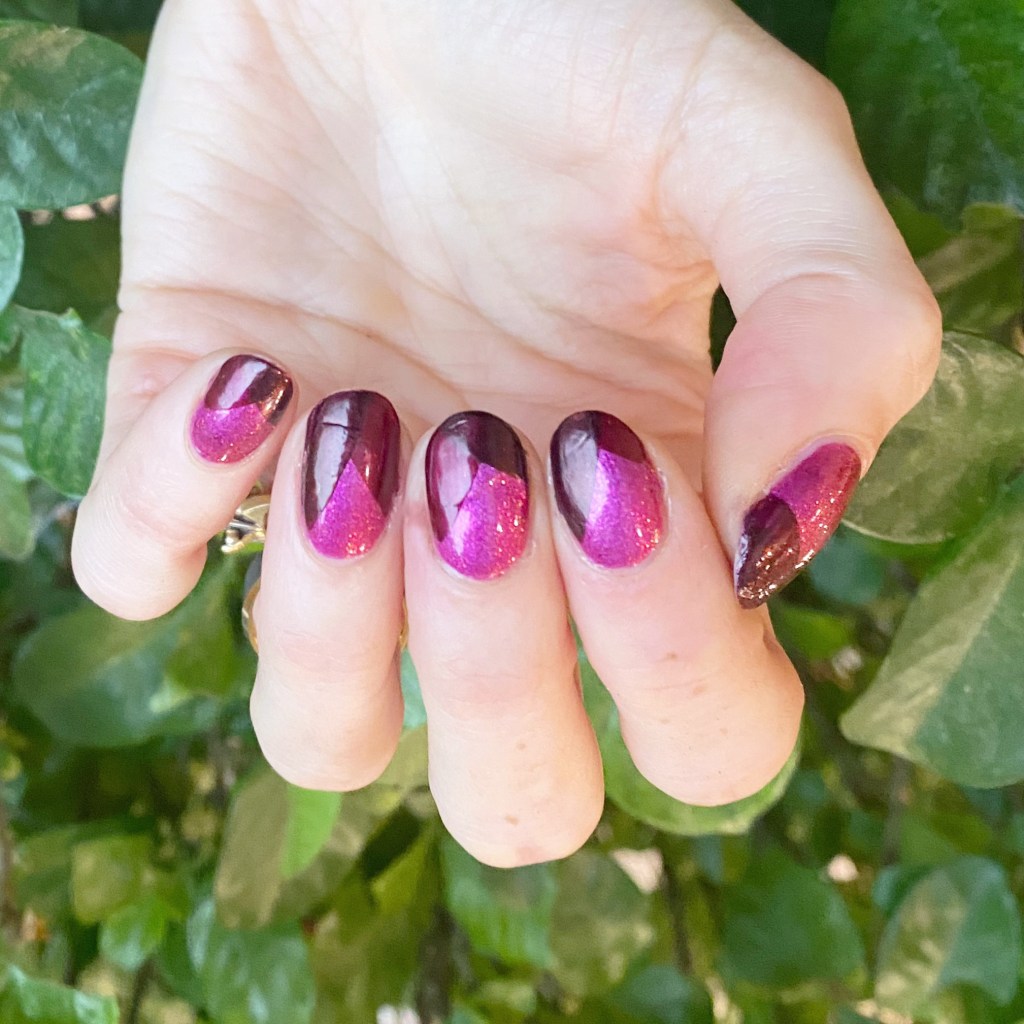
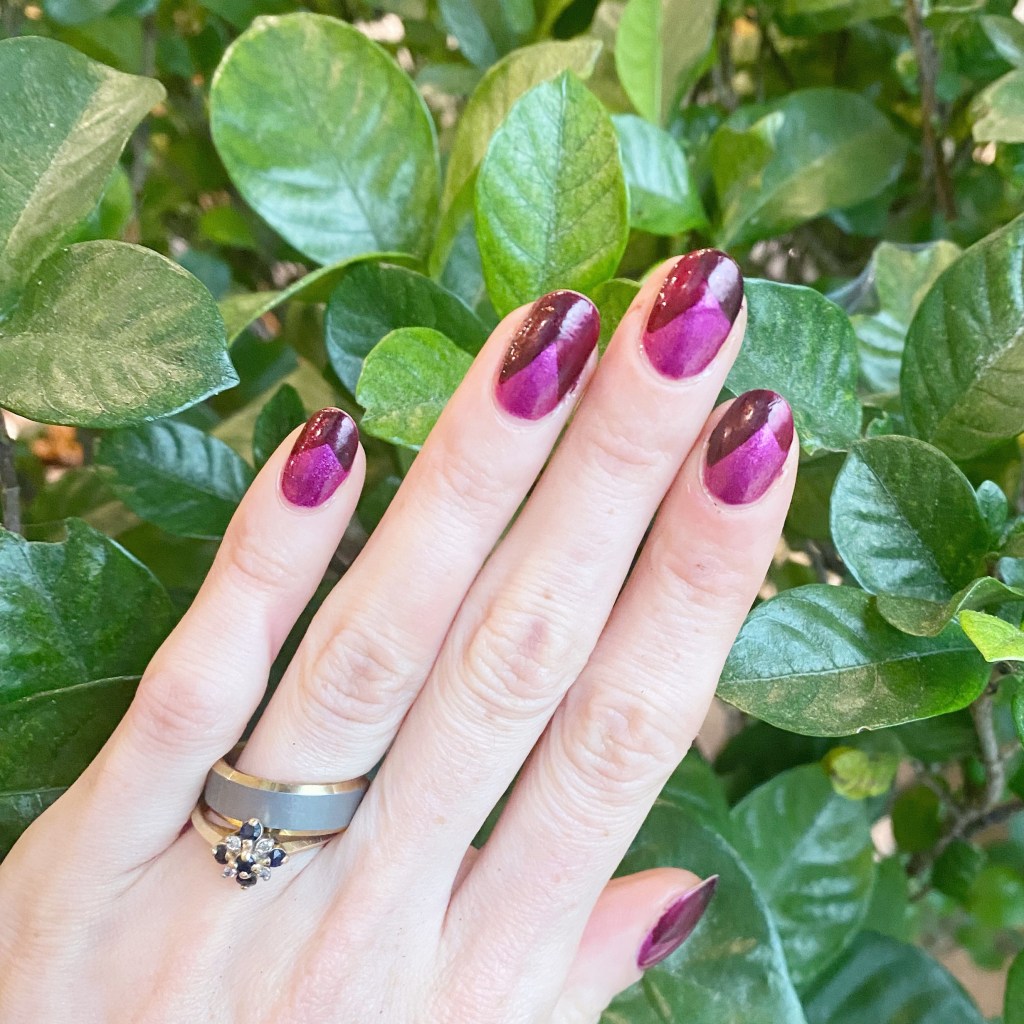
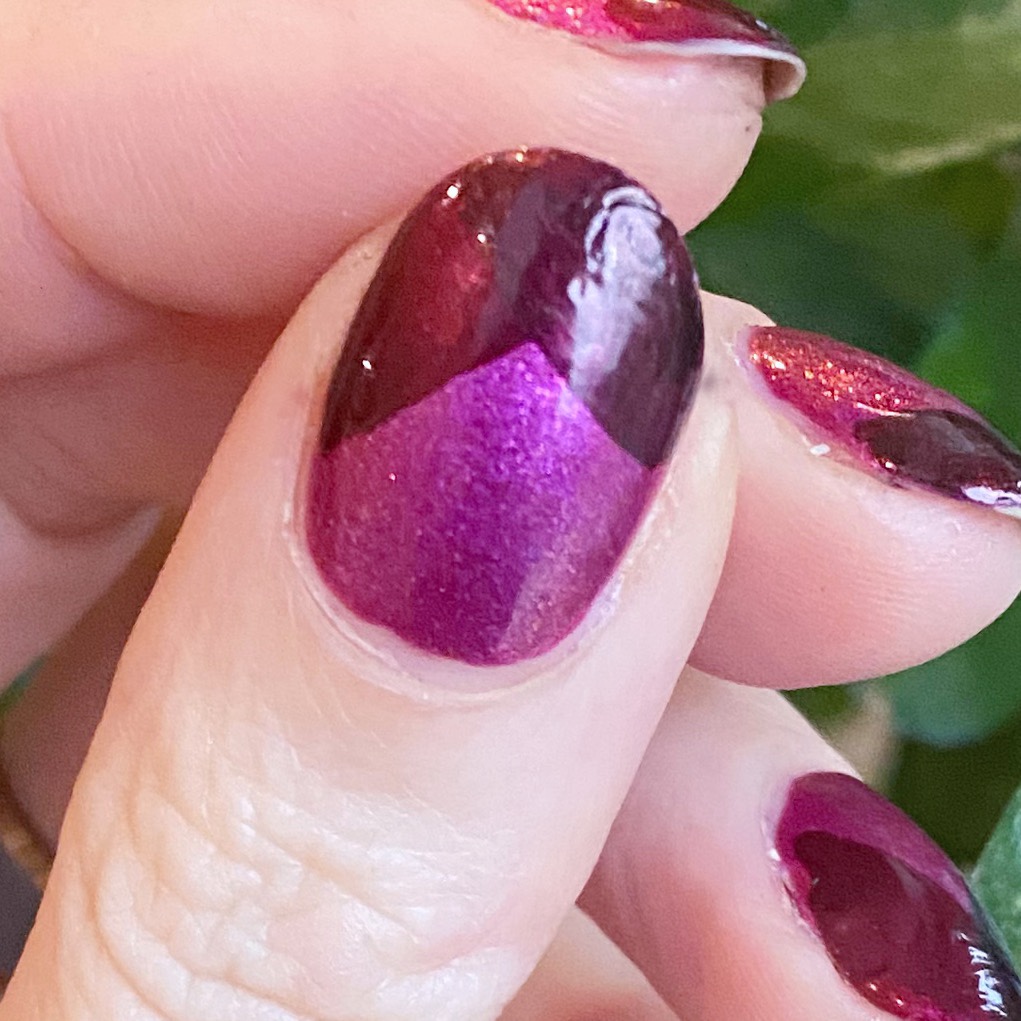
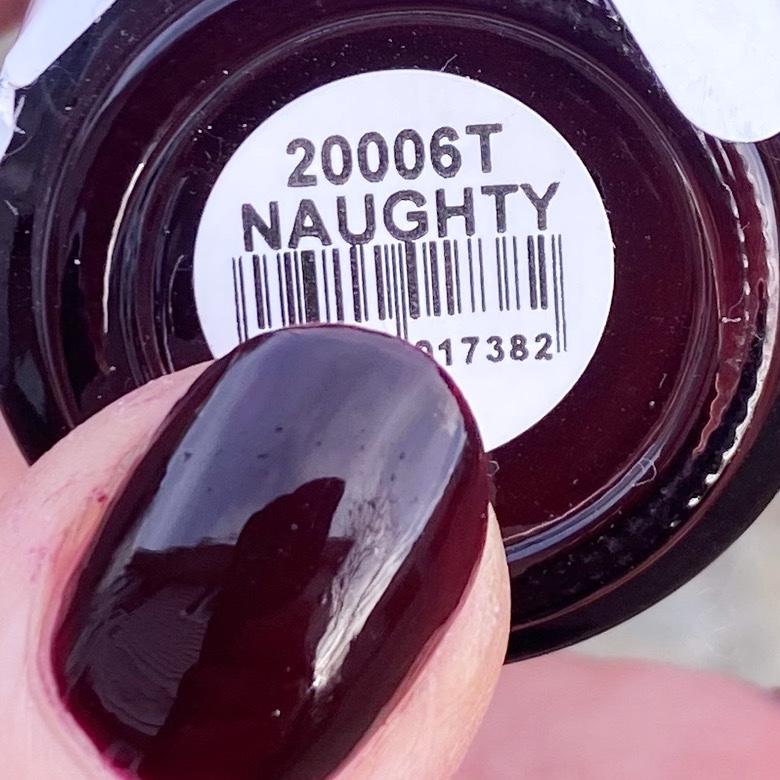
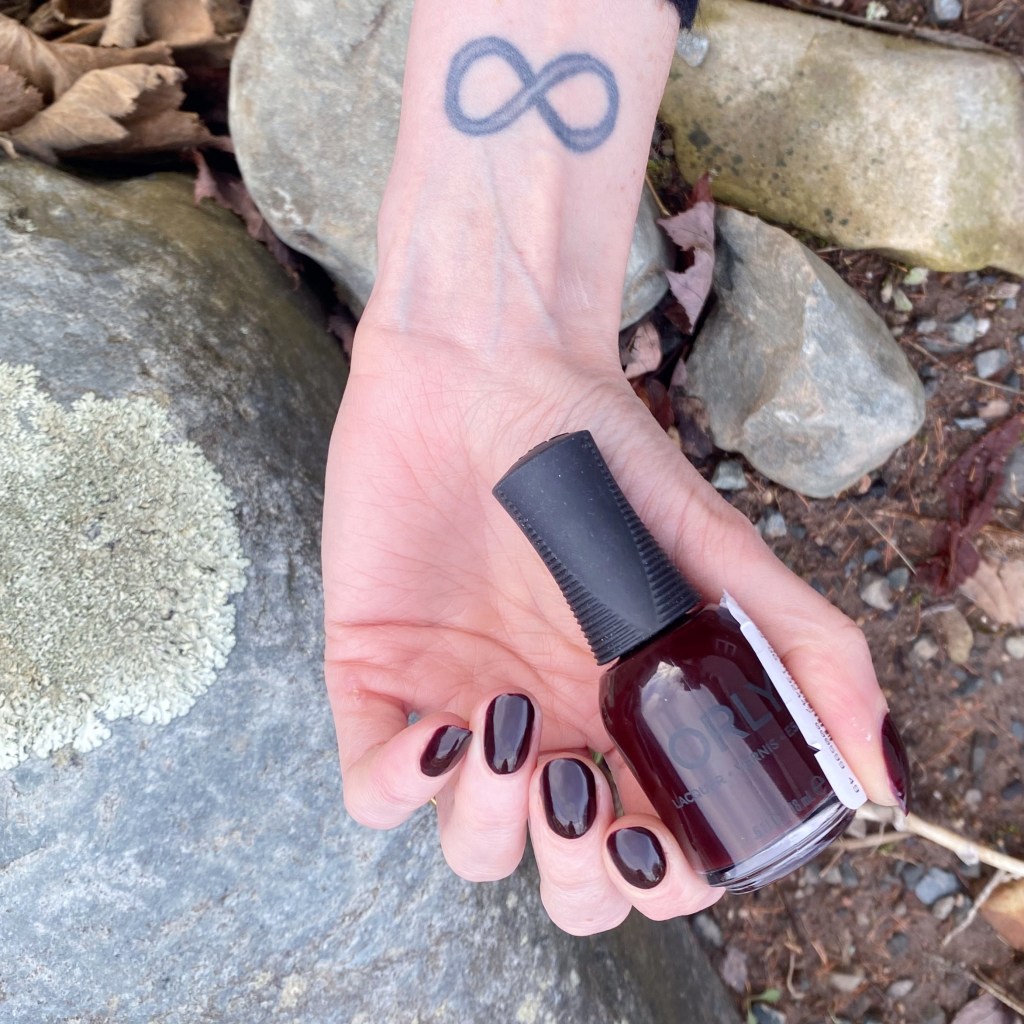
This is Orly Naughty.
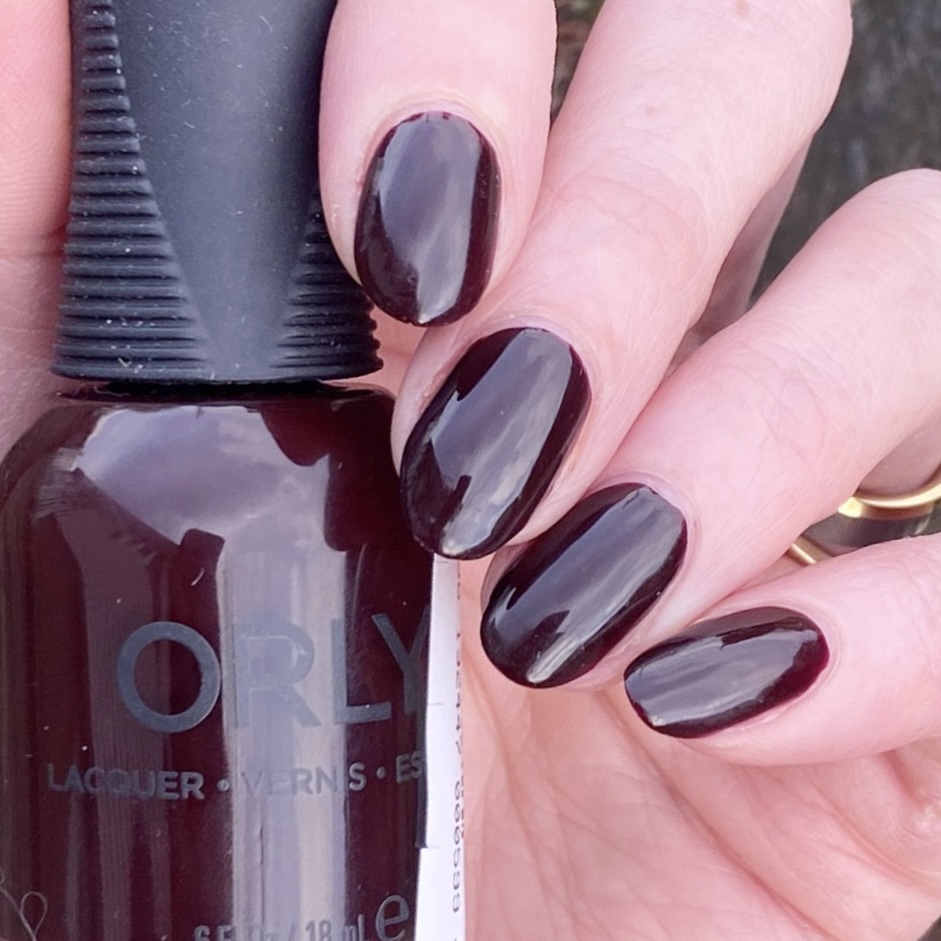
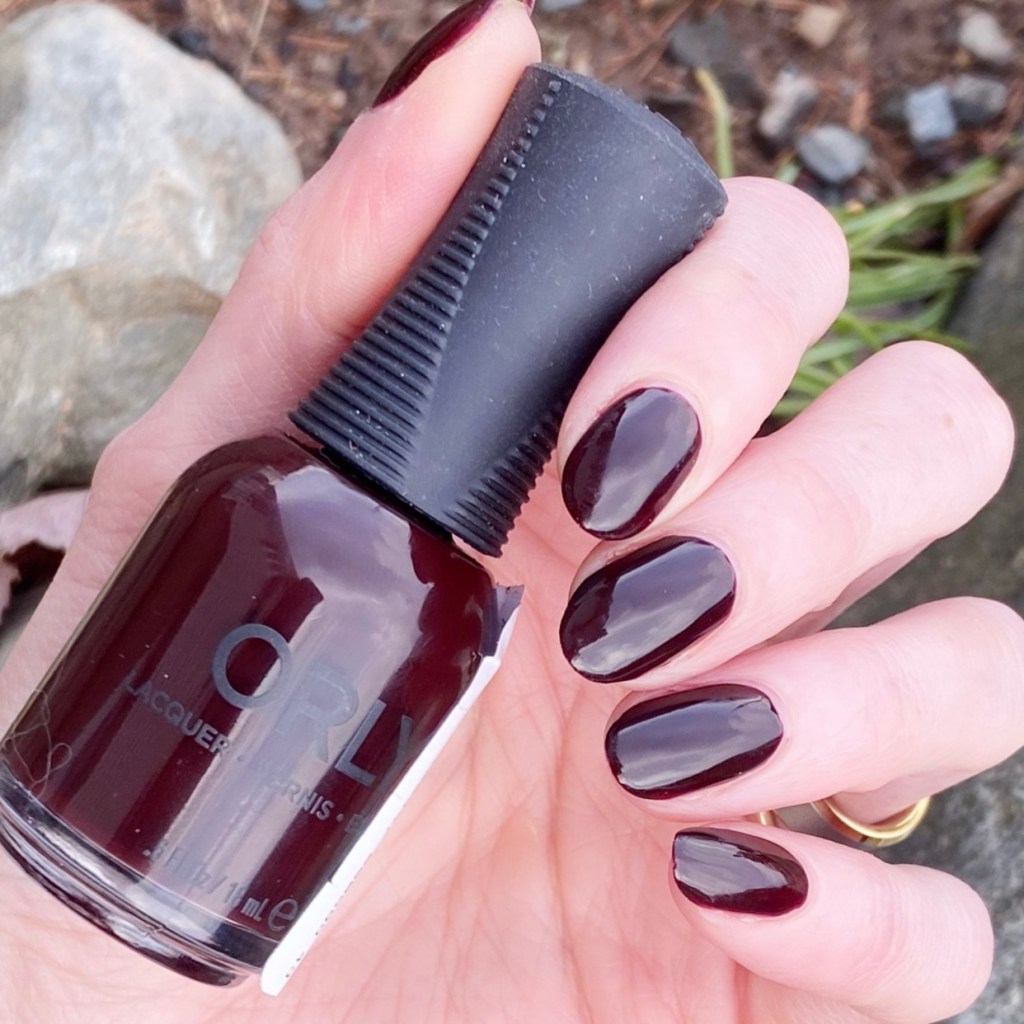
2 coats + top coat

This beautiful reddish brown shade is deep, & dark with a creamy formula. I did find this formula patchy, so I had to be careful with my application — especially around the cuticle line. I did find on a few nails I had to go back & carefully fill in where it was looking thin. But once I applied my top coat, it did smooth everything down nicely.

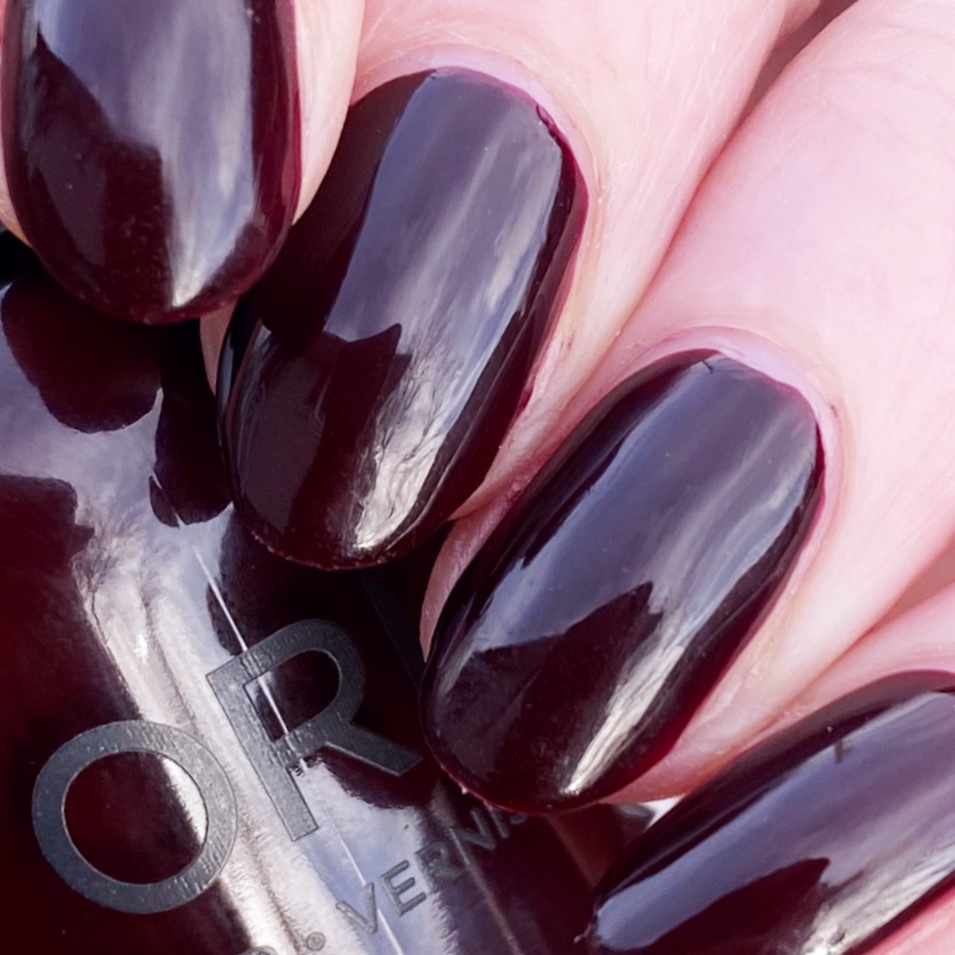
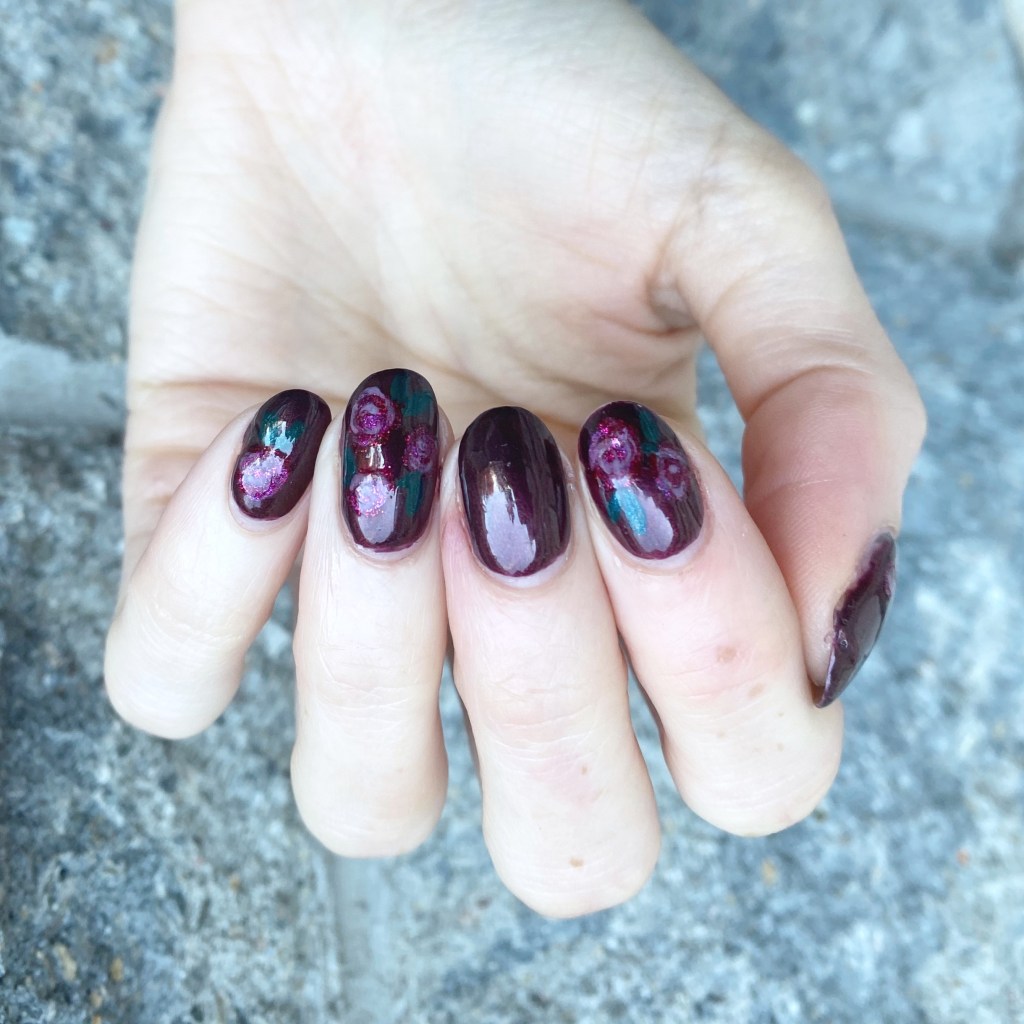
I love this colour so much! It’s deep, dark, & vampy. It fits the January vibe that this year has started with. I do love a dark nail. I did end up adding some glitter on top of this guy — Essie Nail Art Studio Lustrous Luxury which gave it more of a purple look. I’ve actually been wearing that for the last 3 days because I couldn’t figure out any nail art to wear over it, & can’t bare to take it off!

What do you think about this Orly shade? Are you a fan of this deep, dark shade? I don’t often see Orly popping up at Winners, hence why I was exciting to pick it up when I saw it. Let me know all your thoughts down in the comments below!

Happy Sunday

♥︎

Icy Blue Glitter Placement 💙❄️

Hello lovelies & happy Friday. Oh boy is it a cold one today! It felt like -25 degrees (Celsius) this morning — which is too cold for my delicate little self. But it fits with today’s nail art look, because I used some older Christmas shades of mine to create a beauty of a nail art look!

I wanted something winter-y, & Christmas adjacent, & I think I achieved that! ❄️

The polishes I used for this manicure are: 

  • Base Coat: Sally Hansen Miracle Cure
  • Top Coat: Sally Hansen InstaDri Top Coat (red bottle) 
  • Morgan Taylor Baby It’s Bold Outside
  • Morgan Taylor Silver in my Stocking
  • Small Dotting Tool

So I totally forgot I had this fun Morgan Taylor silver shatter glitter I was gifted all the way back in 2017 — so naturally I needed to pull it out for some kind of icy glitter placement look. I decided to use another shade from the same collection (Little Miss Nutcracker) as the base for this look. & this beautiful cobalt blue was calling me!

The base of this silver has a bunch of silver micro shimmers, so it made for an interesting look. I think it gives it even more of an icy effect. &, like I said, Christmas adjacent. If you really wanted to amp up this look, you can paint on some snowflakes to give it the full ice queen effect!

What do you think of this icy blue look? Is it giving ice queen? Does it match our (very) frigid weather outside? Let me know what you think of this look, & if you would wear it yourself!

Happy Friday!

💙

Pink Glitter Snowflakes

Hello lovelies!

Happy day after (American) Thanksgiving to my American readers, & happy Black Friday! This is my first year in a while I’m not working in retail for Black Friday sales, so I’m kind of enjoying the breather.

But we can’t deny — Christmas is coming. & even though I’m feeling less than zero Christmas spirit this year, I figured it was time I at least tried to summon some Holiday/Winter spirit. So naturally I thought we’d dip our toes in with some snowflake nail art stickers.

The polishes I used for this manicure are: 

  • Base Coat: Sally Hansen Miracle Cure
  • Top Coat: Sally Hansen InstaDri Top Coat (red bottle) 
  • Sally Hansen Miracle Gel Wrapped in Love
  • Ardene Dancing Queen
  • NailStuff.ca Snowflake Nail Art Stickers

First off, I’m officially petitioning for glitter pink to become an official Christmas colour. Secondly, I love how cute these are! I’ve had these nail art stickers in my collection forever, & I love that they’re still being used for cute nail art looks.

& it was way simpler than me trying to hand paint snowflakes on my nails! The white of the stickers just pop so well against that pretty pink. Definitely giving Christmas vibes — at least for me.

What do you think about these pink glittery snowflakes? Are they giving holiday vibes? Let me know all your thoughts in the comments below! & how you’re getting your nails into the festive spirit.

Happy Friday

🖤

Festive Berry Toned Colour Blocking

Hello lovelies & happy Thursday!

I hope everyone is having a lovely week so far. With the day off for Remembrance Day on Tuesday, I feel like my whole week is so askew! But I am trying to keep on my painting & posting schedule as best as possible, so here we go!

Today’s look is a simple one, but perfect for this time of year. The holiday vibes are really hitting hard now, so why not have nails to match! & I much prefer a pink Christmas vibe, myself.

The polishes I used for this manicure are: 

  • Top Coat: Sally Hansen InstaDri Top Coat (red bottle) 
  • Base Coat: Sally Hansen Miracle Cure
  • Sally Hansen InstaDri The Queens Velvet
  • Sally Hansen Miracle Gel Frosted Berries
  • OPI Infinite Shine Bring Out The Big Gems

I’m a huge fan of designs like this which feature similar tones all paired together. It looks so beautiful. & I’m very into this pinky red colour scheme right now! As a lady truly dedicated to a crimson nail polish, it’s a nice change from my usual go to shades.

& colour blocking like this is so easy to do! Obviously if you don’t feel comfortable free-handing, you can use nail tape/vinyls — but honestly, once you practice doing it without, you realize how quick & easy it is!

What do you think about my berry toned colour blocking? Do you like this combination of colours? Let me know all your thoughts in the comment below, & if you would wear this design!

Enjoy your Thursday!

🖤

Vampy Autumn Roses

Hello lovelies & happy Monday!

& hello to anyone new discovering this little blog of mine! I had some crazy traffic to my little corner of the internet last week, so I’m happy to welcome you to my little nail blog. ❤️

Today we’re starting off Monday right with some new nails. & I realized the other day it had been ages since I did any floral on my nails, so some vampy roses seemed appropriate.

The polishes I used for this manicure are: 

  • Top Coat: Sally Hansen InstaDri Top Coat (red bottle) 
  • Base Coat: Sally Hansen Miracle Cure
  • OPI Infinite Shine Bring Out The Big Gems
  • Sally Hansen Miracle Gel Red It Twice
  • Sally Hansen InstaDri The Queens Velvet
  • NYC Color Lexington Lilac
  • Essie Off Tropic
  • China Glaze Emerald Fitzgerald
  • NailStuff dotting tool trio
  • NailStuff 7mm Mermaid Tail liner brush

Okay first off — I decided to paint these at 9:30pm in very minimal light, so I’m shocked they turned out as good as they did! Because trying to see those roses on this dark base colour was a challenge, I won’t lie.

Secondly, I’m obsessed! Everytime I do floral I remember why I love wearing floral so much. It’s like me in a manicure. & these vampy roses—as challenging as they were to paint—just look so beautiful against the dark jewel toned based of OPI Bring Out The Big Gems. Just perfect for a gloomy November day.

What do you think of my vampy roses? Do you like them against this dark gloomy base? Let me know all your thoughts down in the comments below!

Enjoy your Monday!

🖤