SWATCH SUNDAY — Icing Stores Starlight

Hello lovelies & happy Sunday. It’s a rainy, grey, & extremely blah day here on the East Coast — & it’s starting to feel like we’ll never see the sun.

I needed some cheering up after this blah, blah week so I started digging through my Claire’s/Icing drawer & found this old school beauty! & I just knew that I had to pick it for this week’s Swatch Sunday.

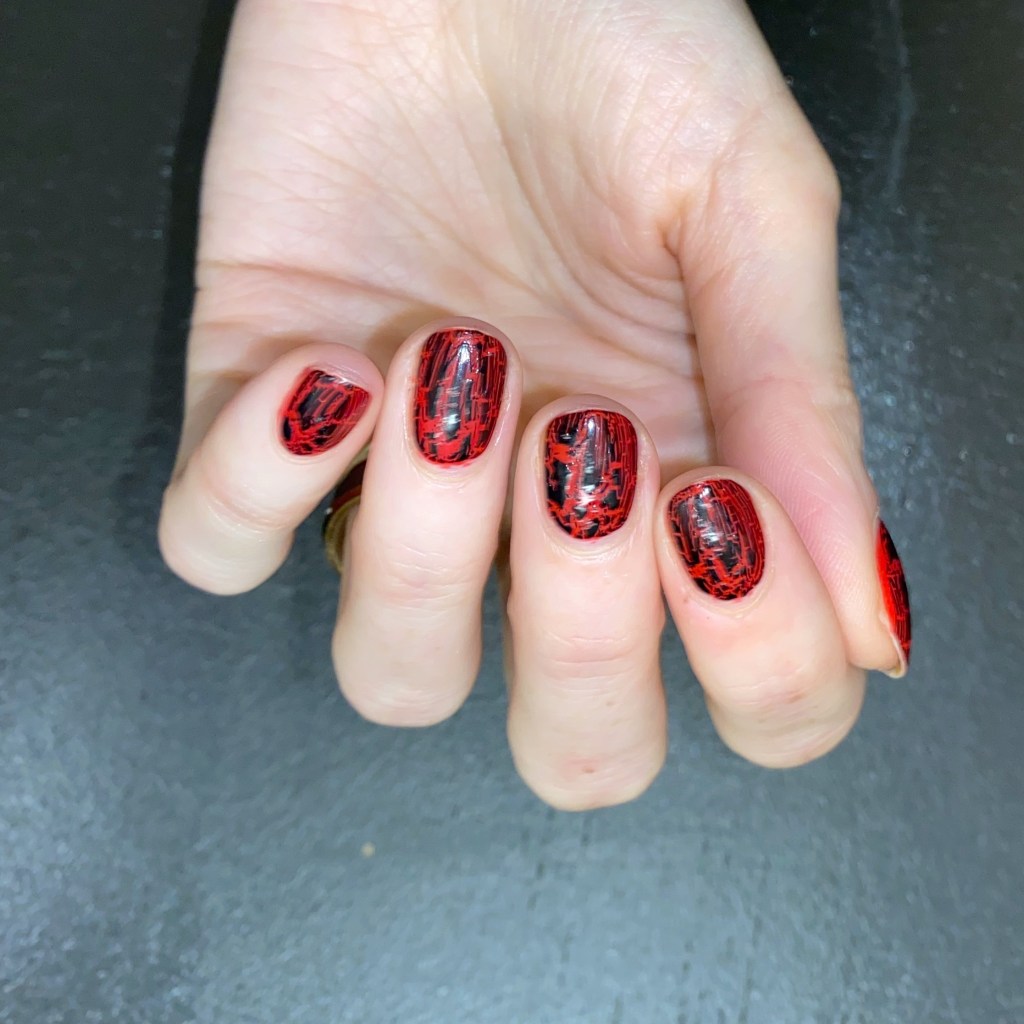
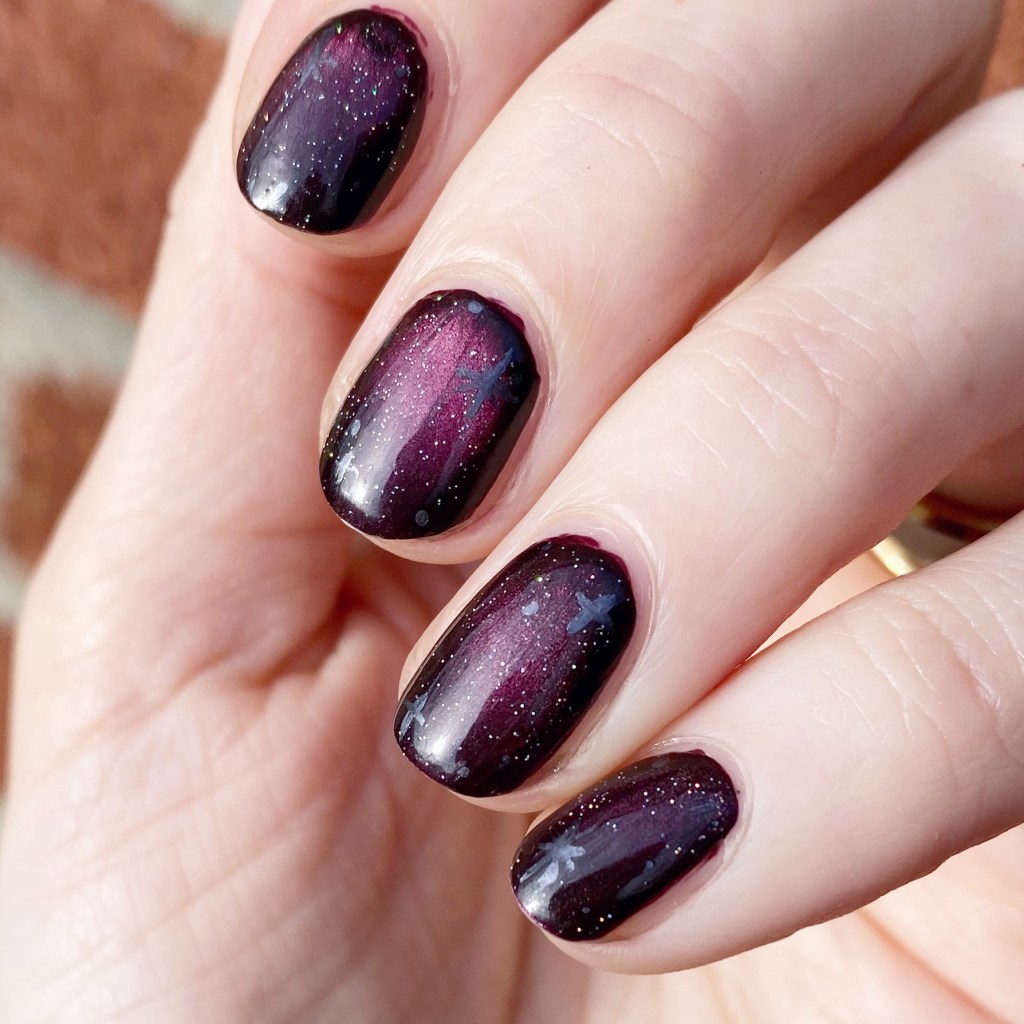
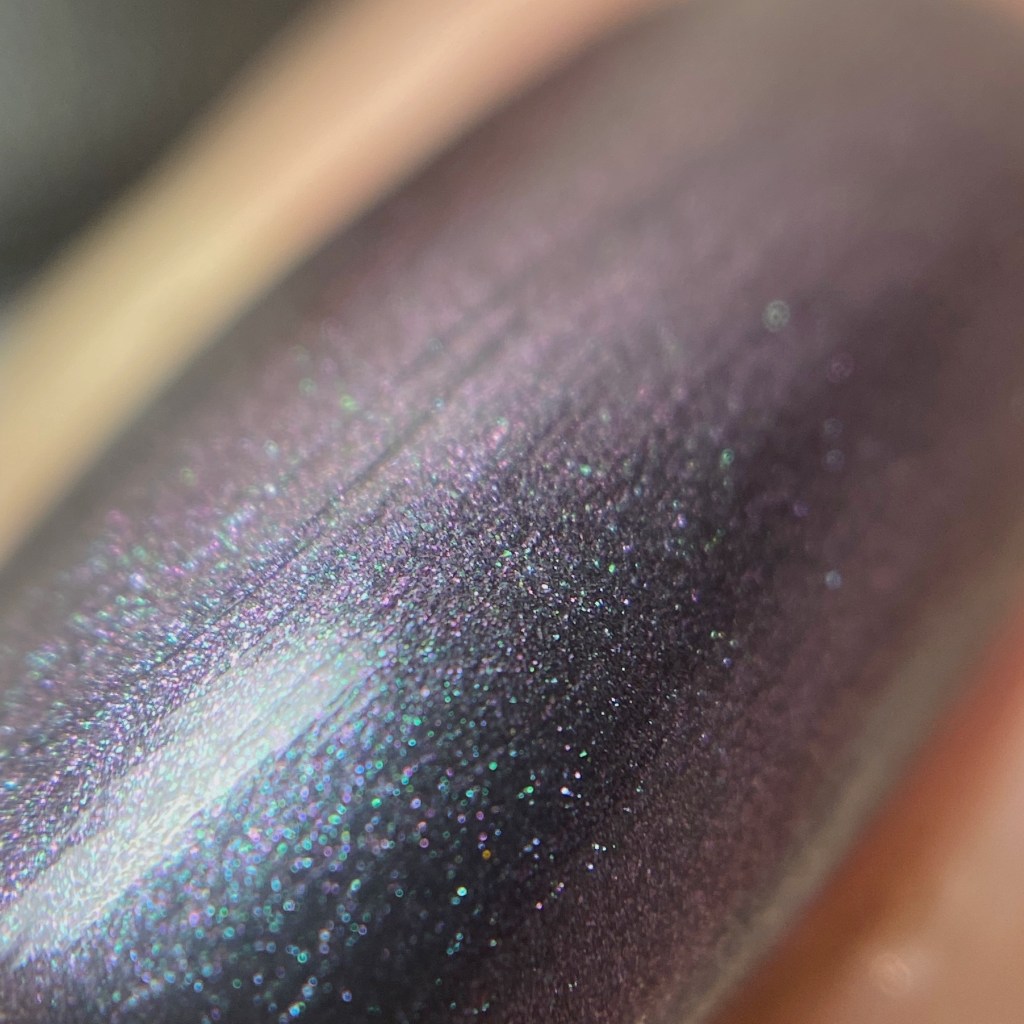
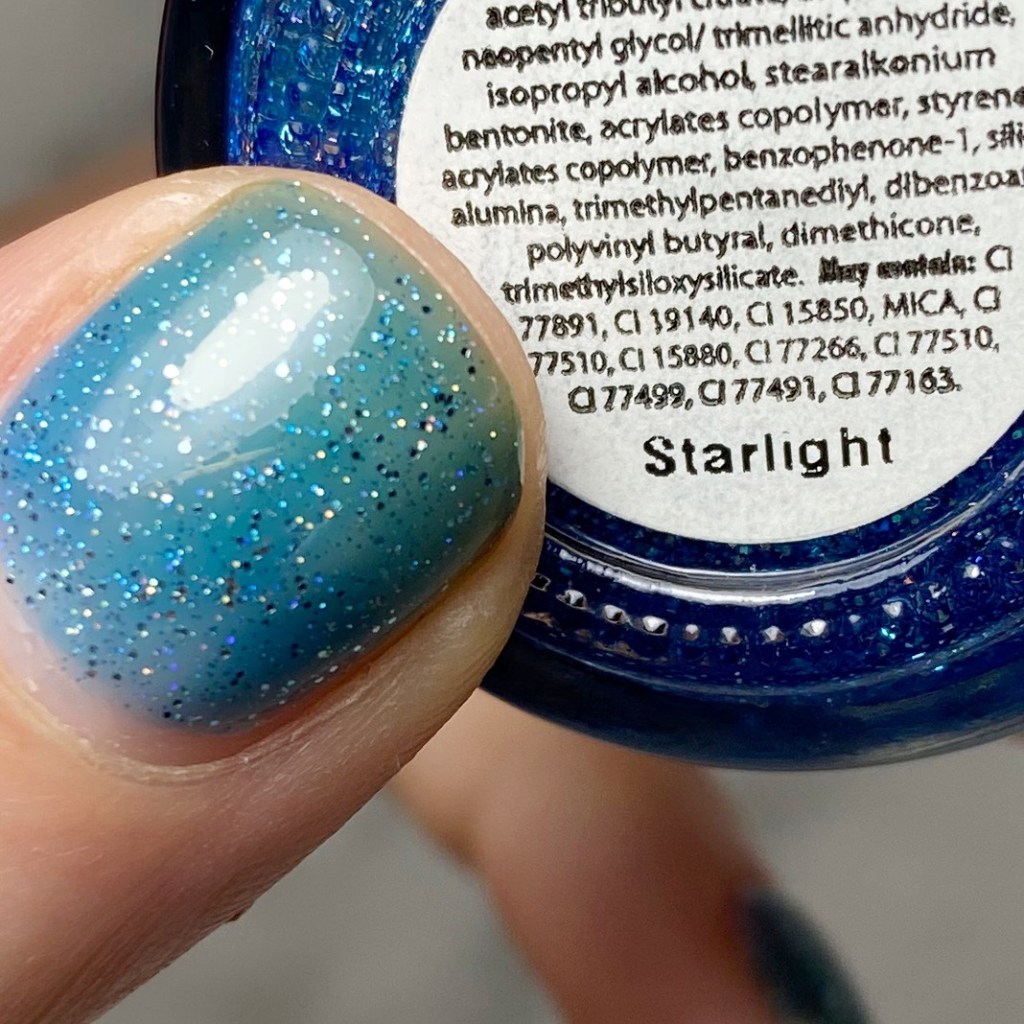
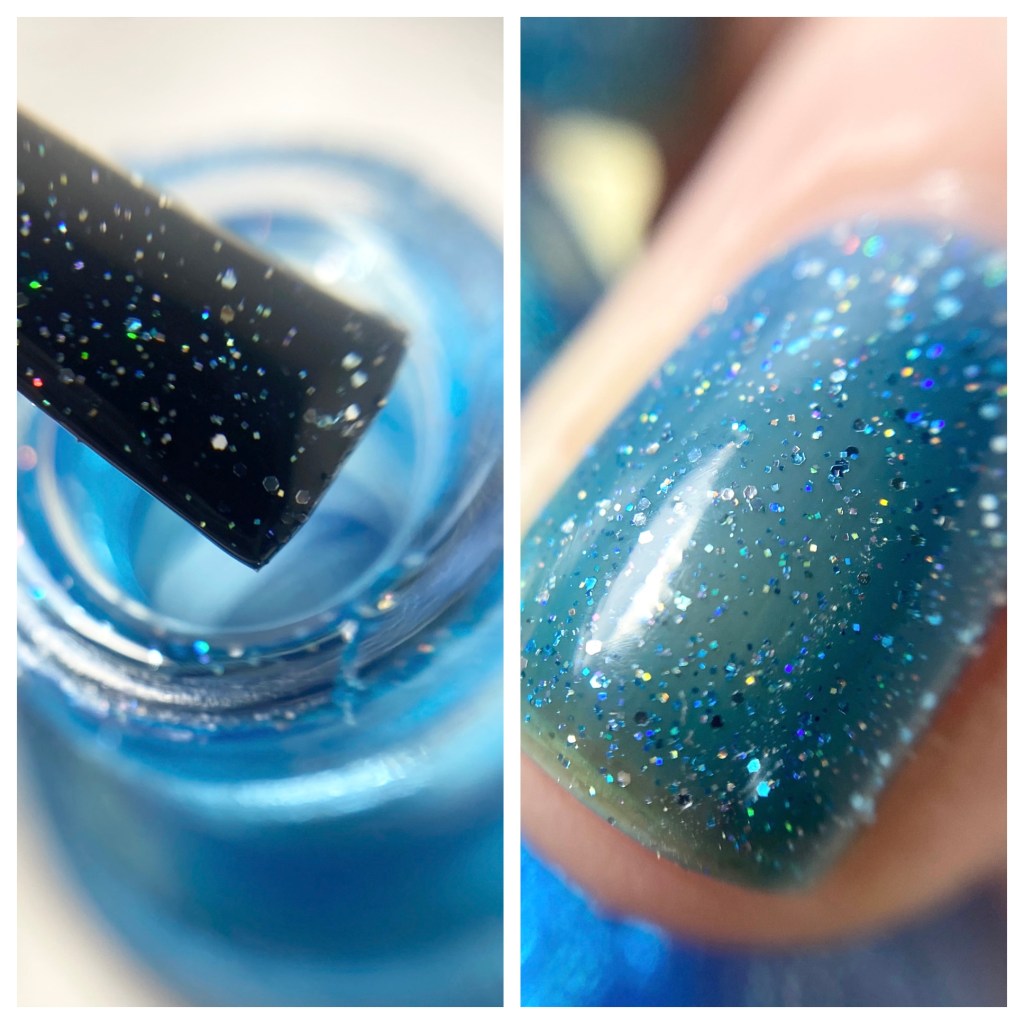
This is Icing Starlight.

3 coats + top coat

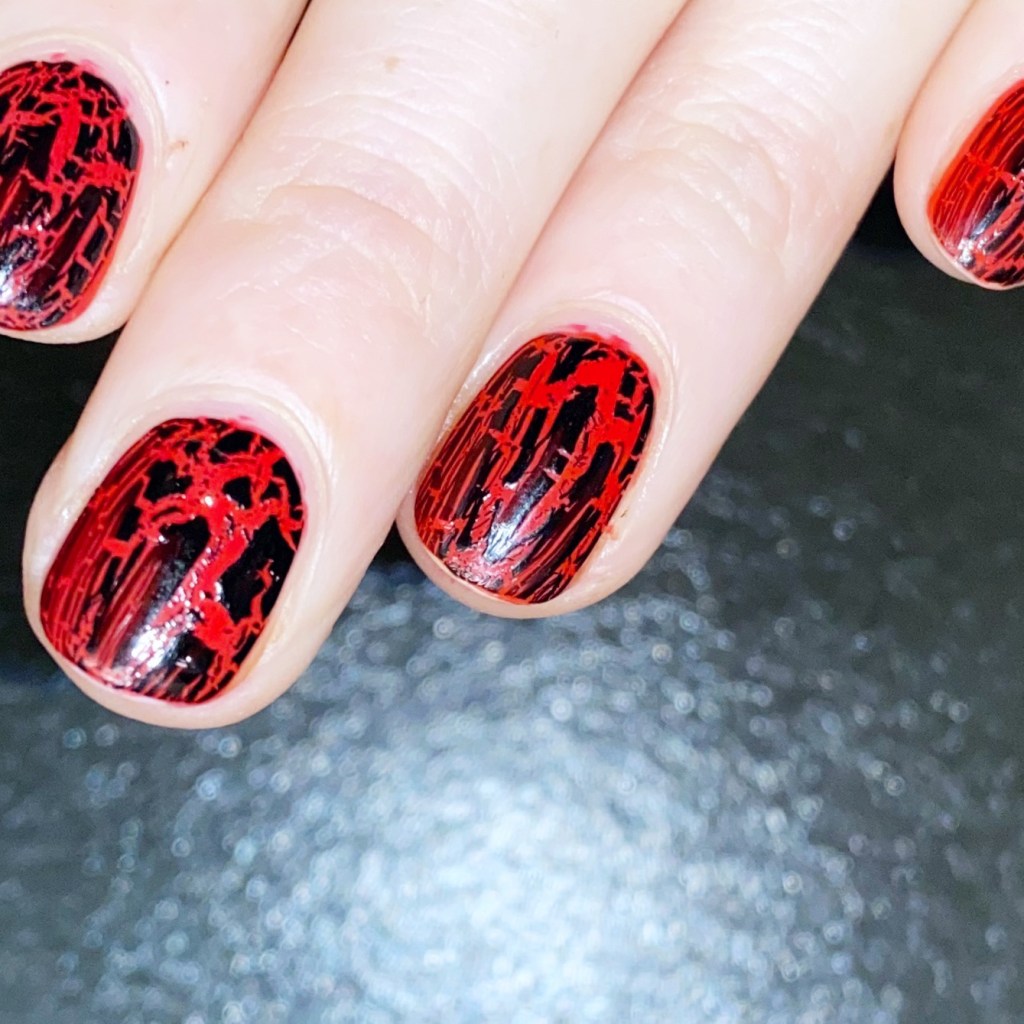
The formula on this beautiful jelly glitter is thin thin thin, but it builds to nice coverage. & because the formula is so thin, each coats dries down quickly before you apply the next one. It also means you can see each & every silver & holo glitter suspended in the base, which I love.

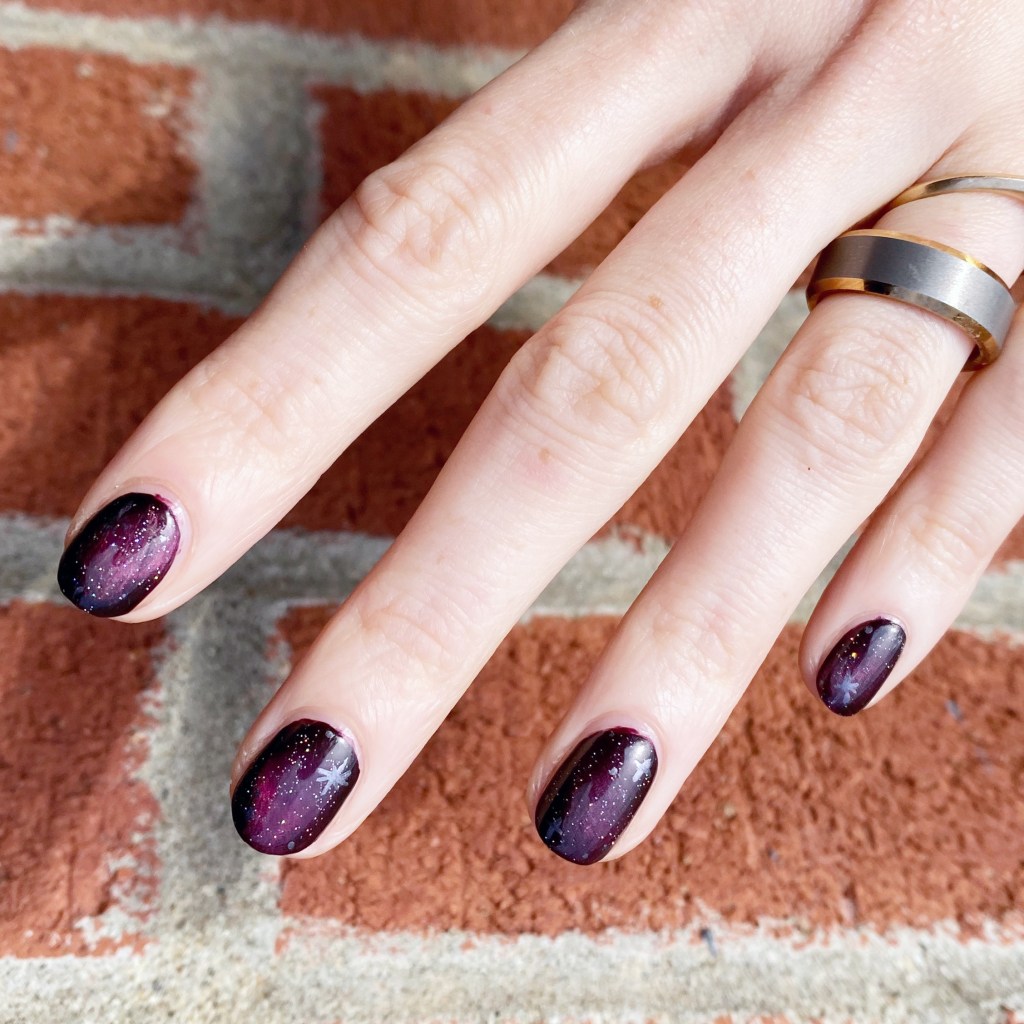
Truthfully, I could have applied a forth coat for a bit more opacity, but with the exception of my tips (where it shows of a bit of my natural yellowing from my nail polish obsession) I really love how this looks. & that could easily be corrected with a colour correcting base coat. Or, by using it as a topper over another blue polish.

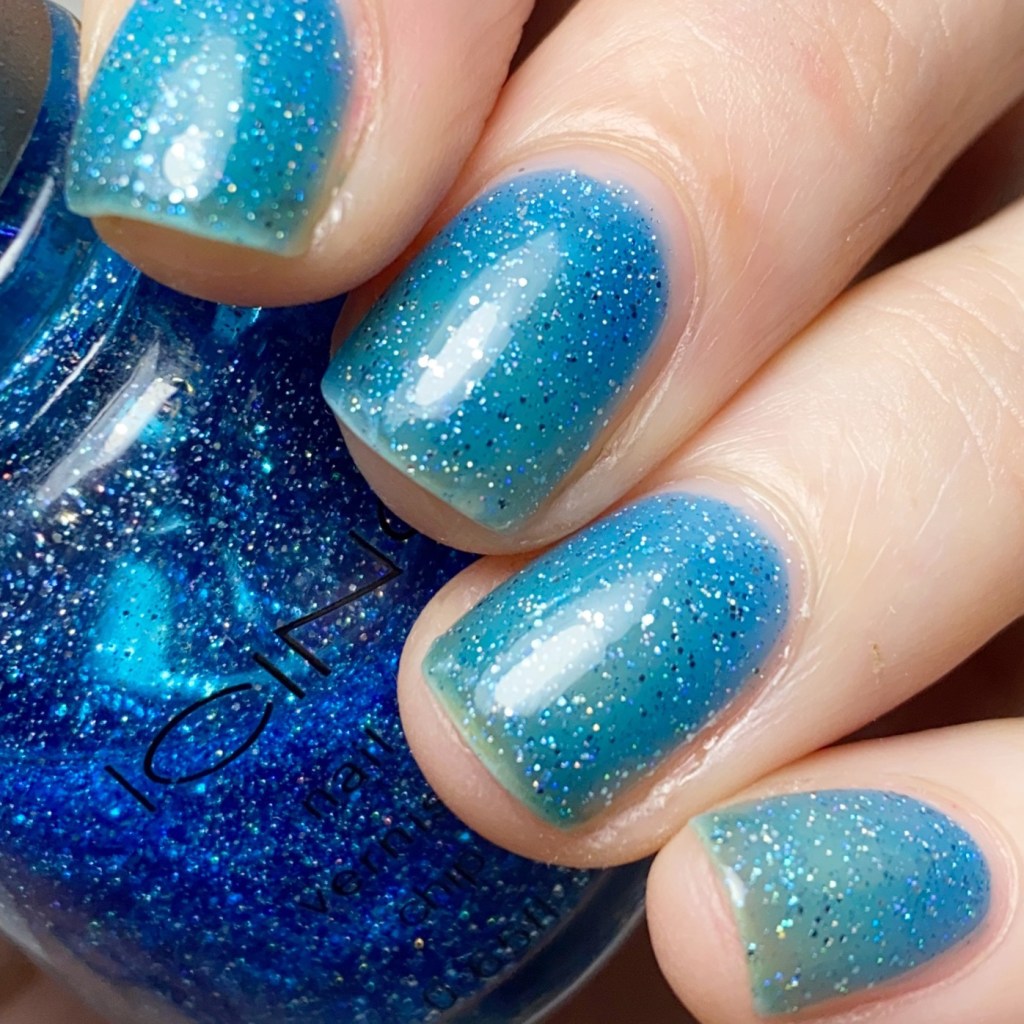
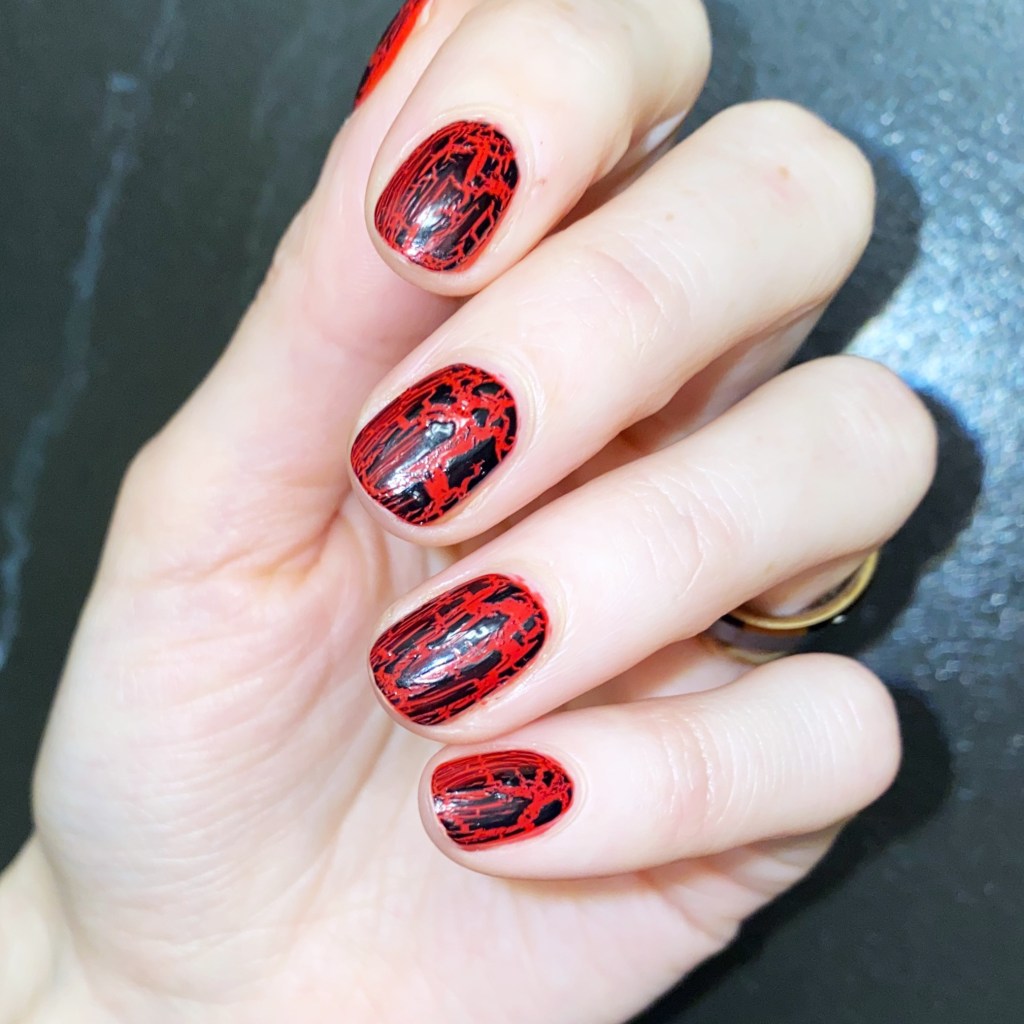
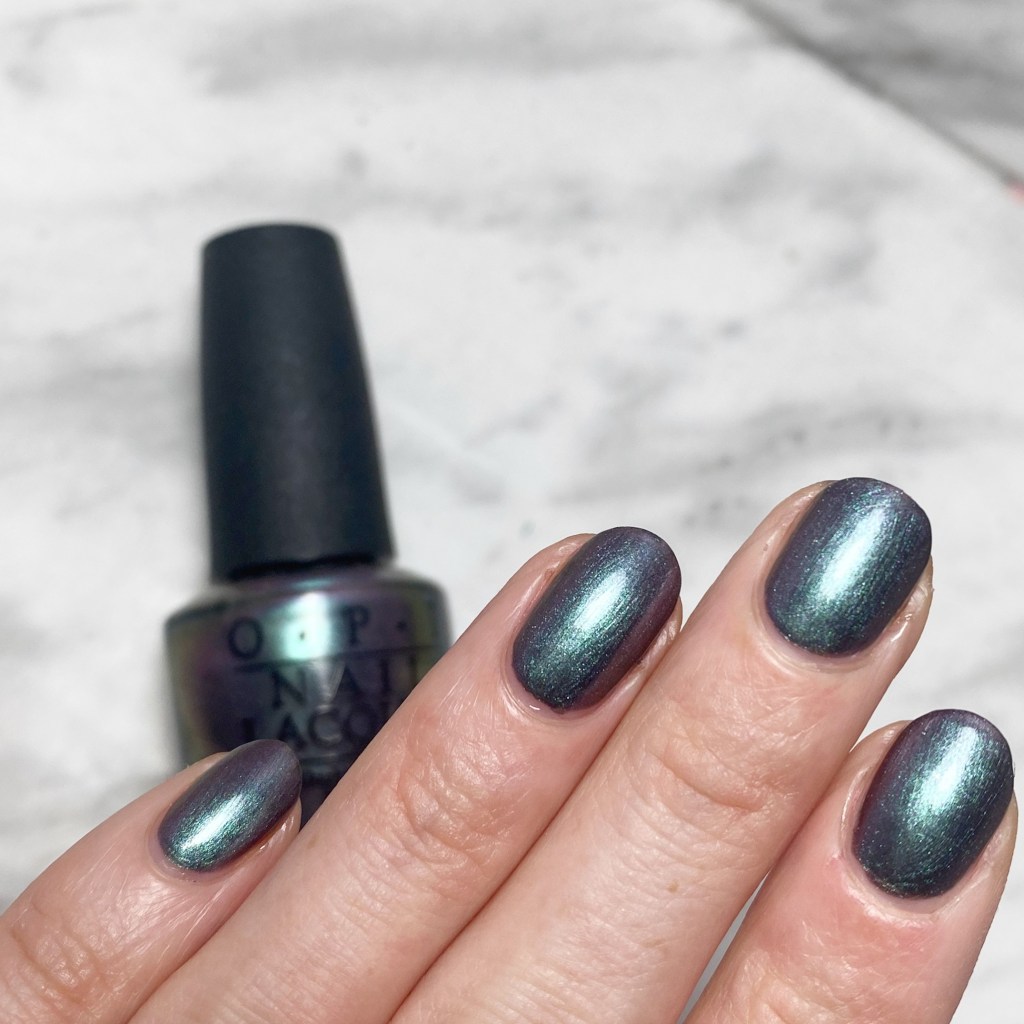
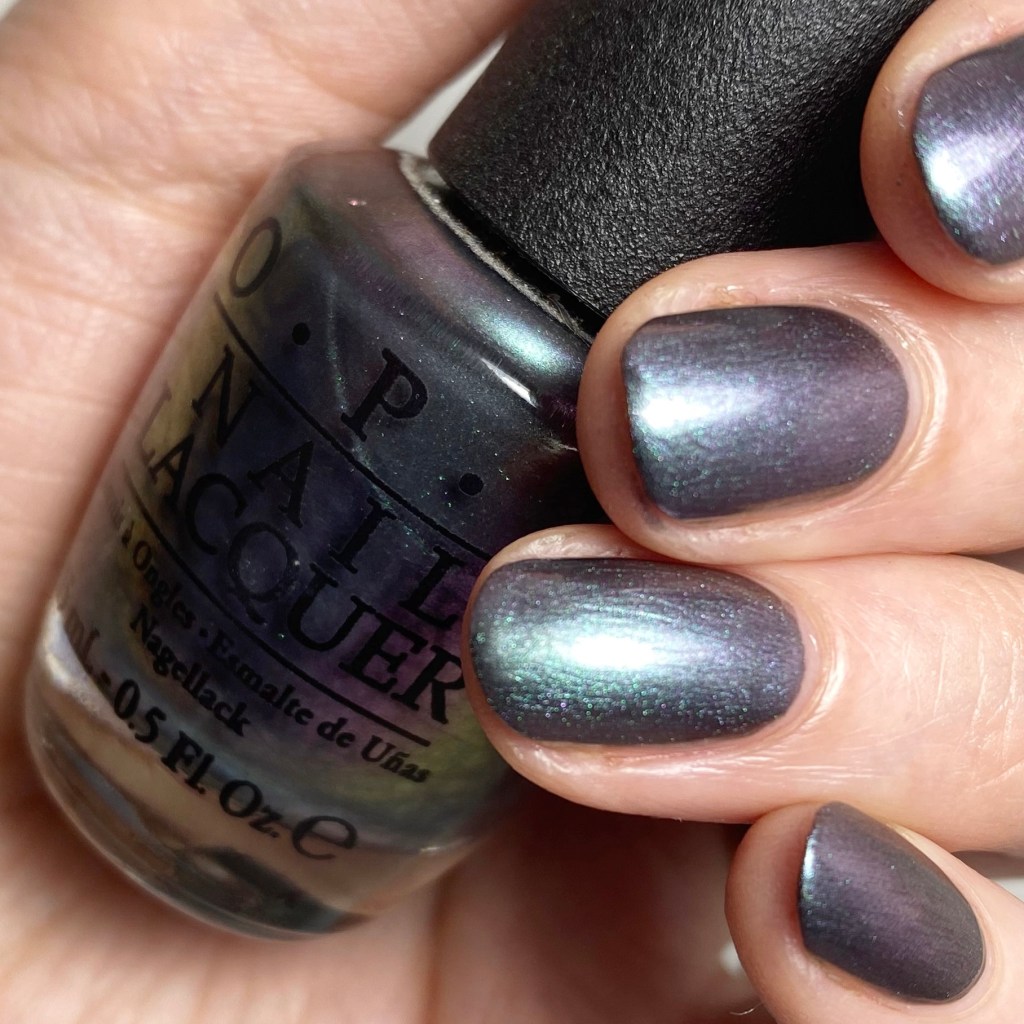
In the bottle it reminds me a bit of China Glaze Dorothy Who? but the base is much thinner leaving the colour on the nail much, much lighter. However, it has those beautiful holographic glitters that really show up, so I can’t be mad about it. It’s a beautiful shade all on its own.

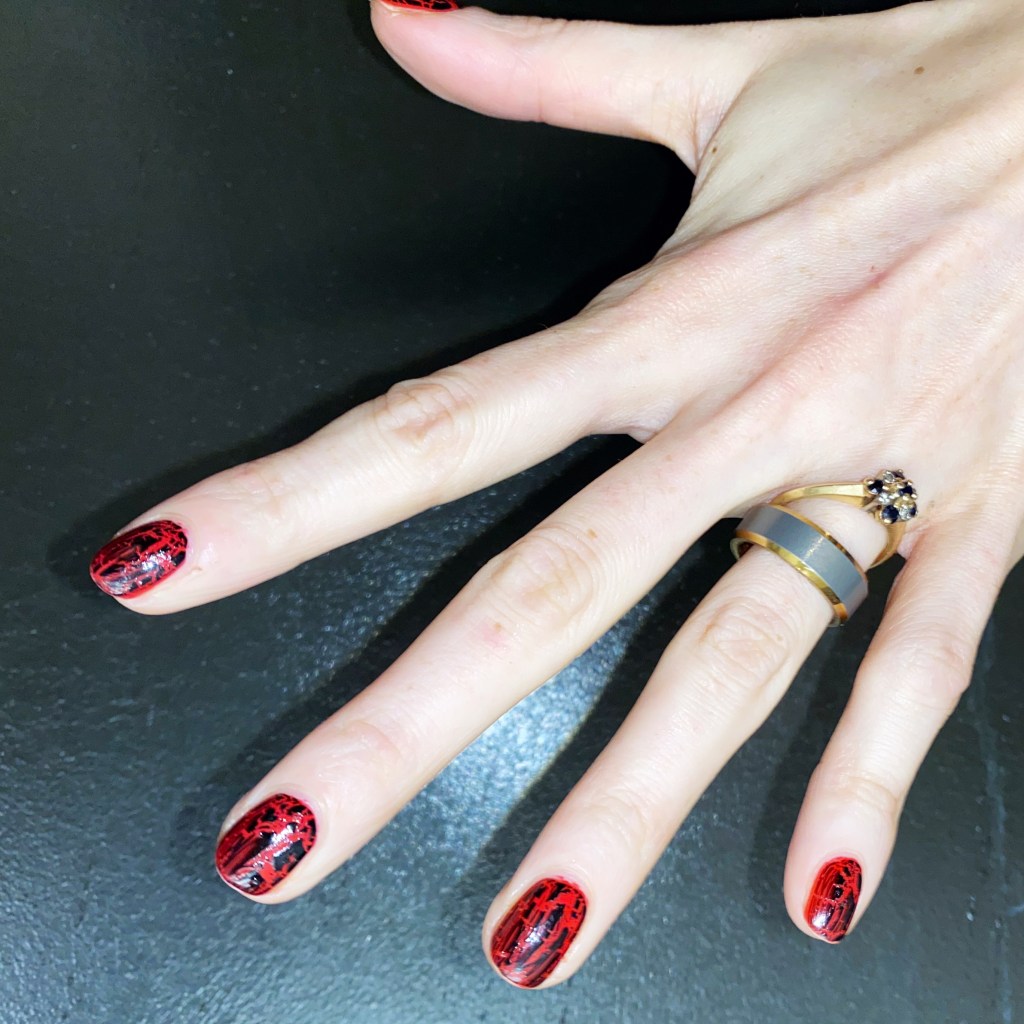
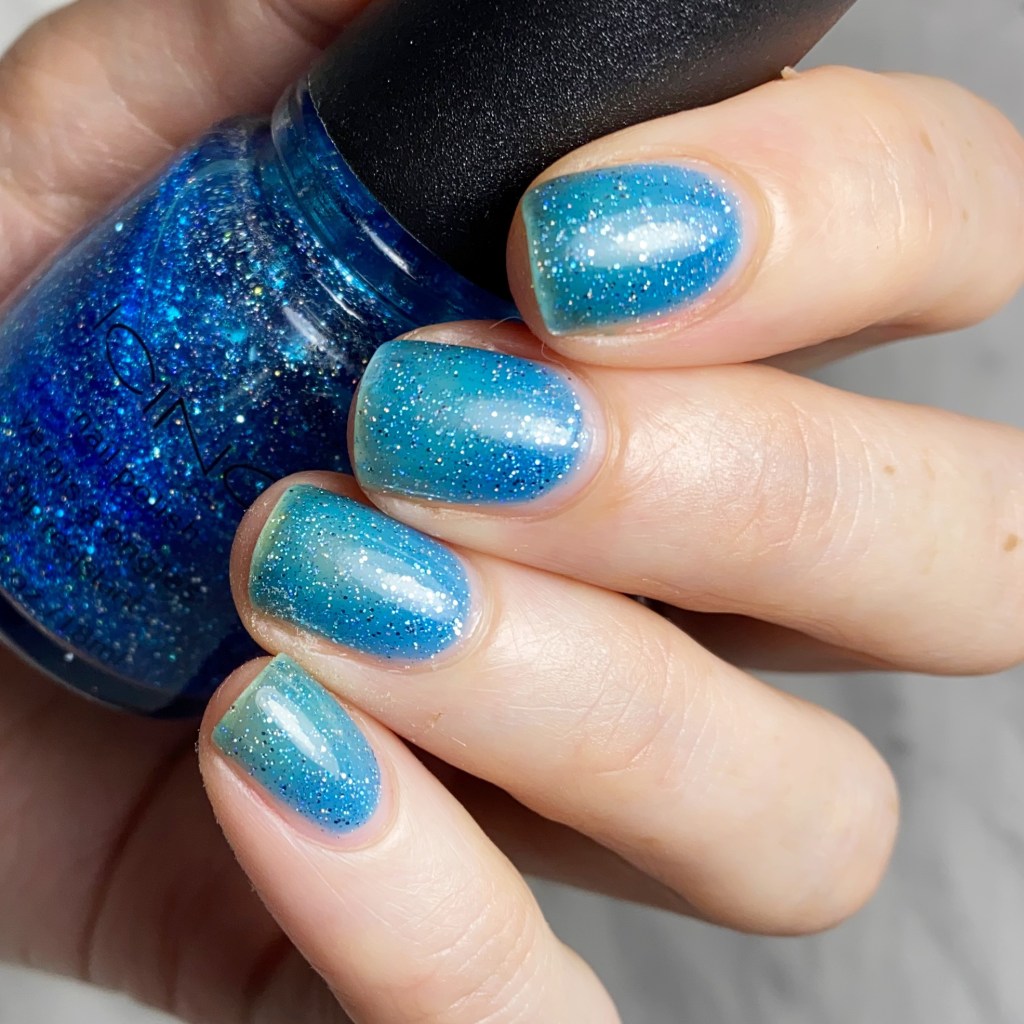
Sadly, this colour is long long out of circulation. If I had to hazard a guess, based just on the bottle shape, I would say I purchased this bottle somewhere between 2009-2011. The brand has gone through quite a few bottle changes since then, but I’m happy to see even a decade later, this shade applies & wears beautifully.

& sometimes it’s just fun to take a walk down nail polish memory lane with a shade you haven’t seen in a while.

What do you think about Icing Starlight? Do you have any oldies in your stash you haven’t pulled out in a while? This Sunday is a great day to find a shade you haven’t worn in a while, & pull it out!

Have a lovely day! 🖤

Embracing the Nostalgia with Crackle Nail Polish

Hello lovelies & happy Thursday. I decided to throw things back a bit (& embrace the crazy nostalgia taking over my life thanks to my very own mid-2006 emo playlist) with a fun look featuring a very nostalgic nail polish finish— crackle.

For anyone not around during the early 2010s, crackle nail polishes became huge around 2012, & by 2013 everyone & their mom was coming out with their own version of the crackle (or shatter) effect. Black was the beginning shade I remember being everywhere, followed by a whole assortment of different colours & finishes.

Recently I was going through my stash, & found a bottle of Avon Mosiac Effects Top Coat — aka their version of the crackle nail Polish — & decided to give it a little shake to see if it was still good. Sure enough, the formula is still perfect! So I had to give it a try to see how it looked after all this time.

The polishes I used for this manicure are: 

  • Base Coat: Essie Hard To Resist Glow & Shine 
  • Top Coat: Seche Vite Fast Dry Top Coat
  • Illamasqua Aorta
  • Avon Mosiac Effects Top Coat Black

I still have a couple crackle/shatter shades left in my stash, although most have long since dried up to be unusable. For this look, what you’re seeing is one rather thick coat over my base shade. I waited about 5 minutes for the cracked effect to set before applying my top coat, & I thought the end result was pretty perfect. I prefer my cracks to be larger so you can see more of the base shade underneath.

Is crackle/shatter nail polish going to make a comeback? I don’t know. I feel like these shades are so controversial, even 11 years later. You either love them, or hate them, & obviously I am firmly planted on the love side. I also think it’s a nostalgia thing, as I remember crackle being the first “nail art” trend I really feel in love with.

What do you think? Do you think crackle is due for its revival? Let me know all your thoughts down in the comments below.

Easy Galaxy Nails ( With Magnetic Polish)

Hello beauties & happy Thursday! We’re almost one full week into 2023 & its kind go crazy to think about. & it actually looks like Winter today, which I think is the first real snowfall we’ve had so far that wasn’t more than a dusting. Now if only it could have come like 2 weeks ago before Christmas, haha.

Today we’ve got our second nail art look of the year.

I’ve recently been going through my stash, looking at old shades I haven’t touched in a while. We all know magnetic polishes are having a serious moment right now on Instagram, so I decided to pull out one of my old school magnetic shades from China Glaze to test it out with the Starrily magnetic I got from NailStuff.ca & see what kind of effect it would have on it. & from that, I realized how perfectly it would be as a base for a galaxy design! So here are my super easy magnetic galaxy nails!

The polishes I used for this manicure are: 

  • Base Coat: Essie Hard To Resist Glow & Shine 
  • Top Coat: Seche Vite Fast Dry Top Coat
  • China Glaze Magnetix Instant Chemsitry
  • China Glaze Fairy Dust
  • China Glaze Public Relations
  • Starrily Magnet (C/o: Nailstuff.ca)
  • NailStuff.ca Mermaid Tail Nail Brush Trio (11mm Liner Brush)

Originally my plan was just to wear the shade on its own, as I loved the effect the magnet had on it. But then I was like “I wonder what Fairy Dust would look over this?” From there I realized how much it looked like a galaxy, so I added a few dark silver stars.

Instant galaxy.

These are definitely the easiest galaxy nails I’ve ever created, & definitely the least time consuming. This is definitely making me want to go through all the magnetic polishes I’ve collected over the years & test them out with the Starrily magnet to see what it creates. The old magnets that came with these shades usually created patterns, but I’m much more fond of this like way.

What do you think about this easy galaxy design? Is this a look you could see yourself recreating? Let me know if this look is one making you want to dig out your own magnetic polishes, or any other thoughts you have down in the comments below!

SWATCH SUNDAY — OPI Peace, Love & OPI

Hello lovelies & happy Sunday. & happy Thanksgiving to my fellow Canadians. I hope you all get a chance to celebrate however you prefer — whether that is turkey, Tofurky or pizza!

Today, though, it’s all about Swatch Sunday, & I’m sharing a fun old school shade from OPI dating back to OPI Fall/Winter San Fransisco collection from 2013. This is OPI Peace Love & OPI, a beautiful charcoal grey metallic with a fun teal purple duo chrome effect.

2 coats + Sally Hansen Complete Salon Manicure

The formula on this beauty isn’t too hard, though it does have a bit of streakiness to it, which I found is alleviated with some top coat. The colour is beautiful — it reminds me a lot of Essie For The Twill of It which is another silver/grey favourite I used to wear quite a bit. & I do love a good duo/multi chrome effect, although I found it didn’t quite show up as much in my photos as it does in person.

A little macro shot action. You can really see the teal & purple here.

This shade has been in my stash a long, long time. I think, at least 6 years — it has a white spot on its lid, which says to me I bought it on clearance at Chatters. When I worked close to one, I used to love checking out the clearance section because they always had the most amazing deals on polishes!

What do you think about this shade from OPI? Do you have Peace Love & OPI in your own stash? Let me know what your favourite metallic grey polish is down in the comments below.

Have a lovely Sunday.

SWATCH SUNDAY — Giorgio Armani Nail Polish in Woodstone

Hello lovelies & happy Sunday! I hope everyone is having a lovely weekend so far.

Today I decided to dig deep into my stash, & pulled out a polish that was gifted to me back in 2015, & has been sitting in there, peaking my interest, for a long time. This is Giorgio Armani #214 Woodstone, which was originally released as part of the Fall 2014 Fade to Grey Collection. At least — I’m 99% sure this is #214 Woodstone. Mine didn’t have the official name on the bottle, but after some Googling, & seeing other swatches, it’s pretty clear that’s which shade this is.

2 coats, no top coat.

First up, this shade is such an unusual colour selection for me, but I was really really feeling this bronze-y brown shade, that I had to put it on. It’s such a deep, dark brown, but the gold shimmer really gives it another depth to it. For my swatches, I applied two coats of polish, but honestly it was pretty much opaque on the first coat, the second one was just to smooth things out fully.

Also, I really like the way the golden shimmer looks with this shade. With the matte finish, it really does almost give you the effect of being wood grain, which is really cool.

Just for fun, I wanted a comparison of the polish both matte & glossy. Top coat definitely takes it to a whole other level — I just love it!

I’m really loving this shade, & kind of sad it’s taken me 7 years to actually venture out of my comfort zone & try it out. It really is a stunning shade for Autumn & Fall. All is missing is a little bit of golden accent, maybe some leaves. A fantastic base for an Autumn inspired nail art look!

Sadly it looks like Giorgio Armani Beauty no longer produces nail polishes, which is a shame. If I had known how nice of a formula their polishes had, I definitely would have sought some out sooner. However, I’m glad to have this beauty in my stash, & I definitely won’t be waiting another 7 years to wear it again!

What do you think about this pretty bronzed brown? Do you ever wear brown nail polish? Do you prefer it with a matte or glossy finish? Let me know all your thoughts down in the comments below!