SWATCH SUNDAY — Born Pretty Store Purple Holographic Pigment Powder (item #41436)

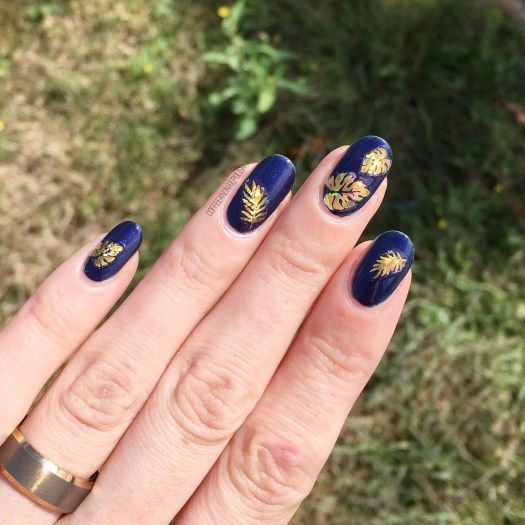
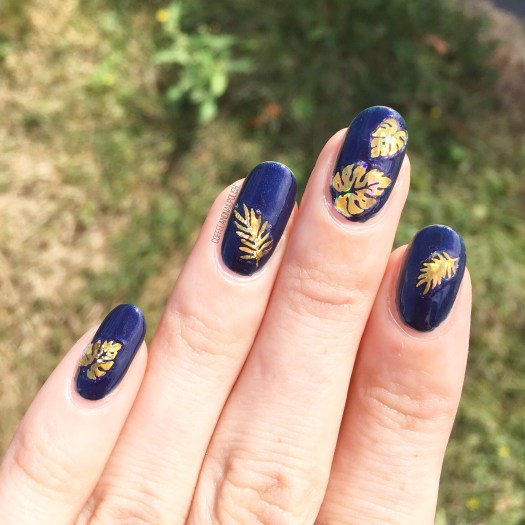
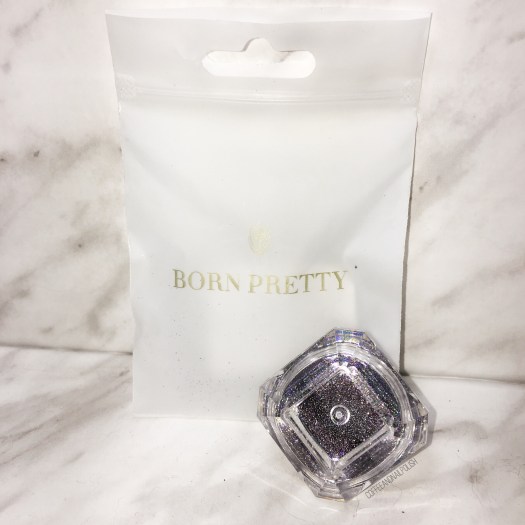
Good morning lovelies & happy Sunday. Couldn’t be more excited for the chance to relax & have a day off… & share something special with you! I recently received some gorgeous PR samples from Born Pretty Store for review, & that includes a couple new nail art powders. I’ve been seriously obsessed with nail powders & flakies lately, so I couldn’t wait to jump in & try them all.

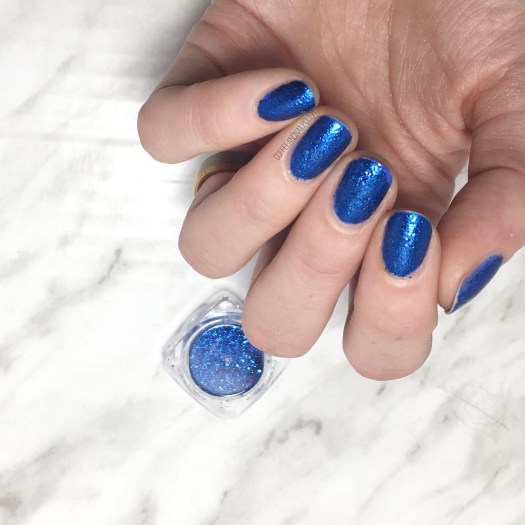
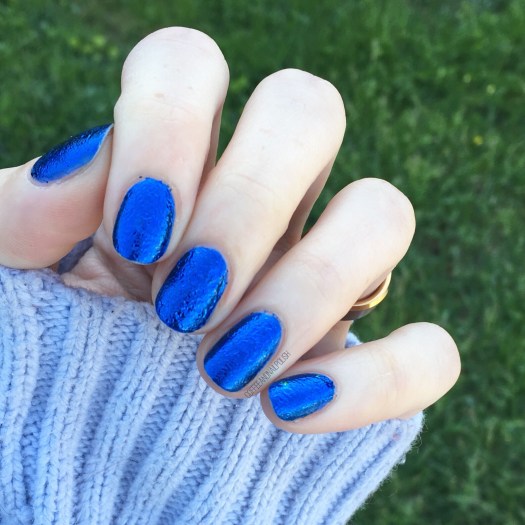
The first one I picked, for today’s post, is a dark purple liner holo powder (item #41436).

For application, I took the following steps.

  • Apply base coat.
  • Apply base colour (I picked Essie Under the Twilight) & top coat.
  • Apply Finger Paints Peel Off Base Coat — let dry for about 5 minutes. If it’s not dry enough, you won’t be able to rub on the powder.
  • To minimize clean up, you can apply liquid latex around your cuticles. I forgot this time, which is why you can see a bit of holo scattered.
  • Using the name eyeshadow applicator that comes with the powder, pick up a small amount of powder & rub onto your nail.
  • Brush off excess powder from nail & around cuticle (or peel off latex if you used it)
  • Top with top coat & stare at your nails in wonder.

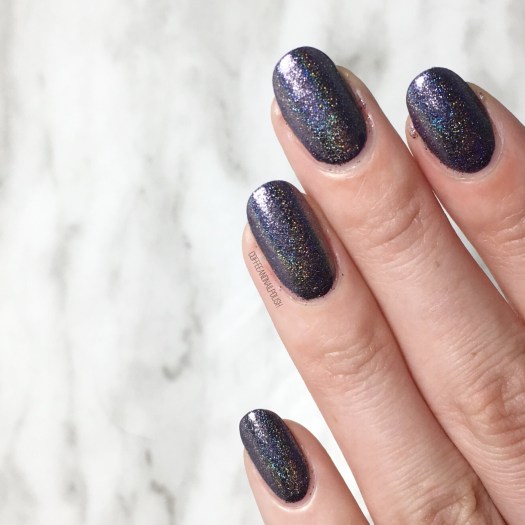
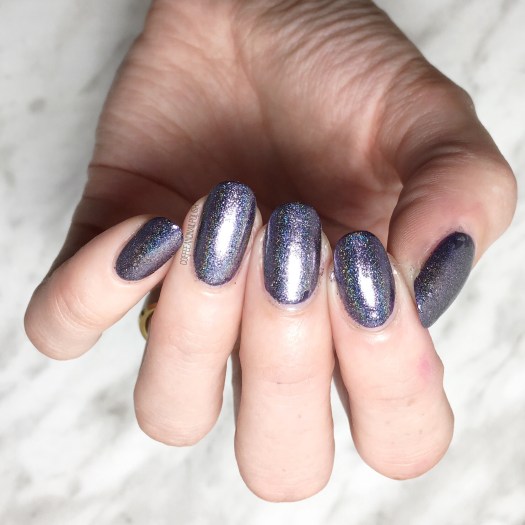
Look at that holo! Seriously obsessed with the dark holo over the dark base. I’ve been absolutely obsessed with my NailStuff.ca holo, but it’s nice to have a darker, vampy option (especially with Halloween quickly approaching).

Application was super simple & easy using my regular nail polish method. I don’t often use gel on my nails, but I feel like if I can easily apply it using regular polish, gel would be no problem. I’ll definitely have to try using it on my toes soon.

if you’re looking to try this powder for yourself, you can pick it up from the Born Pretty Store here.

Also remember, if you use COFFK31, you can save 10% off any regular priced items!

So what do you think of this dark purple holo powder? Do you have a favourite nail powder that you can’t live without. Share down in the comments below!

Born Pretty Store 3D Nail Art Stickers (item #40422) Review

Good morning beauties & happy Tuesday. Today I’m showing off some brand new nail art stickers I recently received in a review package from Born Pretty Store. They were so kind as to send me a few nail art goodies in exchange for my honest thoughts & reviews, & I couldn’t wait to break into the package!

These nail art stickers are item #40422 & come in both gold holo & silver holo. I picked both colours, but since I was feeling a purple base, I figured the gold would pop more over top. The stickers themselves come with a large sheet of different sizes & style, which is perfect when trying to pick what kind of look you want to do. For my nails, I decided to go more simplistic using the larger size stickers.

Application was super simple. All you need to do is paint your base colour (I picked Joe Fresh Gel Gothika Blue) & let dry some. To speed up the drying process, I did apply a quick dry top coat to my base, mostly because if my nails were fully dry, I could be more selective about sticker application. When my nails were dry, I then carefully peeled my stickers off their sheet with tweezers, & applied them onto my nail. I made sure to press them down really well, & flatten any possible air bubbles. Then, when I was happy with my look, I sealed everything in with top coat.

I wore these nails for a full day of work (stock day at that!) & they lasted pretty well. I did find that my nails where the sticker went close to the edge of my nail–like my middle finger & pinky nail–had some issues with the sticker lifting but that could be because I was not as precise with my top coat to fully seal the sticker in. The best bet is to aim to make sure that the stickers are placed more centrally on the nail, or you just make sure your sealing all the edges really well.

As you can see down below, my stickers definitely seemed to stand out a bit from its base–they were for the most part sealed onto my nail, but seemed raised against my base colour. I don’t know if this was because I had used a top coat already but when I use these again I will definitely try it over just the base colour & see if it helps the issue. These stickers are definitely not the first brand I’ve had this issue with, so I’m thinking it’s more an issue with my application.

I’m definitely a fan of these stickers & the easy way you can create a nail art look using them. I even had someone ask me where I got my nails done! As I mentioned above, you can find these guys at the Born Pretty Store website (item #40422) & they come in both silver & gold. I definitely want to try pairing both colours together the next time I use them, so see what kind of look I can create.

Don’t forget, you can use my Born Pretty discount code COFFK31 to save 10% off any regular priced items.

SWATCH SUNDAY — New Polish from Wrenn Polish (& an old favourite too!)

Happy Sunday lovelies! & happy Canada Day 🇨🇦 to all my Canadian followers! I hope everyone is surviving the heat we’re currently experiencing across the country.

Today’s Swatch Sunday post is an exciting one. I recently received some new beauties from Alissa at Wrenn Polish. She just released a brand new polish called Summer Sands which is a sandy tan holo & restocked one of her popular shades Happy Thoughts! & I was lucky enough to receive both gorgeous shades to add to my growing Wrenn Polish collection.

*PR SAMPLE* Some of these items were sent to me for review. However, all opinions are my own

Continue reading “SWATCH SUNDAY — New Polish from Wrenn Polish (& an old favourite too!)”

SWATCH SUNDAY — NailStuff.ca Blue Metallic Foil Flakies

Good Morning Lovelies!

Today I’m sharing one of the beautiful new goodies I was recently gifted from NailStuff.ca! I showed off one of their new nail stud wheels earlier in the week, & now I have these metallic blue flakies swatched for you.

PR Sample. This product was gifted to me for review.

Application was super easy & simple! I love the fact that you can apply these without having to worry about using gel.

For this look, I started off by painting my nails in a complimentary shade (Sally Hansen original Pacific Blue). After a few moments applied a coat of Finger Paints Peel Off Base Coat over my blue, which is my preferred method of flakie application. Once my nails had dried somewhat, I dipped the applicator into the pot of flakies, pulled a small amount out, & brushed them down over the nail. After each nail was covered I sealed the look in with top coat.

It looks like sapphires on the nail & I’m in love with it. 💙💎

These flakies are so, so easy to apply & I love it. I stayed away from using nail powders for so long because I was concerned about making a huge mess, but surprisingly I never have any issues with these NailStuff’s product!

These flakies in particular are awesome because they almost clump together like magnets when picking them up out of the pot. You don’t have to worry about spilling all your flakies all over the couch (which my husband would not be impressed about!) Also I’m so glad how little product you need to use to achieve this look–one little swipe covered each nail so I still have a ton more for future designs!

Down below shows off this look in natural light. So happy for summer for beautiful green grass backgrounds!

What do you think of these gorgeous blue metallic nails? Want to achieve this look for yourself — you can shop all the nail flakies available by NailStuff.ca here including these blue ones & a whole slew of other colours as well.

Have a happy Sunday loves! 💎

Beachy Chevron Nails featuring New Summery Studs from NailStuff.ca

Good morning lovelies & happy Tuesday! Hope the weather where you are is nicer than here in Halifax. After a few days of sunshine, we’re back to cloudy grey overcast skies. But today’s nail design is all about bright colours, so hopefully that will cheer me up!

Today I’m sharing these drag marble chevron nails that for some reason remind me of the beach! I was recently gifted some amazing new goodies from NailStuff.ca & I knew immediately that I had to use some of the beautiful summery studs Victoria had sent! I love how flat & easy to work with these studs are. They sit easily on the nail & because I sealed them in with extra top coat there were no edges you don’t have to worry about catching them on anything & pulling them off prematurely.

For this manicure, the products I used were:

I’m really living the pastel shades form this 6 pack set from Claire’s. I picked it up on payday & used every shade with the exception of coral. Also I love how these studs from NailStuff just brings the whole look together & completes the Summery vibe. For my chevrons, I used the drag brush effect to blend the colours together. I used to do this technique a lot with nail vinyls, but it had been a while.

What do you think of this design? How adorable are these studs from NailStuff.ca? What kind of designs would you do with these Beachy studs? Let me know in the comments below!