Good Morning! We’re half way through the week & in Halifax it’s actually snowing. I seriously thought we would never see actual Winter, so it’s pretty exciting! Although I’m sure it will lose its novelty in about a day & a half.
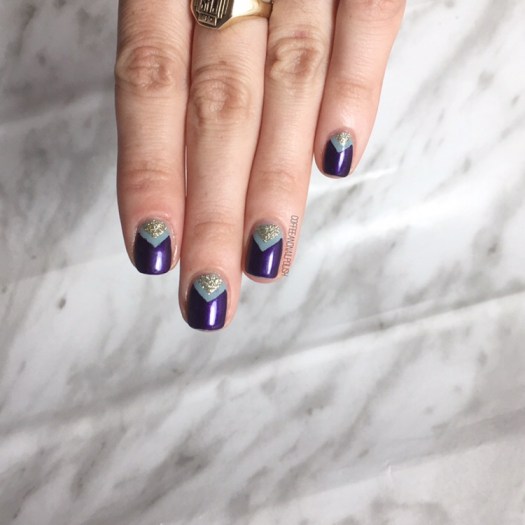
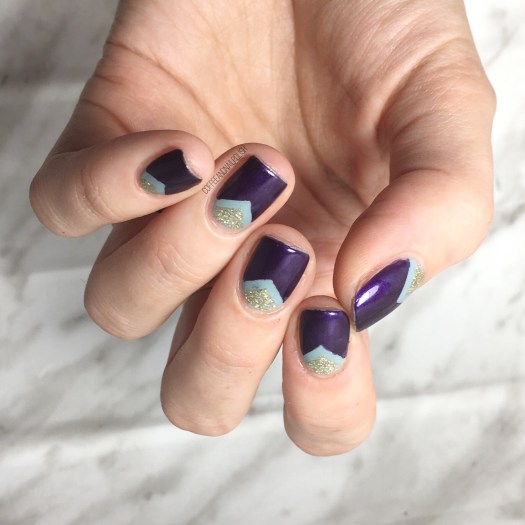
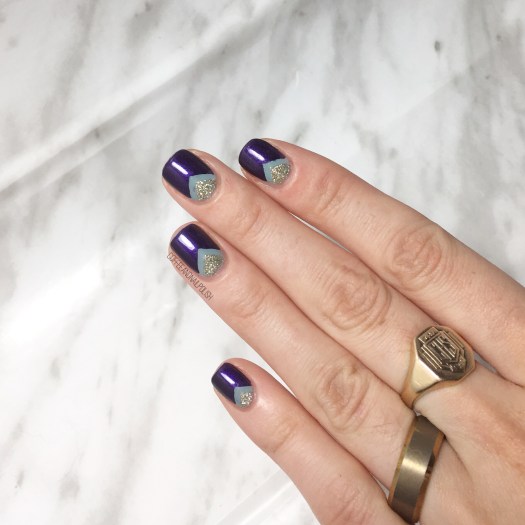
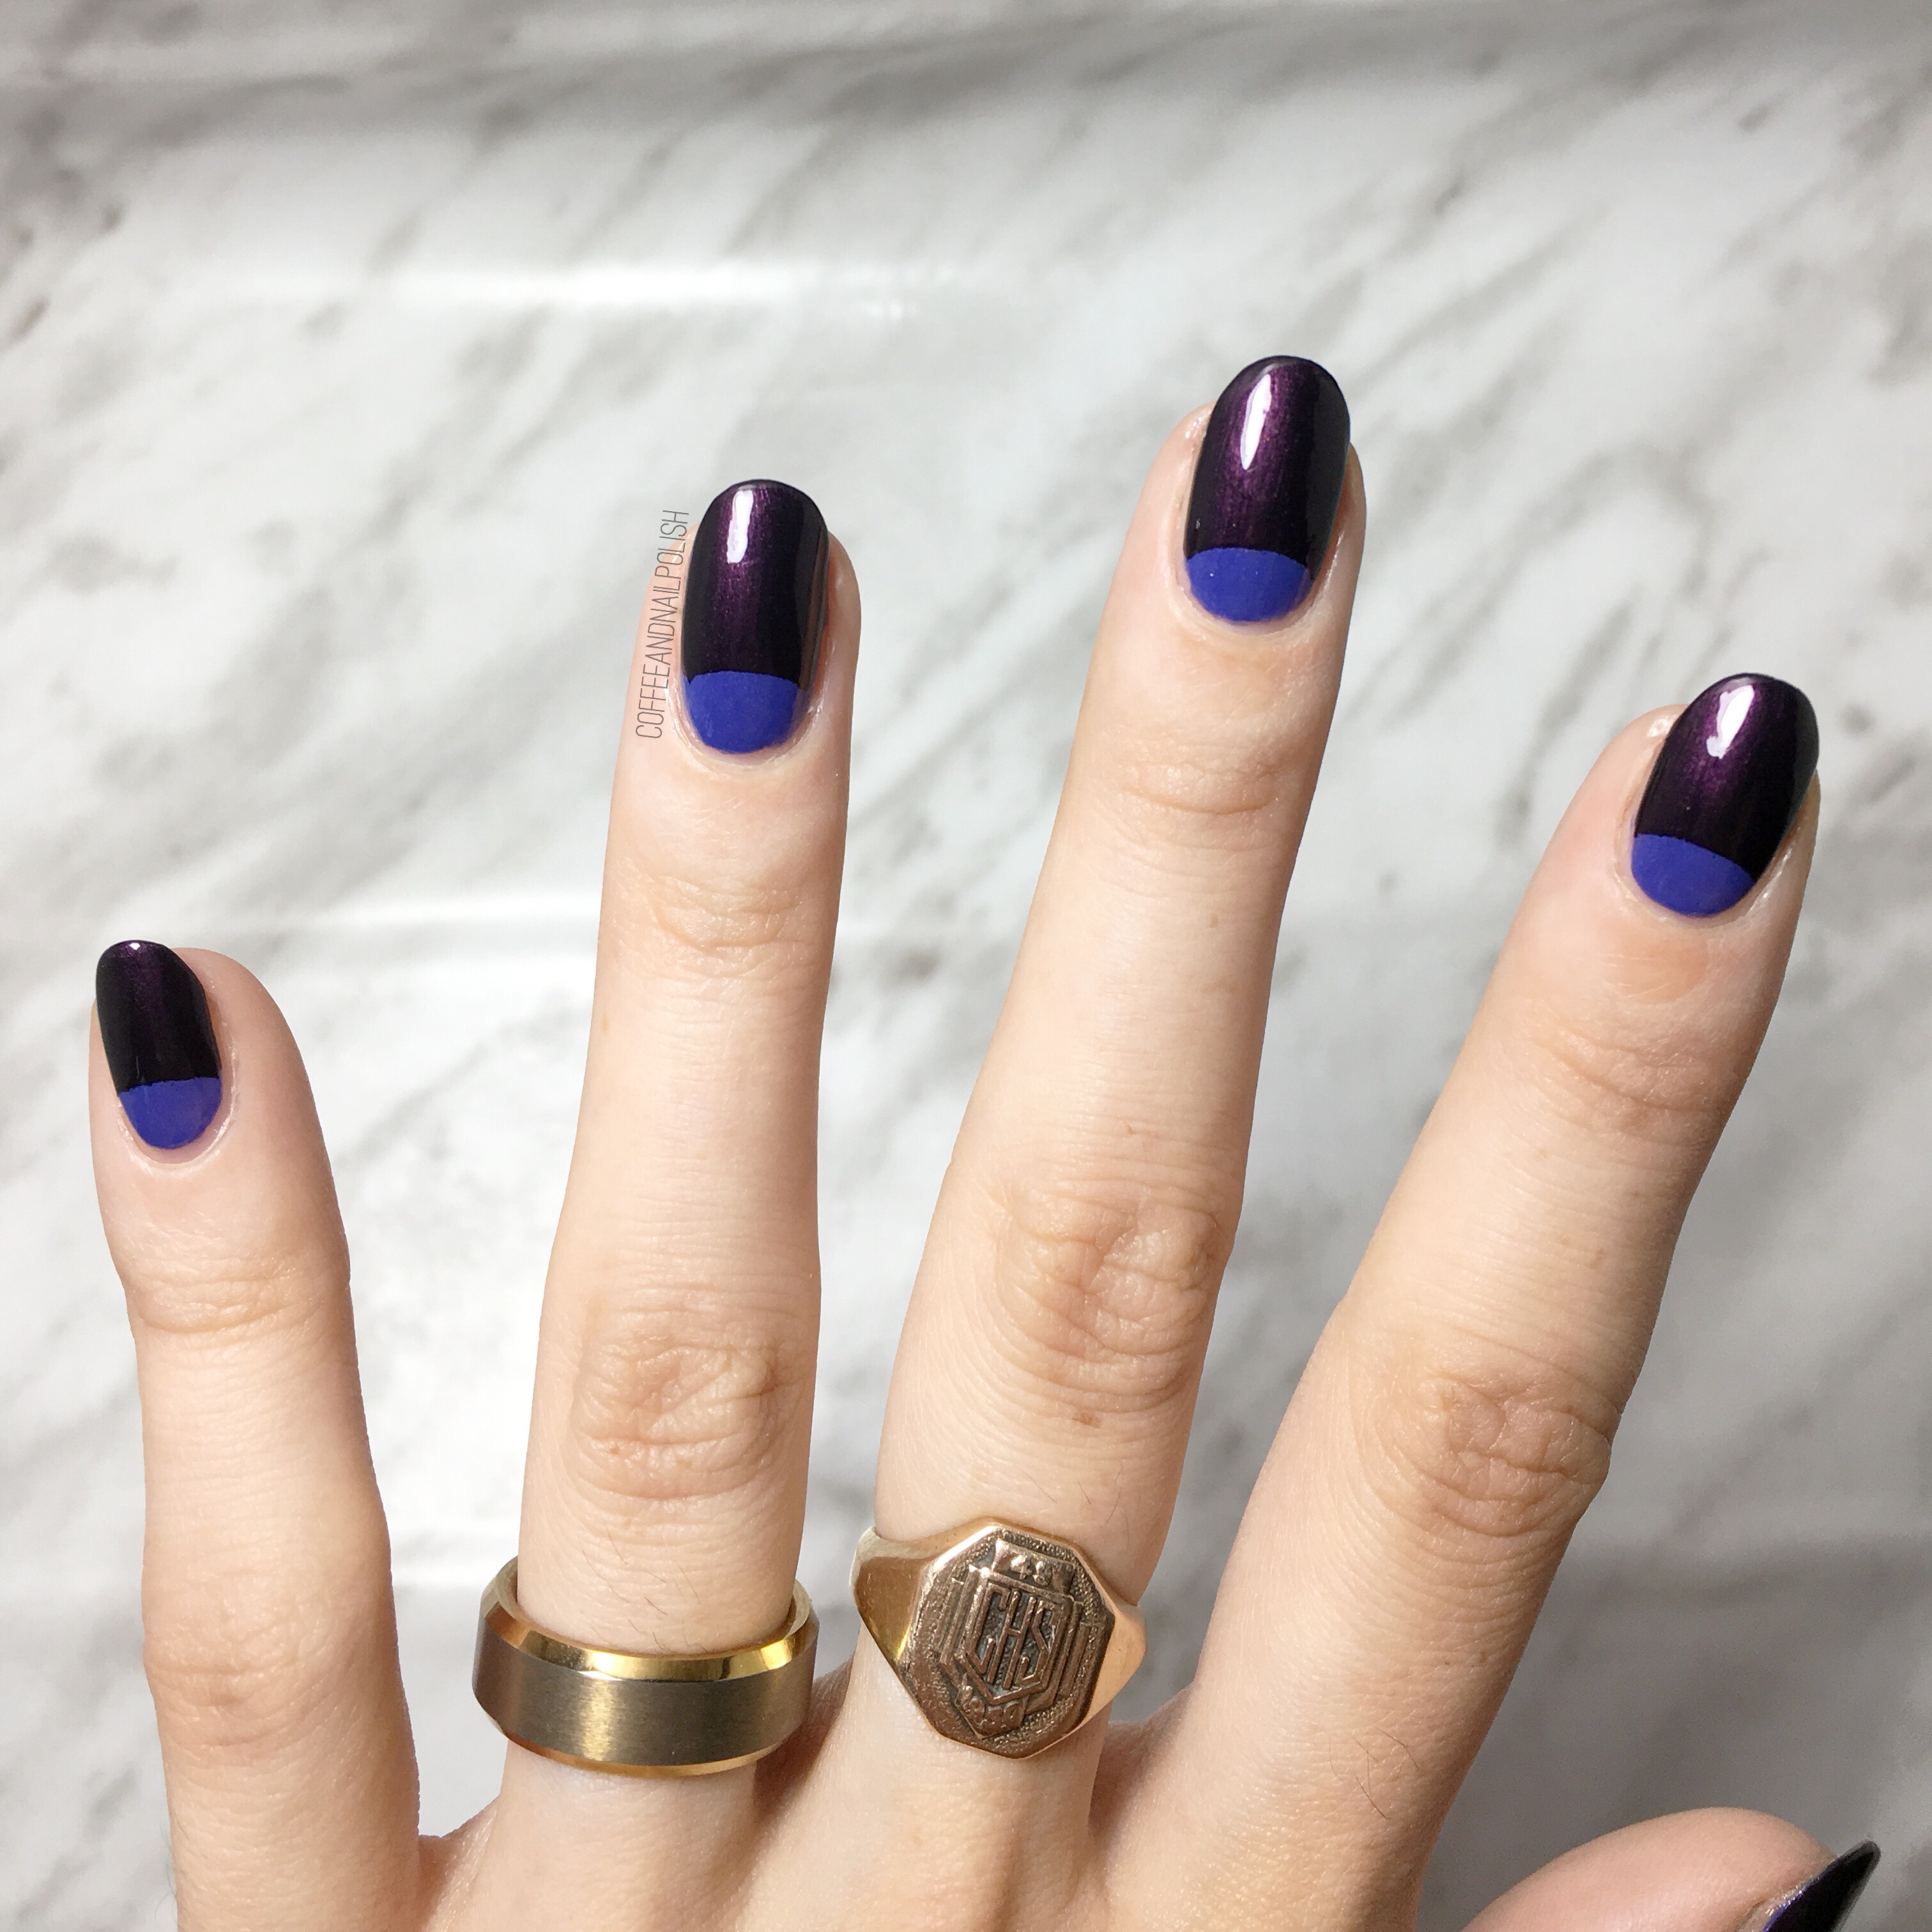
Today I’m sharing a chevron accent nail design with you. I’ve really been into darker shades right now (& grey, always) so I decided to combine a whole lot of shades together. & I even made you another tutorial to show you the technique I used.

Music: bensound.com
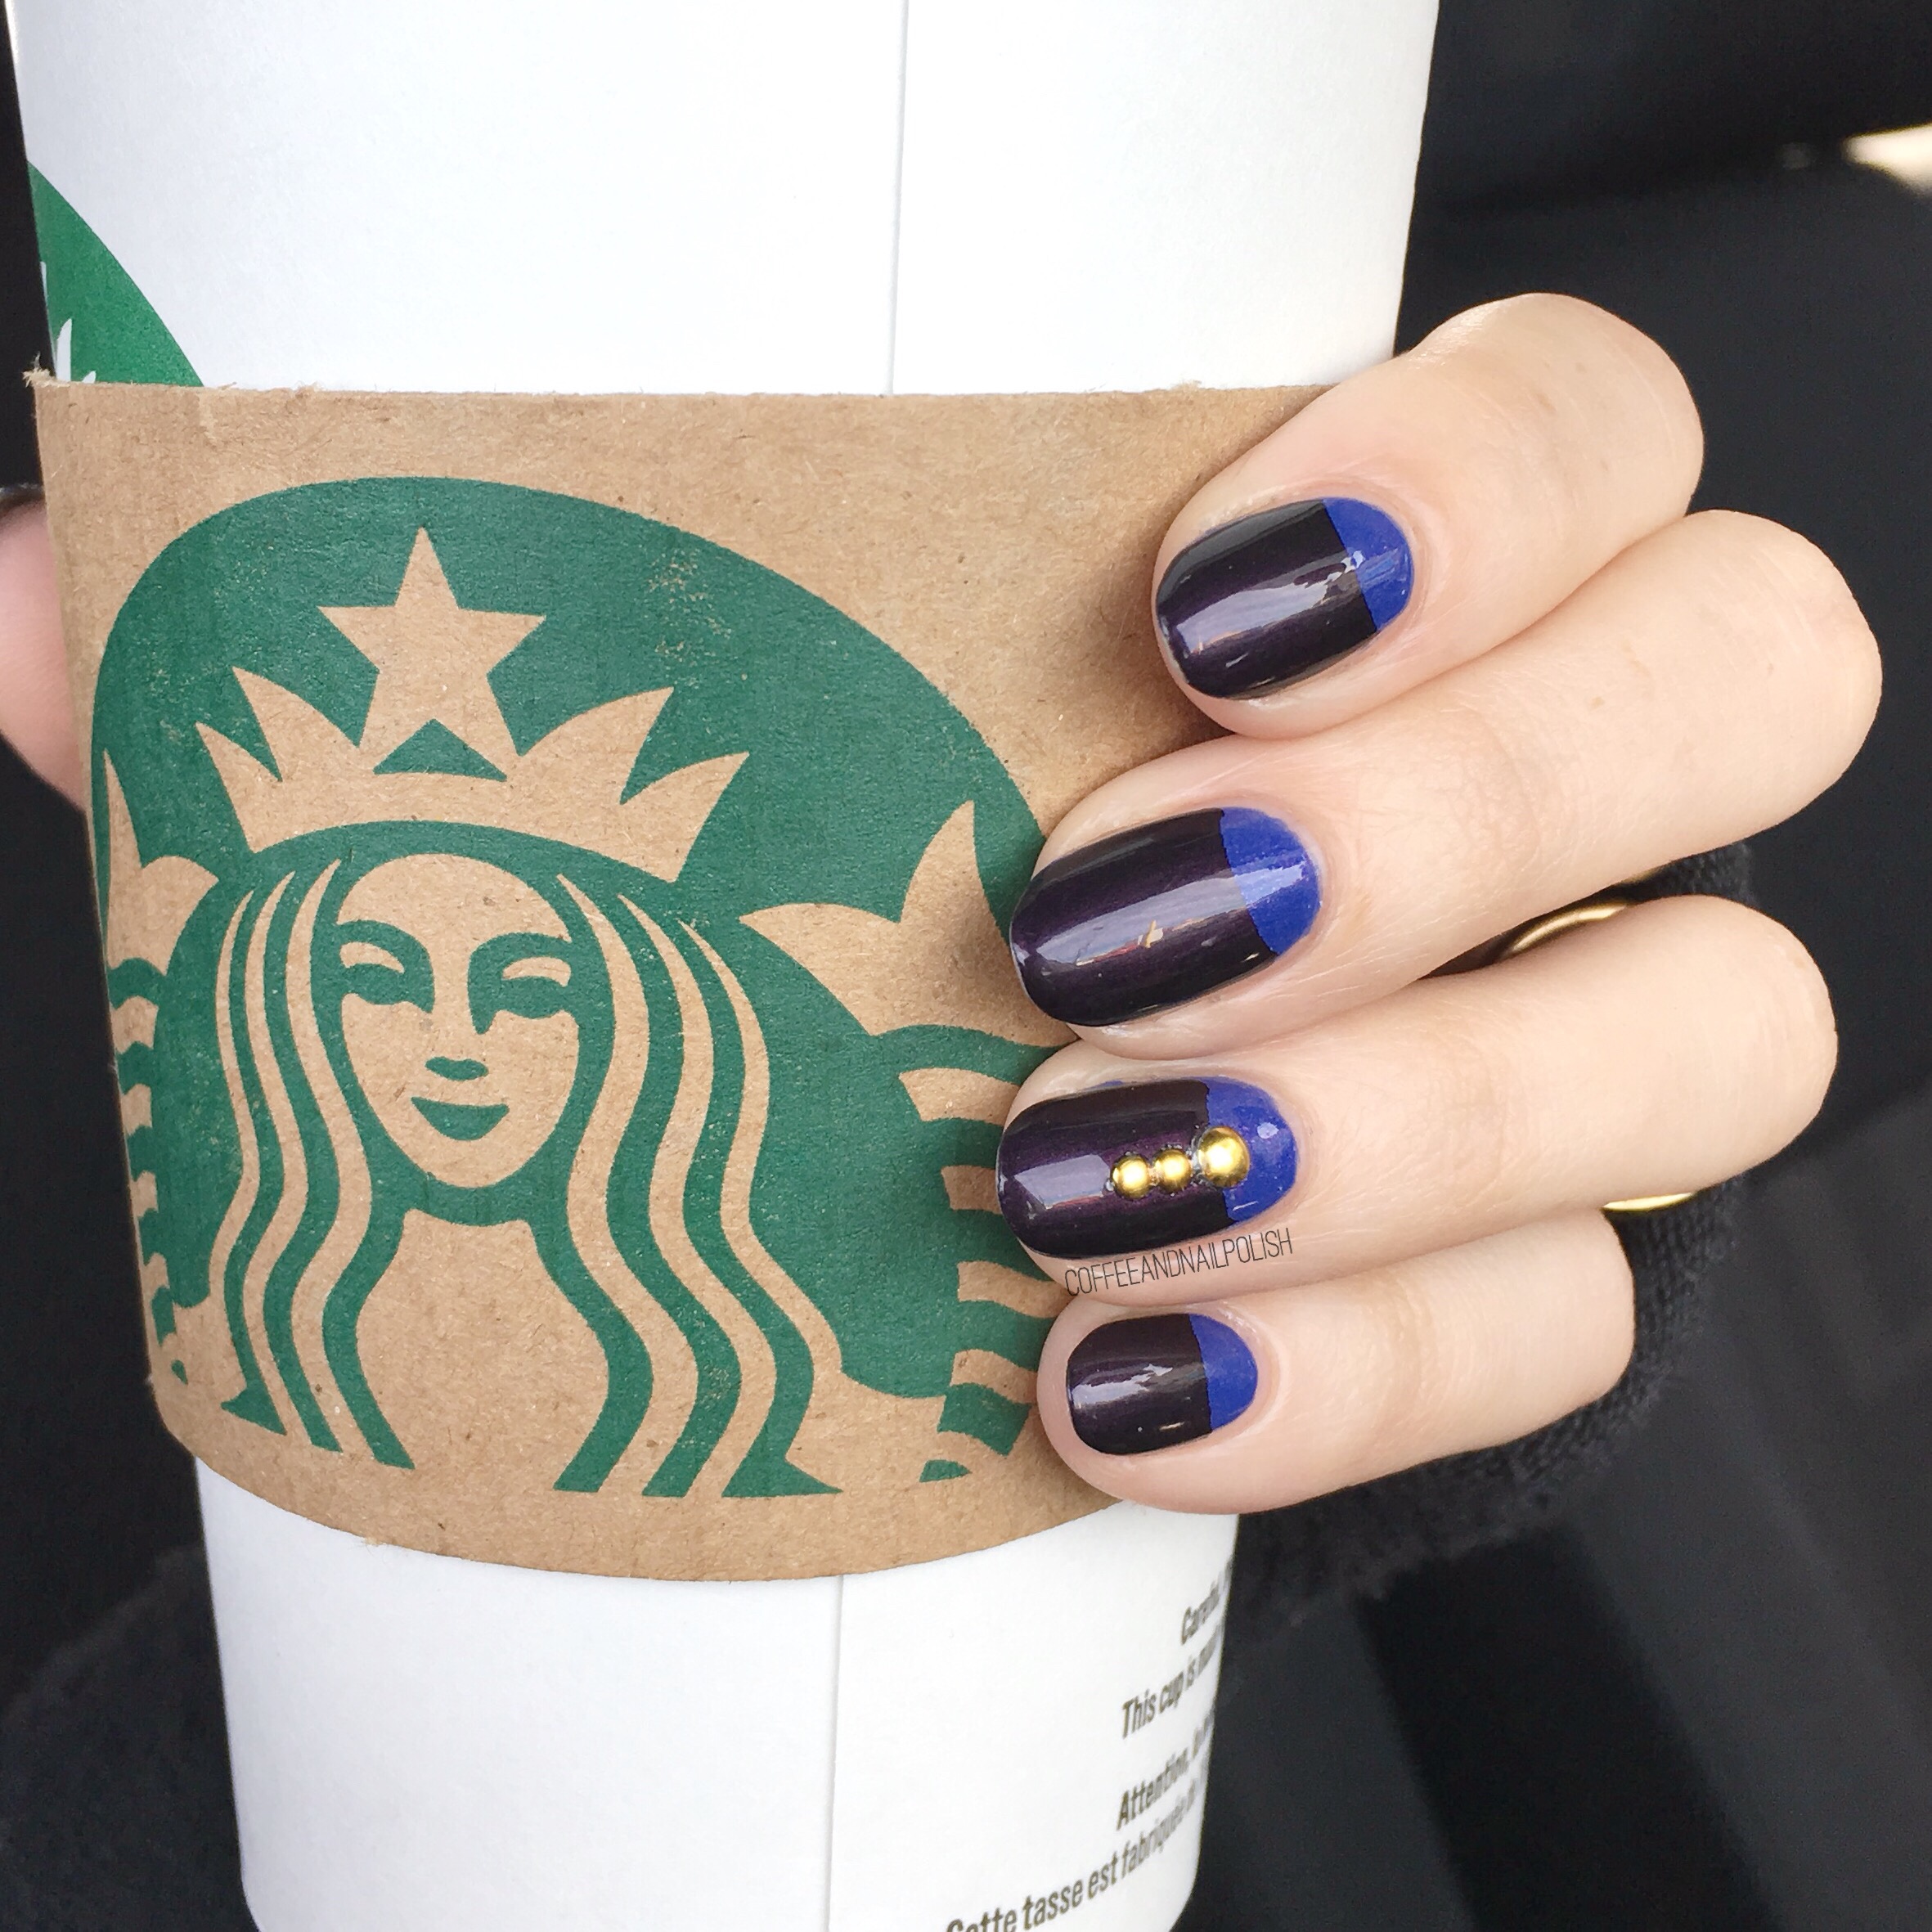
For this design, the polishes I used were:
- Base Coat: Nailtek 2
- Top Coat: Seche Vive
- Sally Hansen Complete Salon Manicure Pat on the Black
- Essie Merino Cool
- Color Club Silver Lake
- OPI Aurora Berry-alis
- L’Oréal Feeling Kilty
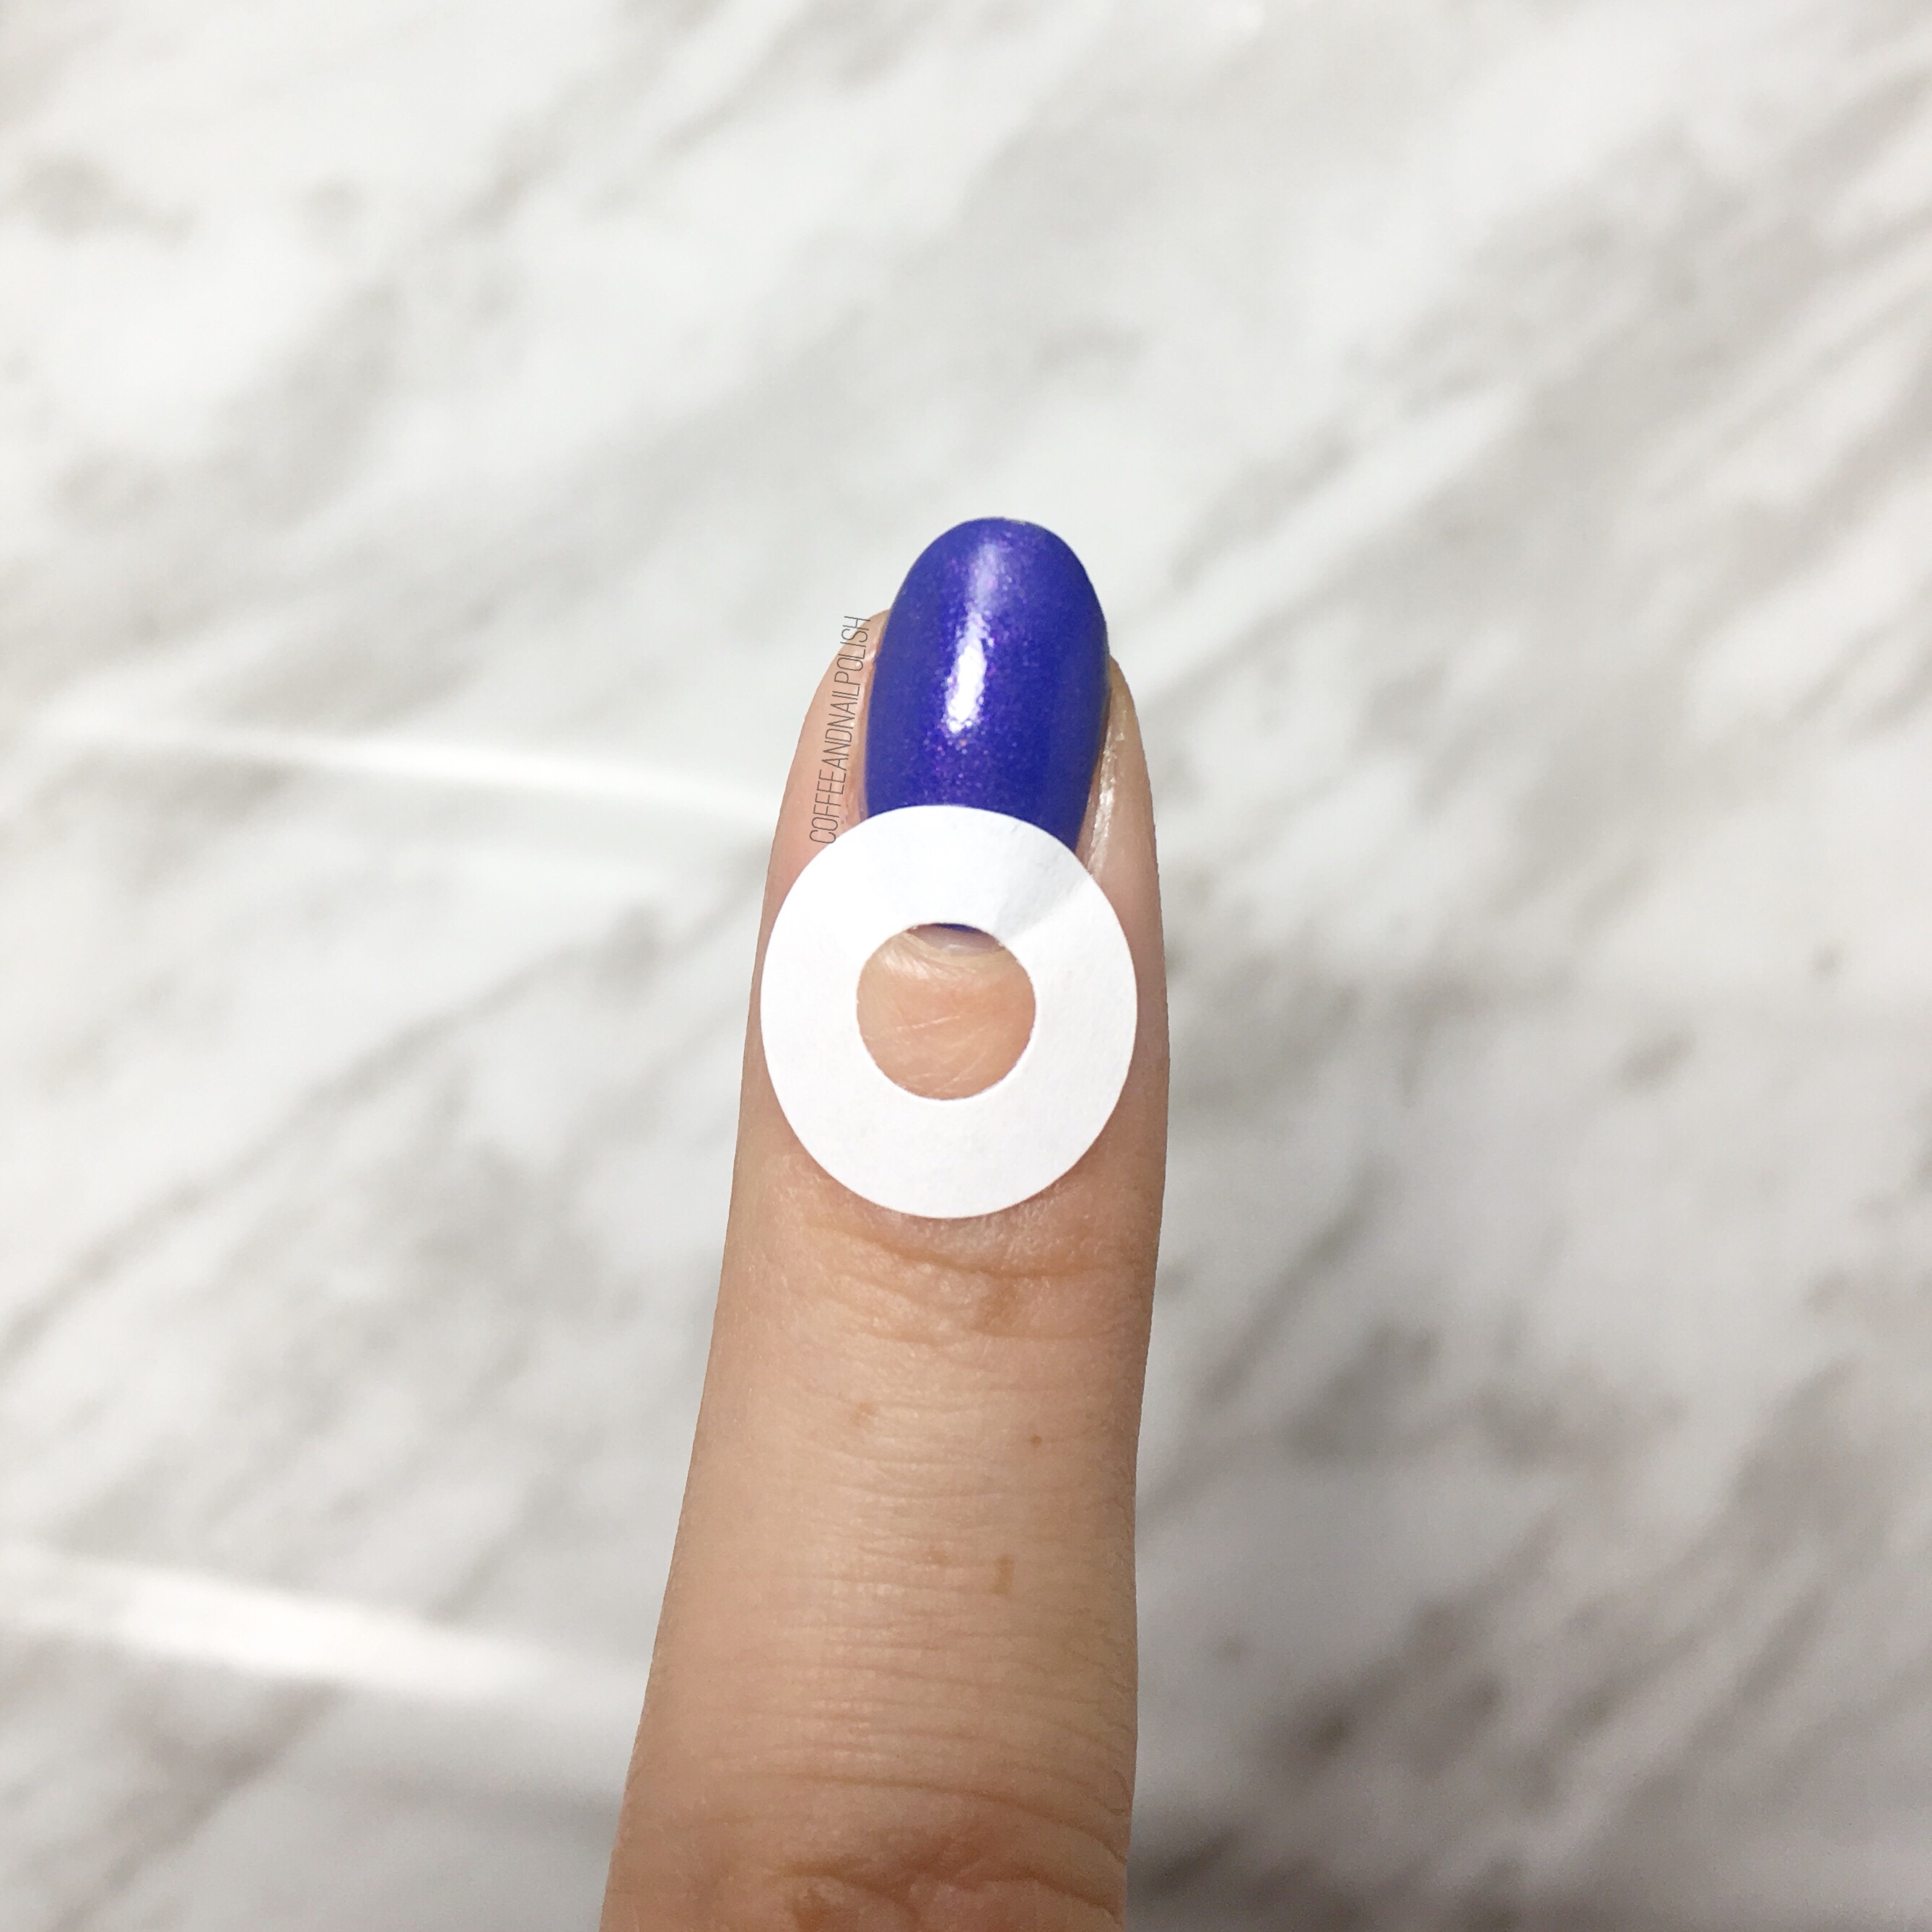
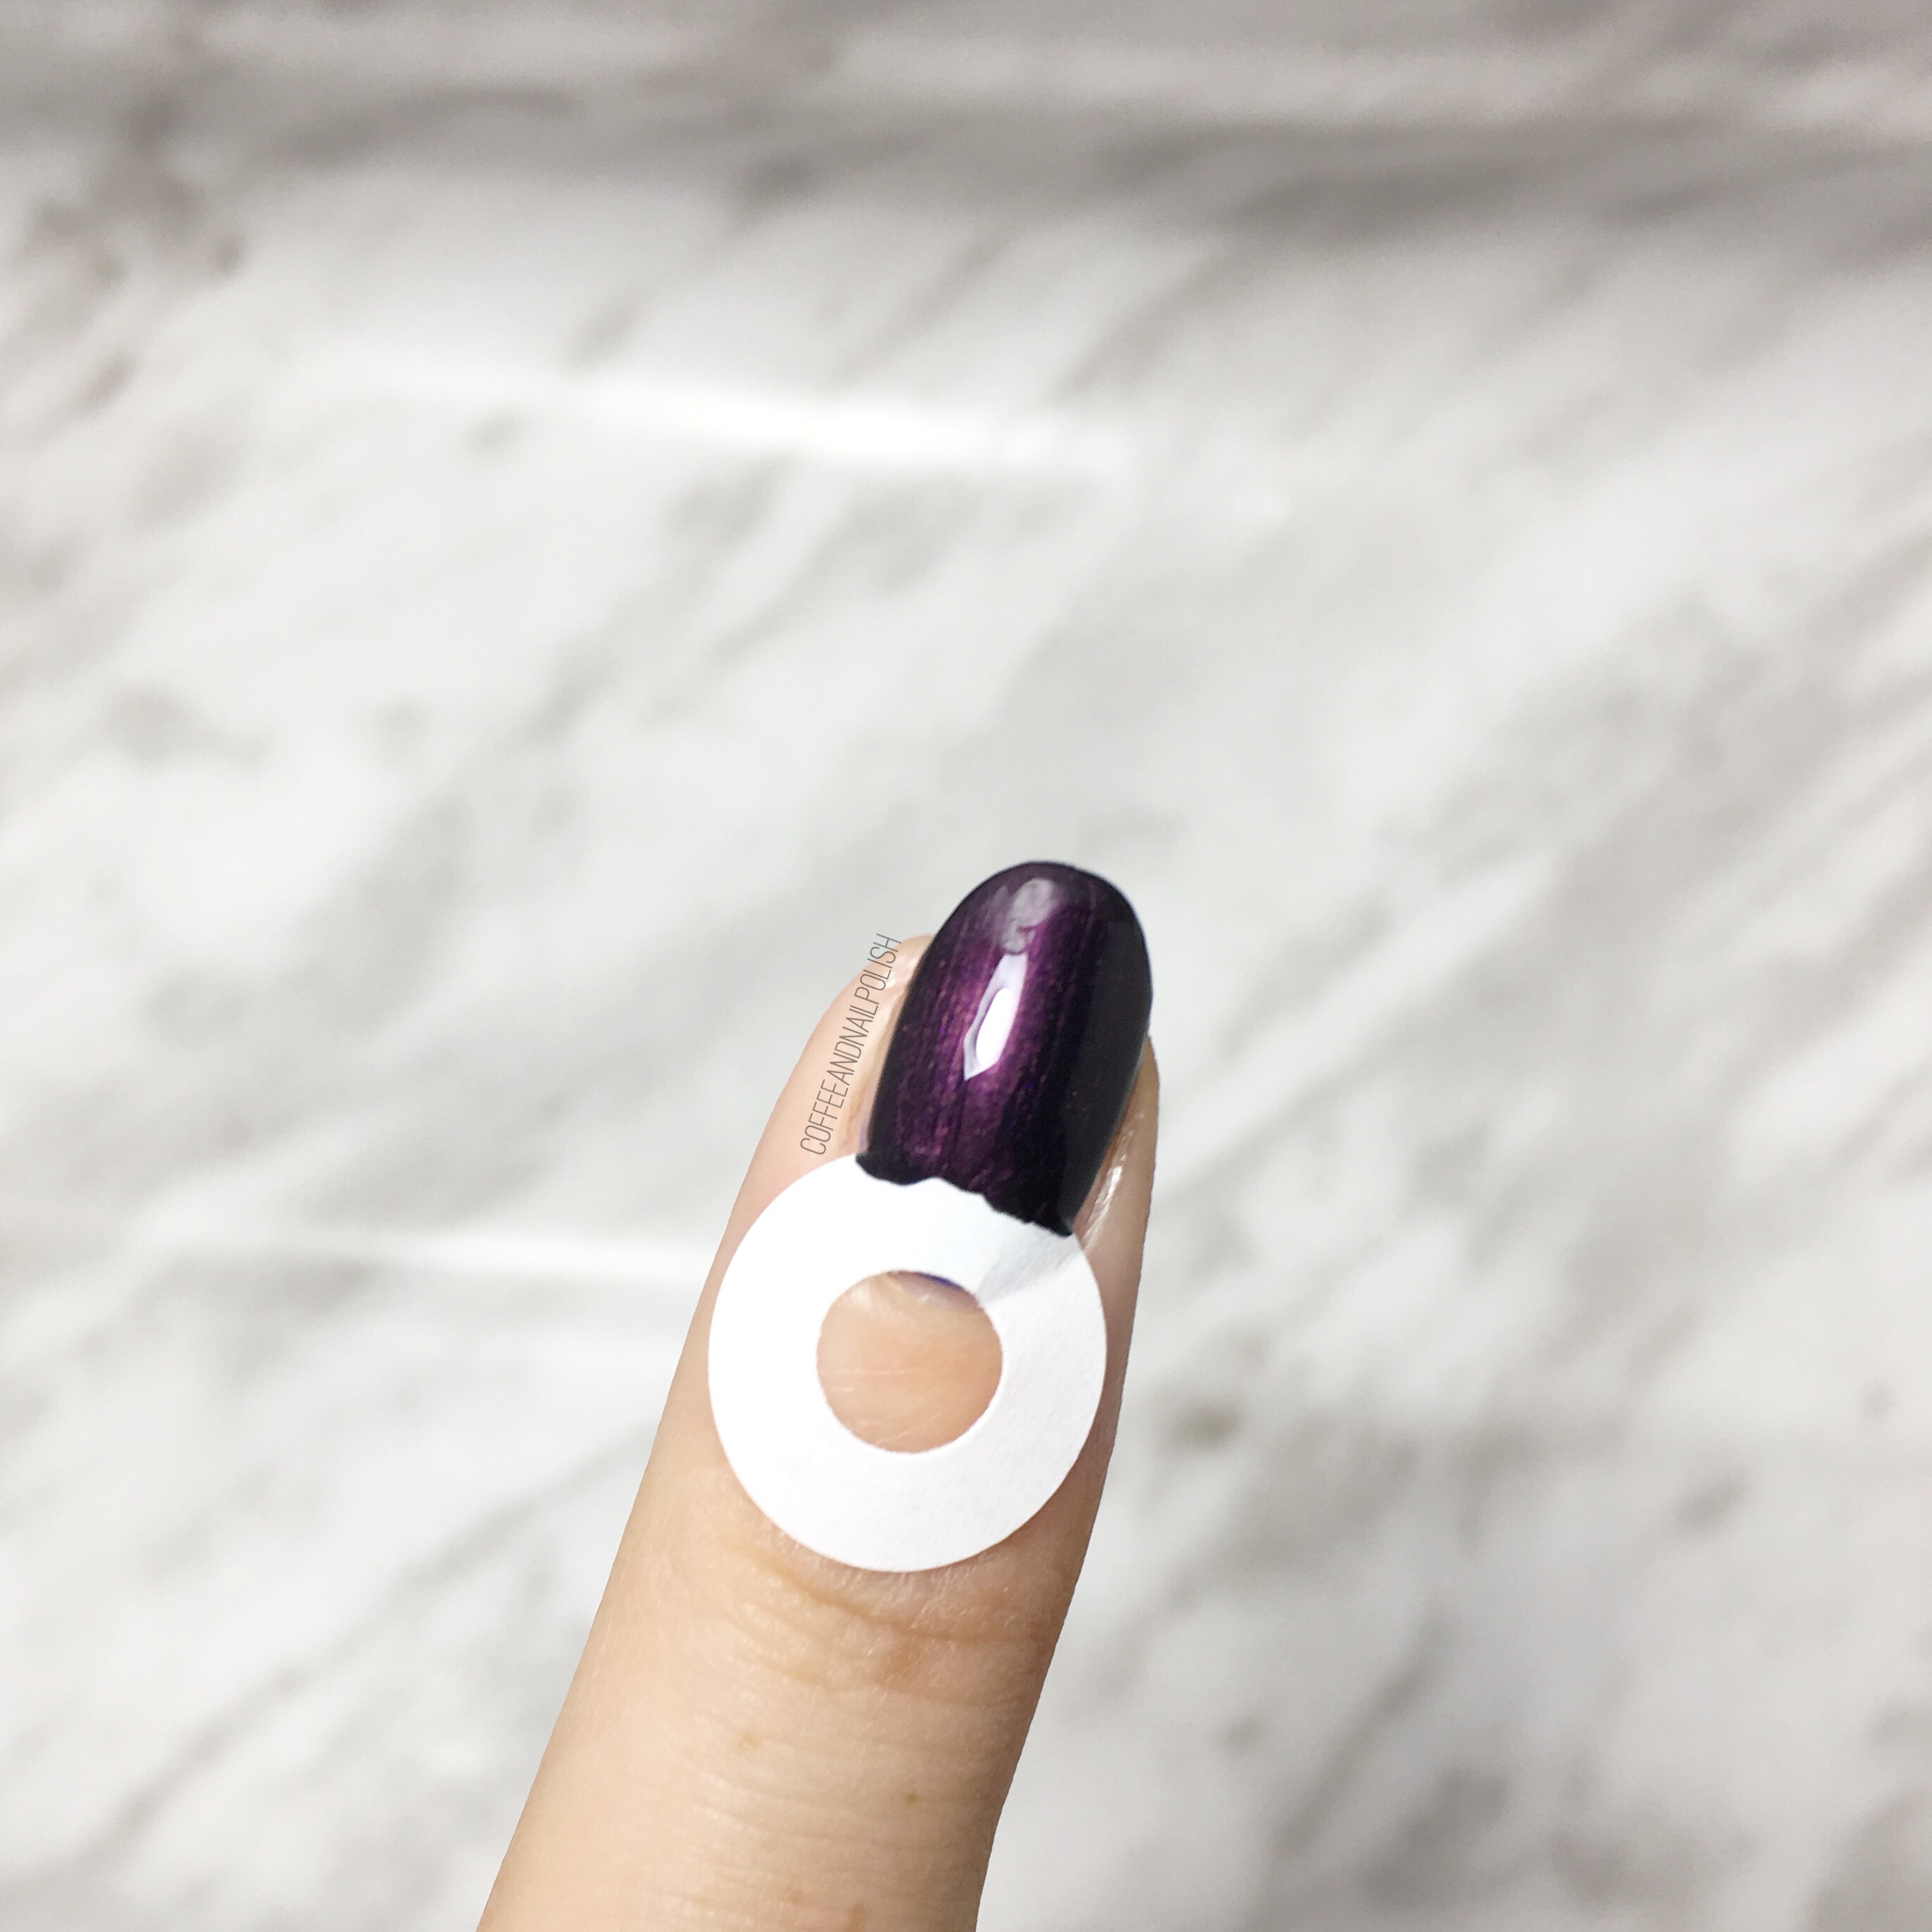
- Kiss Products Nail Art Chevron Vinyls
- Small detail brush (from Born Pretty Store)


You can see in the video above, I was originally going to use Essie Merino Cool (such a good grey) as my main colour, but switched it to Sally Hansen CSM Pat on the Black because it just went better with the accent nails. Also next time I want to try filling in each chevron with a different colour for even more coloured stripes.

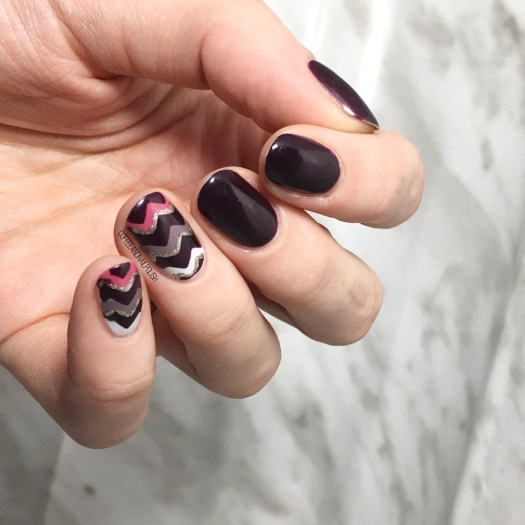
This is such a great design for a beginner because it looks complicated, but it’s really not. The hardest part honestly is just placing your vinyls (as you can see from the above video!) You could also use straight vinyls to make your stripes, but that would involve extra wait time for drying. Your stripes don’t have to be perfect because you’re covering them up anyways, so freehanding them usually is just easiest!

What do you think of this design? Would you try it out? Let me know your thoughts below! & if you do try it out, don’t forget to tag me on social media & use the tag #lookcoffeeandnailpolish! 💜 Happy Wednesday everyone!


 For this manicure, the polishes I used were: