Hello loves & Happy Monday!
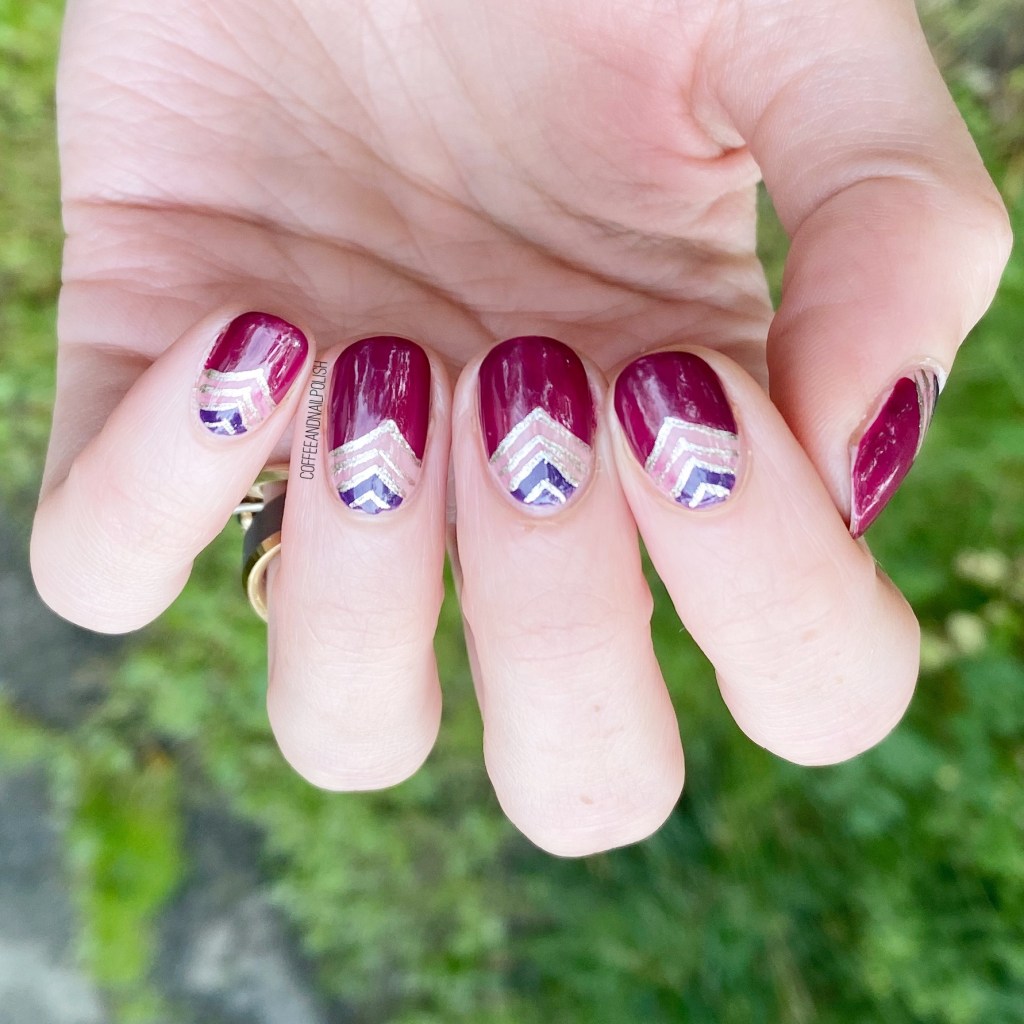
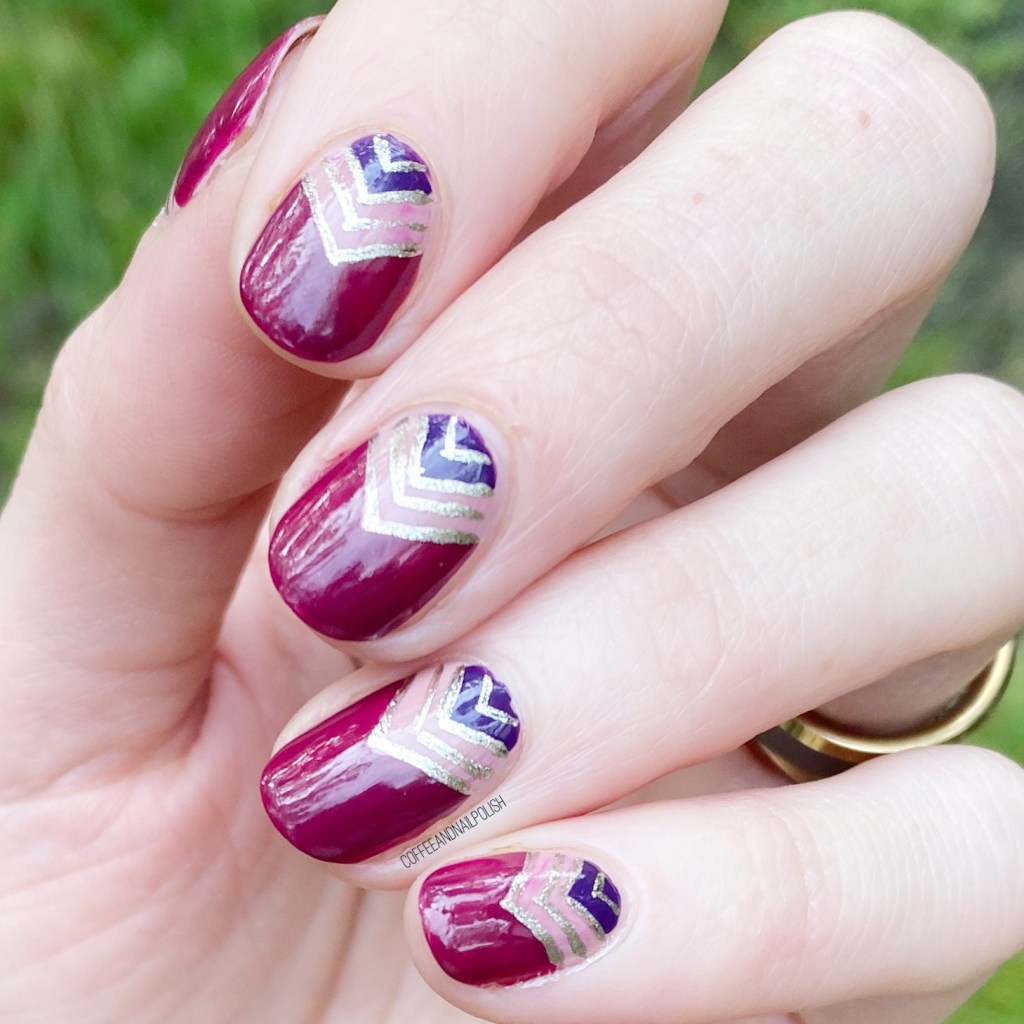
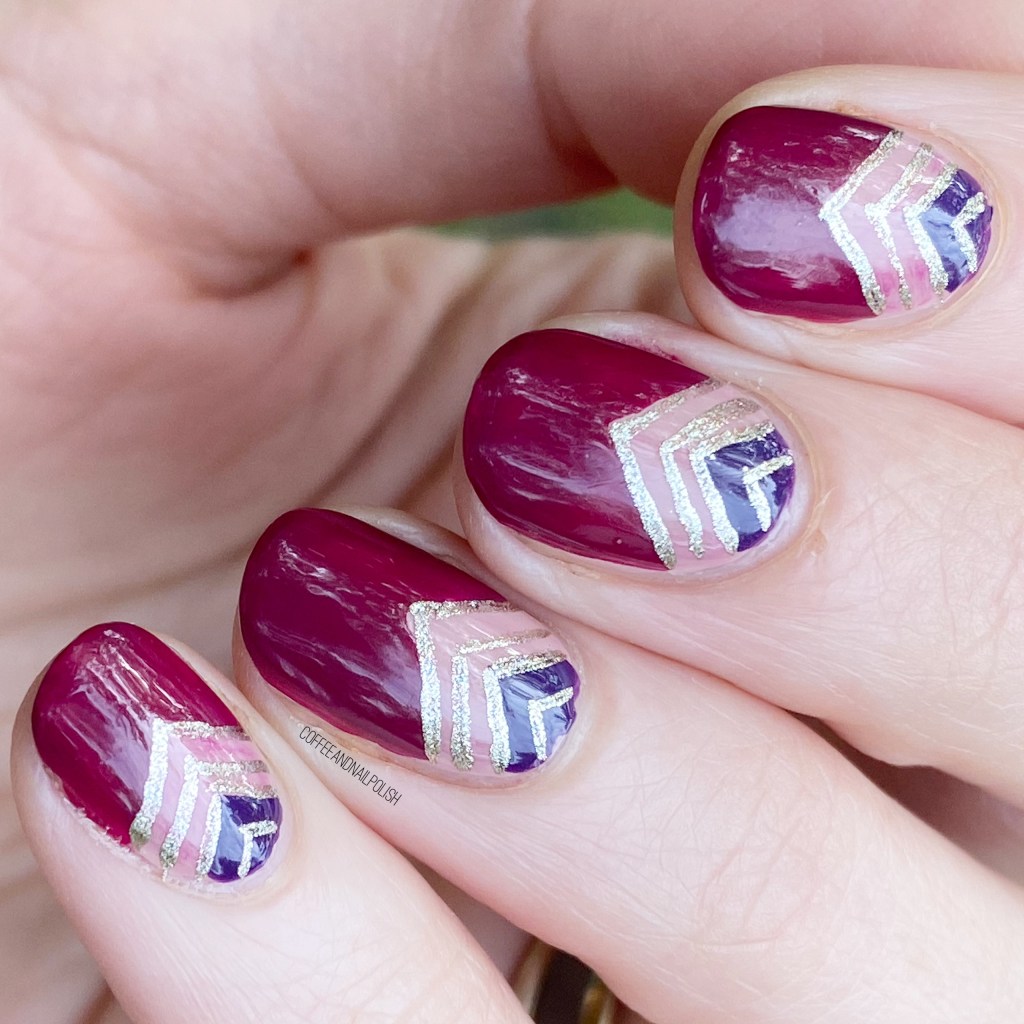
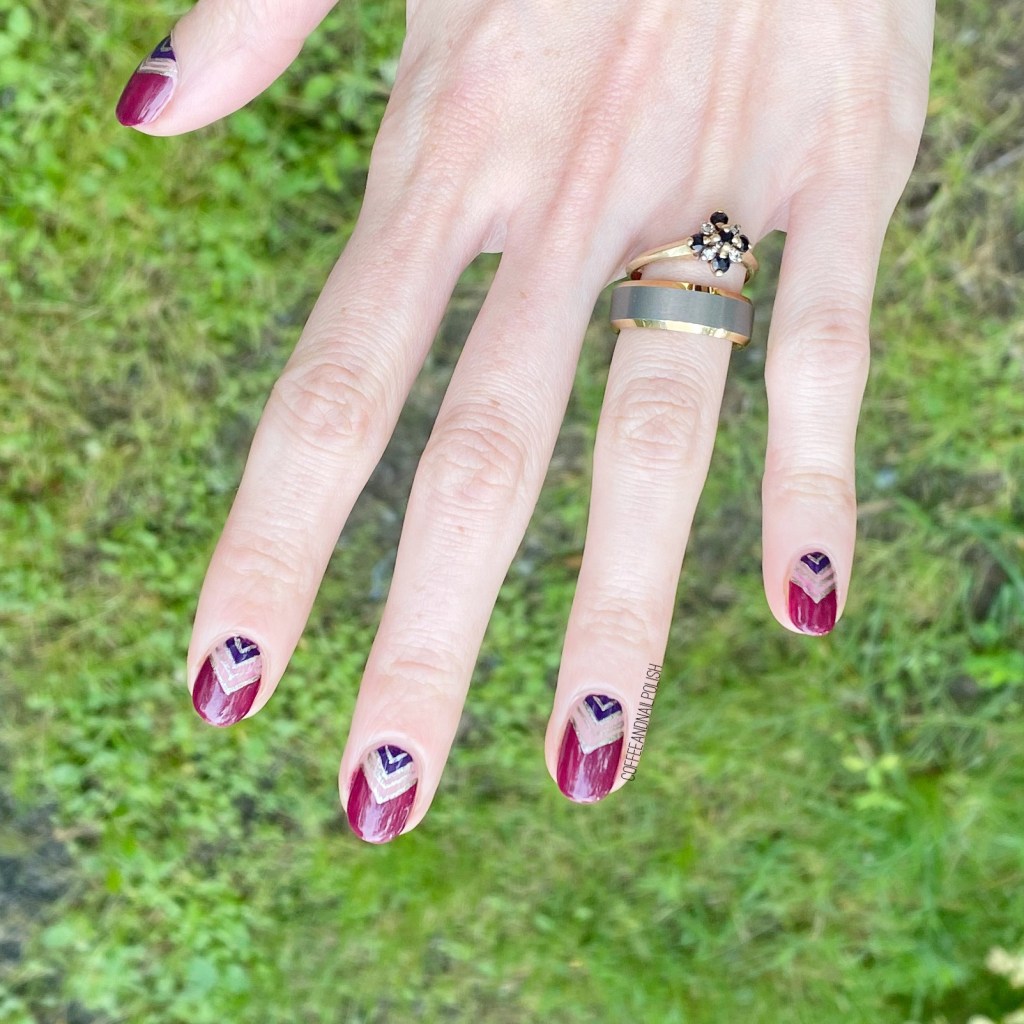
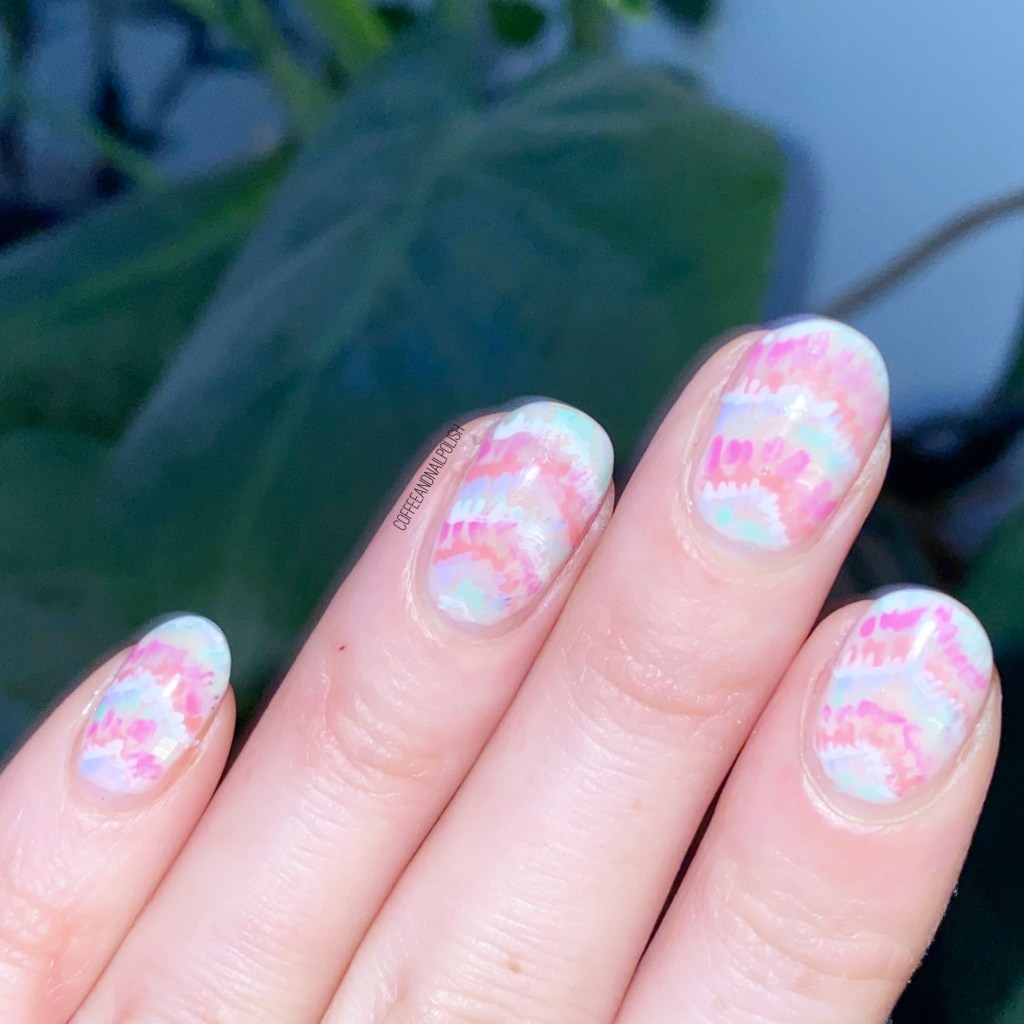
A chilly March Monday at that, which is why some Spring colours are definitely needed right now. Today, I have the next prompt for Glam Nails Challenge March which is chevrons. & we all know, I love me some chevrons. I decided to take inspiration from a design I did a few years ago, but with a more pastel/Spring colour scheme.

The polishes I used for this manicure are:
- Base Coat: Sally Hansen Good. Kind. Pure Hardener
- Top Coat: Seche Vive
- Sally Hansen Miracle Gel Tutu the Ballet
- Sally Hansen MG Crying Out Cloud
- OPI Two Timing the Zones
- L’Oréal Jardin Des Roses
- L’Oréal Pistache Royale
- Sally Hansen MG Get Mod
- NailStuff.ca 4mm Micro Detail Brush
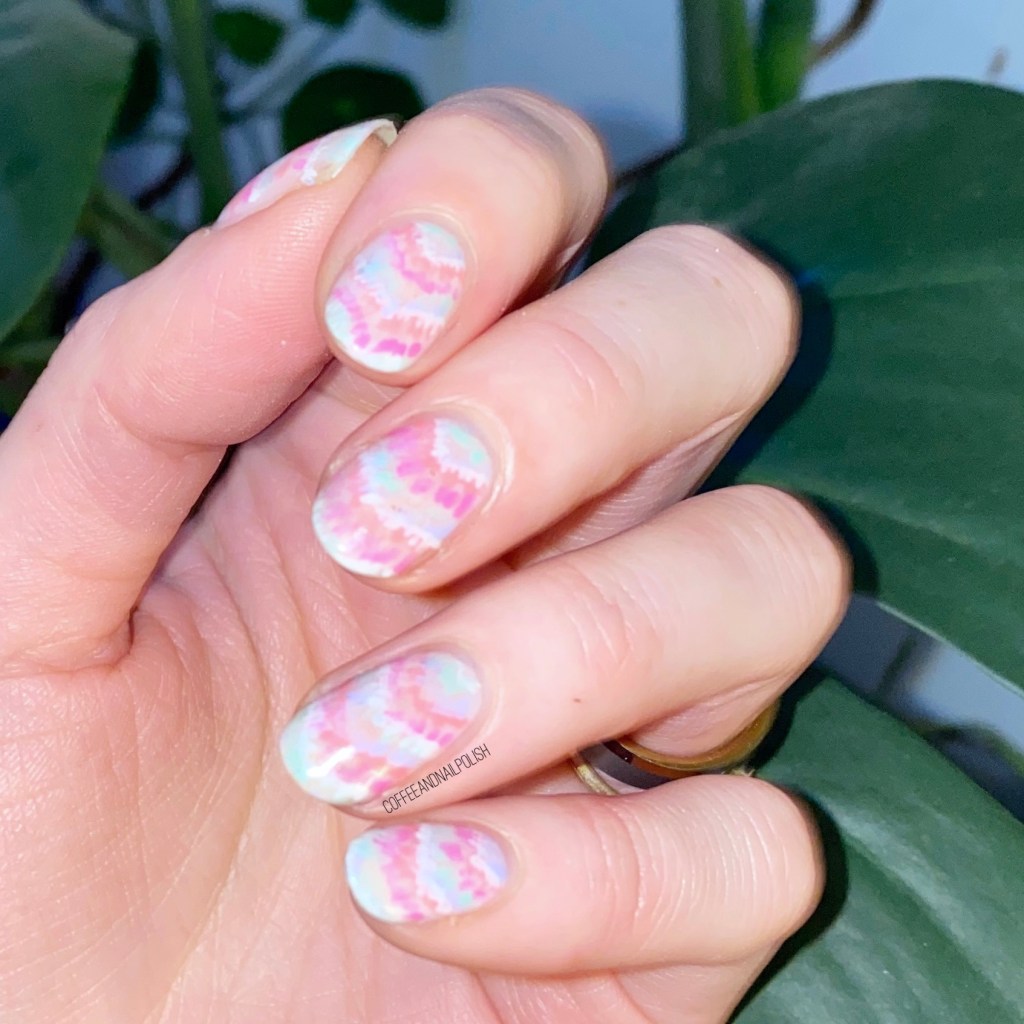
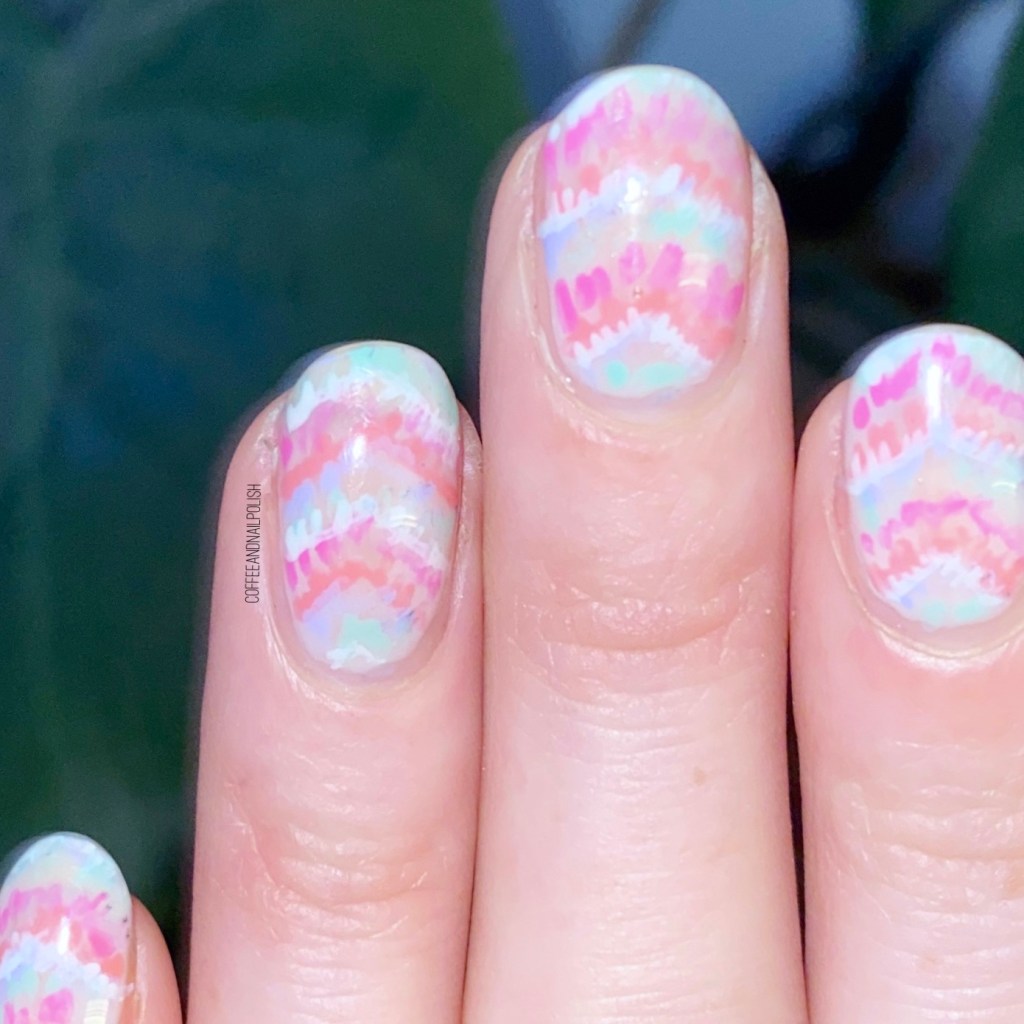
I love the messy feel of these chevrons. It kind of reminds me a bit of tie dye as well, which I really like. Is tie dye still cool?
The girls at work said they reminded them a bit of Easter eggs, which wasn’t quite the look I was going for, but that’s okay. I guess you can put these on the list of manicures perfect for Easter as well. Truthfully, I’m just loving these pastel shades right now, which means I’m very ready for Spring to be here.

What do you think of these chevron nails? Do you like the messy tie dye feel of them? Let me know all your thoughts down in the comments below, & if you would wear these nails too!