So recently I mentioned that I seriously needed to invest in some new liquid latex because I’ve been out for a while & like magic the nail art gods listened! Or, at least, the lovely folks at Edge Perfection did as they sent me their peel off polish barrier to try!
From their website:
Edge Perfection is…
5 Free, Thiuram Free, Ammonia Free, Cruelty Free, Vegan, Prop 65 Compliant, Canadian Cosmetics and EU Cosmetics Compliant too!
Edge Perfection is a low oder polish barrier designed to make clean-up around the nails easier than ever. When using our product you’ll be happy knowing you’re using the highest most pure liquid latex on the market.
Pretty awesome claims & definitely had me curious! I’ll be honest… my previous experience with cuticle barriers only includes glue based peel off base coats (didn’t really work for me) & a Born Pretty Store liquid latex which did work but smelled weirdly fishy. So I was definitely excited to try out something new.
My first experiment? Well a gradient of course!
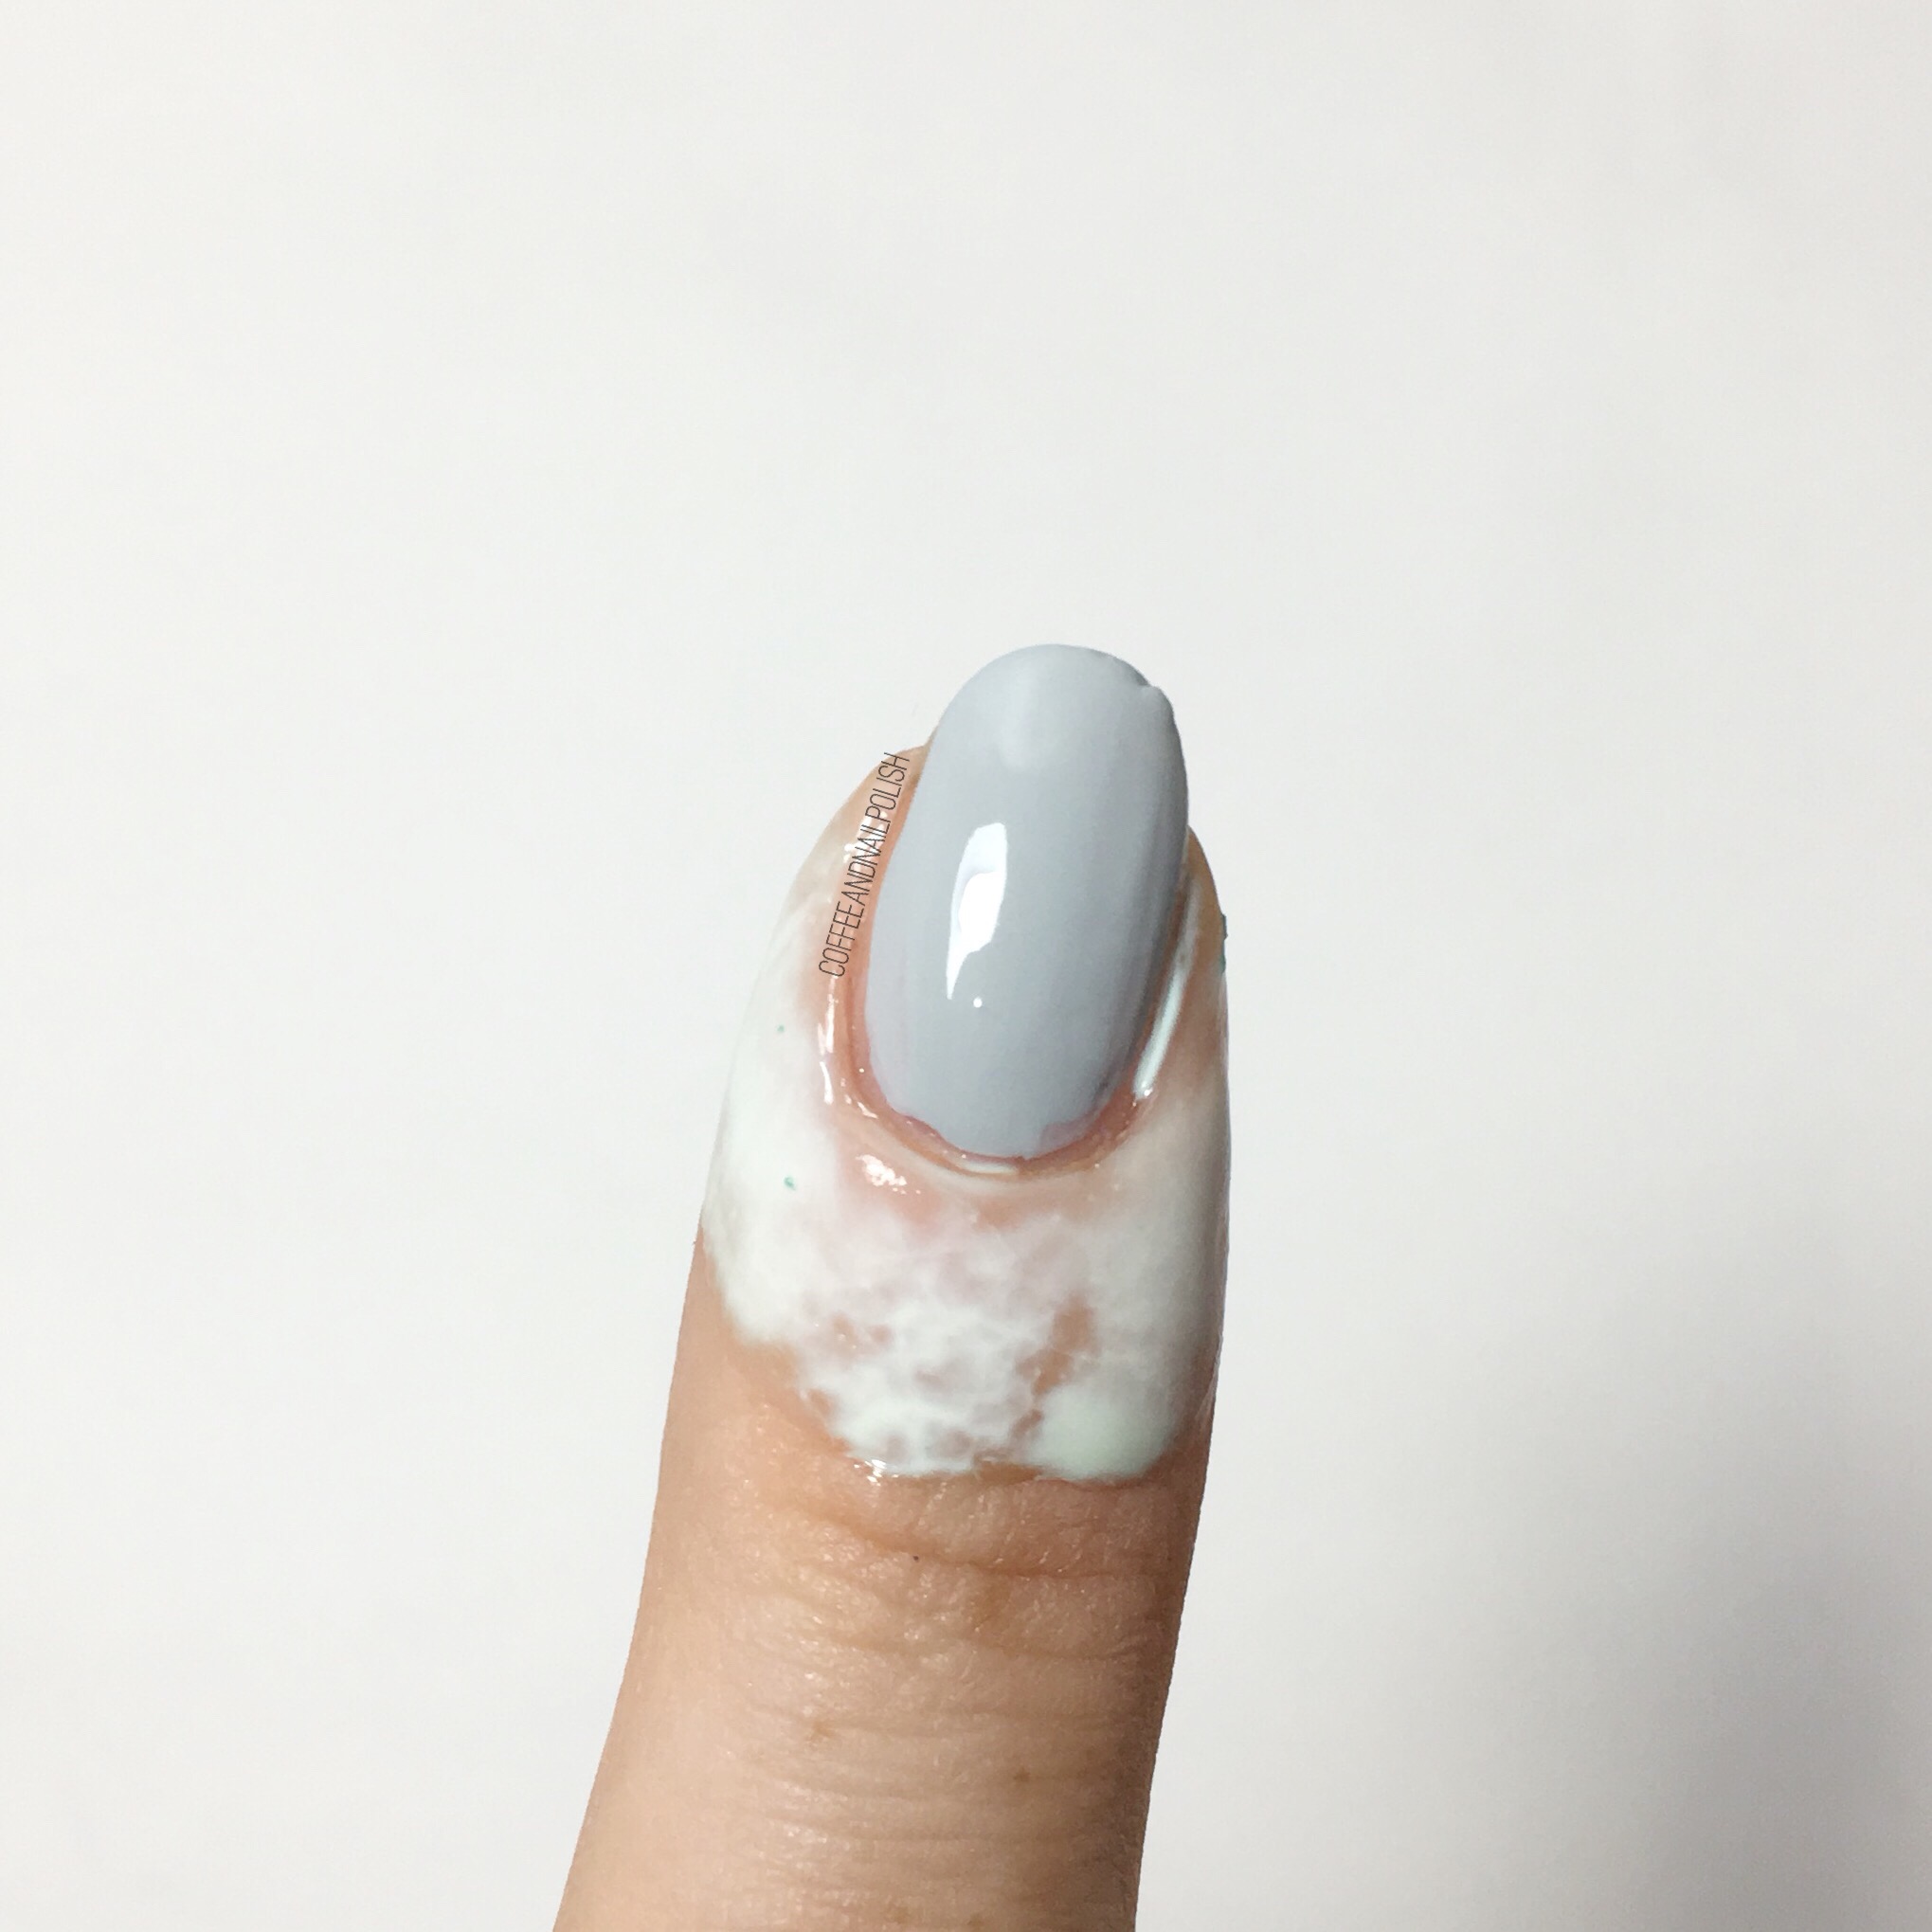
So you can use this as a barrier while applying your base coat of colour (perfect for those whole have trouble painting with their non dominant hand!). I don’t have much trouble staying “within the lines” so I applied it around my cuticles after my base was already painted. It goes on a pale green-ish shade (above) with no smell that I could notice. When applying I suggest using a light hand to get the best application. The tub has a wand with brush inside. I like the fact the brush is shorter—makes for a more precise application.
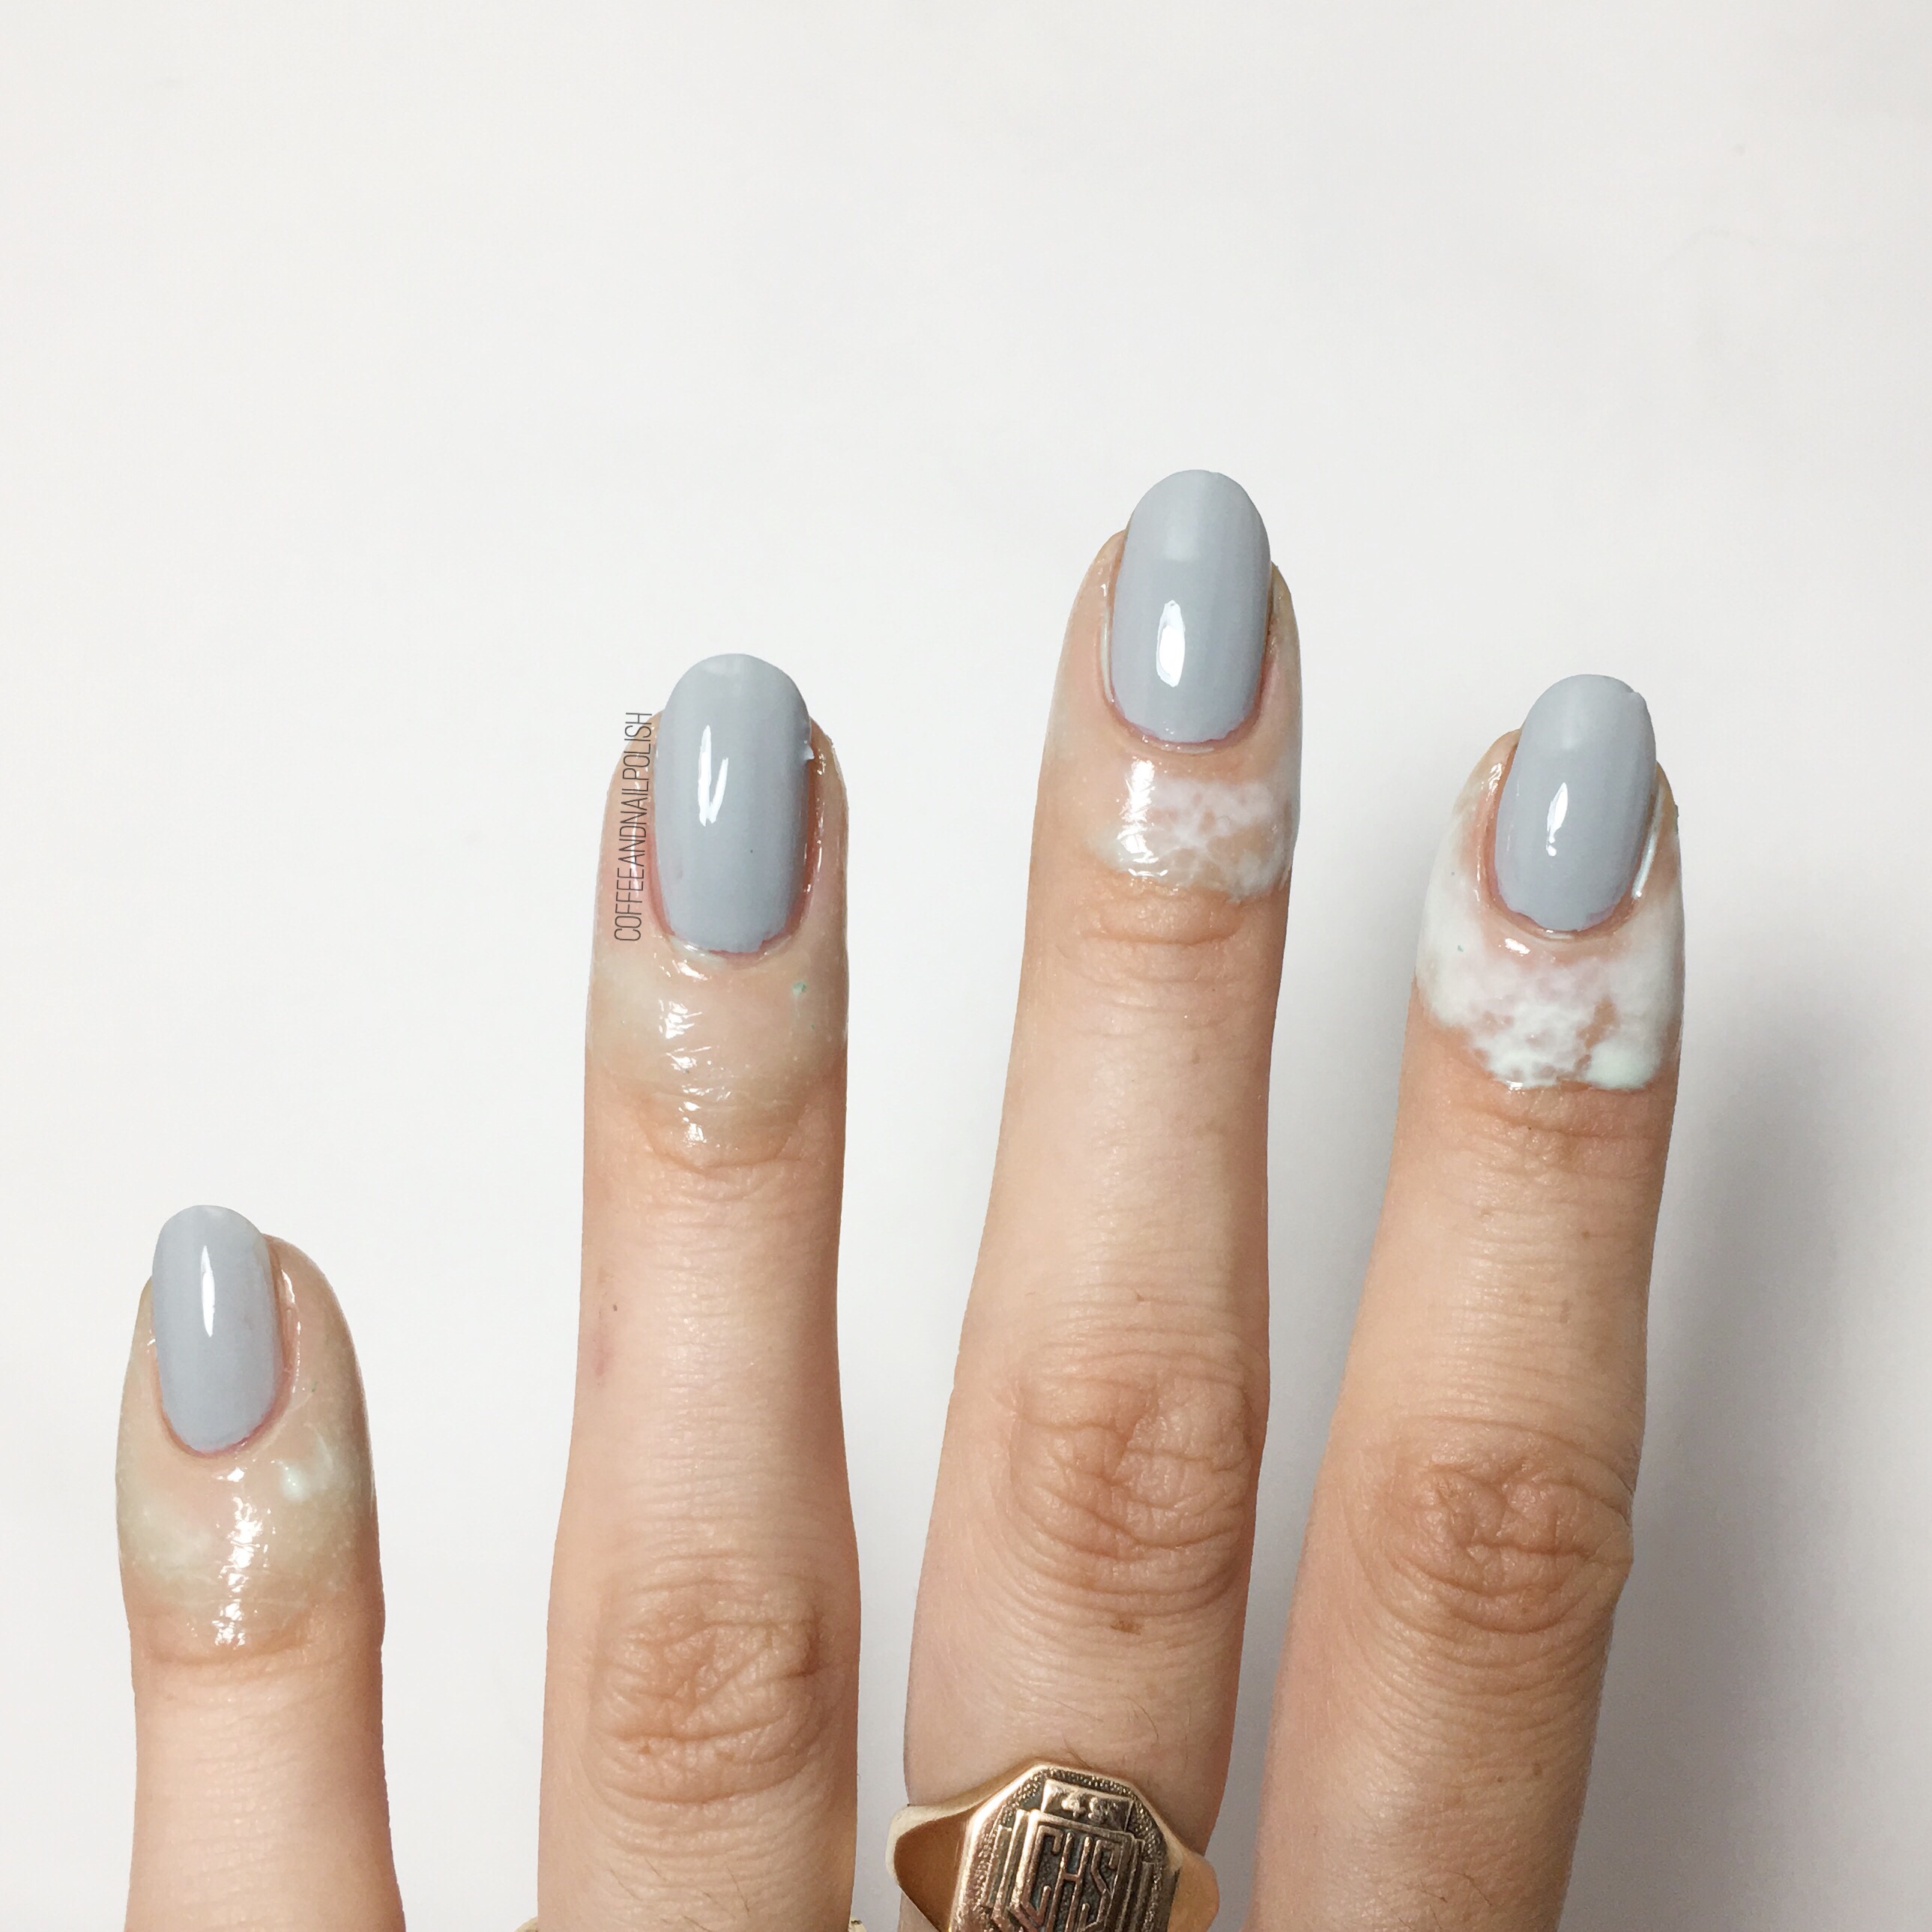
Apply to all nails. I always stick to one hand at a time as I find trying to sponge with latex on my fingers just leads to my fingers sticking together. Dry time is pretty speedy—as you can see above I started with my pinky & moved to my thumb & pinky was already dry by the time I grabbed my phone to snap a picture. It dries down almost clear but with a hint of the mint so it’s easy to find to pull off.
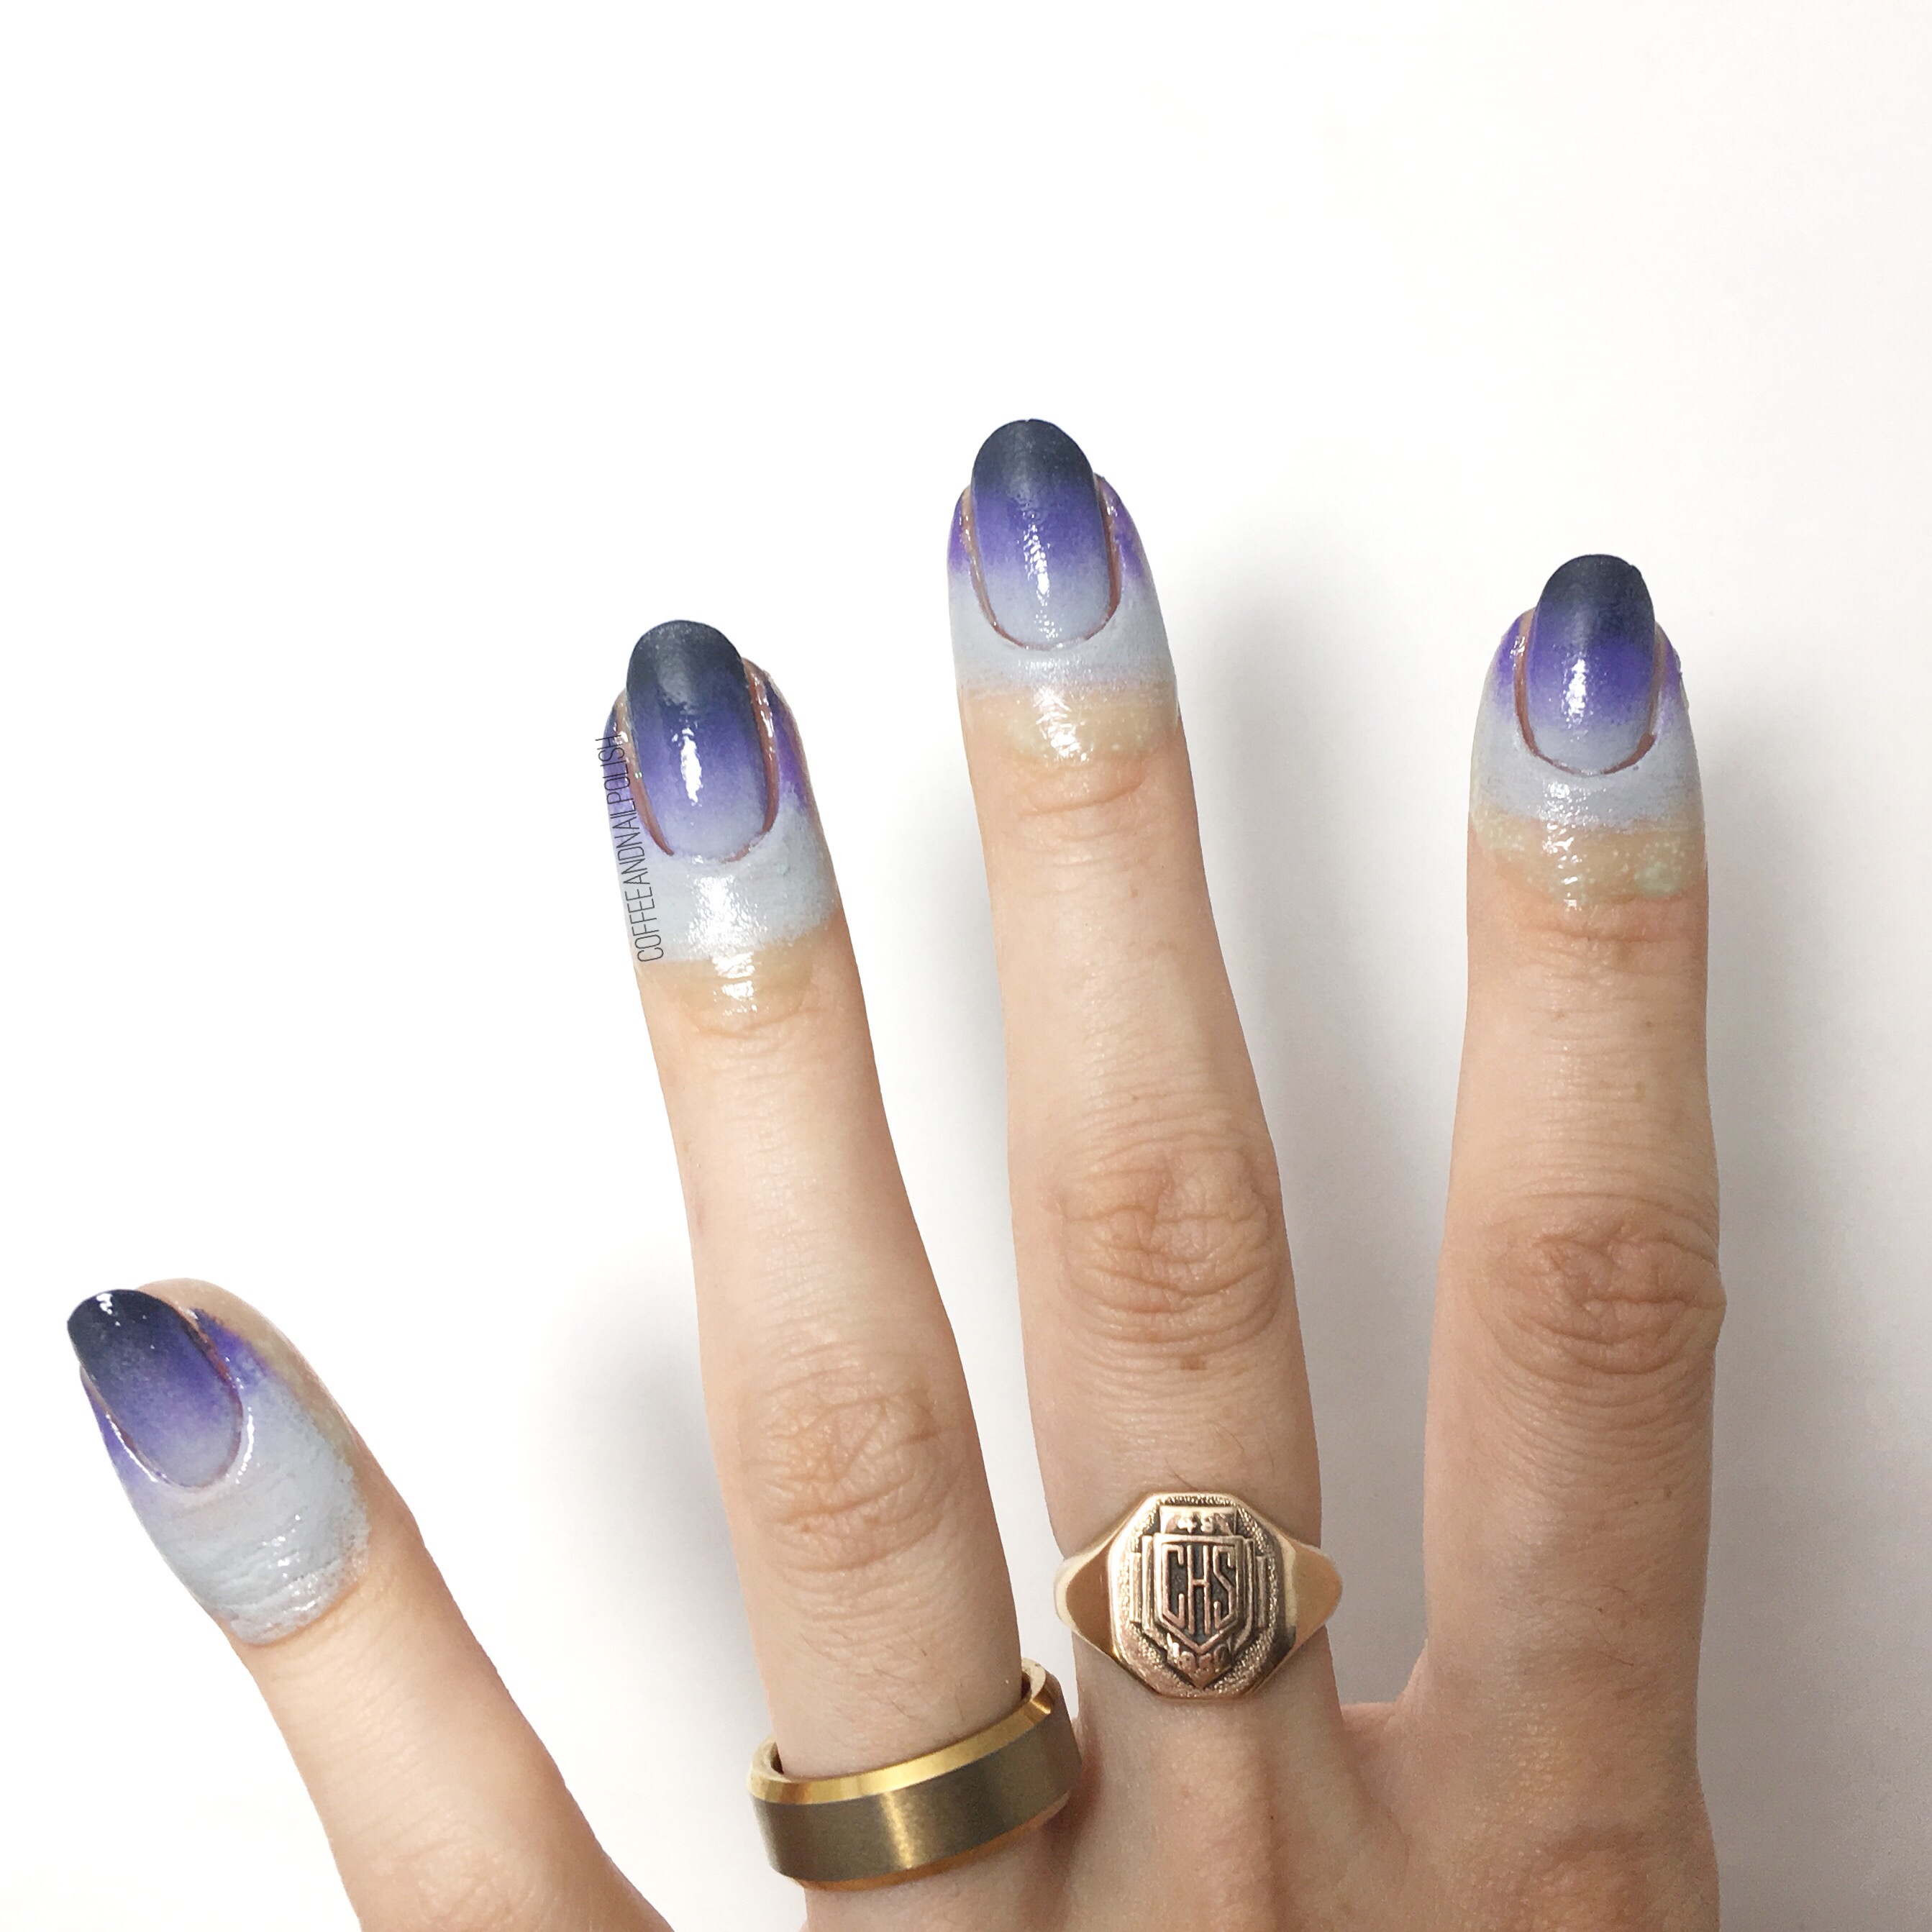
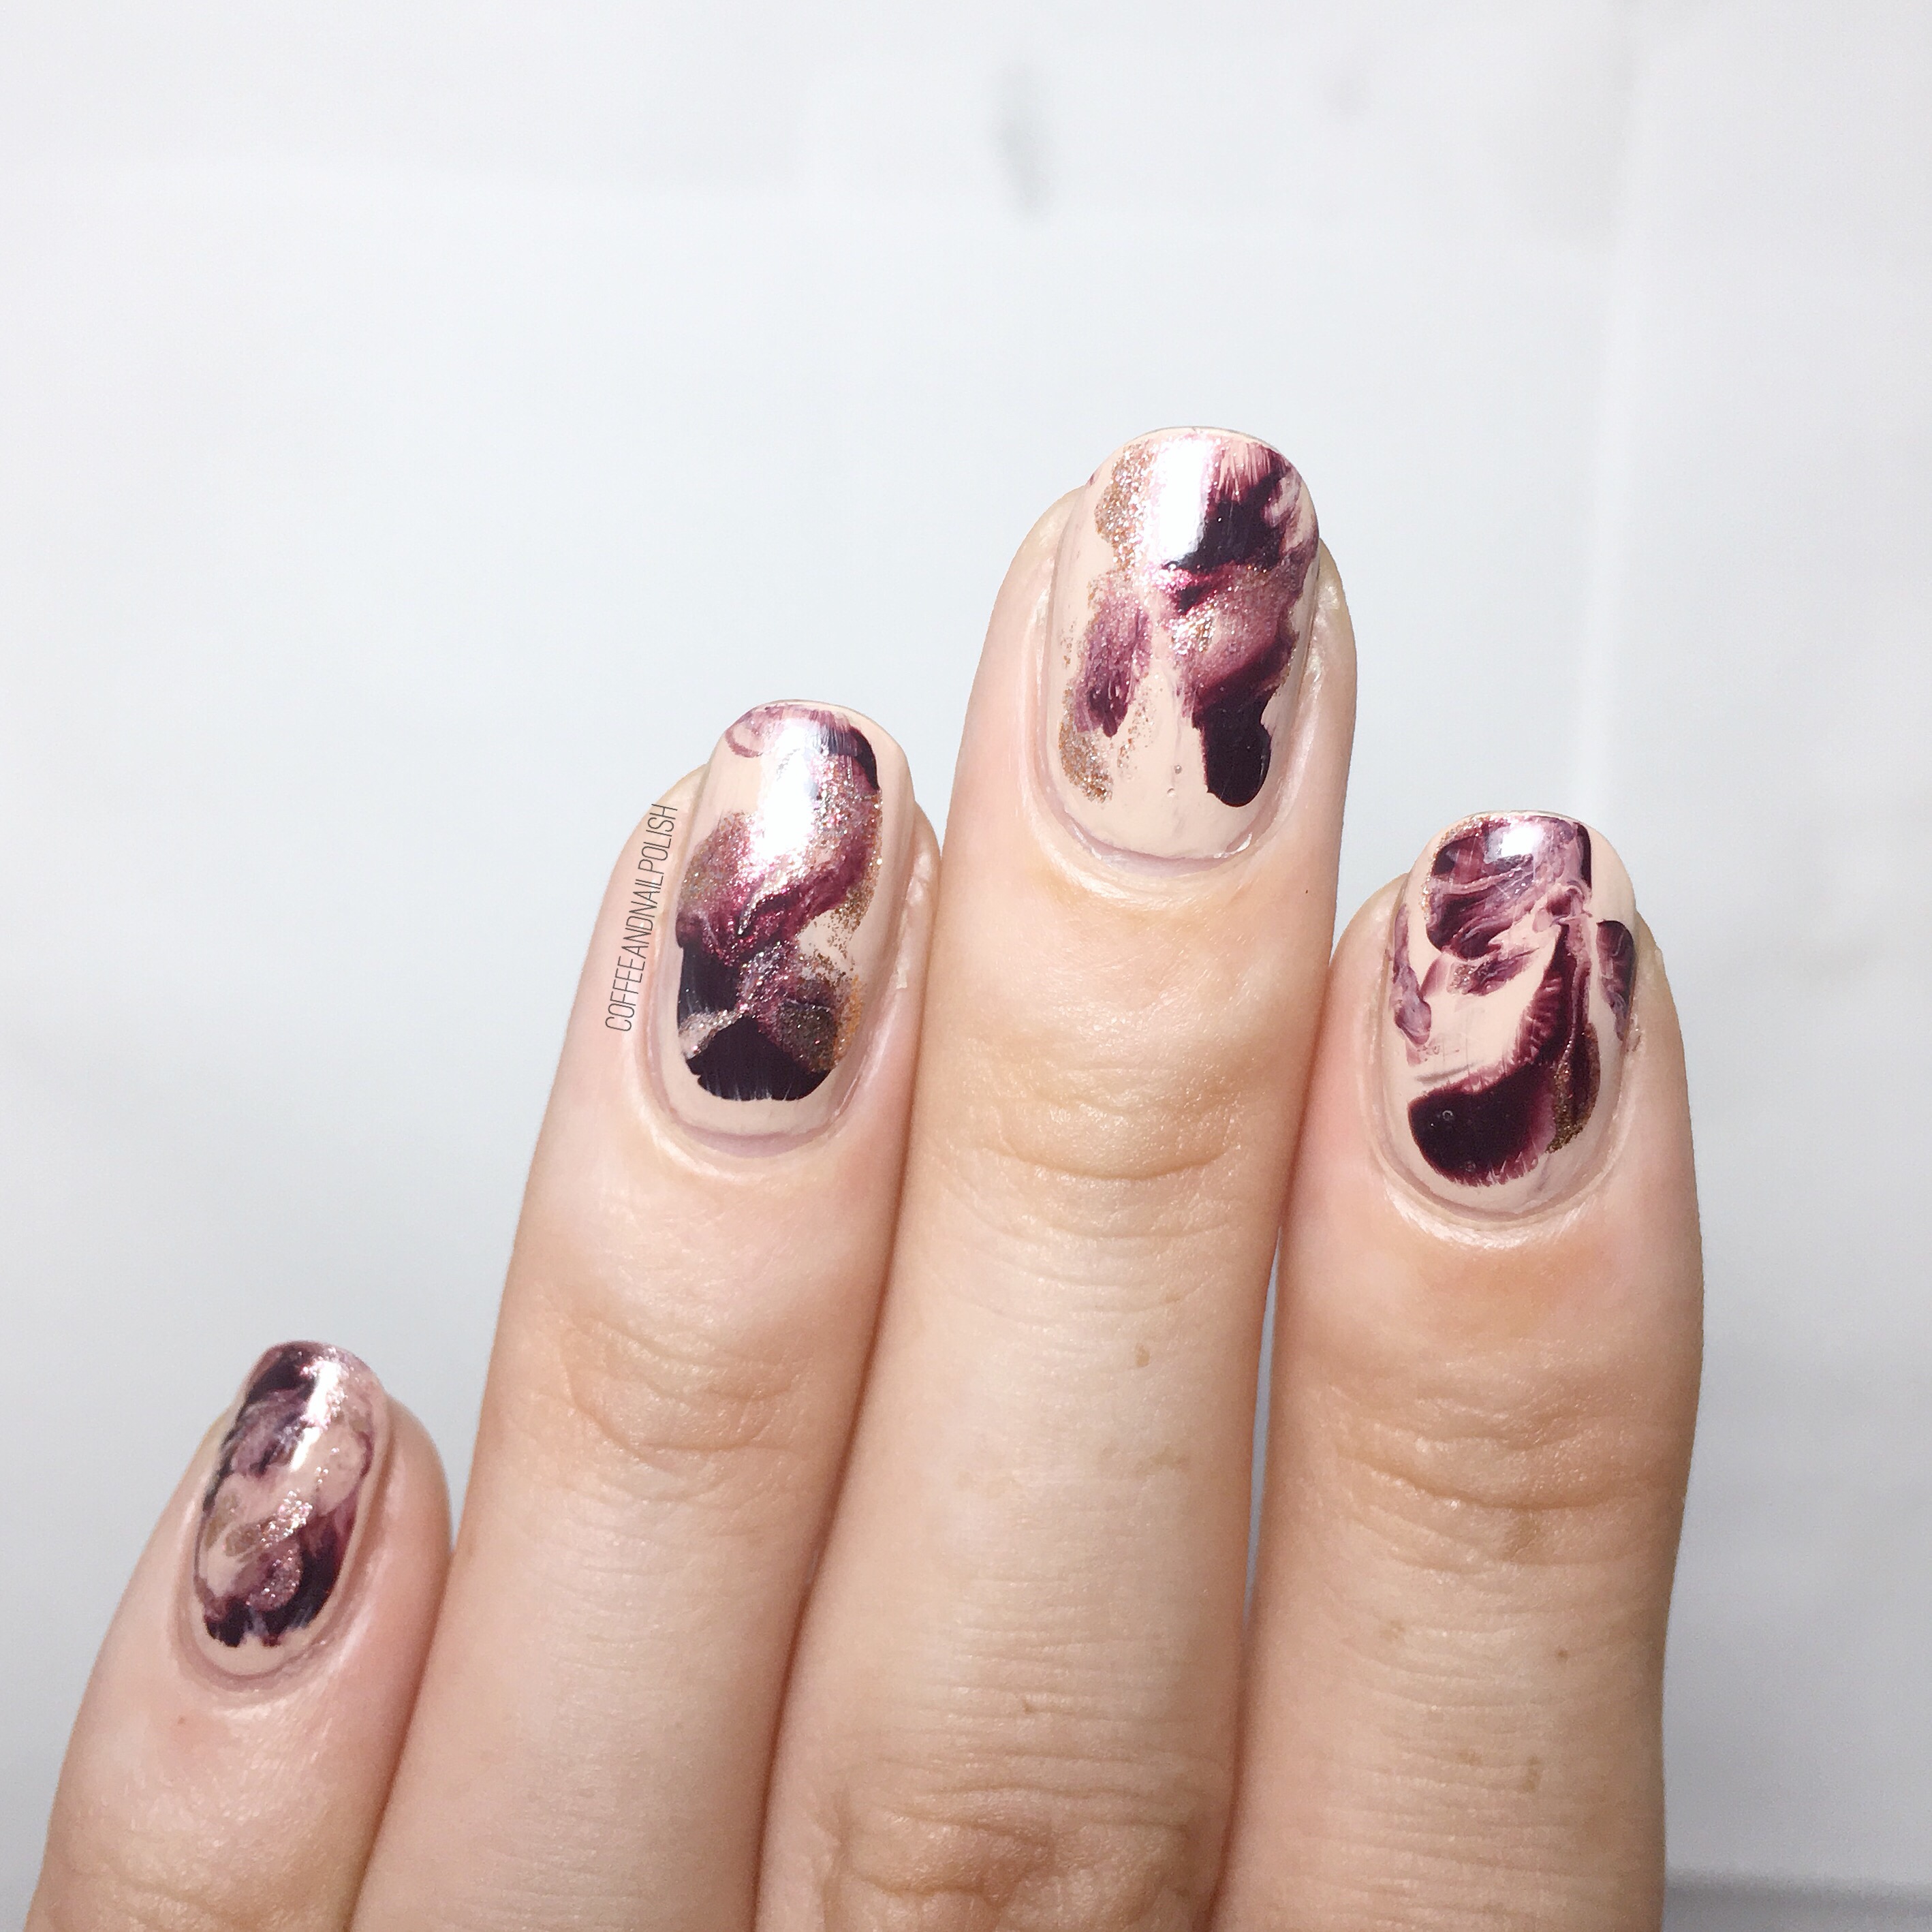
Now it’s time for nail art! I sponged on my gradient using three shades (Color Club Silver Lake, Revlon Elusive, & Essie Under the Twilight) until they were well blended. Always a messy process.
Using tweezers, pull off your latex barrier. Above is right after I peeled off Edge Perfection (before I applied top coat). As you can see, it really did keep things quite clean! There are a few little bits of polish left on the nail but that is just an issue of not getting the product close enough to the edge (middle finger) or not far enough down the finger (pinky) & can easily be fixed with a clean up brush & a little acetone.

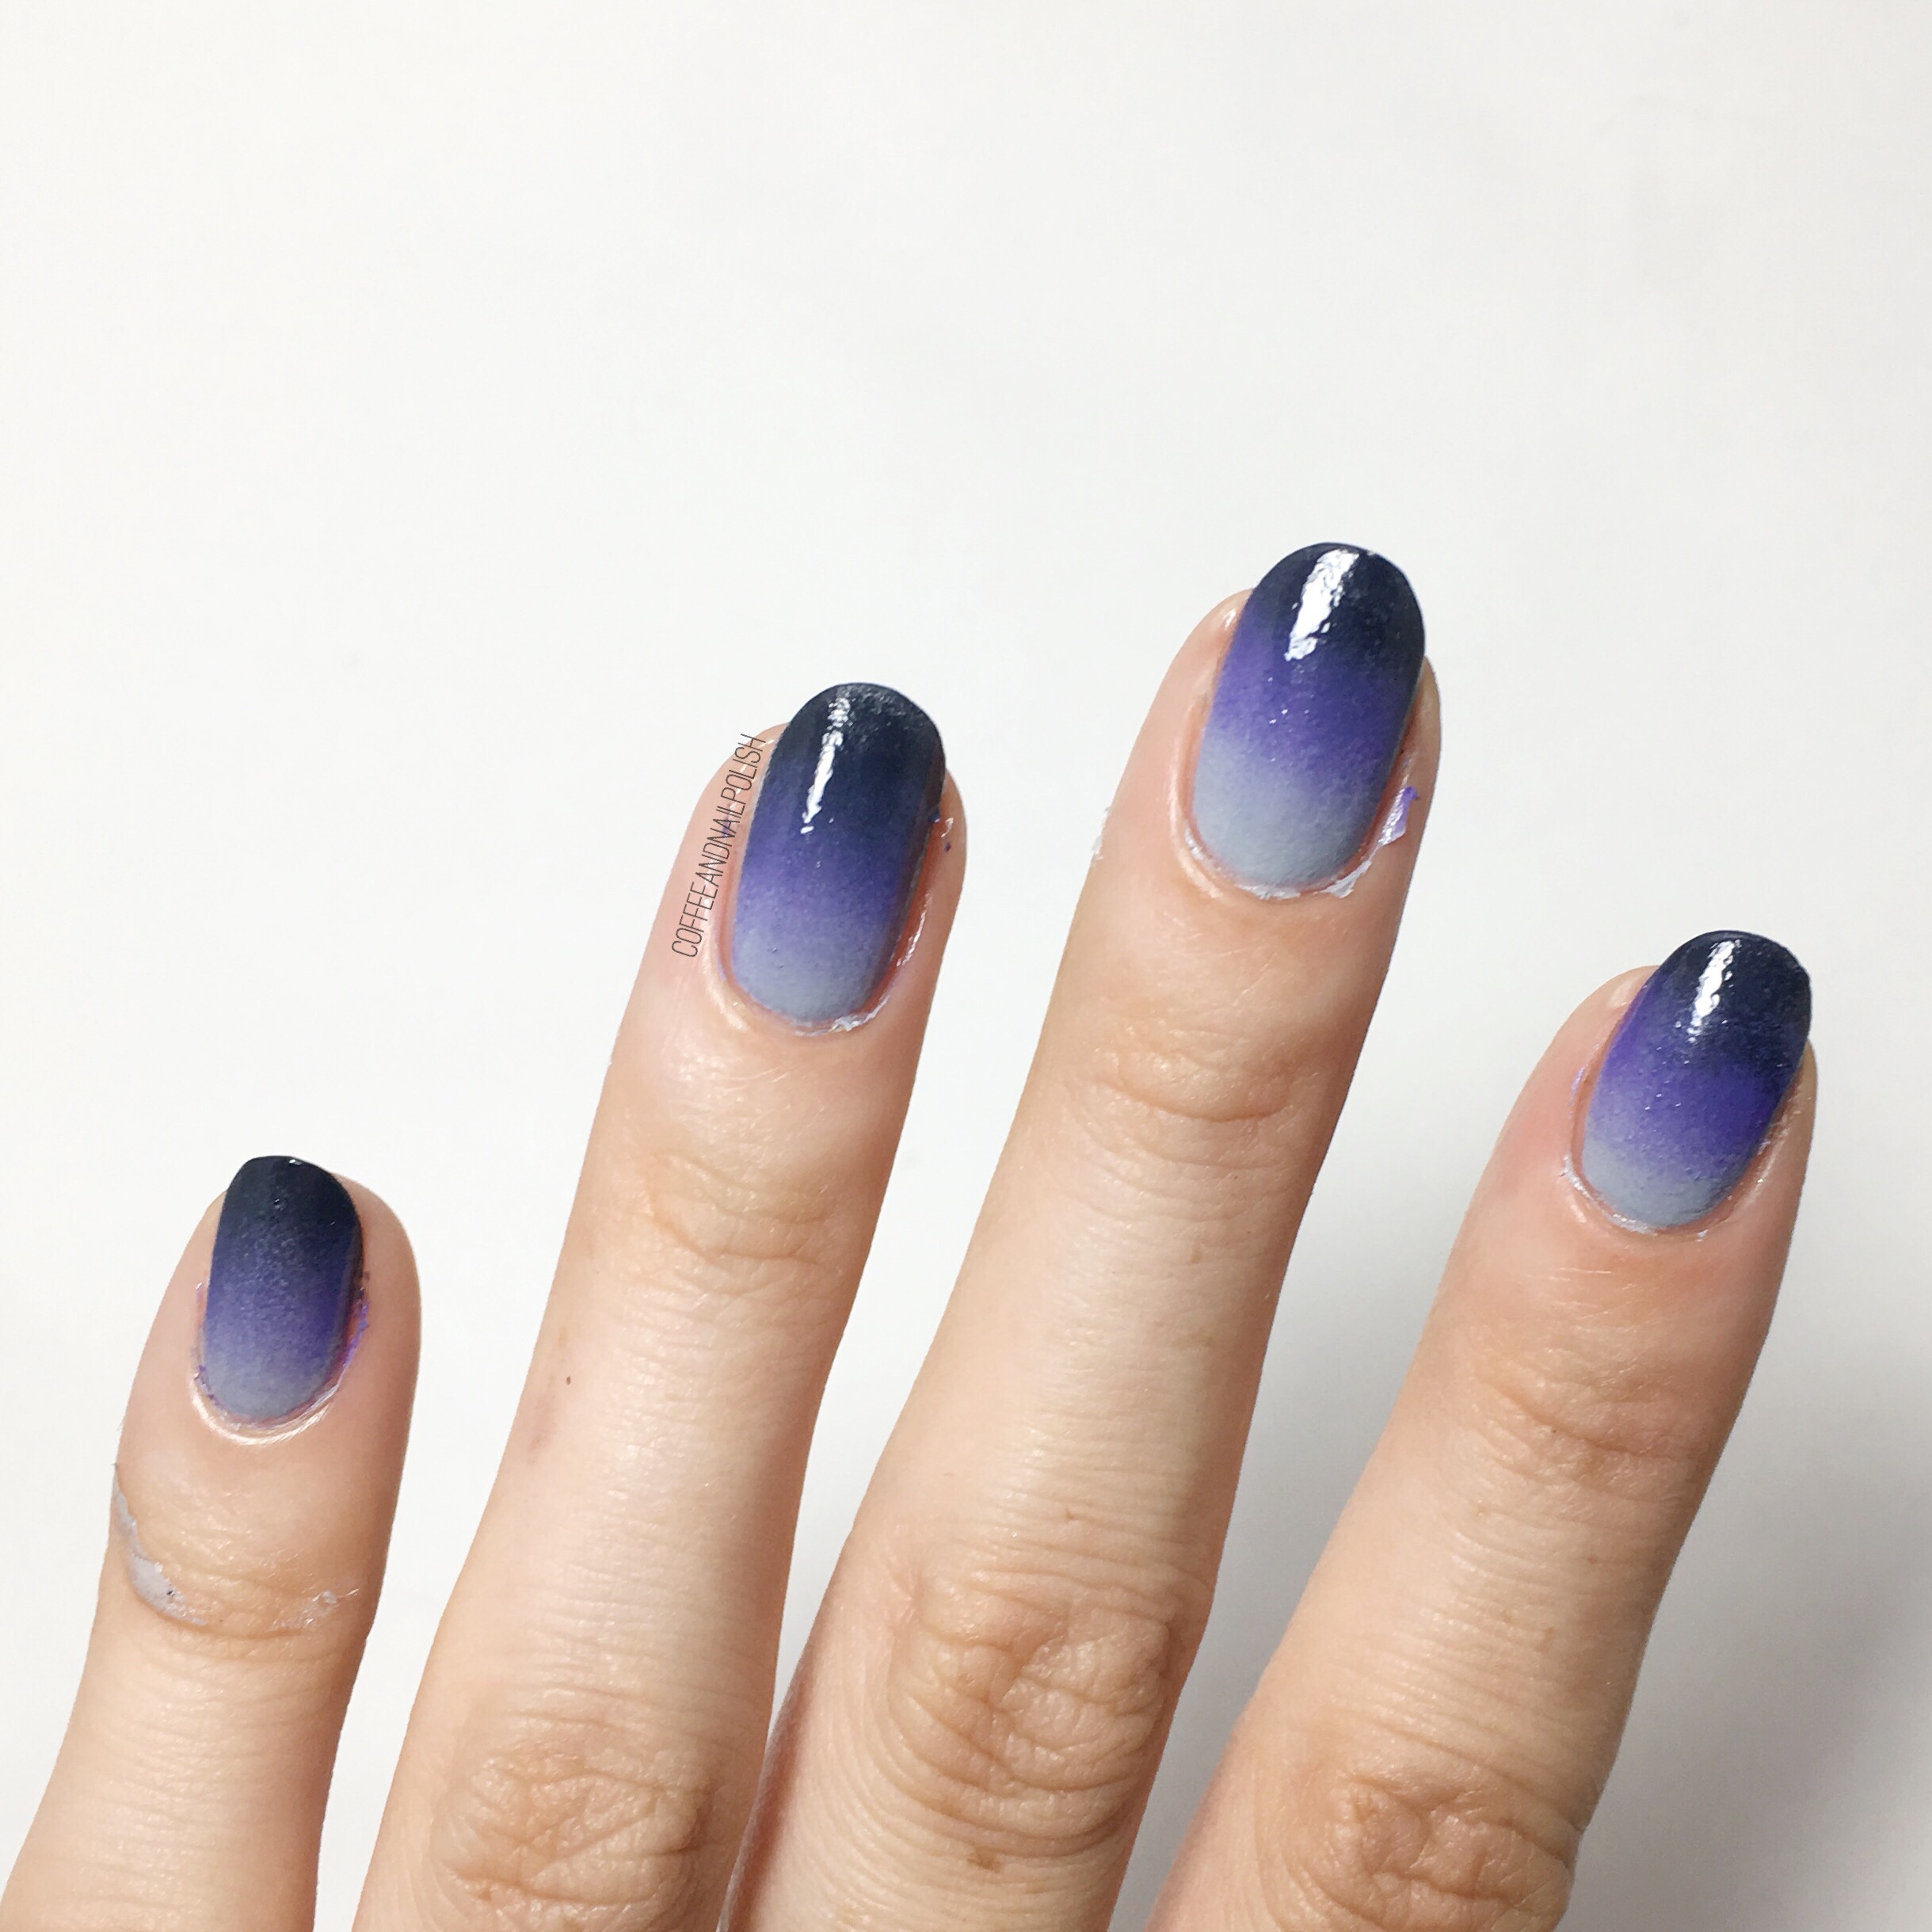
& after I cleaned up the little scraggly bits of polish left over & applied top coat. Pretty gradient nails!
As you can see, Edge Perfection seriously minimizes the mess usually associated with gradients & other messy nail art. There is nothing worse than trying to do a cool but messy nail art look & spending half an hour cleaning up around the nail. I really, really like the brush applicator with it because it’s so easy to apply & get in as close to the nail as you need to be. I also really love the fact that there is no overwhelming weird smell.

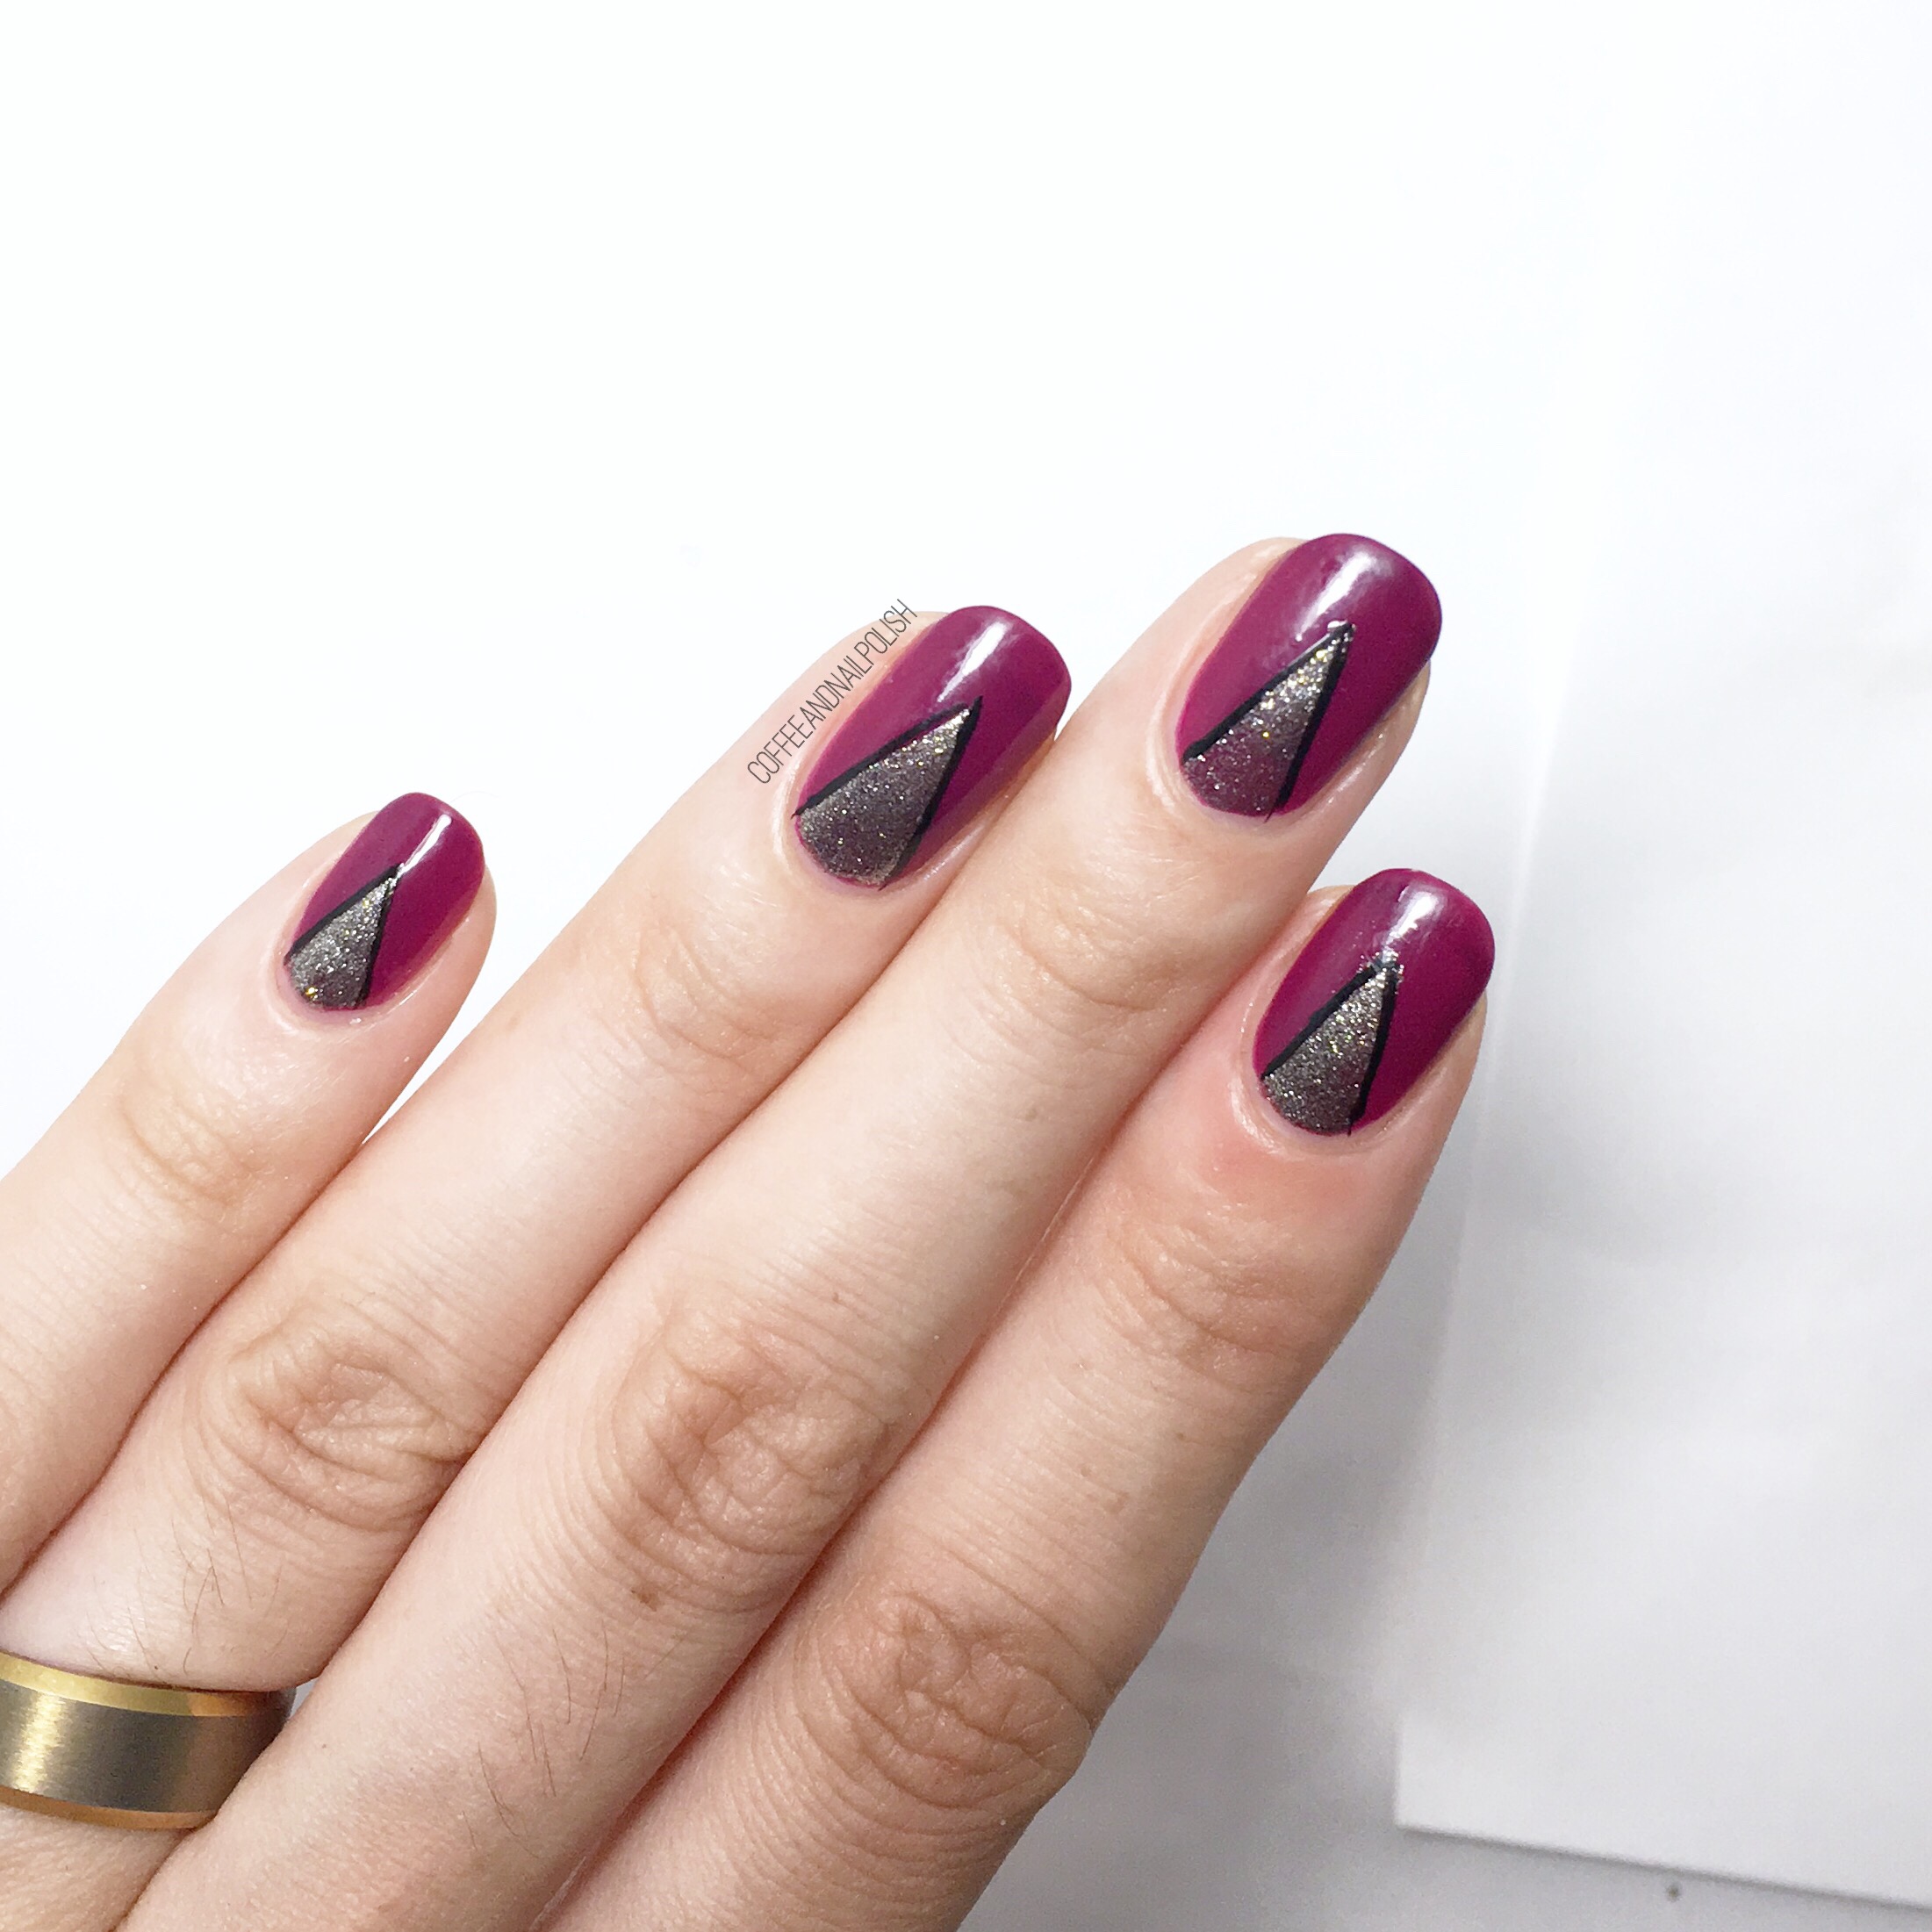
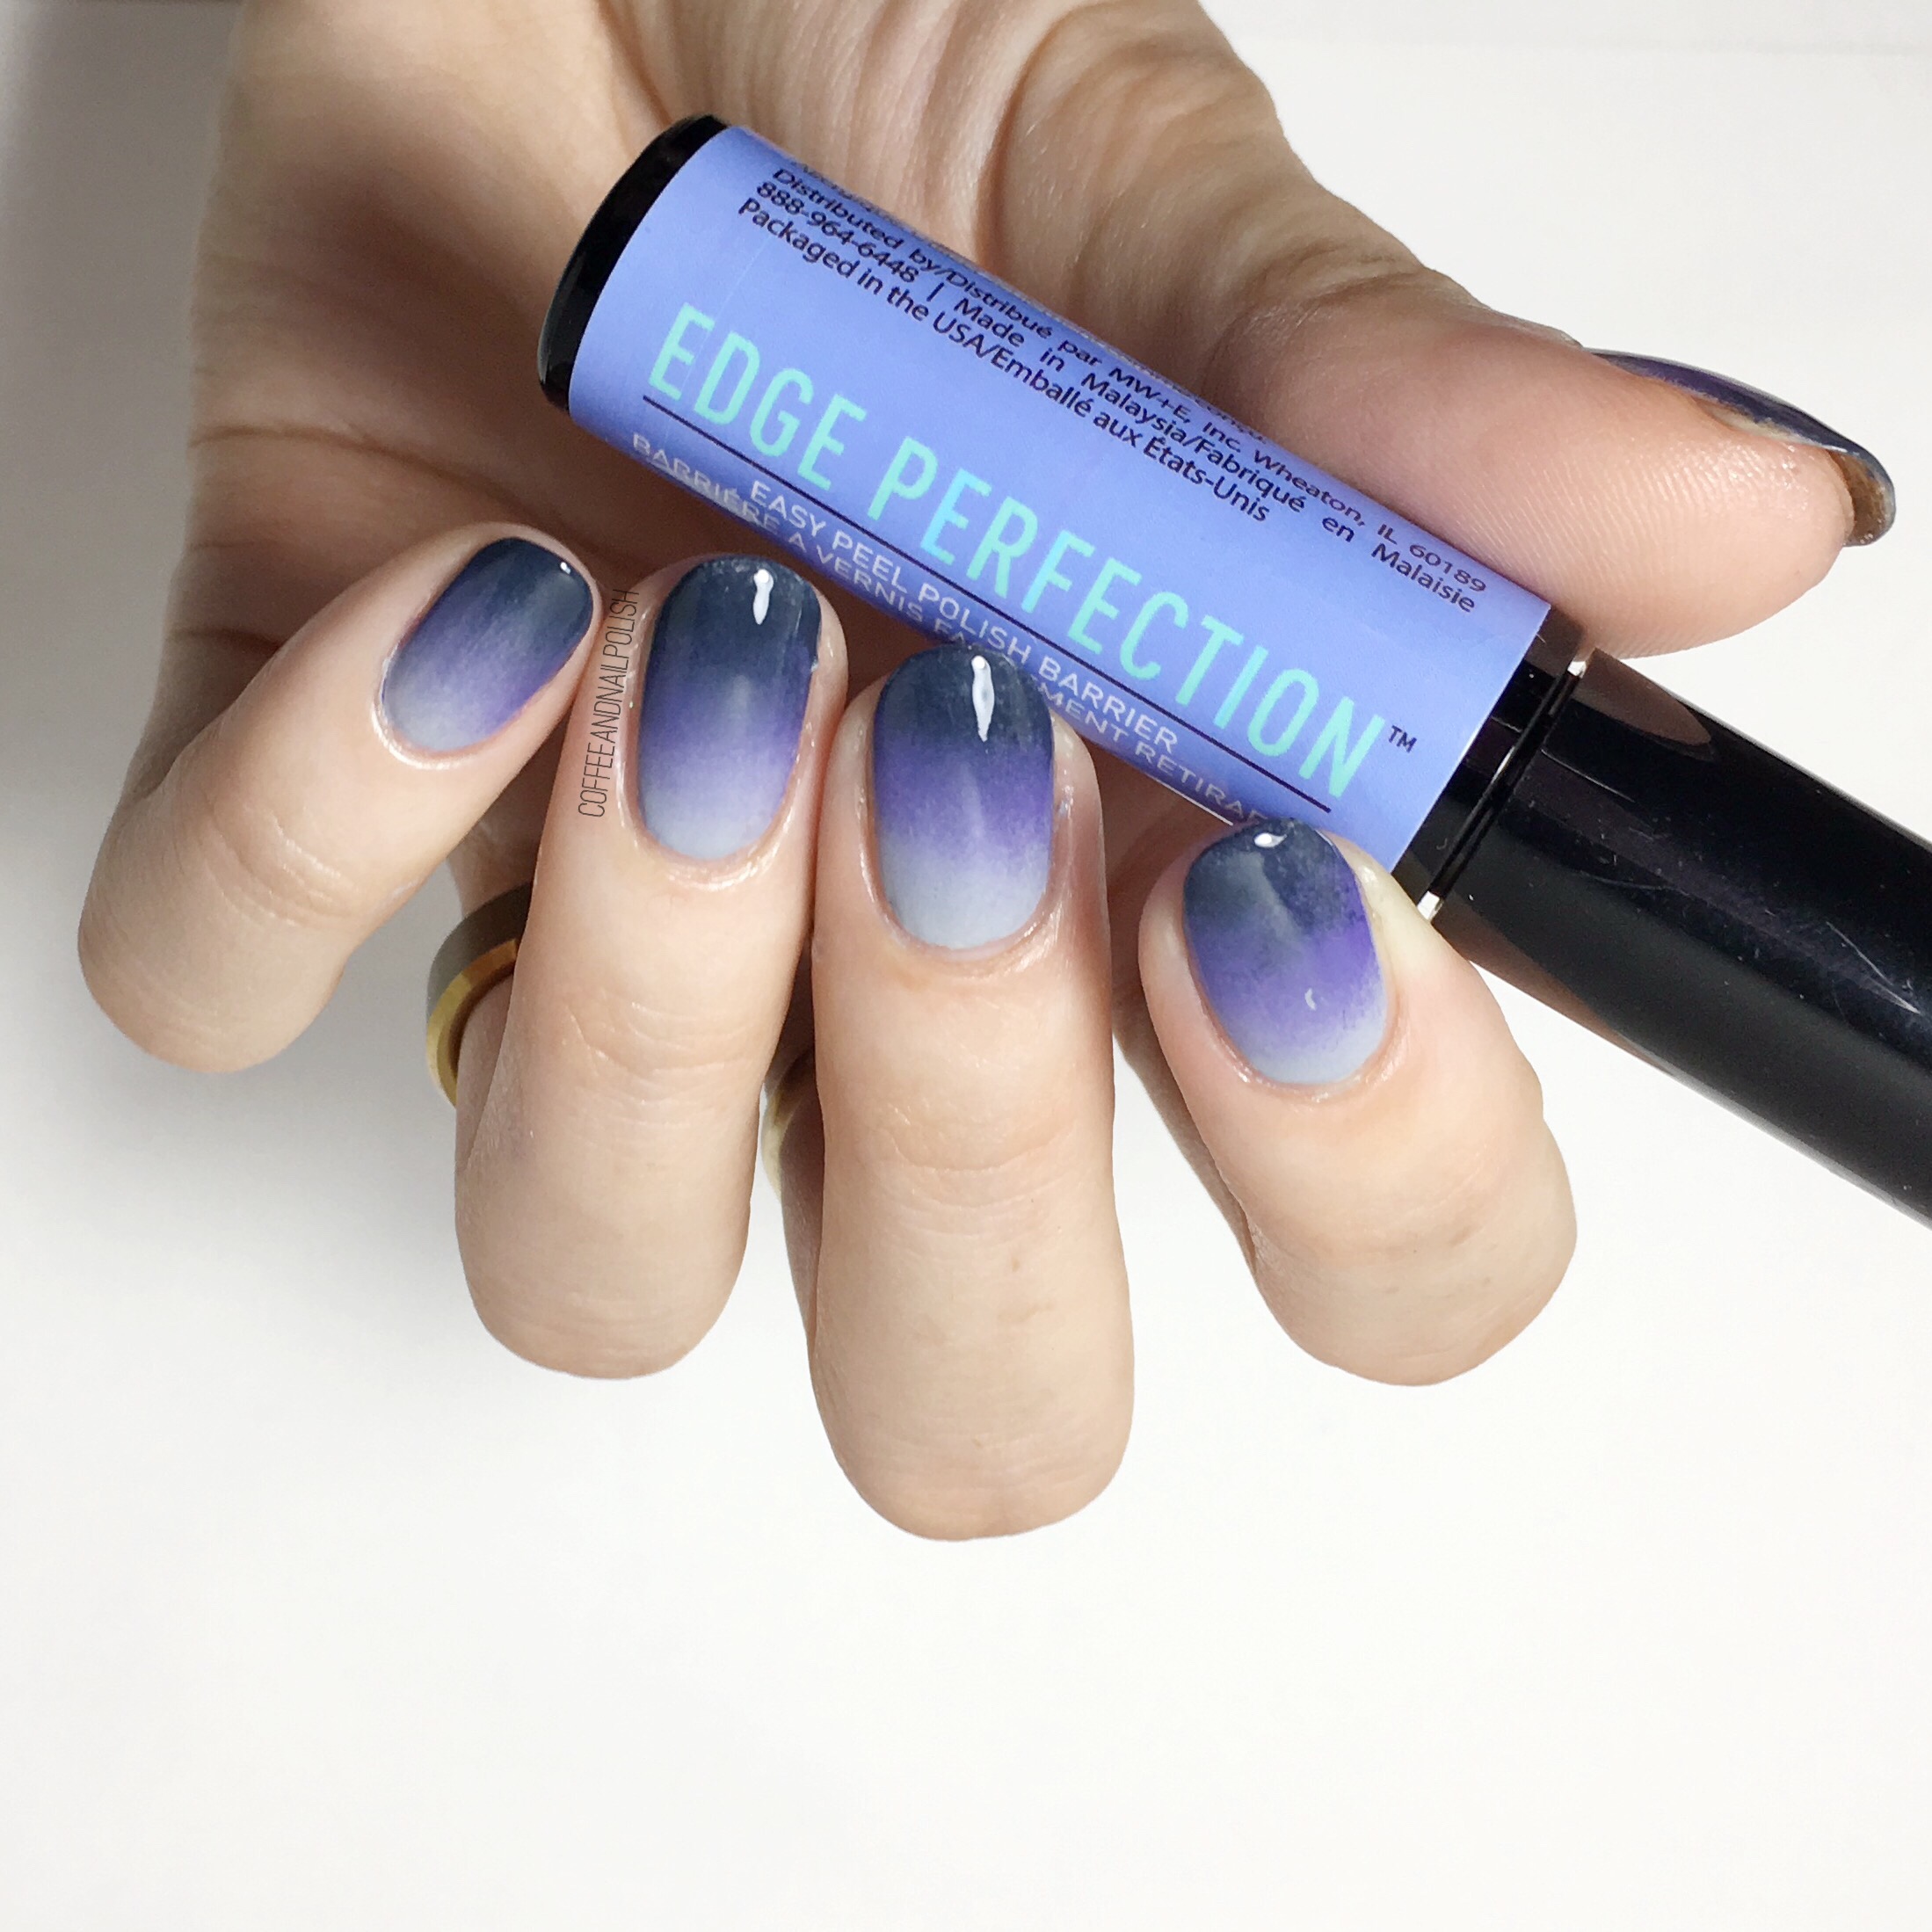
If you’re interested in purchasing Edge Perfection for yourself & giving it a try, you can purchase it directly from the Edge Perfection website as well as CVS & What’s Up Nails. Personally, I think it’s a great product & I was really impressed with results! I can’t wait to use it for more (messy) nail designs! Except to see a lot of gradients in my future.
*PR SAMPLE* Some of these items were sent to me for review. However, all opinions are my own