SWATCH SUNDAY — OPI I Eat Maine-ly Lobster

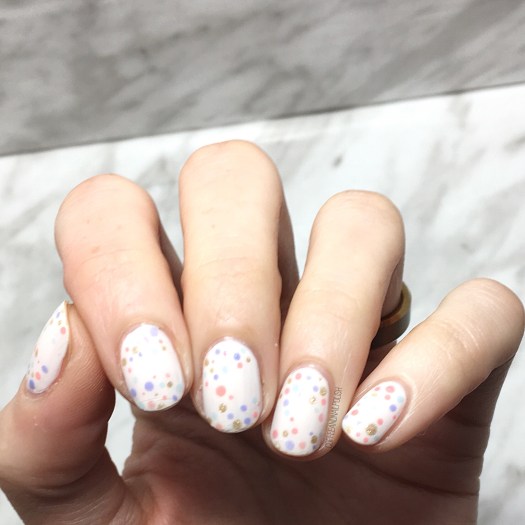
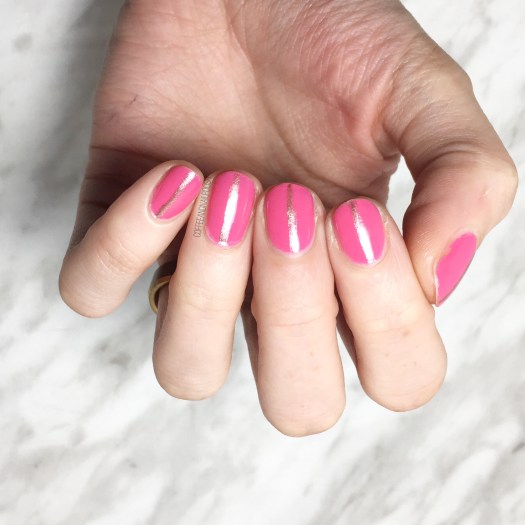
Happy Sunday my loves. & it really is a Sun-day today! We’ve had a run of beautiful Summer like weather so naturally that means I needed to pull out a Summer colour for today’s Swatch Sunday post. Today’s pick is OPI I Eat Maine-ly Lobster which is a vibrant pinky coral with just a hint of shimmer. This shade was originally released as part of the OPI Touring America collection circa 2011 but I scored my bottle on clearance at my locals Lawton’s.

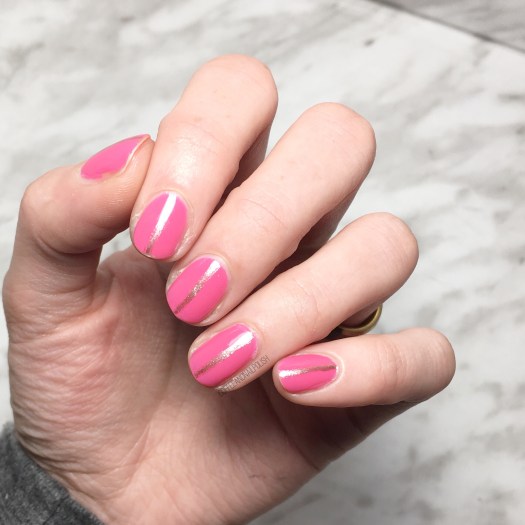
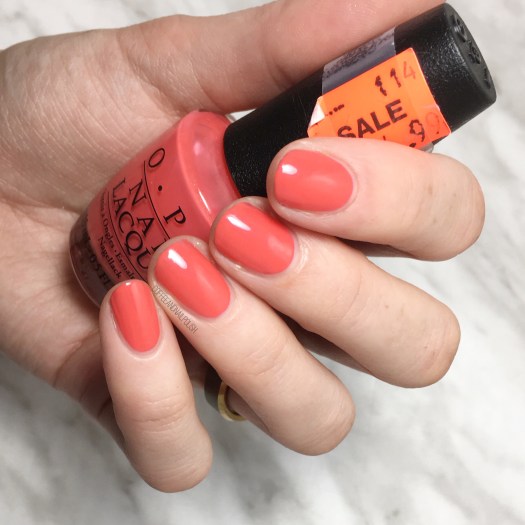
For my swatches, I did two coats + top coat (Essie Gel Setter). I probably could have done 3 coats for more coverage, but I feel like it’s not terribly noticeable unless you’re a nail polish addict. The colour itself is just perfection & even though it was originally a Fall collection release, to me it just screams Summer! I mean, who doesn’t like a stunning coral polish?

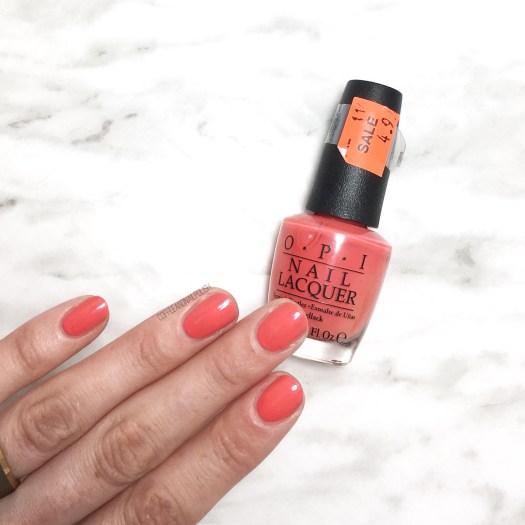
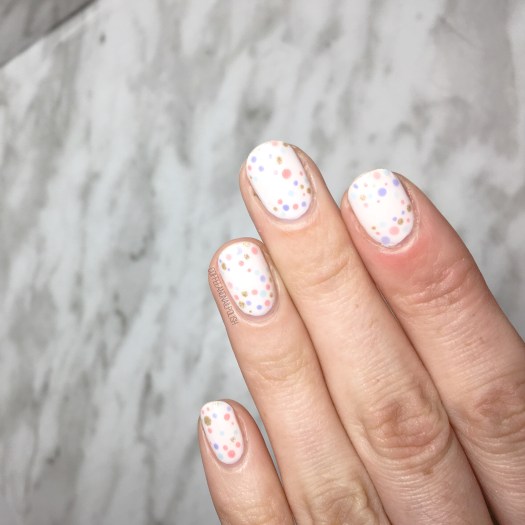
Seriously, how gorgeous is this polish? I had been coveting it for a long time & finding it for only $4.99 at Lawton’s was the best scored ever! I don’t know about you–but when I want to but polish, I want a deal. I don’t like to pay full price for nail polish (& to be honest, I rarely do). So a much desired OPI for less than $5? Yes please! The best kind of nail polish find.

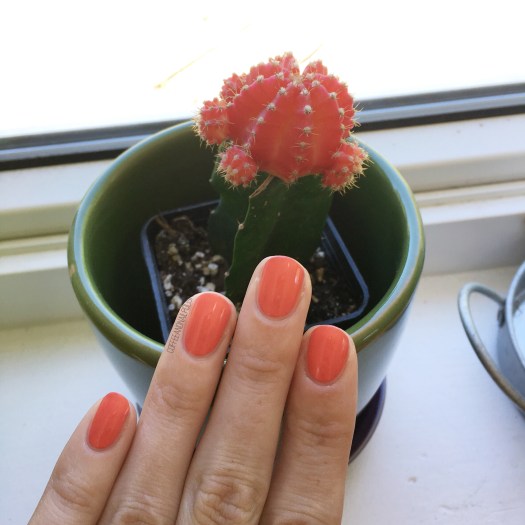
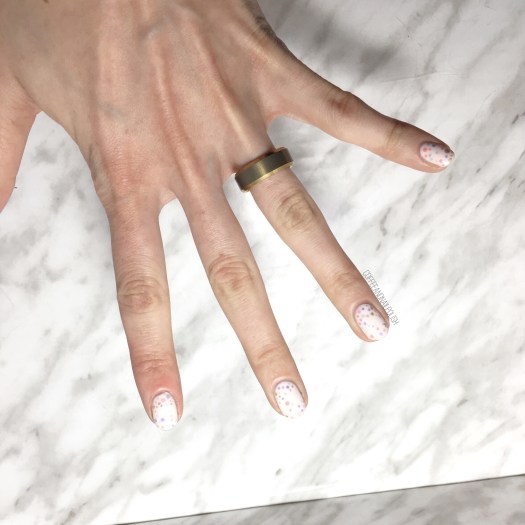
Look how closely it matches my moon cactus? Oh man, if this shade doesn’t scream Summer, I don’t know what does. I’m just obsessed with it! & as you can see from below, it’s the perfect compliment to my newest Summer dress find. It’s a gorgeous pop of colour.

What do you think of this week’s Swatch Sunday pick? Do you have a favourite coral polish? Let me know down in the comments below!

Get Canada Day 🇨🇦 Ready with Nail Polish Canada

Hello lovelies & Happy Thursday. This week is certainly speeding by… & so is this month!

Can you believe that it’s only 17 days until Canada Day? Which means that it’s time to start thinking about what I’m going to do on my nails for the occasion! Thankfully Nail Polish Canada has once again teamed up with some bloggers to share the Canadian love & help make it easier for you to create some Canada Day nails.

When trying to come up with some Canada Day nails, I had this idea of doing negative space nails with a red maple leaf outline. Instead of using the stencil, I decided to apply the maple leaf vinyl to my nail & paint over top to create the maple leaf outline & then go back over top with red. What it created was this cool negative space maple leaf design.

The polishes I used for this manicure were:

  • Base Coat: Sally Hansen Green Tea + Bamboo Strength
  • Top Coat: Essie Gel Setter
  • Sally Hansen Hard As Nails Hard To Get
  • Sally Hansen Complete Salon Manicure Killer Heels
  • Nail Polish Canada What’s Up Nails Canada Flag Nail Stencils
  • Bundle Monster Small Detail Brush

These stencils are so easy to use! I was nervous about using them this way, just because I didn’t want my polish bleeding underneath & making me have to start all over again. The end result was almost exactly what I had pictured in my head–a little bit different Canada Day design besides your typical flag design! This would definitely be a fun look to wear for whatever plans you had for your Canada Day celebrations… hopefully for me it will involve Barbecue & fireworks!

So for all my Canadian friends who want to come up with some cute Canada Day designs, you’re in luck! You can get your very own Canada Fay Maple Leaf stencils for free! I have a code from Nail Polish Canada which will score 10 of my readers free vinyls!

My coupon code: Q72RLBNQQM

If you go to Nail Polish Canada (click here) you can add that special code & get your Canada Day Vinyls for free!

& if you give this negative space look a try with your vinyls, tag me so I can see!

Have a happy Thursday lovelies! ♥️

Dainty Polka Dots

Happy Tuesday lovelies! Hope everyone’s week is off to a good start! I’ve had a busy, busy start to my week & a 13 hour day ahead of me, so I wanted to make sure I share some nails with everyone!

It feels like ages upon ages since I shared a pretty dotticure. I decided I wanted something super dainty, so I grabbed my smallest dotting tool & the Sally Hansen Miracle Gel Pastel Punk Collection to create my look.

For this manicure, the polishes I used were:

  • Base Coat: Sally Hansen Green Tea + Bamboo Strength
  • Top Coat: Sally Hansen Miracle Gel Top Coat
  • Sally Hansen Miracle Gel After Altar
  • Sally Hansen MG Just Maui’d
  • Sally Hansen MG Ocean Daze
  • Sally Hansen MG I Lava You
  • Sally Hansen MG Shell-ebration
  • Sally Hansen MG Golden Glow
  • Bundle Monster dotting tool

Seriously, how cute are these tiny little polka dots?! I really adore how these turned out. They almost look like a glitter cruelly, but with way easier removal! Also still very much obsessed with this collection from Sally Hansen Canada. I’ve been wearing it whenever possible–especially After Alter. You can never go wrong with a beautiful creamy almost white. 💅🏻

What do you think of these dainty polka dots? Is this a design you could see yourself wearing? Let me know down in the comments below!

SWATCH SUNDAY— Crafting a Layered Green Holo

Happy Swatch Sunday lovelies!

Today is a bit of a different post for me–instead of featuring single polishes on their own today, I’m showing off 3 polishes layered together to create one amazing look!

I’ve been really loving layering polishes together–it’s similar to creating franken shades only instead of mixing everything together, your layering one on top of another. Obviously this could only really work with layering more sheer shades over more opaque ones (which works well with a lot of the Layla Cosmetics hologram effect polishes I own.)

For this particular look I started with 2 base coats of Essie Turquoise & Caicos & then layered a coat of Layla Cosmetics Jade Groove over top. I’ve worn this Holo on its own but found it didn’t have enough of a green/mint pop to it on the nail. By adding some undies, it really showed off the colour I wanted. & then, because I’m absolutely Holo obsessed right now I finished off with a layer of Quo by ORLY Trash Glam (aka. ORLY Sparkling Garbage for my non-Canadian friends!) The end result is a whole lot of holo happening on the nail.

Seriously, this is a distracting amount of sparkle happening on the nail. In the sunshine, it was actually incredible how many rainbows you could see.

I love how you get the linear holo from Jade Groove but then the scattered holo from Trash Glam picks up the light too & it’s absolutely memorizing! I definitely need to find a linear holo top coat so I can transform every polish I own into a Holo Polish too! Let me know what your favourite ones are!

I hope everyone had an amazing Sunday. 💚✨

Gold Lines & Pretty Pink Nails

Happy Friday lovelies! I hope you’re all excited for the weekend as much as I am! Today I’m sharing a design I was actually wearing the last couple days. I’m in a bit of a nail art rut right now, so I decided to add something simple to my pretty pink nails.

I’ve also been wearing my Quo by Orly shade polishes as my nails have been in super rough shape (hence why my nails have been trimmed down… again). I decided some gold lines might make my nubs look slightly longer, so I freehanded them over top. A simple design, but enough of a pop for me!

For this design, the polishes I used were:

  • Base Coat: Quo by ORLY Breathable Kiss Me I’m Kind
  • Top Coat: Essie Speed Setter
  • Quo by ORLY Breathable Pep in Your Step
  • Quo by ORLY Breathable Fairy Godmother
  • Bundle Monster small detail brush

This gorgeous pink from Quo by ORLY has to be one of my favourites from the Breathable line. In fact, I added it to my toes at the same time! I’ve raved in the past just how much I adore this polish line because it’s designed to help the health of your nails. & trust me–I need it! Between boxes of stock & hand sanitizer, I’ve been finding I’m having so much trouble keeping my nails healthy. I’m upping my moisturizer & oil routine, but even still I need a little extra help & this polish is a god send!

Plus thanks to all the cute colours in my stash, I can create lots of cute nail art looks too!

what are you wearing on your nails for the weekend? Let me know in the comments below!