SWATCH SUNDAY — Icing Stores Santa Baby

6BD25297-2380-4DB6-AD99-BEAE3A6CBE0A

Hello lovelies & happy Sunday! & happy December 1st as well! The countdown to Christmas is officially on, so naturally it’s time to get SERIOUS about all things holly & jolly. This month, I’m going to be dedicating all my Swatch Sunday posts to polishes of Christmas past, which are my favourite to pull out during the holidays.

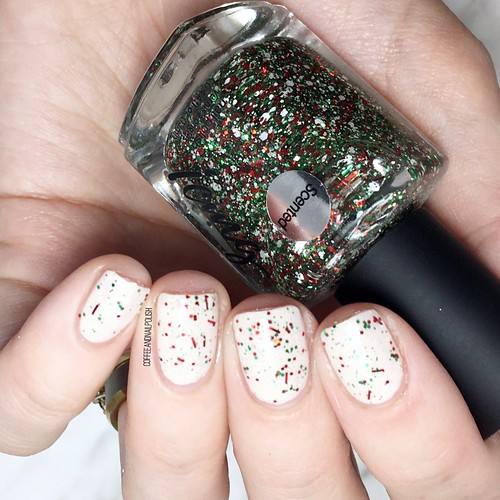
First up, I chose a shade that’s a few years old but is probably one of the most Christmas-y shades I own: Icing Stores Santa Baby. For those who don’t know what Icing is, it’s a accessories store owned by Claire’s–basically Claire’s big sister store–& during holidays like Halloween, Christmas, or Easter, they always come out with themed collections. This bottle of polish was originally released as part of their 2015 Christmas collection, & I’ve been pulling it out ever since!

6815C8CB-A788-4D79-8E21-8CEFF34CB073

881839F5-F4E7-4736-82DA-7B5898DB82B7

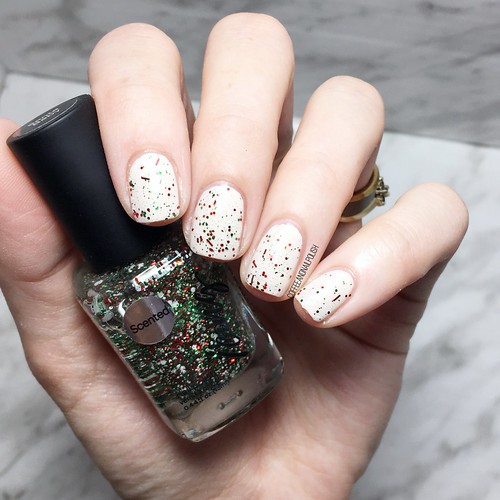
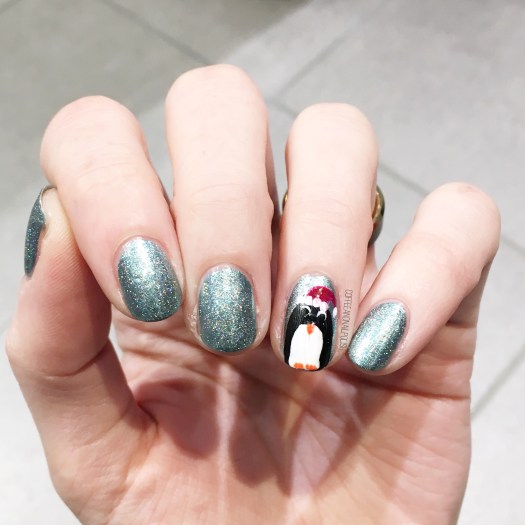
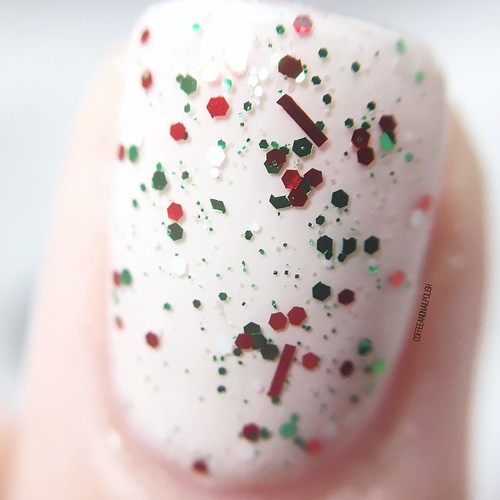
Santa Baby is a glitter topper — the base is clear, & it is packed full of an assortment of glitters in red, green & white, all ranging from tiny micro glitters to medium sized bar glitters. But the coolest part about this polish is that it is scented like peppermint/candy canes once dried, & it comes through even with a nice coat of glossy top coat to seal it in. Seriously… the barista at my local coffee shop commented on how cool this polish looked on my nails, & I literally was like “you have to smell them! It smells like candy canes!” I’m a little weird sometimes.

73C99CE1-ADB5-4818-8C61-A8AAA6BE2F85

C9B5D02C-F233-4A59-88D0-4DC40DD1B94F

0601315E-5907-4F4F-A168-05636FF45053

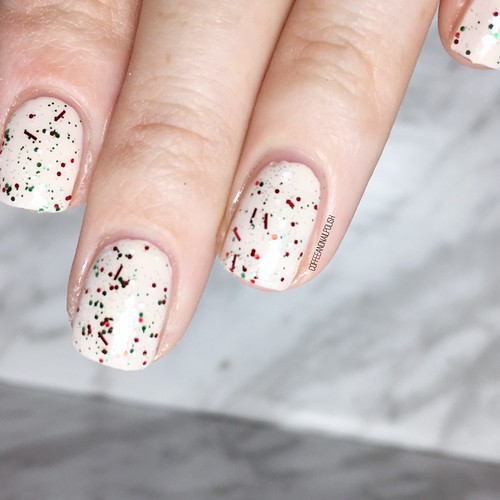
For my swatches, I applied one coat of Santa Baby over Essie Wrap It Up, & sealed everything in with Essie Gel Setter to level my nails out. This is one of my favourite ways to wear this polish & the best option for showing it off in all its glory. Second to that, this shade makes for the most perfect glitter gradient which I’ve shown off in years past. I’d love to try to sponge it on someday, & maybe I will as like an accent nail with some peel off base coat if I’m looking for a one night kind of manicure. I’d be really curious to see what it looks like all sponged on.

0A036C16-4986-4202-8882-95FBA15AFBCF

ED973995-B66C-4719-AF5B-415647057D97

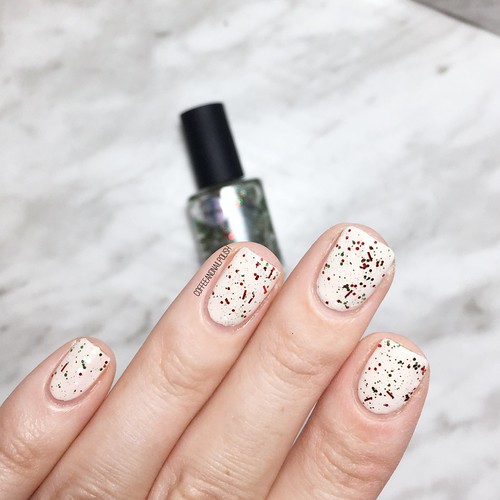
As you can see, it’s like Christmas-y confetti on the nails. How amazing is that? I just adore the different range of glitter styles packed into one bottle. It always makes me feel festive whenever I put it on, even if I’m feeling more Grinch-y than Elf-y! Instantly it is like my holly & jolly levels will begin to rise, no rum spiked egg nog needed at all.

810A48BB-6BB1-4D46-9AC8-42A27932C435

353D9382-2C98-4BD8-95BC-63FD86943466

Sadly this polish is 4+ years old, so it’s no longer in production. I even checked online to see if there was a similar product available, but there doesn’t seem to be any Christmas nail polishes at all this year by them. So this is definitely one of those lock it in the vault kind of shades if you happen to have it as part of your collection, because it really is special.

Do you have any special to your Christmas polishes you pull out every year? Let me know what yours are, & stay tuned because I have more Christmas themed nail polishes to share with you this month!

SWATCH SUNDAY — Sally Hansen Miracle Gel Holiday 2019 {Oh My Gold}

5389D1C1-7179-4690-8E26-854150A632A5

{PR sample}

Hello lovelies! Not only is it one of my favourite days of the week — Swatch Sunday — but even more exciting… the Holiday nail polish collections have started popping up! & Sally Hansen Canada, bring the sweethearts that they are, sent me their brand new Holiday 2019 Oh My Gold! Collection.

The Oh My Gold! Collection is a limited edition collection consisting of 3 gold polishes — one metallic gold with chunky Holo glitter (Goldie Rocks), one dense gold glitter (Good as Gold) in a clear base & finally a sheer gold base with a scattered holo glitter (Five Golden Blings).

60621799-97C5-40CA-A6A9-2C493E8C0778

& now onto the swatches!

Continue reading “SWATCH SUNDAY — Sally Hansen Miracle Gel Holiday 2019 {Oh My Gold}”

Mini Egg inspired Easter Nails (yep… again!)

Good morning lovelies, & happy Friday. Today I’m prepping for Easter festivities with a brand new Easter design… & showing off this Mini Egg inspired look. This is definitely not the first time I’ve created this design, & I seem to return to it every couple of years because it’s a fairly easy “design” to create but it gets the point across!

Also who doesn’t love chocolate?

This look is super simple to do–all you need are your egg colours, the spots (I used a brown polish & Saran Wrap–I’ve seen others create this look using a black & white glitter topper which was awesome) & some matte top coat.

Easy Peasy. & awesome nails to rock for your Easter festivities which won’t cut into any family (or chocolate) time.

For this design, the polishes I used were:

  • Base Coat: OPI Nail Envy
  • Top Coat: Seche Vive
  • Matte Top Coat: Sally Hansen Miracle Gel Matte Top Coat -{PR sample}
  • China Glaze Sun Upon My Skin
  • Claire’s Matte Sorbet Blue
  • Claire’s Matte Sorbet Pink
  • Claire’s Matte Sorbet Mint
  • Claire’s Matte Sorbet Purple
  • OPI How Great is Your Dane?

Is the trick for me to get the spots right in the eggs is a light touch & minimal polish on the Saran Wrap. I crinkle it up extra & then don’t apply too much polish to the plastic so when I dab it down, you don’t apply too much polish to the area. You want just a few dots as opposed to a big splat.

Every time I do & redo this look, I think I love it even more. It’s just such an easy way to do festive nails, & the only downside is you have to fight the urge to eat your nails!

So what are you planning on wearing on your nails this weeekend? Share down below!

Christmas Penguin accent nails!

Good morning lovelies! I’m back again, & I have another Christmas-y design to share… after all it’s only 3 more days until Christmas. (When did that happen?) Today’s look is a surprisingly easy look that I’ve done & redone over the years & always come back to.

I actually did this nails last weekend, but anyone else who works in retail this time of year probably understands the craziness which is my life right now… barely any time to breathe, let alone write a blog post… just counting down the days to my two days off over Christmas. It’s going to be GLORIOUS!

For this look, the polishes I used were:

  • Base Coat: Essie Grow Stronger
  • Top Coat: Essie Gel Couture Top Coat
  • Sally Hansen Miracle Gel Sprinkled With Love
  • Sally Hansen Miracle Gel Make It N-ice
  • Sally Hansen Hard As Nails Black Heart
  • Sally Hansen Hard As Nails Let’s Snow
  • Sally Hansen Miracle Gel Good Cheer-y
  • Sally Hansen Complete Salon Manicure Fiery Island
  • Small dotting tool
  • Small nail art brush (obsessed with my collection from www.nailstuff.ca

First I started off by laying Make It N-ice over Sprinkled with Love for a little extra sparkle…. because tis the season. & then I freehanded my little penguin over top on both my ring fingers to make my look more festive. I first saw this look on Pshiiit Nails (via Pinterest) & just loved how it looked so I needed to recreate. & obviously I had to add a little a festive Christmas-ness with some Santa hats!

My only complaint is that my top coat smeared my penguins a little. I’ve been testing out the Essie Gel Couture Top Coat & while the lasting power is amazing, it’s not my favourite top coat for putting over nail art because it does seem to smear designs. Guess I’m still on the hunt for the perfect one!

what do you think of this penguin design? Have you figured out what you’re wearing for Christmas? Let me know down below!

Get Canada Day 🇨🇦 Ready with Nail Polish Canada

Hello lovelies & Happy Thursday. This week is certainly speeding by… & so is this month!

Can you believe that it’s only 17 days until Canada Day? Which means that it’s time to start thinking about what I’m going to do on my nails for the occasion! Thankfully Nail Polish Canada has once again teamed up with some bloggers to share the Canadian love & help make it easier for you to create some Canada Day nails.

When trying to come up with some Canada Day nails, I had this idea of doing negative space nails with a red maple leaf outline. Instead of using the stencil, I decided to apply the maple leaf vinyl to my nail & paint over top to create the maple leaf outline & then go back over top with red. What it created was this cool negative space maple leaf design.

The polishes I used for this manicure were:

  • Base Coat: Sally Hansen Green Tea + Bamboo Strength
  • Top Coat: Essie Gel Setter
  • Sally Hansen Hard As Nails Hard To Get
  • Sally Hansen Complete Salon Manicure Killer Heels
  • Nail Polish Canada What’s Up Nails Canada Flag Nail Stencils
  • Bundle Monster Small Detail Brush

These stencils are so easy to use! I was nervous about using them this way, just because I didn’t want my polish bleeding underneath & making me have to start all over again. The end result was almost exactly what I had pictured in my head–a little bit different Canada Day design besides your typical flag design! This would definitely be a fun look to wear for whatever plans you had for your Canada Day celebrations… hopefully for me it will involve Barbecue & fireworks!

So for all my Canadian friends who want to come up with some cute Canada Day designs, you’re in luck! You can get your very own Canada Fay Maple Leaf stencils for free! I have a code from Nail Polish Canada which will score 10 of my readers free vinyls!

My coupon code: Q72RLBNQQM

If you go to Nail Polish Canada (click here) you can add that special code & get your Canada Day Vinyls for free!

& if you give this negative space look a try with your vinyls, tag me so I can see!

Have a happy Thursday lovelies! ♥️