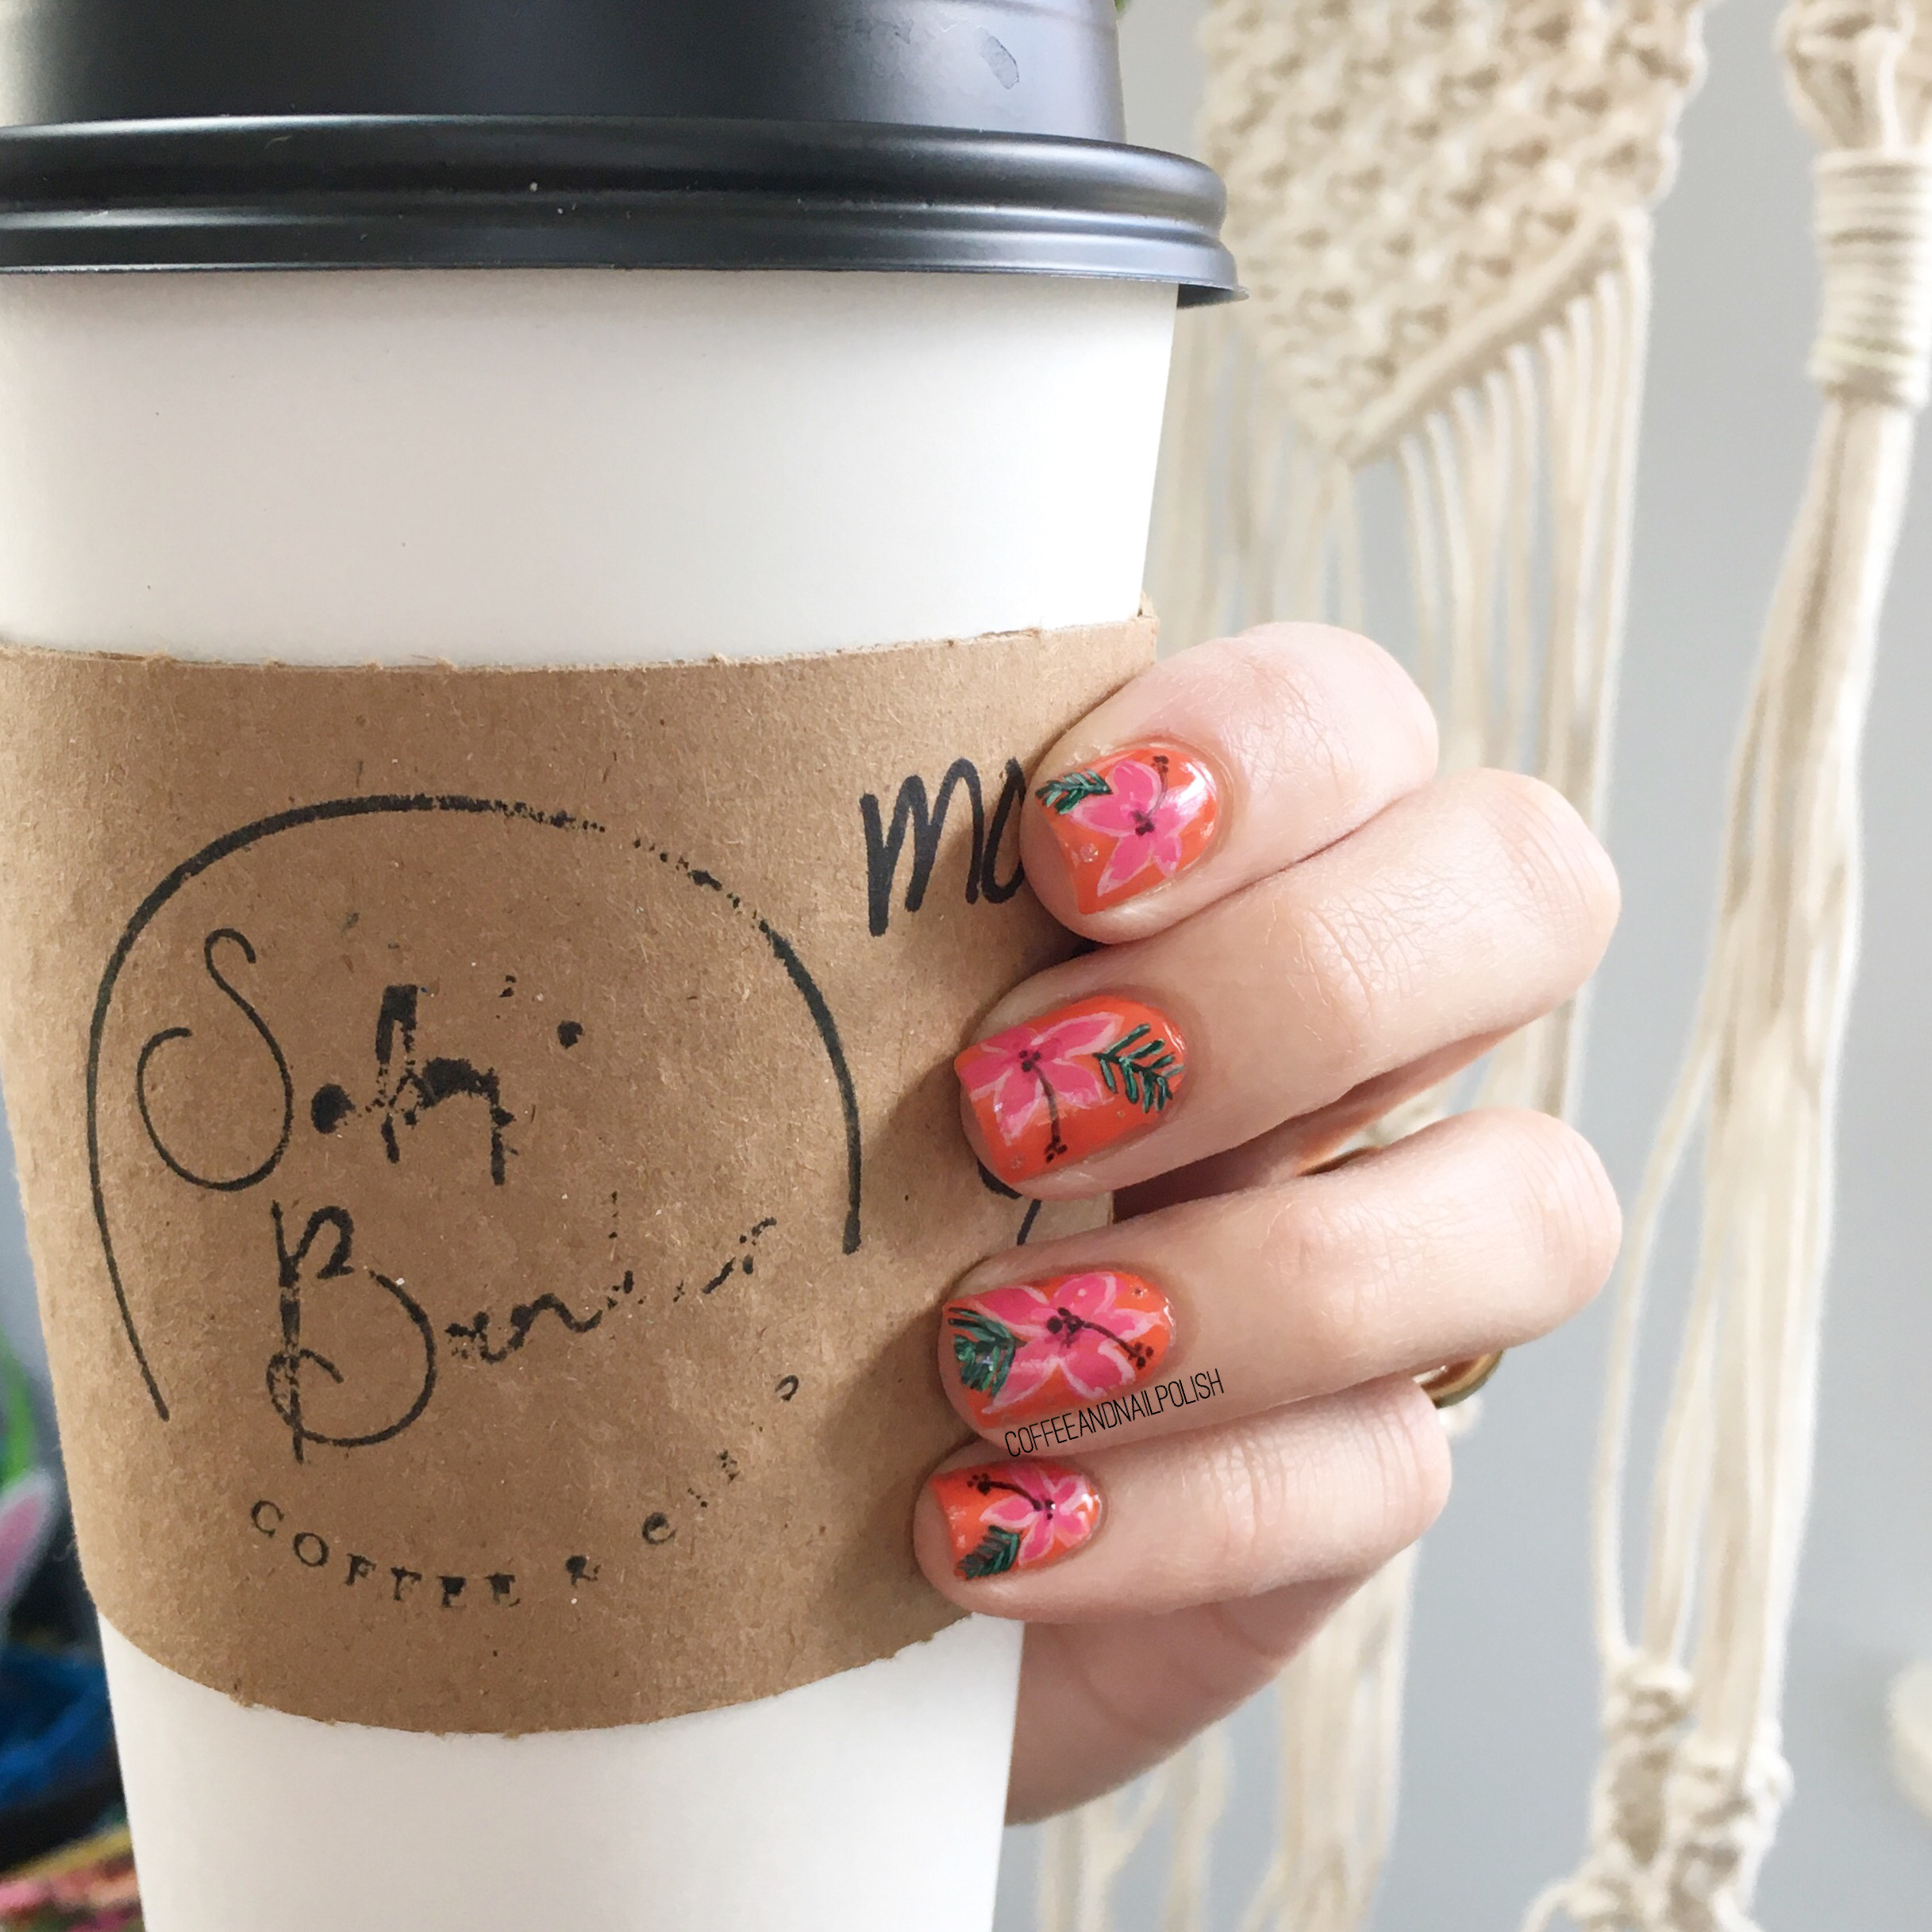
Hello lovelies & happy Tuesday.
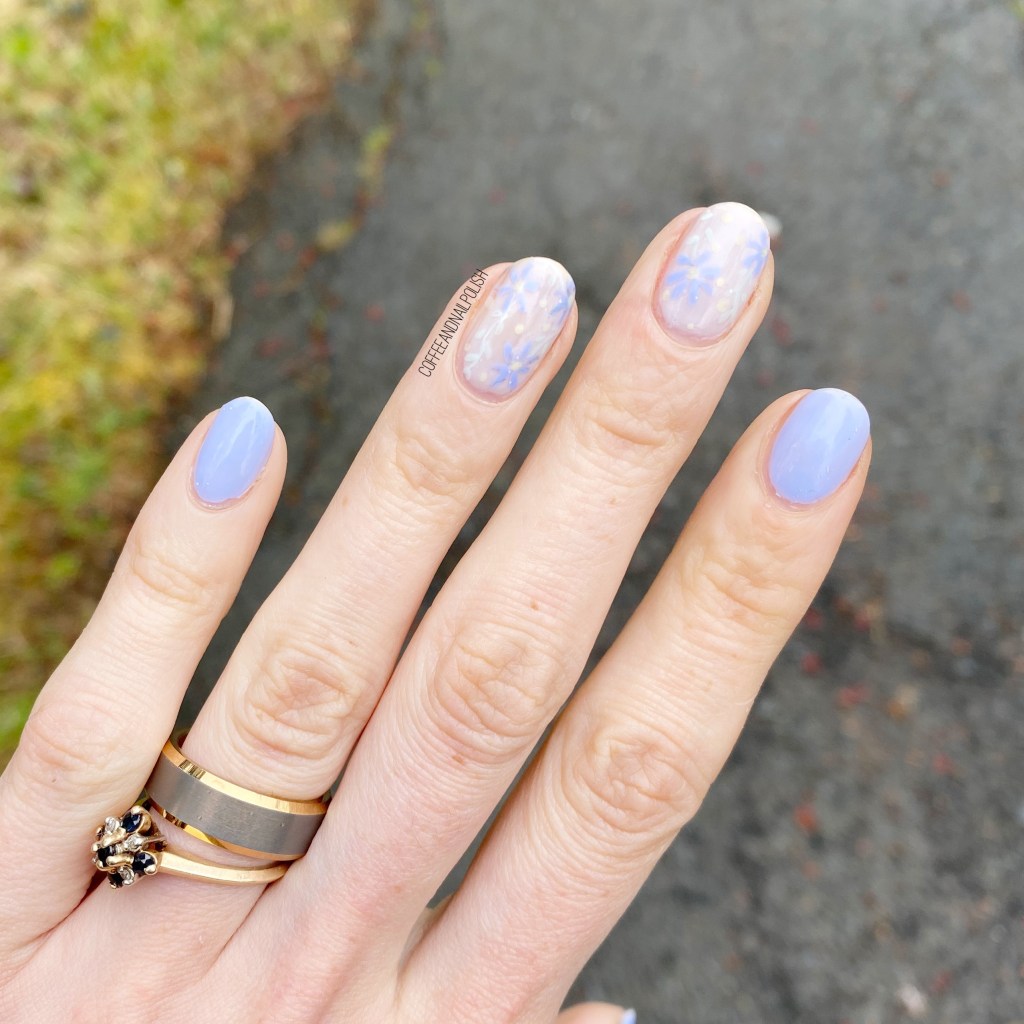
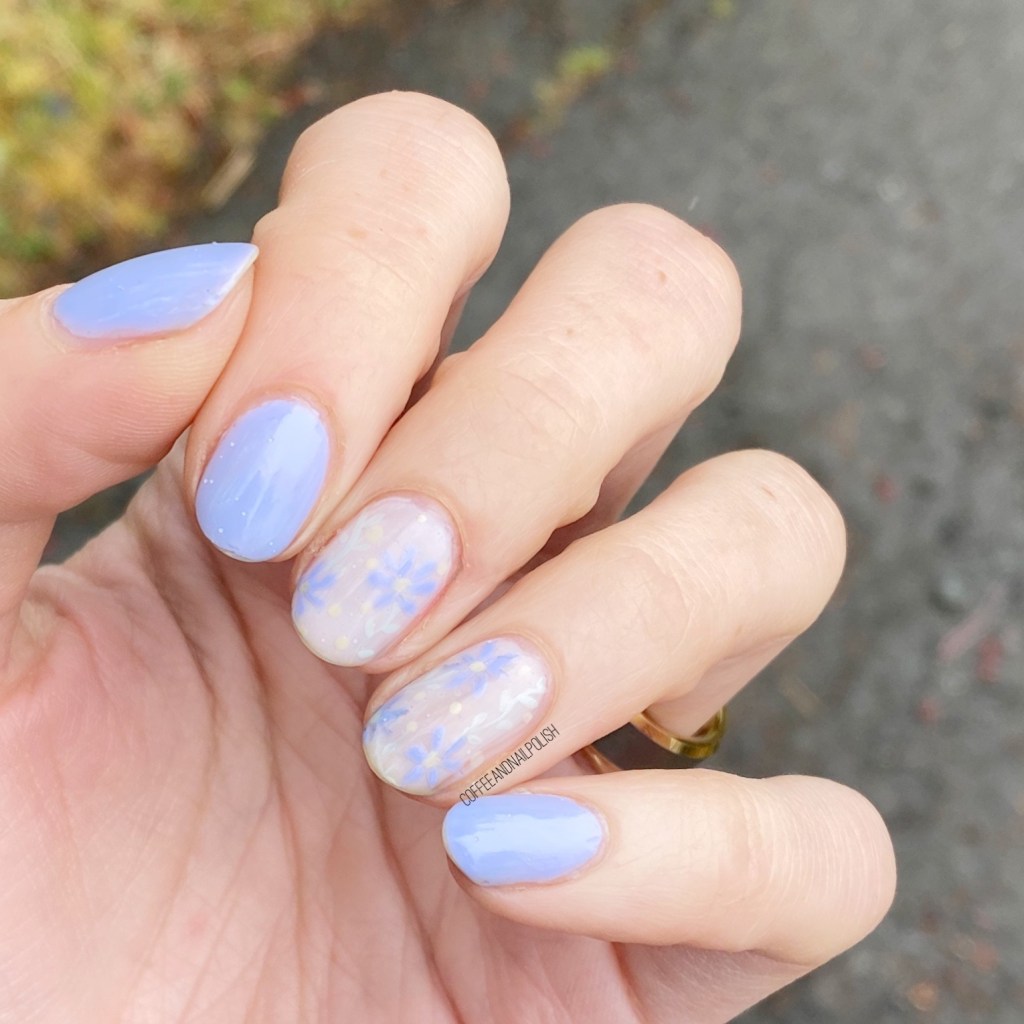
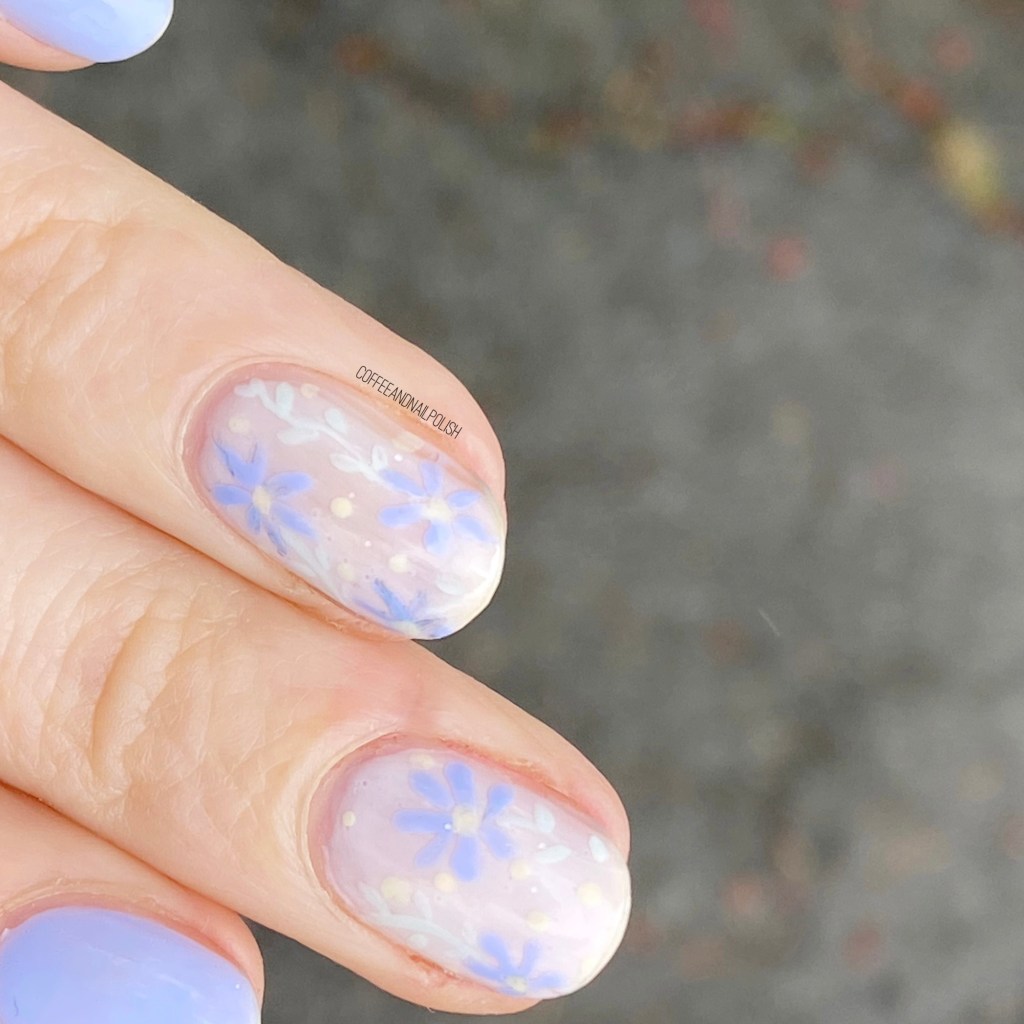
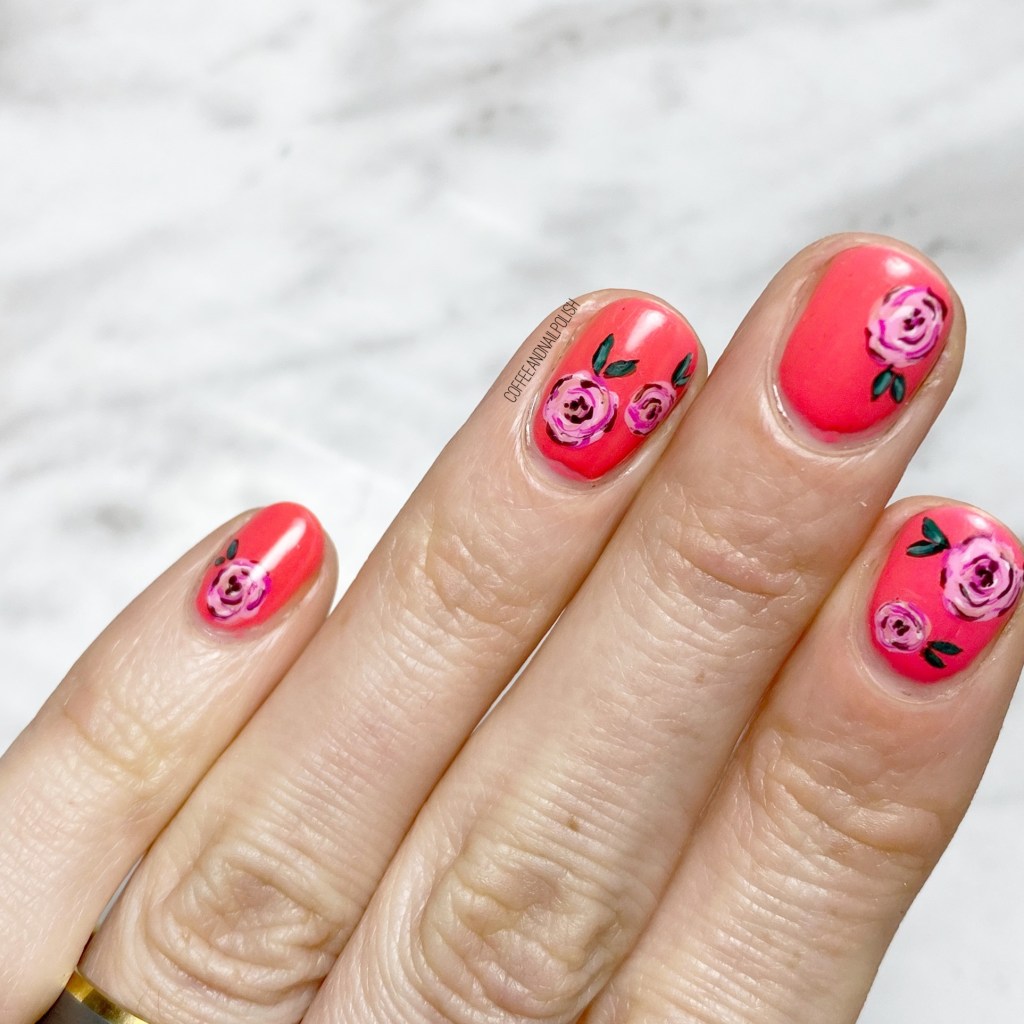
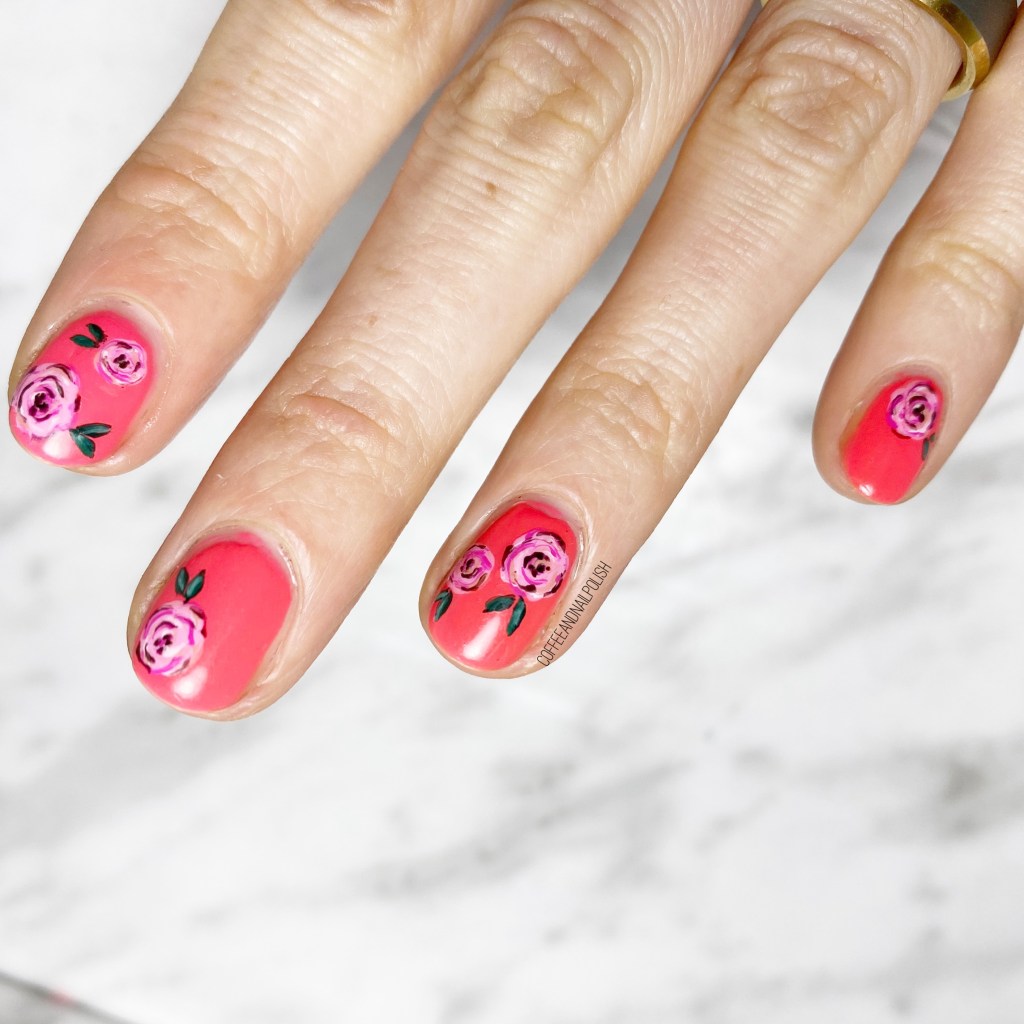
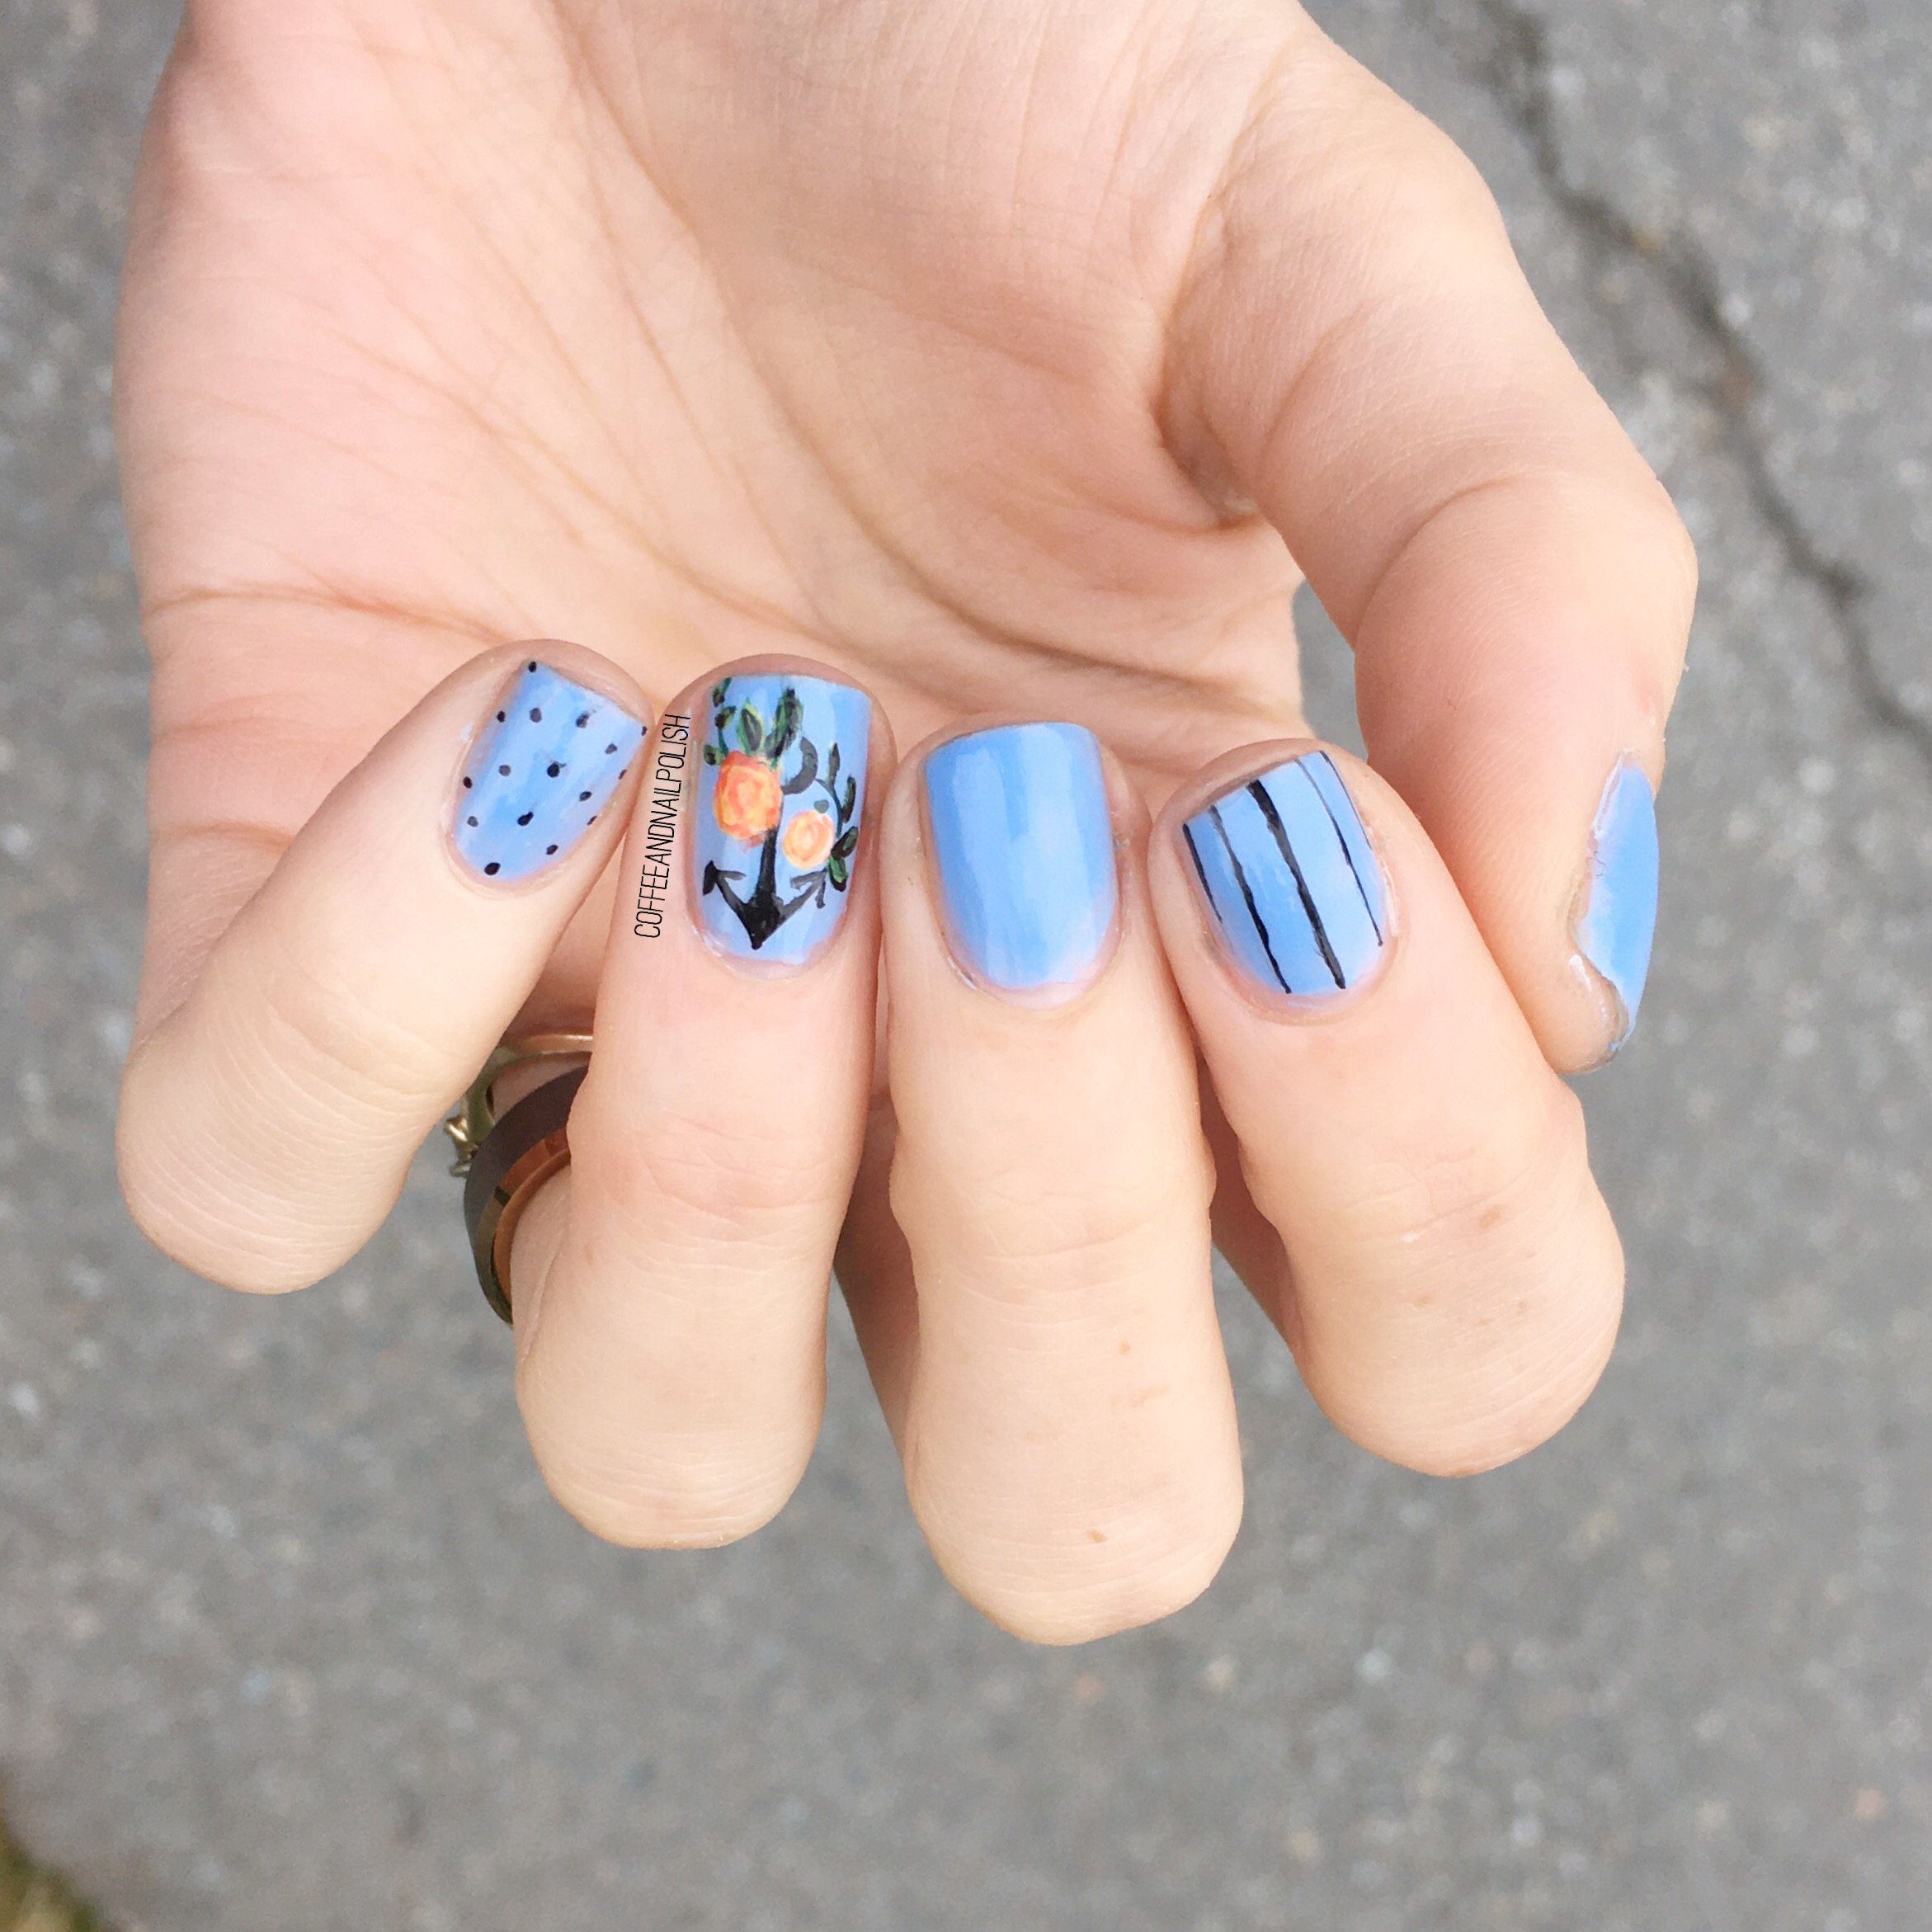
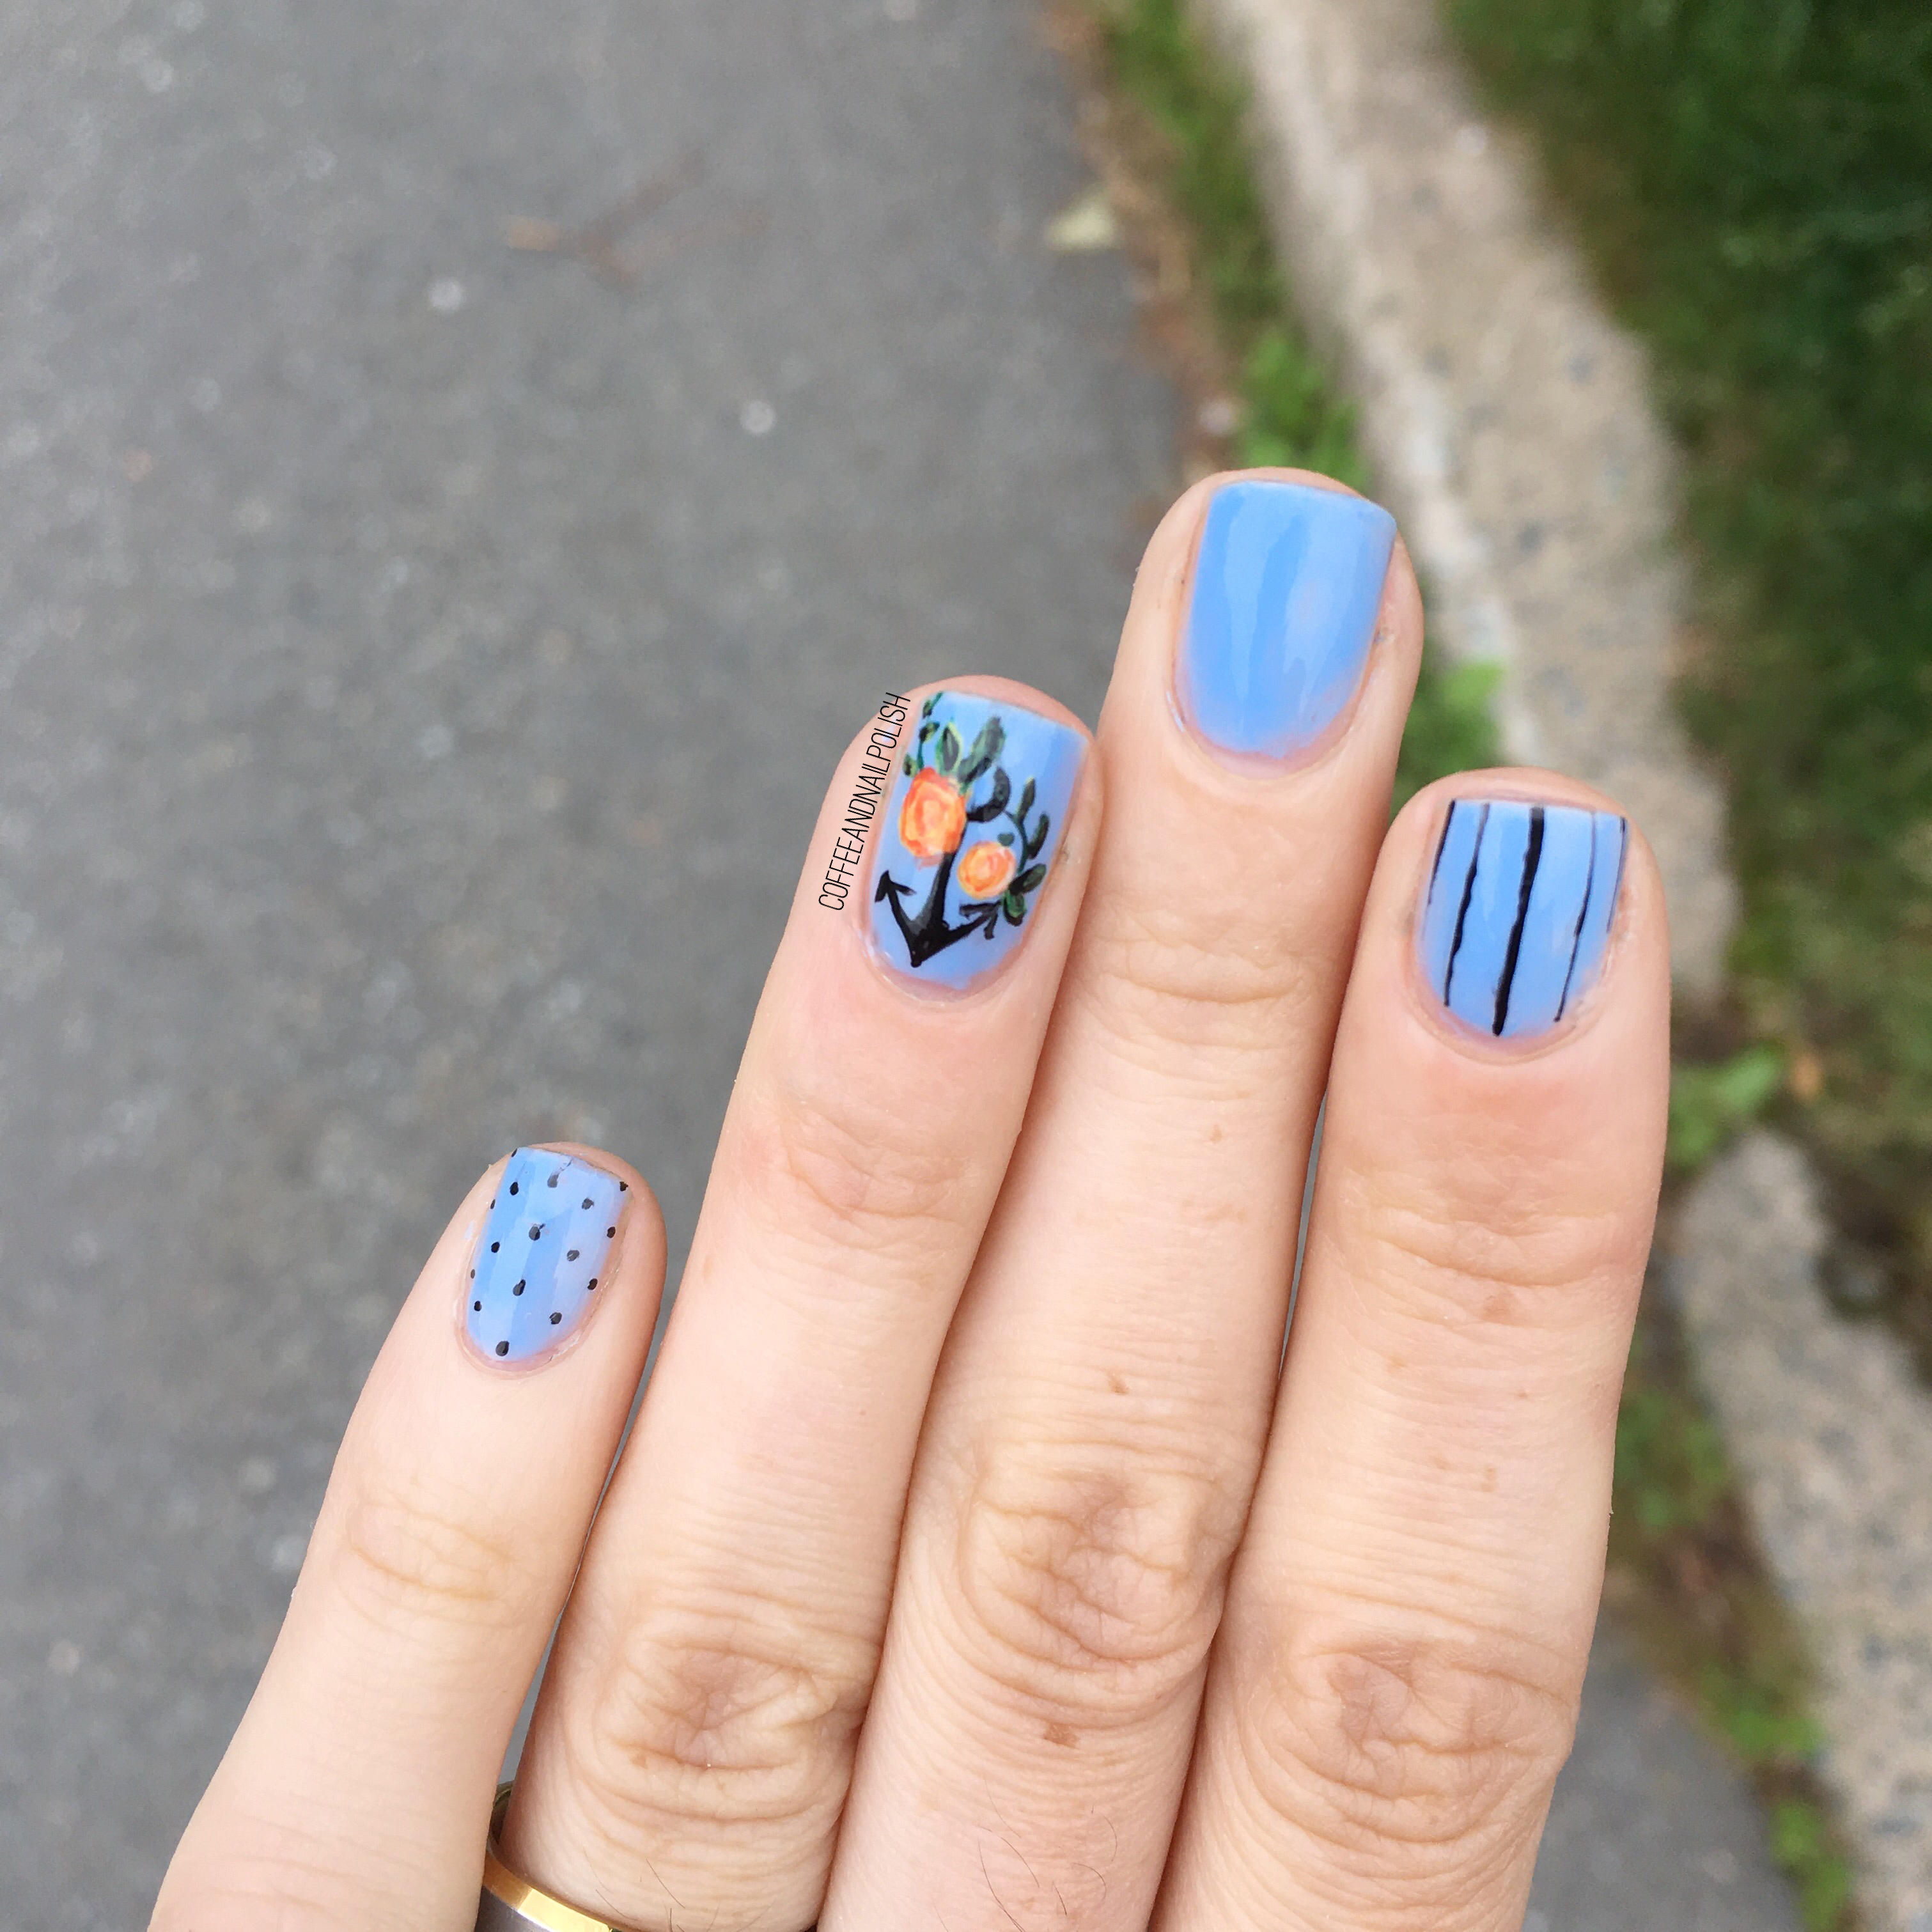
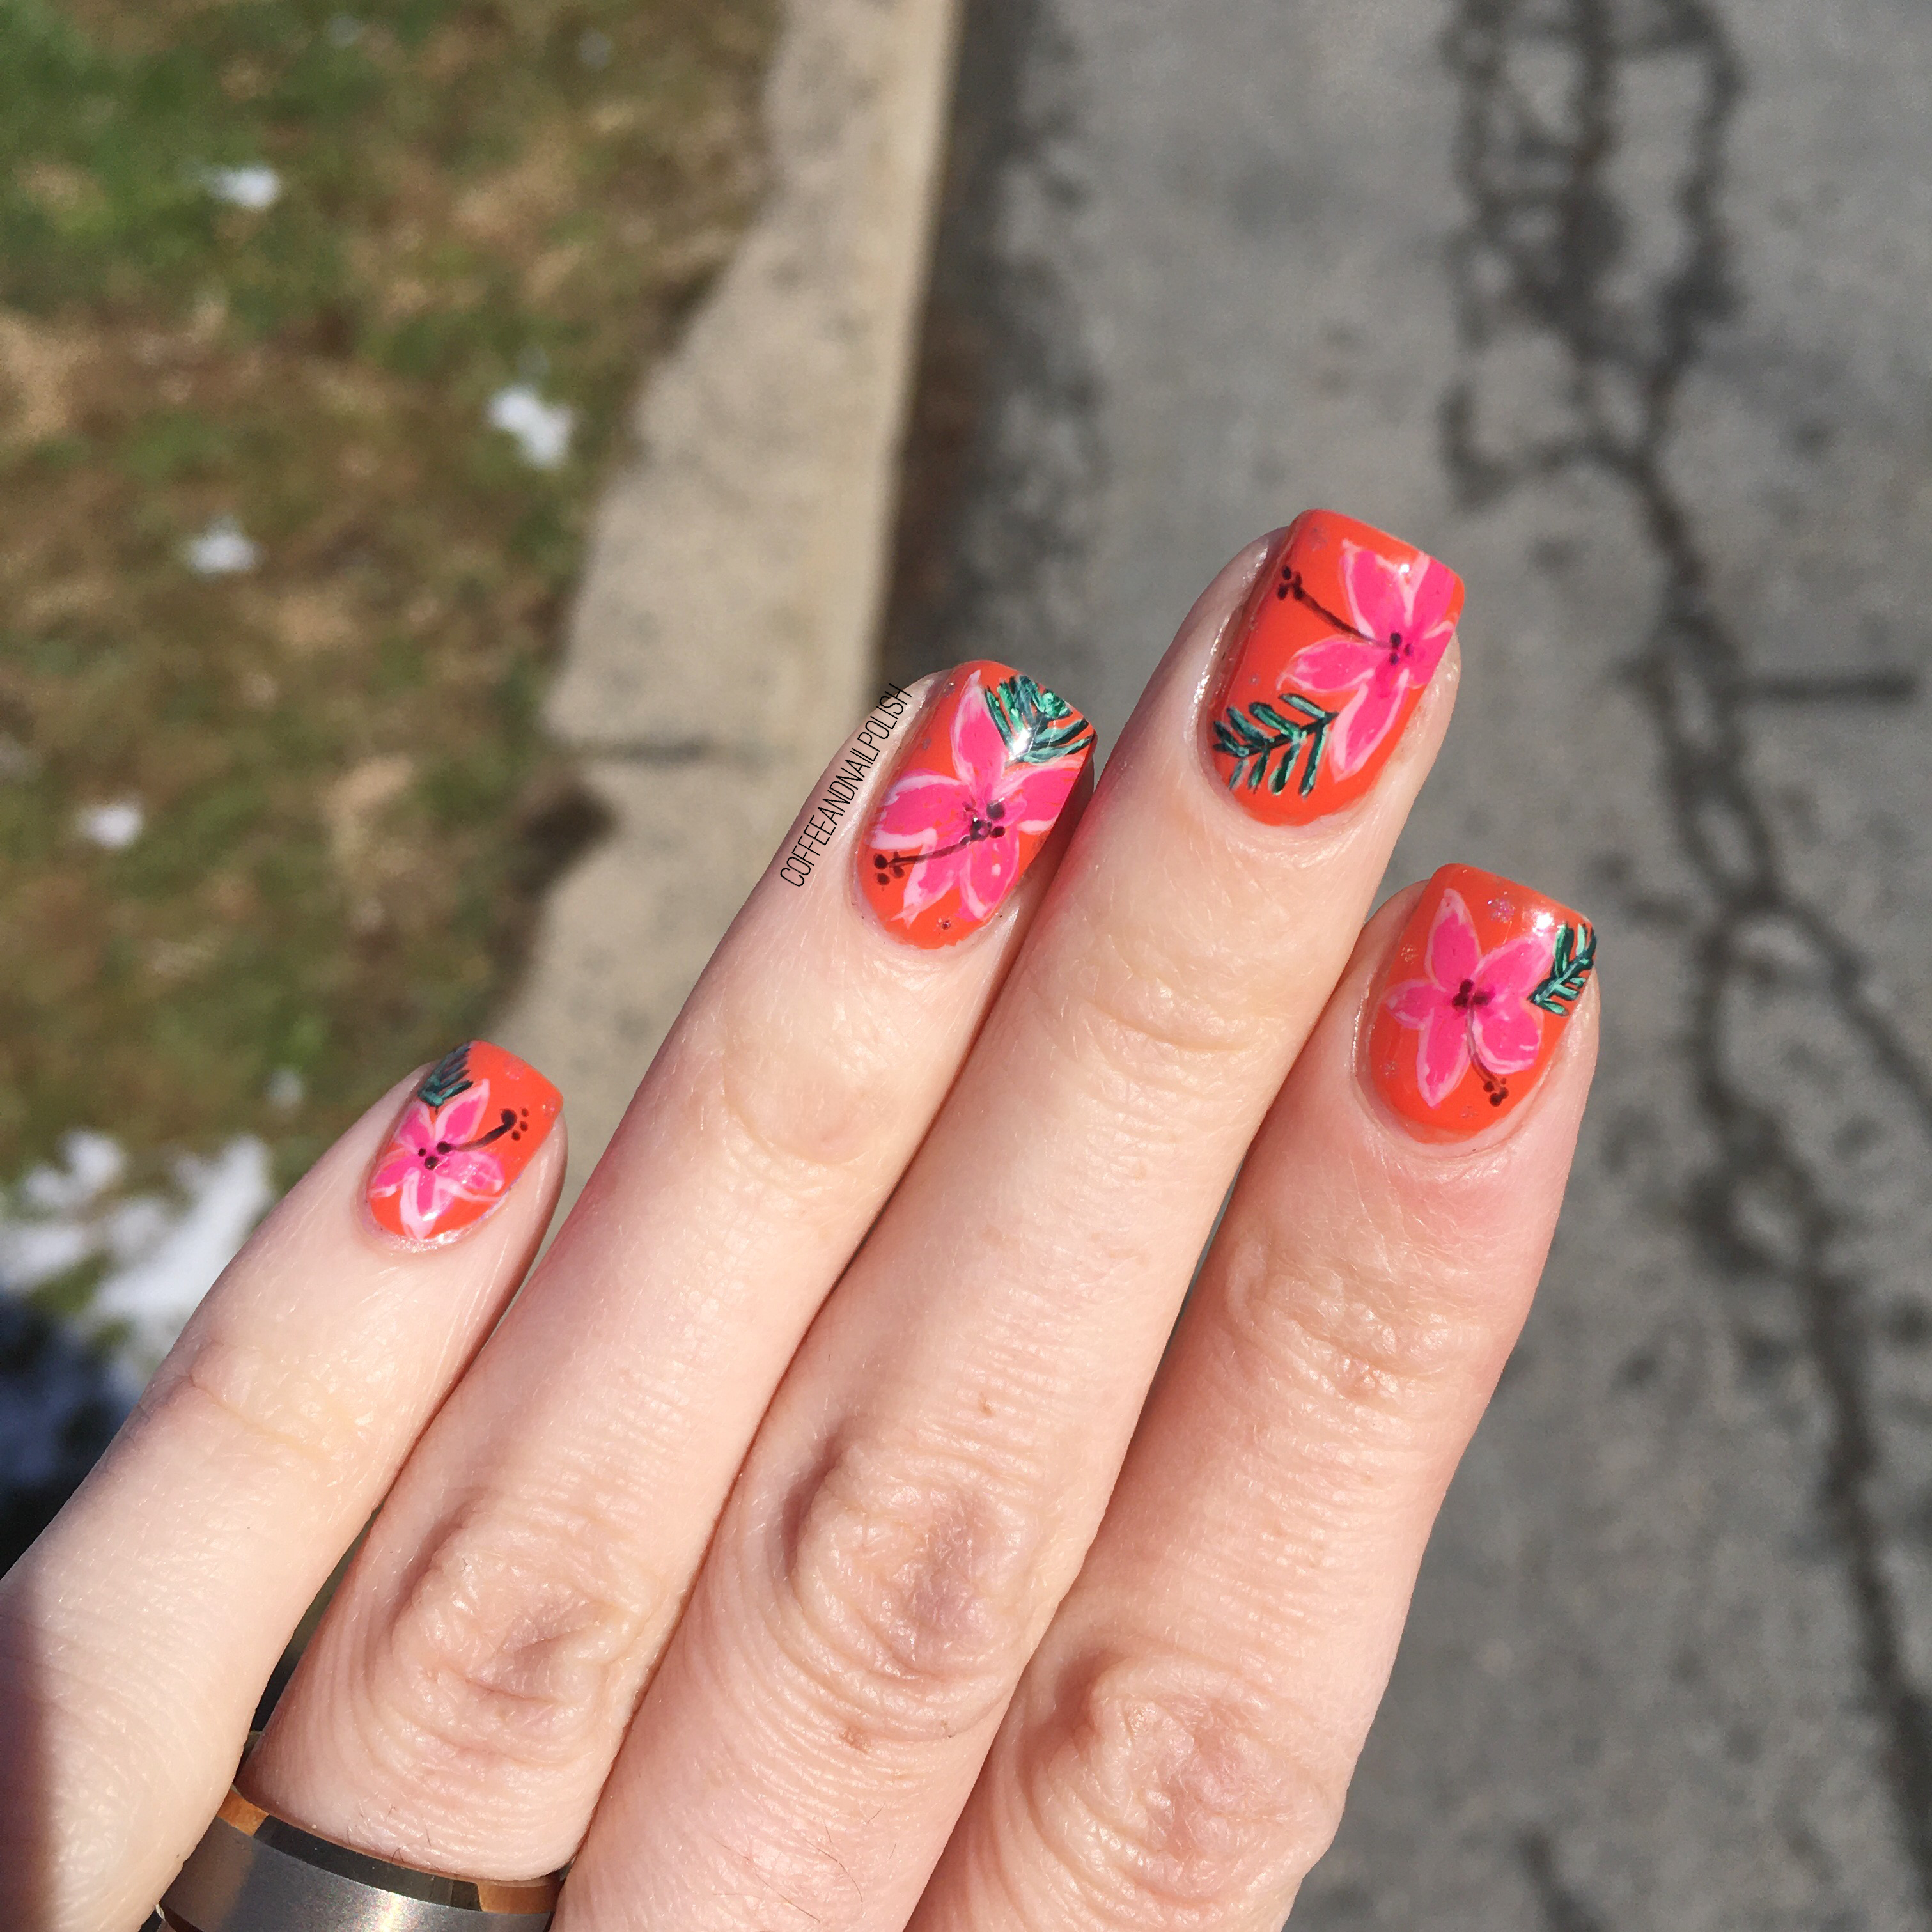
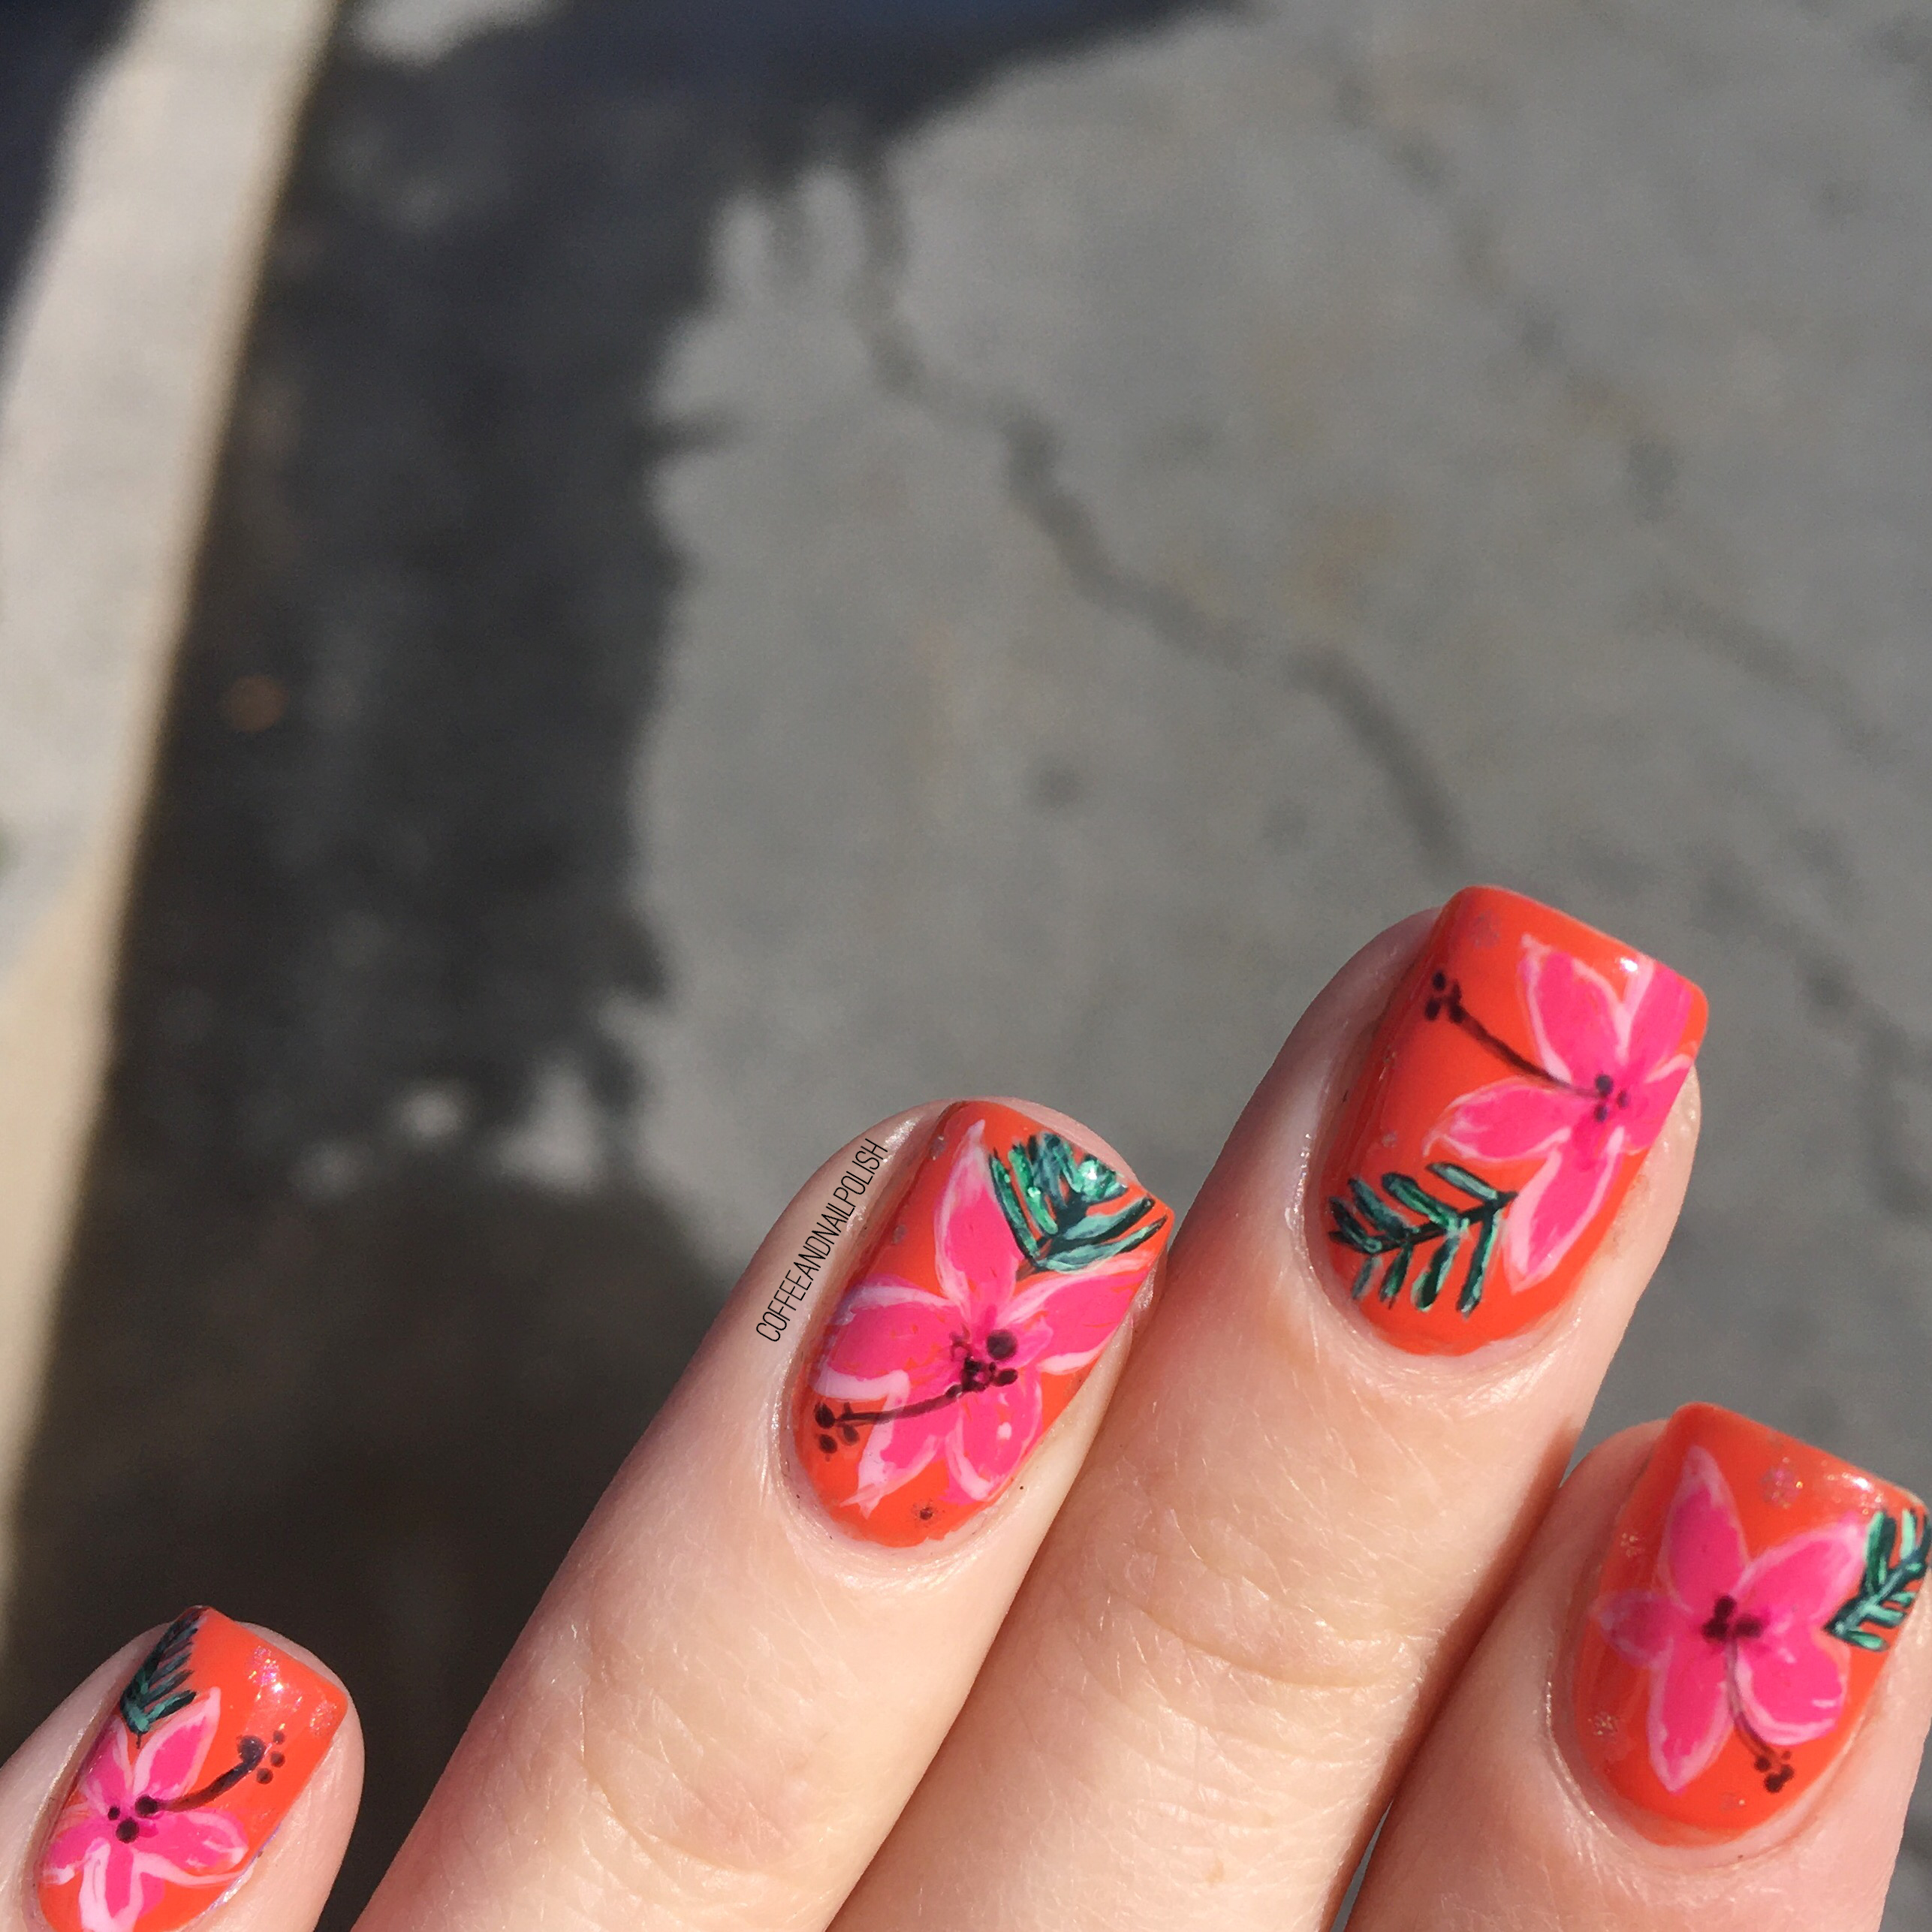
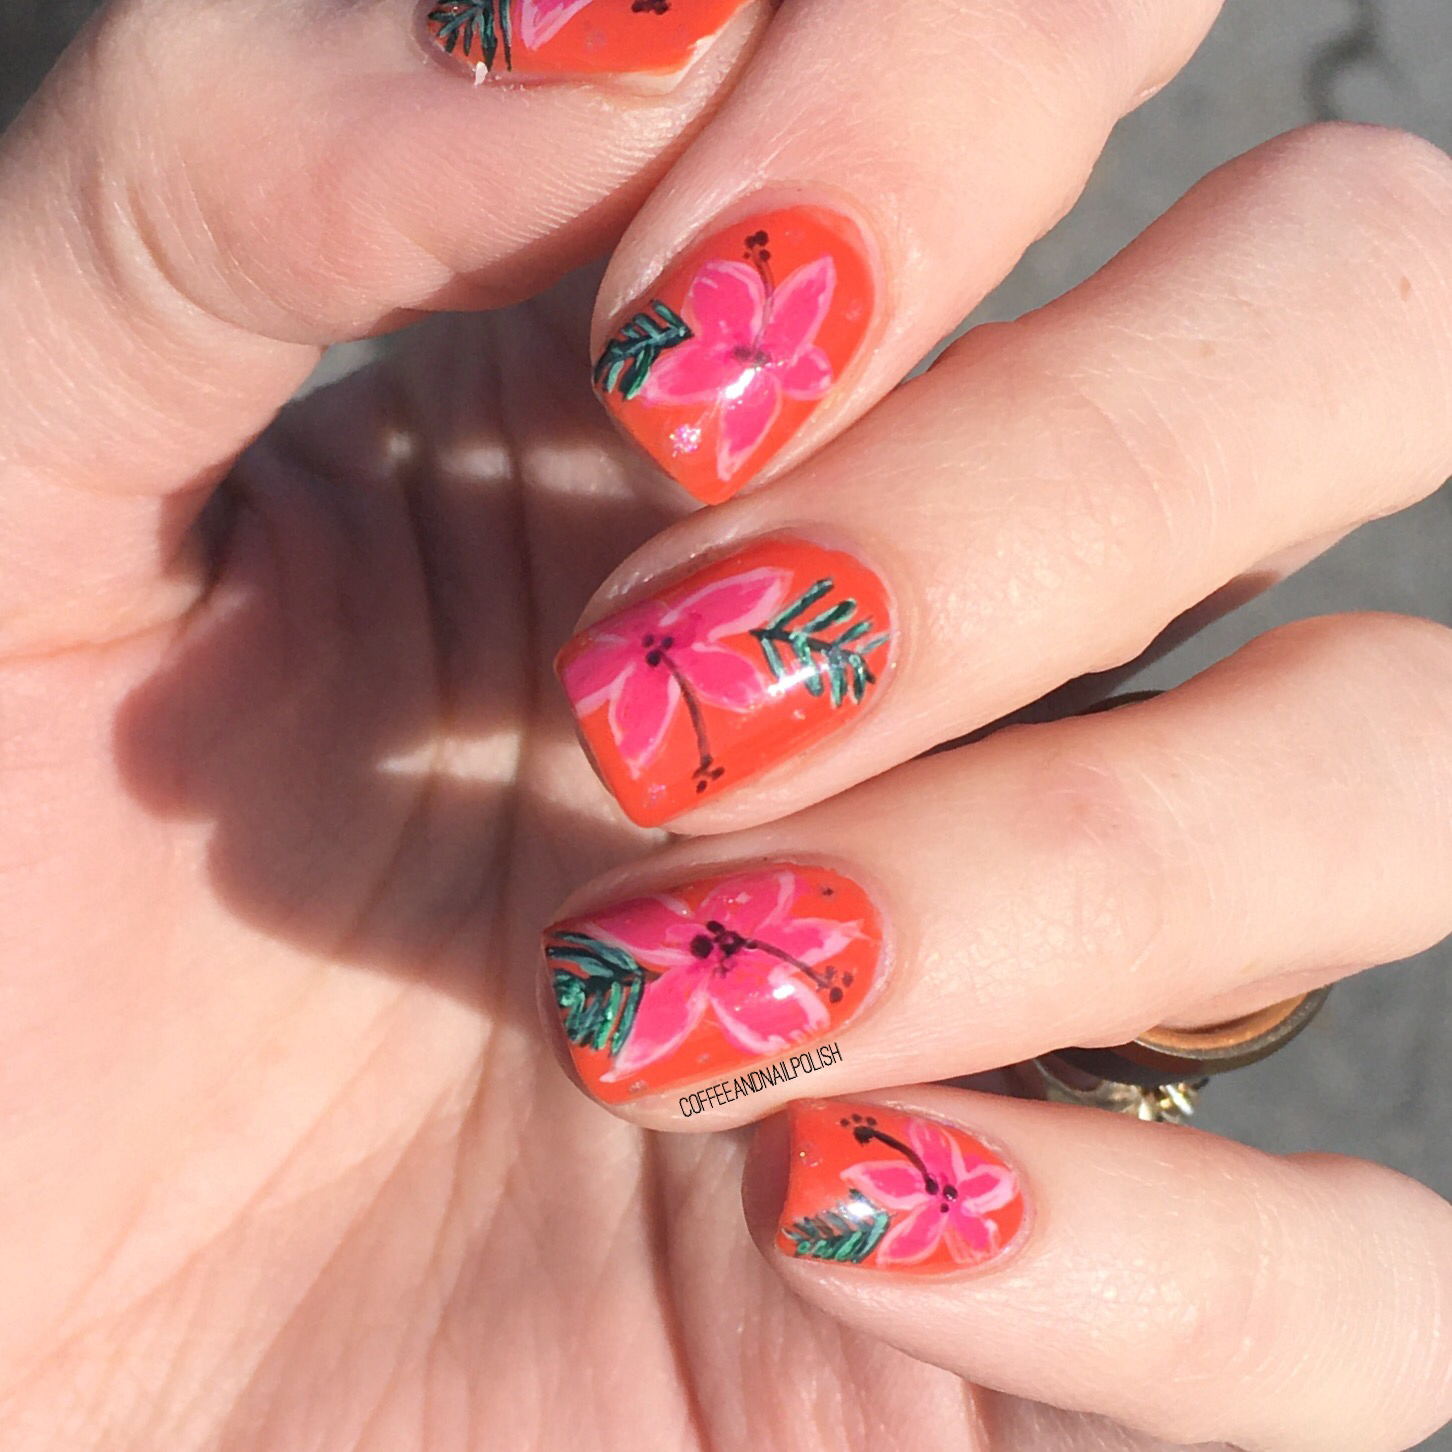
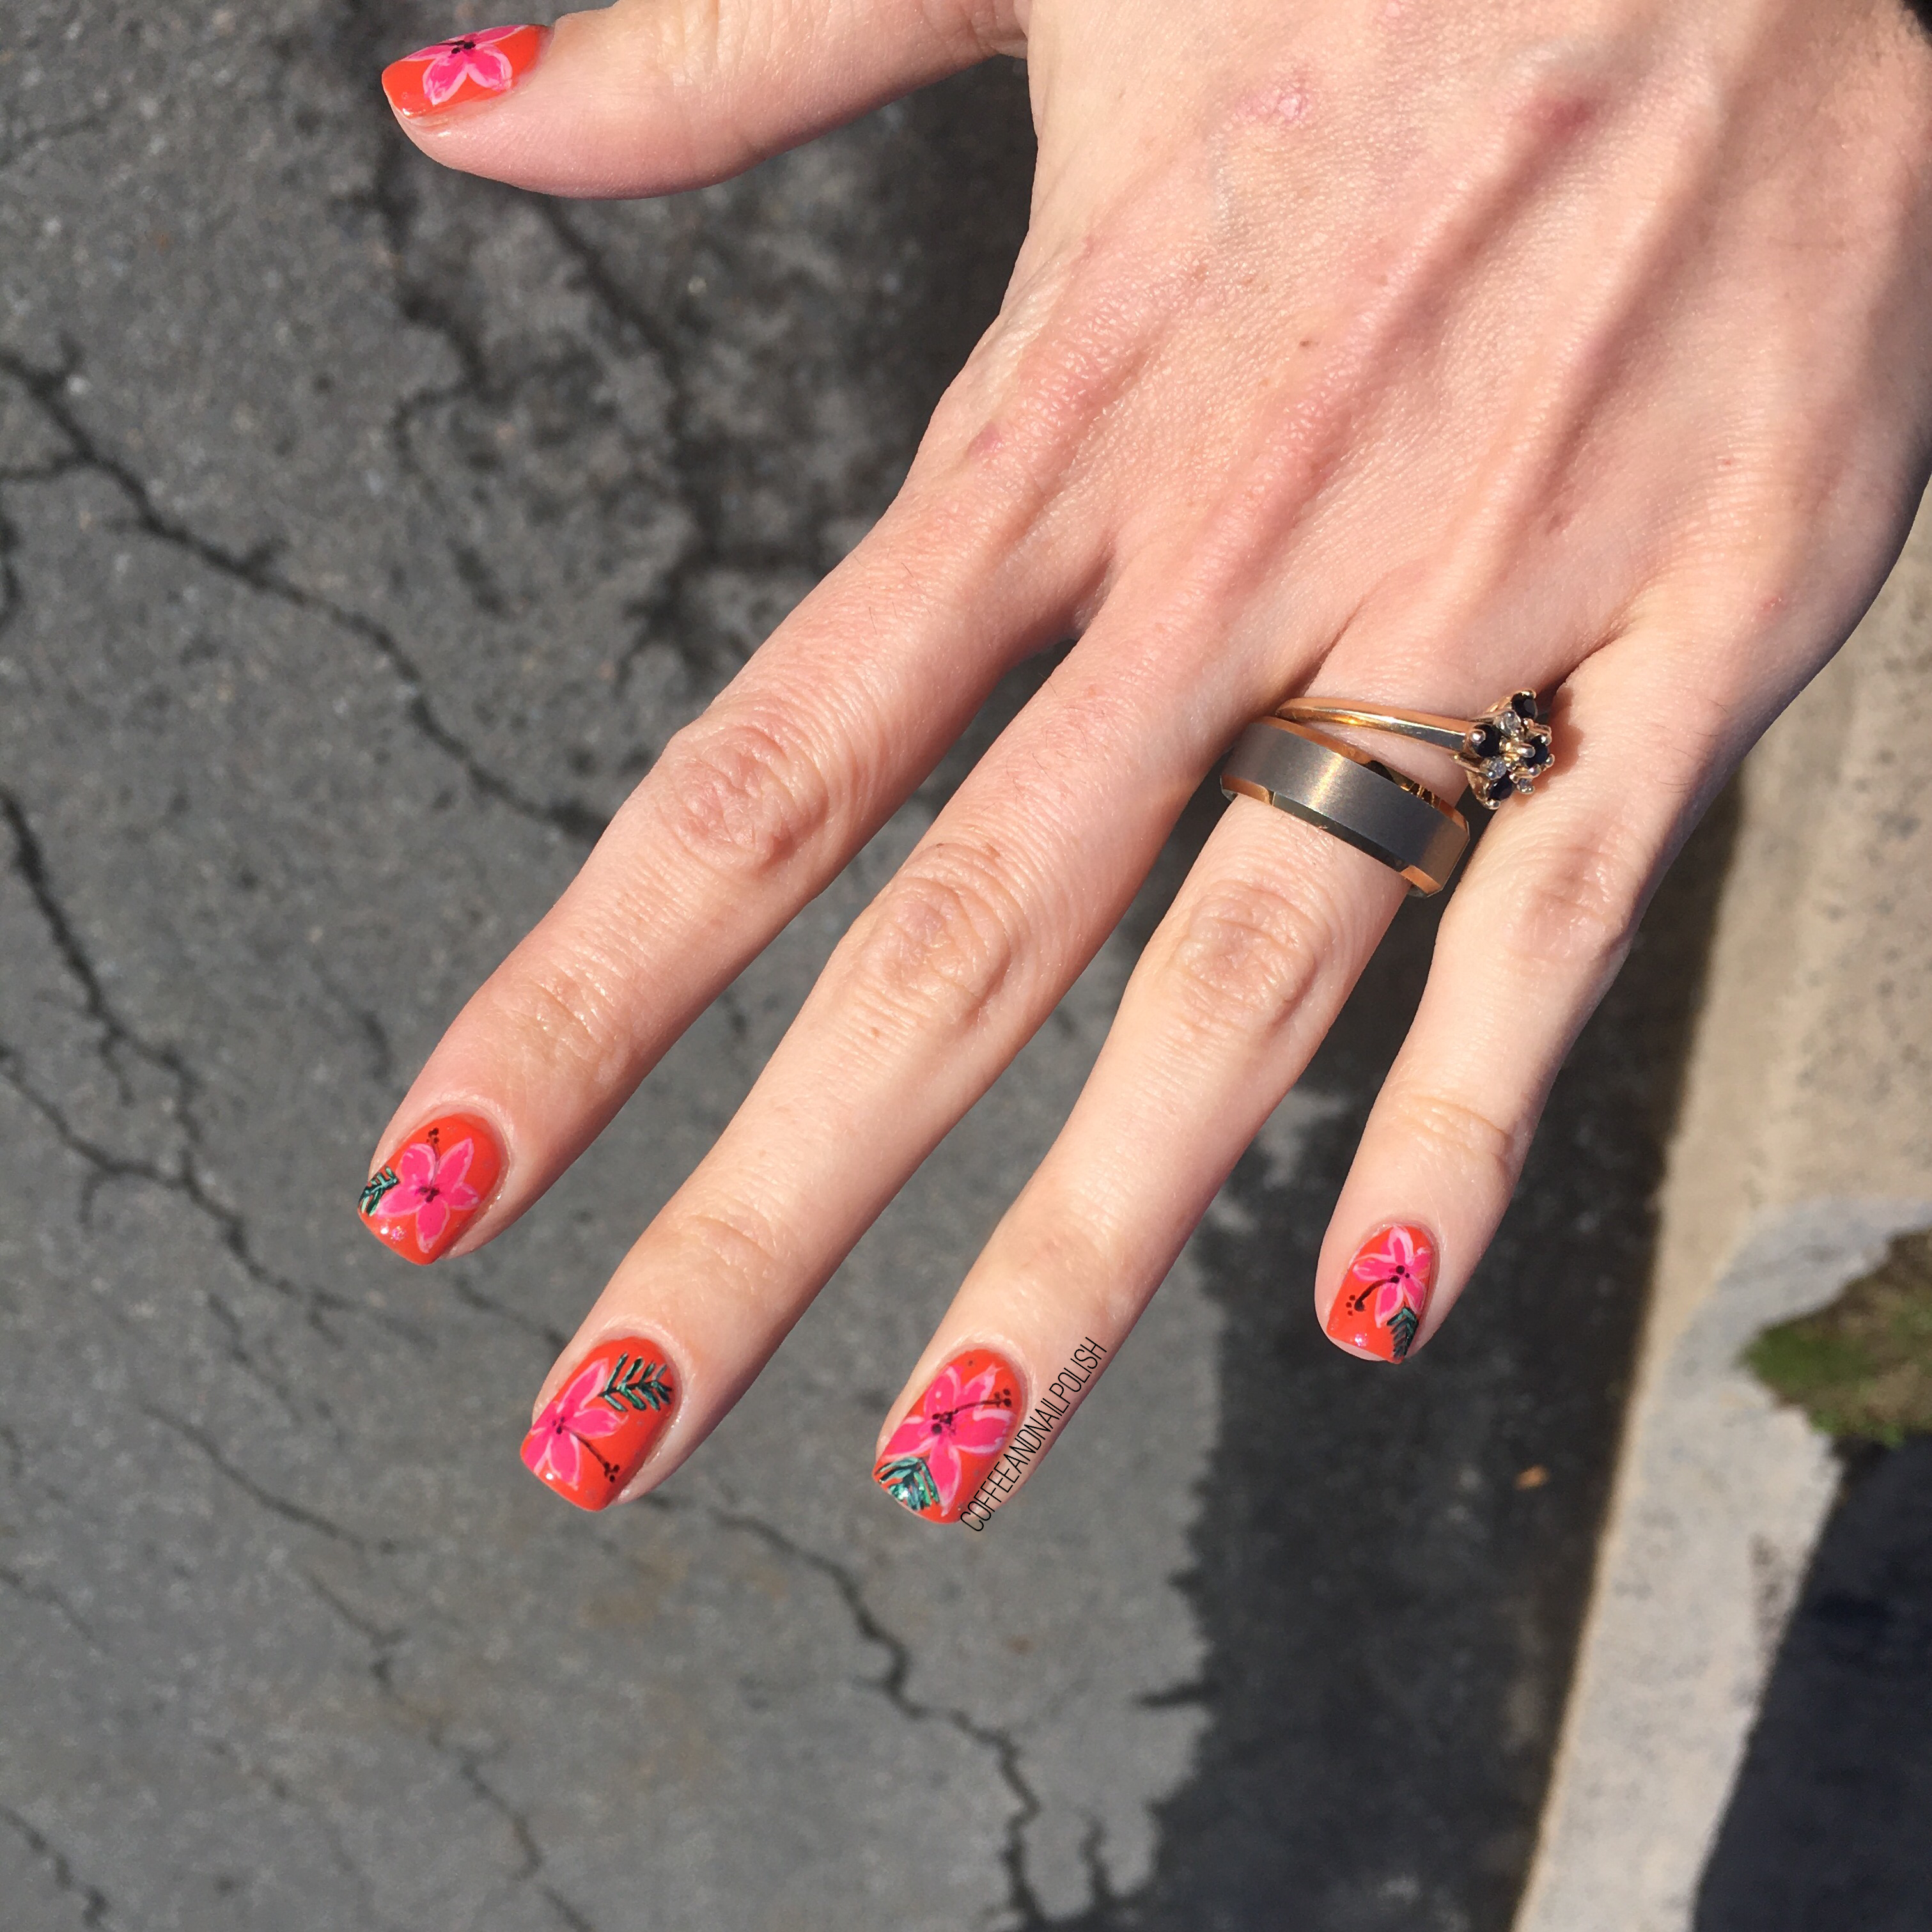
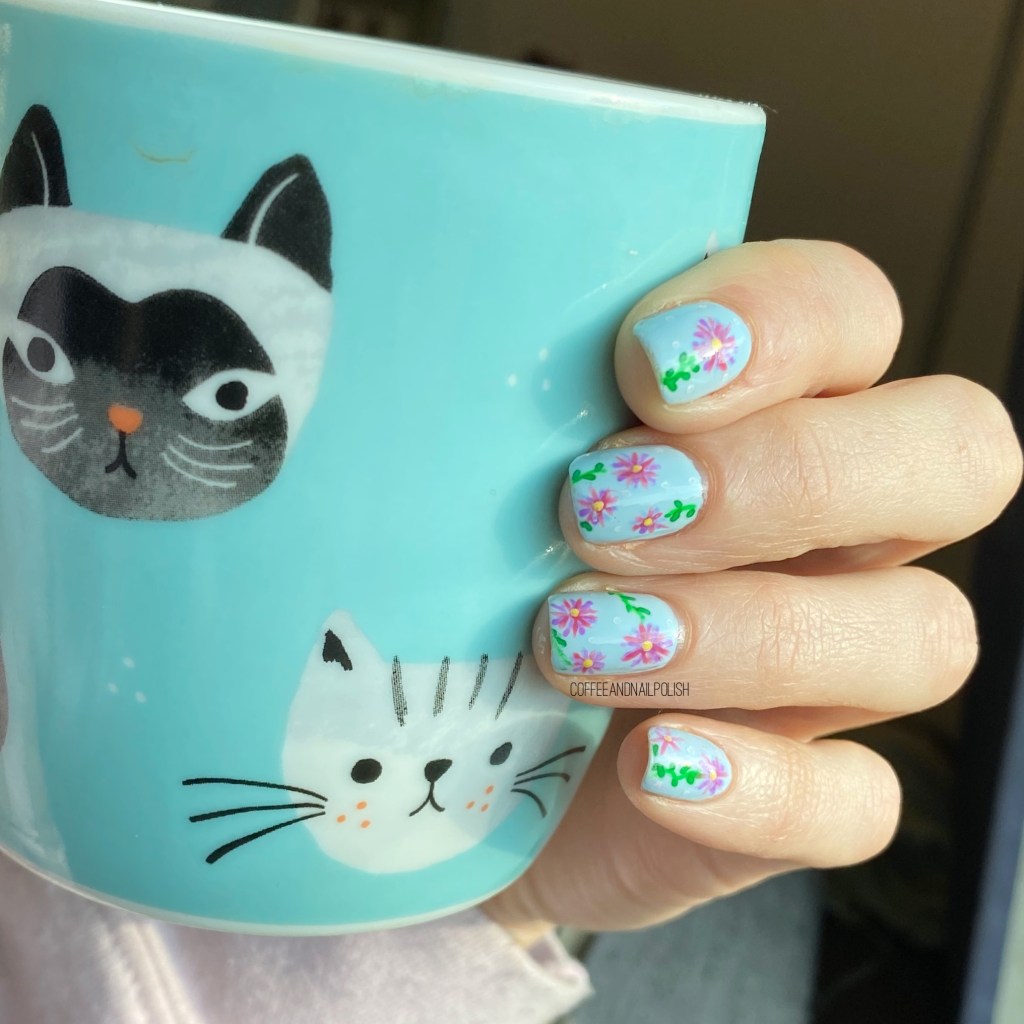
Can you believe it? we’re midway through June! Which means I’m in full all-floral-all-the-time mode. I’m sure you’re not surprised. Today’s nail art look was actually a quick nail art design. I had painted my nails, & wanted to add a little something using my nail art pens, which turned into a full floral mani. Sometimes, I just can’t be stopped haha. But I actually really like how these turned out; usually I go for a more rose centric floral design, but I wanted to create these almost daisies, & I think they turned out really beautiful. & I did them completely without any true nail art brushes.
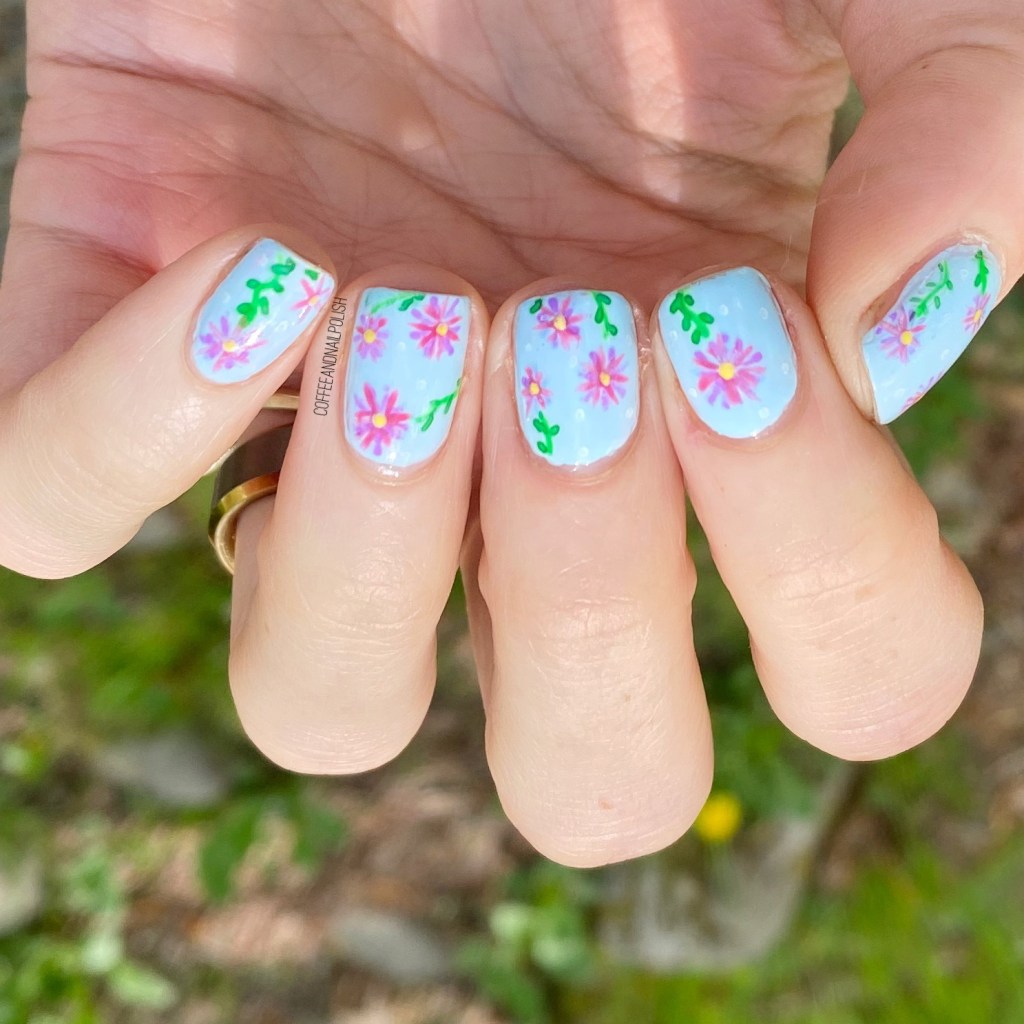

For this manicure, the polishes I used were:
- Base Coat: Sally Hansen Nailgrowth Miracle
- Top Coat: Essie Gel Setter
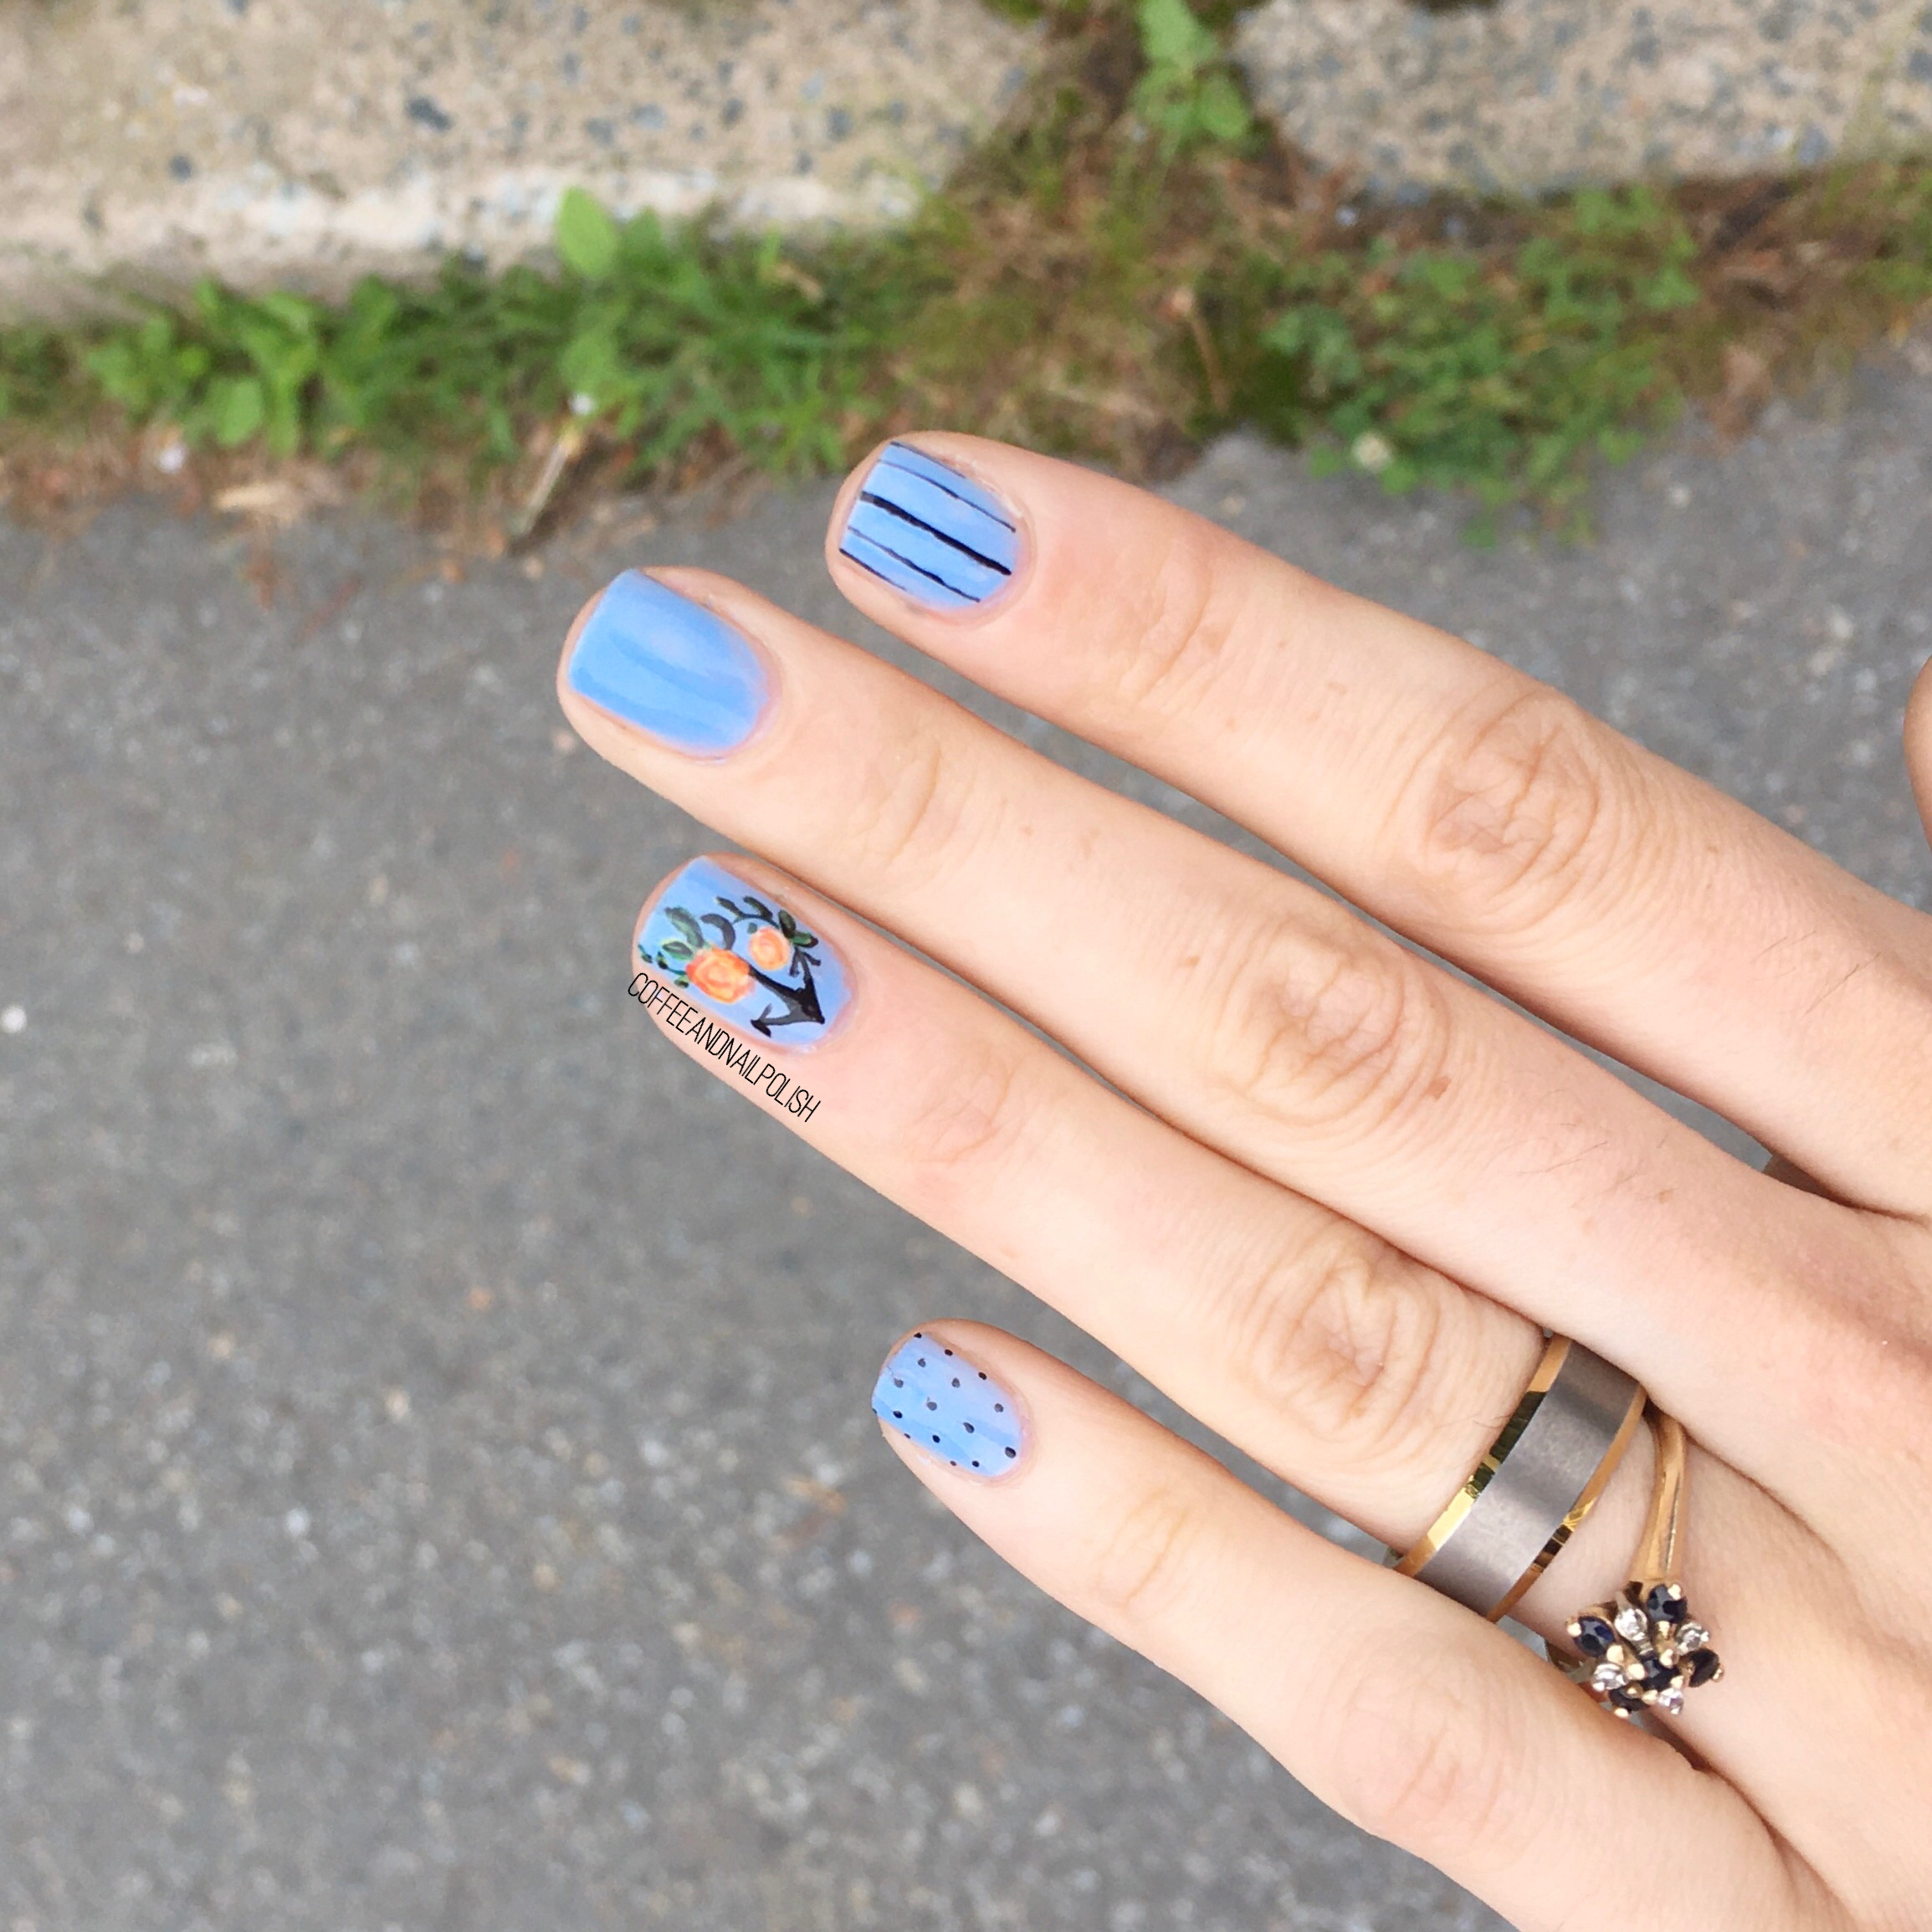
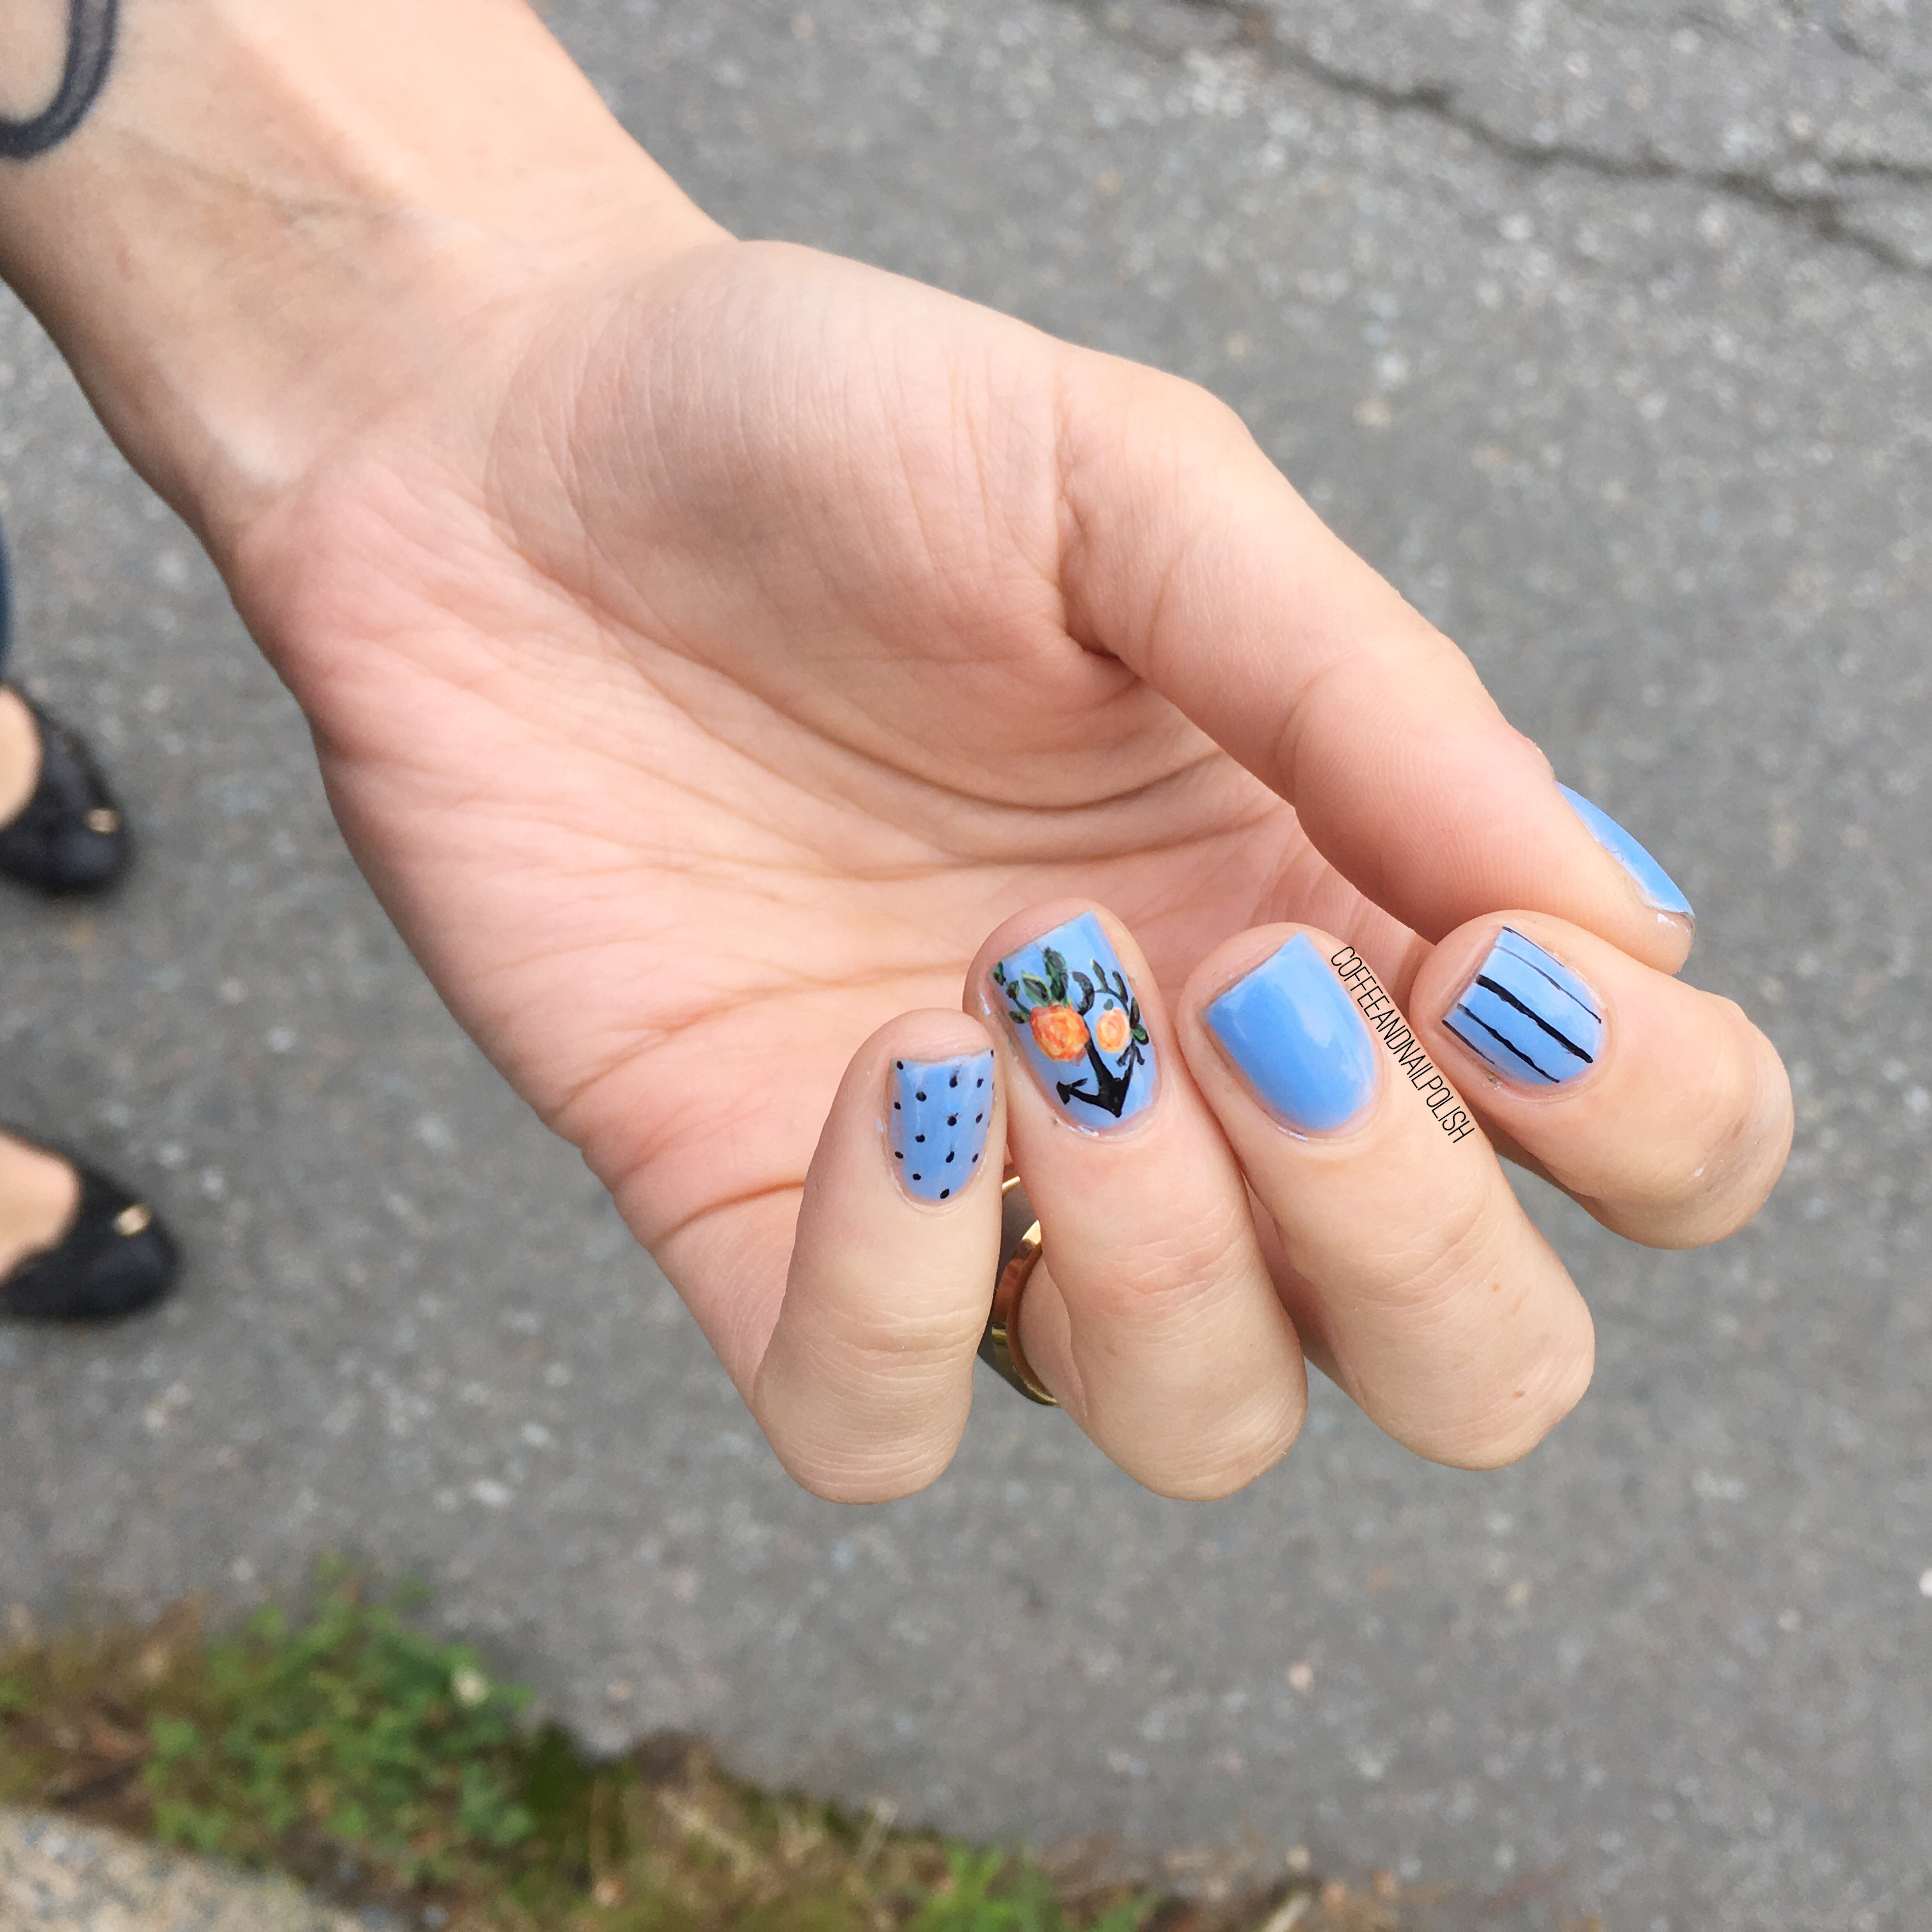
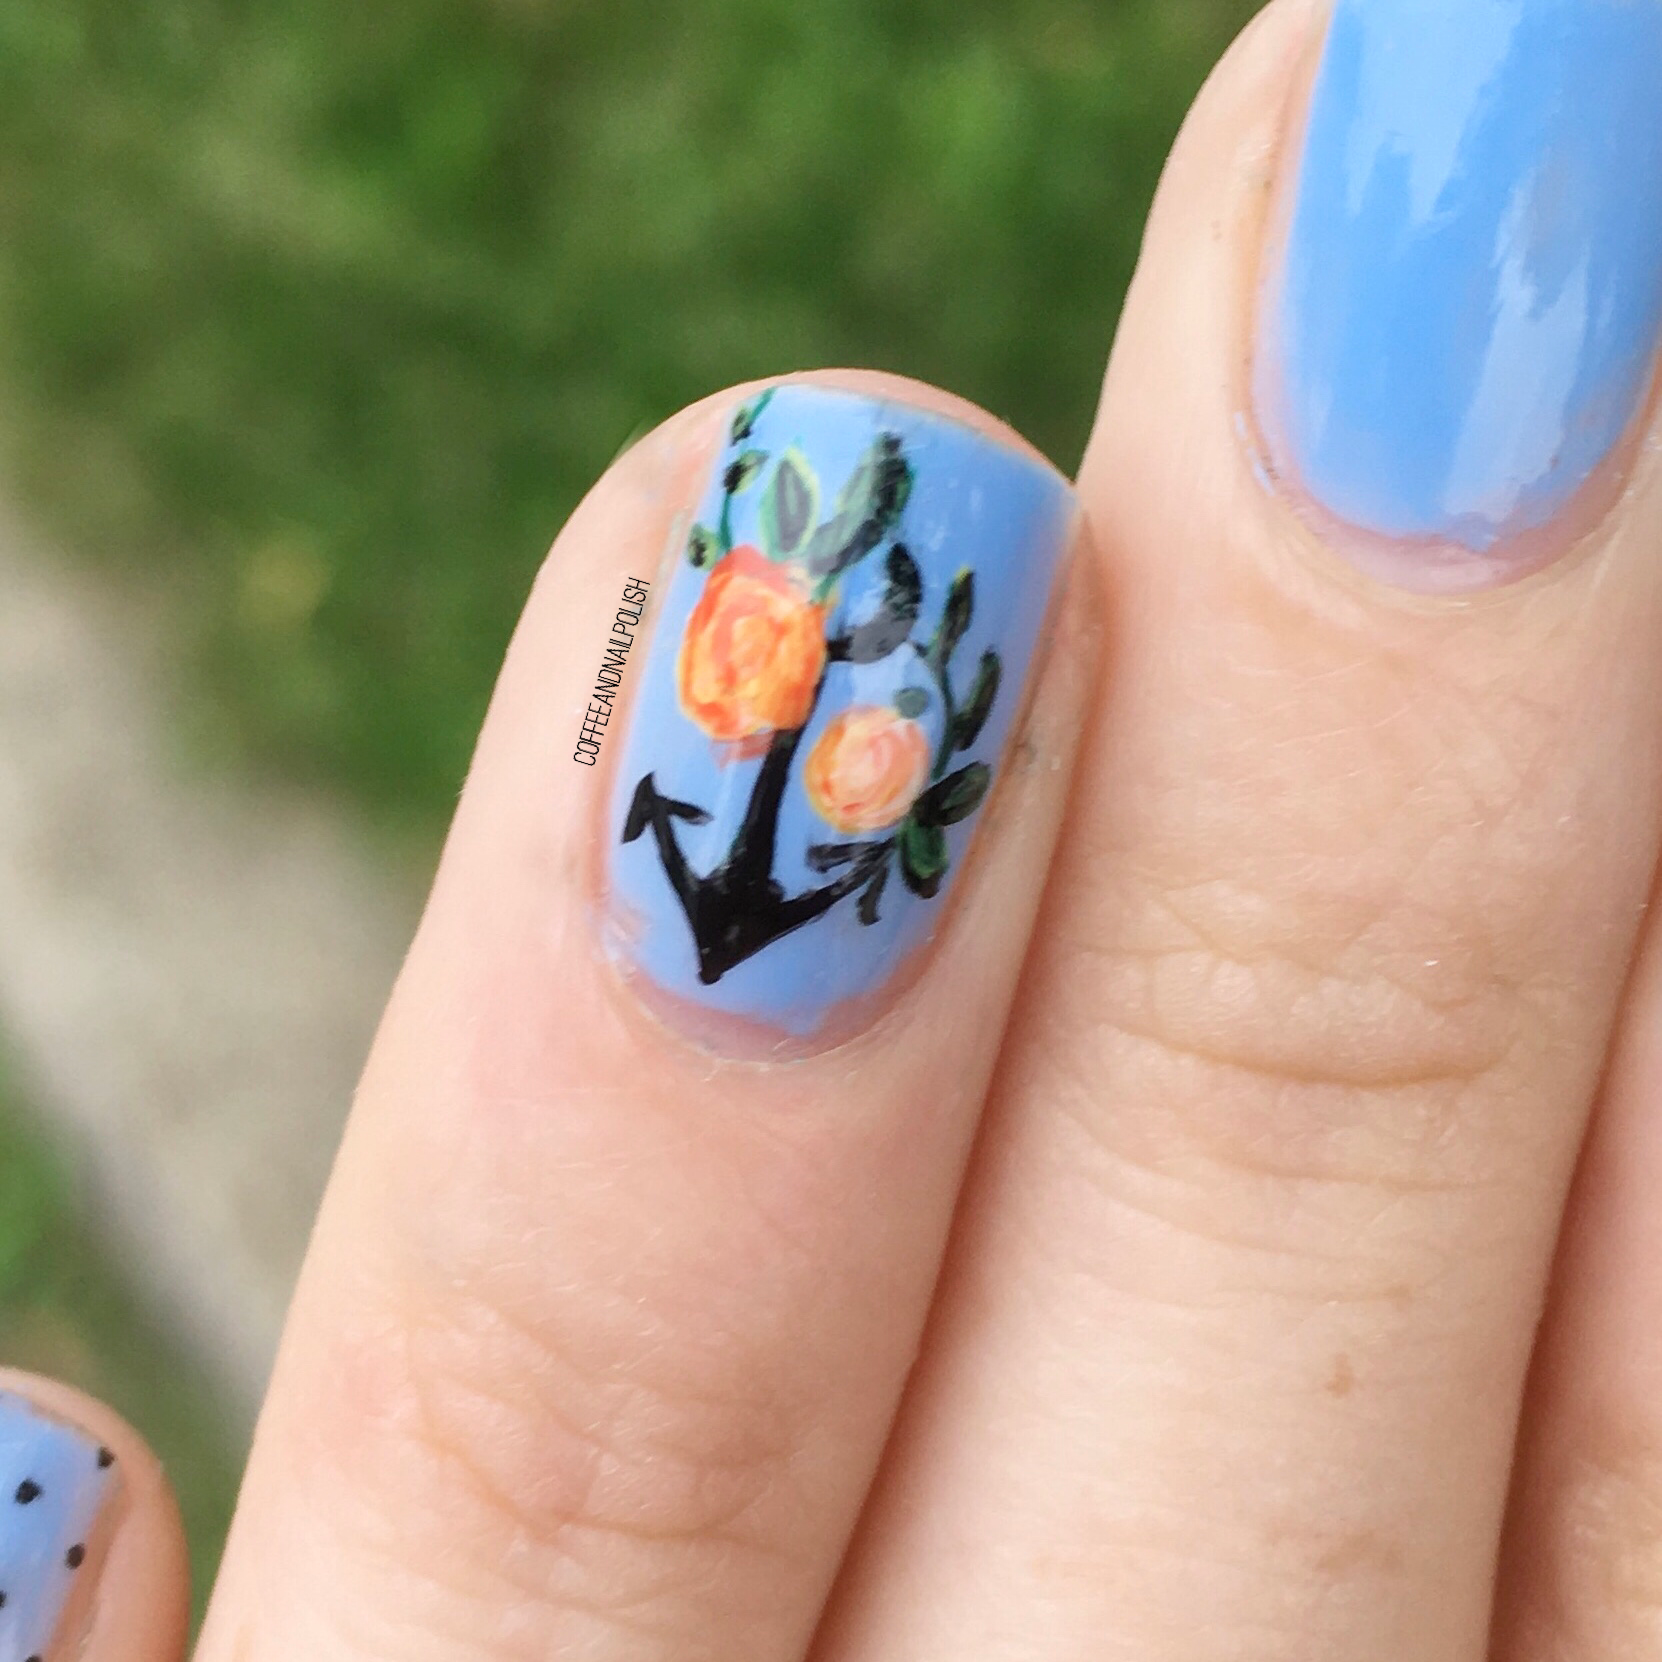
- Zoya Blu
- Sally Hansen I ♥️ Nail Art pen Fuchsia
- Sally Hansen I ♥️ Nail Art pen Purple
- Sally Hansen I ♥️ Nail Art pen Green
- Sally Hansen I ♥️ Nail Art pen White
- Art Club Nail Art Duo Neon Green
- OPI Where Did Suzi’s Man-go
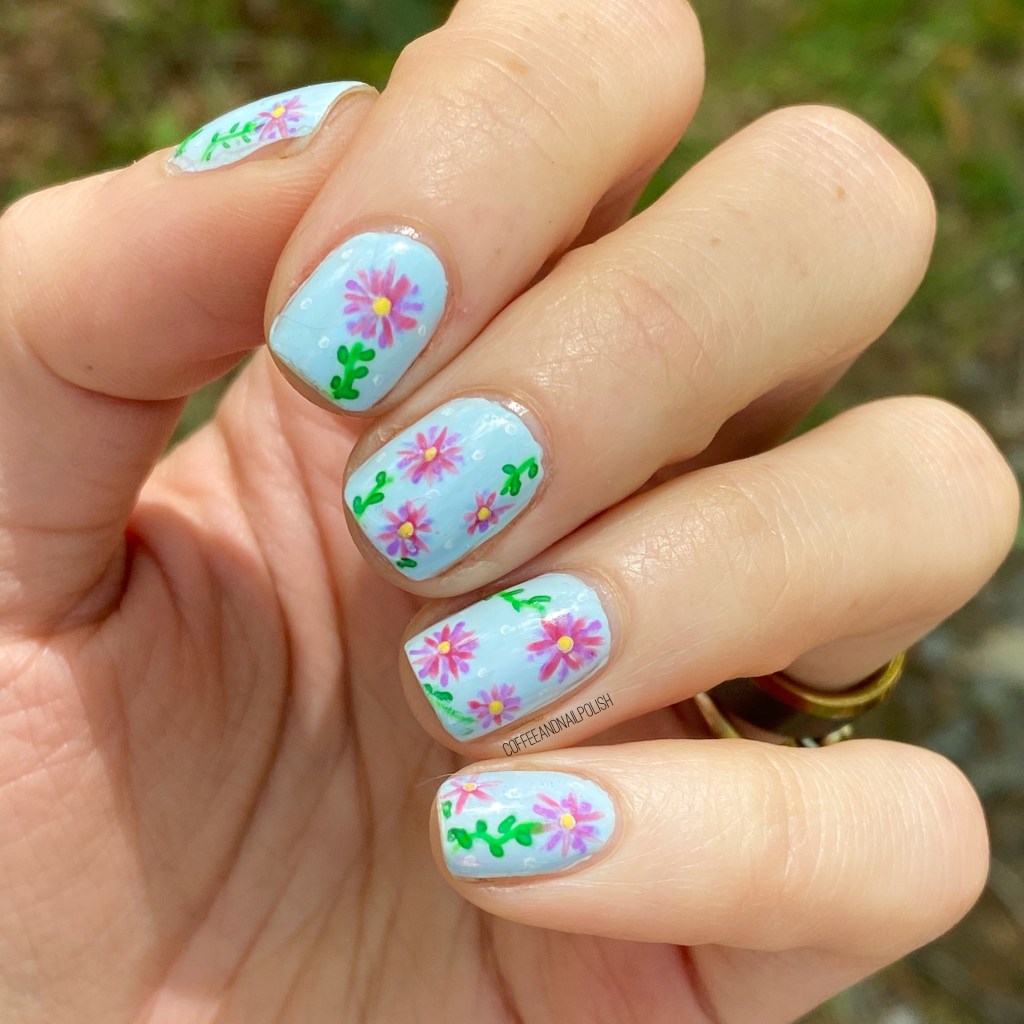

First off, I know these are not my most perfect floral, but I’m really kind of digging them. My little daisies turned out so colourful & cute. I would totally wear this pattern as a full sundress too. It’s all floral, all the time over here. Also, I feel like these nail art pens are so underrated & deserve a comeback. While my nail art brushes will always be the best for nail art, using these pens can still create an awesome pattern! Also they are still number one for dotticures.


What do you think about this cute little floral design? Is there anyone else who loves these nail art pens like I do? The Sally Hansen ones were always my go-to (I have so many), but I haven’t found them for sale in a very long time. Does anyone know of any else nail art pens you can buy? I’d totally be down for adding more to my collection for quick designs like this! Let me know down in the comments below.