#GlamNailsChallengeDec — Holly

Hello lovelies & happy Wednesday! This week is certainly speeding by. The whole month is speeding by! It’s kind of crazy.

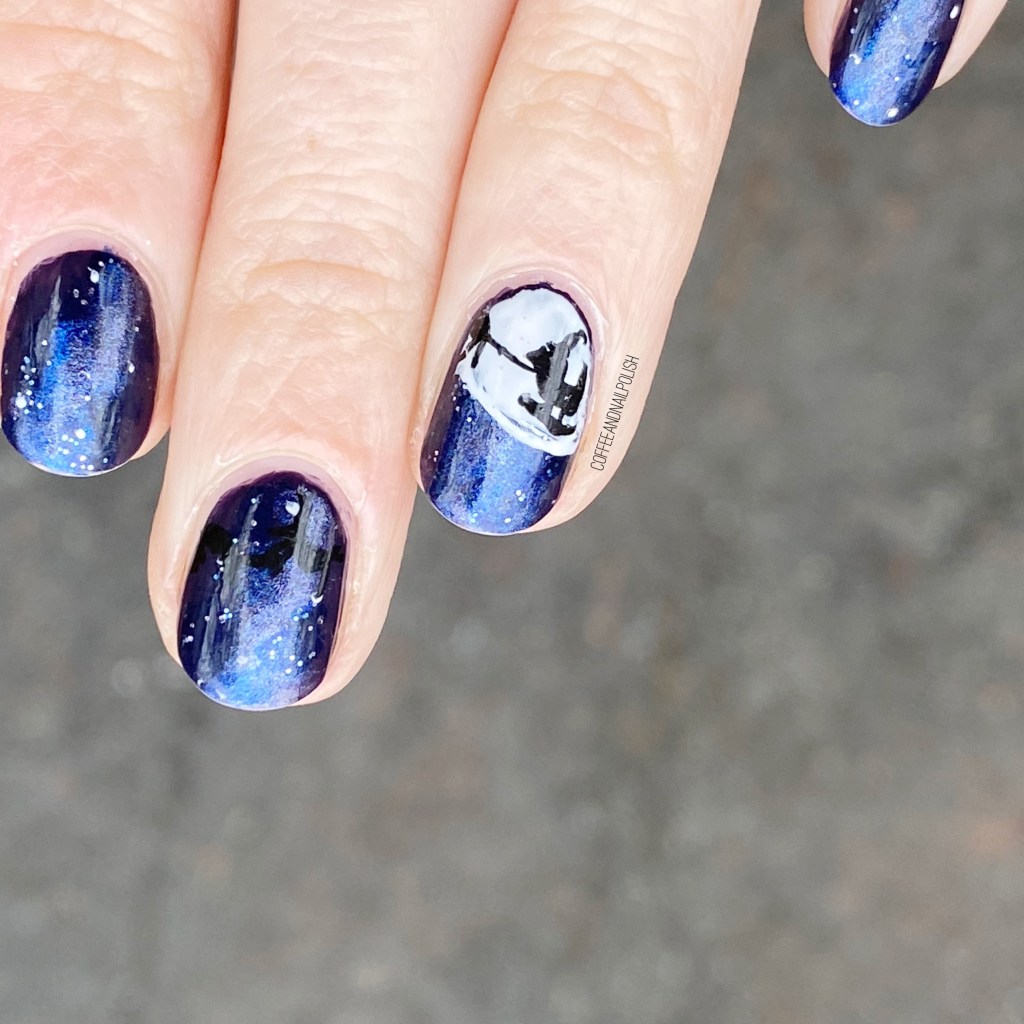
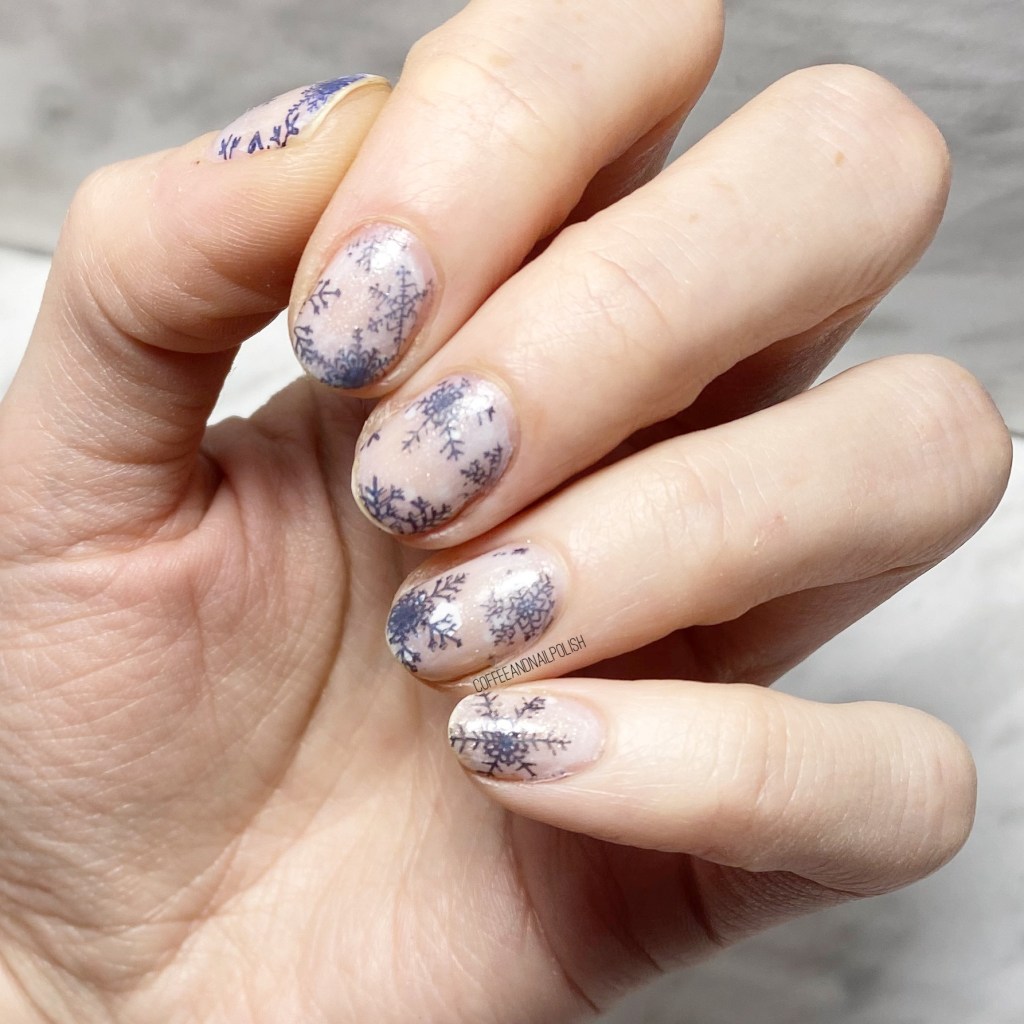
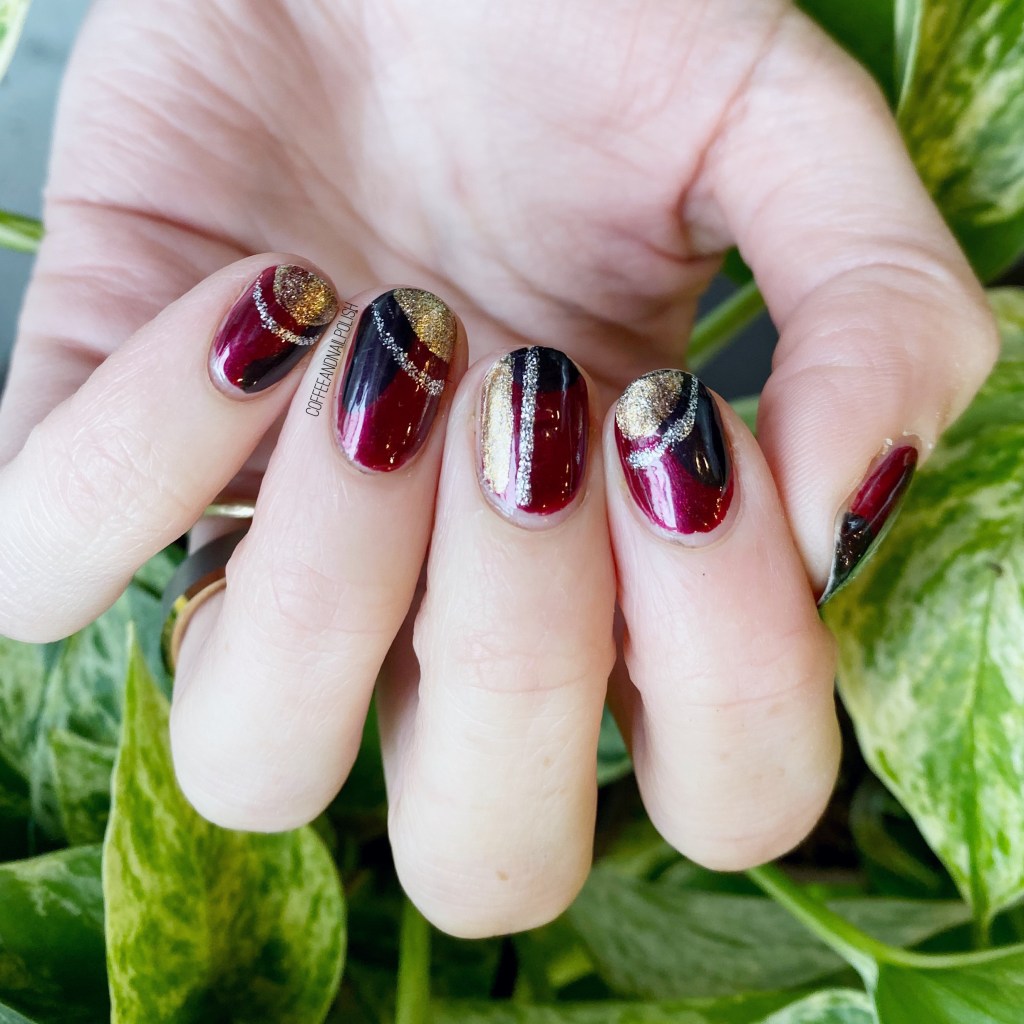
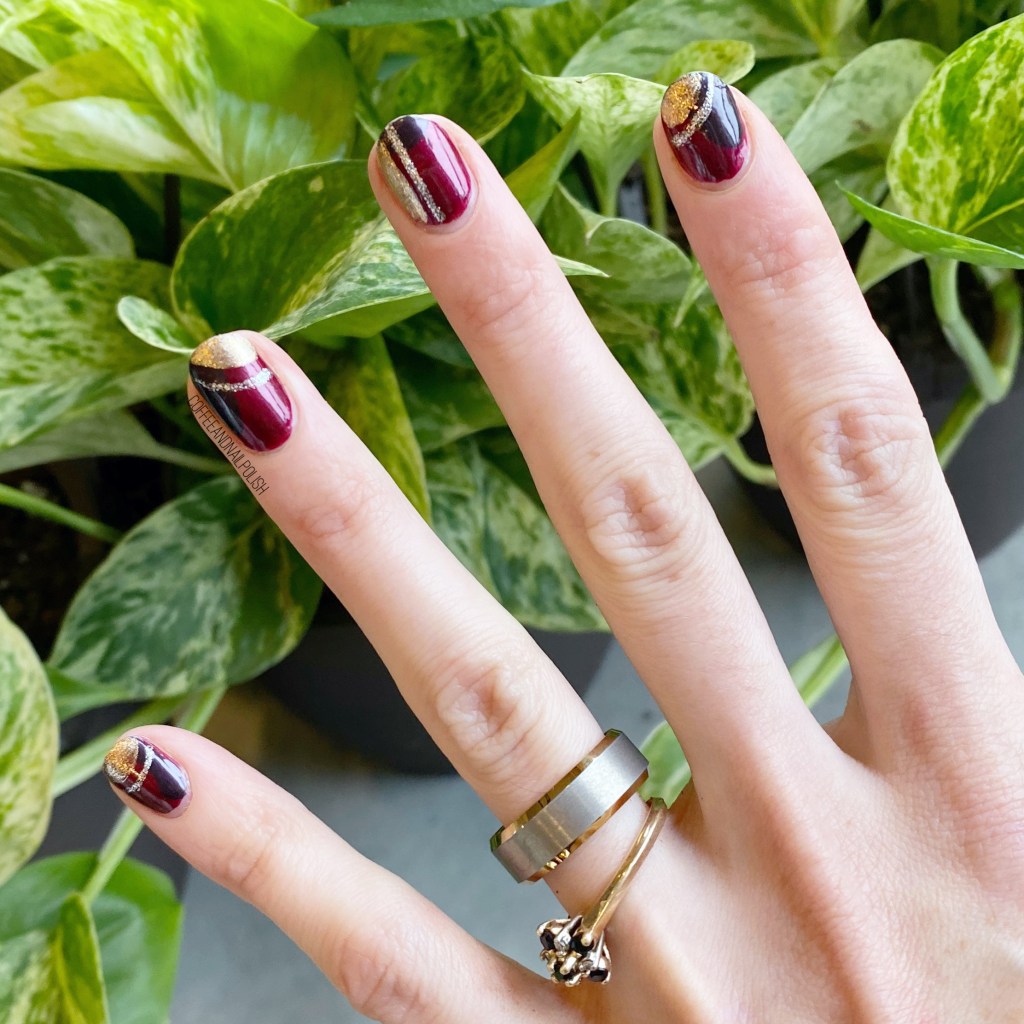
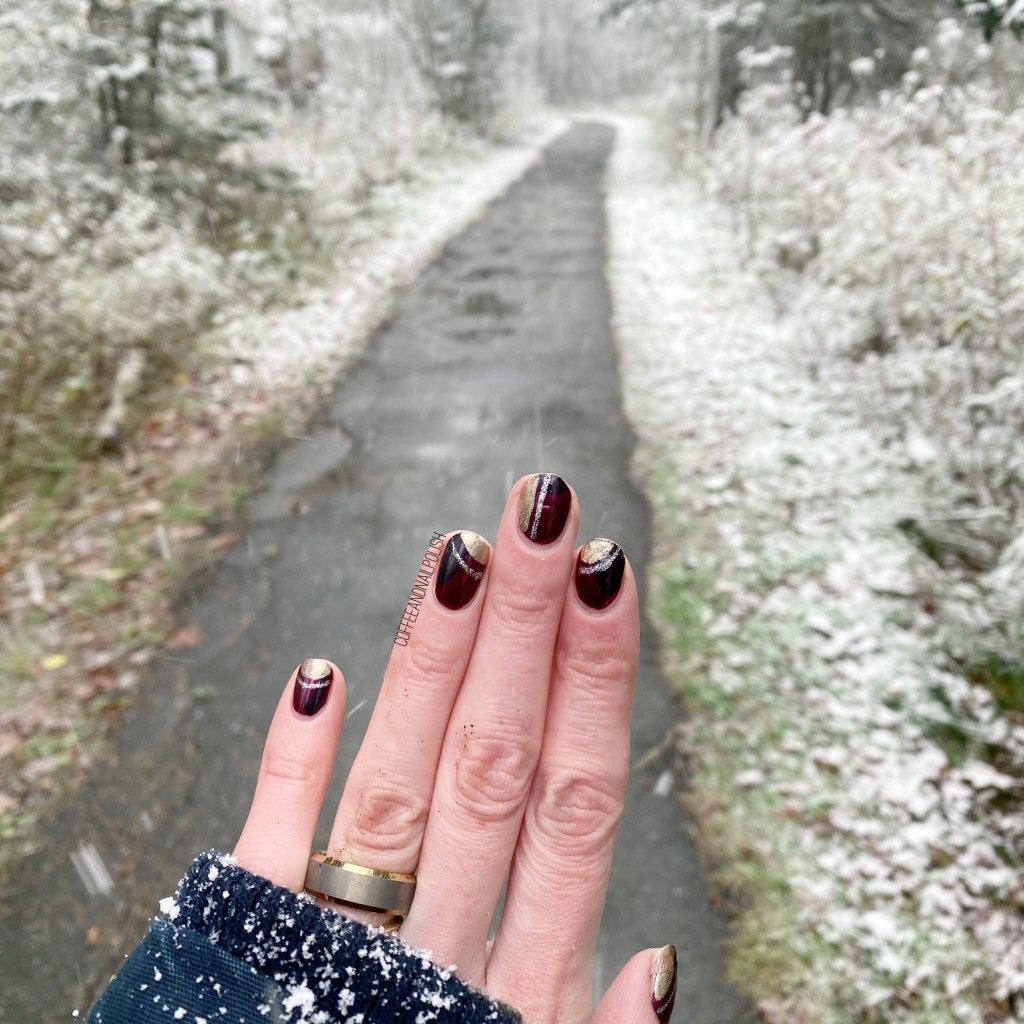
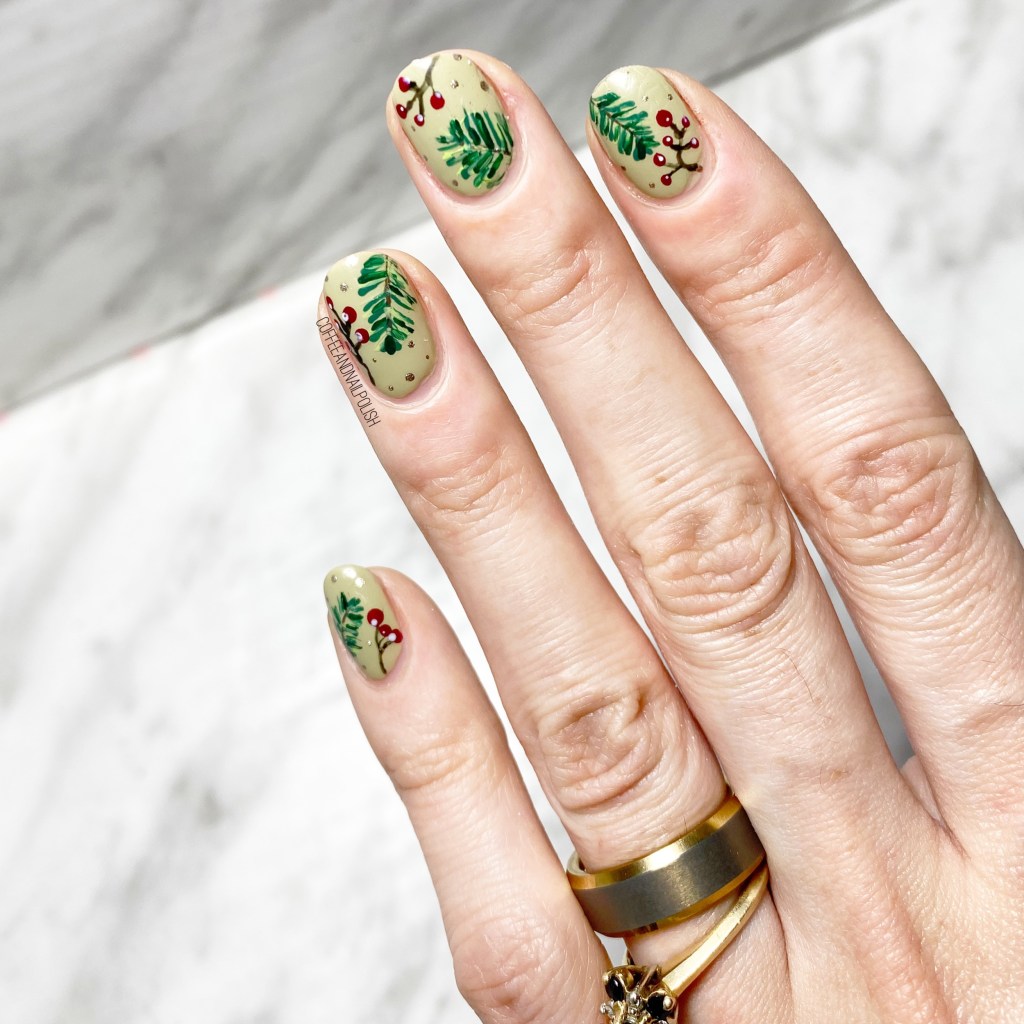
Today I have prompt #3 for #GlamNailsChallengeDec — Holly! Holly is definitely a classic Christmas nail art design, but instead of going with the classic depiction of holly we see this time of year, I wanted to go with a more rustic interpretation.

For this manicure, the polishes I used were:

  • Base Coat: Sally Hansen Hard As Nails
  • Top Coat: Essie Gel Setter
  • OPI This Isn’t Greenland
  • Sally Hansen Miracle Gel Get Mod
  • Essie Off Tropic
  • Sally Hansen Complete Salon Manicure Red My Lips
  • OPI Suzy & The Arctic Fox
  • L’Oréal Feeling Kilty
  • NailStuff.ca 4mm Micro Detail Brush (COFFEE10 saves you 10%!)
  • NailStuff.ca Dotting Tool Trio

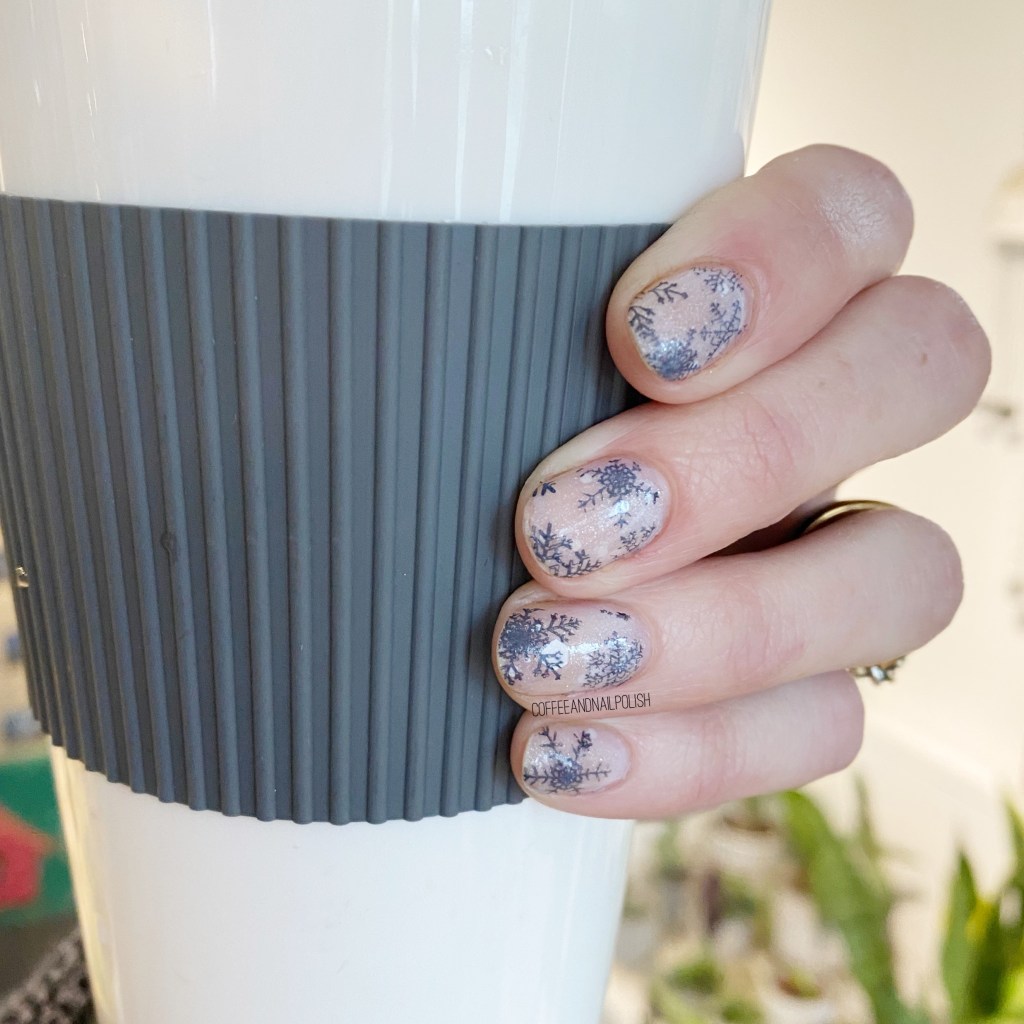
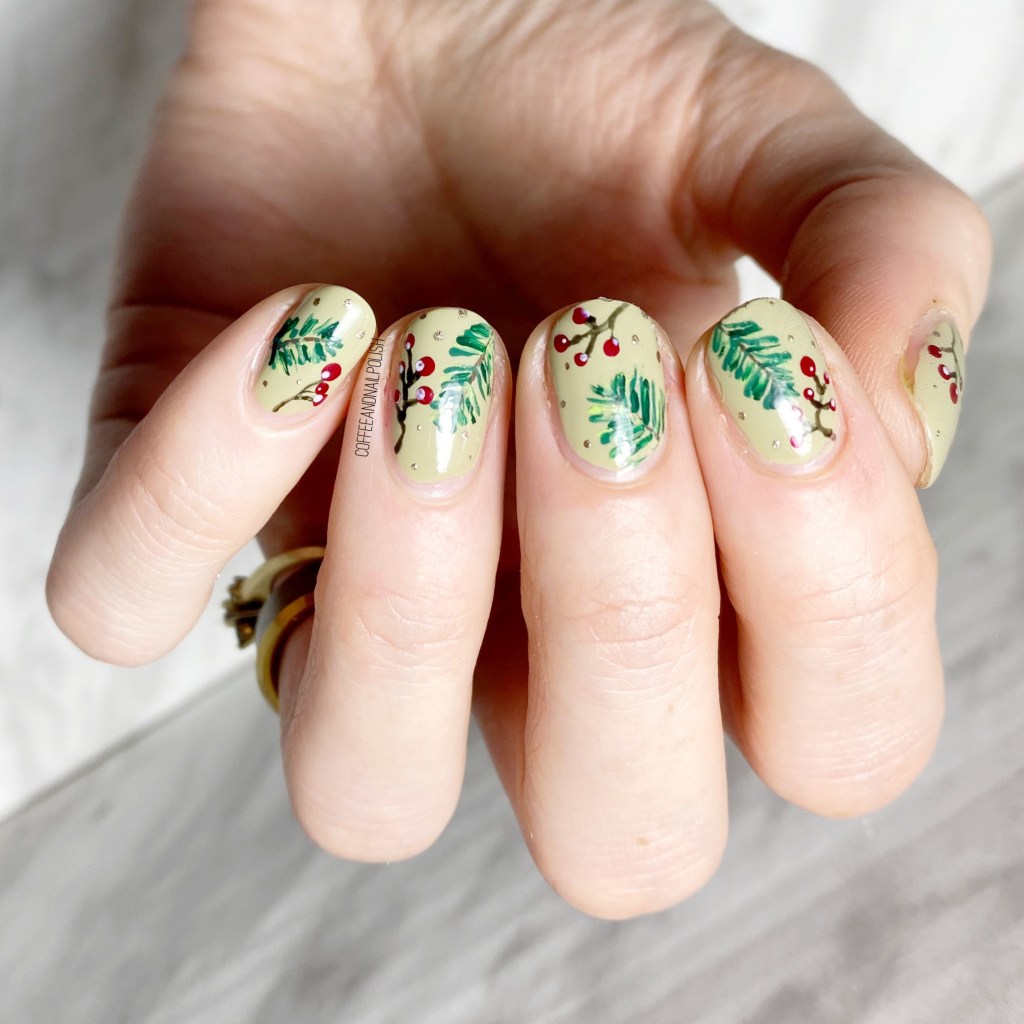
Originally I though I might go with the traditional holly look, but after browsing Pinterest, I decided I wanted to go a different direction. Maybe it’s because I haven’t done any floral designs in longer than I can remember—what is that about—that I needed to go with the next best thing. & the end result just looks so pretty to me.

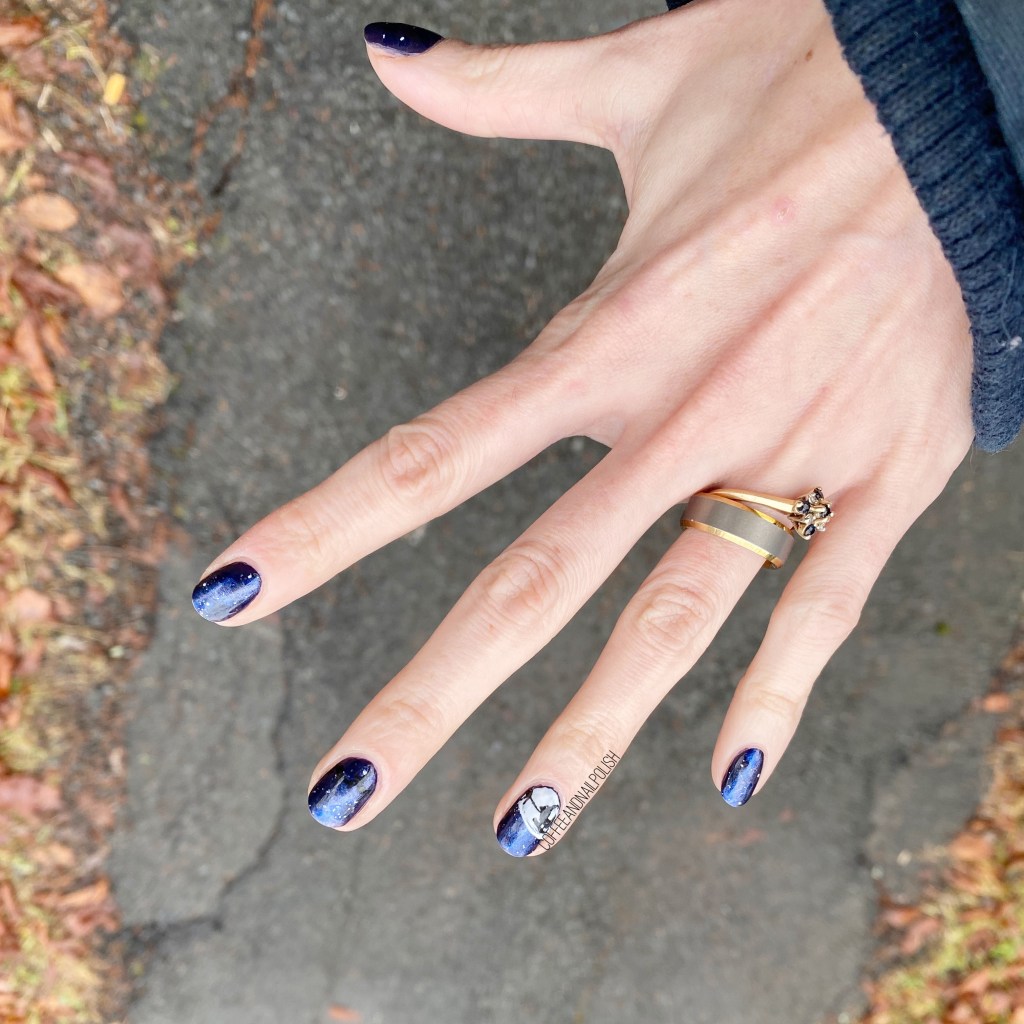
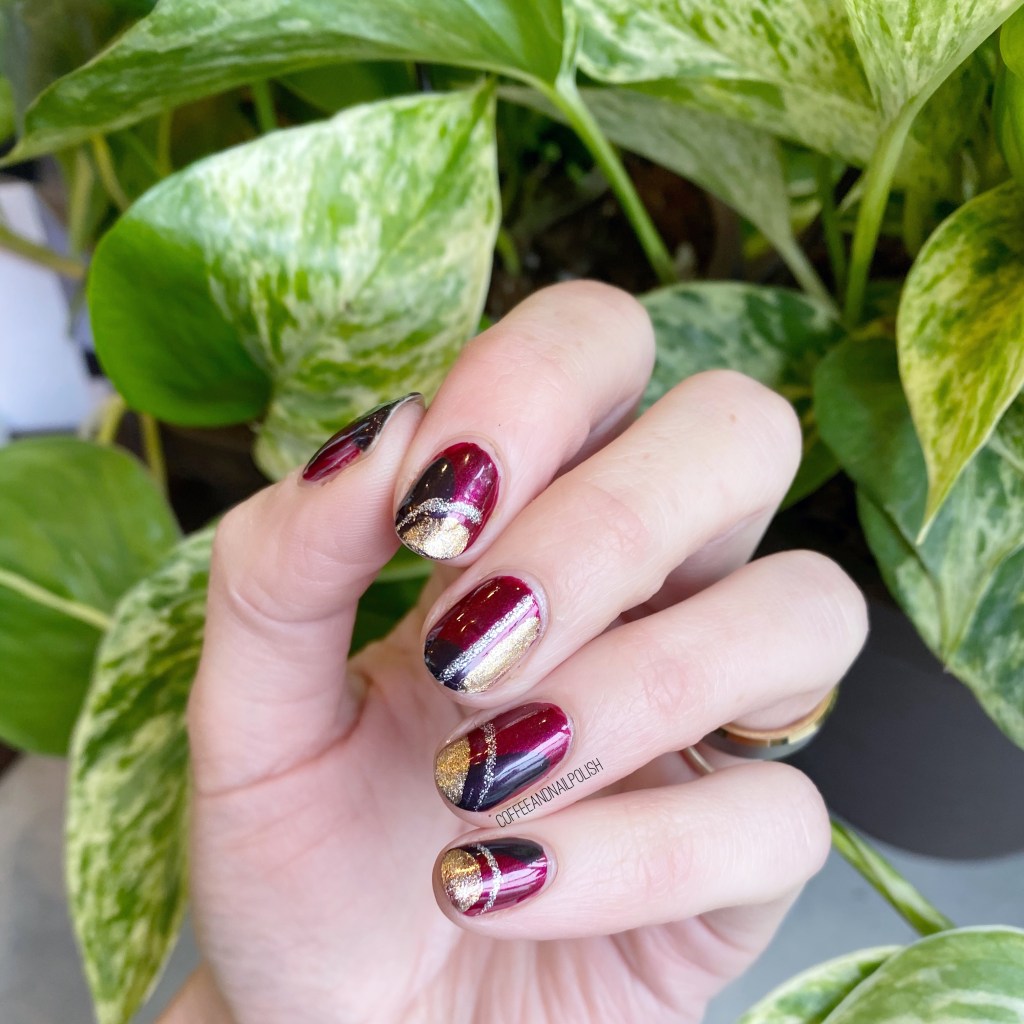
I wanted to get a picture with the holly bush in our front yard, but sadly the birds are all the holly berries off our holly bush, so it’s looking pretty naked.

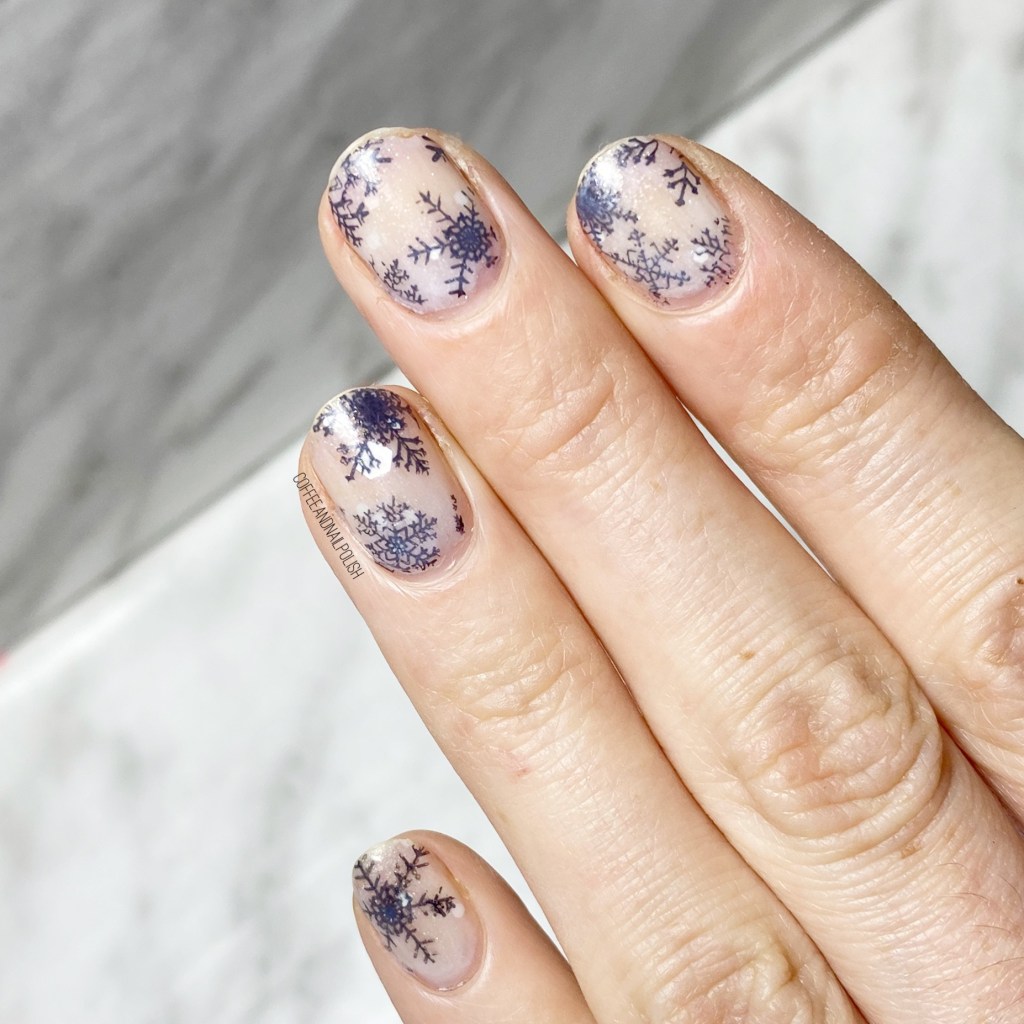
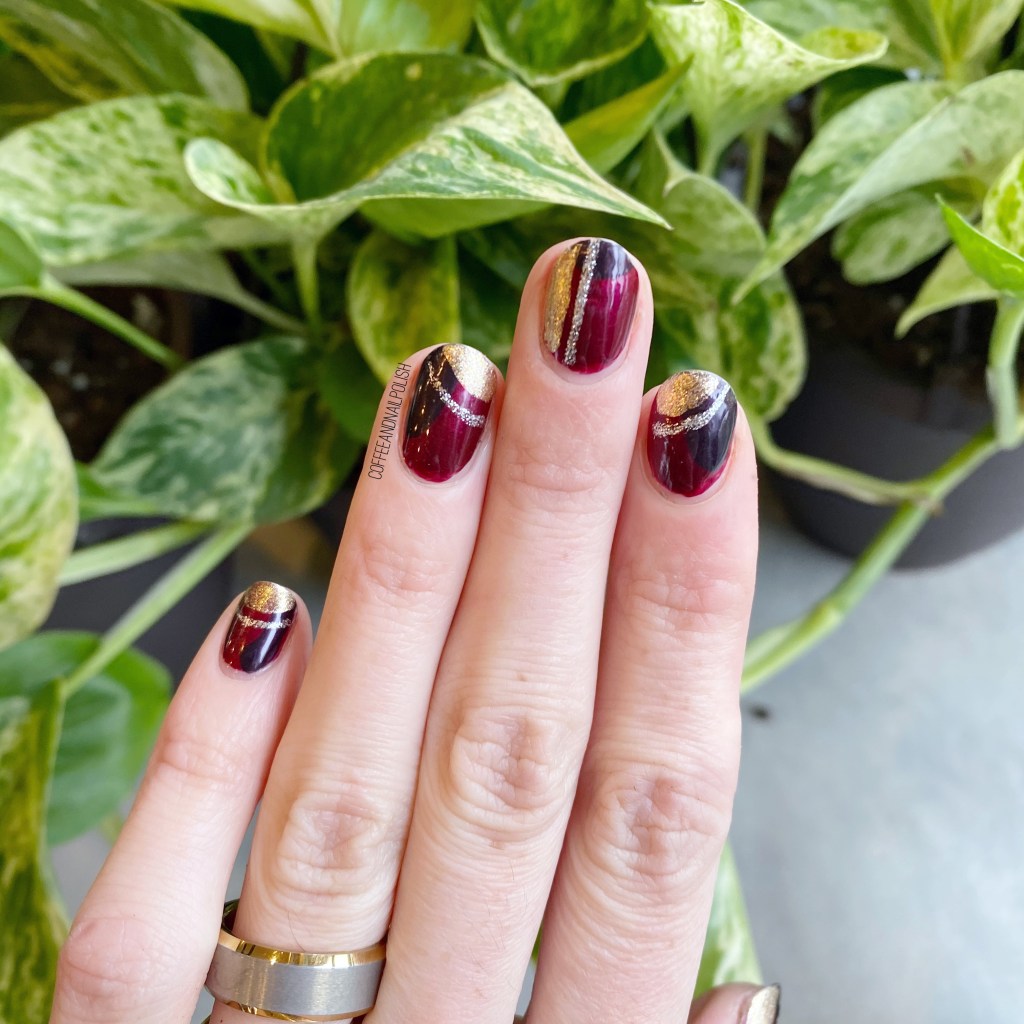
What do you think about this design? Do you like my take on the holly prompt? Have you been keeping track of all the other beautiful designs for this challenge? Let me know in the comments below.

#GlamNailsChallengeDec— Santa’s Sleigh

Hello lovelies & happy Monday! Hopefully you’re week is off to a lovely start. After a busy weekend—that’s Christmas in retail for you—I’m excited for a day off filled with peppermint mocha cold brew, cleaning & hopefully some nail polish fun.

But first I have another prompt for #GlamNailsChallengeDec to share with you! Prompt #2 is Santa’s Sleigh, which I’ll admit I was super nervous about because I wasn’t 100% sure if my freehand skills were up to par.

For this manicure, the polishes I used were:

  • Base Coat: Sally Hansen Hard As Nails
  • Top Coat: Essie Gel Setter
  • Essie Under The Twilight
  • Essie Starry Starry Night
  • Sally Hansen Lustre Shine Azure
  • Sally Hansen Miracle Gel Get Mod
  • NailStuff.ca 4mm Micro Detail Brush (COFFEE10 saves you 10%!)
  • Latex free make up sponge

For this look, I decided that I wanted to create the silhouette of Santa’s sleigh against the moon, with a pretty night sky base. I sponged on a few beautiful blues as my base, & then painted a big moon on my nail. Once that was dry, I used my black acrylic paint to attempt to draw Santa’s sleigh with a few (barely visible) reindeer pulling it.

These definitely aren’t perfect, but you know what, I’m super proud of how they turned out. It’s not your traditional Santa design, but that is what makes it kind of fun.

What do you think about this design?

I’m super pumped for this month’s challenge, & can’t wait for all the prompts to come! You should definitely check out all the other beautiful designs for this month’s challenge!

Dainty Snowflakes

Hello lovelies! & happy Monday. It’s beginning to look a lot like… December. & a green one at that. But I really, really wanted some snowflakes on my nails — even if the weather feels more like October than a month before Christmas, that doesn’t me I can’t pretend!

For this manicure, the polishes I used were:

  • Base Coat: Sally Hansen Hard As Nails
  • Top Coat: Essie Gel Setter
  • Quo by Orly The Boulevard
  • OPI Pirouette My Whistle
  • China Glaze ChillinWith My Snow-mies
  • Essie Bobbing for Baubles
  • Born Pretty Store Stamping plate BP-L032 (item #23268)
  • NailStuff.ca Clear Stamper (COFFEE10 saves you 10%!)

First up, I created a jelly sandwich for my base using Quo by Orly The Boulevard, OPI Pirouette My Whistle & China Glaze Chillin’ With My Snow-mies. I thought it was the perfect dainty base for some snowflakes overtop. Also, I so rarely pull out Chillin’ With My Snow-mies, & it’s kind of sad. It was one of those polishes I bought simply because the name made me laugh, but I should definitely pull it out more.

I was also super, super happy with how my snowflakes stamped. They turned out so opaque, it made me so happy. Nothing worse than going to stamp an image, & it barely picked up, or the polish is just too thin & it looks like a shadow.

What do you think about these snowflake nails? Do you have snow where you are? Let me know in the comments below!

Abstract Colour Blocking (& covering up a chipped mani!)

Hello lovelies & happy Thursday. This week is speeding by quickly, isn’t it? Crazy! Today I’m showing off a fun look I did earlier this week.

Full disclosure: I had painted my nails, went to work, chipped the hell out of them, & had ever intention of repainting them. Then I fell asleep at 7pm. When I woke up the next morning, I didn’t want to go to work with still chipped nails, so I thought of the easiest way I could cover up the “damage”, & decided to create this almost abstract colour blocking. & I think it turned out pretty cool for something that was painted on the fly. Haha.

For this manicure, the polishes I used were:

  • Base Coat: Sally Hansen Hard As Nails
  • Top Coat: Seche Vite
  • Sally Hansen Miracle Gel Frosted Berries
  • China Glaze Glamcore
  • Essie Mosiac On Down
  • Kiss Products Nail Art Striper in Silver

The colour choices — especially that silver — is giving me a bit too much of a holiday vibe, but I really do think this is a fun quick design. It was way easier than taking everything off, & repainting from scratch.

What I did was paint some base coat on the sections that a chipped, to protect the naked parts of my nails, then swiped the polishes over to cover up the chipping. I also used my bottle of Seche Vite, because I wanted to make sure they dried quick. & it turned out pretty neat! Also, in a weird way in kind of reminds me of argyle, or at the very least makes me want to do some argyle sweater print nails ASAP. Already playing the colour combination in my head as we speak.

Also, we totally got hit with a early winter storm, so I’m in full winter knit sweater nail mood when it comes to my nails. So that is your early warning there will probably be A LOT of sweater inspired nail art to come!

Have you ever tried to save a manicure or cover up some chipping to extend your nails another day? Any tricks you want to share? Let me know in the comments below!

Gold & Purple Autumn Half Moons

Hello lovelies! How is everyone coping after Halloween & Daylight Savings Time? I’ll be honest — between a bit of a sugar coma, the increasingly cold weather & the change time, I’m a mess. I’ve literally been falling asleep at 7pm, which doesn’t help me get my nails done!

This design is actually from a few weeks back, when my nails were still longer, but I thought it would be fun to share. You all know how much I adore a good half moon, & I thought these would be perfect to share. Plus they’re just so easy!

For this manicure, the polishes I used were:

  • Base Coat: Sally Hansen Hard As Nails
  • Top Coat: Essie Gel Setter
  • Essie Mosaic On Down
  • Essie Kimono Over
  • Hole Reinforcement Stickers

Ahhhhh love this colour combination. You can never go wrong with dark purple & gold. Also even though it’s such a simple look, half moons always have my heart. They make me so happy. Also I’m always so envious of people who can freehand half moons. I’ve been using the sticker method as long as I’ve been painting my nails, & it just makes the process so easy! (I have an old post here featuring my step by step process, in case you’re curious.)

I just feel like this is such a classy combo appropriate for almost every occasion. Birthday? Wedding? The Oscars? The opportunities are endless! ( & now I totally want to do a post where I create a half moon look for different occasions… definitely adding it to my notebook of ideas!)

What do you think about these half moon nails? Would you wear this look? Let me know in the comments below!